The boot sensor serves an important function – it lets you know if the boot is open! You’ll use a momentary switch for this purpose. If so desired, you could expand or change this project to encompass car doors or even a bonnet sensor.
Hardware Configuration
Remember to disconnect the Pi’s power supply when connecting or disconnecting any circuits.

Boot sensor completed circuit on a breadboard
When the button is pressed, the pairs join up. Current is allowed to flow from the top to the bottom pairs, and complete whatever circuit you are using the button in. These buttons are only momentary acting. The circuit is only completed when you hold the button down. Release the button, and the connection is closed. You’ll need to handle any latching action in the code (but that isn’t required for this project).
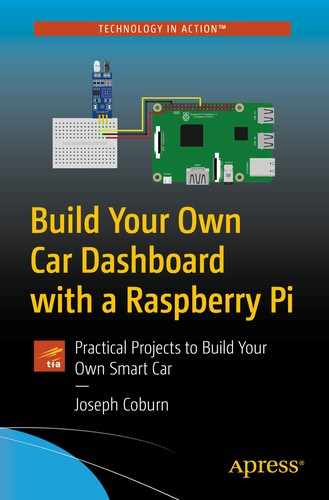
Wiring diagram for the boot sensor
6 (physical) or ground (BCM) – Ground or GND
8 (physical) or 14 (BCM) – GPIO 14
The GPIO pin will supply the current necessary to detect the button press. When you are not pressing the button, GPIO pin 14 detects the Pi’s internal voltage through its in-built pull-up resistor. This value is seen as HIGH, 1, or ON. When you complete the circuit by pressing the button, the signal changes to the ground. This state changes to LOW, 0, or OFF. This is basic binary logic – each pin can have one of two states: on or off, high or low, one or zero. Changes between these states are detected by the Pi.
The Pi uses a mixture of pull-down and pull-up resistors for its GPIO pins. While you can reconfigure each one to serve your specific needs, always double-check the Pi’s default values for pins.
After double-checking your work, apply power and boot up your Pi.
Flask Boot Sensor Logic
This project requires no changes to the Pi’s operating system – it’s handled entirely by Flask and your application logic. Most modern installations on the Pi come with the required GPIO library preinstalled, but should that not be the case on your Pi (for whatever reason), you’ll specify an additional Python package in your Pipfile to avoid issues.
This button is used by your boot. When installed, the boot should rest on the button, effectively completing the circuit. Therefore, when the button is pressed, the boot is closed. When the boot is open, it’s no longer pressing the button. By coding for these states accordingly, you’ll have a functional boot sensor.
PyPI is the default Python package repository. Whenever you download a package using PIP or Pyenv, your Python interpreter searches PyPI. Why am I telling you this now? Packages hosted on PyPI are not case sensitive. It’s a common practice to use case-insensitive package names on PyPI (although it makes no difference). It’s important to clarify this fact, as both of these packages use mixed-case naming conventions, yet the installation commands are all in lowercase.
Once again, when running the application on your computer, the Pi’s GPIO pins are not available. It’s possible to access them remotely through one of the Python GPIO communication libraries, but it’s not necessary. With your build process, and the speed at which the Pi can install new changes, you can write code on your computer and ensure it runs and then run it on the Pi to ensure it works fully.
This imports the Button class, and the exc class from the gpiozero module. It’s not necessary to import pigpio – gpiozero uses this internally if there are errors with any other GPIO libraries it needs.
Create a new static method called get_boot_status . This function will handle all aspects of the boot sensor. It will return a string outlining the status of the boot. This function returns three different strings. If there was a problem (such as the GPIO pins not existing, in the case of your local development computer), the function returns “Unknown”. When the boot is closed (the button is pressed), the function returns “Closed”. Finally, when the boot is open and the button is no longer held down, this function returns “Open”.
Once again, notice the liberal use of logging at various levels. Even in the case of a total failure, the function still continues to work. The overall application may provide a diminished experience, but it still works. Failure with the boot sensor should not and will not cause other sensors or the whole system to fall over.
This isn’t a function – it’s a variable from your button object. It’s updated by the library whenever the button changes state. It’s a Boolean value – True or False.
These objects are wrapped in a try/catch block, to handle any exceptions. The Button class raises an exc.BadPinFactory exception if there is a problem with the underlying GPIO libraries. This is a custom exception implemented by GPIOZero. After handling this exception, a generic Exception is handled. Handling generic exceptions like this is not a bad practice, providing you have handled at least one specific error. Just blindly wrapping code in generic exception handling is not a smart move, but it’s perfectly fine to do once you’ve considered the most likely errors. In either error condition, the status is logged, and the final value is set to “Unknown”.
At this point, the function could return – it’s finished its work, there’s no point running any more code. Well, to ensure the final log statements run, the function continues to its completion. Notice how the button value checking is wrapped inside the check for result. If the result is None, then there are no errors, and the final logic can execute.
Your existing imports and logging are already sufficient for this new change.

Boot sensor application logs, with a failed boot sensor
Turn the Pi off and triple-check your wiring. Are the wires fully inserted into the breadboard? Are you connected to the correct pins, ensuring your pins match either the physical or Broadcom pin layout specific earlier?
First Unit Tests
Way back in the software development primer, I discussed test-driven development (TDD) and how writing unit tests before application logic produces better code. You may be wondering where the unit tests are then? That’s a fair question, and it’s one with a simple answer – there are none yet! I’m a firm believer in unit testing, but up until this point, you’re still getting your feet wet with Python, Flask, and this application. It’s difficult to write fully TDD code if you don’t yet understand what the code will do or how it should behave. Unit tests can help you determine this, but for simplicity, these first two projects have omitted the tests thus far. The projects following this chapter utilize test-driven development, but for this project, let’s write your first tests.
Let’s begin by breaking down what needs unit tests. Unit tests serve to test small independent components. The Flask route inside data.py has little logic to unit test. It ties together logic from the sensor class. This file would be a good candidate for integration testing, as it ultimately displays data to the outside world. App.py does little outside of Flask config and implementing logging. There’s little purpose unit testing other code which is already unit tested. As a general rule, you can rely on third-party libraries to work and (hopefully) have unit tests. You don’t need to test these libraries.
Therefore, sensors.py is the core file left. This is starting to grow and implement your business logic. It’s the perfect file to write unit tests for. As covered in the previous chapter, the get_external_temp function is not getting tests in this project. The benefits from testing its tiny amount of logic are far outweighed by the difficulties of working with the temperature library. The get_boot_status function, however, is perfect. It implements its own logic, with several simple conditions. Any reliance on third-party logic is easy to replace in the tests, and it serves one purpose.
Open
Closed
Unknown
These conditions are determined by the error handling logic, or the output of button.is_pressed. To tightly control the conditions inside this test, you need to understand mocking. Mocking is the process of replacing a component inside your code. This component is not the piece under test at a given moment in time. This could be an API call, which costs you $1 every time it runs, a function to launch a missile, or some other expensive logic to run. You can imagine the trouble that may arise from running expensive or dangerous logic regularly in your tests. For this reason, mocking external dependencies (external to the code under test) is an essential part of unit testing.
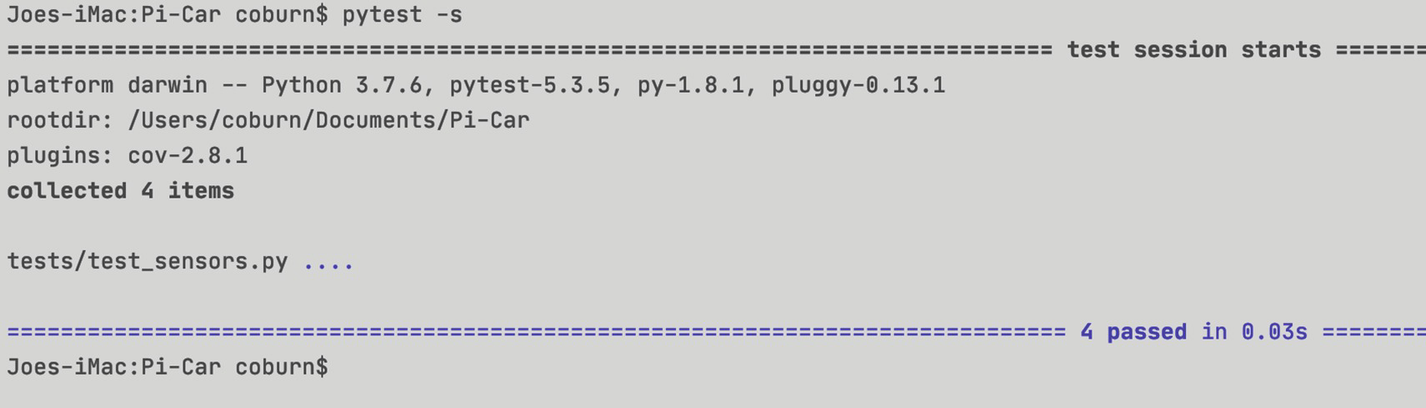
For these tests, you’ll use the Pytest unit testing framework. This is an extension to the older unittest library. Both are excellent and well-used choices, although Pytest is fast becoming the go-to library for unit testing in Python. It’s possible to unit test without a framework such as Pytest, but it’s a lot more work. Pytest handles running the tests, ensuring they all pass, showing you the error message for failures, and lots more. There’s no need to reinvent the wheel and write your own test framework.
You don’t need any other configuration options when running tests. You may notice a new config item at the bottom of this file called FILE_LOGGING. This is a new config item. Pytest will tell you what the problem is and show the logs from STDOUT when the tests fail, so it’s a bit redundant writing these to a log file as well. Making this a new config item lets you disable file logging for tests and enable it again for the normal application uses.
This introduces several Pytest patterns. The build_testing_app function is a Pytest fixture. Fixtures let you share code between tests. This fixture builds a Flask app using your application factory (create_app). To run tests against Flask code, or code which uses Flask features, you need an application running. This logic builds an app. The app_context is a Flask object that gets populated when Flask runs. This gets populated with all kinds of information which Flask needs to work. By pushing a new context, you’re configuring Flask with everything it needs to handle normal operations during your tests.
The yield statement is essentially the same as a return statement right now, but yield serves a powerful purpose. Pytest will run this code until the yield statement – it will build and return a Flask app. Once the tests have finished executing, Pytest will return and run any code after the yield statement. This lets you write logic to build requirements for tests, and then more logic to destroy or reset these requirements. The yield statement is a great way to reduce boilerplate code and get on with writing useful, valuable code.
Pytest fixtures are blocks of code that you can use in your tests. The scope parameter configures when to run this code. The session value means Pytest will run this code once at the start of your tests (and at the end). Other scopes exist such as running code for every test, every class, and more. Finally, the autouse parameter tells Pytest to run this code automatically, rather than explicitly waiting for you to call the function. Your conftest is now ready to start assisting your tests.
Successful unit test run

Failing unit test run
Play around with your sensor code by changing it to fail the tests – change return types, and exception handling, and notice how the tests fail. This is what makes well-written unit tests so powerful. By covering the edge cases and core functionality, you can be confident that your tests will pick up any existing functionality you may break when implementing new features.
- 1.
Bad pin factory – The GPIO library cannot read the pins.
- 2.
Other pin error – The exception handling caught an error when reading the GPIO pins.
- 3.
Closed – The function returns “Closed” when the button is pressed.
- 4.
Open – The function returns “Open” when the button is not pressed.
Each test functions in a similar way. They begin by configuring the conditions required for the code under test to reach a certain state. They then run the code and use assert statements to verify that the output of the function is as expected when the code runs under the predefined conditions.
This function is part of the unittest library, which Pytest extends. This is a mock. As mentioned earlier, mocking lets you replace parts of your code to make it run a certain way under test. Tests should be as repeatable as possible. Right now, your defensive programming kicks in and manipulates the logic when certain libraries are not available. This is great for ensuring your logic still works when running in different environments, but it’s not consistent enough for a reliable test suite.
By mocking the GPIO library, you can control when, what, and how this library works, to achieve the desired result. The first two functions use side effects, with the side_effect property. This is a way to make your code raise specific errors. As your function returns “Unknown” in two error conditions, mocking these functions to raise both exc.BadPinFactory and TypeError ensures these conditions are met during the tests.
The final two tests use the return_value attribute to force the Button class to return a specific value for the is_pressed attribute. Remember, you’re not testing that the external libraries work, you’re testing your specific logic operates under given conditions. Because is_pressed is an attribute and not a function (that is to say, it’s a variable assigned to instances of the Button class), the return_value attribute lets you force a function or attribute to return what you say it should.
The third parameter passed to this function is a dictionary. This dictionary is essentially the name and return values for any attribute you want to mock. You can see that test_get_boot_status_closed and test_get_boot_status_open return different values for is_pressed, according to their test requirements.
If this condition is not met, the tests will fail.
It’s very important to ensure that you only use assert statements inside test code. They may look like a shortcut to improve your code, but they are not designed to run inside production code and will come back to hurt you at some point in the future. It’s possible to disable assert statements altogether in Python. This nets you a modest performance increase, and as you shouldn’t use them for production code, it shouldn’t be a problem. With asserts disabled, they will not evaluate, so any code actually relying on them will fail.
As you progress with these projects, I’ll show you some Pytest tricks to reduce the lines of test code you need to write. I’ll also cover writing tests in a fully TDD way, which can improve your overall code quality.
Chapter Summary
In this chapter you installed and developed the code for a simple boot sensor. You can expand this project to cover your car doors, bonnet, or any other opening. You developed your first unit tests using Pytest and learned how to write assertions, along with when not to use them. Once again, you developed this code defensively, such that the application can continue to work even with a total sensor failure.
In the next chapter, you’ll expand on your unit testing skills by developing a light sensor.