
Every car needs a temperature sensor. Knowing what the outside temperature is useful for all kinds of purposes. At the basic level, it’s useful to know if you should wear a coat and a hat because it’s cold, or to leave your coat in the car because it’s warm out. On a functional level, it’s dangerous to drive in low temperatures, with the risk of icy roads impacting your driving style. By knowing that it’s cold outside, you can adjust your driving accordingly. This project is an excellent basis for expansion – you could use it to install additional sensors for your cabin or engine, for example.
Hardware Configuration
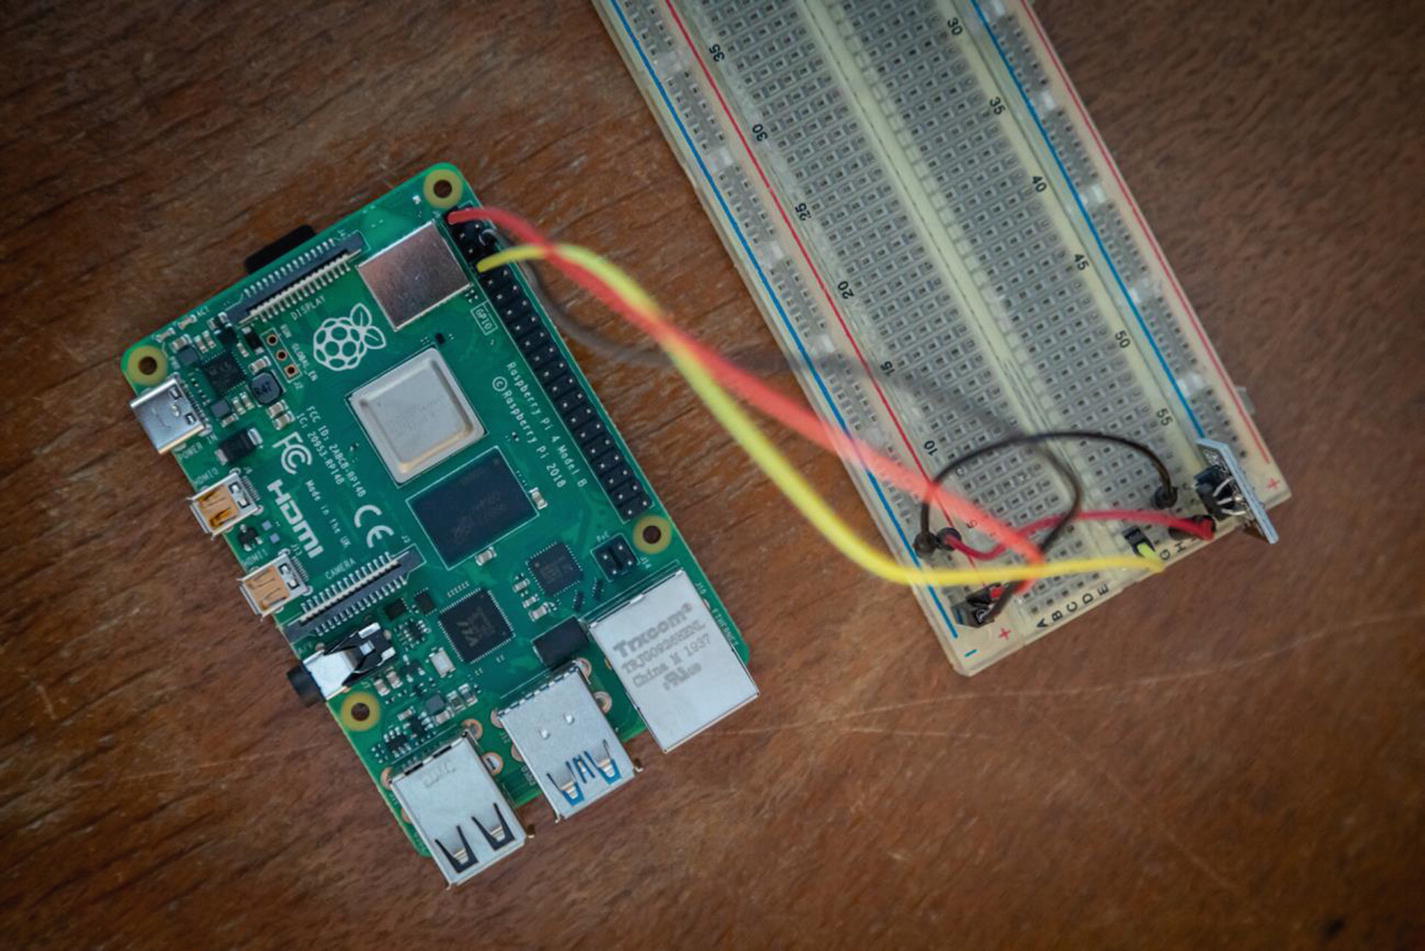
DS18B20 temperature sensor wired into the Pi
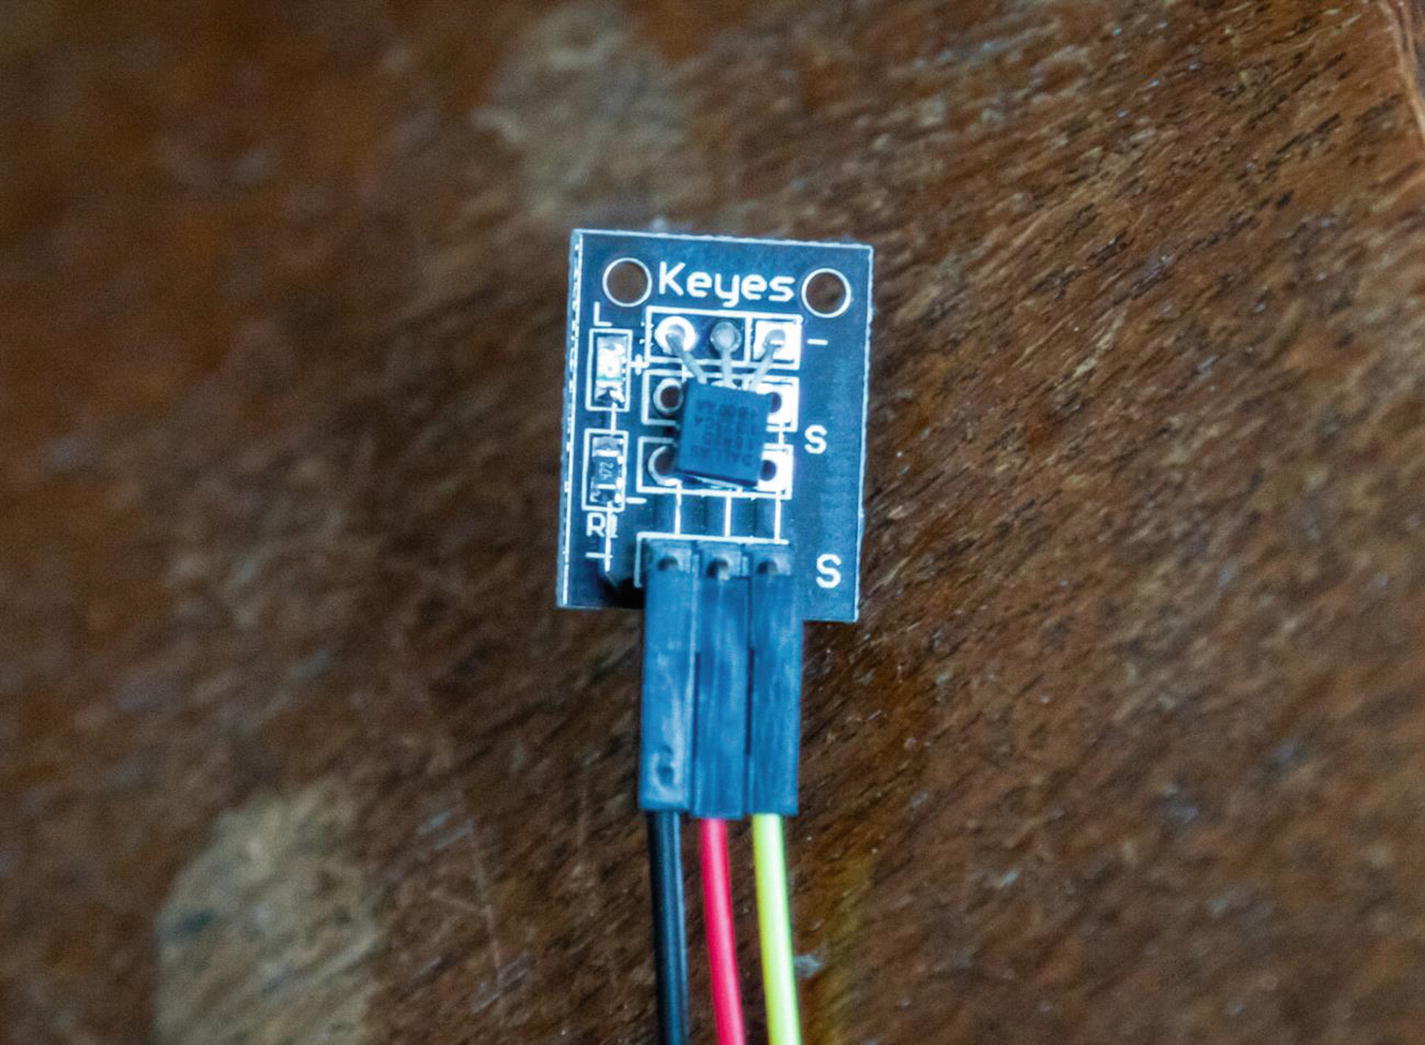
DS18B20 temperature sensor module
The DS18B20 is a digital thermometer, shown in Figure 7-2. It can sense temperatures from -55°C to +125°C within an accuracy of 0.5°C. It only requires one connecting cable between it and the Pi – besides power. It’s also able to share this single data connection with multiple other units, allowing potentially thousands of different temperature sensors to connect to the Pi over one cable – although this project only requires one. This interface of communication over one wire is called 1-wire . By default, the Pi’s physical pin seven (GPIO4) handles this communication.
Ground (GND) – This is the negative side, or 0 volts.
Signal – This is where the Pi connects to retrieve the temperature readings.
Live – This is where your main power input comes in, either 3.3V or 5V.
Look at the illustrated Pi drawing to see the completed circuit. If you’re not sure how to read this, trace each wire back from its source, and copy it to link your two components together. Note that this diagram uses the Pi 3, which has a functionally identical pin layout to the Pi 4.
The Pi’s pins are numbered in two different ways – by their layout and by their function. Pins are arranged in two rows of 20 and zigzag left to right. The top-left pin is number one, the top-right pin is number two, the pin one down from the top left is number three, and so on. Pins referenced this way are using their physical or board location. The more popular alternative references pins by their GPIO purpose. As many pins serve specialist purposes, it makes sense to reference the main ones you need to use. This order may appear a little jumbled up, but it greatly emphasizes the GPIO pins over any others. This pin referencing style is called the Broadcom layout, or BCM for short.

Pi 4 GPIO pinout output of the pinout command
1 (physical) or 3v3 power (BCM) – 3.3V
6 (physical) or ground (BCM) – Ground or GND
7 (physical) or 4 (BCM) – GPIO4
The 3.3V and GND pins provide the electricity the sensor needs to function. GPIO4 is a general-purpose data connection, which the Pi can use to communicate with the outside world. Here’s where you’ll connect the middle leg of your sensor.

Breadboard wiring diagram for the temperature sensor
It also ensures that the readings from the sensor are accurate and not muddled up with spurious readings. It helps to ensure the Pi can tell the difference between the real sensor values and noise from the environment. This noise isn’t audible; it’s interference from all around you – mains power, other data signals, your wireless network, or various other things that exist to interfere with your temperature reading. The Pi has built-in resistors on every GPIO pin, but this sensor needs a slightly different value to operate correctly.
Once connected, go back and double-check your work before applying power.
Pi Configuration
Once restarted, the Pi will have access to its GPIO pins using the 1-wire protocol. This config option is a device tree overlay . It’s a bit like a driver in Microsoft Windows systems. It lets the Pi’s Linux kernel have access to many different hardware configurations, without getting into the complex guts of operating system logic required to support such a variety of hardware.
Flask Temperature Sensor Logic
Back on your computer, you need to instruct the Pi (through Python) to read the temperature values from the sensor. For this section of the project, you’ll create a Sensors class, which will handle all current and future communication with the Pi’s sensors. You’ll also learn about blueprints. This Flask pattern lets you store your application code outside of the create_app function.
It’s possible to write 100% of the code to read these values, but it’s much easier to use an open source library to handle the heavy lifting. While it’s not too difficult to handle this yourself, it detracts from the main focus of this project, and it isn’t as simple as you’d imagine. To facilitate this process, the Python package W1ThermSensor (https://github.com/timofurrer/w1thermsensor) needs installing. This works on both the Pi and your desktop computer.
Begin by importing the library into your code. Create a new sensor object, based on the W1ThermSensor class. Finally, use the get_temperature function to read the current temperature.
The rest of this logic is logging, and defensive handling. All of this ensures the Pi can keep on working even if the temperature sensor is removed. If you’re driving a car, it wouldn’t make sense for the radio to break if the temperature sensor fails, and the same is true here. If this logic is allowed to fail, the Pi cannot continue its work with all the other (possibly more important) sensors. Notice how the temperature variable is set to zero if any errors occur. This ensures that the temperature sensor can fail entirely, and you’d only lose this data. No other aspect of the system is impacted, which is how code should be designed almost all of the time.
Generally speaking, you should try to avoid generic exception handling. This code handles any error, rather than certain specific errors. It’s a bit of a brutish approach, but it works in this use case because of one specific flaw in the library. By performing this import, the W1ThermSensor library begins to run its code. Just importing it is enough for it to configure the device to read the sensor. This sounds like a good thing, but it’s another anti-pattern. In Python and object-oriented programming languages, it’s good to explicitly run your logic. Running code on import is an implicit action – and you may not even know it’s happening.
It’s not possible to log this failure at the point of import. The Flask logger is not accessible until you are in a class – imports get evaluated before the app boots, so Flask hasn’t started configuring the app or the logger when this code executes.
In this case, this import fails when running locally on your computer. It only works on the Pi or other devices which support the 1-wire protocol. This library provides custom exceptions you can handle, but again, just importing these runs the config code, and fails again.
Trying to access the library code when it has failed and been set to None raises a TypeError, which is safely handled (and logged appropriately) here.
This library does provide the ability to prevent this behavior, but in my opinion, it just pushes the same problem to a different part of your code. This library is still one of the best for this purpose, and this minor issue isn’t enough to completely derail the experience. It makes unit testing more difficult, but you’ll notice there are no tests for this portion of the code. While you could technically write some tests, they would deliver very little value, as most of the work is handled by the library. In an ideal world, you would write these tests, but software development is often performed in an imperfect environment, and as such, the time to implement tests on this code (while considering the workarounds needed with the imports) outweighs the benefits.
Finally, the value of temperature is cast to an integer using the int function – which is part of Python’s core library. This ensures that it is always a number and rounds it to the nearest whole number. How many cars have you seen which display the precise temperature, to several decimal places? It’s not necessary, and as the sensor is only accurate to within half a degree anyway, you’re not losing critical information.
There are very few lines here. Much of it should be familiar from the “Hello, world!” Flask route you created inside app.py.
Inside Flask, you can access the running app through current_app , which is aliased to the shorter app. This lets you access your configs, your logger object, and anything else configured by your create_app function. This app object is used to write the application logs in this file, which route to the correct log handlers.
You defined this function as a static method. It requires no access to any other parts of the class, which means you don’t need to define an instance of the class first, you can just access the object directly.
Finally, the data is returned as JSON using the jsonify function. This converts it from a Python dictionary object to a JSON object – which is essentially a string. Flask only allows specific shape objects or strings as valid return types from routes, as it has to render these in the browser.
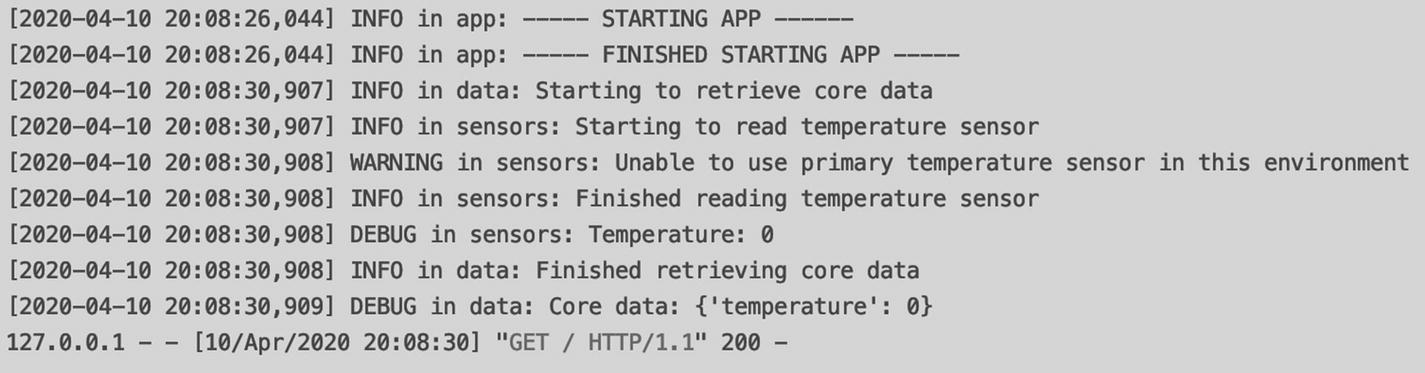
Application logs for the temperature sensor

JSON output of temperature sensor
Finish testing your sensor by warming it up – either with your breath or holding it (briefly) near a radiator or other heat source. Reload your app to see the increased temperature displayed.
If you’re struggling to see these changes on your Pi, then open up your application logs, visible in /home/pi/Documents/Pi-Car/pi-car.log. What do you notice about them? Are there any errors or stack traces visible? If so, go back and double-check your code. Test it first by running it on your computer. You may need to change your logging level to something more verbose first. Check your sensor is installed correctly (making sure to shut down and unplug the Pi first).
Chapter Summary
In this chapter you learned how to connect a digital temperature sensor module to the Pi and defensively program your application to read this data and expose it to the network through your Flask server. You also learned how to write your code such that it can handle a total sensor failure – either through incorrect wiring, a broken sensor, or any number of other hardware faults that could prevent the sensor from working.
In the next chapter, you’ll continue to expand the system by building a boot sensor.