For this project, you’ll connect the Pi Camera to the Pi and stream the video feed to a web page. You’ll learn how to configure the camera and settings and get the best possible image quality. In later chapters, you’ll use this camera in conjunction with several of the other reversing sensors to build a complete reversing module, which automatically kicks in when you engage the reverse gear.
The Pi Camera is unlike other cameras you may have used. There is no button to take a picture, and there’s no memory card to save photos to. There’s no battery, and it’s a fragile looking circuit which won’t survive one trip to the beach. This Pi Camera is a camera module . It connects to the Pi and relays camera data for the Pi to process. The camera module handles reading the sensor stream, streaming data, adjusting light, and more, but the Pi has to tell it what to do and perform some processing of its own, to convert the raw stream into usable image formats.

The Pi Camera V2.1
For this project, you’ll need to purchase the official Raspberry Pi V2 camera module, shown in Figure 11-1. Introduced in April 2016, this module is developed and built by the Raspberry Pi Foundation. It costs roughly $25 and is available on Amazon, or from any other store which sells Raspberry Pis. Similar clones of the camera module are available, as are the earlier V1 versions, but for the simplest experience following this chapter, you’ll have less issues with the V2 model.
Camera Connection
Always turn off and disconnect the Pi’s power supply when working with electronic circuits.
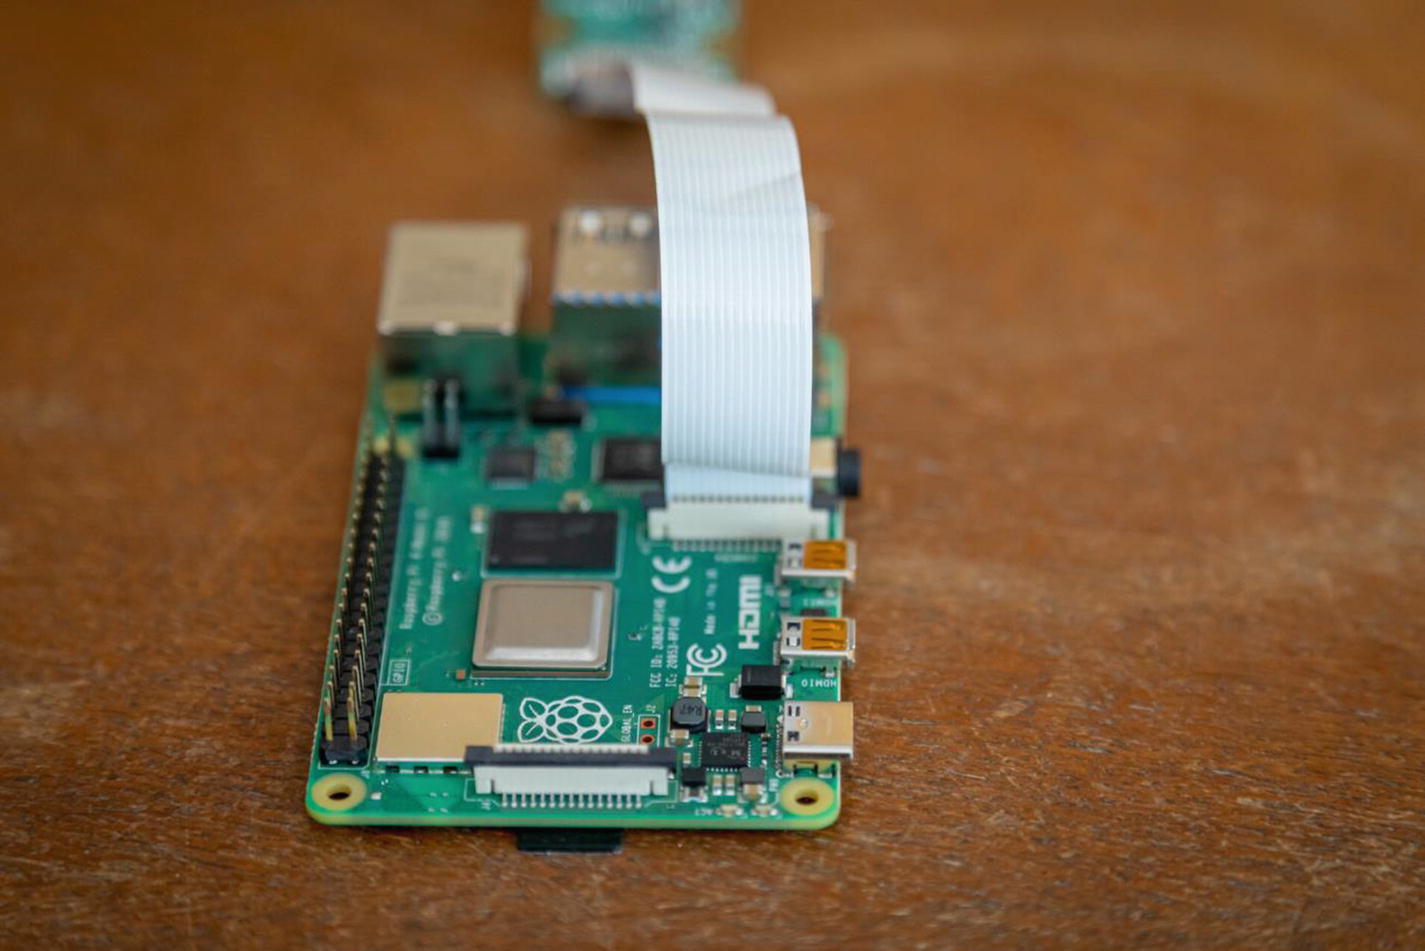
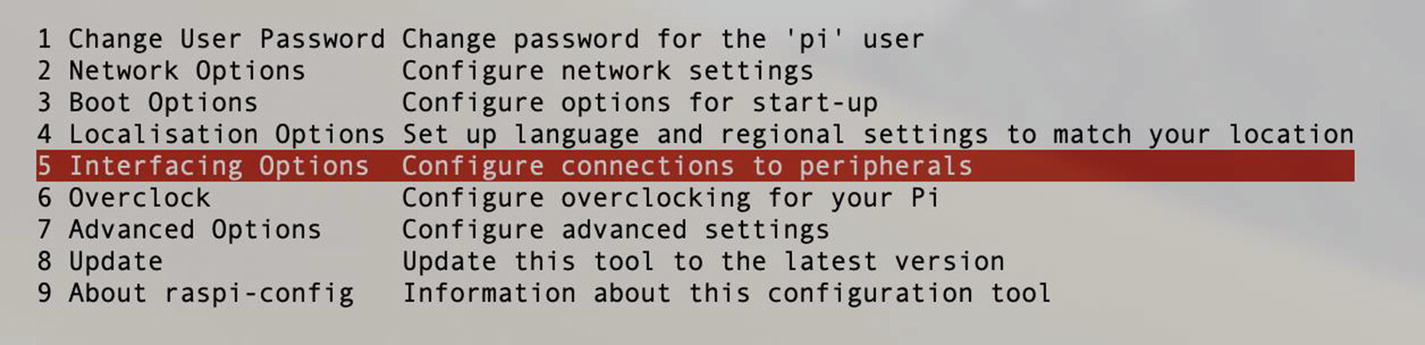
Pi Camera ribbon cable installed on the Pi
With the exception of the Pi Zero, every single Pi has the camera connection port. This proprietary connection is cheap to manufacture, although it’s not very durable. It’s not so fragile that you should be afraid of using it, or using the Pi or connecting other peripherals or components to your GPIO ports; just don’t go overboard by stressing the connector.
Pi Camera ribbon cable installed on the Pi
Now gently insert the ribbon cable, with the exposed “pins” facing away from the Pi’s I/O section, toward the HDMI and power connections – as shown in Figure 11-3. Don’t force it. If you’re struggling, double-check your cable is the correct orientation and that you’re inserting it square on, and not at an angle. Once seated 1/8th of an inch, gently push the plastic cover back down, clamping down on the cable. Visually inspect the cable, and gently tug it, to ensure it’s seated properly. When ready, apply the power and boot up the Pi.
Pi Camera First Time Configuration
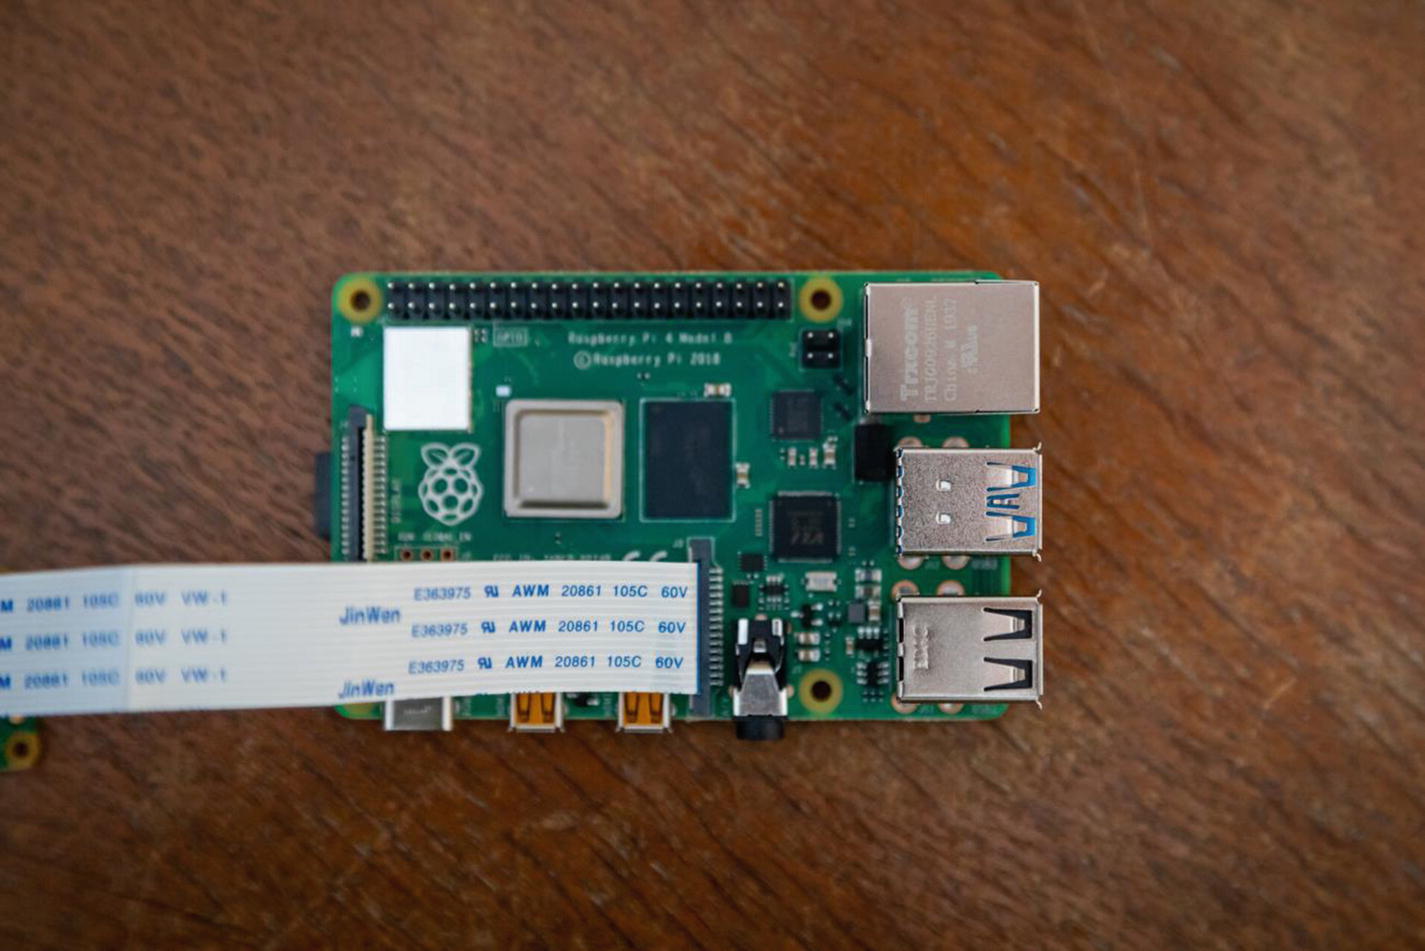
The Pi configuration utility menu
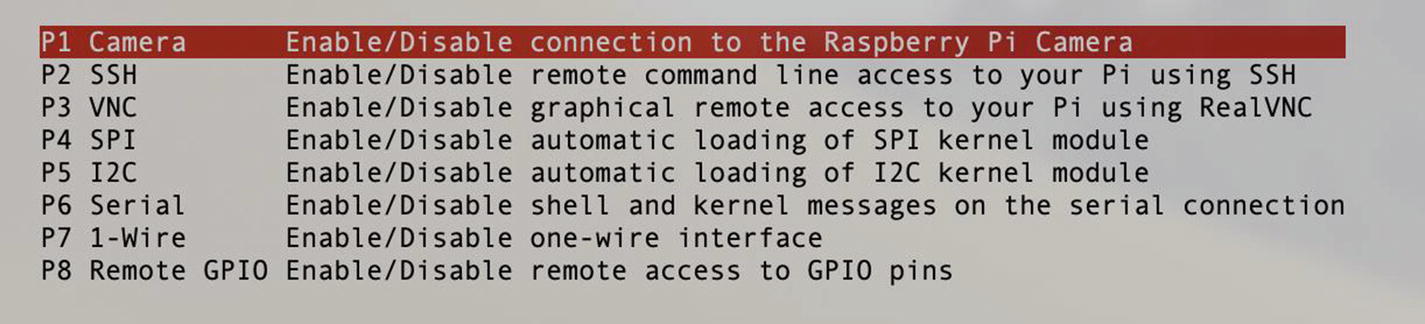
Interfacing Options menu of the Pi configuration utility

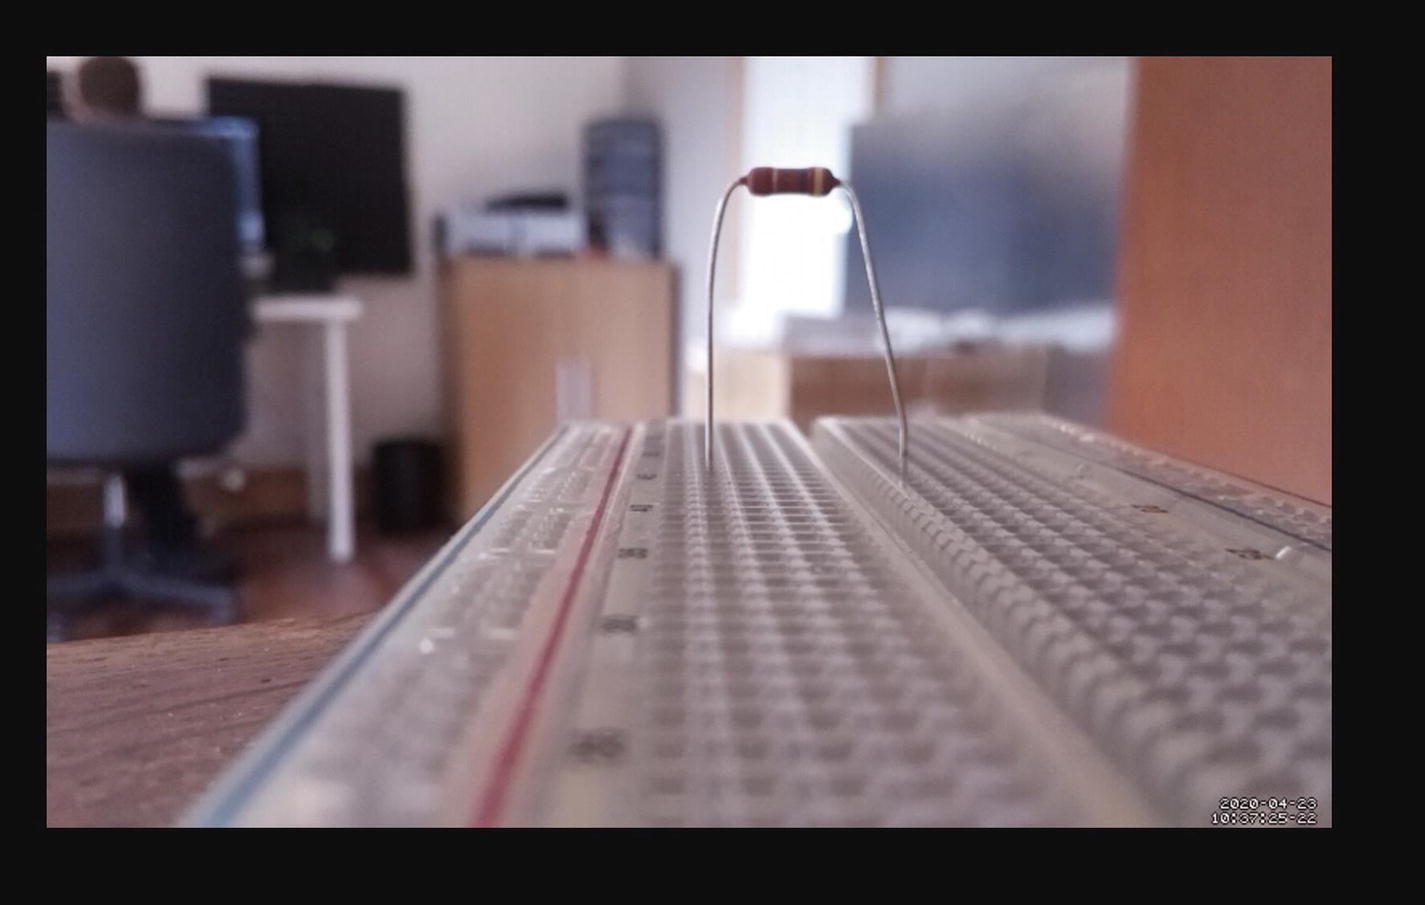
Early, uncorrected Pi Camera photo
Open your photo and look at it. It may not be perfect – my photo is blurry and upside down and visible in Figure 11-6. For now, providing that you have something, then that will do. You’ll improve the quality and make it usable later on, but right now, this test is about ensuring the module works properly. If you can’t copy the file, double-check your scp command. Does the file exist at all on the Pi? Was there a problem raspistill raised saving the photo at all? Double-check your work and, if necessary, your wiring.
Camera Live Stream Configuration
To work with this camera feed, the Pi will read in the camera data, interpret it, process it, and stream it to the network over its TCP port. This section isn’t configured in Python. There are many Python libraries available, but a solution which is both simple to configure and that works reliably (or can be defensively programmed around) is difficult to achieve in Python.
For this section, you’ll use the Motion (https://motion-project.github.io/) library to handle the stream. This is a Debian package for working with the Pi Camera. It’s mainly designed around motion detection and video recording (which would be an interesting extension project), yet it has excellent streaming capabilities, and is configured with a config file. It can run as a daemon, so the Pi can configure the stream itself when it boots.
Motion config changes required
Option | Value | Description | Full config line |
|---|---|---|---|
width | 800 | Width of the video in pixels. | width 800 |
height | 480 | Height of the video in pixels. | height 480 |
framerate | 30 | Number of frames (individual images) to stream per second. | framerate 30 |
stream_quality | 100 | Percentage quality of video stream. | stream_quality 100 |
stream_localhost | off | Restrict the video stream to the Pi only, or allow access over the network. | stream_localhost off |
ffmpeg_output_movies | off | Record videos to the Pi’s memory card in addition to streaming. | ffmpeg_output_movies off |
stream_maxrate | 30 | The maximum framerate to stream. | stream_maxrate 30 |
rotate | 180 | Rotate the video feed in degrees, only works in increments of 90. | rotate 180 |
Now load the Pi in your web browser, and use Motion’s default streaming port of 8081:
http://pi-car:8081/
Rotated and refined Pi Camera photo
Pi Camera Focus Adjustment
Like any camera, the Pi Camera V2 has a lens with adjustable focus. There’s no autofocus, it’s purely manual – a mechanical lens adjustment. If your video feed is blurry, and providing you haven’t increased the output dimensions to huge numbers (which will reduce the quality), then you may need to adjust the lens focus.
All cameras use a plane of focus (PoF). This imaginary line defines what is and is not in focus at a given time. Adjusting the focus on a lens moves this plane forward or backward. Everything parallel to the lens at a given distance is in focus, and moving nearer or further from or to the lens gets increasingly out of focus. An object 1M away could be in focus, and something right next to the lens would be out of focus. For these reasons, you won’t be able to get everything the camera sees in focus – it will be a compromise, which may need adjusting once the camera is mounted on your car.

Tools needed for Pi Camera lens focus adjustment
Use a small pair of pliers to grip the outer lens housing – shown in Figure 11-8. Use a small screwdriver to nudge the lens barrel, and use the indentation to grip your tool. Be very careful not to apply too much pressure. Slipping here could damage the lens itself or risk pulling the entire lens assembly away from the module itself. Treat this lens and this maintenance step as you would a pair of glasses, or when putting contact lenses in.
Remember, this focus will need adjusting when the camera is installed in your car.
Camera Flask Code
For this code section, you’ll create a new Flask route to serve the image. Later on, you’ll expand this route to make use of the reversing sensors, but for now, it simply serves the camera feed. This is a simple code change – the Pi is already handling the hard work of the video.
The reverse.py file is the new route for this reversing screen. The template file reverse.html is the markup to render this stream. It lives inside the templates folder, which is a Flask pattern for storing markup files.
This is a new blueprint file. It defines a new route /reverse/ and handles the logic to connect to the stream. There’s lots of logging (as is standard across this project). This file uses the render_template function from Flask. This function renders the contents of a template to the browser – reverse.html. Notice how you don’t need to specify the templates folder, as Flask already knows this is where to look for templates. By using a render template, you can keep your code neater, as all the HTML and markup-specific logic lives in the template itself, ready for reuse by any of your application logic.
You can also pass data to templates. This route passes the stream_url to the template. This stream URL is where the browser can find the video feed. It’s a Fully Qualified Domain Name , or FQDN. It consists of the protocol (http), host (pi-car), and stream port. Notice how the stream port is pulled from the config even though it does not exist. This defensive logic falls back to the 8081 stream port if the config is not set. This lets you easily change the port in the future, just by modifying the config file. You don’t have to dig through the code, which could use this port in numerous locations in a bigger code base.
This is Jinja, the templating language included with Flask. This renders the value “http://pi-car:8081”, as specified in your back-end logic.
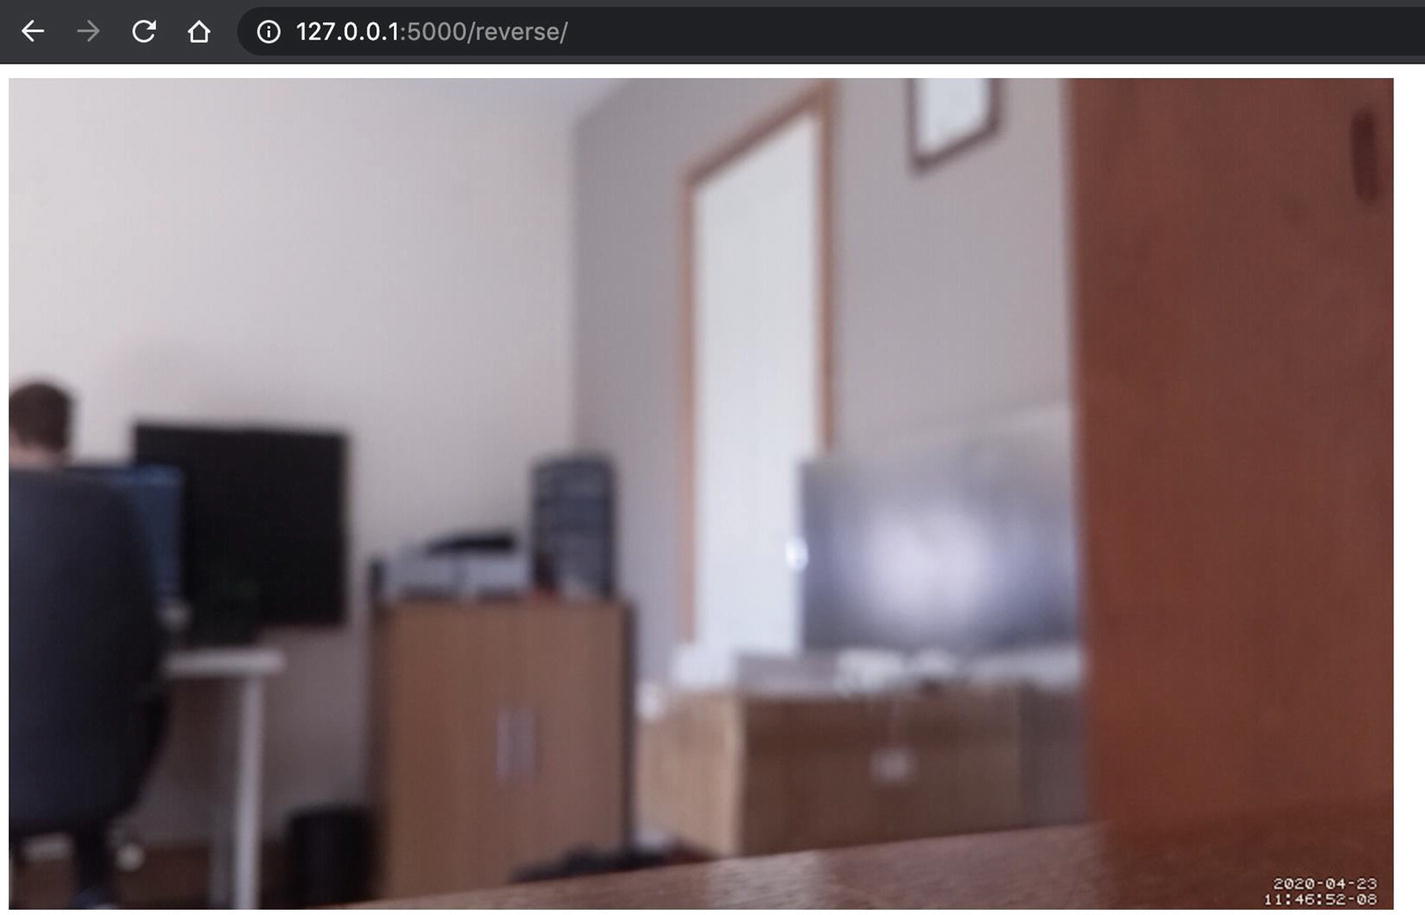
Flask application streaming the live video feed
Notice how you’re using port 5000 to access the application, but if you look at the code rendered by the reverse route (by right-clicking and choosing inspect to bring up your console developer tools), you’ll see the stream is coming from http://pi-car:8081. This is due to ports, as discussed in earlier chapters. The application runs on port 5000, but the stream runs on port 8081. You don’t need to merge or combine the two – they are independent data feeds coming out of the Pi.
Chapter Summary
This chapter introduced to you the Pi Camera module. You learned how to connect it to the Pi and fine-tune the settings to achieve the best possible quality. You configured the Pi to stream the camera feed over the network and created a basic template to pull this stream into your application. This is the basis for your entire reversing module, which you’ll continue to expand upon later on.
The next chapter shows you how to develop a reverse beeper, to indicate the presence of a rear obstacle.