Throughout this book, you’ve mainly learned theoretical computer science, case studies, and best practices, along with an introduction to the Pi and an overview of the software and hardware needed to follow along with these projects. You should now know the “why,” but not the “how.” This practical chapter covers the first steps needed to begin building the project.
A local development environment is the first and the most important tool in your software developer’s toolkit. This lets you write code, write unit tests, safely store and version your code, and rapidly make changes with instant feedback. By running the project on your computer, you can quickly iterate over new designs and features and experiment with code. You don’t even need a Raspberry Pi at this stage.
Running code on your computer instead of the Pi itself provides one major benefit: speed! It’s far quicker and easier to run your code locally instead of remotely. With a build pipeline hanging off your Git repo, it could take several minutes to deploy code to the Pi. This doesn’t sound like a lot, but it gets tedious very quickly, especially if you change something simple like a comma or a bracket. Running code on your computer lets you instantly see the changes – it’s as fast as pressing save.
There is a time and a place for running and testing code on the Pi itself, as your computer is not a Pi and behaves very differently in terms of supported hardware, processing speed, and CPU instruction set. Later on, you’ll learn when and why to deploy to your Pi.
Throughout this book, the instructions given are specifically for macOS Unix and the Raspberry Pi’s Debian-based Raspbian operating systems. Linux users should have no problem running the commands on a different operating system – in some cases, they are the same commands. Microsoft Windows users may struggle to complete some of the console-heavy instructions.
Despite its popularity with consumers, writing code on a Windows machine is more difficult than it should be, and the vast majority of Windows development machines are used for working with Microsoft technologies. If you’re attempting this project on a Windows computer, pay special attention to the instructions. Once you know what you need to do, you may need to figure out how to achieve this in Windows. Often, a simple console command on Mac or Linux requires a GUI installer on Windows.
Getting Started with Python
Almost any current version of Python will work with these projects (although you may have to perform your own troubleshooting and investigation if certain features are not available in older releases of Python). I don’t recommend you use Python version 2 releases, as discussed in Chapter 2. Many new Python modules will simply not work with old versions of Python, and it is officially deprecated – meaning you shouldn’t begin new projects with it.
Other languages could work with this project. Perhaps PHP, Java, or Go would work, but at the very least, you’d need to know how to develop in those languages, and much of the guidance in the following chapters would be rendered useless by choosing a language other than Python. You’d also need to learn how to interface with the sensors, and how to read the camera stream and various other components for the projects. The Official Pi APACHE server tutorial (www.raspberrypi.org/documentation/remote-access/web-server/apache.md) may be a good starting point for one of these alternative languages.
Don’t forget that the vast majority of Pi projects are implemented in Python. There exists a vast range of articles, papers, Tweets, and tutorials around Python on the Pi, which is significantly reduced when working in other languages.
Python is quick to learn, easy to read, and uses standard English keywords. Its popularity is going from strength to strength right now, and the Pi is perfectly paired to work with Python as the go-to language.
In order to run any Python scripts, you need to install a Python interpreter. This reads your Python code and translates it into instructions your computer can understand. This happens in real time, and a Python interpreter is often simply called Python. When you run code with Python version 3.7 (www.python.org/downloads/release/python-370/), you are simply using the Python interpreter, version 3.7.
macOS comes with a Python interpreter preinstalled, but it’s not a good practice to use this. This Python is required by some tools used by your operating system. It can change without warning and is usually an old version such as Python 2.7. There’s also the problem of dependencies. Libraries you import into your code are called modules – your code is dependent on these. If these modules are not part of the Python core library, then you need to install them. If you have two projects both using your system Python, then it’s common for both projects to install modules and compete with each other. Perhaps the first project needs version one of a module, but another project needs version two. This is difficult to manage and frustrating to work with.
Solving this dependency problem is simple enough – in theory. You can install specific versions of Python, and install your modules into a virtual environment, which uses any version of Python you have installed. Virtual environments keep all your modules isolated from other projects. Everything installs into a self-contained place. You can create as many as you like – one for each project is sufficient. This ensures that changes to modules in project A don’t impact project B.
This project uses Python 3.7, so get started by installing this version. Open a new Terminal either from your applications folder or by going to Spotlight Search ➤ Terminal.
You could immediately install Python 3.7, but there’s a better way to manage Python versions. A tool called Pyenv lets you install, uninstall, manage, and switch Python versions on a per-project level. It’s easy to use and takes away a lot of the hard work of managing multiple versions of python.
Pyenv is a free tool available on GitHub at https://github.com/pyenv/pyenv. A Windows fork is available at https://github.com/pyenv-win/pyenv-win. Pyenv provides detailed installation instructions, but installation through a tool called Homebrew is far simpler and is a common approach for dev tools on macOS.
Homebrew is a package manager for Mac and Linux. Available at https://brew.sh/, Homebrew lets you install Mac packages (such as pyenv) from your command line. It’s free, and marketed as “The Missing Package Manager for macOS (or Linux).” Different packages are defined as formulas, and you can see the full list at https://formulae.brew.sh/formula/.
This uses Ruby (included with macOS) to download a build script from GitHub and then run it. This will install Homebrew on your computer, but before running, it lists what it will install and what directories will be created. Click Return to continue the installation. Various words, modules, and formulas will fill up your terminal, but after a few short minutes, you should see “Installation successful!” if everything went to plan. If your installation failed, then take a look at the Homebrew troubleshooting tips available at https://docs.brew.sh/Common-Issues.
Homebrew will update you on the status of this installation. Often it begins by downloading the code for the latest package version and then installing it, which Homebrew calls “pouring.”
The .bash_profile is a configuration file for your bash shell (Mac Terminal). When you start a new bash session, the shell looks at this config file. It’s used to configure packages and export variables. Depending on your operating system, this file works and is named slightly differently. macOS Catalina uses ZSH (.zshrc config file) as the default interactive shell, and Linux systems may use additional files, such as .bashrc. Check the pyenv installation guide at https://github.com/pyenv/pyenv for detailed instructions across many operating systems.
The intricacies of how pyenv works are complex, and well explained in the pyenv GitHub repo. In short, whenever your Python applications run, they specify the version of Python they need. Before this command reaches your operating system’s Python interpreter, pyenv jumps in and redirects the command to the version of Python managed by pyenv. It basically intercepts Python commands and redirects them to the correct version of Python.
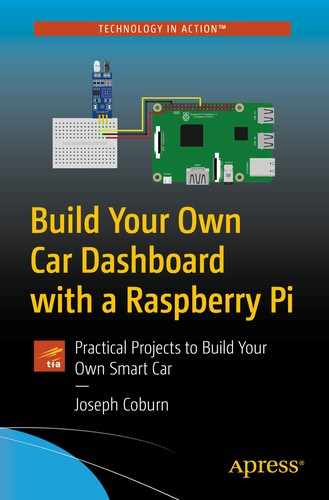
All the Python 3.7 versions listed by Pyenv

Console output during the installation of Python version 3.7.6

Installed Python versions listed by Pyenv

Console output of the current system Python version
Now when you get the Python version from a Python shell, it should match the version you installed. Python 3.7.6 is now installed, and you can move on to the next step.
Breaking changes are those which are not backward compatible with previous software versions. If you’re upgrading to a breaking version of a package, your code may not work properly, and you may need to make changes to ensure it functions the same as it did with the previous version.
Developers try to ensure changes don’t cause major issues, and you can often upgrade packages without issue. In the case of breaking changes, sometimes it’s just not possible to rework the code in a way that doesn’t cause an issue for someone. A good example of a breaking change is the migration from Python 2 to Python 3.
A Python package called Pipenv ( https://github.com/pypa/pipenv) is needed to handle your virtual environment. This solves many module import issues and ensures any modules you use in this project won’t interfere with other projects – either current or future.
Pip will install Pipenv into your global system Python. This seems at odds with my recent advice to always install modules into a virtual environment and never mess with system Python. In this case, Pipenv is the virtual environment manager, which makes it tricky to install in its own virtual environment. As Pipenv is the basis of virtual environments across many Python projects on your computer, it receives a pardon and goes into your global Python. Once installed, all future modules can install into their own, isolated, virtual environments.
You’ll revisit Pipenv later on in this chapter, so for now, all you need to do is install it.
Git and GitHub Repository Configuration
Git is one of if not the most popular version control systems in use today, and for good reason. Creating manual revisions of files may work for graphic designers or writers, but the vast number of changes made by software developers on a daily basis mandates the need for a robust code storage solution.
Git lets you store, share, collaborate, restore, undo, experiment, and back up your code easily, and it’s free. GitHub exists as a web platform and remote Git host. While you may not need to share code with other people, free, secure, online code hosting is a wonderful tool to have at your disposal. Other tools exist, but GitHub is free to get started with and is very popular with the open source community.
The official Raspberry Pi Git tutorial may assist you here, available at https://projects.raspberrypi.org/en/projects/getting-started-with-git.
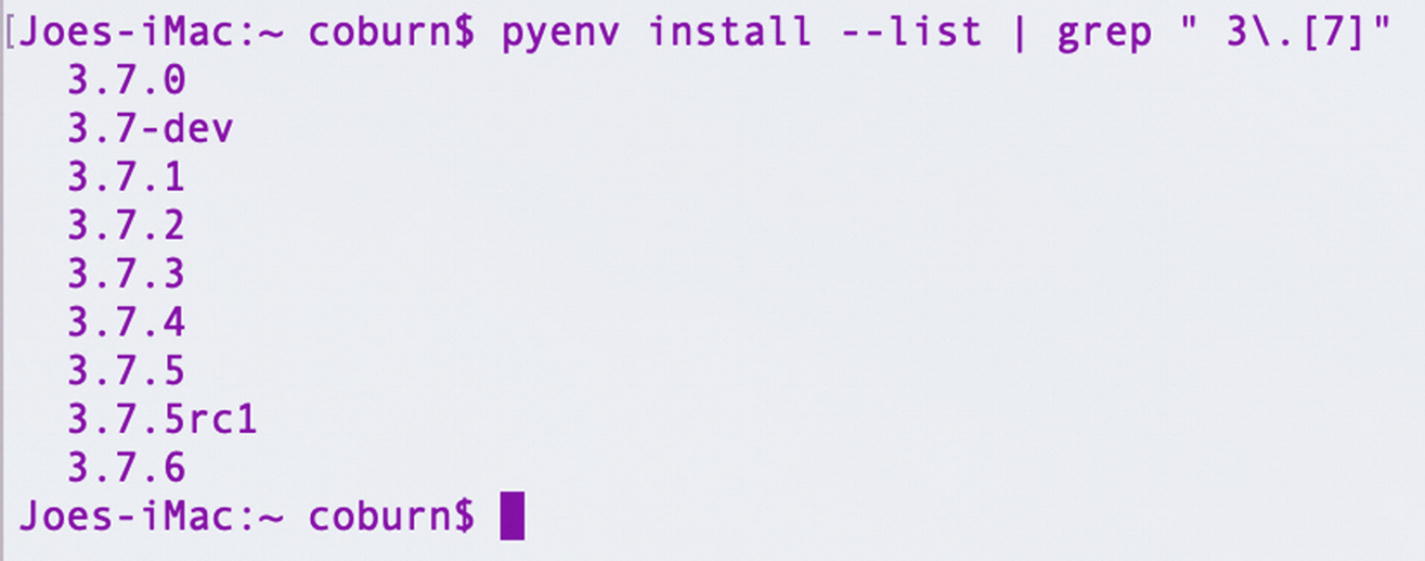
GitHub welcome screen

Main GitHub dashboard
Repository name – This is unique to your account.
Optional description – A brief overview of your project.
Visibility – Public or private. With public access, anyone can see and potentially contribute to your project. If you’re not ready to share your code with the world just yet, then choose private. Only you and people you invite can see your private project.
README initialization – A Git README file is where you can write a quick guide to using this code, and it’s a good practice to have one.
.gitignore – .gitignore files tell Git not to include certain files or folders when working on a project. Select the Python option here for a boilerplate file.

GitHub new repository screen
When you’re ready, choose the Create repository button at the bottom of the page. You’re almost ready to begin coding. The final step needed is to get your new code and associated Git files onto your computer.
This Git configuration is all performed over the command line. If you’re not comfortable with this, then various GUI Git tools exist to aid you. I’d recommend learning the basics of Git first so you can understand how these tools work instead of downloading and blindly pressing buttons in one. If you’re still set on a Git GUI, then GitHub Desktop (https://desktop.github.com/) or Sourcetree (www.sourcetreeapp.com/) are both excellent choices, available for both Mac or Windows operating systems.

The GitHub repository landing page
https://github.com/CoburnJoe/Pi-Car.git
You only need to do this configuration once after installing Git. Git retains this information across all projects on your computer.

Sample console output when Git cloning a repository
Integrated Development Environment Setup
Now you have a way to run Python, a place for your code to live, and a way to track changes, you need a way to write code. You may be familiar with command-line editing tools such as Vi, Vim, or Nano, but an integrated development environment (IDE) provides a wealth of useful tooling and features not possible in (some) other editors.
Compile code without leaving the program
Run unit tests and measure code coverage
Debug code and halt execution at arbitrary points in time
In addition to this, IDEs often provide helpful warnings and information about your code as you write it. They point out where you may have made a typo or otherwise named something wrong. They can analyze your code and pull out docstrings, parameter names, and best practices. IDEs shouldn’t be shied away from as they can greatly improve your efficiency as a developer.
My personal preference for a Python IDE is PyCharm, by JetBrains. One reason for this preference is familiarity. I know the tool well – don’t underestimate the performance increase you can achieve by using tools, languages, and frameworks you are familiar with (providing they are suitable for the task at hand). PyCharm has built-in version control and conflict management tools, and a wealth of extensive tools, features, and extensions available. JetBrains (the developers of PyCharm) have a wealth of experience behind them, and continue to expand their software with useful tools, features, and bug fixes. In addition to this, there is large online PyCharm community, where you can find help to any issues you encounter. The PyCharm learning center is a good place to start (www.jetbrains.com/pycharm/learning-center/).
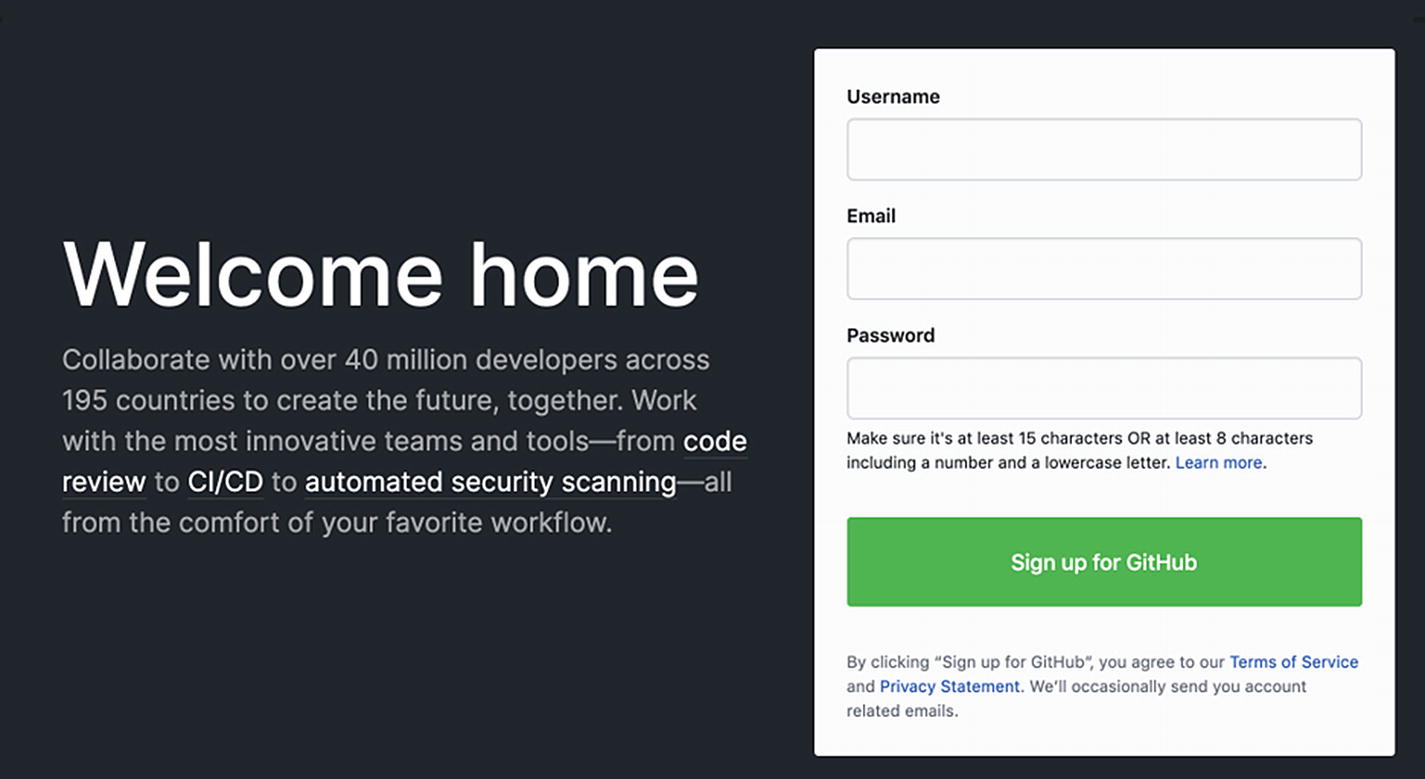
Available for free at www.jetbrains.com/pycharm/, PyCharm has a wealth of tools built-in to make your life easier as a developer and to save you time when writing Python. A professional version is available, but for all the projects in this book, the free community edition is sufficient.
PyCharm download screen
If you have a preferred Python IDE, there’s no reason you can’t use it to follow along with this book. Most of the examples given are executed through macOS X terminal commands, with only a small section geared toward PyCharm-specific steps.

PyCharm Mac installation
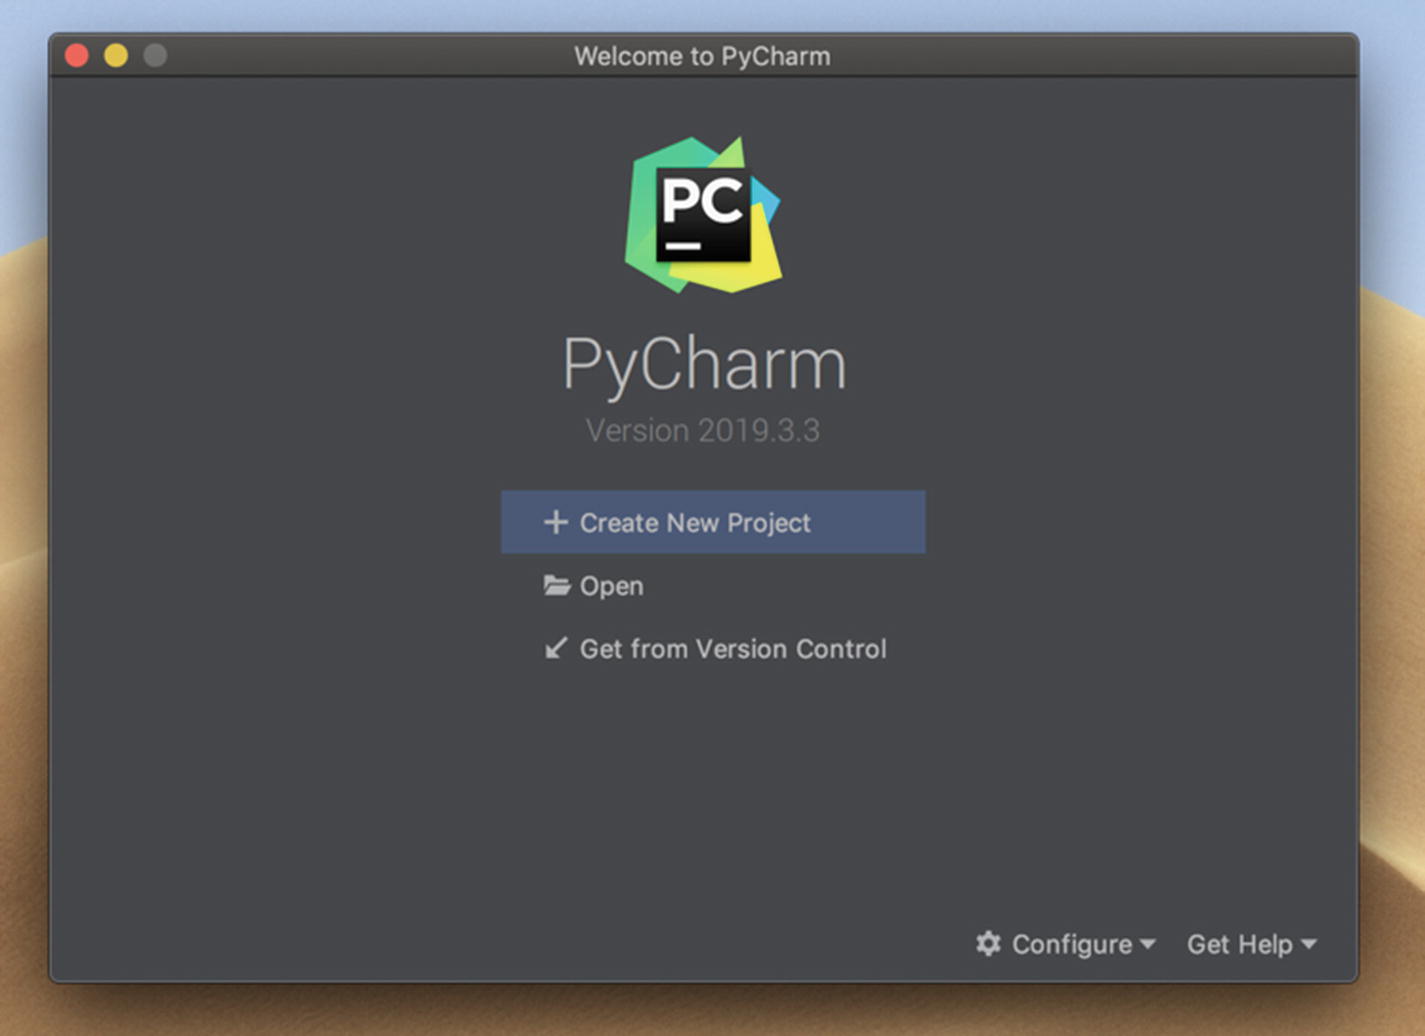
PyCharm first time landing page
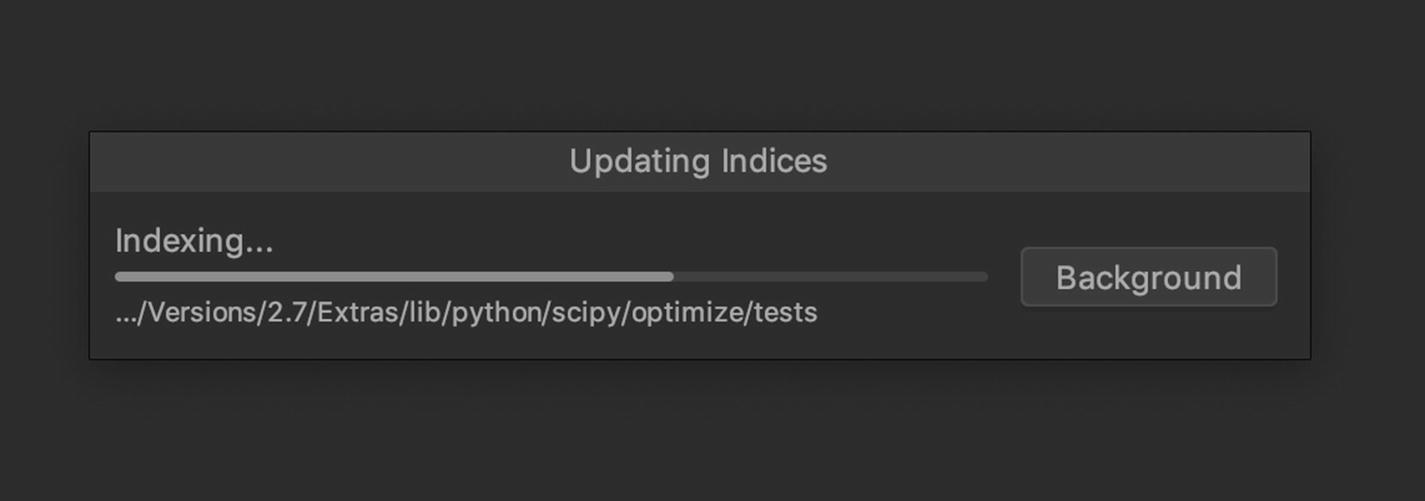
PyCharm updating its indexes
- 1.
The Project is on the left.
- 2.
The Navigation Bar is at the top, with buttons on the right.
- 3.
The Tool Window Bar is at the bottom.
- 4.
The Main code editor is on the right.

The main PyCharm project view
The project area lists details about your project. It lists all of your files (including hidden files used by Git). The navigation bar shows you where the current file lives in relation to the whole project. It also provides options to run your unit tests and modify your Python configuration. The tool window bar at the bottom provides lots of useful tools. A terminal is here, along with a Python console, version control options, and many more features. Finally, the main code editor is where you can read and write your code. Double-click a file to see it here. You can work with multiple files, split this into two or more views, and more.
You’re now ready to begin writing code. By default, PyCharm will automatically save any changes for you in the background. This only happens when PyCharm loses focus – often when you click another application such as your web browser or another PyCharm tab.
Python Virtual Environment Configuration
This will create a new virtual environment for you using your global Python version, which is configured as Python 3.7 as per the previous instructions on Pyenv. Pipenv provides a status bar on this progress, but as you have no other modules to install yet, it shouldn’t take very long.
Let’s break down these four sections. The source specifies where to look to find any Python packages you need. For the vast majority of projects, this is always PyPI, which is the de facto Python module repository. If you need to install modules not found on PyPI, you’ll need to specify a different source here. The dev-packages area lists any packages and versions you need to write your code, but which you don’t need in the final build. This is often linting tools, or a unit testing module.
The packages section lists any modules and versions your code needs to work. Finally, the requires section lists any other dependencies. Your Python version 3.7 is listed here, which outlines what version of Python is needed to run this project.
This file will grow as you build the projects and import more modules (other than those modules found in the Python core code base). This file lists the modules you need, but not necessarily specific versions. Installing modules listed as “*” will install the latest build and associated dependencies.
The Pipfile.lock contains mostly the same information, but it serves a different purpose. This is locked or pinned to specific versions. It’s used for systems, pipelines, and automated tooling to read and install modules from. This won’t ever install a newer version; it’s always locked to a specific version listed when the file was last generated. It also contains hashes of modules, which allows pipenv to verify the contents are exactly the same as those it expects. This again prevents accidental upgrade of packages and protects against a polluted remote source, which may serve up poisoned or otherwise “tampered with” modules.
Flask is the Python microframework which is the basis of this whole project. Pytest is a very popular unit testing framework. Notice how the --dev flag is used. This tells Pipenv to install this package under the dev-packages section of the pipfile. Finally, the Black package is an uncompromising code formatter. It reformats your code to meet the Python recommended styles outlined by the Python community. It’s listed as an “uncompromising code formatter.” It handles the formatting of your code, so you can think about the logic and the stuff that really matters. Black is still in prerelease, so the --pre flag ensures pipenv knows you really do want to install it. Using a tool such as Black is a great habit to get into, especially if you come to work with multiple developers on the same code base. You’ll no longer argue over trivial semantic issues such as placement of commas, which quotes you used, or how long lines are. It sounds trivial, but everyone has a preferred style of code formatting. By using Black, it makes all the code consistent. Don’t overlook how important this is.
The keyword Black is needed to run Black itself. The special $PWD statement is a bash command. It stands for ”print working directory.” When used with Black, this means “run Black on all the code from the folder your terminal is currently in.”
This is a helpful reminder that you are in a virtual environment. Go ahead and run that Black command again. If everything is working correctly, Black will say that it has nothing to do. This is perfectly fine – you have no Python files to format yet (but if you did, Black is ready to format them).
Once again, Pytest will say there are no tests to run. This is not a problem – you simply haven’t written them yet. You didn’t think unit testing would be that easy, did you?

PyCharm’s “Add Python Interpreter” menu
PyCharm will do some figuring out and perhaps recalculate its indexes. When it’s ready, the bottom right of PyCharm will now say “Python 3.7,” followed by the name of your virtual environment. Now you can use a virtual environment in the terminal, or with any buttons and tools within PyCharm itself.
You may have noticed a Pipenv option from the PyCharm interpreter menu, so why must you select Virtualenv instead? Pipenv is really a wrapper around the Python package Virtualenv. By using Pipenv, it’s really created your virtual environments with Virtualenv in the background (along with a few other helpful things). Feel free to select Pipenv and create a new virtual environment this way instead. It’s not possible to point PyCharm to an existing Pipenv virtual environment without selecting Virtualenv. Knowing how Pipenv works in the background is a much better place to be in than blindly relying on PyCharm to operate it for you in either case.
Git Workflow
Now that you have two new files, let’s get these into your Git repository. You could just crudely shove these into the master branch, but that’s not very refined. Many businesses are not willing to tolerate code going to a customer without a code review – other developers looking and approving of the changes.
You could argue that this code is just for you, and there’s no other developers working on it, so you’ll shove it wherever you please. This is a valid approach, yet as you’ll see shortly, your Raspberry Pi will look at the master branch. If you blindly cram unstable or even unfinished code into it, your Pi may not work until you finish the code. This may be acceptable just for you, but again, if this was a real product, website, or business, things randomly breaking is not an acceptable option.
By creating a branch, you can safely work and experiment on code away from the main branches, and all the other developers and systems which rely on them. A common system is a master branch, which is your production code. A develop branch is used for nearly ready or possibly unstable changes. The code goes into a feature branch (often stemming from develop) while it is developed. When ready to share, it gets pull requested (PR’d) to develop. You won’t need to get other developer’s approvals if it’s just you on this project, but PRs provide an easy way to undo a whole feature at a time.
Once merged into develop , you can pull request (PR) to master if you’re ready to go “live.” A final option is that of urgent bug fixes. If there’s a problem on the master branch (and therefore your production code), this can be fixed with a branch taken off master. This is known as a hotfix, and it goes back to master, bypassing develop. Once the crisis is over, you can merge it from master down to develop, to keep everything in sync.
This creates a new branch called develop. The checkout command lets you switch between local branches, and by using the -b flag, you can create a new branch with a name – in this case, “develop.” Notice how Git confirms the command it just executed, and the bottom right of your PyCharm window shows the current branch.
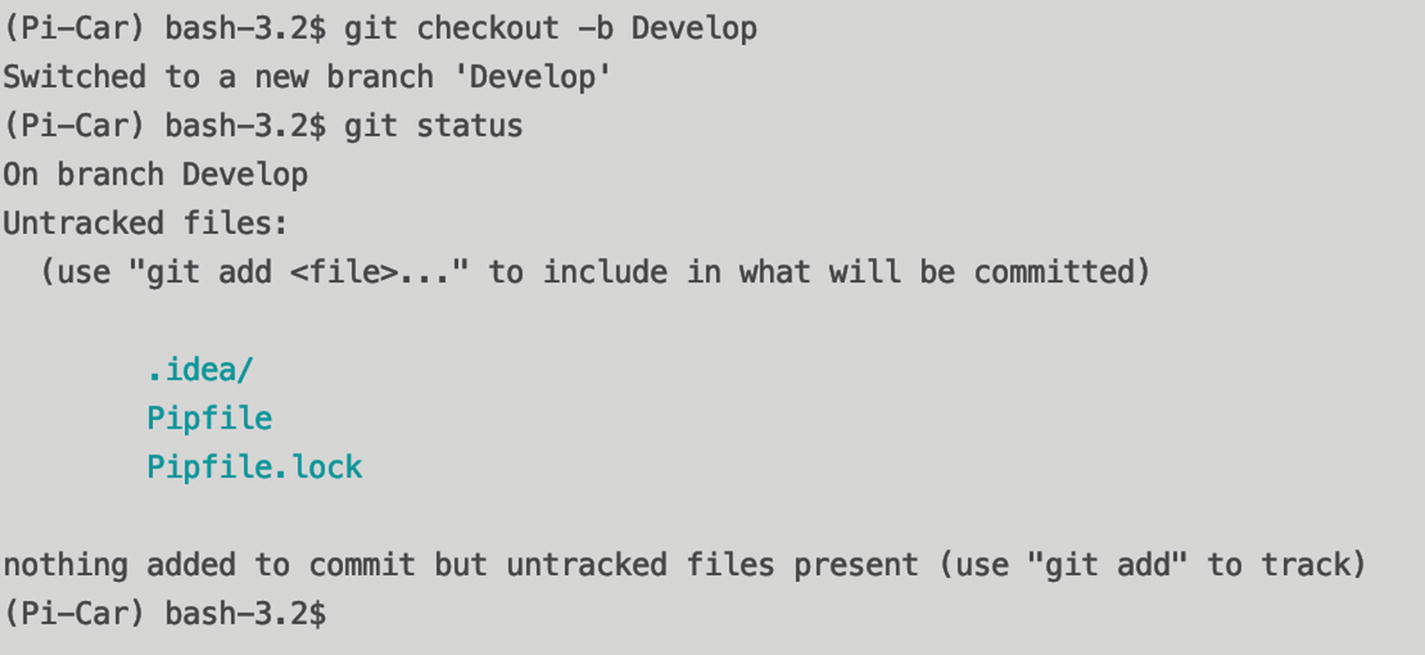
Untracked files highlighted by Git
This is a bash command to add “.idea/” to your .gitignore file. You don’t need to open the file; this will append to the end of it. Now when you check the git status, you’ll see three files, but with a difference. The .idea folder has gone, but it’s now been replaced by your .gitignore file. You’ve modified this file, so you now need to commit it.

Tracked files highlighted by Git
The -m option lets you type a message to accompany your commit. Make this descriptive so that you can understand what this change is, and any other developers who may look at this Git history in the future. It sounds simple but lacking the discipline to write good messages here will cause you trouble later on – either when you’re trying to track down what changes occurred in a repo, or you start working with other people, who look at you quizzically as to why you let your cat walk all over your keyboard with regard to your commit messages.
The final step needed is to push these changes. This tells Git to get all your changes and then commit and send it to the remote repository – GitHub in this case. This gets the code off your machine. It backs it up remotely and ensures other developers can see and work with it. Without pushing to a remote repository, your code exists only on your computer.
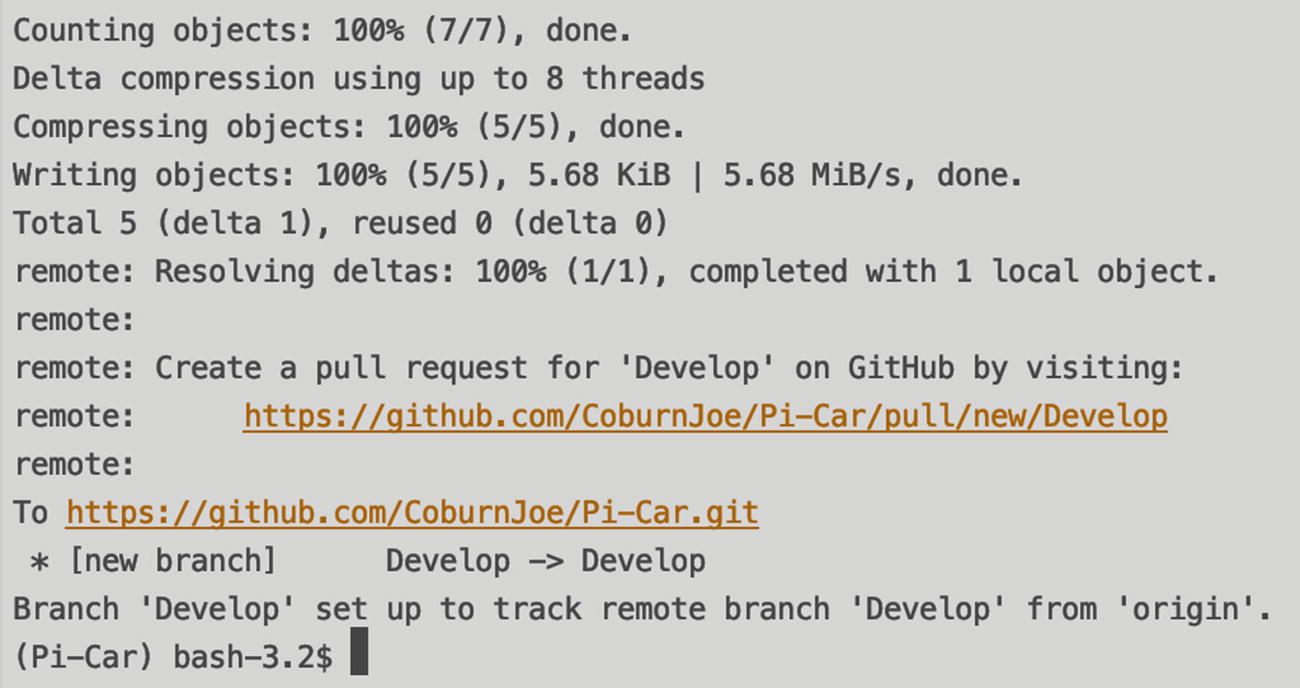
Console output during the first push of code to a remote repository
As a good rule of thumb, you should avoid pushing without specifying where to push to. While a plain “git push” often works perfectly fine, it pushes directly to the remote branch – which may not be what you expect. By explicitly stating the branch to use, you avoid any risk of shoving your changes into the wrong place.
Pull Requests
As discussed previously, pull requests are the best way to get your code into another branch. They allow other developers to see and approve of your changes, and they provide an excellent way to discuss the merits of said code. Developers can comment on specific lines or changes, and everyone gets to see your changes with a nicely formatted output. Even if you’re not working with other developers, pull requests are a great way to move code from one branch to another.
Before starting a pull request, you need to get all the changes from the upstream branch into your branch. If you’re going from develop into master, then develop needs all the changes in master, plus your new additions. This places the onus of resolving conflicts and integrating all changes on the pull request author. Solo developers will rarely encounter any issues, but once you join a team, it’s common for a branch to fall behind the main branch fairly quickly. Keeping your branch updated with upstream changes is a good practice to employ.

Git conflicts highlighted by PyCharm
At this point in time (and providing nobody sneaks new changes into master), your develop branch contains your changes plus all the changes in master. Develop is now ready to pull request into master. This is the stage where I’ll deviate from a command-line only Git tutorial. Git purists may start hating now, but creating PRs from the command line requires even more Git knowledge than is needed to start using Git right now. GitHub shows the changes between branches in a much clearer way than the stock Bash command line does, so now feels like an appropriate time to use a GUI.

GitHub Project Navigation bar

The GitHub branch overview page
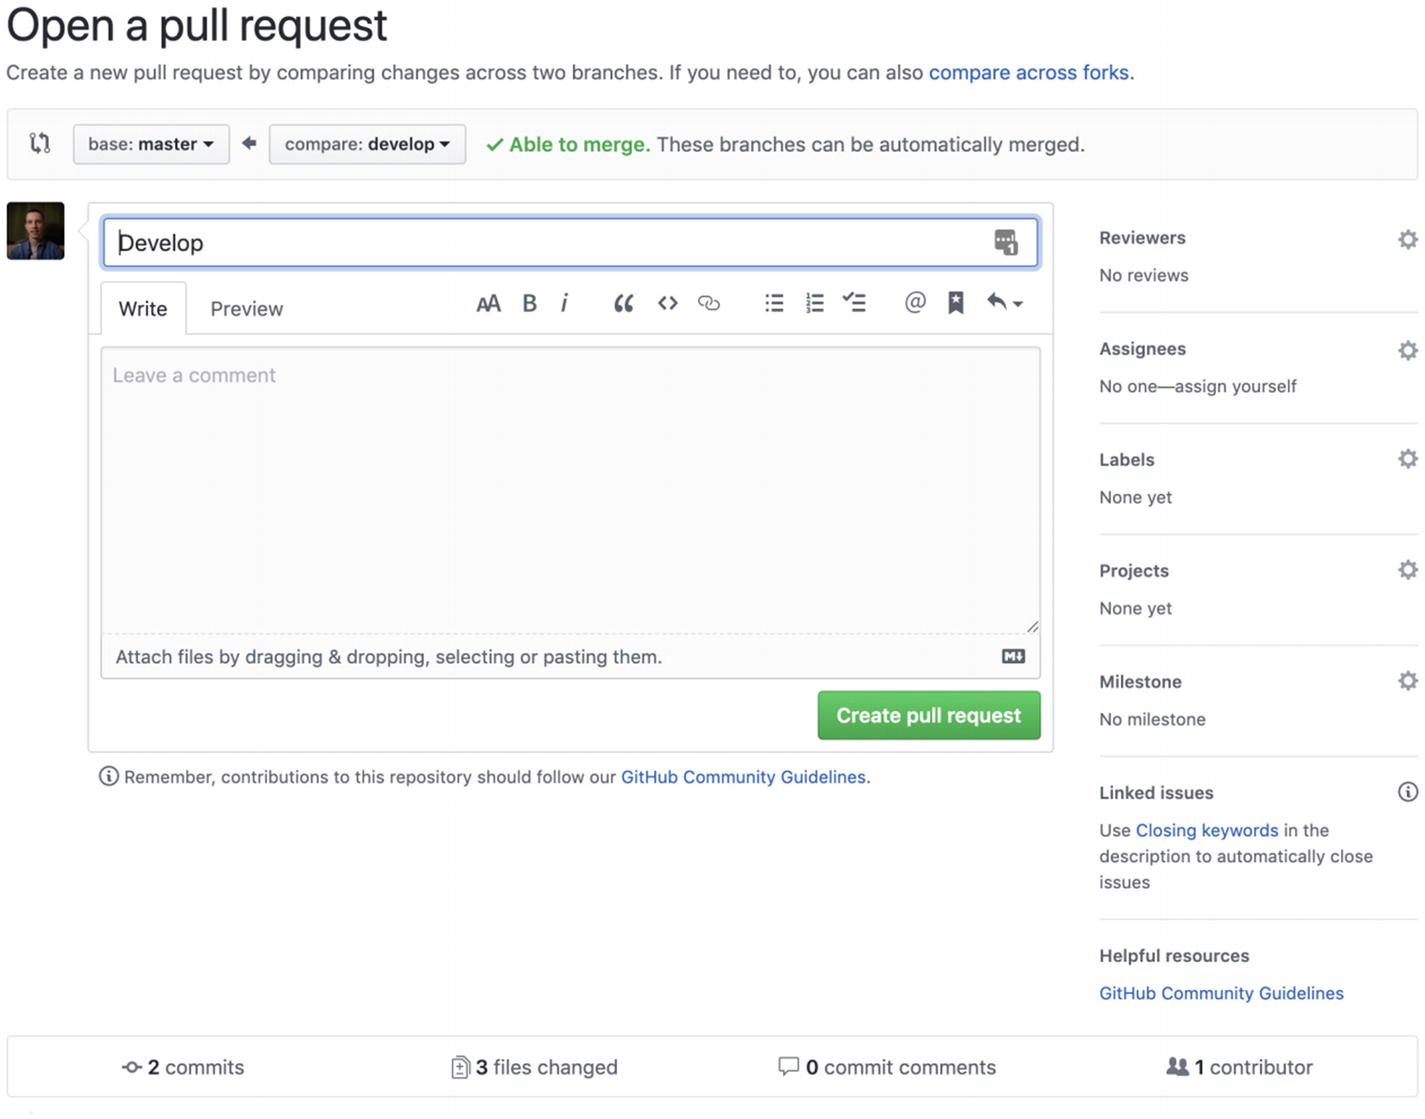
GitHub’s new pull request page
This page is split into two sections. The top half contains details of your pull request, the number of reviewers, pull request messages, labels, assignees, and more. The bottom half outlines the number of commits made and the changes they occurred on. It highlights any additions or subtractions, along with any commit messages made on this branch.
- 1.
Reason – Why are you making this PR? What problem does it solve?
- 2.
Rational – Why did you code it this way? Was there another option that wouldn’t work in this scenario?
- 3.
Background – Other developers may not have the context of a fix that you do.
- 4.
High-level list of changes (if significant).
- 5.
Any future changes to follow, or pull requests in other repositories to accompany this change?
As a final sanity check, take a look at your commits and the diff. If this was someone else’s code, what would you say? Have you left any debug or test logic in the code? Is it ready to run in the destination branch, or production? It’s OK to go back and make changes before finishing this PR. Once ready, choose the big green Create pull request button to share your changes with the world.
Once opened, it’s time to sit back and bask in that sweet sweet karma that comes from being an awesome developer – go you! On a serious note, it’s a bad practice to merge PRs without sign-off from other developers in your team. Rules and regulations vary between businesses and teams, but it’s not uncommon to face disciplinary action for failing to get enough approvals on a pull request (accidents excluded). If you’re working on a personal project without any other developers, go ahead and merge this PR with the big green Merge pull request button. Providing there are no conflicts (there shouldn’t be at this stage), your PR will merge without issue. If you do encounter any conflicts, then revisit some of the previous steps to merge and resolve them.
To keep your repository tidy, it’s a good idea to close feature branches when merging PRs. This keeps branches around for a small purpose or feature. Branches cost nothing, but having lots of old ones around can clutter up your repository. Create new branches as and when you need them. Common branches master and develop (and sometimes others) rarely get closed.
Repository Rules
Any good repository needs rules. Rules stop you committing directly to the master branch, or merging a pull request without enough approvals. Once again, when working solo you may not need as many rules, but they can still keep you safe. This project uses CI/CD to automatically deploy code from the master branch to the Pi (as you’ll see in the next chapter). Any changes to the master branch could result in the Pi not working properly. Sure, a home project on the Pi failing isn’t a big deal, but what about a system customers are paying for, a military missile, or a medical system? Small mistakes here could cost lives (as illustrated in some of the software development case studies).
It’s hard enough to write bug-free software, so save yourself the trouble and protect your branches! At the very least, branch permissions prevent you from accidentally committing work-in-progress code to the wrong branch.

GitHub’s top navigation bar

Adding a branch protection rule in GitHub
The Branch name pattern defines what branch to apply this new rule to. You can use the wildcard * operator here to match patterns, but for now, master is sufficient.
Require pull request reviews before merging means that any pull request must have a certain number of approvals before it can merge. Not very helpful for solo developers, but incredibly useful for a team. The Required approval reviews drop-down lets you specify how many reviews are needed to merge. By enabling Dismiss stale pull request approvals when new commits are pushed, GitHub will reset the approvals if the code changes while a PR is open. Finally, Require review from code owners means a designated code owner has to approve any PRs in addition to the other rules. This is useful for any benevolent dictators to have the final say over a code change.
Next, Require status checks to pass before merging means your branch must meet any status checks before it can merge. This could be a limit on the number of conflicts present, or that all the code from the destination branch has already merged into the source branch. This is easy to meet if you follow the Git steps on previous pages.
Require signed commits enforces a cryptographically verifiable signature across all commits. This ensures users can trust project authors – not something typically enforced on private projects.
The Require linear history option means all commits merging in a PR go into the destination branch as one commit, instead of several. This keeps the main branch tidy if there are lots of changes going in.
The Include administrators option applies these rules globally to any user, or only to users who are not project administrators.
Finally, at the bottom is the Rules applied to everyone including administrators section. Confusingly this doesn’t include the Include administrators option from the previous section. Inside here, Allow force pushes lets you allow or disable force pushing. Force pushes let you shove code into a branch that may not otherwise go. This could be commits which don’t have the matching commit history or don’t meet a particular rule. It’s not advisable to enable this.
The Allow deletions option lets users delete this branch. You probably don’t want this to happen on develop or master branches when using CI/CD.
As a good starting point, you should require pull request reviews before merging, with a suitable number of approvals – even one at this moment is sufficient. Enable Dismiss stale pull request approvals when new commits are pushed, and require status checks to pass. If these rules are too prescriptive for you, or not strict enough to prevent problems, then loosen or tighten them as you see fit once you get into the flow of Git and your project.
GitHub’s Project Administration guide available at https://help.github.com/en/github/administering-a-repository goes into extensive detail with all of these options are more.
Pipeline Configuration
A pipeline or build step is an essential part of a CI/CD process. Tools such as Jenkins (https://jenkins.io/) or Travis CI (https://travis-ci.com/) exist to let you completely automate the deployment process. From running various tests and building other services to building and deploying images, and rolling back changes, pipeline automation tools can save you a serious amount of time and effort. While a large automation is little out of the scope of this book, let’s discover how to run your unit tests automatically across any branch.

Passing unit tests
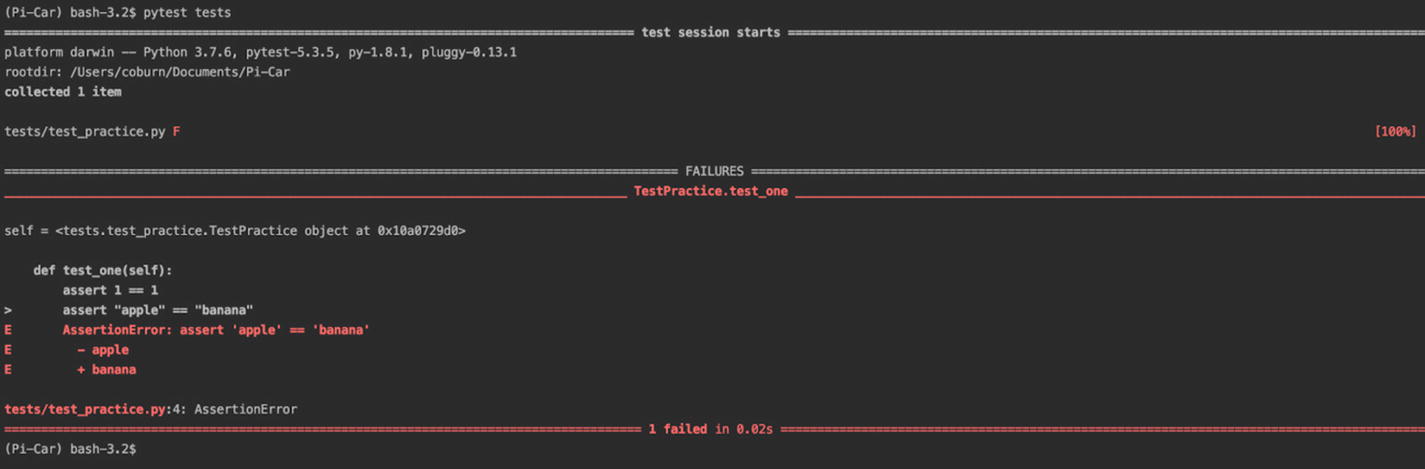
Failing unit tests
Now you have a unit test. You have a local and remote branch called feat/tests, and you know how to write assertions. Pull request and merge your branch into master – you’ll need it there for this next step. Let’s get GitHub to run these tests in your pipeline.
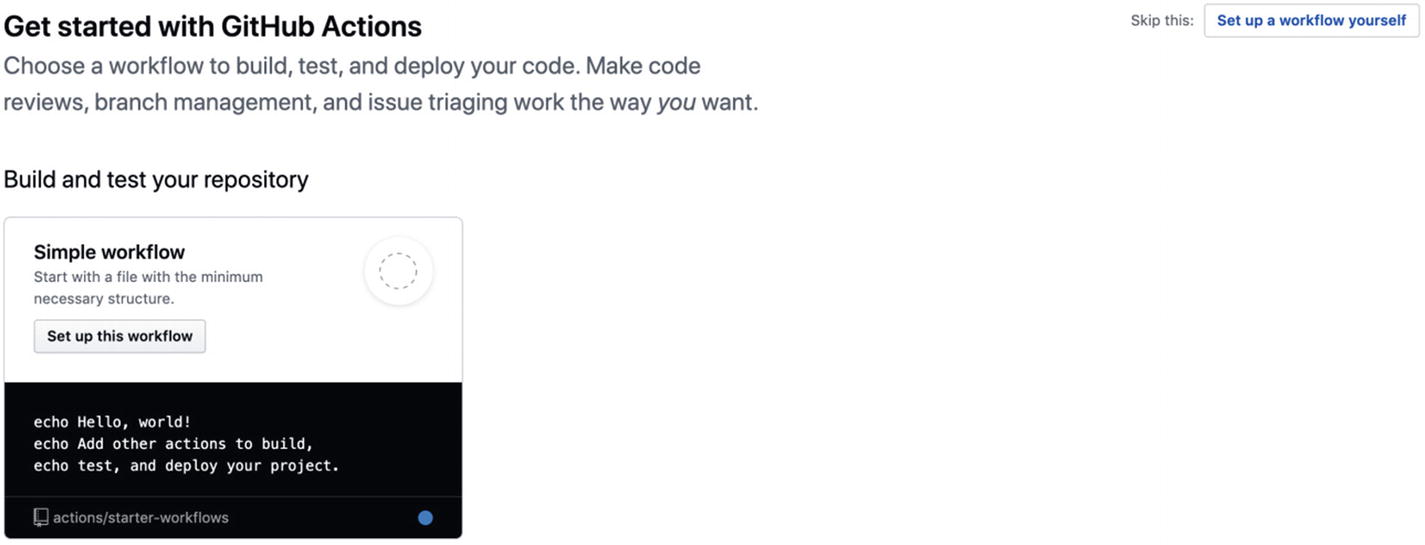
GitHub’s initial Actions page

Configuring a build pipeline in GitHub
GitHub Actions are configured using a YAML file. By default, GitHub proposes you store this nested under .github/workflows and call it main.yml. You can change this name and location from the top left of this action configuration page. Alternatively, you can commit this file as is and then pull and work on it locally. For now, let’s edit it online and let’s leave its default file name and location. The benefit of editing this file in the GitHub Actions file editor is automatic syntax correction. If you make a mistake, or enter an invalid (but technically correct) command, GitHub will inform you of the problem.
YAML is a recursive acronym for YAML ain’t markup language. It’s a human-readable configuration language, used for config files and build pipelines. It’s simple to use and nests commands through indentation, colons, and hyphens.
Let’s break this down. This .yml file configures your build pipeline to run in GitHub. Each individual line represents a configuration parameter. Each line starts with its name, followed by a colon, and then the value. Line breaks only exist to make it easier to read, and commands are further subdivided and nested with tabs and hyphens – a bit like Python.

Committing a change though GitHub’s web-based interface

The Actions screen on GitHub
On the list of pipelines, you can see supplementary information about that build. The green tick or red cross indicates if the build was successful or not. Next is the name, followed by the most recent commit in that build. The event that triggered this build (such as pull request or code push) is listed after the words on. In the middle lists the branch this pipeline ran against, and the user who changed something to trigger it. Finally, the right-hand side lists the duration of this build, along with the time and date it last ran. The three ellipses on the far right will take you to the workflow configuration file once expanded.

Sample output of a GitHub pipeline
When you’re ready, pull request and merge this pipeline branch to the master branch. Congratulations! You are now well on your way to becoming an expert software developer. You’ll use this pipeline regularly to assess the quality of your code. Whenever you push new code or create a pull request, this pipeline will run. It will run your latest code and tests, so you don’t need to worry about updating it. You may want to regularly maintain it – adding new versions of Python as they become available, or fine-tuning it to your preferences.
Git Cheat Sheet
A list of common Git commands
Command | Description |
|---|---|
git init | Initialize a new git repository in the current folder. |
git add <file> | Stage a single file into your local branch. |
git add . | Add ALL files recognized by Git. Localized to your current directory. Use wisely! |
git commit -m "commit_message" | Commit your staged changes with a message. |
git commit | Commit your staged changes without a message (opens up your default console text editor with a sample message). |
git push origin develop | Push your staged changes and commits to a specific remote branch. |
git push | Push your staged changes and commits to whatever your remote branch is. Use wisely! |
git push --set-upstream origin <branch_name> | Push your staged changes and commits to a new remote branch. |
git checkout <branch_name> | Switch to a preexisting local branch. |
git checkout -b <branch_name> | Create a new local branch and switch to it. |
git remote -v | List the remote branches and repositories your local branch is linked to. |
Chapter Summary
This chapter has equipped you with everything necessary to write the code for this project. You used Pyenv and Pipenv to manage different versions of Python, and configure virtual environments for per-project dependency management. You created your own Git repository on GitHub, and learned how to create pull requests, and configured a build pipeline to run your unit tests automatically.
You and your computer are now fully equipped to develop any Python application you like, using industry-standard tools and best practices. In the next chapter, you’ll continue this configuration by preparing the Pi itself. You’ll learn how to install an operating system, install the latest version of Python, and pull your application code and run it on the Pi itself.