By now you should have an understanding of software development processes, tools, and best practices. Chapter 2 covered the basic building blocks needed to make you a software developer, and not just someone who can write code. With that in mind, this chapter aims to provide you with an overview of the mini-projects covered in the following chapters and explains how these projects work together to produce a complete system in the form of a smart car dashboard.
Chapter 2 is intended as both a software development primer and a beginner’s reference guide. If you’re unsure about an aspect of a mini-project, refer back to Chapter 2, but remember that it’s a beginner’s guide, so it naturally can’t go into intricate details for every topic. This chapter and all those following furnish you with further information and practical examples as you need to know them.
The mini-projects encompassed in the following chapters are designed as stand-alone projects. Each one builds upon skills learned in the previous chapter, yet jumping right into a project doesn’t mandate the completion of all the previous projects. By working through each chapter sequentially, you will produce a fully functional in-car computer or smart dashboard. While these projects involve electronic circuits, sensors, and interactive components, these are all software-heavy projects. Sensors provide data and facilitate interaction with the outside world; the Raspberry Pi and software you write does all of the hard work.
Project Structure
This smart dashboard is similar to the one you might find in your car, although it’s significantly more intelligent than that of an entry-level model. The Pi drives a full-color LCD display which outputs an abundance of real-time sensor data – data such as the temperature, time, reversing status (complete with rear camera), available light, a boot sensor, fog light sensors, and more.
The Pi is connected to a series of simple electronic circuits installed in your car – although installation is optional if you’d prefer not to tinker with your pride and joy. Code developed in Python interrogates these sensors, interprets the results, and displays them to you in a functional and aesthetically pleasing way. You could run this project on any computer, but the Pi’s size, price, and energy consumption make it a clear winner here.
Rather than developing a graphical user interface (GUI) from scratch, this project displays information to the user via a web server and basic HTML web page. This has many advantages. Primarily, it’s easy to produce and fast to load. It may not be the most efficient way to design an application, but it’s certainly the easiest. It’s good enough for this project and is the way most applications are heading through software-as-a-service (SaaS) models. By letting Python handle the hard work, and limiting the client-side code (JavaScript), the main downsides of an HTML GUI are mitigated.
Client-side code is code executed by your web browser. This uses the client’s computer (that’s you or me) to do some work. JavaScript is the language of choice for this, and it can greatly enhance the user experience of a website. The downside is that it’s slow to run, and user support varies for different commands.
The alternative to client-side code is server-side code. This is code executed by a server of some kind, written in a server-side language such as Python. In this project, the Pi is both the client and the server, and as the server can execute code far faster than the client, it makes sense to restrict the JavaScript in use and let Python do all the hard work.
Once completed, you could easily extend this project. A Bluetooth module provides endless expansion options – Apple CarPlay or Android Auto support. Electronic seat driver profiles, keyless entry, or anti-theft driver photography and tracking are all very real and achievable projects building upon the skills learned here.
As with all modern gadgets, this is a software-heavy project. Python is easy to write, easy to understand, and “fast enough” for this use case. Some may argue that compiled languages such as C++ or Java are far better choices, yet their relative complexity is enough to scare most people off such a project. Besides, Python is rapidly growing as the number one choice for many different projects, and it’s been around long enough now to ensure a thriving and active ecosystem exists to serve you and your needs.
If you’re familiar with digital car diagnostics, you may be screaming at me right now. Modern cars equipped with OBD-2 (onboard-diagnostics) ports can provide an abundance of car data to anyone who cares to connect to the port. Statistics such as engine error codes, current revolutions per minute (RPM), engine health, fuel efficiency, and much more are available.
Here’s the problem with the OBD-2 port: It’s for mechanics. Sure, you or I might find some useful information in the torrent of data provided by the car, but its primary purpose is to aid with troubleshooting and diagnostics. It generally won’t augment your experience as a driver, and it’s harder to connect to and use than a home-brew solution. Granted, consumer USB or stand-alone OBD-2 modules exist, but those would boil this project down to reading in existing data and spitting it out to the screen. The Raspberry Pi presents a truly exciting opportunity to learn basic electronics skills, and really hone your software development experience skills.
The Hardware
The Raspberry Pi provides the processing power for this project. It’s cheap enough to be accessible to most people and powerful enough to run a huge number of applications. It has a host of different input/output (I/O) ports and is easily extended with a variety of affordable hardware components. As outlined in Chapter 2, there are several different models of Raspberry Pis. While processing power and style of I/O ports often changes, the basic structure of the Pi itself is very consistent. These projects will work on almost any Pi model, although early revisions may struggle due to their limited processor speeds and the amount of RAM they use. Any model from the Model 2 B+ and above will work with these projects, providing you account for the slight changes in I/O location between models. For the purposes of consistency, I am using a Pi 4 Model B 4GB throughout this book.
You’ll need a power supply to run your Raspberry Pi. During the development stage of these projects, a mobile phone charger or dedicated Pi power supply is suitable. For final installation in a car (well known for their lack of mains power sockets), you’ll need a different power solution. Early Pi models require a micro-USB charger capable of providing 3A of current. For modern boards, a USB Type-C charger of the same rating is needed.
You’ll also need a microSD card. This is the solid-state hard drive for your Pi. Not only does it store the entire Pi operating system, but it stores all of your settings, configurations, and application logic. These are reasonably priced (the $10–$20 range) and smaller than your fingernail. Ensure you buy a “class 10” or higher memory card, which is the speed rating of the card. These faster cards can handle the needs of a Pi with ease. As these projects don’t need to store reams of data, 8GB is more than enough storage space (although larger capacity cards won’t cause any problems). A 4GB memory card is not large enough.
For development at home, you may want to buy a Pi case. These pieces of plastic, wood, or metal are like phone cases or the case for your computer. They protect the hardware while still allowing easy access to the ports. They serve to protect your Pi from excess grease and grime from your fingers, along with shielding it from errant fingers and providing protection from knocks and falls. In one instance, cases protect Pis from undesirable photoelectric effects! These cost a few dollars and are available in a huge variety of shapes and styles.
When released, the Pi 2 would instantly power-down when photographed with a flash! This is due to an exposed component known as the WLCSP package. This component regulates the power delivered to the Pi’s processor, and the intense light delivered by a camera flash is enough to confuse this part. When confused, the WLCSP cannot function properly, so the Pi promptly turns off. This isn’t dangerous, and won’t damage the Pi. Using a case or otherwise obscuring this circuit prevents the problem from happening.
WLCSP stands for wafer-level chip-scale package. It refers to the process of packaging a component at the wafer level. In short, it’s a way to produce TINY integrated circuits, found in devices such as the Raspberry Pi and the iPhone.
For the screen, you can choose any suitable display you own or have access to. The keyword here is suitable. It’s perfectly possible to build this project with a spare 17-inch LCD from your old computer, but that’s not very practical for a car. A 3.5-inch HDMI display is a good choice, and it doesn’t need to be a touchscreen. These cost between $20 and $50, and you can buy them on Amazon, or any large retailer such as Walmart. Often a miniature HDMI cable to connect the Pi to the display is included, but you may need to buy a standard HDMI cable if you don’t get one, or you wish to install the Pi in a different location to the screen.
Electronic Components
Aside from the Pi and associated electronic parts, you’ll need a selection of electronic components. These range from tire pressure sensors to breadboards, resistors, wires, and LEDs. While covered in greater detail during the mini-projects, here are the basics.
A solderless breadboard is used to quickly construct temporary circuits. These let you rewire them in mere seconds, and greatly speed up the experimental section of a project. These are no good for permanent use, or installation in a car. Breadboards contain several power rails spanning the length of the board. These allow for easy (low voltage) power distribution to the whole board. The middle contains a gap – this is wide enough to place dual inline packages (small processors to augment the Pi, or microswitches, all of which share this common spacing). Surrounding this gap are independent rows with five holes each. Each series of five holes is connected, but each group of five is independent of the next. This lets you wire circuits without fear of a short-circuit. Sizes are defined by the number of points (or tie points). Something in the 400–800 range is a good start.
Breadboards are so named because they were literal breadboards from the kitchen! Before solderless breadboards arrived, hobby engineers used wooden breadboards with nails or thumbtacks pushed into them. By wrapping strands of wire around these ad hoc terminal points, it was possible to construct crude circuits. As you can imagine, real breadboards are hard to manage and take a lot of time to build any circuit. Thank goodness for plastic and solderless breadboards.
Breadboards are wired with solid-core wire or hookup wires. These wires connect different components to each other and the Pi. By fitting into the gaps in the breadboard, you can complete the circuit. They are often called jumper wires and are covered in plastic to prevent short-circuits.
Resistors are an essential electronic component. They resist the flow of electricity. This is useful to prevent components from overheating due to excessive electricity. Resistors work by converting electricity to heat. This loss reduces the voltage available to the other part of the circuit. In theory, any resistor will work with any voltage, but are generally sized for the job at hand, both to save money and prevent excessive heat generation and early failure.
Resistors are specified with a power rating and a resistance. This indicates the maximum load that the resistor can safely dissipate. As a loose rule, bigger resistors can handle a bigger load, but every resistor sold is designed and tested with a specific maximum load. The power rating of a resistor is measured in watts (W). The resistance is measured in ohms (Ω). Ohms specify the maximum resistance this resistor can safely provide. You don’t have to max this out in your circuit, and there’s a formula you can use to calculate resistance and power. Resistors don’t have a polarity – they work the same backward as forward.
The physics behind electronic components such as these are fascinating, and many books can and have been written on the topic. As such, I can’t dive into this topic as deeply as would be preferred – I’d be here all day!
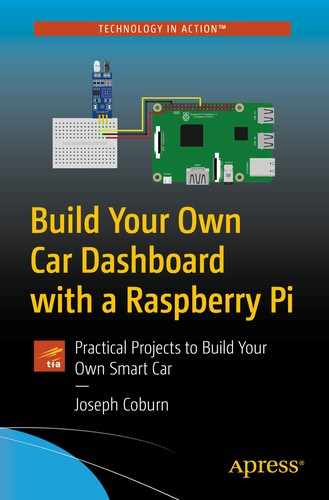
The Dallas DS18B20 temperature sensor unit lets your Pi sense the temperature of its environment. You could use several of these to determine the temperature outside the car, inside the car, and inside the engine bay. These complete units only require one wire to operate (in addition to a power connection).
Light-dependent resistors (LDRs) or photoresistors are variable resistors that alter the resistance depending on the available light. They cost a few cents and are simple to use. They are a great way to augment your Pi with light-sensing capabilities.
Fuses exist to protect circuits in the event of a failure. If there’s a short-circuit, or other failure resulting in a runway current draw, the fuse breaks and breaks the circuit. Ensure you use fuses rated for your application, and don’t use a bigger fuse, or worse – replace one with aluminum foil!
A piezo is a fascinating device that converts electrical energy into sound by expanding or contracting a thin membrane. By varying the amount of time power is applied for (and sizing the membrane accordingly), you can produce a beep or buzzing sound. If so desired, you can even play a tune on one, but that’s not covered in this book. These cost $1–$2.
Finally, the KY-032 infrared (IR) unit is a tiny circuit. It uses an integrated circuit (IC) to generate, pulse, transmit, and then measure IR signals bouncing off nearby subjects. Available for a few dollars, this circuit is easy to implement and is a brilliant way to enhance your car.
Equipment List
This list serves as a master list of everything you need to follow along with these projects. These are repeated during the projects, but if you’d like to buy them all in one go, then here’s what you need. In some cases, it may not be possible to buy the exact item required – and that’s OK. For the vast majority of items, a close enough match is almost always as good as the original item, but in circumstances where a close match is critical, these items are denoted with an asterisk (*).
1 x Raspberry Pi 4 Model B (or newer)
1 x Pi power supply (3A, USB Type-C)
1 x 8GB (minimum) class 10 microSD card*
1 x stylish Pi case (optional)
1 x 3.5-inch or larger LCD HDMI display*
1 x micro-HDMI to full-size HDMI cable
1 x USB keyboard
1 x USB mouse
1 x official Pi Camera module V2*
1 x jewelers’ screwdriver set
1 x 830-point breadboard*
Assorted breadboard jumper wires – male and female
1 x Dallas DS18B20 temperature sensor unit (with integrated 4.7k ohm, 0.25 watt resistor)
1 x miniature momentary tactile switch
1 x photoresistor/light-dependent resistor
2 x 23k ohm, 0.25 watt resistors
2 x 250mA fuses*
1 x 3v piezo element
1 x 3v KY-032 IR sensor module
Chapter Summary
This chapter presents and equips you with everything required to begin the project. You should understand the software side, how the application will be structured, and what language and frameworks you’ll use. You learned the basic theory of how this application will read its sensors, and present that data to the display. Not only do you have a basic understanding of the electronic components that power this system, but you have a shopping list of exactly what you need to buy to begin construction of your own smart car dashboard.
In the next chapter, you’ll learn how to prepare your computer to write Python, run unit tests, and safely store your code in a version control system.