
APPENDIX F
WINDOWS SERVER
Windows server is one of the most popular operating systems for servers. The server operating system enables you to share resources such as files, applications, and printers with other computers. In this section, we will explain how to set up Windows Server to share files.
F.1 MANAGING USER ACCOUNTS
Every user who wants to use the server must have an account that specifies what they can and cannot access. There are two types of accounts. A local account is an account that is managed on just one computer. A domain account is an account that is managed by Active Directory and can provide access rights to many different computers through a single login. For this activity, we will assume you are working with local accounts, although the processes for managing domain accounts is almost identical to the process for managing local accounts.
The administrator account is the account that controls the server. The administrator has the rights to add users, change their rights, and control who can do what on the server. In order to manage user accounts, you must login as the administrator. We will assume that you have already logged in as the administrator for the rest of this activity.
Each user account belongs to a group. For example, we might create groups by function with one group for sales, one group for accounting, one for production, and so on. We might also create groups by region so that we have one group for Los Angeles, one group for Toronto, one group for New York, and so on. Groups can be organized in a hierarchy so that we can start by defining groups by region, and then add the functional groups below the region so that we have Los Angeles staff, Los Angeles sales staff, Los Angeles accounting staff, and so on.
We can set individual access rights user by user. We can also set access rights by group so that all members of the same group receive the rights for the group. Groups make it simpler to manage user accounts because we do not need to enter information for every user, just every group.
F.1.1 Creating Users
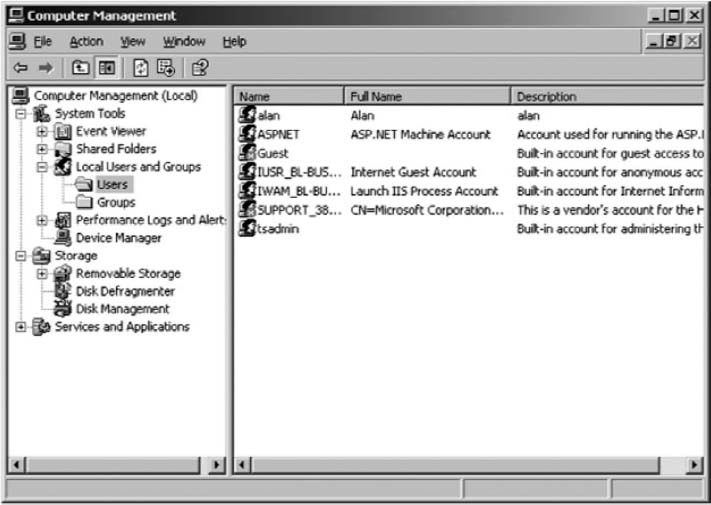
To create a local user, click Start, Administrative Tools, Computer Management. This will show you the list of objects on the server, including folders, users, and groups. Figure F.1 shows the display after clicking on Local Users and Groups and then Users. This shows all currently defined users, which are those that were created automatically by Windows.1
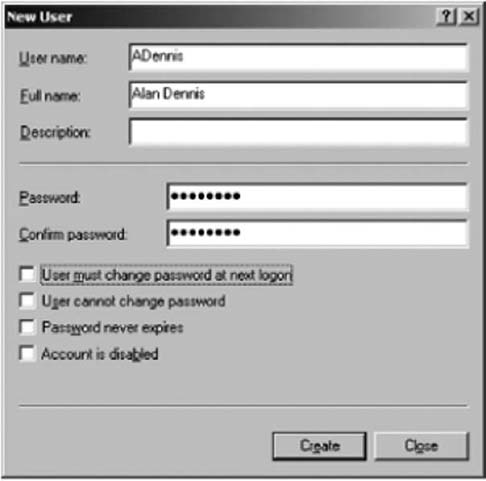
To create a user, right click on the Users and then choose New User. You can then enter the information about the user such as the user name (i.e., userid) he or she will use to login as well as his or her full name and description (see Figure F.2). You also enter the password associated with the account, as well as the policies associated with the password. You can, for example, require the user to change the password when he or she next logs in, or prevent the user from changing the password. Click Create to add the user.
F.1.2 Setting User Properties
There are dozens of properties you can set for each user. After you have created the user, the user name will appear in the list shown in Figure F.1. Right click on the user name and then click Properties. You can record additional information about the user, define what groups the user belongs to (more on that in a moment), and even restrict what hours the account can be used (See Figure F.3).
F.1.3 Creating Groups
Before you create groups, you should have a plan. Prepare a list of groups you would like to create and determine the hierarchy of the groups you want to implement.
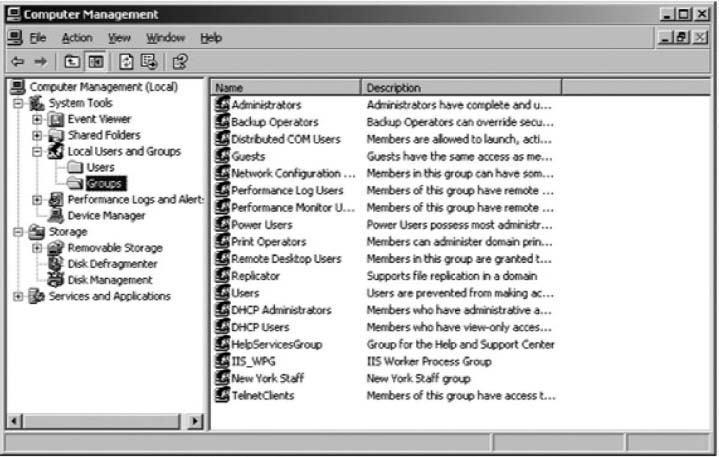
To create a group, click Start, Administrative Tools, Computer Management, and then click on Groups. This will show you the list of currently defined groups which are those automatically defined by Windows (see Figure F.4).
Right click on Groups and then choose New Group. You can then enter the information about the group, including its name. This is very similar to creating a new user.
F.1.4 Adding Users to Groups
To add users to a group, click Start, Administrative Tools, Computer Management, and click on Users. This will show you the list of currently defined users as in Figure F.1.
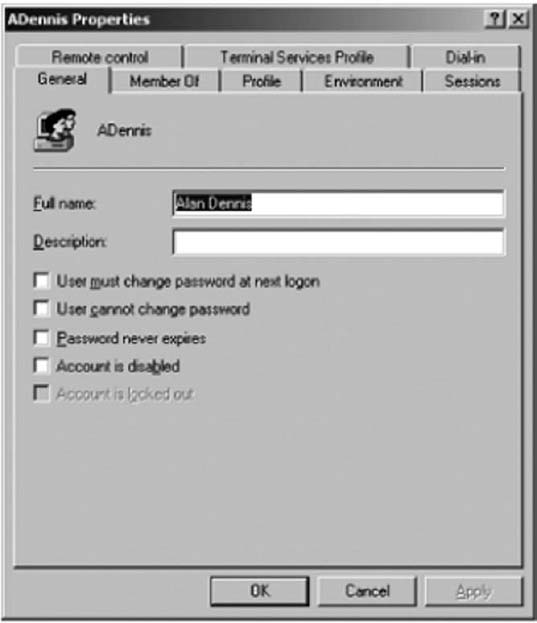
FIGURE F.3 Managing user properties
Right click on the user name you want to add into the group. Then select the Properties.
Click on the Member Of tab (See Figure F.5). Click Add and select the name of the group into which you want to add the user. Then click OK.
F.2 MANAGING FILE SHARING
Any resource on the server can be shared with one or more users. Each resource (e.g., file, printer) has an access control list (ACL) that defines which user(s) and/or which group(s) have access to the resource and what they can do with it—in other words, their permissions. For example, some users might have permission only to read files in a shared directory, others might have permission only to add new files to the directory, while others might have permission to change or delete existing files. Figure F.6 lists the basic permissions you can set. There are also more advanced special permissions that can be set as well.
Permissions can be assigned to folders or to files. If you assign a permission to a folder, all the files and subfolders it contains receive the same permissions unless you specifically change the permissions of the files and subfolders. Likewise, if you grant a permission to a group, all users in the group and all subgroups receive the same permissions.
F.2.1 Creating a Shared Folder
To create a shared folder, you must first create the folder exactly as you would in Windows on your desktop computer. Open Windows Explorer (click Start, Programs, Accessories, Windows Explorer). Click on the folder in which to place the shared folder and click File, New, Folder. Then type the name of the folder.
There are two steps in permitting users to access the shared folder. First, you must enable sharing for the folder and then define the security ACL. This is rather cumbersome, but this is how Windows requires you to do it.
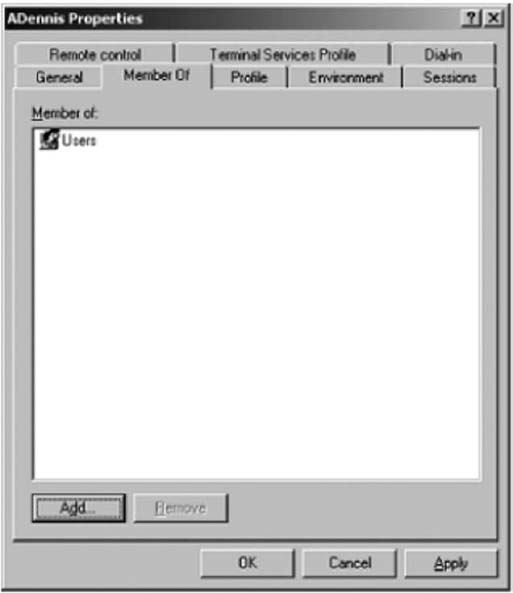
FIGURE F.5 Adding users to groups
F.2.2 Enabling Sharing
In Windows Explorer right click on the folder and Select Properties. The click the Sharing tab (see Figure F.7). Click the radio button to Share this folder. Then type the name that the folder will be known as to users.
Next, click Permissions. This will show you the list of users who can access this folder (see Figure F.8). By default, Windows permits the group named Everyone to access all shared folders. The Everyone group is exactly what it sounds like—every user name on the server. Typically, network managers start by removing the Everyone group and adding in only those users or groups who should have access to the folder. Click the Remove button to remove the Everyone group.
Click Add to grant permission to access this folder to a user (see Figure F.9). In the window, type the name of the group or user with whom you want to share the folder and click Check Names. Then click OK.
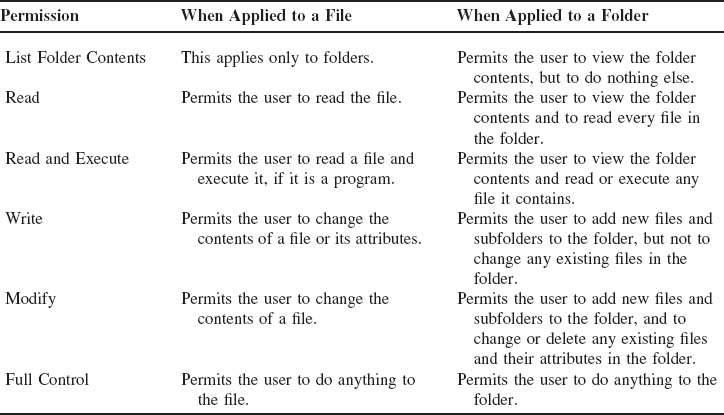
FIGURE F.6 File and folder permissions
Once the user name is found, you can then define the type of access to permit (see Figure F.10). In this figure, you can see that we've granted access to the group called New York Staff. The types of access are fewer than those shown in Figure F.6, but there will be more options shortly. Then click OK.
At this point, the folder is now available to be shared to those users or groups to whom you have granted permission. However, they still cannot access the folder. You must define the security access list first.
F.2.3 Defining Security
In Windows Explorer, right click on the folder and Select Properties and then click the Security tab (see Figure F.11). This will display all users and groups who have security access to the folder. You will see that New York Staff does not appear in this list. Even though they were granted sharing permission, this does not grant security permission. Click Add and enter the New York Staff group as a permitted group.
You can then grant the types of permissions this group has (see Figure F.12). This is the same list of options as described in Figure F.6.
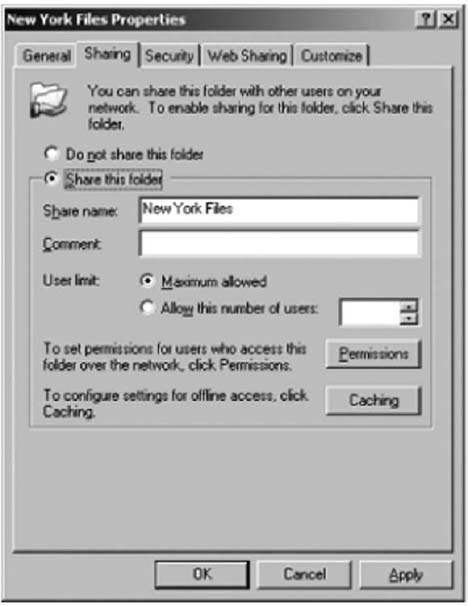
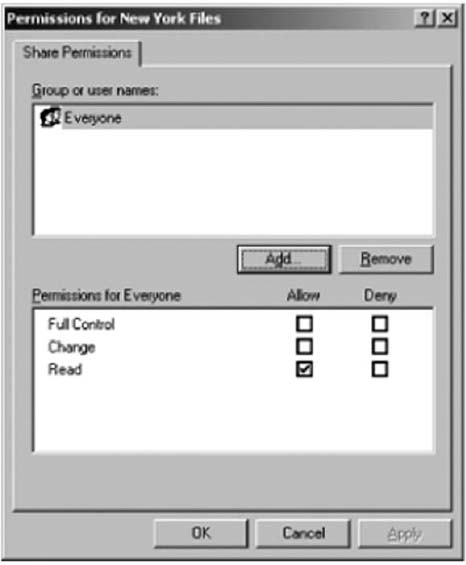
FIGURE F.8 Viewing sharing permissions
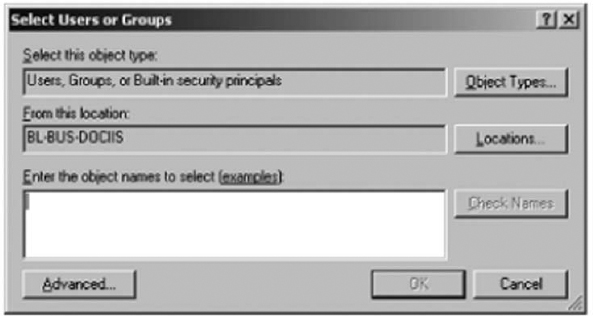
FIGURE F.9 Selecting groups for sharing permissions
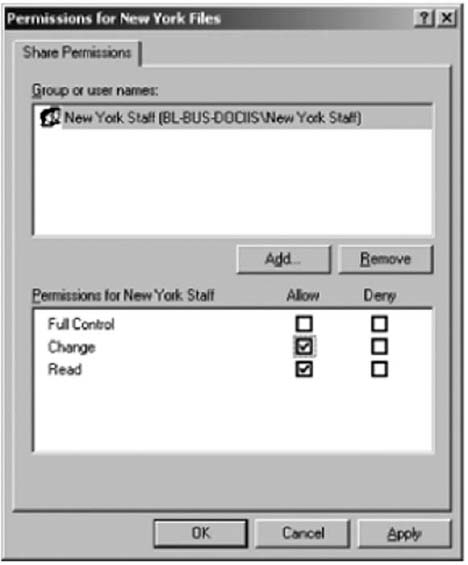
FIGURE F.10 Setting sharing permissions
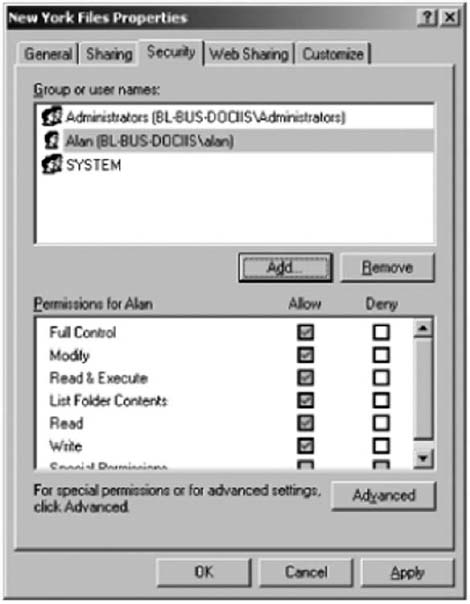
FIGURE F.11 Viewing security permissions
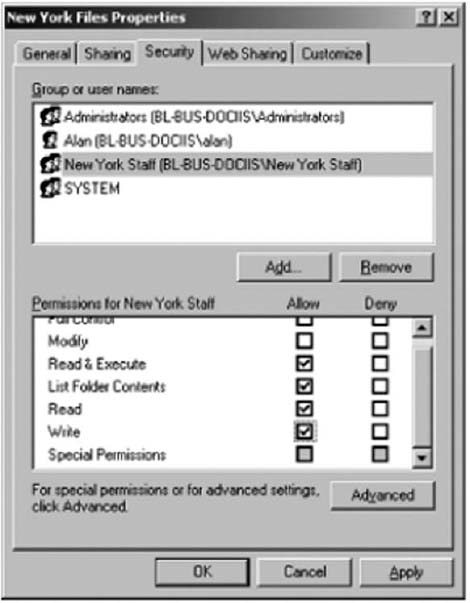
FIGURE F.12 Granting security permissions
1To create a domain account using Active Directory, click Start, Administrative Tools, Active Directory Users, and Computers. The screen in Figure F.1 would display the domains rather than users, which you could then click on to see the users and groups.