Chapter 17
Mixing
Mixing or balancing classical music recording is the art of blending microphone sources that contain varying amounts of spill and reverb as well as direct sound from each source. EQ is generally minimal and subtle, and the use of appropriate artificial reverb is an essential skill. At all times, the aim is a balance of clarity with a sense of real space, perspective, and depth, and the listener should never be aware of the presence of individual microphone sources that are too dry, too mono, or both.
With the advent of inexpensive multi-track recording and editing, classical workflow has become more fluid with regard to whether editing comes before or after mixing. The skill of mixing straight to stereo on session is still valuable, if only to test your microphone placement and give you something to use for playbacks, but because it is now easy to remix after editing, a remix stage has become common where the budget will allow.
The usual workflow is as follows:
- 1Recording session, capturing a good stereo mix alongside a multi-track backup of microphone feeds.
- 2Editing process (see Chapter 18), where the editor listens to the stereo mix but edits the multi-track alongside.
- 3Optional remixing stage using the final edited multi-track master, if it is decided that the session mix can be improved.
- 4Mastering.
Sections 2.6.4 and 2.6.5 offer further advice on efficient session workflow, reasons for mixing live to stereo on session, and the advantages of using faders rather than a mouse.
For use of software such as Cedar Retouch and iZotope RX for the removal of clicks, thumps, coughs, bangs, hiss, and rumble after mixing, see Chapter 19. For discussion about mixing in 5.1 surround, see Chapter 10.
17.1 Choosing and blending microphone sources into a static balance
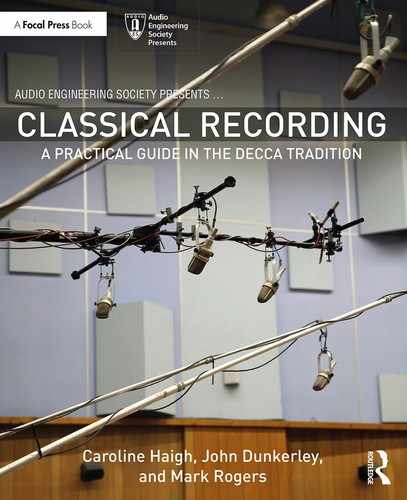
The core of classical recording technique is getting the microphones in the right place when on the session, and the main pickup will form the majority of the mix. Ancillary or spot microphones can be blended into this sound where an orchestral section or instrument needs highlighting, focussing or bringing forward in perspective. Any main pickup needs to collect a suitable blend of direct and reverberant sound and to produce an image width that is appropriate to the source. Chapter 8 explains what to listen for when positioning a Decca Tree, and Chapter 3 discusses placement of other main pickups.
Even if you have rigged a lot of additional microphones for coverage, it is important to remember that you do not have to use them all if they are not doing anything useful or are making things worse. A good example might be the rigging of a brass section microphone in an orchestra; its presence alone will discourage excessively loud playing, and this might be its main purpose. There is no need to use it in the mix if it is not needed, that is if the brass are clear and well punctuated and do not feel excessively distant. If at any time you are aware of a spot microphone in a mix, it is too high in level; being able to hear that a source has a microphone destroys the illusion of ‘naturalness’ that we are striving for.
When ancillary or spot microphones are blended into the sound from the main pickup, they will need to be panned to a position that matches the source location in the main image. This can be done most quickly with one finger on the ancillary or spot microphone fader and the other hand on the associated panpot. Alter the pan position incrementally while testing the position by fading the source up and down again. If the panning does not match, the image will either move or become smeared when the source is faded up; once the image is stable whilst the spot microphone is altered in level, the panning is correct. An exception to this might be percussion microphones that are often panned a little wider than their actual position for clarity of lines; see Chapter 9 and section 17.1.1 for more on percussion microphones.
The ‘solo’ function can be misleading when mixing because it takes the individual microphone out of context, and so the engineer should avoid getting too focussed on the individual sound of one microphone at a time. In this recording style, where spill is to be used and embraced, the main use for the solo button is for listening to the quality and amount of spill on a microphone rather than the direct sound of the instrument it is pointing at. If we are using good microphones at an appropriate distance from a nice-sounding instrument, the direct sound will generally be quite acceptable. What might not sound good is the spill of the other instruments, so this is where the engineer’s attention needs to be directed. The usual caution should be observed with ‘solo’, that is not to use destructive solo (whereby all the other channels are cut) whilst in record. Stereo AFL should be used instead. Using PFL or mono AFL is usually quite unhelpful in this context as they present the solo signals in mono without panning information.
Each of the following sections deals with basic balancing of microphones to arrive at a good static mix in several scenarios. It is usual to ride the fader levels of ancillary and soloist microphones depending on musical content; a classical orchestral balance is not static. See section 17.2.
17.1.1 Orchestral
Whether the recording is based on a tree with outriggers and a bass section microphone or another overall pickup technique, proceed in this order:
- 1Fade up the main pickup (with a tree this includes the outriggers and bass section microphone) and check that overall image width and amount of reverb/direct sound is acceptable. See Chapter 8 for notes on setting up the tree and Chapter 3 for alternative overall pickups.
- 2Bring in the woodwind microphones, taking care of panning and avoiding pulling the section too far forwards.
- 3Bring in the horns in the same way.
- 4Bring in the brass if you decide you are going to use their section microphones.
- 5Bring in the timpani. If there are more than two timpani and you therefore have more than one microphone, pan them so they are separated a little.
- 6Bring in the percussion microphones. Note here that because the percussion section do not usually play continuously, it is usual to leave their microphones at a low level and fade them up when they are needed. This requires score following and great attention to detail to keep on top of this. However, if there are a lot of microphones left open at the back of the orchestra, their contribution is not helpful to the overall image. Additionally, you need to reduce the sound of the percussion players moving things around to get ready for the next section.
- 7Bring in any ancillary microphones for instruments placed in the front (at least for a recording session), such as harp and celeste.
- 8Bring in any microphones put there for ambience/reverb collection, panning all pairs fully.
- 9Finally, bring in any artificial reverb (see section 17.5).
Take care if you are mixing live on session that the conductor’s talk microphone is not left open and not sent to the main mix bus.
17.1.2 Opera: orchestra, choir, soloists
For opera, proceed in a similar way, but with the addition of the solo and chorus voices early on into the overall scheme. (See also section 16.2.3.) The soloists will usually be added to the balance first, as there is usually more solo work than chorus in an opera.
- 1Main pickup.
- 2Woodwinds.
- 3Soloists – these will not be in use all of the time; see section 17.2 for discussion on riding the level of ancillary and soloist microphones throughout a performance. (See Chapter 16.)
- 4Chorus (see Chapter 15 for discussion of obtaining even blended coverage of a choir).
Then follow steps 3 through 9 (from section 17.1.1) for the rest of the orchestra.
17.1.3 Piano and soloist (e.g. violin)
The quality of spill on both the piano and soloist microphones is very important because both pairs will be contributing a significant amount to the overall sound; neither should dominate the sound to the extent that a main orchestral pickup does. As seen in Chapter 7, the basis of the sound will be the piano microphones, which are placed to obtain the best piano sound and give a good stereo width to the overall space. They will also contain a great deal of ambient soloist spill.
- 1Start with the piano microphones, panned fully.
- 2Bring in the soloist’s microphones, also panned fully, or nearly so; check these in ‘solo-in-place’ mode to assess the quality of the piano spill. If this is muddy and bassy, a small amount can be gently filtered off at no higher than 100 Hz if the solo instrument’s range is not affected (this should be fine for violin, upper woodwinds, and brass, or female and tenor singers). If the problem is more significant, do not try to cure it with more severe filtering, but move the microphones to be at least 1.2 m (4′) back from the piano. Changing the microphone to pick up less piano is also an option.
- 3Any ambient pick up.
- 4Artificial reverb.
The soloist and pianist should feel as if they are occupying the same room, but the soloist should feel as if he or she is placed very slightly in front of the piano.
17.1.4 Piano trio
This applies to the methods looked at in Chapter 12, using a small tree for sense of space on the strings, individual string spots, a vertically mounted rear ambience pair, and a main piano pair (which will provide the starting basis for the sound.) As with the piano and soloist, the quality of spill is important to the success of the mix.
- 1Start with the piano microphones, panned fully.
- 2Bring in the individual violin and cello spots (single microphones) panned to the location that you would like them to be, either side of the centre, in front of the piano (the small tree image should also align with this).
- 3Bring in the small tree that is centred on the strings (panned left, centre, right) for some ‘space’ for the string sound. This is needed because the spot microphones can be too localised and the string spill onto the piano microphones too distant to produce the right feeling of perspective for the strings.
- 4Bring in the rear vertical pair for additional ‘space’ for the piano.
- 5Artificial reverb.
17.2 Riding levels on ancillary microphones
Riding levels means to alter the static balance when it is needed, and in an orchestral context, it will be the ancillary microphones more than the main pickup that will be altered in level. This is usually done to ensure that music lines are supported to come across clearly but without sticking out inappropriately. For singers in particular, it is usually necessary to ride the soloists’ levels, keeping the voice audible and supporting it against the orchestra or piano as required.
The key to successfully riding levels on any ancillary or soloist’s microphone is to anticipate the necessary fader moves so that sudden large gain changes are avoided. Because of the amount of spill on most microphones, fast level changes will almost always be audible as they will affect the sound of other instruments. When a singer’s microphone is changed in level on a piano and voice recording, the piano sound will be affected, even if the effect is subtle, so care has to be taken. Fader movements will usually be in the 2–3 dB range and not more than about 5 dB. Younger opera singers will usually have less control over their voice, and a greater degree of fader riding will be needed to help them smooth out exuberant plosives and other unevenness of line.
As mentioned earlier in the context of orchestral percussion microphones, where you have a microphone that will not be used often during the course of a piece, its level should be kept low but not faded out entirely. This will avoid a large change when that instrument needs to be faded up for a solo line.
For woodwind and horn sections that will be playing through most of the piece, the ancillary microphones can remain faded up to provide a satisfactory static balance, but small fader movements of up to about 3 dB will be useful in bringing out any part that has a solo (usually indicated in the score as ‘solo’ to distinguish it from general part writing). If larger fader movements are needed, they can be accomplished more slowly so that the changes remain imperceptible. The extent to which this is necessary will depend on the repertoire.
17.3 Use of EQ and high-pass filters
17.3.1 EQ
For classical work, the aim is a natural-sounding instrument, and the initial approach always involves trying to choose the right microphone and put it in the right place. Because classical recording technique involves avoiding very close placement wherever possible, capturing a good overall representation of an instrument’s sound is easier than in pop recording, where close microphone placement inevitably means that the sound could be quite localised. This then requires some EQ either to restore a good tone or to make sure that a part can sit well in a mix. Even so, there are times when some EQ will be helpful in classical recording, but it is used gently, usually in amounts of around 2–4 dB.
If it is remembered that the aim is to retain a natural-sounding instrument, but with a small adjustment, possibly to brighten a dull tone or to calm down some over-bright key noise in the absence of a ribbon microphone, then EQ should not go too far wrong. For example, to brighten timpani, a combination of small reduction in the mid-bass range (−2 dB at 150 Hz) and a boost in the presence range (+1–2 dB at 2.8 kHz, and a +2 dB shelf at 10 kHz) can be used.
An interesting technique used to add more sense of space and ambience to an overall sound is the addition of a gentle shelf boost of about +2–3 dB at around 10–12 kHz. A more subtle version of the same could be placed as high as 16 kHz. Removing the same amount will give the effect of drying a recording out a little bit.
When adding EQ, it is surprising how quickly an altered sound is one that you become used to, so take frequent breaks in order to give your ears a rest and keep some perspective. Then play the passage with and without EQ in quick succession to make a final judgement. (See also Chapter 19.)
17.3.2 High-pass filters
The HPF is used quite a lot in classical recording when trying to clean up the lower frequencies, particularly in a recording context where there are a lot of microphones, such as an orchestra. The troublesome LF comes from picking up both room tone (rumble) and the lower orchestral frequencies on many microphones. Another source of unwanted LF in a room full of people is from seismically transmitted vibrations finding their way through microphone stands, so it is a good idea to use a cradle support for a microphone rather than a rigid clip where possible.
The overall pickup should usually be left unfiltered (especially if you have been able to decouple the microphones from the stand), but if a hall is particularly boomy, applying a gentle 6 dB/octave roll-off no higher than about 100 Hz to the centre microphone of a three- or five-microphone tree can help. (See also section 8.2 for centre microphone filtering to help LF imaging.) If this isn’t sufficient, add a similar filter to the other tree microphones rather than increasing the steepness of the filter on the centre microphone.
All the ancillary microphones can have some contributory effect to an overabundance of LF, although where they are cardioids, they will not be supplying a great deal of really low frequencies (50 Hz and below). It can be helpful in cleaning up the lower end of the recording to roll-off the ancillary microphones at no higher than around 150 Hz at 6–12 dB/octave. The 24 dB/octave filters are a little brutal in their effect, so they will usually be avoided except in very difficult circumstances. Caution should be applied with microphones that are being used on bass instruments to avoid removing important content. On a DAW, there is usually a spectrum analyser available which can help with the diagnosis of where any LF problem lies. However, you should beware of over-reliance on a visual representation of EQ; your final decisions about HPF and EQ should be taken aurally.
17.4 Use of delays
Use of digital delays is much talked about in classical recording, perhaps because of the relatively large distances between microphones, and because instruments spill onto almost all the other microphones in the room to a greater or lesser extent. Given 30 microphones on an orchestra, the order of complexity in calculating which player is delayed relative to which, and on which microphone, begins to render the whole question unanswerable and certainly not simple. Following are some principles that you can use, as well as some examples of where delays are helpful and perhaps even necessary. However, given the number of great recordings made before the arrival of digital delays on every channel, it could be concluded that they are a potentially useful but not essential tool in most circumstances.
They key thing to remember if you are going to use delays is that there has to be one set of microphones that is dominant in the mix, and these are then a reference point to which other microphone signals can be delayed. Any other approach will result in confusion, as signals are all delayed with respect to one another depending on each microphone’s location in the room.
As a straightforward example, let’s consider the woodwind ancillary microphones in an orchestra. The sound of the woodwinds will arrive at the ancillary microphone before it arrives at the main tree. It can be argued that this means that less of the ancillary microphone might be needed in the mix (due to the precedence effect), but it is equally valid to argue that these microphone signals should be delayed so that the wavefronts arrive at the same time as the woodwind signals on the main microphones. Excellent recordings have been made with and without use of delays, so there is no objectively right and wrong way to proceed. If you want to apply delays during mixing, you should have a good idea of the actual distances involved – this is another good reason to measure your orchestral microphone set-up accurately. Each metre will require 3.4 ms delay; this means 1 ms delay per foot. These delays are not large, and provided that the distance does not push the delay above about 35 ms (10 metres’ distance), leaving them uncorrected should not result in any apparent double attacks at the start of notes. Uncorrected delays of more than this do have the potential to cause smearing of transients, especially if they are percussive in nature.
Low frequencies can also be adversely affected by large delays as there is the potential for some partial phase cancellations. For example, 35 ms represents a whole wavelength for about 28 Hz, 1.5 wavelengths for about 43 Hz, and so on. If choir or opera chorus microphones have to be placed more than 10 m away from the main pickup, using some delay on the chorus microphones to correct for this will usually have a beneficial effect on cleaning up the bass end.
In Chapter 14, we looked at the scenario of having several sets of organ pipes distributed around the church. This might seem a situation where delays might be useful, but again, unless there is an obvious overall set of microphones that are dominating the mix, it can be hard to decide which microphones should be delayed with respect to which. Leave playing with delays until mixing after the event; it is easy to get into quite a mess, and it is best not to record delays on the microphone feeds at the time.
The situation where use of signal delays during mixing is essential is when recording live opera using radio microphones as part of the set-up. The personal radio microphones are very close and dry, and their signal will be significantly ahead of that on the main stage microphones at the front of the stage. This means they will stick out of the mix very prominently even if faded up only a little. Their purpose is to capture some detail and provide some focus to the voices, so to enable them to be used at an appropriate level in the mix, they are delayed by variable amounts depending on where the singer is standing at the time. Once the delay is adjusted appropriately (and any error is made in the direction of having too much delay rather than too little) the individual voices blend right back into the mix. See the end of Chapter 16 for more discussion of how this is done.
17.5 Reverb: natural and artificial
The most obvious characteristic of classical recording as opposed to pop recording is the use of greater recording distances, and when engineers are learning to record classical music, a common error is to add a large amount of reverb that obscures the detail like a thick layer of varnish on a painting. Artificial digital reverb is an essential tool for most classical recording, but it has to be used with skill in order to blend it into the natural reverb of the space used for the recording.
Before digital reverb existed, additional reverb was added to classical recordings by playing them back through a good-sounding room or studio and recording the results through a pair of omnidirectional microphones. This new signal could then be used as a reverb return and blended with the original. Kingsway Hall was frequently used for this purpose by Decca, although there was a downside in the audibility of tube trains that would be recorded in the reverb.
This live playback method has also been used in more modern times as an effective way of adding a natural sense of early reflections to a recording from a dry space. Using a single artificial reverb on a very dry recording will leave an obvious artificial signature, but recording some real early reflections that are then augmented by artificial reverb is much less obtrusive. (See also section 17.5.6 for discussion of cascading reverbs for the same purpose.) Live reverb was created in 2001 for a recording of Angela Gheorghiu from ROH Covent Garden.1 Three B&W 801 loudspeakers were placed at the back of the great hall at Air Lyndhurst Studios to play back the original recording, and the results were picked up on two Neumann M50s spaced about 4.5 m (15′) apart and placed a long way further back in the room. Abbey Road’s Studio 1 has also been used in this way to enhance recordings made elsewhere.
For discussion of using artificial reverb in surround sound, see Chapter 10.
17.5.1 Implementing artificial reverb
It is worth taking a moment here to discuss how reverb should best be implemented both in a traditional mixing desk and within a DAW. Using a mixing desk means using a mono or stereo aux bus to take a feed from each microphone source to send to the external reverb unit and bringing a 100% reverberant signal back into the mixer as stereo reverb returns. On a DAW, reverb might be available as a channel insert, but there are some very good reasons to set it up as an internal aux bus with a send from each channel. A single stereo plug-in is then used on the aux bus and the 100% wet reverb signal is added to the mix.
Reasons for doing this are:
- 1You will only have a single set of reverb parameters to alter.
- 2You will not be wasting processing power by running a separate reverb plug-in on every channel.
- 3Adding reverb returns into the mix is much easier than altering a ‘wet/dry’ control on each individual channel. The disadvantage of a wet/dry control is that as you increase the ‘wetness’, the dry signal is turned down in level. This changes the fundamental balance between your microphones every time you alter the amount of reverb and makes mixing harder.
- 4Unless your DAW does clever things on your behalf, reverb inserted into a mono channel will be mono reverb.
- 5Even if your DAW makes a channel into stereo when you insert a reverb, you cannot alter the reverb return panning or EQ it separately from the original microphone source.
17.5.2 What is the purpose of additional artificial reverb?
Reverb is very appealing, and we use it to make things sound ‘nice’, but we do not necessarily aim to make them sound further away. When too much reverb is added, it starts to have a smearing effect on the details in the music and eventually stops adding to a greater sense of distance and becomes muddy and confusing. Artificial reverb can be used to augment the natural sound of a room and to extend reverb tails when necessary; it is generally less successful when used alone to salvage a recording made in a very dry room.
Because reverb sounds good, it is particularly easy to overdo things. If you can obviously hear the reverb, you have too much of it either in terms of reverb length or amount in the mix. A suggested rule of thumb is to set the reverb algorithm to how you like it when you can hear it well, then adjust the level to what you think sounds good, and then reduce the level of the reverb returns by about 2–3 dB. Reverb amounts are particularly difficult to judge if you are monitoring on headphones; one suggestion to help with this if you have to use headphones is to pan the headphone feeds in slightly (you will have to pass it down some channels to do so), so panning the channels to about 75% L and 75% R. This will introduce a little crosstalk between channels and mimic loudspeaker listening to a small extent.
The early reflections of natural reverb are very characteristic of a particular space, and these are usually the least natural sounding part of digital reverb algorithms. Therefore, the most successful approach is to rely on the microphones in the room to pick up the genuine early reflections but to use the artificial reverb to augment the tail part of the reverb if necessary.
17.5.3 Choosing a reverb programme
Artificial reverb can be provided by plug-ins or by stand-alone units such as the Lexicon range (480L, 960) and the Bricasti M7. In terms of cost, the outboard units used by professional recording engineers are at the highest end of the range, and it is advisable to pay as much as you can afford for your outboard reverb or plug-in as there is a huge variation in quality and what you can achieve with them. The most expensive reverb units will give you control over many more parameters and reverb characteristics than a basic free plug-in will allow.
Programmes such as plates, halls, spaces, and rooms are all available as pre-sets, but these are best thought of as a good place to start; given control over all parameters (and you might not be able to access many parameters in a basic plug-in), you can learn to adapt any of these to work as you wish. The primary parameters that you will have control over are discussed in the following sections.
17.5.3.1 Tone colour
This is often expressed by means of HF and LF multipliers, which are then applied to the headline reverb time. A pleasant-sounding room for classical recording generally has slightly longer LF reverb, so using an LF multiplier of about x1.1 and an HF multiplier of x0.9 is a good place to start. A more sophisticated programme will allow you to choose where the crossover from mid-range to HF or LF reverb times occurs. Be careful about using over-bright reverb as this is where artificial reverb tends to show itself by sounding a little ‘tizzy’.
Church reverb programmes tend to be very bright and long, and you shouldn’t feel you have to use a church reverb on a recording that was made in a church. Layering reverbs can work very well, provided you are really listening to what you are doing and avoid making an audible double decay due to a mismatch between the real reverb and what you have added. See section 17.5.4 about blending reverb with signal from ambience microphones.
17.5.3.2 Reverb time
It is quite easy to overdo the length of artificial reverb, and this can give its presence away. The headline number given as the reverb time in seconds can be misleading, so avoid getting too stuck on the number of seconds given, and listen to what is happening instead. Listening to the ends of phrases is an essential part of judging how your reverb settings are working, and you should err on the shorter side in the first instance. A useful thing to listen for is whether there is a drop in level between the end of the direct sound and the reverb. Something to avoid is a long, low-level reverb tail; the results are more satisfactory if the end of the direct sound transitions smoothly into slightly higher level reverb. Therefore, using a slightly higher level of a shorter reverb is often a good thing. If you still feel that the recording needs more reverb, try a higher level of reverb returns first, and if that doesn’t work, try a slightly longer reverb time.
17.5.3.3 Pre-delay
This can be quite a crude parameter in the reverb controls, as it usually simply delays the early reflections that give us the characteristic sense of a space. The longer the pre-delay, the further away the walls should feel. However, even in a very large real room, there will be some early reflections of a few milliseconds from the nearby floor, making the sound from a real room much more complex. The natural early reflections captured on your recording by overall pickups and ambience microphones in particular will give a far better sense of the character of the room, and when you are trying to enhance a recording that already contains some natural reverb, it will often work best if the pre-delay is removed from the artificial reverb. With additional pre-delay added, the artificial reverb can tend to separate out from the real thing. The Hall programs on the Lexicon 480L can work very well for piano, provided the pre-delay is removed by setting it to zero. Section 17.5.4 looks at how to use natural early reflections in combination with artificial reverb for the complex build-up of later reflections.
17.5.4 Blending with ambience microphones
Reverberation can be divided into the early part of the room response, where there are discrete reflections that provide us with information about the size and nature of the room, and the later part of the reverb, where the reflections have multiplied rapidly to form a rich mix of complex reflections that make up the main body of the reverb. As noted earlier, artificial reverb tends to model the latter part of the reverb better than the early part, and a high-end unit such as the Bricasti M7 allows the user to control the amount of early reflections against reverb on a scale of ±20.
The vertically or backwards-facing pairs of cardioids that have been frequently used in the techniques discussed in earlier chapters (e.g. Chapters 12 and 10) are designed to pick up the early reflections that are characteristic of the room, and the artificial reverb can be used to enhance the reverb tails with its pre-delay set to zero. These microphones can be sent to the artificial reverb unit so that the early reflections are then used to generate reverb tails. If you are using more than one ambient pair in a stereo mix (such as an upwards-facing pair at the front of the tree and a rearward-facing pair behind it), you will find that you have to choose one of the pairs to dominate by at least 10 dB or the result is confusing. Each pair will have a different sounding reverb contribution, and either can be used as the main one.
17.5.5 Which microphone sources are sent to the reverb?
It is possible to send only the final mix to the reverb, but this does not allow you to customise the amount of signal sent from individual microphones, which can be a very useful mixing tool. The starting point when using an aux bus is to send the tree microphones, outriggers, and woodwind ancillaries to the aux bus (post-fade). All the channel aux send level controls should initially be set to the same value so that the amount sent to the reverb from each is in proportion to that channel’s level in the mix. This can then be altered if necessary.
Common reasons for deviating from the initial settings include:
- 1A very reverberant hall – reduce or remove the send from the main microphones and leave the ancillaries only.
- 2A live set up with a closer-than-preferred soloist’s microphone – more will need to be sent to the reverb, although using a different or additional reverb programme for the soloist is another option. Sometimes simply sending more just makes the artificial reverb more audible. (See section 17.5.7 for notes on treating a dry source with more than one reverb.)
As noted in section 17.5.4, microphones designed to pick up the natural early reflections in the room can also be sent to the reverb unit.
17.5.6 Stereo versus mono aux send?
There will usually be an option to send a stereo aux signal to the reverb unit rather than a mono one. Assuming that the channel aux send occurs after the channel panpot (if it doesn’t, you will have to manually set up the stereo aux bus panning to match the channel panning), this will then generate reverb that gives a sense of lateral source location in the return reverb signal. If any significant amount of reverb is used, this imaging information will simply reinforce the location of the various sources. Where a mono send is used, this spatial information is not present in the reverb returns, and if a significant amount of reverb return is added to the mix, lateral image smearing can occur.
17.5.7 Using more than one reverb
Using more than one reverb is a useful technique in some situations, but this doesn’t mean putting a different reverb on every microphone, given that the aim is to create the impression that everyone is located in the same room. Occasionally, a soloist might benefit from a different reverb to the rest or from sending a little more to the main reverb. An additional reverb is useful because it opens up more options in that the RT length and send and return levels can all be altered. With a single reverb, the only option available is to send more of it.
Cascading reverbs – that is, taking the output of one reverb unit and putting it straight into the input of another (in dual machine reverb units such as the Lexicon 480L, this is called ‘cascade mode’) – is an unusual technique, but it can be a very elegant way of adding reverb to a very dead hall. Rather than adding a single long reverb at a high level (which can sound obviously artificial), the desired length is built up in stages. The first programme should be a shorter reverb with no pre-delay, and the second reverb can then be a longer programme. This makes a much denser reverb tail and avoids an obviously artificial reverb signature.
17.6 Riding overall levels
Classical music often has a very large dynamic range, and while it can be contained within the dynamic range of a 24-bit recording system, the listener cannot generally reproduce the loudest sections at their true acoustic level in a domestic setting. Therefore, the quietest parts of a large orchestral piece might fall too close to the acoustic noise floor for the listening environment. A recording such as the Concertgebouw/Chailly Stravinsky’s Firebird suite2 has a dynamic range of about 45 dB, and while it is a very exciting and dynamic recording, this does not equal the real dynamic range that would be experienced in the room. Automatic compression might seem like a solution to this, but compressors are designed for use over the time frame of the envelope of individual notes rather than to gradually alter the dynamics of a phrase to reduce the overall dynamic range. Therefore, it is usual to alter the overall level of orchestral music by careful riding of the main mix bus faders. Because the engineer can use the foresight that comes from knowledge of the piece or the ability to follow the score to decide when and how to effect any necessary gain changes, this process can be referred to as ‘intelligent compression’. This is a process that demands some experience and confidence to execute at the time of recording; to make editing workable, resulting levels need to be fairly consistent between takes. For recording rather than live broadcast, there is a good argument to make for altering levels in this way as part of the final mastering process (see section 19.4.2), although for a very dynamic piece some level manipulation might occur at both the recording/mixing and mastering stages.