- Making your DAGs more modular and succinct with custom components
- Designing and implementing a custom hook
- Designing and implementing a custom operator
- Designing and implementing a custom sensor
- Distributing your custom components as a basic Python library
One strong feature of Airflow is that it can be easily extended to coordinate jobs across many different types of systems. We have already seen some of this functionality in earlier chapters, where we were able to execute a job on for training a machine learning model on Amazon’s SageMaker service using the S3CopyObjectOperator, but you can (for example) also use Airflow to run jobs on an ECS (Elastic Container Service) cluster in AWS using the ECSOperator to perform queries on a Postgres database with the PostgresOperator, and much more.
However, at some point, you may want to execute a task on a system that is not supported by Airflow, or you may have a task that you can implement using the PythonOperator but that requires a lot of boilerplate code, which prevents others from easily reusing your code across different DAGs. How should you go about this?
Fortunately, Airflow allows you to easily create new operators for implementing your custom operations. This enables you to run jobs on otherwise unsupported systems or simply to make common operations easy to apply across DAGs. In fact, this is exactly how many of the operators in Airflow were implemented: someone needed to run a job on a certain system and built an operator for it.
In this chapter, we will show you how you can build your own operators and use them in your DAGs. We will also explore how you can package your custom components into a Python package, making them easy to install and reuse across environments.
8.1 Starting with a PythonOperator
Before building any custom components, let’s try solving our problem using the (by now familiar) PythonOperator. In this case, we’re interested in building a recommender system, which will recommend new movie(s) to watch depending on our view history. However, as an initial pilot project, we decide to focus on simply getting in our data, which concerns past ratings of users for a given set of movies and recommending the movies that seem most popular overall based on their ratings.
The movie ratings data will be supplied via an API, which we can use to obtain user ratings in a certain time period. This allows us, for example, to fetch new ratings daily and to use this for training our recommender. For our pilot, we want to set up this daily import process and create a ranking of the most popular movies. This ranking will be used downstream to start recommending popular movies (figure 8.1).

Figure 8.1 Building a simple pilot MVP for movie recommender project
8.1.1 Simulating a movie rating API
To simulate data for this use case, we use data from the 25M MovieLens data set (https://grouplens.org/datasets/movielens/), which is freely available and contains 25 million ratings for 62,000 movies by 162,000 users. As the data set itself is provided as a flat file, we built a small REST API using Flask,1 which serves parts of the data set at different endpoints.
To start serving the API, we’ve provided a smaller Docker Compose file that creates multiple containers: one for our REST API and a couple for running Airflow itself. You can start both containers using the following commands:
$ cd chapter08
$ docker-compose up
After both containers have finished starting up, you should be able to access our movie rating API at port 5000 on localhost (http:/ /localhost:5000). Visiting this URL should show you a hello from our movie rating API (figure 8.2).

Figure 8.2 Hello from the movie rating API
For this use case, we are mainly interested in obtaining movie ratings, which are provided by the /ratings endpoint of the API. To access this endpoint, visit http:/ /localhost:5000/ratings. This should result in an authentication prompt (figure 8.3), as this part of the API returns data that could contain (potentially) sensitive user information. By default, we use airflow/airflow as a username and password combination.

Figure 8.3 Authenticating to the ratings endpoint
After you enter the credentials, you should get an initial list of ratings (figure 8.4). As you can see, the ratings are returned in a JSON format. In this JSON, the actual ratings are contained in the result key, while two additional fields, limit and offset, indicate that we are only looking at a single page of the results (the first 100 ratings) and that there are potentially more ratings available (indicated by the total field, which describes the total number of records available for a query).
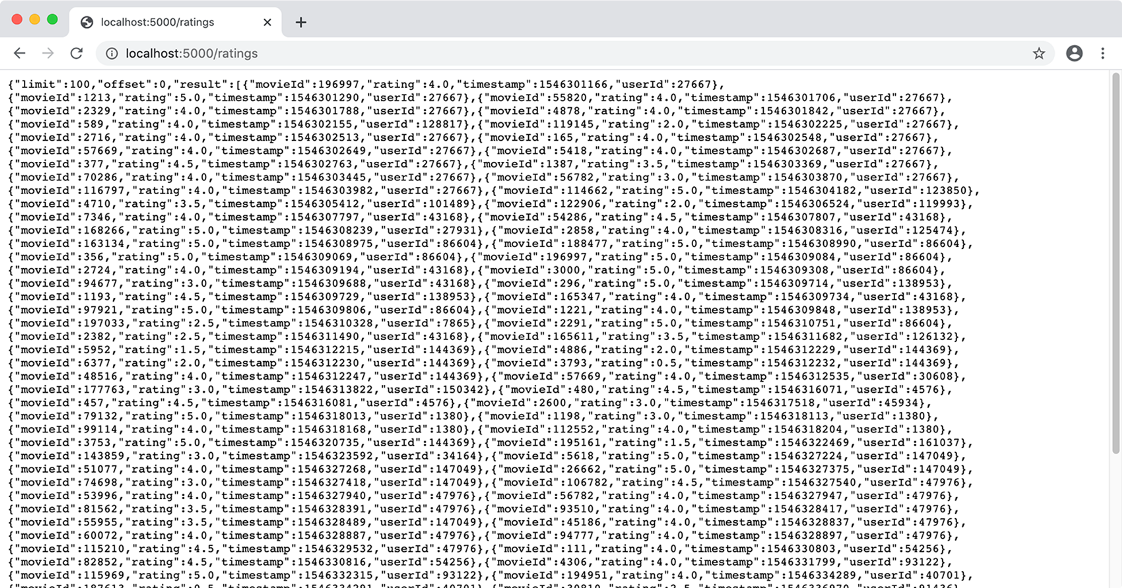
Figure 8.4 Ratings returned by the ratings endpoint of the API
To step through the paginated result of a query, you can use the offset parameter of the API. For example, to fetch the next set of 100 records, we can add the offset parameter with a value of 100:
http://localhost:5000/ratings?offset=100
We can also increase the number of records retrieved in a single query using the limit parameter:
http://localhost:5000/ratings?limit=1000
By default, the ratings endpoint returns all ratings available in the API. To fetch ratings for a specific time period, we can select ratings between a given start/end date using the start_date and end_date parameters:2
http://localhost:5000/ratings?start_date=2019-01-01&end_date=2019-01-02
This API filtering functionality will allow us to load data from the API on an incremental (daily) basis, without having to load the full data set.
8.1.2 Fetching ratings from the API
Now that we’ve seen the basics of the MovieLens API, we want to start fetching ratings programmatically so that we can (later) automate this fetching using Airflow.
For accessing our API from Python, we can use requests (https://requests.readthe docs.io/en/master/), which is a popular and easy-to-use library for performing HTTP requests in Python. To start firing requests at our API, we first need to create a requests session using the Session class:
import requests
session = requests.Session()
This session will then allow us to fetch ratings from our API by using its get method, which performs a GET HTTP request on our API:
response = session.get("http://localhost:5000/ratings")
The get method also allows us to pass extra arguments, such as parameters (e.g., start/end date), to include in the query:
response = session.get(
   "http://localhost:5000/ratings",
   params={
       "start_date": "2019-01-01",
       "end_date": "2019-01-02",
   },
)
Our call to get will return a response object, representing the result of the request. This response object can be used to check whether the query was successful using the raise_for_status method, which raises an exception if the query returned an unexpected status code. We can access the result of the query using the content attribute or, in this case, using the json method (as we know that our API returns JSON):
response.raise_for_status()
response.json()
If we perform this query, we should see that our requests fail, as we forgot to include any authentication in our request. Because our API is using basic HTTP authentication, we can configure our session to include our authentication details as follows:
movielens_user = "airflow"
movielens_password = "airflow"

session.auth = (movielens_user, movielens_password)
This will make sure that the requests session includes our username/password authentication with its requests.
Let’s encapsulate this functionality in a _get_session function, which will handle setting up the session with authentication so that we don’t have to worry about this in other parts of our code. We’ll also let this function return the base URL of the API so that this is also defined in a single place.
Listing 8.1 Function that builds the API HTTP session
def _get_session():
   """Builds a requests Session for the Movielens API."""


      session = requests.Session()             ❶
      session.auth = ("airflow", "airflow")    ❷

   base_url = "http://localhost:5000"

   return session, base_url                    ❸
❷ Configure the session for basic HTTP authentication with this username and password.
❸ Return the session together with the API’s base URL, so we also know where to reach the API.
To make this a bit more configurable, we can also specify our username/password and the different parts of our URL using environment variables.
Listing 8.2 Making _get_session configurable (dags/01_python.py)
MOVIELENS_HOST = os.environ.get("MOVIELENS_HOST", "movielens")            ❶
MOVIELENS_SCHEMA = os.environ.get("MOVIELENS_SCHEMA", "http")
MOVIELENS_PORT = os.environ.get("MOVIELENS_PORT", "5000")

MOVIELENS_USER = os.environ["MOVIELENS_USER"]                             ❷
MOVIELENS_PASSWORD = os.environ["MOVIELENS_PASSWORD"]

def _get_session():
   """Builds a requests Session for the Movielens API."""

   session = requests.Session()
   session.auth = (MOVIELENS_USER, MOVIELENS_PASSWORD)                    ❸

   base_url = f"{MOVIELENS_SCHEMA}://{MOVIELENS_HOST}:{MOVIELENS_PORT}"   ❸

   return session, base_url

session, base_url = _get_session()
❶ Retrieve the API configuration details from optional environment variables.
❷ Fetch the username/password from two required environment variables.
❸ Use the retrieved configuration to build our session and base URL.
This will later allow us to easily change these parameters when running our script by defining values for these environment variables.
Now that we have a rudimentary setup for our requests session, we need to implement some functionality that will transparently handle the pagination of the API. One way to do this is to wrap our call to session.get with some code that inspects the API response and keeps requesting new pages until we reach the total number of rating records.
Listing 8.3 Helper function for handling pagination (dags/01_python.py)
def _get_with_pagination(session, url, params, batch_size=100):
   """
   Fetches records using a GET request with given URL/params,
   taking pagination into account.
   """

   offset = 0                                  ❶
   total = None                                ❶
   while total is None or offset < total:      ❷
       response = session.get(
           url,
           params={
               **params,
               **{"offset": offset, "limit": batch_size}
           }
       )                                       ❸
       response.raise_for_status()
       response_json = response.json()         ❹

       yield from response_json["result"]      ❺

       offset += batch_size                    ❻
       total = response_json["total"]          ❻
❶ Keep track of how many records we’ve retrieved and how many we should expect.
❷ Keep looping until we’ve retrieved all records. Note that the None check is for the first loop, as the total number of records is unknown until after the first loop.
❸ Fetch a new page, starting from the given offset.
❹ Check the result status and parse the result JSON.
❺ Yield any retrieved records to the caller.
❻ Update our current offset and the total number of records.
By using yield from to return our results, this function effectively returns a generator of individual rating records, meaning that we don’t have to worry about pages of results anymore.3
The only thing missing is a function that ties this all together and allows us to perform queries to the ratings endpoint while specifying start and end dates for the desired date range.
Listing 8.4 Tying things together in _get_ratings (dags/01_python.py)
def _get_ratings(start_date, end_date, batch_size=100):
   session, base_url = _get_session()                             ❶

   yield from _get_with_pagination(                               ❷
       session=session,
       url=base_url + "/ratings",                                 ❸
       params="start_date": start_date, "end_date": end_date},    ❹
       batch_size=batch_size,                                     ❺
   )

ratings = _get_ratings(session, base_url + "/ratings")            ❻
next(ratings)                                                     ❼
list(ratings)                                                     ❽
❶ Get the requests session (with authentication) plus base URL for the API.
❷ Use our pagination function to transparently fetch a collection of records.
❸ Make sure we’re using the ratings endpoint.
❹ Fetch records between the given start/end dates.
❺ Limit pages to a specific batch size.
❻ Example usage of the _get_ratings function
❽ ... or fetch the entire batch.
This provides us with a nice, concise function for fetching ratings, which we can start using in our DAG.
8.1.3 Building the actual DAG
Now that we have our _get_ratings function, we can call it using the PythonOperator to fetch ratings for each schedule interval. Once we have the ratings, we can dump the results into a JSON output file, partitioned by date so that we can easily rerun fetches if needed.
We can implement this functionality by writing a small wrapper function that takes care of supplying the start/end dates and writing the ratings to an output function.
Listing 8.5 Using the _get_ratings function (dags/01_python.py)
def _fetch_ratings(templates_dict, batch_size=1000, **_):
   logger = logging.getLogger(__name__)                             ❶

   start_date = templates_dict["start_date"]                        ❷
   end_date = templates_dict["end_date"]
   output_path = templates_dict["output_path"]

   logger.info(f"Fetching ratings for {start_date} to {end_date}")
   ratings = list(                                                  ❸
       _get_ratings(
           start_date=start_date,
           end_date=end_date,
           batch_size=batch_size,
       )
   )
   logger.info(f"Fetched {len(ratings)} ratings")

   logger.info(f"Writing ratings to {output_path}")

   output_dir = os.path.dirname(output_path)                        ❹
   os.makedirs(output_dir, exist_ok=True)

   with open(output_path, "w") as file_:                            ❺
       json.dump(ratings, fp=file_)

fetch_ratings = PythonOperator(                                     ❻
   task_id="fetch_ratings",
   python_callable=_fetch_ratings,
   templates_dict={
       "start_date": "{{ds}}",
       "end_date": "{{next_ds}}",
       "output_path": "/data/python/ratings/{{ds}}.json",
   },
)
❶ Use logging to provide some useful feedback about what the function is doing.
❷ Extract the templated start/end dates and output path.
❸ Use the _get_ratings function to fetch rating records.
❹ Create the output directory if it doesn’t exist.
❺ Write the output data as JSON.
❻ Create the task using the PythonOperator.
Note that the start_date/end_date/output_path parameters are passed using templates_dict, which allows us to reference context variables, such as the execution date, in their values.
After fetching our ratings, we include another step, rank_movies, to produce our rankings. This step uses the PythonOperator to apply our rank_movies_by_rating function, which ranks movies by their average rating, optionally filtering for a minimum number of ratings.
Listing 8.6 Helper function for ranking movies (dags/custom/ranking.py)
import pandas as pd
def rank_movies_by_rating(ratings, min_ratings=2):
   ranking = (
       ratings.groupby("movieId")
       .agg(                                                            ❶
           avg_rating=pd.NamedAgg(column="rating", aggfunc="mean"),
           num_ratings=pd.NamedAgg(column="userId", aggfunc="nunique"),
       )
       .loc[lambda df: df["num_ratings"] > min_ratings]                 ❷
       .sort_values(["avg_rating", "num_ratings"], ascending=False)     ❸
   )
   return ranking
❶ Calculate the average rating and the total number of ratings.
❷ Filter for the minimum number required ratings.
Listing 8.7 Adding the rank_movies task (dags/01_python.py)
def _rank_movies(templates_dict, min_ratings=2, **_):
   input_path = templates_dict["input_path"]
   output_path = templates_dict["output_path"]

   ratings = pd.read_json(input_path)                                  ❶
   ranking = rank_movies_by_rating(ratings, min_ratings=min_ratings)   ❷
   output_dir = os.path.dirname(output_path)                           ❸
   os.makedirs(output_dir, exist_ok=True)
   ranking.to_csv(output_path, index=True)                             ❹

rank_movies = PythonOperator(                                          ❺
   task_id="rank_movies",
   python_callable=_rank_movies,
   templates_dict={
       "input_path": "/data/python/ratings/{{ds}}.json",
       "output_path": "/data/python/rankings/{{ds}}.csv",
   },
)
fetch_ratings >> rank_movies                                           ❻
❶ Read ratings from the given (templated) input path.
❷ Use the helper function to rank movies.
❸ Create the output directory if it doesn’t exist.
❺ Use the _rank_movies function within a PythonOperator.
❻ Connect the fetch and rank tasks.
This results in a DAG comprising two steps: one for fetching ratings and one for ranking movies. As such, by scheduling this DAG to run daily, it provides a ranking of the most popular movies for that day. (Of course, a smarter algorithm might take some history into account, but we have to start somewhere, right?)
8.2 Building a custom hook
As you can see, it takes some effort (and code) to actually start fetching ratings from our API and to use them for our ranking. Interestingly, the majority of our code concerns the interaction with the API, in which we have to get our API address and authentication details, set up a session for interacting with the API, and include extra functionality for handling details of the API, such as pagination.
One way of dealing with the complexity of interacting with the API is encapsulating all this code into a reusable Airflow hook. By doing so, we can keep all the API-specific code in one place and simply use this hook in different places in our DAGs, which allows us to reduce the effort of fetching ratings to something like this.
Listing 8.8 Using a MovielensHook for fetching ratings
hook = MovielensHook(conn_id="movielens")            ❶
ratings = hook.get_ratings(start_date, end_date)     ❷
hook.close()                                         ❸
❷ Use the hook to do some work.
❸ Close the hook, freeing any used resources.
Hooks also allow us to leverage Airflow’s functionality for managing connection credentials via the database and UI, meaning that we don’t have to manually supply our API credentials to our DAG. In the next few sections, we’ll explore how to write a custom hook and set about building a hook for our movie API.
8.2.1 Designing a custom hook
In Airflow, all hooks are created as subclasses of the abstract BaseHook class.
Listing 8.9 Skeleton for a custom hook
from airflow.hooks.base_hook import BaseHook

class MovielensHook(BaseHook):
   ...
To start building a hook, we need to define an __init__ method that specifies which connection the hook uses (if applicable) and any other extra arguments our hook might need. In this case, we want our hook to get its connection details from a specific connection but don’t need any extra arguments.
Listing 8.10 Start of the MovielensHook class (dags/custom/hooks.py)
from airflow.hooks.base_hook import BaseHook

class MovielensHook(BaseHook):
   def __init__(self, conn_id):      ❶
     super().__init__()              ❷
     self._conn_id = conn_id         ❸
❶ The parameter conn_id tells the hook which connection to use.
❷ Call the constructor of the BaseHook class.4
❸ Don’t forget to store our connection ID.
Most Airflow hooks are expected to define a get_conn method, which is responsible for setting up a connection to an external system. In our case, this means that we can reuse most of our previously defined _get_session function, which already provides us with a preconfigured session for the movie API. That means a naive implementation of get_conn could look something like this.
Listing 8.11 Initial implementation of the get_conn method
class MovielensHook(BaseHook):

    ...

    def get_conn(self):
       session = requests.Session()
       session.auth = (MOVIELENS_USER, MOVIELENS_PASSWORD)

       schema = MOVIELENS_SCHEMA
       host = MOVIELENS_HOST
       port = MOVIELENS_PORT

       base_url = f"{schema}://{host}:{port}"

       return session, base_url
However, instead of hardcoding our credentials, we prefer to fetch them from the Airflow credentials store, which is more secure and easier to manage. To do so, we first need to add our connection to the Airflow metastore, which we can do by opening the “Admin > Connections” section using the Airflow web UI and clicking Create to add a new connection.
In the connection create screen (figure 8.5), we need to fill in the connection details of our API. In this case, we’ll call the connection “movielens.” We’ll use this ID later in our code to refer to the connection. Under connection type, we select HTTP for our rest API. Under host, we need to refer to the hostname of the API in our Docker Compose setup, which is “movielens.” Next, we can (optionally) indicate what schema we’ll use for the connection (HTTP) and add the required login credentials (user: “airflow”, password: “airflow”). Finally, we need to say under which port our API will be available, which is port 5000 in our Docker Compose setup (as we saw earlier when manually accessing the API).

Figure 8.5 Adding our movie API connection in the Airflow web UI
Now that we have our connection, we need to modify our get_conn to fetch the connection details from the metastore. To do so, the BaseHook class provides a convenience method called get_connection, which can retrieve the connection details for a given connection ID from the metastore:
config = self.get_connection(self._conn_id)
This connection configuration object has fields that map to the different details we just filled in when creating our connection. As such, we can use the config object to start determining the host/port and user/password for our API. First, we use the schema, host, and port fields to determine our API URL as before:
schema = config.schema or self.DEFAULT_SCHEMA
host = config.host or self.DEFAULT_HOST
port = config.port or self.DEFAULT_PORT

base_url = f"{schema}://{host}:{port}/"
Note that we define default values in our class (similar to the constants we defined before) in case these fields are not specified in the connection. If we want to require them to be specified in the connection itself, we can raise an error instead of supplying defaults.
Now that we have obtained our base URL from the metastore, we only need to configure authentication details on our session:
if config.login:
   session.auth = (config.login, config.password)
This gives us the following new implementation for get_conn.
Listing 8.12 Making get_conn configurable (dags/custom/hooks.py
class MovielensHook(BaseHook):
   DEFAULT_HOST = "movielens"                               ❶
   DEFAULT_SCHEMA = "http"
   DEFAULT_PORT = 5000

   def __init__(self, conn_id):
       super().__init__()
       self._conn_id = conn_id

   def get_conn(self):
       config = self.get_connection(self._conn_id)          ❷

       schema = config.schema or self.DEFAULT_SCHEMA        ❸
       host = config.host or self.DEFAULT_HOST
       port = config.port or self.DEFAULT_PORT

       base_url = f"{schema}://{host}:{port}"

       session = requests.Session()                         ❹

       if config.login:
           session.auth = (config.login, config.password)   ❹

       return session, base_url                             ❺
❶ Default connection values, as stored class variables for convenience
❷ Fetching the connection configuration using the given ID
❸ Building the base URL using the connection config and defaults
❹ Creating the requests session using login/password from the connection config
❺ Returning the requests session and base URL
One drawback of this implementation is that each call to get_conn will result in a call to the Airflow metastore, as get_conn needs to fetch the credentials from the database. We can avoid this limitation by also caching session and base_url on our instance as protected variables.
Listing 8.13 Adding caching for the API session (dags/custom/hooks.py)
class MovielensHook(BaseHook):

   def __init__(self, conn_id, retry=3):
       ...
       self._session = None               ❶
       self._base_url = None              ❶
   def get_conn(self):
       """
       Returns the connection used by the hook for querying data.
       Should in principle not be used directly.
       """

       if self._session is None:          ❷
           config = self.get_connection(self._conn_id)
             ...
           self._base_url = f"{schema}://{config.host}:{port}"

           self._session = requests.Session()
             ...

       return self._session, self._base_url
❶ Two extra instance variables, used for caching the session and base URL
❷ Check if we already have an active session before creating one.
This way, the first time get_conn gets called, self._session is None, so we end up fetching our connection details from the metastore and setting up our base URL and session. By storing these objects in the _session and _base_url instance variables, we make sure that these objects are cached for later calls. As such, a second call to get_ conn will see that self._session no longer is None and will return the cached session and base URL.
Note Personally, we’re not fans of using the get_conn method directly outside of the hook, even though it is publicly exposed, because this method exposes the internal details of how your hook accesses the external system, breaking encapsulation. This will give you substantial headaches if you ever want to change this internal detail, as your code will be strongly coupled to the internal connection type. This has been an issue in the Airflow codebase as well, for example, in the case of the HdfsHook, where the implementation of the hook was tightly coupled to a Python 2.7–only library (snakebite).
Now that we have completed our implementation of get_conn, we are able to build an authenticated connection to our API. This means we can finally start building some useful methods into our hook, which we can then use to do something useful with our API.
For fetching ratings, we can reuse the code from our previous implementation, which retrieved ratings from the /ratings endpoint of the API and used our get_with_ pagination function to handle pagination. The main difference from the previous version is that we now use get_conn within the pagination function to get our API session.
Listing 8.14 Adding a get_ratings method (dags/custom/hooks.py)
class MovielensHook(BaseHook):
    ...

  def get_ratings(self, start_date=None, end_date=None, batch_size=100):   ❶
       """
       Fetches ratings between the given start/end date.
       Parameters
       —————
       start_date : str
           Start date to start fetching ratings from (inclusive). Expected
           format is YYYY-MM-DD (equal to Airflow"s ds formats).
       end_date : str
           End date to fetching ratings up to (exclusive). Expected
           format is YYYY-MM-DD (equal to Airflow"s ds formats).
       batch_size : int
           Size of the batches (pages) to fetch from the API. Larger values
           mean less requests, but more data transferred per request.
       """

       yield from self._get_with_pagination(
           endpoint="/ratings",
           params={"start_date": start_date, "end_date": end_date},
           batch_size=batch_size,
       )

   def _get_with_pagination(self, endpoint, params, batch_size=100):       ❷
       """
       Fetches records using a get request with given url/params,
       taking pagination into account.
       """

       session, base_url = self.get_conn()

       offset = 0
       total = None
       while total is None or offset < total:
           response = session.get(
               url, params={
                  **params,
                  **{"offset": offset, "limit": batch_size}
               }
           )
           response.raise_for_status()
           response_json = response.json()

           yield from response_json["result"]

           offset += batch_size
           total = response_json["total"]
❶ Public method that will be called by users of the hook
❷ Our internal helper method that handles pagination (same implementation as before)
Altogether, this gives us a basic Airflow hook that handles connections to the MovieLens API. Adding extra functionality (other than just fetching ratings) can be easily done by adding extra methods to the hook.
Although it may seem like a lot of effort to build a hook, most of the work was shifting around the functions we wrote before into a single, consolidated hook class. An advantage of our new hook is that it provides nice encapsulation of the MovieLens API logic in a single class, which is easy to use across different DAGs.
8.2.2 Building our DAG with the MovielensHook
Now that we have our hook, we can start using it to a fetch ratings in our DAG. However, first we need to save our hook class somewhere so that we can import it into our DAG. One way is by creating a package in the same directory as our DAGs folder5 and save our hook in a hooks.py module inside this package.
Listing 8.15 Structure for a DAG directory with a custom package
chapter08
├── dags
│   ├── custom              ❶
│   │   ├── __init__.py
│   │   └── hooks.py        ❷
│   ├── 01_python.py
│   └── 02_hook.py
├── docker-compose.yml
└── ...
❶ Example package named “custom”
❷ Module containing the custom hook code
Once we have this package, we can import our hook from the new custom package, which contains our custom hook code:
from custom.hooks import MovielensHook
After importing the hook, fetching ratings becomes quite simple. We only need to instantiate the hook with the proper connection ID and then call the hook’s get_ratings method with the desired start/end dates.
Listing 8.16 Using our MovielensHook to fetch ratings
hook = MovielensHook(conn_id=conn_id)
ratings = hook.get_ratings(
   start_date=start_date,
   end_date=end_date,
   batch_size=batch_size
)
This gives back a generator of rating records, which we then write to an output (JSON) file.
To use the hook in our DAG, we still need to wrap this code in a PythonOperator that takes care of supplying the correct start/end dates for the given DAG run, as well as actually writing the ratings to the desired output file. For this, we can essentially use the same _fetch_ratings function we defined for our initial DAG, changing the call to _get_ratings with the call to our new hook.
Listing 8.17 Using the MovielensHook in the DAG (dags/02_hook.py)
def _fetch_ratings(conn_id, templates_dict, batch_size=1000, **_):
   logger = logging.getLogger(__name__)

   start_date = templates_dict["start_date"]
   end_date = templates_dict["end_date"]
   output_path = templates_dict["output_path"]

   logger.info(f"Fetching ratings for {start_date} to {end_date}")
   hook = MovielensHook(conn_id=conn_id)                                    ❶
   ratings = list(                                                          ❷
       hook.get_ratings(                                                    ❷
           start_date=start_date, end_date=end_date, batch_size=batch_size  ❷
       )                                                                    ❷
   )                                                                        ❷
   logger.info(f"Fetched {len(ratings)} ratings")

   logger.info(f"Writing ratings to {output_path}")

   output_dir = os.path.dirname(output_path)                                ❸
   os.makedirs(output_dir, exist_ok=True)                                   ❸

   with open(output_path, "w") as file_:                                    ❸
       json.dump(ratings, fp=file_)                                         ❸

PythonOperator(
   task_id="fetch_ratings",
   python_callable=_fetch_ratings,
   op_kwargs={"conn_id": "movielens"},                                      ❹
   templates_dict={
       "start_date": "{{ds}}",
       "end_date": "{{next_ds}}",
       "output_path": "/data/custom_hook/{{ds}}.json",
   },
)
❶ Create an instance of the MovielensHook with the appropriate connection ID.
❷ Use the hook to fetch ratings from the API.
❸ Write the fetched ratings like before.
❹ Specify which connection to use.
Note that we added the parameter conn_id to fetch_ratings, which specifies the connection to use for the hook. As such, we also need to include this parameter when calling _fetch_ratings from the PythonOperator.
This gives us the same behavior as before, but with a much simpler and smaller DAG file, as most of the complexity surrounding the MovieLens API is now outsourced to the MovielensHook.
8.3 Building a custom operator
Although building a MovielensHook has allowed us to move a lot of complexity from our DAG into the hook, we still have to write a considerable amount of boilerplate code for defining start/end dates and writing the ratings to an output file. This means that, if we want to reuse this functionality in multiple DAGs, we will still have some considerable code duplication and extra effort involved.
Fortunately, Airflow also allows us to build custom operators, which can be used to perform repetitive tasks with a minimal amount of boilerplate code. In this case, we could, for example, use this functionality to build a MovielensFetchRatingsOperator, which would allow us to fetch movie ratings using a specialized operator class.
8.3.1 Defining a custom operator
In Airflow, all operators are built as subclasses of the BaseOperator class.
Listing 8.18 Skeleton for a custom operator
from airflow.models import BaseOperator
from airflow.utils.decorators import apply_defaults


class MyCustomOperator(BaseOperator):           ❶
   @apply_defaults                              ❷
   def __init__(self, conn_id, **kwargs):       ❸
       super.__init__(self, **kwargs)
       self._conn_id = conn_id
       ...
❶ Inherit from the BaseOperator class.
❷ Decorator that makes sure default DAG arguments are passed to our operator
❸ Pass any extra keyword arguments to the BaseOperator constructor.
Any arguments specific to your operator (such as conn_id in this example) can be specified explicitly in the __init__ constructor method. How you use these arguments is, of course, up to you. Operator-specific arguments vary between different operators, but typically include connection IDs (for operators involving remote systems) and any details required for the operation (such as start/end dates, queries, etc.).
The BaseOperator class also takes a large number of (mostly optional) generic arguments that define the basic behavior of the operator. Examples of generic arguments include the task_id the operator created for the task, but also many arguments such as retries and retry_delay that affect the scheduling of the resulting task. To avoid having to list all these generic tasks explicitly, we use Python’s **kwargs syntax to forward these generic arguments to the __init__ of the BaseOperator class.
Thinking back to earlier DAGs in this book, you may remember that Airflow also provides the option of defining certain arguments as default arguments for the entire DAG. This is done using the default_args parameter to the DAG object itself.
Listing 8.19 Applying default arguments to operators
default_args = {
   "retries": 1,
   "retry_delay": timedelta(minutes=5),
}

with DAG(
   ...
   default_args=default_args
) as dag:
   MyCustomOperator(
       ...
   )
To ensure that these default arguments are applied to your custom operator, Airflow supplies the apply_defaults decorator, which is applied to the __init__ method of your operator (as shown in our initial example). In practice, this means that you should always include the apply_defaults decorator when defining custom operators; otherwise, you will inadvertently break this Airflow behavior for your operator.
Now that we have our basic custom operator class, we still need to define what our operator actually does by implementing the execute method, the main method Airflow calls when the operator is actually being executed as part of a DAG run.
Listing 8.20 The operator’s execute method
class MyCustomOperator(BaseOperator):
   ...

   def execute(self, context):     ❶
       ...
❶ Main method called when executing our operator
As you can see, the execute method takes a single parameter, context, which is a dict containing all the Airflow context variables. The method can then continue to perform whatever function the operator was designed to do, taking variables from the Airflow context (such as execution dates, etc.) into account.
8.3.2 Building an operator for fetching ratings
Now that we know the basics of building an operator, let’s see how we can start building a custom one for fetching ratings. The idea is that this operator fetches ratings from the MovieLens API between a given start/end date and writes these ratings to a JSON file, similar to what our _fetch_ratings function was doing in our previous DAG.
We can start by filling in the required parameters for the operator in its __init__ method, which include the start/end dates, which connection to use, and an output path to write to.
Listing 8.21 Start of the custom operator (dags/custom/operators.py)
class MovielensFetchRatingsOperator(BaseOperator):
   """
   Operator that fetches ratings from the Movielens API.

   Parameters
   —————
   conn_id : str
       ID of the connection to use to connect to the Movielens
       API. Connection is expected to include authentication
       details (login/password) and the host that is serving the API.
   output_path : str
       Path to write the fetched ratings to.
   start_date : str
       (Templated) start date to start fetching ratings from (inclusive).
       Expected format is YYYY-MM-DD (equal to Airflow"s ds formats).
   end_date : str
       (Templated) end date to fetching ratings up to (exclusive).
       Expected format is YYYY-MM-DD (equal to Airflow"s ds formats).
   """

   @apply_defaults
   def __init__(
       self, conn_id, output_path, start_date, end_date, **kwargs,
   ):
       super(MovielensFetchRatingsOperator, self).__init__(**kwargs)

       self._conn_id = conn_id
       self._output_path = output_path
       self._start_date = start_date
       self._end_date = end_date
Next, we have to implement the body of the operator, which actually fetches the ratings and writes them to an output file. To do this, we can essentially fill in the execute method of the operator with a modified version of our implementation for _fetch _ratings.
Listing 8.22 Adding the execute method (dags/custom/operators.py)
class MovielensFetchRatingsOperator(BaseOperator):
   ...

   def execute(self, context):
       hook = MovielensHook(self._conn_id)                    ❶

       try:
           self.log.info(
               f"Fetching ratings for {self._start_date} to {self._end_date}"
           )
           ratings = list(                                    ❷
               hook.get_ratings(                              ❷
                   start_date=self._start_date,               ❷
                   end_date=self._end_date,                   ❷
               )                                              ❷
           )                                                  ❷
           self.log.info(f"Fetched {len(ratings)} ratings")
       finally:
           hook.close()                                       ❸

       self.log.info(f"Writing ratings to {self._output_path}")

       output_dir = os.path.dirname(self._output_path)        ❹
       os.makedirs(output_dir, exist_ok=True)

       with open(self._output_path, "w") as file_:            ❺
           json.dump(ratings, fp=file_)
❶ Create an instance of the MovielensHook.
❷ Use the hook to fetch ratings.
❸ Close the hook to release any resources.
❹ Create the output directory if it doesn’t exist.
As you can see, porting our code to a custom operator required relatively few changes to our code. Similar to the _fetch_ratings function, this execute method starts by creating an instance of our MovielensHook and using this hook to fetch ratings between the given start/end dates. One difference is that the code now takes its parameters from self, making sure to use the values passed when instantiating the operator. We also switched our logging calls to use the logger provided by the BaseOperator class, which is available in the self.log property. Finally, we added some exception handling to make sure our hook is always closed properly, even if the call to get_ratings fails. This way, we don’t waste any resources by forgetting to close our API sessions , which is good practice when implementing code that uses hooks.
Using this operator is relatively straightforward, as we can simply instantiate the operator and include it in our DAG.
Listing 8.23 Using the MovielensFetchRatingsOperator
fetch_ratings = MovielensFetchRatingsOperator(
   task_id="fetch_ratings",
   conn_id="movielens",
   start_date="2020-01-01",
   end_date="2020-01-02",
   output_path="/data/2020-01-01.json"
)
A drawback of this implementation is that it takes predefined dates for which the operator will fetch ratings. As such, the operator will only fetch ratings for a single hardcoded time period, without taking the execution date into account.
Fortunately, Airflow also allows us to make certain operator variables template-able, meaning that they can refer to context variables such as the execution date. To allow specific instance variables to be templated, we need to tell Airflow to template them using the templates_field class variable.
Listing 8.24 Adding template fields (dags/custom/operators.py)
class MovielensFetchRatingsOperator(BaseOperator):
   ...
   template_fields = ("_start_date", "_end_date", "_output_path")      ❶
   ...

   @apply_defaults
   def __init__(
       self,
       conn_id,
       output_path,
       start_date="{{ds}}",
       end_date="{{next_ds}}",
       **kwargs,
   ):
       super(MovielensFetchRatingsOperator, self).__init__(**kwargs)

       self._conn_id = conn_id
       self._output_path = output_path
       self._start_date = start_date
       self._end_date = end_date
❶ Tell Airflow to template these instance variables on our operator.
This effectively tells Airflow that the variables _start_date, _end_date, and _output _path (which are created in __init__) are available for templating. This means that if we use any Jinja templating in these string parameters, Airflow will make sure that these values are templated before our execute method is called. As a result, we can now use our operator with templated arguments as follows.
Listing 8.25 Using templating in the operator (dags/03_operator.py)
from custom.operators import MovielensFetchRatingsOperator

fetch_ratings = MovielensFetchRatingsOperator(
   task_id="fetch_ratings",
   conn_id="movielens",
   start_date="{{ds}}",
   end_date="{{next_ds}}",
   output_path="/data/custom_operator/{{ds}}.json"
)
This way, Airflow will fill in the values of the start of the execution window (ds) for the start date and the end of the execution window (next_ds) for the end date. It will also make sure the output is written to a file tagged with the start of the execution window (ds).
8.4 Building custom sensors
With all this talk about operators, you may be wondering how much effort it takes to build a custom sensor. In case you skipped over them in previous chapters, a sensor is a special type of operator that can be used to wait for a certain condition to be fulfilled before executing any downstream tasks in the DAG. For example, you may want to use a sensor for checking if certain files or data are available in a source system before trying to use the data in any downstream analysis.
Regarding their implementation, sensors are very similar to operators, except that they inherit from the BaseSensorOperator class instead of the BaseOperator.
Listing 8.26 Skeleton for a custom sensor
from airflow.sensors.base import BaseSensorOperator

class MyCustomSensor(BaseSensorOperator):
    ...
As the name suggests, this shows that sensors are in fact a special type of operator. The BaseSensorOperator class provides the basic functionality for a sensor and requires sensors to implement a special poke method rather than the execute method.
Listing 8.27 The sensor’s poke method
class MyCustomSensor(BaseSensorOperator):

   def poke(self, context):
       ...
The signature of the poke method is similar to execute in that it takes a single argument containing the Airflow context. However, in contrast to the execute method, poke is expected to return a Boolean value that indicates if the sensor condition is true. If it is, the sensor finishes its execution, allowing downstream tasks to start executing. If the condition is false, the sensor sleeps for several seconds before checking the condition again. This process repeats until the condition becomes true or the sensor hits its timeout.
Although Airflow has many built-in sensors, you can essentially build your own to check any type of condition. For example, in our use case, we may want to implement a sensor that first checks if rating data is available for a given date before continuing with the execution of our DAG.
To start building our MovielensRatingsSensor, we first need to define the __init__ of our custom sensor class, which should take a connection ID (that species which connection details to use for the API) and a range of start/end dates, which specifies for which date range we want to check if there are ratings. This would look something like the following.
Listing 8.28 Start of the sensor class (dags/custom/sensors.py)
from airflow.sensors.base import BaseSensorOperator
from airflow.utils.decorators import apply_defaults

class MovielensRatingsSensor(BaseSensorOperator):
   """
   Sensor that waits for the Movielens API to have
   ratings for a time period.

   start_date : str
       (Templated) start date of the time period to check for (inclusive).
       Expected format is YYYY-MM-DD (equal to Airflow"s ds formats).
   end_date : str
       (Templated) end date of the time period to check for (exclusive).
       Expected format is YYYY-MM-DD (equal to Airflow"s ds formats).
   """

   template_fields = ("_start_date", "_end_date")       ❶

   @apply_defaults                                      ❶
   def __init__(self, conn_id, start_date="{{ds}}",
                end_date="{{next_ds}}", **kwargs):
       super().__init__(**kwargs)                       ❶
       self._conn_id = conn_id
       self._start_date = start_date
       self._end_date = end_date
❶ Since sensors are a special type of operator, we can use the same basic setup as we used for implementing an operator.
After specifying the constructor, the only thing we need to implement is our poke method. In this method, we can check if there are ratings for a specific date range by simply requesting ratings between the given start/end dates that return true if there are any records. Note that this does not require fetching all rating records; we only need to demonstrate that there is at least one record in the range.
Using our MovielensHook, implementing this algorithm is pretty straightforward. First, we instantiate the hook and then call get_ratings to start fetching records. As we are only interested in seeing if there is at least one record, we can try calling next on the generator returned by get_ratings, which will raise a StopIteration if the generator is empty. As such, we can test for the exception using try/except, returning True if no exception is raised and False if it is (indicating that there were no records).
Listing 8.29 Implementing the poke method (dags/custom/sensors.py)
class MovielensRatingsSensor(BaseSensorOperator):
   def poke(self, context):
       hook = MovielensHook(self._conn_id)

       try:
           next(                                   ❶
               hook.get_ratings(
                   start_date=self._start_date,
                   end_date=self._end_date,
                   batch_size=1
               )
           )
           self.log.info(
               f"Found ratings for {self._start_date} to {self._end_date}"
           )
           return True                             ❷
       except StopIteration:                       ❸
           self.log.info(
               f"Didn't find any ratings for {self._start_date} "
               f"to {self._end_date}, waiting..."
           )
           return False                            ❸
       finally:
           hook.close()                            ❹
❶ Try to fetch one record from the hook (using next to fetch the first record).
❷ If this succeeds, we have at least one record, so return true.
❸ If this fails with a StopIteration, the collection of records is empty, so return false.
❹ Makes sure to close the hook to free resources
Note that the reuse of our MovielensHook makes this code relatively short and succinct, demonstrating the power of containing the details of interacting with the MovieLens API within the hook class.
This sensor class can now be used to make the DAG check and wait for new ratings to come in before continuing with the execution of the rest of the DAG.
Listing 8.30 Using the sensor to wait for ratings (dags/04_sensor.py)
...

from custom.operators import MovielensFetchRatingsOperator
from custom.sensors import MovielensRatingsSensor

with DAG(
   dag_id="04_sensor",
   description="Fetches ratings with a custom sensor.",
   start_date=airflow_utils.dates.days_ago(7),
   schedule_interval="@daily",
) as dag:
   wait_for_ratings = MovielensRatingsSensor(          ❶
       task_id="wait_for_ratings",
       conn_id="movielens",
       start_date="{{ds}}",
       end_date="{{next_ds}}",
   )

   fetch_ratings = MovielensFetchRatingsOperator(      ❷
       task_id="fetch_ratings",
       conn_id="movielens",
       start_date="{{ds}}",
       end_date="{{next_ds}}",
       output_path="/data/custom_sensor/{{ds}}.json"
   )

   ...

   wait_for_ratings >> fetch_ratings >> rank_movies
❶ Sensor that waits for records to be available
❷ Operator that fetches records once the sensor has completed
8.5 Packaging your components
Up to now, we’ve relied on including our custom components in a subpackage within the DAGs directory to make them importable by our DAGs. However, this approach is not necessarily ideal if you want to be able to use these components in other projects, want to share them with other people, or want to perform more rigorous testing on them.
A better approach for distributing your components is to put your code into a Python package. Although this requires a bit of extra overhead in terms of setup, it gives you the benefit of being able to install your components into your Airflow environment, as with any other package. Moreover, keeping the code separate from your DAGs allows you to set up a proper CI/CD process for your custom code and makes it easier to share/collaborate on the code with others.
8.5.1 Bootstrapping a Python package
Unfortunately, packaging can be a complicated topic in Python. In this case, we’ll focus on the most basic example of Python packaging, which involves using setuptools to create a simple Python package.6 Using this approach, we aim to create a small package called airflow_movielens, which will contain the hook, operator, and sensor classes written in the previous sections.
To start building our package, lets first create a directory for our package:
$ mkdir -p airflow-movielens
$ cd airflow-movielens
Next, let’s start including our code by creating the base of our package. To do this, we’ll contain a src subdirectory in our airflow-movielens directory and create a directory, airflow_movielens (the name of our package), inside this src directory. To make airflow_movielens into a package, we also create an __init__.py file inside the directory:7
$ mkdir -p src/airflow_movielens
$ touch src/airflow_movielens/__init__.py
Next, we can start including our code by creating the files hooks.py, sensors.py, and operators.py in the airflow_movielens directory and copying the implementations of our custom hook, sensor, and operator classes into their respective files. Once done, you should end up with a result that looks something like this:
$ tree airflow-movielens/
airflow-movielens/
└── src
   └── airflow_movielens
      ├── __init__.py
      ├── hooks.py
      ├── operators.py
      └── sensors.py
Now that we have the basic structure of our package, all we need to do to turn this into a package is to include a setup.py file, which tells setuptools how to install it. A basic setup.py file typically looks something like the following listing.
Listing 8.31 Example setup.py file (package/airflow-movielens/setup.py)
#!/usr/bin/env python
import setuptools

requirements = ["apache-airflow", "requests"]                          ❶

setuptools.setup(
   name="airflow_movielens",                                           ❷
   version="0.1.0",                                                    ❷
   description="Hooks, sensors and operators for the Movielens API.",  ❷
   author="Anonymous",                                                 ❸
   author_email="[email protected]",                               ❸
   install_requires=requirements,                                      ❹
   packages=setuptools.find_packages("src"),                           ❺
   package_dir={"": "src"},                                            ❺
   url="https://github.com/example-repo/airflow_movielens",            ❻
   license="MIT license",                                              ❼
)
❶ List of Python packages that our package depends on
❷ Name, version, and description of our package
❹ Informs setuptools about our dependencies
❺ Tells setuptools where to look for our package’s Python files
The most important part of this file is the call to setuptools.setup, which gives setuptools detailed metadata about our package. The most important fields in this call are as follows:
-
name —Defines the name of your package (what it will be called when installed).
-
install_requires —A list of dependencies required by your package.
-
packages/package_dir —Tells setuptools which packages to include when installing and where to look for these packages. In this case, we use a src directory layout for our Python package.8
Additionally, setuptools allows you to include many optional fields9 for describing your package, including the following:
-
description —A short, readable description of your package (typically one line). A longer description can be given using the
long_descriptionargument. -
license —The license under which your package code is released (if any).
Looking at the setup.py implementation, this means that we tell setuptools that our dependencies include apache-airflow and requests, that our package should be called airflow_movielens with a version of 0.1, and that it should include files from the airflow_movielens package situated in the src directory, while including some extra details about ourselves and the package description license.
Once we have finished writing our setup.py, our package should look like this:
$ tree airflow-movielens
airflow-movielens
├── setup.py
└── src
   └── airflow_movielens
      ├── __init__.py
      ├── hooks.py
      ├── operators.py
      └── sensors.py
This means we now have a setup for our basic airflow_movielens Python package, which we can try installing in the next section.
Of course, more elaborate packages will typically include tests, documentation, and so on, which we don’t describe here. If you want to see extensive setups for Python packaging, we recommend checking out the many templates available online (e.g., https://github.com/audreyr/cookiecutter-pypackage), which provide excellent starting points for bootstrapping Python package development.
8.5.2 Installing your package
Now that we have our basic package, we should be able to install airflow_movielens into our Python environment. You can try this by running pip to install the package in your active environment:
$ python -m pip install ./airflow-movielens
Looking in indexes: https://pypi.org/simple
Processing ./airflow-movielens
Collecting apache-airflow
...
Successfully installed ... airflow-movielens-0.1.0 ...
Once pip is done installing your package and dependencies, you can check whether your package was installed by starting Python and trying to import one of the classes from your package:
$ python
Python 3.7.3 | packaged by conda-forge | (default, Jul  1 2019, 14:38:56)
[Clang 4.0.1 (tags/RELEASE_401/final)] :: Anaconda, Inc. on darwin
Type "help", "copyright", "credits" or "license" for more information.
>>> from airflow_movielens.hooks import MovielensHook
>>> MovielensHook
<class 'airflow_movielens.hooks.MovielensHook'>
Deploying your package to your Airflow environment shouldn’t require much more effort than installing your package in Airflow’s Python environment. However, depending on your setup, you should make sure that your package and all its dependencies are installed in all of the environments Airflow uses (that is, the scheduler, webserver, and worker environments).
Distribution of your package can be handled by either installing directly from a GitHub repository,
$ python -m pip install git+https://github.com/...
or by using a pip package feed such as PyPI (or a private feed),
$ python -m pip install airflow_movielens
or by installing from a file-based location (as we initially did here). In the latter case, you do need to make sure that the Airflow environment can access the directory from which you want to install the package.
Summary
-
You can extend Airflow’s built-in functionality by building custom components that fit your specific use cases. In our experience, two use cases in which custom operators are particularly powerful are as follows:
- Running tasks on systems that are not natively supported by Airflow (e.g., new cloud services, databases, etc.)
- Providing operators/sensors/hooks for commonly performed operations, such that these are easy to implement by people in your team across DAGs
-
Of course, this is by no means an exhaustive list, and there may be many other situations in which you would want to build your own components.
-
Custom hooks allow you to interact with systems that do not have support built into Airflow.
-
Custom operators can be created to perform tasks that are specific to your workflows and are not covered by built-in operators.
-
Custom sensors allow you to build components for waiting on (external) events.
-
Code containing custom operators, hooks, sensors, and so on can be structured by implementing them in a (distributable) Python library.
-
Custom hooks/operators/sensors require you to install them with their dependencies on your Airflow cluster before they can be used. This can be tricky if you do not have permission to install software on the cluster or if you have software with conflicting dependencies.
-
Some people prefer to rely on generic operators such as the built-in
DockerOperatorand theKubernetesPodOperatorto execute their tasks. An advantage of this approach is that you can keep your Airflow installation lean, as Airflow is only coordinating containerized jobs; you can keep all dependencies of specific tasks with the container. We’ll focus on this approach further in a future chapter.
1.The code for the API is available in the code repository accompanying this book.
2.The API only goes back 30 days, so make sure to update the start/end date parameters to more recent dates than this example to get results.
3.An additional advantage of this implementation is that it is lazy: it will only fetch a new page when the records from the current page have been exhausted.
4.In Airflow 1, the constructor of the BaseHook class requires a source argument to be passed. Typically you can just pass source=None, as you won’t be using it anywhere.
5.We’ll show another package-based approach later in this chapter.
6.More in-depth discussions of Python packaging and different packaging approaches are outside the scope of this book and explained more elaborately in many Python books and/or online articles.
7.Technically the __init__.py file is no longer necessary with PEP420, but we like to be explicit.
8.See this blog for more details on src- versus non-src-based layouts: https://blog.ionelmc.ro/2014/05/25/ python-packaging/#the-structure.
9.For a full reference of parameters that you can pass to setuptools.setup, please refer to the setuptools documentation.