- Examining and configuring the RBAC interface for controlling access
- Granting access to a central set of users by connecting with an LDAP service
- Configuring a Fernet key to encrypt secrets in the database
- Securing traffic between your browser and the webserver
- Fetching secrets from a central secret management system
Given the nature of Airflow, a spider in the web orchestrating a series of tasks, it must connect with many systems and is therefore a desirable target to gain access to. To avoid unwanted access, in this chapter we discuss the security of Airflow. We cover various security-related use cases and elaborate on these with practical examples. Security is often seen as a topic of black magic, where the understanding of a plethora of technologies, abbreviations, and intricate details is deemed necessary. While this is not untrue, we wrote this chapter for readers with little security knowledge in mind, and hence highlight various key points to avoid unwanted actions on your Airflow installation, which should serve as a starting point.
13.1 Securing the Airflow web interface
Start the Airflow webserver by running airflow webserver and go to http://localhost:8080, where you will see a login screen (figure 13.1).

Figure 13.1 Home screen of the RBAC interface. Password authentication is enabled by default. No default user exists.
This is the first view of the RBAC interface. At this point, the webserver is asking for a username and password, but there are no users yet.
13.1.1 Adding users to the RBAC interface
We’ll create an account for a user named Bob Smith.
Listing 13.1 Registering a user for the RBAC interface
airflow users create
--role Admin                    ❶
--username bobsmith
--password topsecret            ❷
--email [email protected]
--firstname Bob
--lastname Smith
❶ Admin role grants all permissions to this user.
❷ Leave out the --password flag to prompt for a password.
This creates a user with a role named “Admin.” The RBAC model consists of users, which are assigned to a (single) role with permissions (certain operations) assigned to those roles, which apply to certain components of the webserver interface (figure 13.2).
![]()
Figure 13.2 RBAC permissions model
In listing 13.1, the user “bobsmith” was assigned the role “Admin.” Certain operations (e.g., edit) on certain components (such as menus and specific pages, e.g., “Connections”) can then be assigned to a role. For example, having the “can edit on ConnectionModelView” permission allows us to edit connections.
There are five default roles. The admin role grants all permissions, including access to the security view. However, think wisely about which role to grant a user in a production system.
At this point, we can sign in with username “bobsmith” and password “topsecret.” The main screen will look just like the original interface, but the top bar has a few new items, shown in figure 13.3.

Figure 13.3 Top bar displaying menu items depending on the role and corresponding permissions your user has been granted
The security view is the most interesting feature of the RBAC interface. Opening the menu displays several options (figure 13.4).

Figure 13.4 Options under the Security tab
Click List Roles to inspect all default roles (figure 13.5).

Figure 13.5 Default roles and corresponding permissions in Airflow. Several permissions are omitted for readability.
In the list roles view, we see the five roles available to use by default. The default permissions for these roles are given in table 13.1.
The just created “bobsmith” user was assigned the admin role, granting him all permissions (several permissions were omitted from figure 13.5 for readability). You might note the public role has no permissions. As the role name implies, all permissions attached to it are public (i.e., you do not have to be logged in). Say you want to allow people without an Airflow account to view the Docs menu (figure 13.6).
Table 13.1 Airflow RBAC interface default role permissions

Figure 13.6 Granting permissions to the public role makes components of the UI available to everybody.
To enable access to these components, we must edit the public role and add the correct permissions to it (figure 13.7).

Figure 13.7 Adding permissions to the public role
The permissions are quite fine-grained; access to every menu and menu item is controlled by a permission. For example, to make the Docs menu visible, we must add the “menu access on Docs” permission. And to make the Documentation menu item within the Docs menu visible, we must add the “menu access on Documentation” permission. Finding the correct permissions can be cumbersome at times. It is easiest to inspect the other roles to learn which permissions are available. Permissions are reflected by a string, which in most cases should be self-explanatory about the access it provides.
13.1.2 Configuring the RBAC interface
As noted, the RBAC interface is developed on top of the Flask-AppBuilder (FAB) framework. When you first run the RBAC webserver, you will find a file named webserver_config.py in $AIRFLOW_HOME. FAB can be configured with a file named config.py, but for clarity this same file was named webserver_config.py in Airflow. So, this file contains configuration to FAB, the underlying framework of Airflow’s RBAC interface.
You can provide your own configuration to the RBAC interface by placing a webserver_config.py file in $AIRFLOW_HOME. If Airflow cannot find the file, it will generate a default one for you. For all details and available options in this file, refer to the FAB documentation. It holds all configurations for the RBAC interface (not just those that are security-related). For example, to configure a theme for your Airflow RBAC interface, set APP_THEME = "sandstone.css" in webserver_config.py. View the FAB documentation for all available themes (figure 13.8).

Figure 13.8 RBAC interface configured with the sandstone theme
13.2 Encrypting data at rest
The RBAC interface requires users to exist in the database, with a username and password. This prevents random strangers “just looking around” from having access to Airflow, but is far from perfect. Before diving into encryption, let’s look back at Airflow’s basic architecture from figure 12.1.

Figure 13.9 The webserver and database expose a service and can offer a potential access path for uninvited guests to Airflow. Protecting these will lower the attack surface.
Airflow consists of several components. Every piece of software is a potential threat since it serves as a path through which uninvited guests can gain access to your systems (figure 13.9). Lowering the number of exposed entrance points (i.e., narrowing the attack surface) is therefore always a good idea. If you must expose a service for practical reasons, such as the Airflow webserver, always ensure it’s not accessible publicly.1
13.2.1 Creating a Fernet key
You also want your data to be secure after an intruder has managed to gain access. Before creating any users and passwords, ensure encryption is enabled on your Airflow. Without encryption, passwords (and other secrets such as connections) are stored unencrypted in the database. Anybody with access to the database can then also read the passwords. When encrypted, they are stored as a sequence of seemingly random characters, which is essentially useless. Airflow can encrypt and decrypt secrets using a so-called Fernet key (figure 13.10).

Figure 13.10 The Fernet key encrypts data before storing it in the database and decrypts data before reading it from the database. Without access to the Fernet key, passwords are useless to an intruder. One key for both encryption and decryption is called symmetric encryption.
The Fernet key is a secret string used for encryption and decryption. If this key is somehow lost, encrypted messages can no longer be decrypted. To provide Airflow with a Fernet key, we can generate one.
Listing 13.2 Creating a Fernet key
from cryptography.fernet import Fernet

fernet_key = Fernet.generate_key()
print(fernet_key.decode())
# YlCImzjge_TeZc7jPJ7Jz2pgOtb4yTssA1pVyqIADWg=
Then we can provide it to Airflow by setting the AIRFLOW__CORE__FERNET_KEY configuration item:
AIRFLOW__CORE__FERNET_KEY=YlCImzjge_TeZc7jPJ7Jz2pgOtb4yTssA1pVyqIADWg=
Airflow will now use the given key to encrypt and decrypt secrets such as connections, variables, and user passwords. Now we can create our first user and safely store their password. Keep this key safe and secret, since anybody with access to it will be able to decrypt secrets; plus, you will not be able to decrypt secrets if you ever lose it!
To avoid storing the Fernet key in plain text in an environment variable, you can configure Airflow to read the value from a Bash command (e.g., cat /path/to/secret) instead. The command itself can be set in an environment variable: AIRFLOW__CORE __FERNET_KEY_CMD=cat /path/to/secret. The file holding the secret value can then be made read-only to only the Airflow user.
13.3 Connecting with an LDAP service
As demonstrated in section 13.1, we can create and store users in Airflow itself. In most companies, however, there are typically existing systems in place for user management. Wouldn’t it be much more convenient to connect Airflow to such a user management system instead of managing your own set of users with yet another password?
A popular method for user management is via a service supporting the LDAP protocol (lightweight directory access protocol), such as Azure AD or OpenLDAP, which are called directory services.
NOTE Throughout this section, we will use the term LDAP service to indicate a directory service supporting queries via the LDAP protocol. A directory service is a storage system, typically used for storing information about resources such as users and services. LDAP is the protocol via which most of these directory services can be queried.
When Airflow is connected to an LDAP service, user information is fetched from the LDAP service in the background upon logging in (figure 13.11).

Figure 13.11 Users are stored in a directory service such as Azure AD or OpenLDAP, which can be accessed with LDAP. This way, a user is created only once and connects to all applications.
We first give a small introduction into LDAP and its corresponding technologies (section 13.3.1) and next demonstrate how to connect Airflow to an LDAP service (section 13.3.2).
13.3.1 Understanding LDAP
The relationship between SQL and a relational database (e.g., PostgreSQL or MySQL) is similar to the relationship between LDAP and a directory service (e.g., Azure AD or OpenLDAP). Just like a relational database stores data and SQL is used to query the data, a directory service also stores data (albeit in a different structure), and LDAP is used to query the directory service.
However, relational databases and directory services are built for different purposes: relational databases are designed for transactional use of any data you desire to store, while directory services are designed for high volumes of read operations, where the data follows a phonebook-like structure (e.g., employees in a company or devices within a building). For example, a relational database is more suitable for supporting a payment system since payments are made often and payment analysis involves different types of aggregation. A directory service, on the other hand, is more suitable for storing user accounts since these are requested often but usually do not change.
In a directory service, entities (e.g., users, printers, or network shares) are stored in a hierarchical structure named a directory information tree (DIT). Each entity is called an entry, where information is stored as key-value pairs named attributes and values. Also, each entry is uniquely identified by a distinguished name (DN). Visually, data in a directory service is represented like figure 13.12.

Figure 13.12 Information in a directory service is stored in a hierarchical structure named DIT. Entries represent an entity such as a person and hold key-value attributes about the entity.
You might wonder why we demonstrate this hierarchy and what the abbreviations dc, ou, and cn stand for. While a directory service is a database in which you can theoretically store any data, there are set LDAP requirements for how to store and structure data.2 One of the conventions is to start the tree with a so-called domain component (dc), which we see in figure 13.12 represented as dc=com and dc=apacheairflow. As the name suggests, these are components of the domain, so your company domain is split by the dots, for example apacheairflow and com.
Next we have ou=people and cn=bob. ou is short for organizational unit, and cn is short for common name. While nothing is telling you how to structure your DIT, these are commonly used components.
The LDAP standard defines various ObjectClasses, which define a certain entity together with certain keys. For example, the ObjectClass person defines a human being with keys such as sn (surname, required) and initials (optional). Because the LDAP standard defined such ObjectClasses, applications reading the LDAP service are certain to always find the surname of a person in the field named sn, and thus any application that can query an LDAP service knows where to find the desired information.
Now that we know the main components of a directory service and how information is stored inside, what exactly is LDAP and how does it connect with a directory service? Just like SQL provides certain statements such as SELECT, INSERT, UPDATE, and DELETE, the LDAP provides a set of operations on a directory service (table 13.2).
Table 13.2 Overview of LDAP operations
For only fetching user information, we will require the operations bind (to authenticate as a user with permissions to read users in the directory service), search (to search for a given DN), and unbind to close the connection.
A search query contains a set of filters, typically a DN selecting part of the DIT, plus several conditions the entries must meet, such as uid=bsmith. This is what any application querying an LDAP service does under the hood.3
Listing 13.3 Example LDAP searches
ldapsearch -b "dc=apacheairflow,dc=com"                   ❶
ldapsearch -b "dc=apacheairflow,dc=com" "(uid=bsmith)"    ❷
❶ This will list all entries under dc=apacheairflow,dc=com.
❷ This will list all entries under dc=apacheairflow,dc=com where uid=bsmith.
Applications communicating with an LDAP service will perform such searches to fetch and validate user information for authentication to the application.
13.3.2 Fetching users from an LDAP service
LDAP authentication is supported via FAB; therefore, we must configure it in webserver_config.py (in $AIRFLOW_HOME). When configured correctly and upon logging in, FAB will search the LDAP service for the given username and password.
Listing 13.4 Configuring LDAP synchronization in webserver_config.py
from flask_appbuilder.security.manager import AUTH_LDAP

AUTH_TYPE = AUTH_LDAP
AUTH_USER_REGISTRATION = True
AUTH_USER_REGISTRATION_ROLE = "User"                         ❶

AUTH_LDAP_SERVER = "ldap://openldap:389"
AUTH_LDAP_USE_TLS = False
AUTH_LDAP_SEARCH = "dc=apacheairflow,dc=com"                 ❷
AUTH_LDAP_BIND_USER = "cn=admin,dc=apacheairflow,dc=com"     ❸
AUTH_LDAP_BIND_PASSWORD = "admin"                            ❸
AUTH_LDAP_UID_FIELD = "uid"                                  ❹
❶ The default role assigned to any user logging in
❷ Section of the DIT to search for users
❸ User on the LDAP service to connect (bind) with and search
❹ Name of the field in LDAP service to search for username
If found, FAB will allow the found user access to the role configured by AUTH_USER _REGISTRATION_ROLE. At the time of writing, no feature exists to map LDAP groups to Airflow RBAC roles.4
With LDAP set up, you no longer have to manually create and maintain users in Airflow. All users are stored in the LDAP service, which is the only system in which user information will be stored, and all applications (including Airflow) will be able to verify user credentials in the LDAP service without having to maintain their own.
13.4 Encrypting traffic to the webserver
An intruder can obtain data at various places in your system. One of these places is during the transfer of data between two systems, also known as data in transit. A man-in-the-middle attack (MITM) is an attack where two systems or people communicate with each other, while a third person intercepts the communication, reading the message (potentially containing passwords and such), and forwarding it so that nobody notices the interception (figure 13.13).

Figure 13.13 A man-in-the-middle attack intercepts traffic between a user and the Airflow webserver. Traffic is read and forwarded so that the user does not notice the interception, while the attacker reads all traffic.
Having secrets intercepted by an unknown person is undesirable, so how do we secure Airflow such that data in transit is safe? The details about how a man-in-the-middle attack is performed are not in the scope of this book, but we will discuss how to mitigate the impact of a man-in-the-middle attack.
13.4.1 Understanding HTTPS
We can work with the Airflow webserver via a browser, which communicates with Airflow through the HTTP protocol (figure 13.14). To communicate with the Airflow webserver securely, we must do so over HTTPS (HTTP Secure). Before securing traffic to the webserver, let’s understand the difference between HTTP and HTTPS. If you already know this, you can skip to section 13.4.2.

Figure 13.14 With HTTP, the validity of the caller is not checked, and data is transmitted in plain text.
What is different with HTTPS? To understand how HTTPS works and what the private key and certificate are for, let’s first establish how HTTP works.
When browsing to an HTTP website, no checks are performed on either side (user’s browser or webserver) to verify the identity of the request. All modern browsers display a warning of the insecure connection (figure 13.15).

Figure 13.15 Navigating to http://example.com in Google Chrome will display “Not Secure” because HTTP traffic is unsecured.
Now that we know HTTP traffic is not secure, how does HTTPS traffic help us? First, from a user’s perspective, modern browsers will display a lock or something green to indicate a valid certificate (figure 13.16).

Figure 13.16 Navigating to an HTTPS website in Google Chrome displays a lock (if the certificate is valid) to indicate a secure connection.
When your browser and a webserver communicate over HTTPS, the initial handshake involves more steps to verify the validity of the remote side (figure 13.17).

Figure 13.17 At the start of an HTTPS session, the browser and webserver agree on a mutual session key to encrypt and decrypt traffic between the two.
The encryption used in HTTPS is TLS (transport layer security), which uses both asymmetric encryption and symmetric encryption. Whereas symmetric encryption applies a single key for both encryption and decryption, asymmetric encryption consists of two keys: public and private. The magic of asymmetric encryption is that data encrypted with the public key can only be decrypted with the private key (which only the webserver knows), and data encrypted with the private key can only be decrypted with the public key (figure 13.18).

Figure 13.18 Using symmetric encryption, a loss of the encryption key allows others to both encrypt and decrypt messages. With asymmetric encryption, a public key is shared with others, but a loss of the public key does not compromise security.
At the start of an HTTPS session, the webserver first returns the certificate, which is a file with a publicly shareable key. The browser returns a randomly generated session key to the webserver, encrypted with the public key. Only the private key can decrypt this message, which only the webserver should have access to. For this reason, it’s important to never share the private key; anybody with this key is able to decrypt the traffic.
13.4.2 Configuring a certificate for HTTPS
Airflow consists of various components, and you want to avoid attacks on and between all of them, regardless if they’re being used externally (e.g., exposed on a URL such as the webserver), or internally (e.g., traffic between the scheduler and database). Detecting and avoiding a man-in-the-middle attack can be difficult. However, it is straightforward to render the data useless to an attacker by encrypting the traffic.
By default, we communicate with Airflow over HTTP. When browsing to Airflow, we can tell if the traffic is encrypted by the URL: http(s):/ /localhost:8080. All HTTP traffic is transferred in plain text; a man-in-the-middle reading the traffic could intercept and read passwords as they’re transmitted. HTTPS traffic means data is encrypted on one end and decrypted on the other. A man-in-the-middle reading HTTPS traffic will be unable to interpret the data because it’s encrypted.
Let’s view how to secure the one public endpoint in Airflow: the webserver. You will need two items:
We will elaborate on what these items entail later. For now, it’s important to know the private key and certificate are both files provided by a certificate authority or a self-signed certificate (a certificate you generate yourself that is not signed by an official certificate authority).
Listing 13.5 Creating a self-signed certificate
openssl req
-x509
-newkey rsa:4096
-sha256
-nodes
-days 365                                          ❶
-keyout privatekey.pem                             ❷
-out certificate.pem                               ❸
-extensions san                                    ❹
-config                                            ❹
 <(echo "[req]";                                    ❹
   echo distinguished_name=req;                     ❹
   echo "[san]";                                    ❹
   echo subjectAltName=DNS:localhost,IP:127.0.0.1   ❹
   )                                               ❹
-subj "/CN=localhost"                               ❹
❶ Generate a key valid for one year.
❹ Most browsers require the SAN extension for security reasons.
Both the private key and certificate must be stored on a path available to Airflow, and Airflow must be run with the following:
-
AIRFLOW__WEBSERVER__WEB_SERVER_SSL_CERT=/path/to/certificate.pem
-
AIRFLOW__WEBSERVER__WEB_SERVER_SSL_KEY=/path/to/privatekey.pem
Start the webserver and you will see that http://localhost:8080 does not serve the webserver anymore. Instead, it is served on http://localhost:8080 (figure 13.19).

Figure 13.19 After providing a certificate and private key, the webserver is served on http://localhost:8080. Note that no official certificate can be issued for localhost; therefore, it must be self-signed. Self-signed certificates are by default untrusted, so you must add the certificate to your trusted certificates.
At this point, traffic between your browser and the Airflow webserver is encrypted. While the traffic can be intercepted by an attacker, it will be useless to them since it’s encrypted and thus unreadable. Only with the private key can the data be decrypted; that’s why it’s important to never share the private key and to keep it in a safe place.
When using the self-signed certificate, as generated in listing 13.5, you will initially receive a warning (Chrome displayed in figure 13.20).

Figure 13.20 Most browsers display warnings when using self-signed certificates because their validity cannot be checked.
Your computer holds a list of trusted certificates and their location, depending on your operating system. In most Linux systems, the trusted certificates are stored in /etc/ssl/certs. These certificates are provided with your operating system and agreed on by various authorities. These certificates enable you to go to https://www.google .com, receive Google’s certificate, and verify it in your pre-trusted list of certificates because Google’s certificate is shipped with your operating system.5 Whenever your browser is directed to a website that returns a certificate not in this list, your browser will display a warning, as is the case when using our self-signed certificate. Therefore, we must tell our computer to trust our generated certificate, knowing we generated it ourselves and therefore trust it.
How to tell your computer to trust a certificate differs based on the operating system used. For macOS, it involves opening Keychain Access and importing your certificate in the system keychain (figure 13.21).

Figure 13.21 Adding a self-signed certificate to the system certificates on macOS
After this, the certificate is known to the system but still not trusted. To trust it, we must explicitly trust SSL when encountering the self-signed certificate (figure 13.22).

Figure 13.22 Trusting SSL using the self-signed certificate enables trust between our computer and the Airflow webserver.
If you’re hosting Airflow on an address accessible by others (i.e., not localhost), everybody will have to go through the hassle of trusting the self-signed certificate. This is obviously undesirable; therefore, you issue certificates by a trusted authority that can be validated. For further reading, search the internet for “TLS certificate” (for purchasing a certificate), or “Let’s Encrypt” (for generating DNS-validated certificates, providing you with encryption).
13.5 Fetching credentials from secret management systems
Many companies apply a central secret storage system, enabling them to store secrets (passwords, certificates, keys, etc.) just once in one single system, and applications are able to request the secrets when needed without having to store their own. Examples include HashiCorp Vault, Azure Key Vault, AWS SSM, and GCP Secrets Manager. This avoids scattering secrets over various systems and instead keeps secrets all in a single system that is designed specifically for storing and managing secrets. Additionally, these systems provide features such as secret rotation and versioning, which you do not get in Airflow.
Secret values in Airflow can be stored in variables and connections. Wouldn’t it be convenient and secure to connect with one of these secret storage systems instead of having to copy-paste secrets into Airflow? In Airflow 1.10.10, a new feature was introduced named the Secrets Backend, which provides a mechanism to fetch secrets from external secret storage systems while still using the existing variable and connection classes.
At the time of this writing, AWS SSM, GCP Secret Manager, and HashiCorp Vault are supported. The secrets backend provides a generic class that can be subclassed to implement and connect with your own desired secret storage system. Let’s view an example using HashiCorp Vault.
Listing 13.6 Fetching connection details from a configured secrets backend
import airflow.utils.dates
from airflow.models import DAG
from airflow.providers.http.operators.http import SimpleHttpOperator
dag = DAG(
   dag_id="secretsbackend_with_vault",
   start_date=airflow.utils.dates.days_ago(1),
   schedule_interval=None,
)

call_api = SimpleHttpOperator(
   task_id="call_api",
   http_conn_id="secure_api",      ❶
   method="GET",
   endpoint="",
   log_response=True,
   dag=dag,
)
❶ Refers to the secret id in Vault
As you can see in listing 13.5, there is no explicit reference to HashiCorp Vault in your DAG code. The SimpleHttpOperator makes an HTTP request, in this case to the URL set in the connection. Before the existence of secrets backends, you’d save the URL in an Airflow connection. Now we can save it in (among others) HashiCorp Vault. There are a couple of things to point out when doing this:
-
Secrets backends must be configured with AIRFLOW__SECRETS__BACKEND and AIRFLOW__SECRETS__BACKEND_KWARGS.
The secret name is stored as a path (this applies to all secret managers), for example secret/connections/secure_api, where secret and connections can be seen as folders used for organization and secure_api is the name identifying the actual secret.
NOTE The “secret” prefix is specific to the Vault backend. Refer to the Airflow documentation for all details of your secret backend of choice.
The hierarchical organization of secrets in all secret management systems allows Airflow to provide a generic secrets backend to interface with such systems. In the “Secrets Engines” section in HashiCorp Vault, the secret would be stored as displayed in figure 13.23.
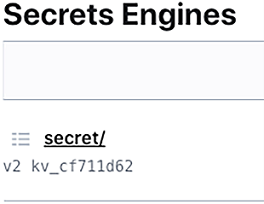
Figure 13.23 Secrets in Vault are stored in “Secrets Engines,” which can store secrets in various systems. By default, you get an engine named “secret” for storing key-value secrets.
Within a secret engine in Vault, we create a secret with the name connections/ secure_api. While the prefix “connections/” is not necessary, Airflow’s secrets backend takes a prefix under which it can search for secrets, which is convenient for searching within just one part of the secret hierarchy in Vault.
Storing an Airflow connection in any secret backend requires setting a key named conn_uri, which is the key Airflow will request (figure 13.24). The connection must be given in URI format. The URI will internally be passed to Airflow’s connection class, where the proper details are extracted from the URI.

Figure 13.24 Saving Airflow connection details in Vault requires setting a key: conn_uri.
Say we have an API running on hostname secure_api, port 5000, and it requires a header with the name “token” and the value “supersecret” for authentication. To be parsed into an Airflow connection, the API details must be stored in URI format, as displayed in figure 13.24: http://secure_api:5000?token=supersecret
In Airflow, we must set two configuration options to fetch the credentials. First, AIRFLOW__SECRETS__BACKEND must be set to the class reading the secrets:
-
HashiCorp Vault: airflow.providers.hashicorp.secrets.vault.VaultBackend
-
AWS SSM: airflow.providers.amazon.aws.secrets.systems_manager.Systems-ManagerParameterStoreBackend
-
GCP Secret Manager: airflow.providers.google.cloud.secrets.secrets_manager .CloudSecretsManagerBackend
Next, various details specific to the chosen secrets backend must be configured in AIRFLOW__SECRETS__BACKEND_KWARGS. Refer to the Airflow documentation for all details of all secret backends. Take, for example, BACKEND_KWARGS for Vault: {"url":"http:// vault:8200","token":"airflow","connections_path":"connections"}
Here, the "url" point to Vault’s URL, "token" refers to a token for authenticating against Vault, and "connections_path" refers to the prefix to query for all connections. In the Vault backend, the default prefix for all secrets (both connections and variables) is set to secret. As a result, the full search query given a conn_id, “secure_api,” becomes secret/connections/secure_api.
The secrets backend does not replace secrets stored in environment variables or the Airflow metastore. It’s an alternative location to store secrets. The order of fetching secrets becomes the following:
With a secret backend set up, we outsourced the storage and management of secret information into a system developed specifically for that purpose. Other systems can also connect to the secret management system so that you only store a secret value once, instead of distributing it over many systems, each with the potential for a breach. As a result, your attack surface becomes smaller.
Technically, the number of possibilities to breach into your systems are limitless. However, we’ve demonstrated various ways to secure data both inside and outside Airflow—all with the goal of limiting the number of options for an attacker and safeguarding against some of the most common ways attackers gain unwanted access. On a final note, ensure you keep up-to-date with Airflow releases, as these sometimes contain security fixes, closing bugs in older versions.
Summary
-
In general, security does not focus on one item but involves securing various levels of your application to limit the potential attack surface.
-
The RBAC interface features a role-based security mechanism to allow certain actions to the groups in which users are organized.
-
Interception of traffic between the client and the Airflow webserver can be made useless by applying TLS encryption.
-
Credentials in Airflow’s database can be made unreadable to an attacker by encrypting the secrets with a Fernet key.
-
A secret management system such as HashiCorp Vault can be used to store and manage secrets so that secrets are managed in one single location and shared only when needed with applications such as Airflow.
1.In any cloud, it’s easy to expose a service to the internet. Simple measures you can take to avoid this include not using an external IP address and/or blocking all traffic and allowlisting your IP range only.
2.The standards are defined in RFC 4510-4519.
3.ldapsearch requires installation of the ldap-utils package.
4.It is possible to manually edit the table ab_user_role in the metastore to assign a different role (after the first login).
5.Various technical details are omitted for clarity. Storing billions of trusted certificates for all websites is impractical. Instead, few certificates high up in the chain are stored on your computer. Certificates are issued by certain trusted authorities. Reading a certificate should enable your browser to find the certificate’s issuing authority, and their respective issuing authority, and again, until one of the certificates in the chain is found on your computer.