
"Make objects that talk—and then listen to them."
Paper documentation, animations, and movies are simply tools of communication on the road to launching a gestural system. The next essential step in that journey is prototyping, creating a version of the final product that can be tested and refined. Of course, as noted in Chapter 5, documenting can also follow prototyping; it just depends on your design process.
Prototypes come in many shapes and sizes, from crude paper mockups to prerelease versions of the actual product. The type of prototype you should design depends on the type of feedback you want from clients, team members, and any potential users.
Note
The more refined the prototype is, the more refined the response to it will likely be.
Oddly, refined feedback can be a bad thing. A high-fidelity, working prototype could engender lots of comments about the colors used or typefaces involved, not about the concept, features, gestures, and system flow, which may be what you really care about (and should care about in the early stages of prototyping).
Thus, you'll want to engage different types of prototypes to elicit the type of feedback you want.Initially, start with a low-fidelity prototype. It's much cheaper and less time-consuming to try out a concept on paper than in code or electronics!
One desired trait of prototypes, especially low-fidelity ones, is multiplicity. Plan to create more than one variation. Ideally, you will create several types of prototypes during the course of a project, each one becoming increasingly refined. Plan to throw away several!
Low-fidelity prototypes seem crude and unpolished, and in fact, they often are. They might be sketched on paper, or they might be digital but with limited functionality and a roughhewn look and feel.Low-fidelity prototypes frequently do not "work" in that the features and functionality of the system might need to be faked by a human agent, or they are otherwise static with no real interactivity at all. They are meant to be put together (and thrown away) quickly—in just enough time to test a concept.
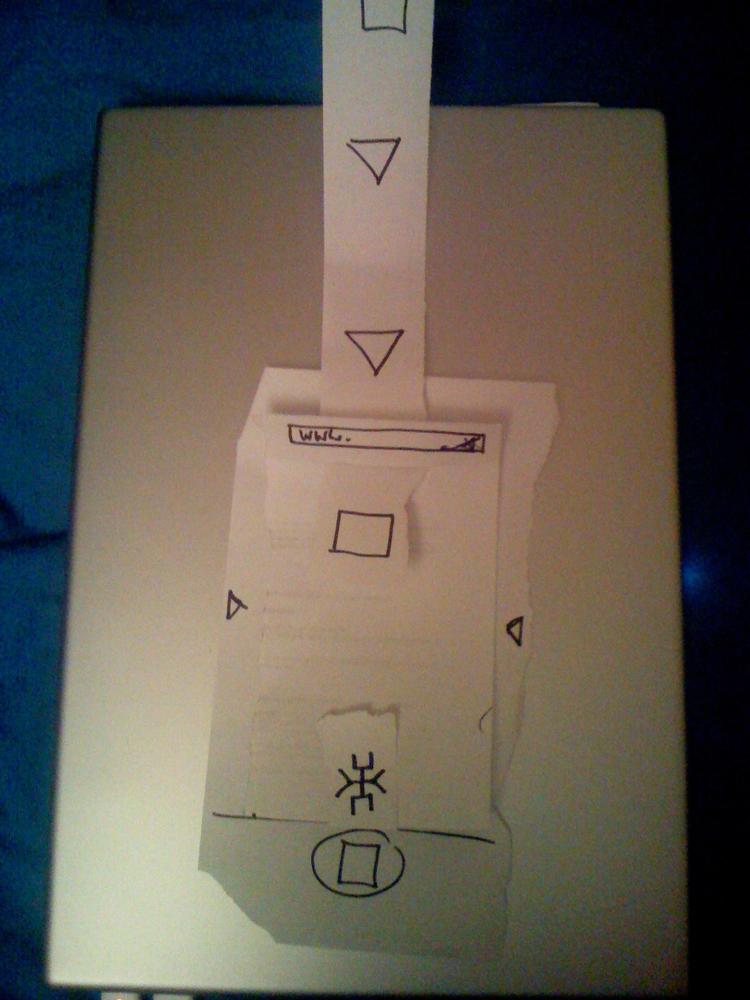
Figure 6-1. This prototype of the iPhone game Tilt went so far as to mimic the whole device using paper; someone demonstrated the game by sliding a strip of paper through the "phone." Courtesy Nicole Lazzaro and XEODesign, Inc.
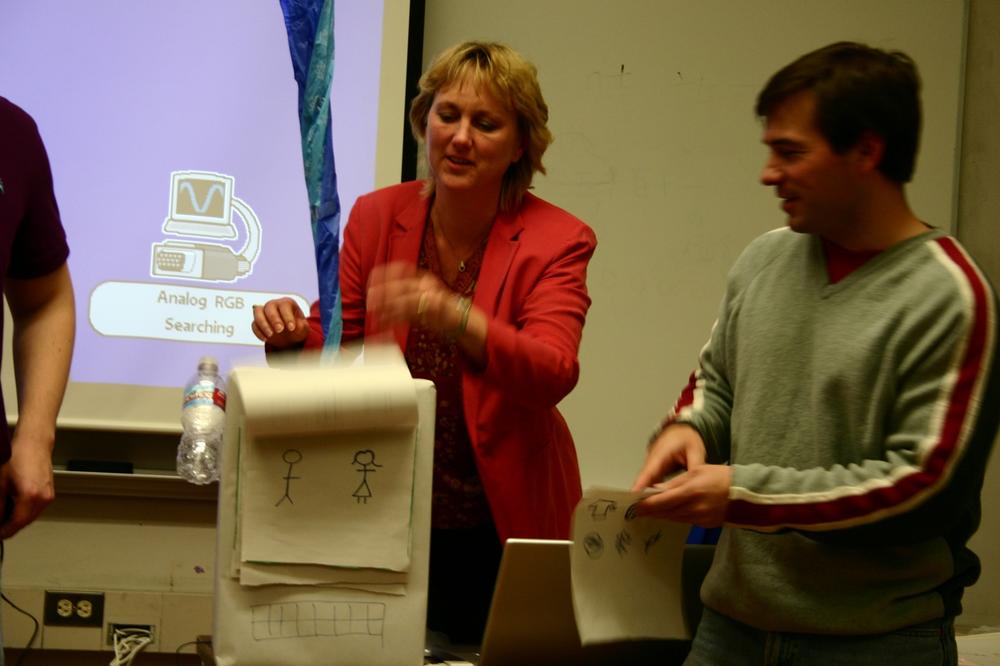
The simplest form of prototype are those made on paper. Some would argue that because there is no digital component to them, these aren't prototypes at all. But they do have value for testing a product's overall concept and flow, both with users and just with the product team alone.Because they aren't digital, they can be put together more quickly than any other type of prototype. Indeed, the most rapid and crudest forms of paper prototypes are those that are quickly sketched out on sheets of paper and placed into an order that the designers can manipulate manually, flipping pages as users walk through the experience of using the product.
Note
When possible, sketch to scale. It is easy to create impractical interfaces otherwise.
At this level of prototyping, both the designers and any test subjects should be focused on the product concept and general implementation, not on details. These prototypes are for roughing out the features and making sure users can perform the overall tasks and the accompanying gestures.
Note
Use paper prototypes to design and test the basic, high-level dconcepts, screen flows, and gestures of a product.
Of course, not everything with gestures is going to be screen-based; even if it is, it might be in a device that should be prototyped alongside it. Mobile and medical devices, as well as consumer electronics, should have their physical form prototyped whenever possible simply because there is more to the experience of using a device than just the screen itself. A device's physical form—especially when it is held in the hand—can drastically change both how it is used and the gestures that can be employed to engage with it.
![A rough model of a mobile device carved out of balsa wood. Designer Matt Jones once noted, "The mobile experience is different in your hand. The sooner you can get a [mobile] sketch onto a block of wood, the better."South by Southwest 2007 panel, "Mobile Application Design Challenges and Tips." Courtesy Cheryl Gach.](http://imgdetail.ebookreading.net/design/5/9780596156756/9780596156756__designing-gestural-interfaces__9780596156756__httpatomoreillycomsourceoreillyimages227055.png.jpg)
Figure 6-3. A rough model of a mobile device carved out of balsa wood. Designer Matt Jones once noted, "The mobile experience is different in your hand. The sooner you can get a [mobile] sketch onto a block of wood, the better."[35] Courtesy Cheryl Gach.
Rough physical models can be made of almost anything: wood, paper, cardboard, clay, plastic, or foam core, just to name a few materials. At this stage of prototyping, what is important is the beginning of form:a suggestion of size, shape, and weight. What are the dimensions? Is there a screen, and if so, how large is it? Where are the physical controls placed? Where are the sensors, and what sensors are necessary? A low-fidelity prototype can begin to answer all of these questions. The answers can considerably affect the gestures used to control the device: it might be too heavy (or too light) to be swung around. A physical control might get in the way of doing a swipe. The screen dimensions may limit gestures to simple taps. The list goes on.
Note
Use rough physical models to determine how the form of a device aligns with the gestures and behavior of the device.
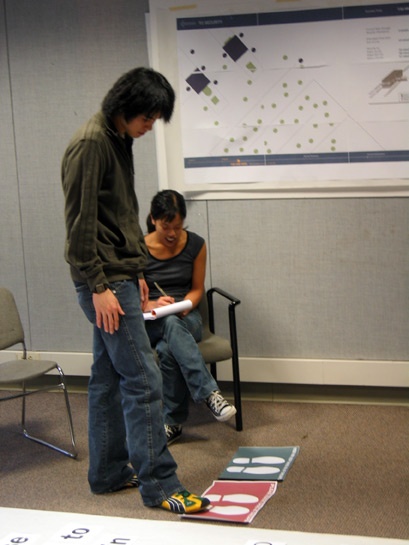
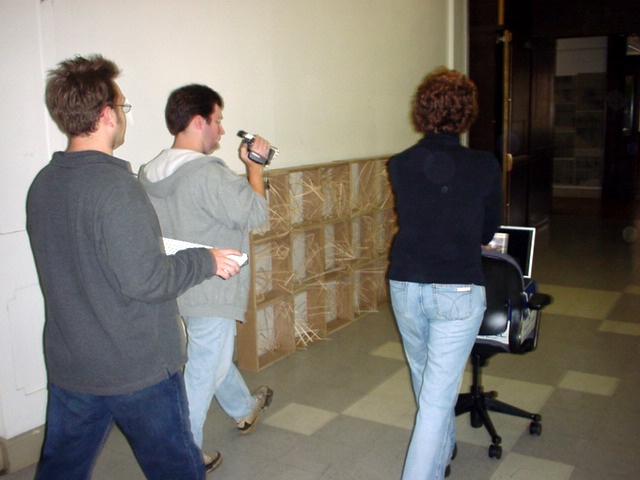
Figure 6-4. A test subject walks through a prototype of an airport security environment. The papers on the floor indicate sensors for detecting metal in shoes. Courtesy Phi-Hong Ha.
When designing free-form interactive gestures for an environmental system, the options for low-fidelity prototyping are limited. About the best you can do is combine some rough physical models (if necessary to create the locations of sensors and the objects the gestural system can control) with manual control of the objects in the environment—in other words, having a "man behind the curtain" (discussed shortly). Remote controls, other devices such as mobile phones, and even fishing wire can be used to manually control objects (or prototypes of objects).
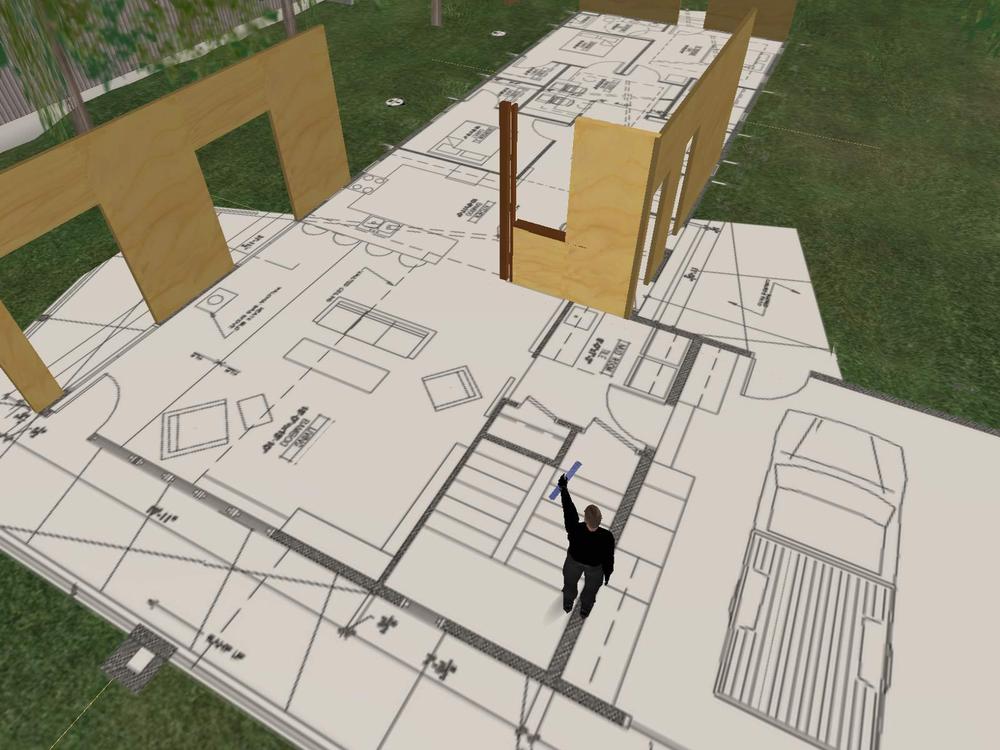
Figure 6-5. Crescendo Design uses Second Life to model physical spaces as part of its professional practice, to describe design ideas to long-distance clients. Courtesy Jon Brouchoud, Crescendo Design.
One alternative that some designers and architects are exploring to physically prototype spaces is to model environments in a virtual world, such as Second Life.[36] The cost in materials and physical space is obviously nil, and objects and interactions can be easily created and tweaked right in the virtual environment (or in other 3D software). One drawback is that gestures created by avatars can be primitive, and they certainly don't have the full range of motion of the human body, especially the hands; nor do virtual spaces provide the immersive testing environment that can bring an interactive system to life. Nevertheless, they can be a viable alternative for creating a rough model of an environment.
Since low-fidelity prototypes are, by nature, quickly put together and may be only somewhat interactive (if at all), they often require that someone control them to make them appear interactive. This someone—the "man behind the curtain" (named for the famous scene in the movie The Wizard of Oz: "Pay no attention to that man behind the curtain!")—can be hidden from sight or be out in the open, depending on how realistic the designers want the experience to be. (This technique is sometimes called the Wizard of Oz technique.)
Note
Employ a "man behind the curtain" to manipulate a low-fidelity prototype into seeming more interactive than it really is.
Obviously, with paper prototypes or rough physical models, no type of functionality can be controlled remotely; it all has to be done manually and in sight. But with a digital prototype, the "man behind the curtain" can literally be behind a curtain (or a one-way mirror), controlling a device that only seems interactive from another (hidden) location. As a user makes a gesture, the man behind the curtain triggers the system to respond as it normally would if the correct sensors, mechanics, and so on were in place. Voilà! An interactive, gestural system.
Man-behind-the-curtain functionality can save quite a bit of the time, effort, and money that it takes to prototype a working system, and it can also provide valuable feedback if you do decide to build a high-fidelity prototype.
Low-fidelity prototypes can tell you only so much. Once the general concepts, gestures, and flows have been prototyped with low-fidelity methods, it is time to focus on making a prototype that closely mimics the actual experience of the final product: a high-fidelity prototype. If low-fidelity prototypes are about testing concepts, high-fidelity prototypes are about refining those concepts, making sure that what looks good on paper still looks good once it is "alive." The difference between high- and low-fidelity prototypes is simply this: the high-fidelity prototype (mostly) works as it should. When a gesture is made, something happens that doesn't require a "man behind the curtain" or a designer to explain it. The system behaves as it would in the field.
Note
Use high-fidelity prototypes to test and refine the details of the gestural system.
Figure 6-7. With a high-fidelity prototype, you are able to test such things as legibility and ergonomics. Courtesy Stimulant.
As the name suggests, these prototypes require a more serious investment in time and resources to create. With high-fidelity prototypes, the idea is to design and test as many of the details as possible—in interaction, environmental, industrial, and visual design, as well as in engineering and code. Even though it occurs only occasionally, designers, developers, and engineers should strive to create high-fidelity prototypes that are nearly indistinguishable from the product a user would buy or encounter. The less the high-fidelity prototype seems like a prototype, the more accurate the feedback will be about the experience of using it. Users won't be thrown by, say, being handed a lump of wires, a sensor, and a battery and being told to imagine they are holding a kitchen appliance. With a high-fidelity prototype, the aesthetics matter.
Plumbing, however, does not matter. Prototypes should not be production- or manufacturing-ready (that would make them the actual products, not prototypes). They have to work just enough to, well, work. Prototypes, even high-fidelity ones, should be built to be thrown away eventually. Assuming that you can reuse code or engineering from a prototype leads to delays in prototype development and possibly even a lower-quality final product.
There are three types of high-fidelity prototypes, categorized by what it takes to build them: exact, off-the-shelf, and do-it-yourself. With an exact prototype, you have as the prototyping environment the exact device on which the software will run. This is obviously the best-case scenario, as you'll get the most accurate results with it and usually the hard work of constructing the device has already been done for you.
But when that device is unavailable or doesn't exist yet, you need to create it. Off-the-shelf (OTS) prototypes make use of existing hardware and software to build the prototype, whereas do-it-yourself(DIY) prototypes are handcrafted and require much more assembly and general know-how to manufacture. If you need a soldering iron to make it, it is definitely a DIY prototype. Most prototypes for touchscreens are now exact or OTS prototypes, whereas prototypes of free-form interactive gestures are mostly DIY prototypes.
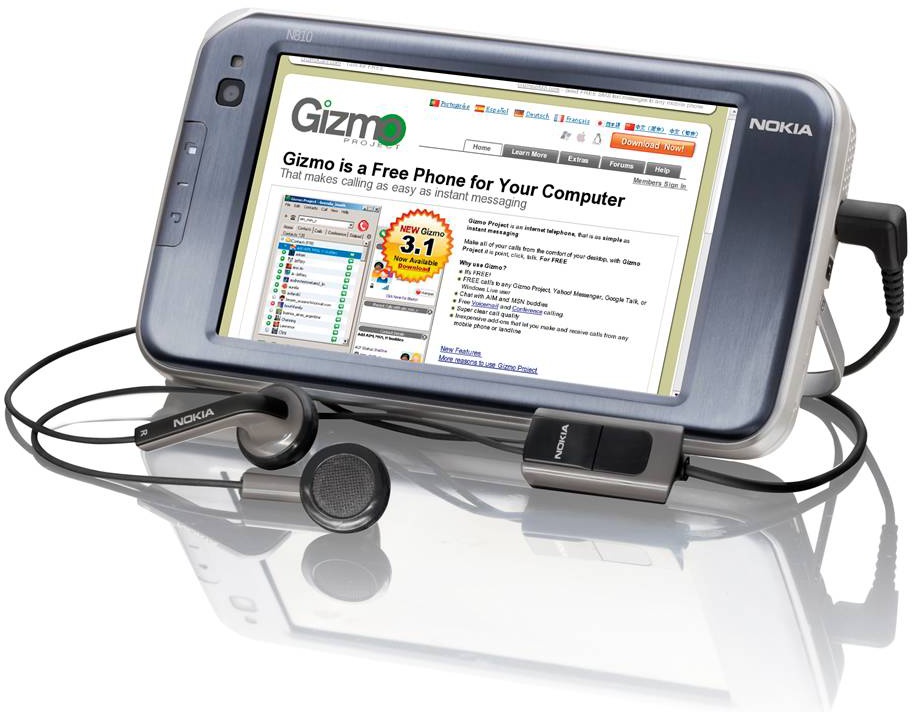
Exact prototypes are for when you are designing for an existing platform or known piece of hardware. If you are designing for an iPhone, Wii, Nokia late-model N series device, IBM touchscreen kiosk, and so forth, there is no reason not to use the existing and readily available hardware for a high-fidelity prototype. What you need to do is to acquire the necessary drivers, manuals, or APIs to put your code onto the device (and to know what programming languages it supports in the first place).
Even though it is easier than creating a device from scratch, creating an exact prototype can still be quite difficult and time-consuming because you are forced to develop for a specific environment—one with which you may not be very familiar. You may even have to partner with an outside developer who has a particular expertise if you or your team doesn't know the necessary language. For example, mobile devices require specialized expertise in programming frameworks such as J2ME, .NET Mobile, S60, and the iPhone SDK.
All device manufacturers help developers and designers by providing documentation. In addition to basic documentation, some companies provide software development kits (SDKs). An SDK is a set of software tools and possibly hardware that facilitate the creation of applications for a device. You will find that although some manufacturers provide an SDK free of charge, many companies charge (sometimes a lot) for their SDKs.
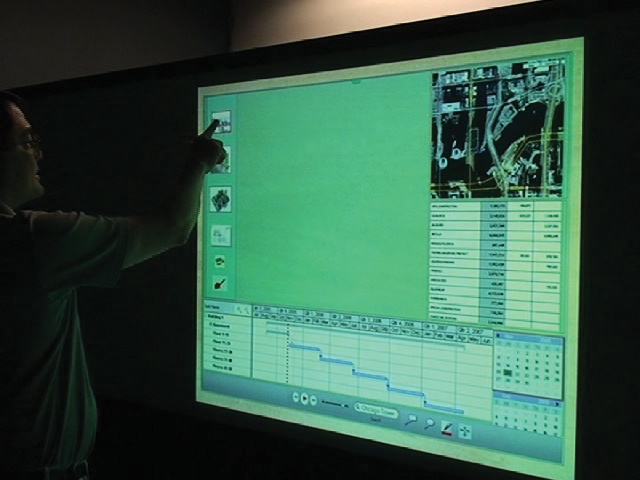
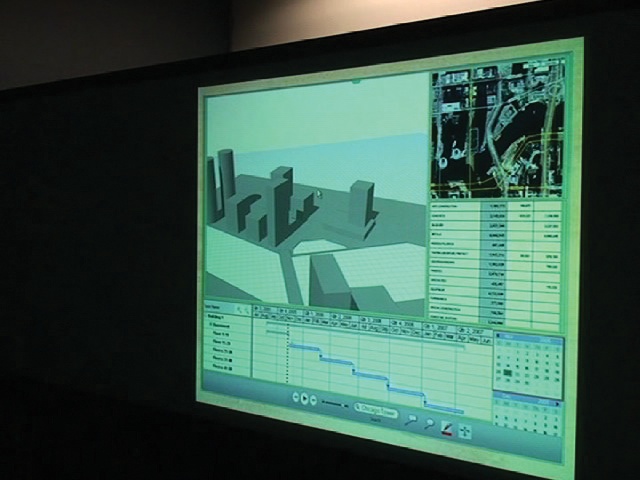
Figure 6-8. Autodesk Labs prototyping a version of its software on a Perceptive Pixel multitouch wall. Courtesy Doug Look, Scott Sheppard, and Autodesk.
It gets trickier when the device or environment is not an established platform or doesn't yet exist. Then you have to resort to OTS or DIY prototypes.
Whenever possible, OTS prototypes are suggested rather than DIY prototypes, simply because it is often easier to recycle existing parts than it is to build your own from scratch. For instance, it is easier to buy a similar device and repurpose it than to build an exact device. In many cases, good enough is good enough. If the form, screen size and resolution, controls, and sensors can be near the final version, that should be enough. If they are not, you can resort to a DIY prototype (discussed shortly).
Most OTS prototypes will require that you somehow get your code onto the hardware. To do this—and before you start coding!—make sure you have the correct developer kit and documentation so that you don't create, say, a prototype coded in ActionScript when the device doesn't support it.
The resources for OTS prototypes vary based on the type of gestural system you are designing.
Touchscreens and interactive surfaces. As touchscreens become increasingly ubiquitous, it is becoming easier to prototype for them. A wide variety of vendors now sell touchscreens and utilities to simulate touchscreen behavior specifically for prototyping.
As noted earlier, the best-case scenario for all prototyping is to prototype on the exact device on which the product will be used, and for touchscreens, this should often be the case. Seldom will you be creating your own touchscreen or will you need to. If you don't have access to the actual device(s), the next best thing is to simply acquire a touchscreen of a similar size. Many vendors (see PROTOTYPING RESOURCES, later in this chapter) now sell touchscreens or what are called overlays. Touchscreen overlays are devices that plug into a USB port and fit over existing monitors, turning them into de facto touchscreens. Tablet PCs can also be used to imitate touchscreens, with a stylus substituting for a user's finger.
Figure 6-9. A NextWindow touchscreen overlay being installed over a large monitor. Courtesy NextWindow USA.
For very small touchscreens on devices or consumer electronics, or for oddly shaped touchscreens, it is considerably easier to use a larger touchscreen and disable or physically mask (using paper, cardboard, foam core, etc.) the unused area on the touchscreen than it is to find a touchscreen that is of a small or unusual size. One exception to this is the OneTouch kit from touchscreen manufacturer Synaptics, which contains a small device-size touchscreen for prototyping.
Figure 6-10. A small table with a clear top, Cubit is a multitouch surface, powered by a webcam with an infrared filter, projector, and laptop running open source software. Cubit can be assembled for a fraction of the cost of other large touchscreens. Courtesy NOR_/D.
Devices. Several device platforms are open for development of gestural interfaces. Designers can use these platforms to simulate other devices that aren't yet available, or (because of their small size) mount them inside other physical shells to act as the gestural interface for a larger device, such as a kitchen appliance or piece of stereo equipment.
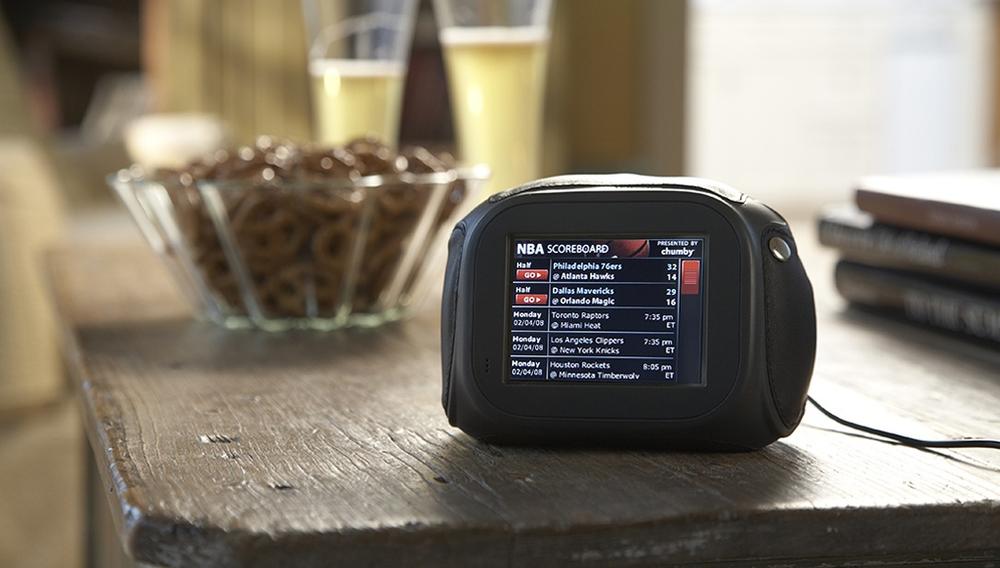
Figure 6-11. The Chumby touchscreen device is open for development by design. Its touchscreen and even physical form are easily modified for use. Courtesy Chumby Industries.
For prototyping environments, DIY prototypes are nearly the only way to go. A DIY prototype typically requires knowledge of electronics and coding to build, as it is often a pieced-together electrical system of sensors and motors surrounding a microprocessor. Usually in a DIY prototype, the designer or engineer has to create an electronic device using a stripboard (trade name Veroboard) or a breadboard to create an electrically correct circuit, but one that is not physically identical to the final product (which will likely have just a manufactured circuit board). Sensors, batteries, microprocessors, and servo-mechanical motors can all be attached to these boards to create a working prototype of an electrical device that can detect and respond to gestures.
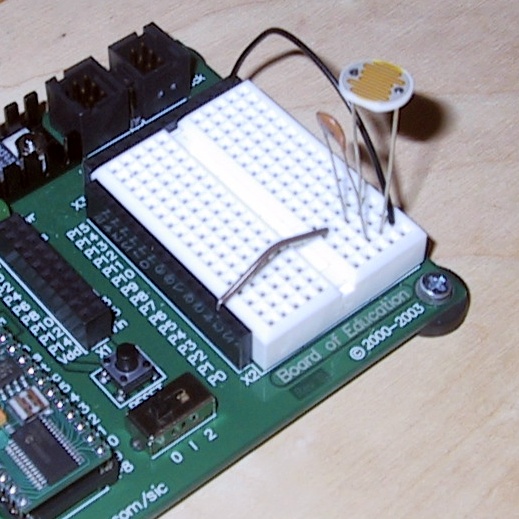
Figure 6-14. A photoresistor plugged into a breadboard. Some breadboards, such as this one, come with microprocessors already attached and ready to accept code. Courtesy Carl DiSalvo.
Of course, no one expects designers and engineers to be building their own sensors, microprocessors, and the like. Many vendors sell these items in kits or as standalone parts for building just these sorts of prototypes. A list of these vendors is available at the end of this chapter.
Physical computing. DIY gestural prototypes are in the realm of what is known as physical computing. It is beyond the scope of this book to go into too much detail about the particulars of how to engage with all the disciplines that make up physical computing, such as electronics, but there are many fine books on the subject (see the end of this chapter for recommended reading).
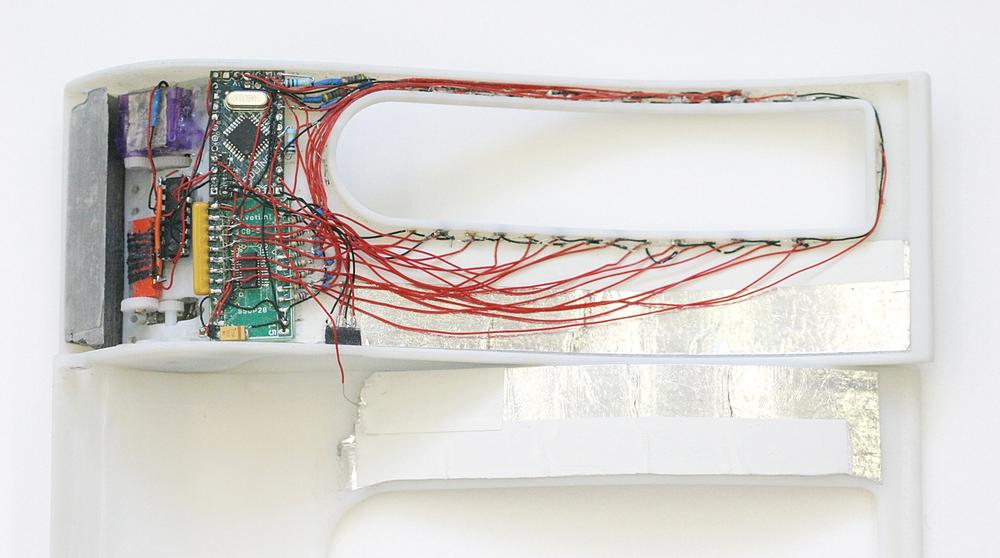
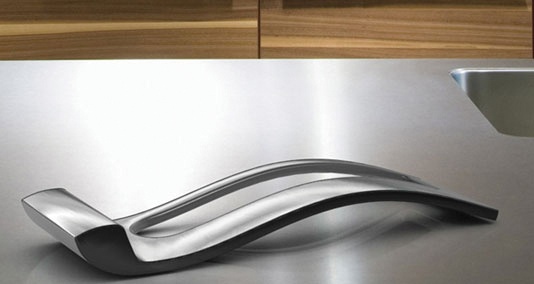
Figure 6-15. This DIY prototype of a touchless remote control was built by Joris Van Gelder for Bang & Olufsen. With the device, which was designed for use in kitchens where hands might be messy, users slide a finger into the open center slot to control their televisions. Courtesy Joris Van Gelder.
Seven disciplines make up physical computing (and thus, DIY prototypes):
- Electronics
For powering the parts of the device. Electronics form the connections between a power source (e.g., a battery), the microprocessor, any sensors, and any motors to power physical objects.
- Mechanics
For any mechanical motors that may be part of the system. These can often be purchased cheaply, although they may require some tinkering to fit into the physical environment or connect to nonmotorized parts.
- Coding
To control and monitor the overall system. Code can either live on a host PC and be delivered through a USB cable or be put on a microprocessor as part of the device. Code can be many types of programming and scripting languages depending on the platform. The most common are ActionScript, C++, Processing, Max/MSP, and Java.
- Interaction design
To determine the feedback and effects of the system based on human behavior.
- Visual design
To craft any visual feedback on a screen or projected into the environment.
- Sound design
To craft any audible feedback.
- Industrial design
To create the form in which all the mechanics are housed. This is done manually, or a 3D rendering is turned into a model.
If that sounds like a lot, that's because it is. Creating a DIY prototype is very much like creating from parts a piece of consumer electronics without an instruction manual—because that is exactly what you're doing! Of course, you can leave out some of these steps (visual, industrial, or sound design), but the result is going to be something between a high- and low-fidelity prototype—something that works, but simply doesn't look finished.
This list also doesn't include installation, which can be challenging as well: mounting sensors, projectors, displays, and other hardware.
Designers should not be daunted by this challenge, however. Many excellent kits and code samples exist (see PHYSICAL COMPUTING RESOURCES later in this chapter) to help beginners design and build their first DIY prototypes.
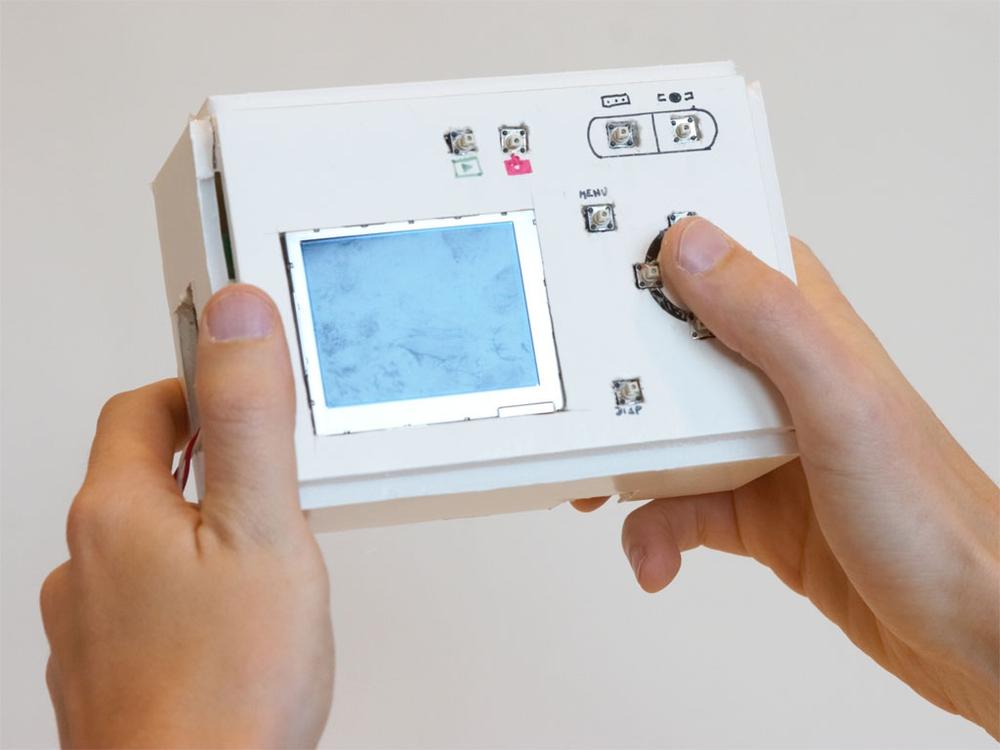
Figure 6-16. A digital camera prototype built with d.Tools. d.Tools provides Plug-and-Play prototyping of hardware components by making each component smart (adding a dedicated microcontroller)and then networking the components together. Courtesy Björn Hartmann.
One such resource is William Turkel's collection of Physical Computing Cards,[37] which help newcomers to physical computing map out systems. Each card shows a picture of a device or sensor and has symbols along the sides that indicate how it could be combined with other components. In this way, a designer can model a system before ever plugging anything in or writing a line of code.
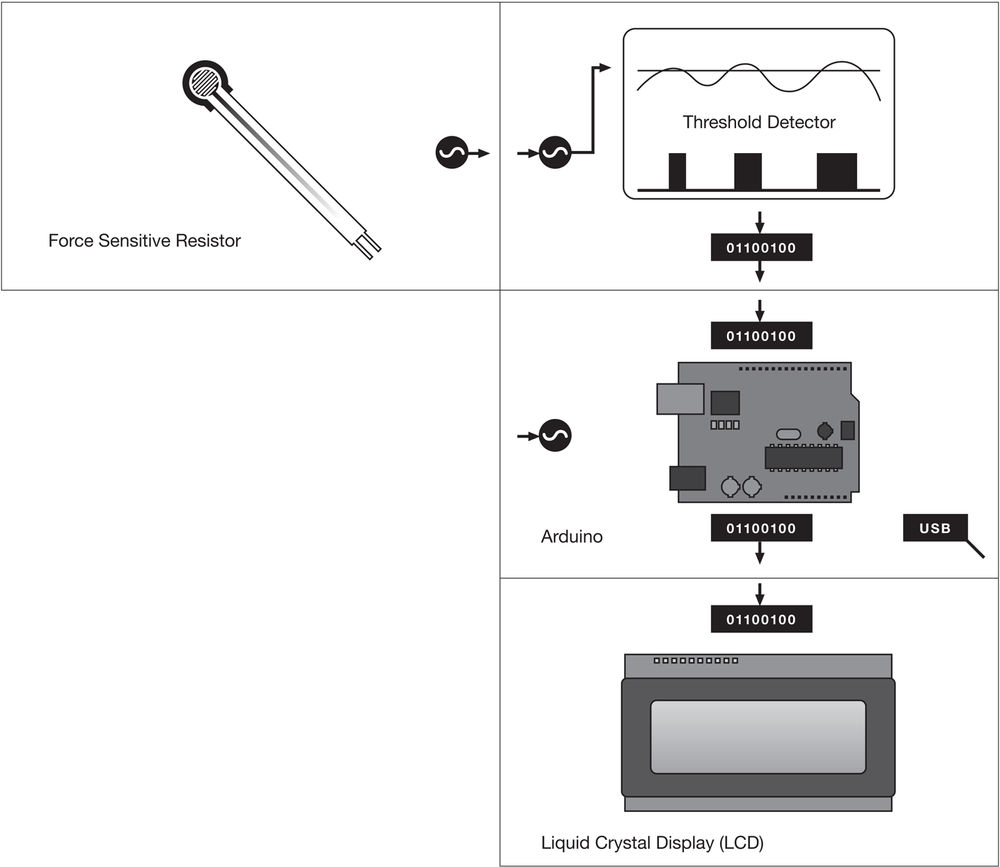
Figure 6-17. An example of the Physical Computing Cards in action. If you wanted a museum exhibit to sense the presence of a viewer, try to figure out whether the viewer was a child or an adult, and adjust the wording of the artifact captions accordingly, you could use force-sensitive resistors hidden in a floor mat to determine the person's weight and establish one or more thresholds to set an appropriate caption, which would then be displayed on an LCD. Based on cards by William Turkel.
Once you have a gesture in mind, how do you go about figuring out which sensor (or device with built-in sensors) you need to capture it?
If your gesture involves hands-on touching, a number of touchscreen technologies are available (see Chapter 1). If you need single touches (taps, swipes, etc.) on a small surface (anything less than a standard sheet of paper, say), any of the touchscreen types should suffice, although capacitive seems to be the standard. (See PROTOTYPING RESOURCES, later in this chapter, for purchasing information.)
For larger, multitouch surfaces, two common technologies are frustrated total internal reflection (FTIR) and diffused illumination (DI); see Chapter 1 for descriptions of each. If you only need reliable finger recognition, FTIR is likely the best choice, and unlike DI, it doesn't require a closed box. Front DI, although the simplest to build, can be used only if you have control of the outside environment, as the infrared light needs to be projected onto the surface from the front. You should use rear DI if you need object recognition or the ability to hover over the surface.
If you need to detect proximity, you can employ a number of sensors, depending on the environment and your budget. You can use a simple infrared or laser tripwire in fixed spaces; when something breaks the tripwire, proximity is detected. More portable and able to be employed in multiple places is a fixed camera (mounted on the front of the device, say). The system compares the current image with a reference image and simply counts the number of different pixels. If enough pixels are different, something is likely in front of the camera. You also can use microphones to detect presence, although they are less reliable, especially in loud environments. Passive infrared (PIR)sensors can detect body heat and thus the presence of a person nearby (often within a 20-foot range). You also can use pressure to detect presence, requiring a pressure sensor to be placed on the ground or on a seat.
For detecting motion near a device, ultrasonic sensors can send out pulses and measure the reflection off a moving object. Microwave sensors send out microwave pulses and measure any reflection off a moving object. Pressure sensors can also detect someone walking around or near a device.
For detecting a device's motion, accelerometers (often combined with gyroscopes) need to be attached to the device.
For detecting facial expressions, you need to use a camera mounted at the average head height or built into the screen where the user will be looking.
Sensing gestures with the hands or arms requires either a camera (sometimes multiple cameras at different angles to capture depth), a special device such as gloves, or an object such as a Wiimote with built-in accelerometers (for speed and/or pitch), gyroscopes (for angle/pitch), and some method of detecting actual position in space (if necessary).
To determine exactly where someone (or an object or a part of someone, such as a hand) is in space either involves that object sending out a signal (such as an infrared beam) that the system can detect and use to pinpoint location in relation to (or at least distance from) the sensor (such as an infrared camera); or involves having multiple cameras (two for triangulation, three for trilateration) to determine location based on where motion is occurring in relation to the cameras.
Once you have a prototype, the next likely thing to do with it is to test it with potential users. It is particularly important with gestural interfaces that you find representative potential users on whom to test the prototype, because a gesture that works fine with an office of technically savvy, educated, and healthy people may not work well when exposed to the harsh light of the public or a specific user group. Many research firms will help you find research subjects if needed.
Because the use of sensors and the data from them can change based on environment, if you are creating a free-form gestural interface, it makes sense to test your product in the actual environment (or in a set of potential environments) to make sure that the sensors and any other hardware, such as projectors, are calibrated and set up correctly and that the data coming in from the sensors is triggering the system correctly.
You'll want to put together a test plan—a written path through your product to test—and a moderator script—what to say when guiding people through the plan—that make sure your gestures are discoverable ("What would you do if you wanted to do X?"), meaningful ("Would you ever do that?"), useful ("Are you able to do what you wanted to do?"), and usable ("Can you do that action?").
Several test subjects(typically less than 10) will usually quickly reveal the flaws of your product. If possible, you should leave yourself time between testing sessions to recalibrate sensors or adjust any code. You don't want a set of test subjects constantly stumbling over a minor technical error that can be easily adjusted.
The following is an unpaid (and hopefully unbiased) list of vendors that can help you create high-fidelity prototypes.
GestureTek (http://www.gesturetek.com) has a wide range of products, from surfaces to displays.
Mass Multimedia, Inc. (http://www.touchscreens.com) is a source for touchscreens, touchscreen overlays, and software.
NextWindow (http://www.nextwindow.com) sells large-scale touchscreens and touchscreen overlays for displays up to 120 inches.
Synaptics (http://www.synaptics.com) has a developer toolkit and software for its OneTouch touchscreens.
Cubit (http://nortd.com/cubit/) is an open source project and accompanying kit for creating a large, Microsoft Surface-like multitouch table.
Toradex (http://www.toradex.com) sells motors and USB sensors that are useful in prototyping physical environments.
SparkFun Electronics (http://www.sparkfun.com) sells all kinds of sensors, tools, and components for DIY prototypes.
Infusion Systems (http://infusionsystems.com/catalog/) has lots of environmental and human sensors as well as software as part of its I-CubeX product line for making prototypes.
MakingThings (http://www.makingthings.com/) has a full line of tools, sensors, motors, and software around its Make Controller. Good for beginners.
AlphaPrototypes (http://www.alphaprototypes.com/) will make plastic prototypes from 3D CAD drawings.
d.Tools (http://hci.stanford.edu/dtools/)is a hardware and software system for rapid prototyping.
Exemplar (http://hci.stanford.edu/exemplar/)is open source software that takes some of the pain out of programming gestures. Works with d.Tools.
Arduino (http://www.arduino.cc/)is an open source electronics prototyping platform based on flexible, easy-to-use hardware and software. It's intended for designers to create interactive objects or environments.
Ponoko (http://www.ponoko.com) is a service for making plastic or metal objects from 3D CAD files.
Protocafe (http://www.protocafe.com/) will make or finish models and will even provide CAD services from drawings.
With the gestural interface now designed and prototyped, how do we communicate to users how to use gestures to control it? After all, the gestural system may be nearly invisible, with sensors tucked away in an environment or piece of equipment. A touchscreen may have no visible controls at all and may appear to be just a blank, dark piece of plastic and metal. Engaging users to use and explore interactive gestures is the subject of the next chapter.
Analog In, Digital Out: Brendan Dawes on Interaction Design, Brendan Dawes (New Riders Press)
Art & Fear: Observations on the Perils (and Rewards) of Artmaking, David Bayles and Ted Orland (Image Continuum Press)
Physical Computing: Sensing and Controlling the Physical World with Computers, Tom Igoe and Dan O'Sullivan (Course Technology PTR)
Making Things Talk: Practical Methods for Connecting Physical Objects, Tom Igoe (Make Books)
Getting Started in Electronics, Forrest M. Mims III(Master Publishing, Inc.)
Paper Prototyping: The Fast and Easy Way to Design and Refine User Interfaces, Carolyn Synder (Morgan Kaufmann)
[35] South by Southwest 2007 panel, "Mobile Application Design Challenges and Tips."
[36] For more information, see The Arch, a blog by Jon Brouchoud at http://archsl.wordpress.com/.
[37] You can download the collection at http://digitalhistory.uwo.ca/dhh/images/physcomp-cards-01-04.pdf.