
Custom Brushes
Sky Machina
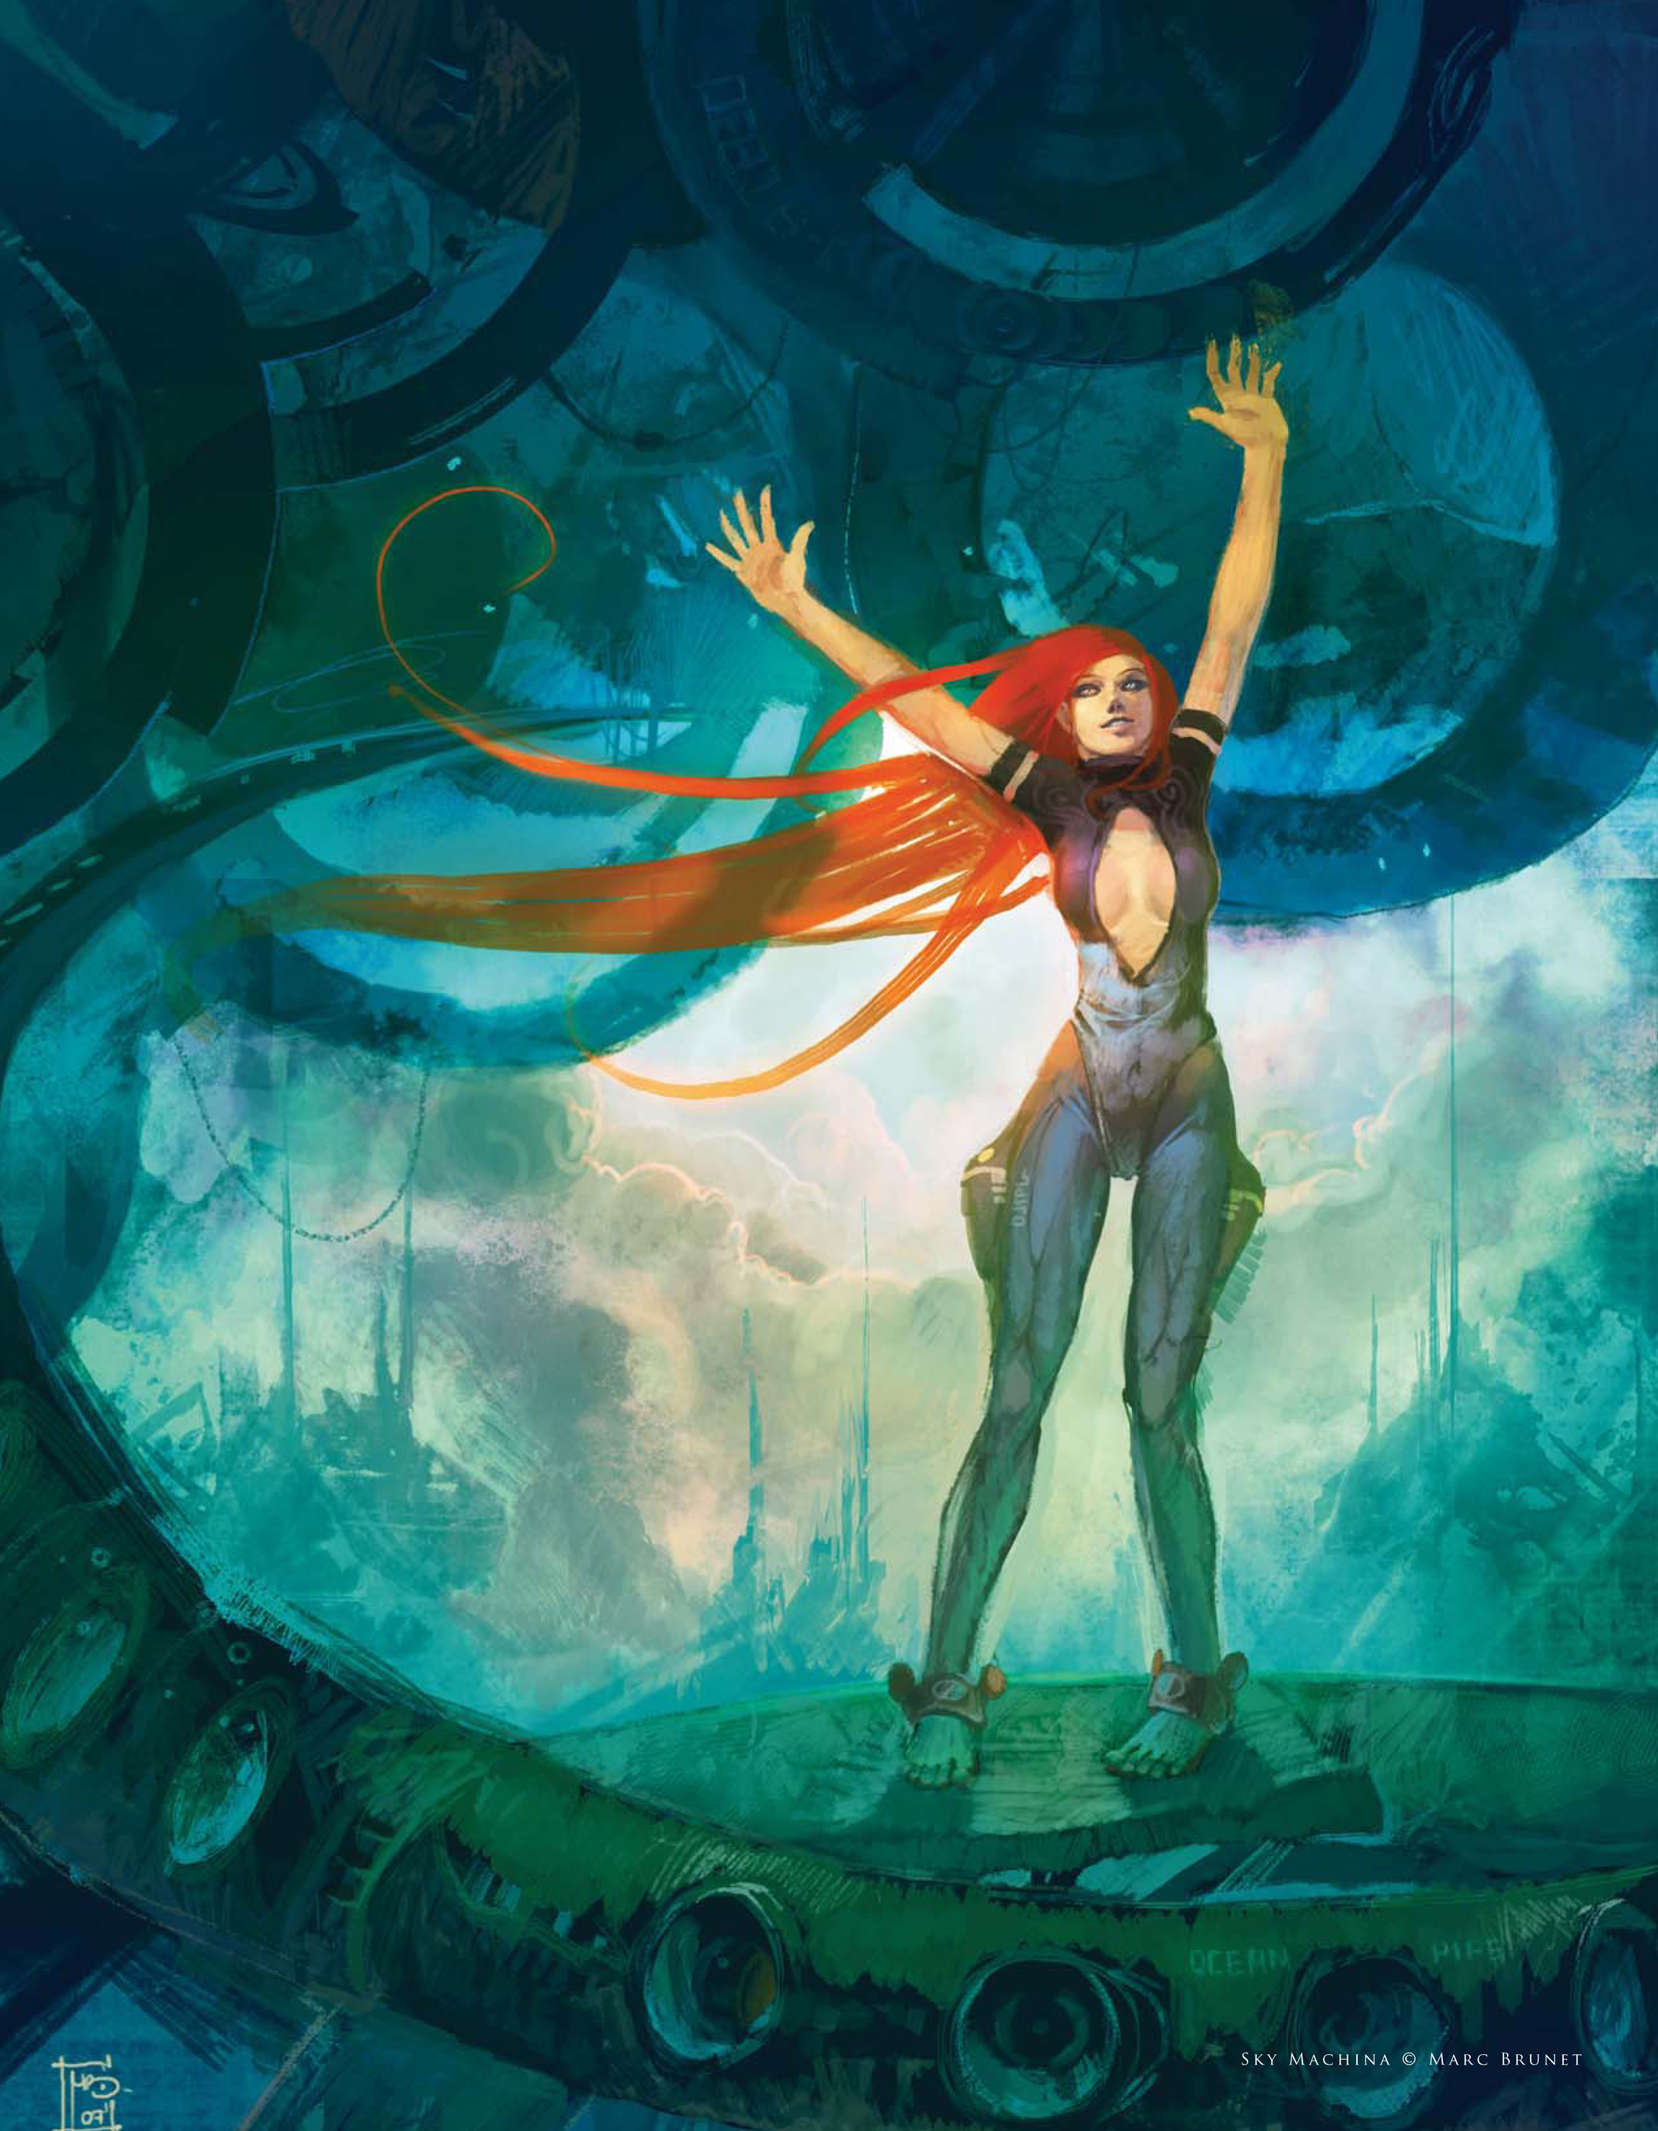
© Marc Brunet
Any artist will tell you that the link between their thoughts and ideas and the actual paintings they produce are the tools they wield. From a traditional standpoint these have been the canvas and in particular the brushes. These are no less important in a digital context; the increasing array of brushes available and the freedom to create customized versions is paramount to the quality of digital painting today. This chapter provides an insight into the value of using custom brushes, and shows how they can be created from scratch and tailored to suit your subject matter.
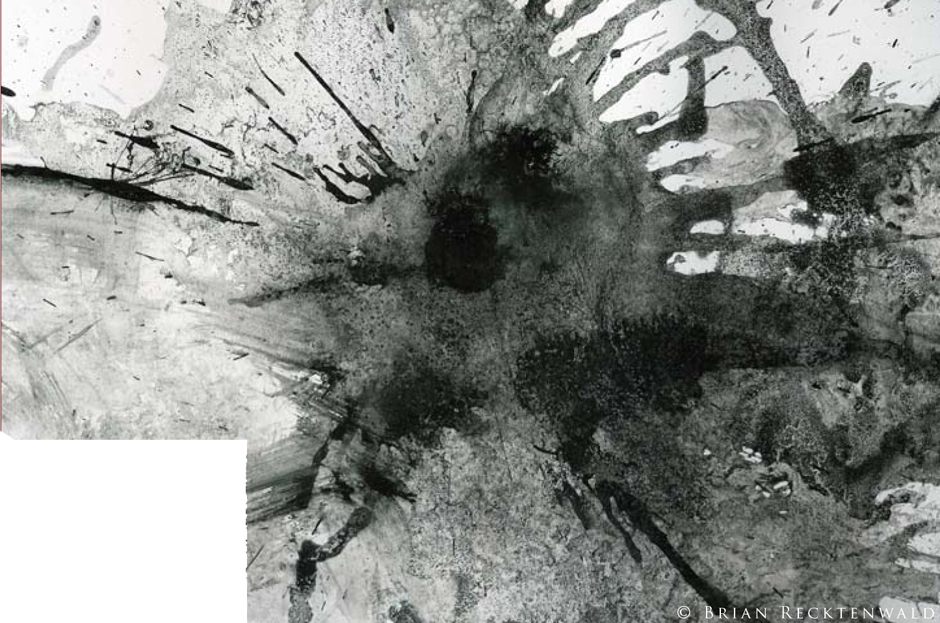
© Brian Recktenwald
ORGANIC CUSTOM BRUSHES FROM INK, WATER AND SALT EXPERIMENTS
INTRODUCTION
Like a lot of other digital artists out there, creating custom brushes is not only a key step in creating the art, but a heck of a lot of fun all in itself! The default Photoshop brushes are quite awesome, and I use them frequently, especially in the blocking phase, but I always end up integrating one or two custom brushes as well, for control and a personal touch. I’ve created custom brushes from just about anything I can find, including pictures, textures, doodles and digital scribbles. But my preference is to add an organic feel to my brushes, so 90 percent of my custom brushes come from high-resolution scans made up of crazy experiments with ink, water and salt on drawing paper (Fig.01).
© Brian Recktenwald
STEP 01
Here I pull different selections from the scanned image and mess with them using Levels and Filters and painting over them with other brushes until I get an ideal base image for a new custom brush (Fig.02).
© Brian Recktenwald
STEP 02
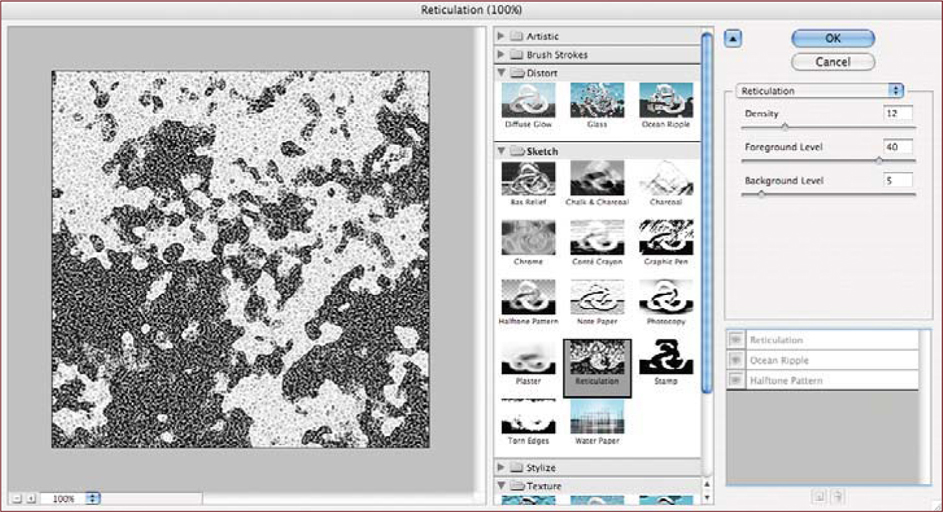
In this example, I’m going to create a brush for use with the Smudge tool. I want a more stippled pattern, like a dry brush would give, to help add texture as I blend. After bringing contrast into the image by clamping the Levels, I begin experimenting with some filters to further pronounce the shapes (Fig.03).
Step 03
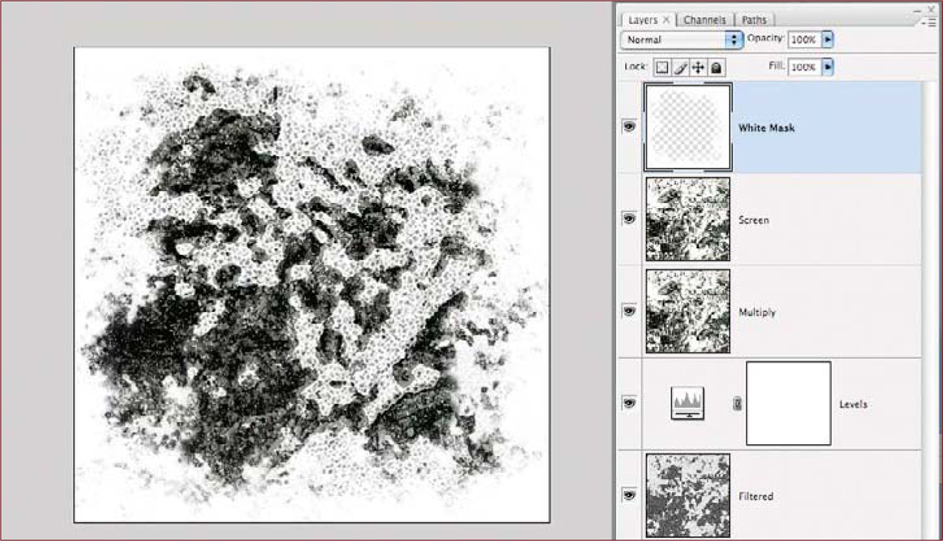
Then I duplicate the original texture a few times and place them on top of the filtered version. Finally, I play with different blending modes until there’s a good texture/shape balance (Fig.04).
Step 04
Once I have my base brush, I flatten my layers and possibly resize the image. It’s better to save your brush at the highest native resolution possible. However, the higher you go, the slower the drawing performance. To save this image off as a brush, go to Edit > Define Brush Preset, and hit OK after giving it an appropriate name (Fig.05). Now you can access this brush at any time in the Brushes window.

Step 05
It’s now time to set up the Smudge tool brush settings for use with our new brush. We’ll be able to pull a lot of mileage from this brush simply by adjusting the Shape Dynamics, Scattering, and Other Dynamics settings, without having to swap out a new brush image. Another important value to adjust and tinker with as you go is the Strength setting. An example of this brush in action starts with a canvas of broad brush strokes (a default round brush with Strength and Hardness of 100) and then a Cutout filter applied (Fig.06).

Step 06
I now select the Smudge tool and load our new brush image (Fig.07). For rapid, first pass blending I want speed and spread ability, so at this stage I’ll use a smaller brush size with just the Shape Dynamics and Other Dynamics settings adjusted (Fig.08a – b).

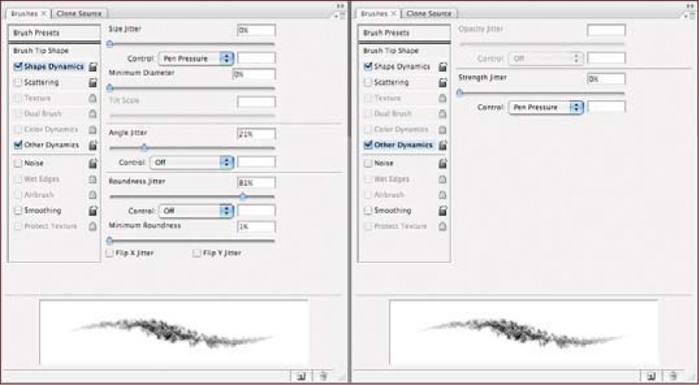
Step 07-Final
At this stage I’m constantly changing the strength and sometimes turning off the Other Dynamics setting. After some cross-hatching to bring out some tonal gradation, I change my brush settings to bring a softer, yet still textural, quality to the strokes by turning on the Scattering (Fig.09a – b). The rule of thumb here is that the higher the scatter, the softer the blending. Also, the higher the strength, the more the texture will come through. Adjusting the brush accordingly is also important at this stage.
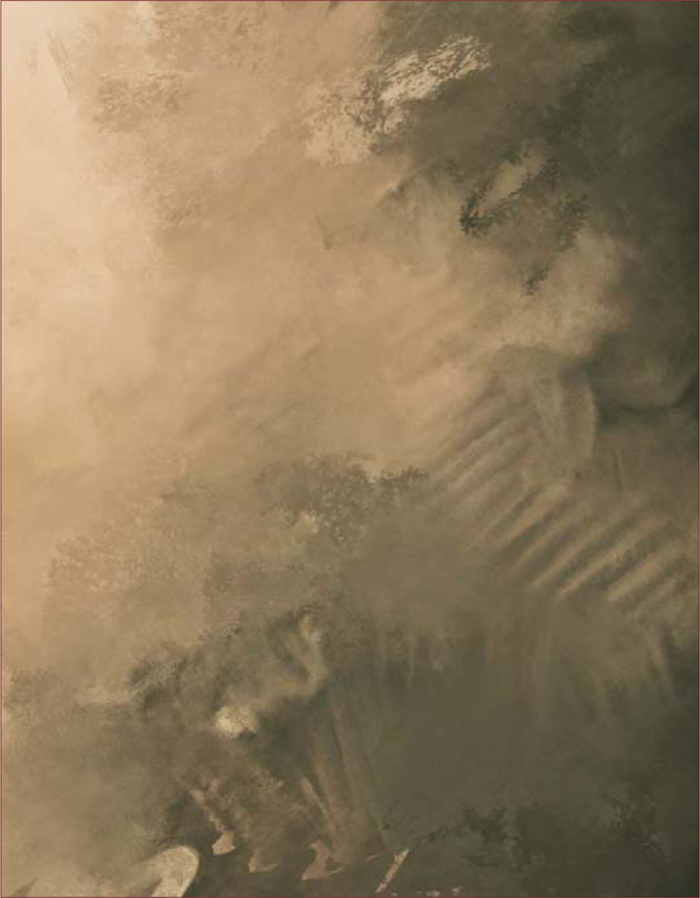
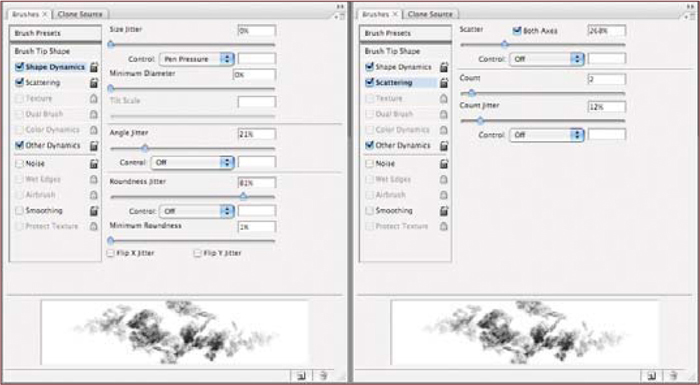
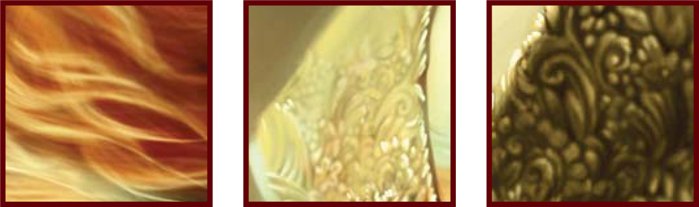
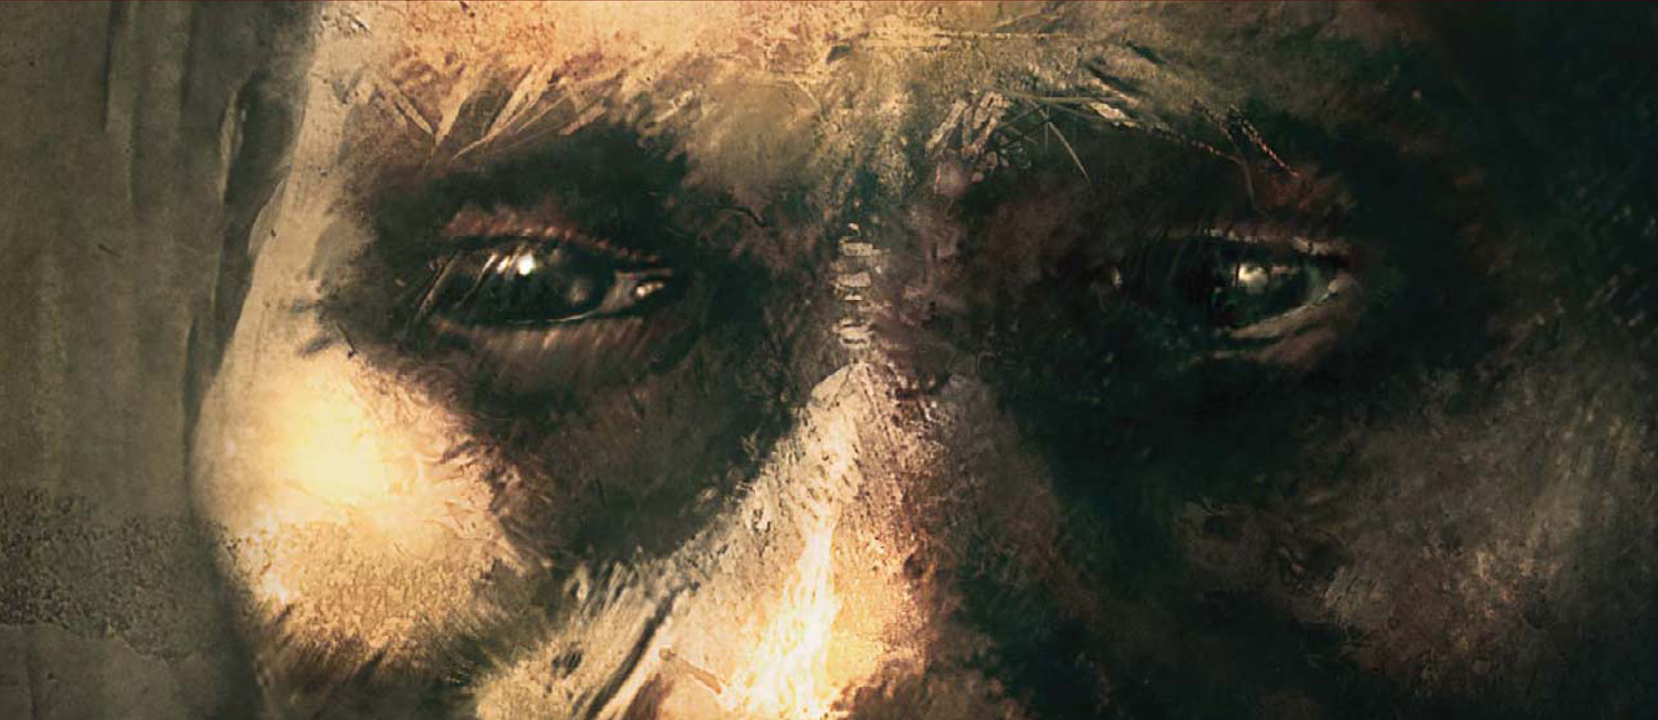
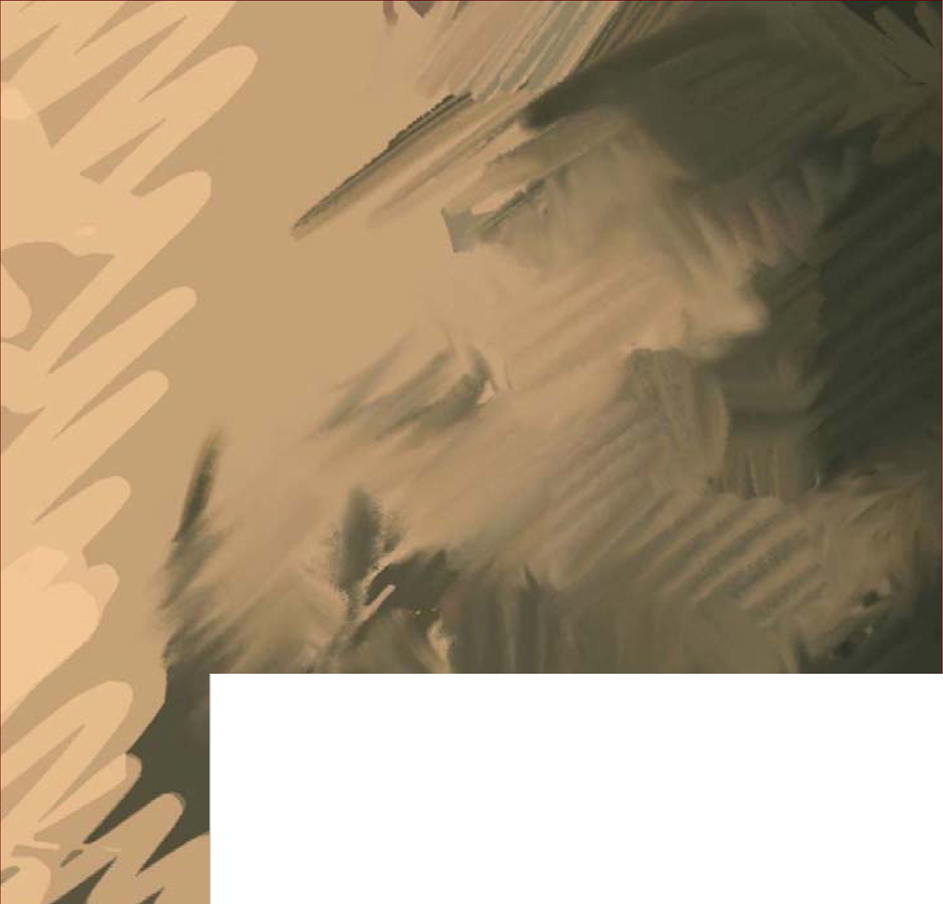
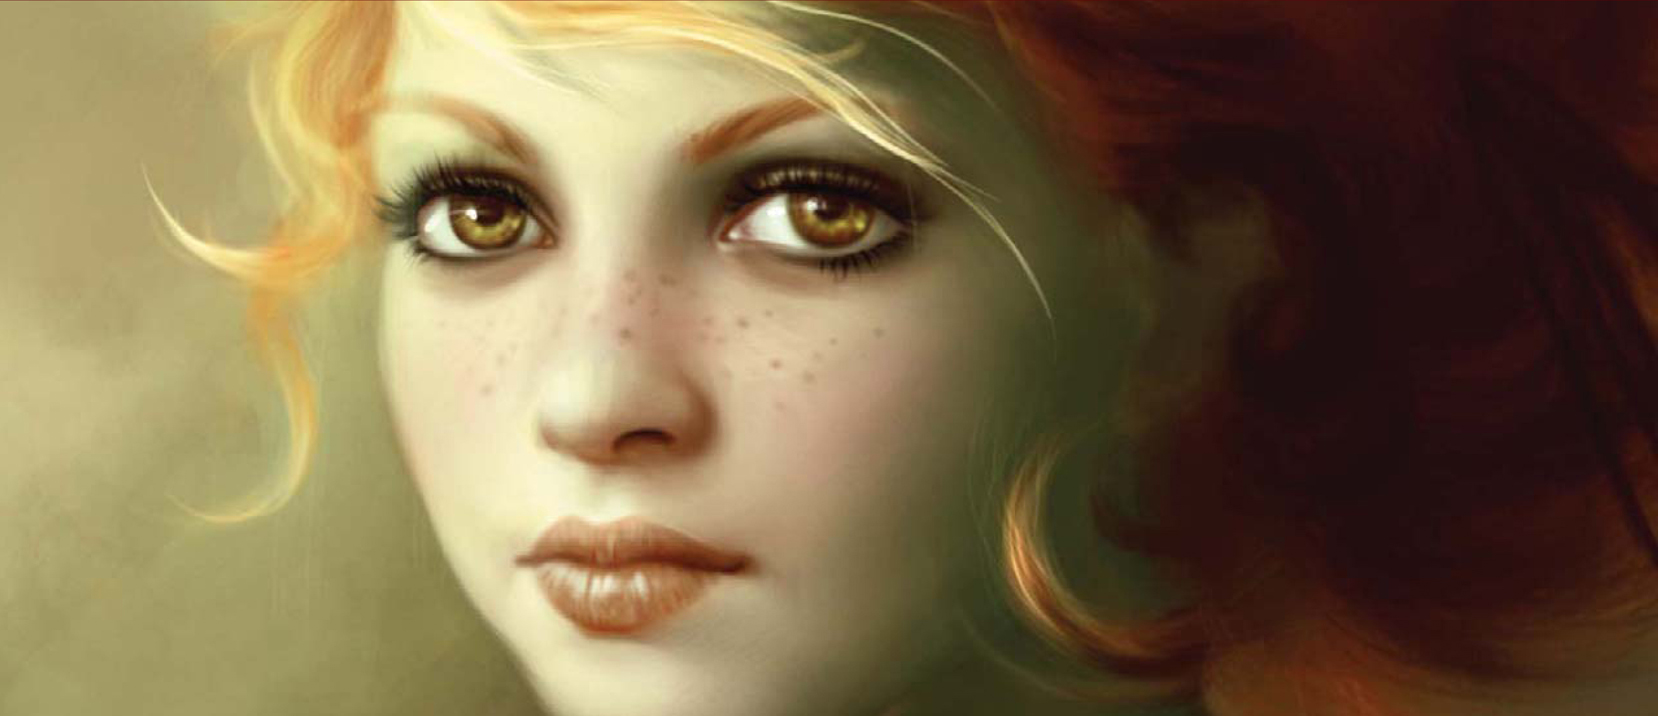
To show you an example of our new brush in action, the custom brush made in this tutorial, and the variations mentioned, have been used exclusively in creating this painting of an old woman (Fig.10).
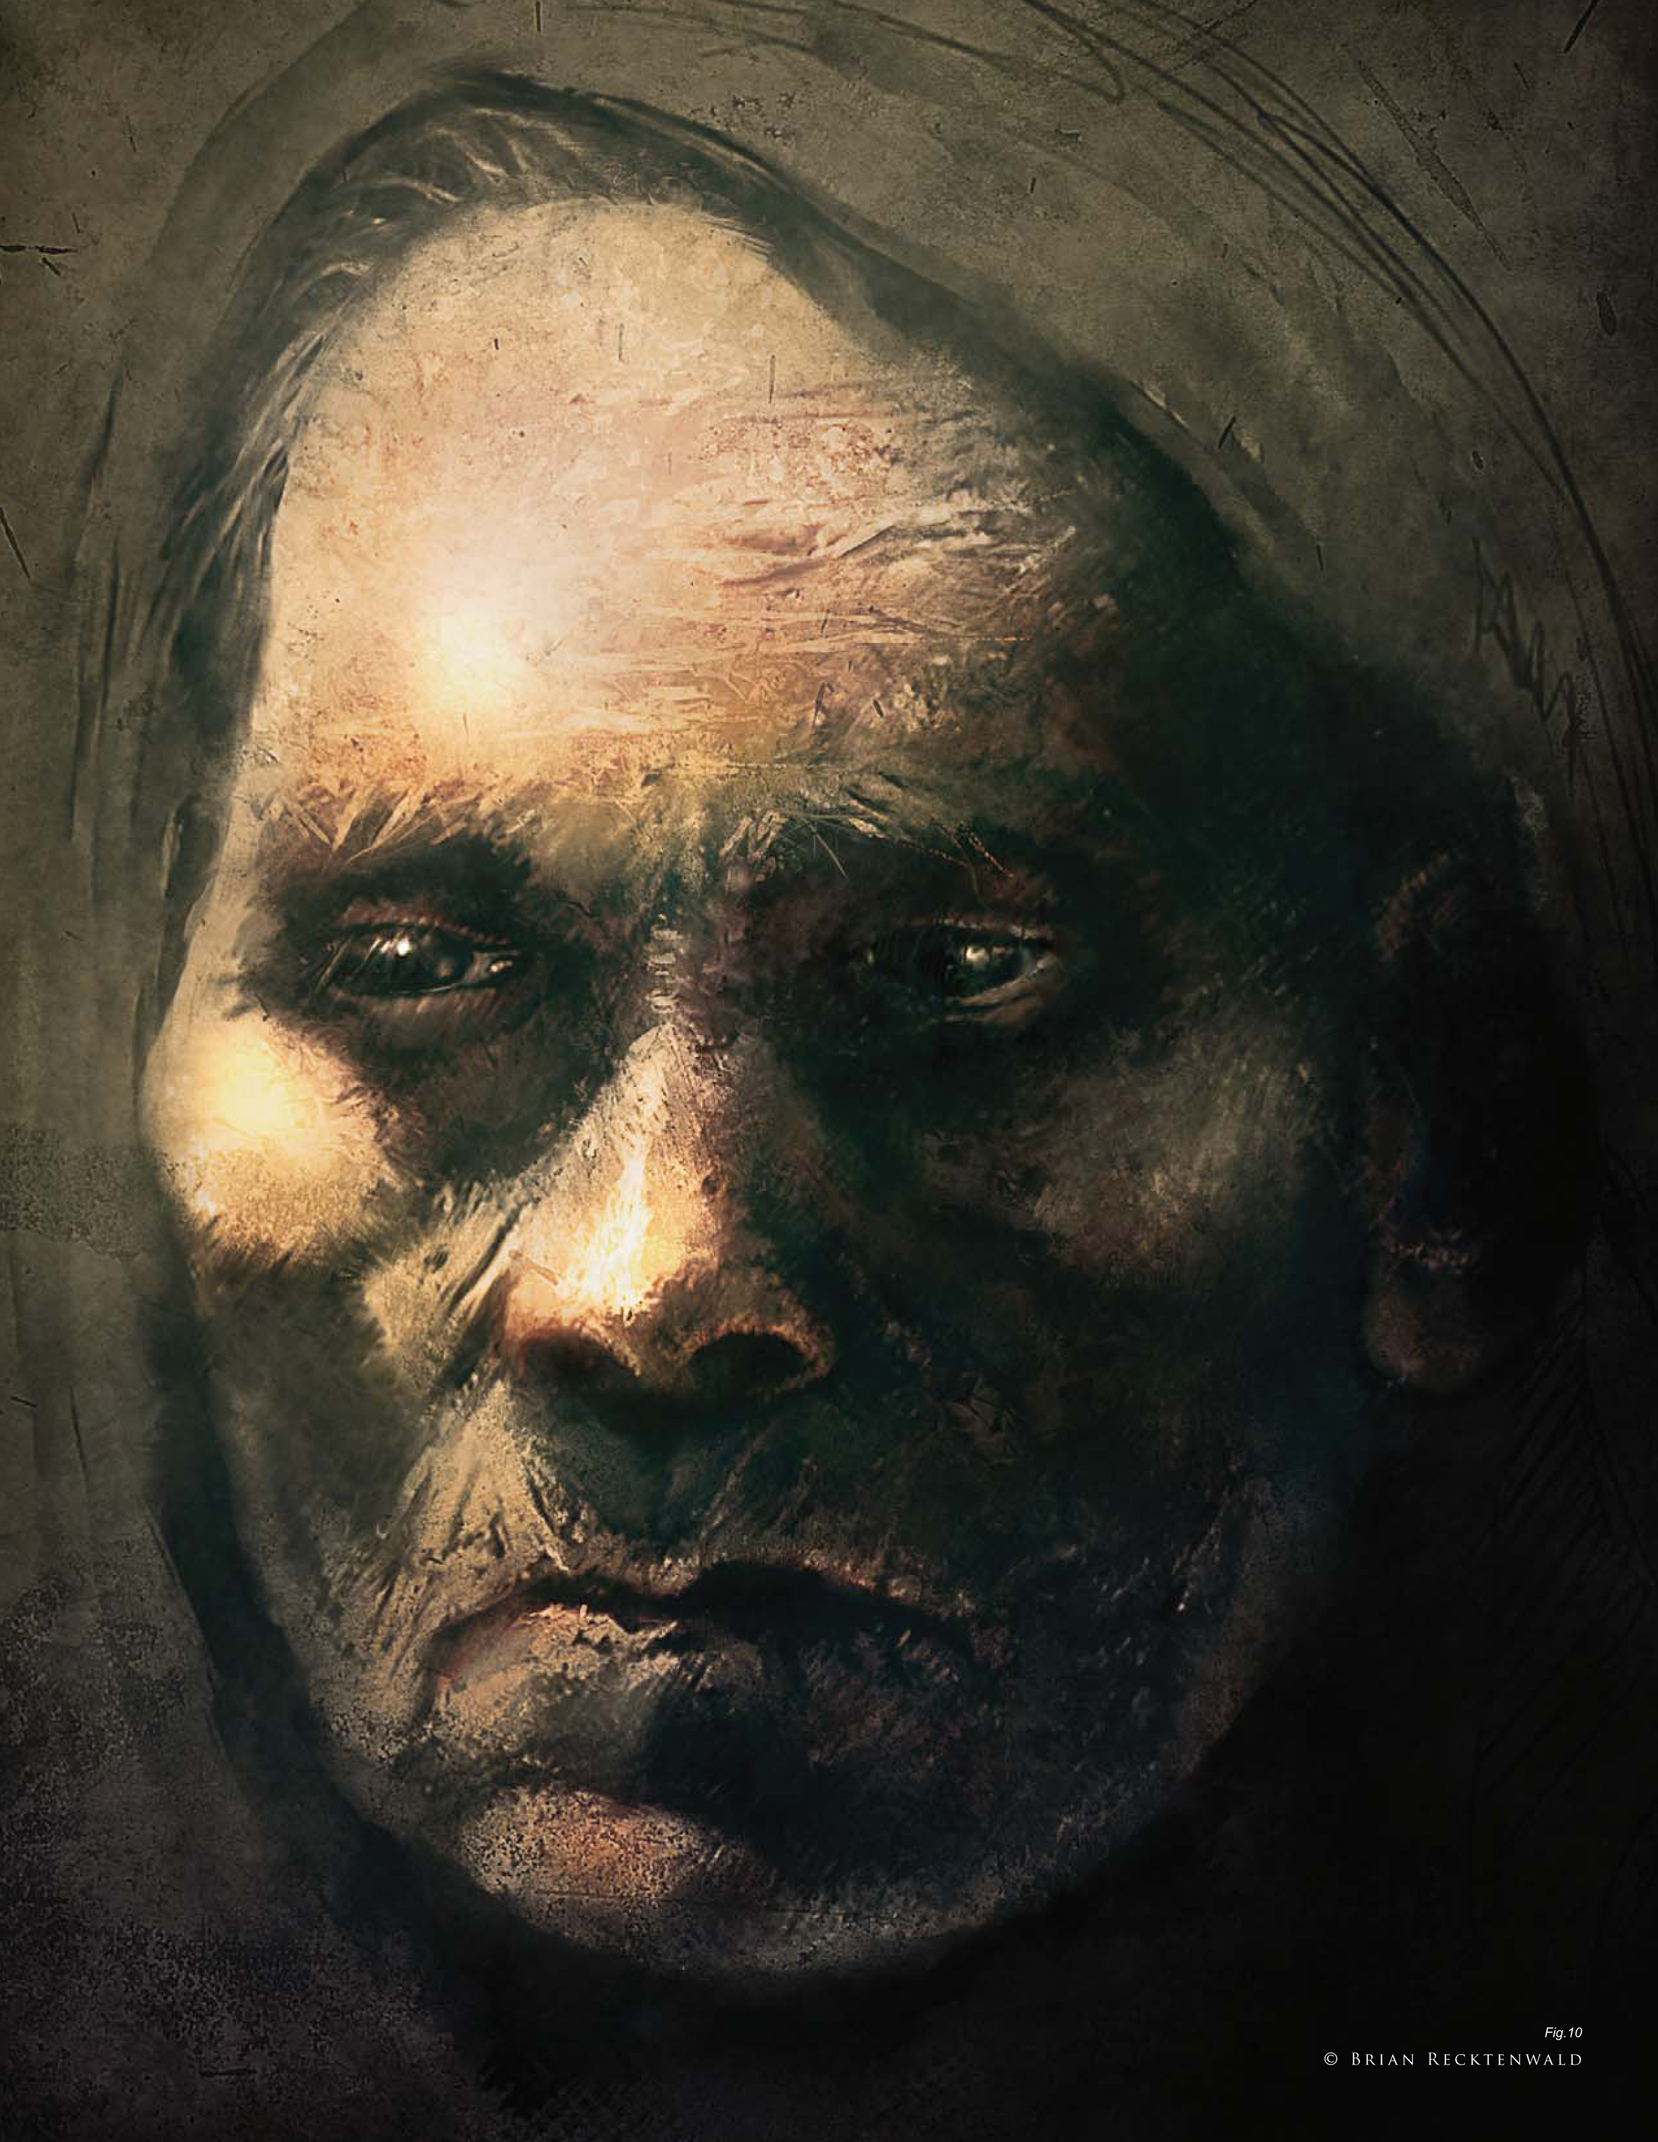
© Brian Recktenwald

© Carlos Cabrera
HOW TO CREATE BRUSHES FROM ANIMAL TEXTURES
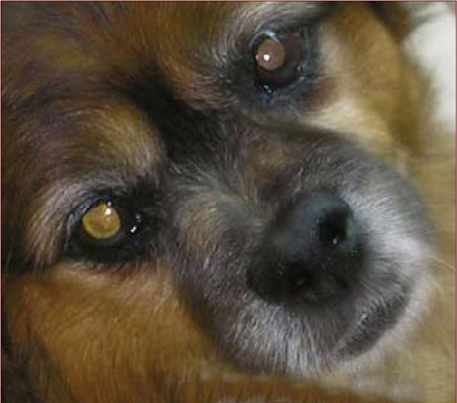
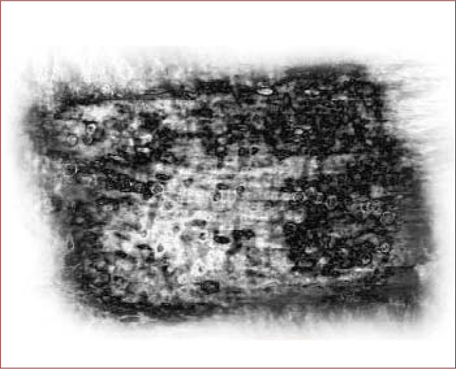
The first thing we need for this tutorial is a couple of pictures to create the texture that we will be using in our brush. In this instance, I have chosen to use two photographs of my dog and cat (Fig.01a – b).

© Carlos Cabrera
© Carlos Cabrera
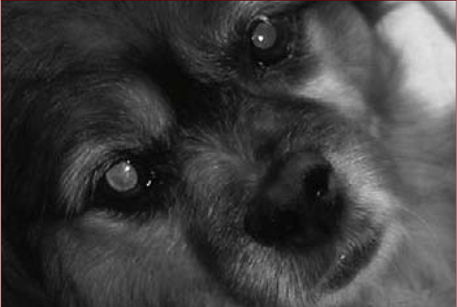
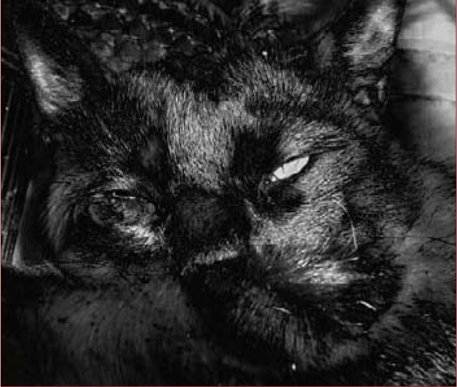
The next step is to completely desaturate the two pictures. With both images on one layer, we can achieve this simply by going to Image > Adjustments > Desaturate. We now need to place each picture in a different layer. Select the top layer and change the properties of the layer to Difference (Fig.02a). By doing this, we will have both layers combined in one to create a new and interesting texture (Fig.02b – d).


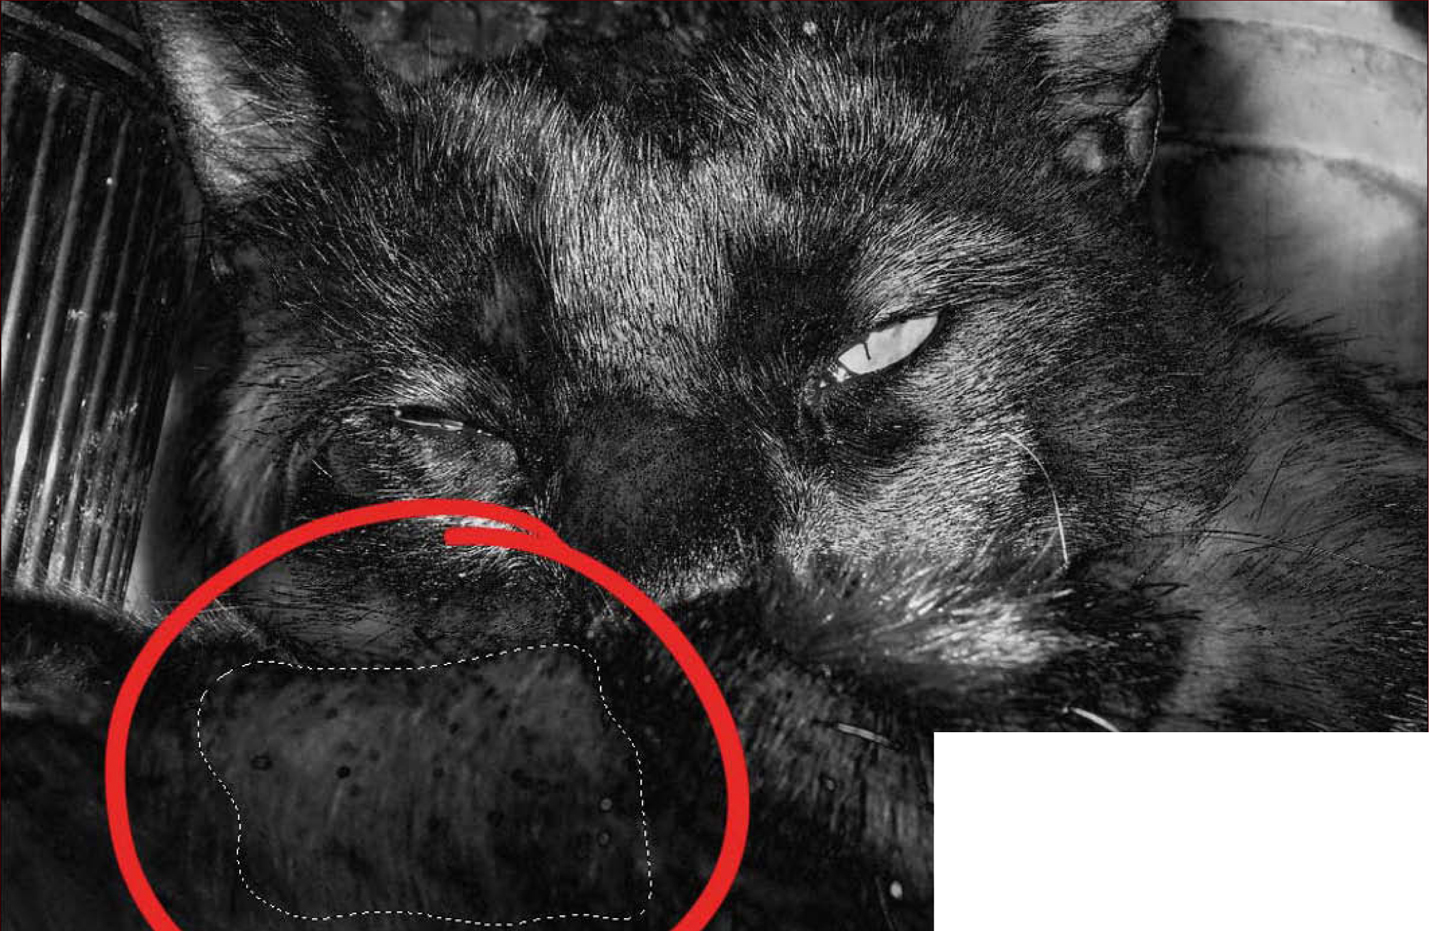
Now let’s flatten the image (Layer > Flatten Image) and search for some original shapes within the texture to use for our new brush. Fig.03 shows a unique shape, which I’ve circled in red. We will need to select it with our Lasso tool (Feather = 20%), and then cut and paste it onto a new document (CTRL + C + N + V).
You will see that the new document that we just created is a potential custom brush. Now, let’s duplicate the layer where our brush is (CTRL + J) and rotate it by 90 degrees (CTRL + T) at any angle. We need to change the properties of this new layer, once again to Difference, and then repeat this step two or three times until we manage to create a textured border (Fig.04).
Our new brush is now almost done; we just need to tell Photoshop to start using this new image as a brush from now on. So, go to Edit > Define Brush, and voila! We have just created a new custom brush. We can now go ahead and change the settings in order to make it even better (Fig.05).

Go to the Brush tab and try out the following settings:
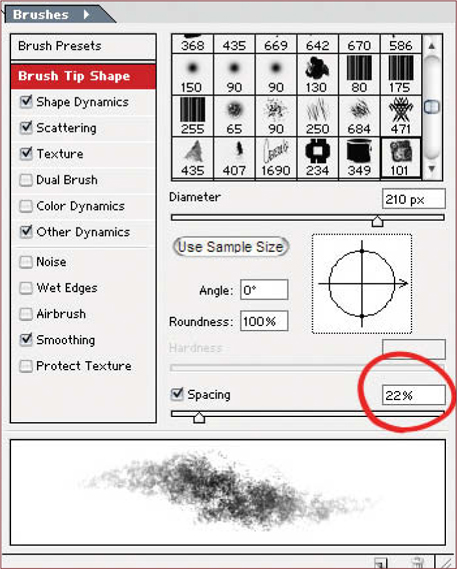
• Brush Tip Shape – Spacing 22% (Fig.06)
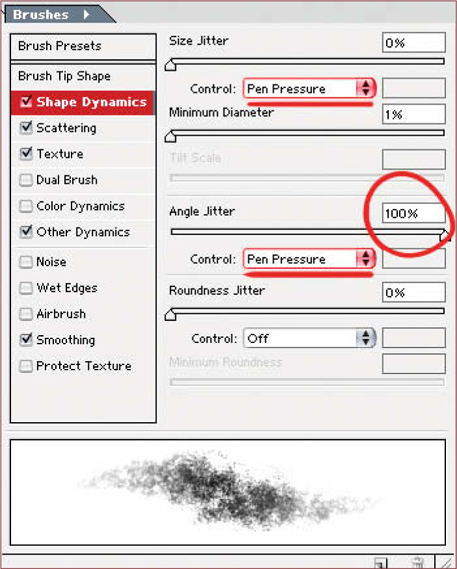
• Shape Dynamics – Size Jitter 0% and select Pen Pressure; Angle Jitter 100% and select Pen Pressure (Fig.07)
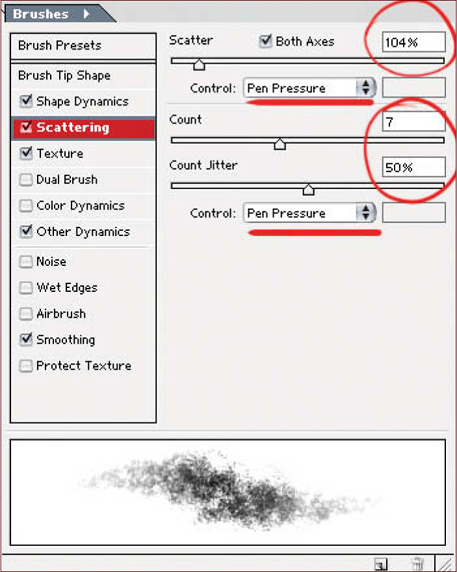
• Scattering – Scatter 104% and select Pen Pressure; Count 7, Count Jitter 50% and select Pen Pressure (Fig.08)
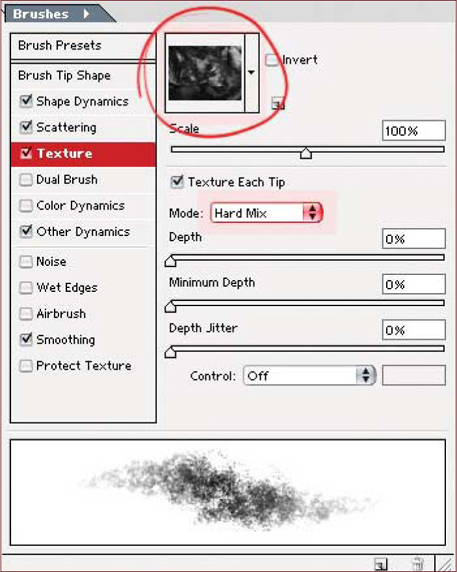
• Texture – Select a random texture and change the mode to Hard Mix (Fig.09)
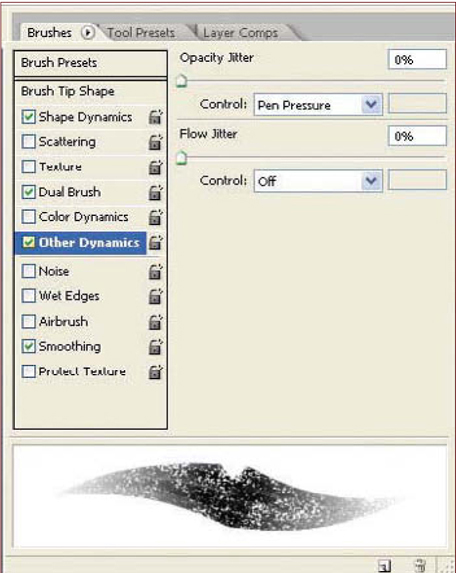
• Other Dynamics – Opacity Jitter 0% and select Pen Pressure; Smoothing > On (Fig.10)

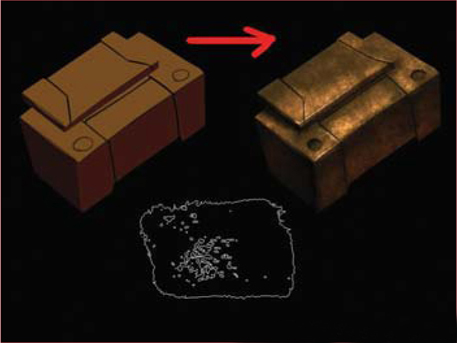
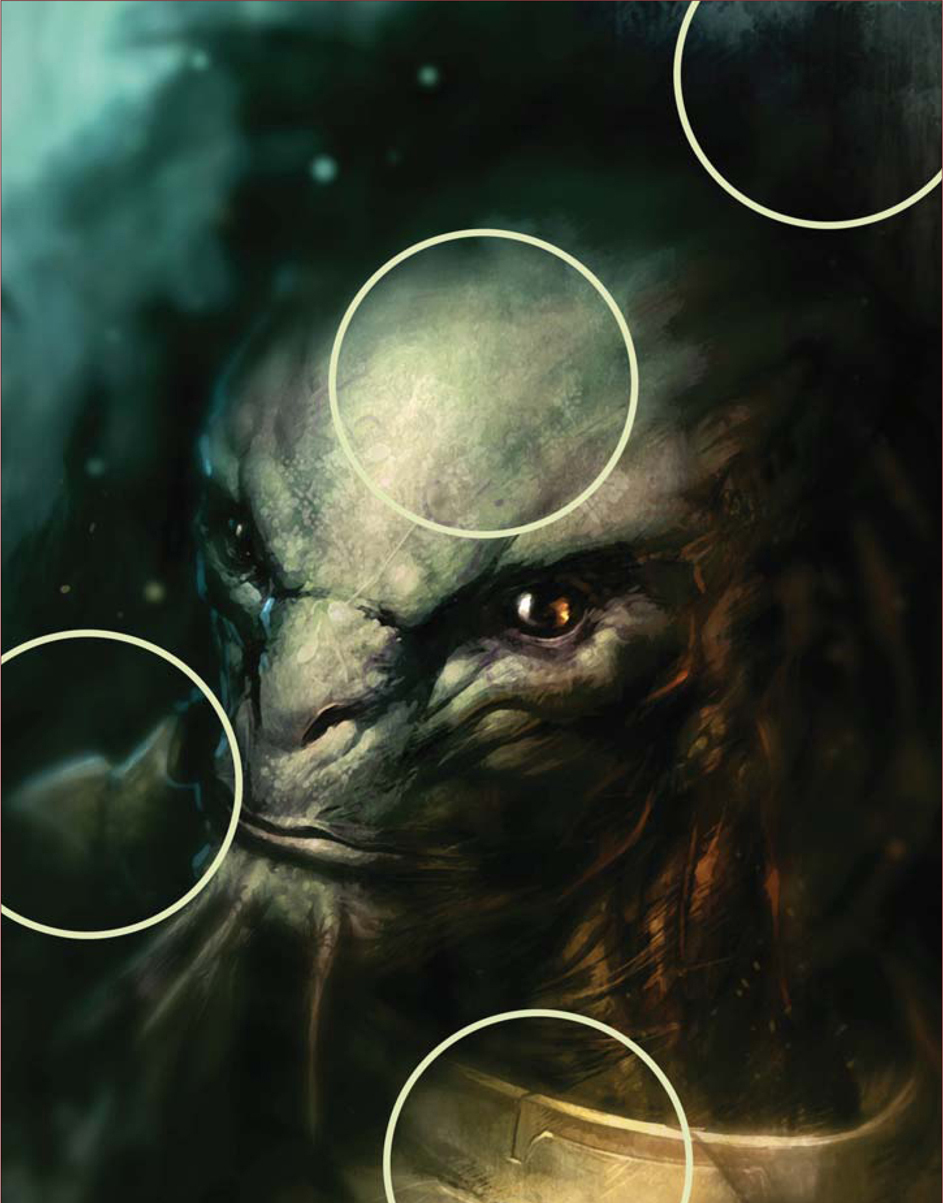
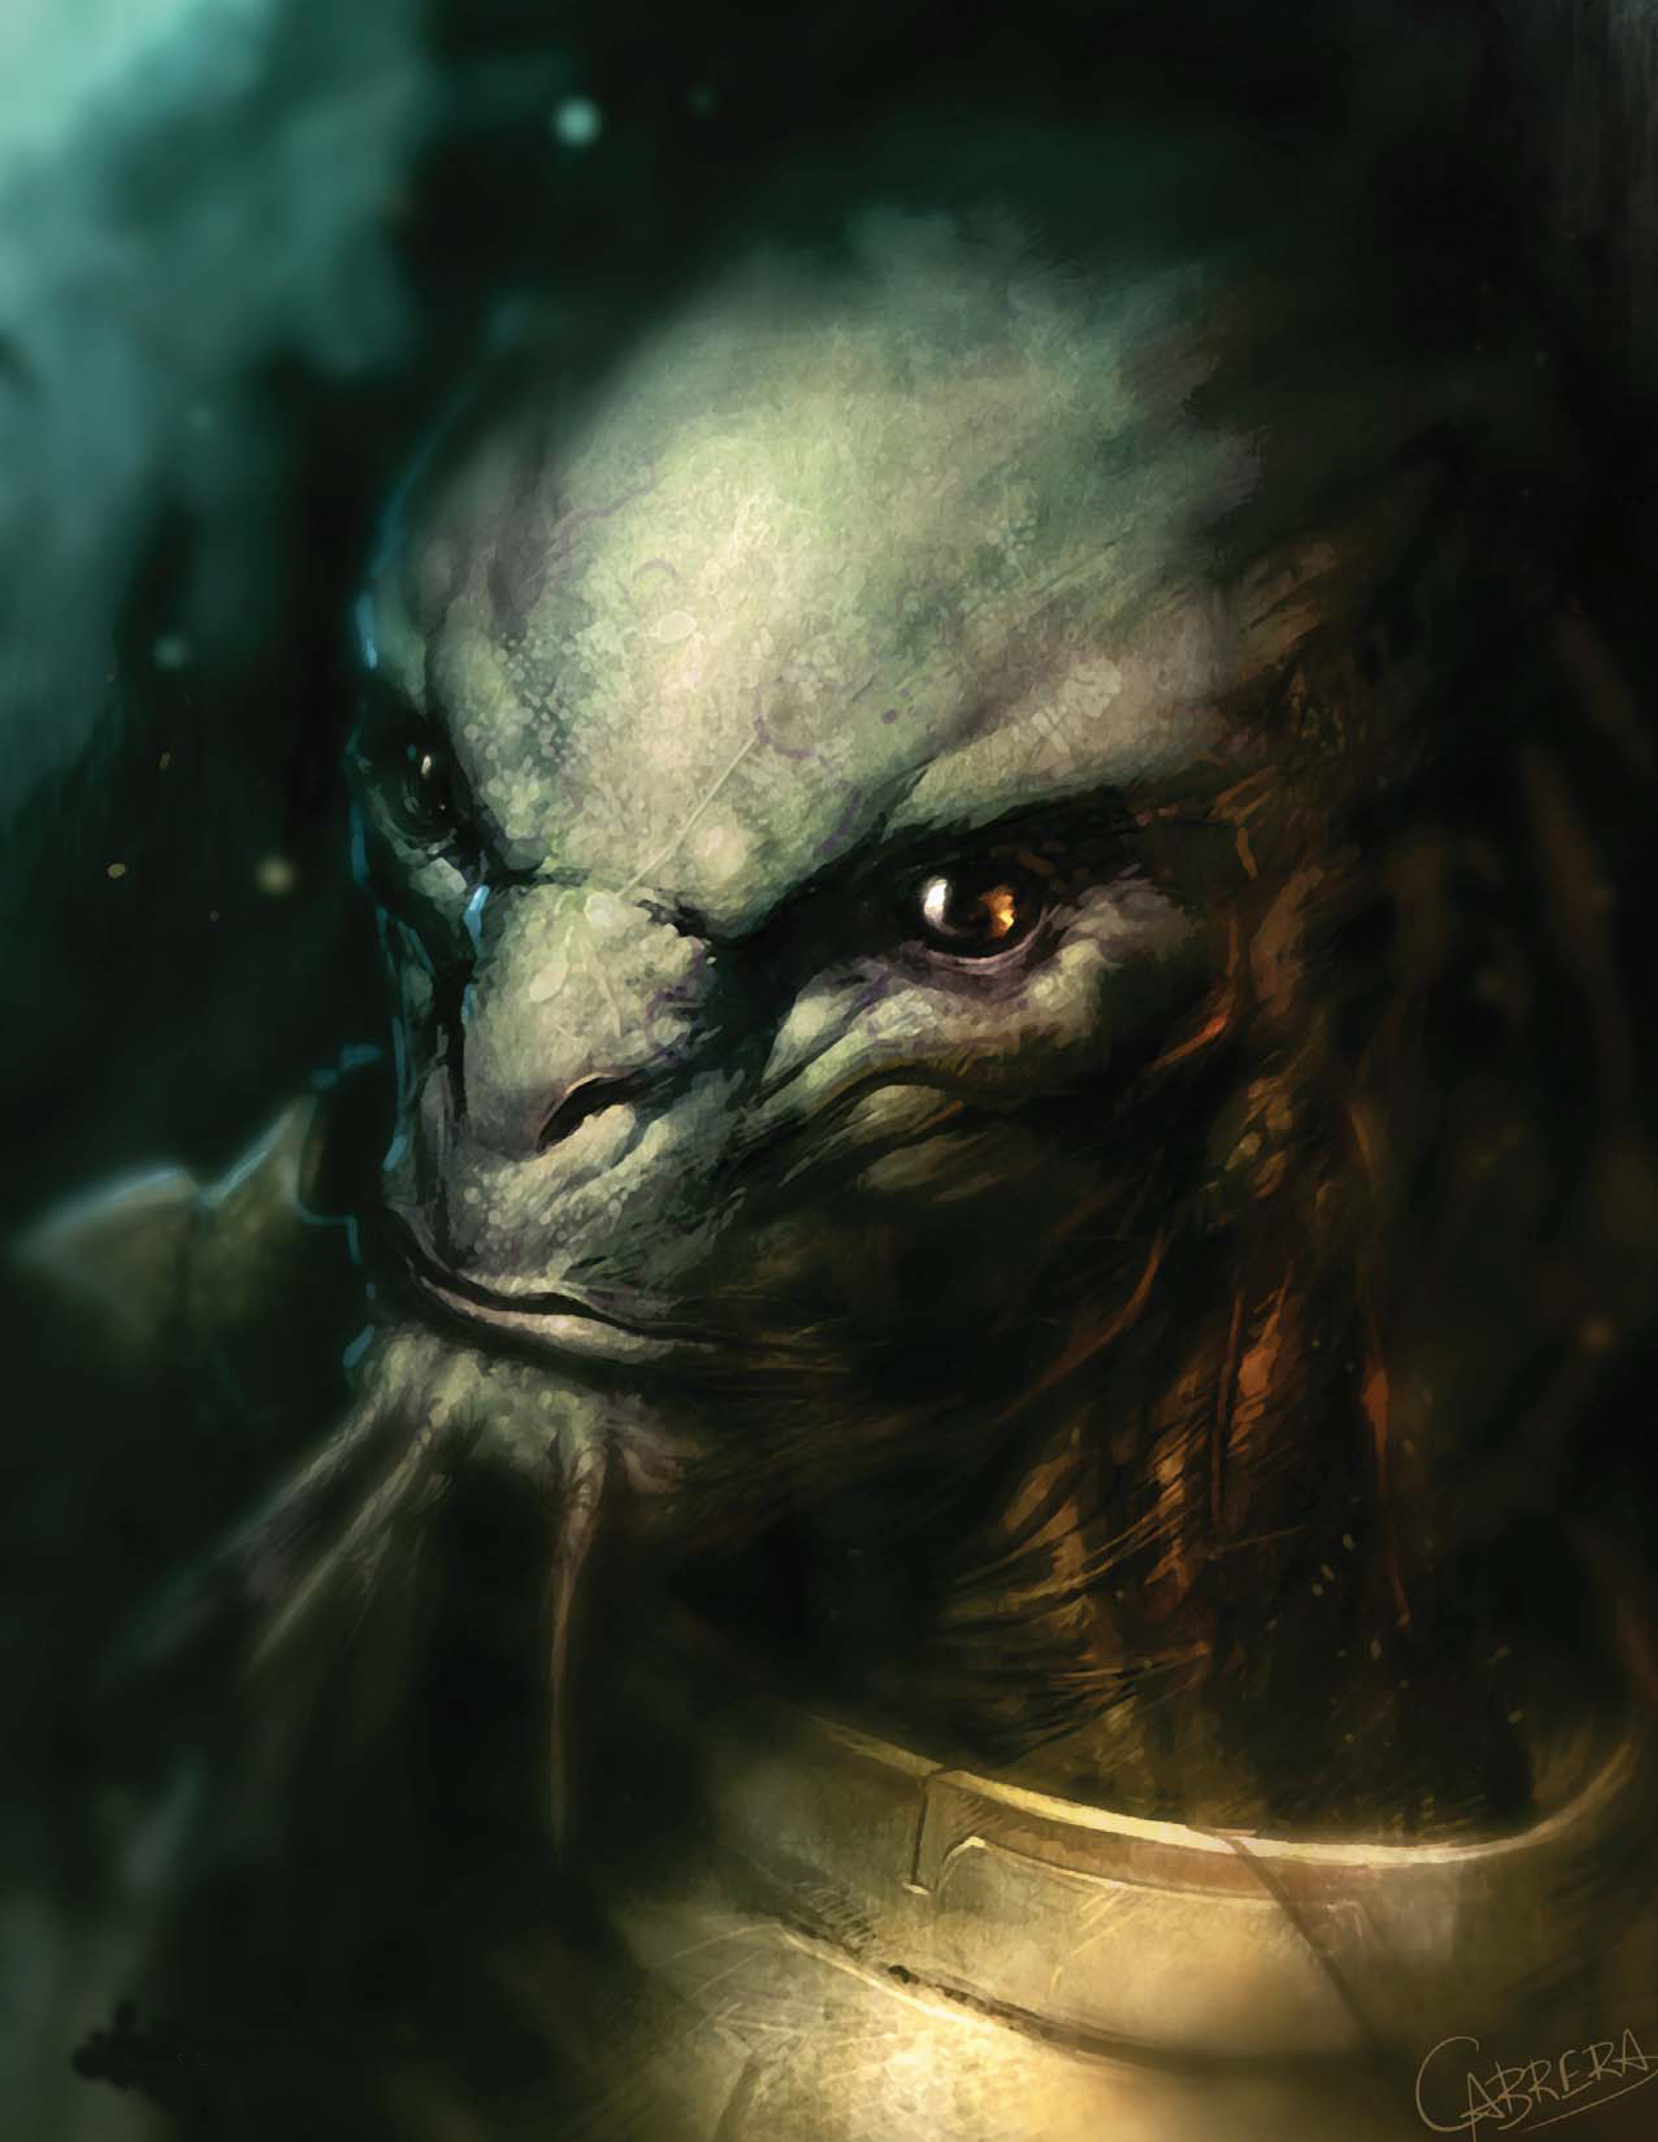
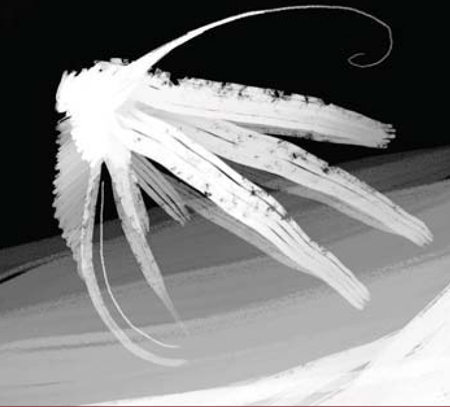
And that’s it–pretty easy, don’t you think? Here are a couple of examples of this new brush at work (Fig.11 – 12). You now have the skills to create your own custom brushes for your projects, so get creative and have some fun with them!
© Carlos Cabrera
© Carlos Cabrera
You can download a custom brush (ABR) file to accompany this tutorial from www.focalpress.com/digitalartmasters

© Carlos Cabrera
© Daarken
CUSTOM BRUSHES
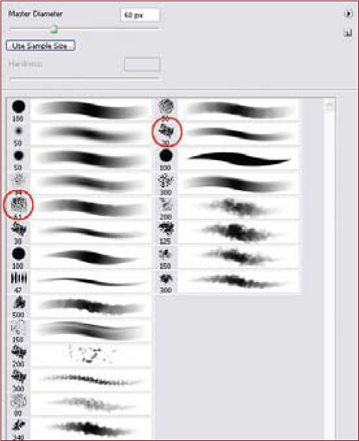
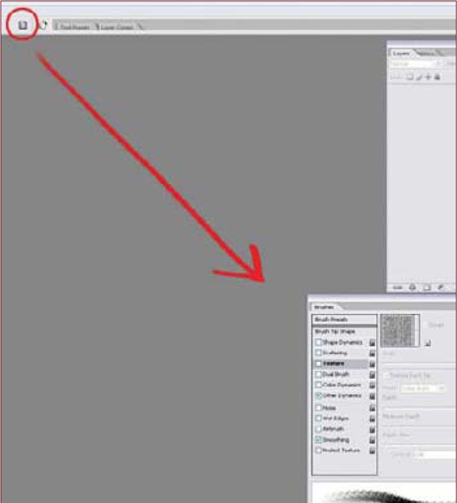
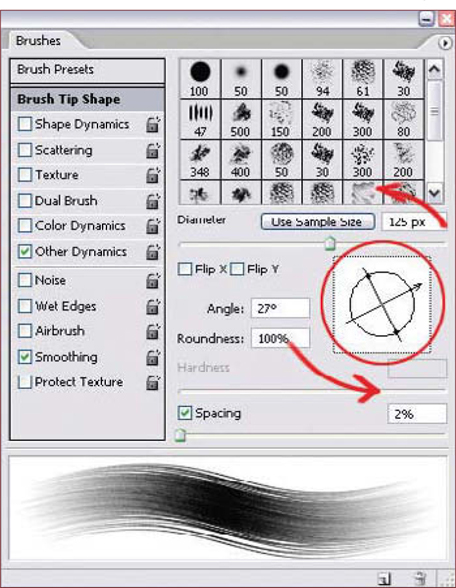
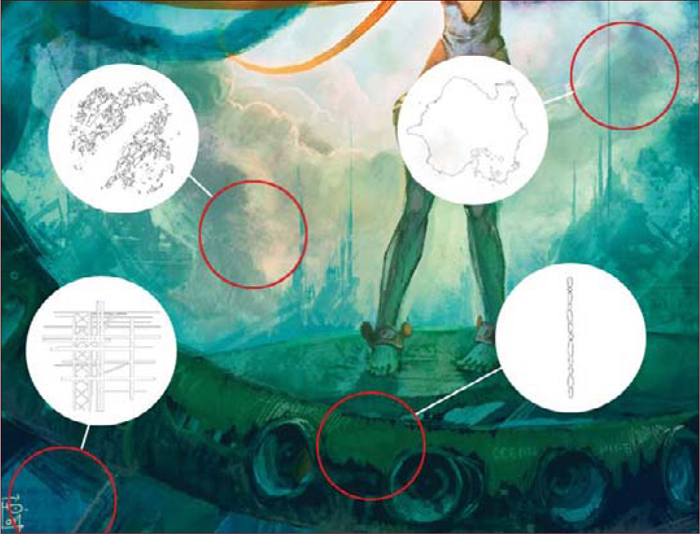
A lot of people ask me what kind of brushes I use and how I make them. Usually, when I paint, I only use a few brushes, most of which are just Photoshop presets with a few tweaks to the brush settings. When painting a figure I normally use the standard brushes and save my custom brushes for textures and backgrounds. These are the brushes I use, although a majority of all my illustrations are painted using primarily the two brushes circled in Fig.01. I find that most of the time there are too many brushes to choose from, and most of them are just plain gimmicky. I like to stick with just a few of my favorite brushes when painting. This also helps to improve your speed, since you don’t have to look around and try and decide which brush to use next. It also allows you to learn how to paint different textures using the same brushes, instead of relying on a brush to paint a texture for you.
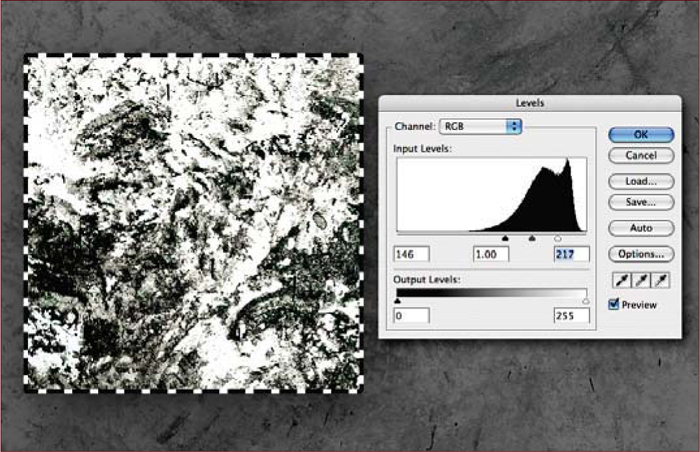
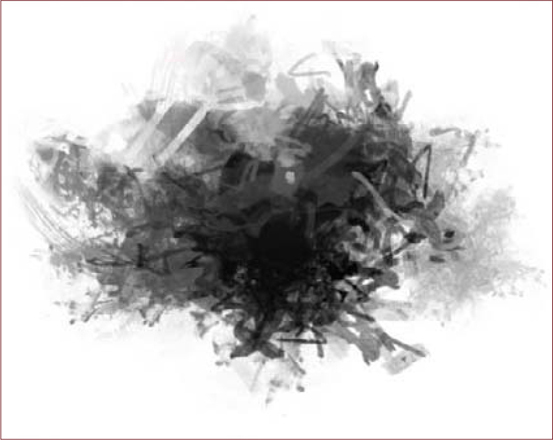
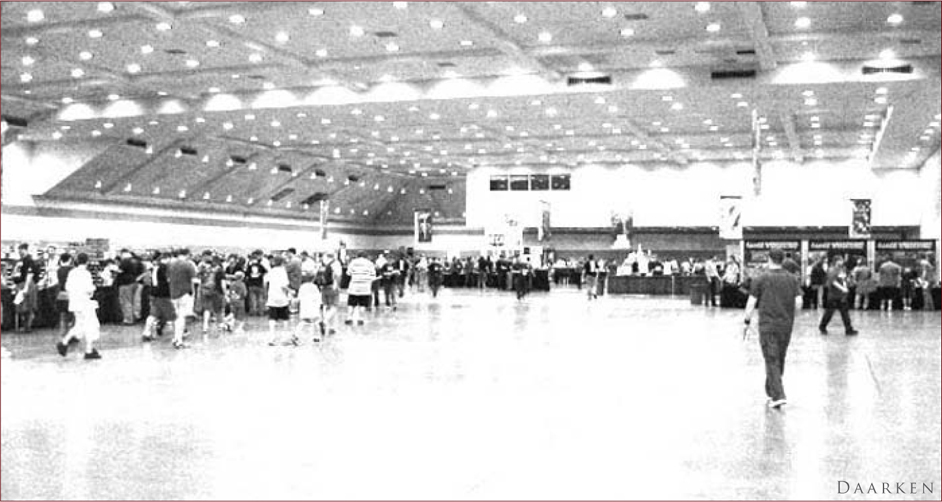
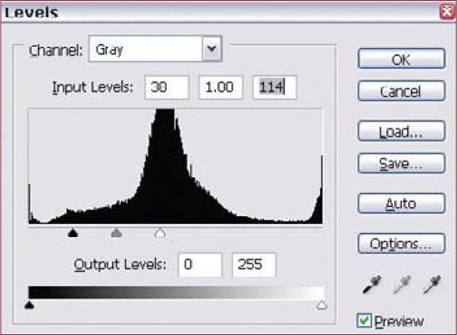
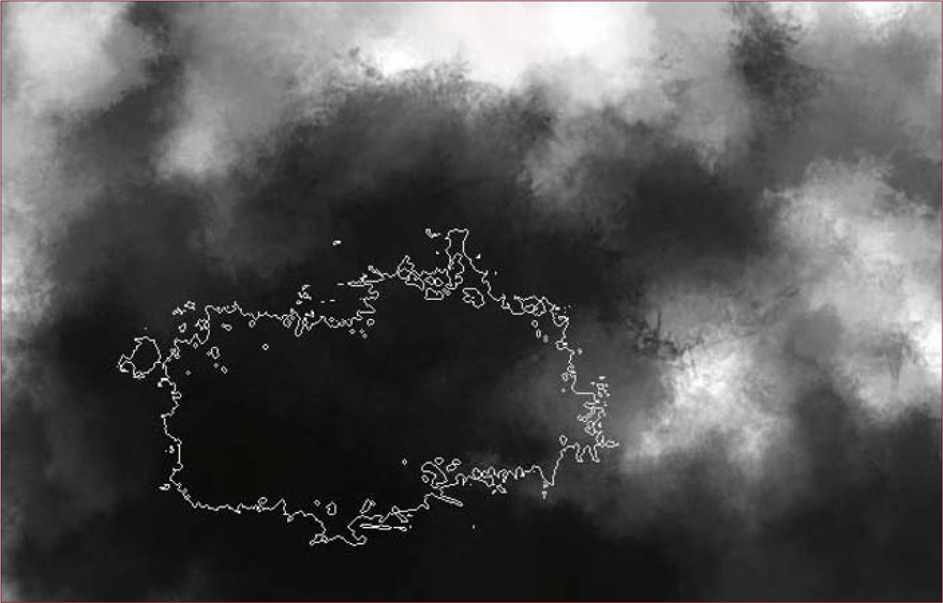
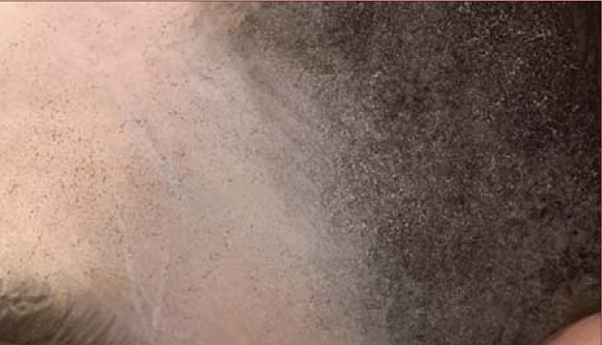
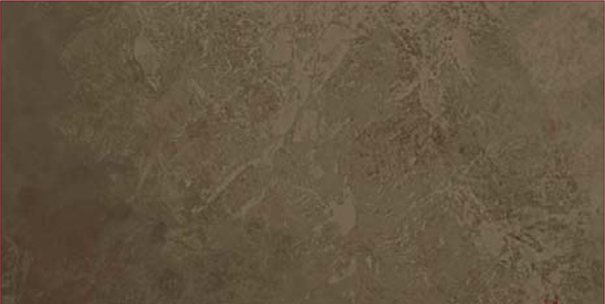
Let’s start making a custom brush by putting down some random shapes and lines. Try not to make anything too symmetrical, as this will make your brush look weird and fake (Fig.02). Sometimes what I like to do is use a custom brush that I have already made as a starting point. I lay that down and then start drawing and erasing on top of it. Now that I am happy with my shapes I am going to open a photo to use as a texture overlay. It doesn’t really matter what kind of photo you use (Fig.03); you can use any subject matter and still get a cool–looking brush. Once you have a photo, convert it to grayscale and then go to Image > Adjustments > Levels (or Ctrl + l) (Fig.04). Drag the sliders around until you get high levels of contrast within the photo, and then click OK when you’re ready.
Daarken
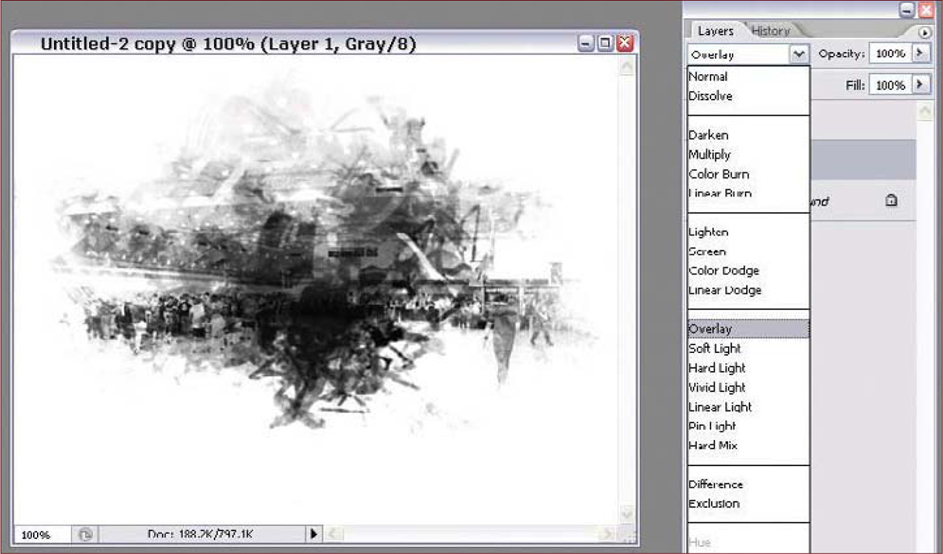
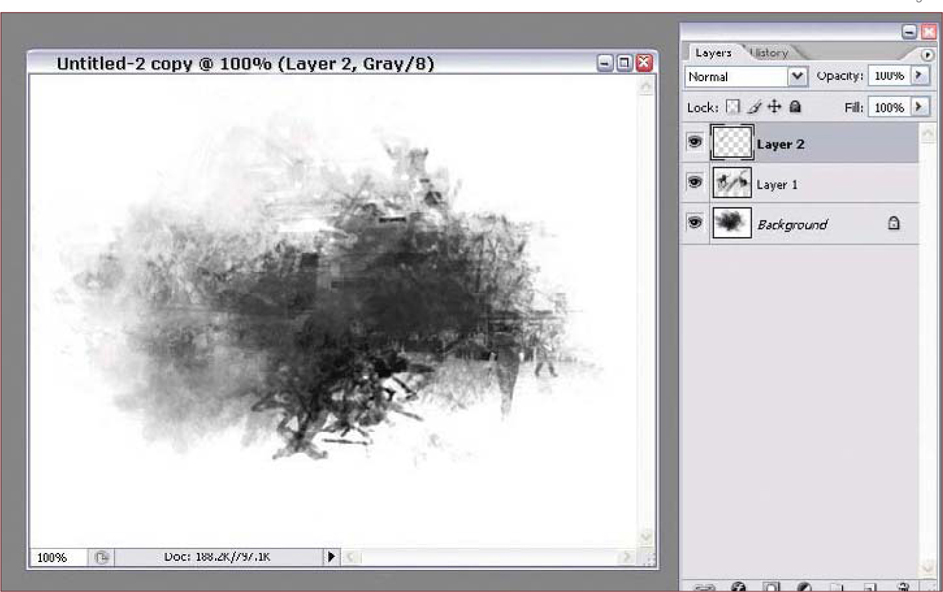
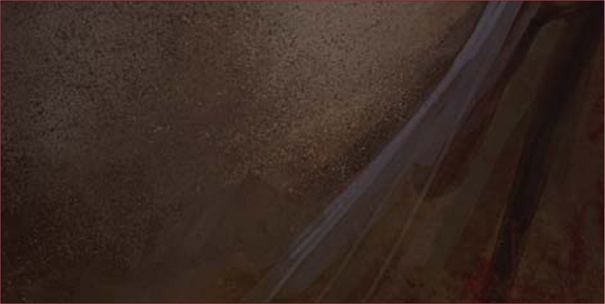
Copy and paste the photo into the document with the brush we started making. On the layer with the photo, change the layer properties to something that looks good. In this case I used Overlay (Fig.05). Now you can go back and add another layer on top of the photo and fix any parts that may cause problems or repetition (Fig.06). For example, I painted out some of the lines in the top left of the picture.
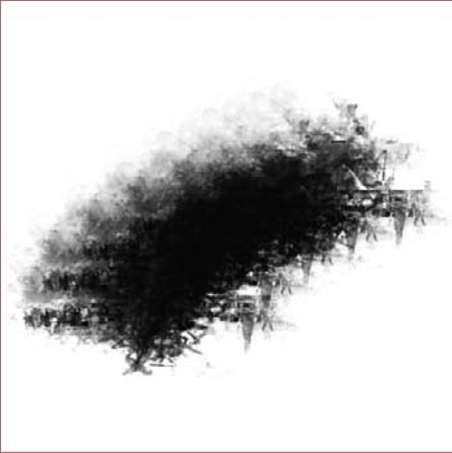
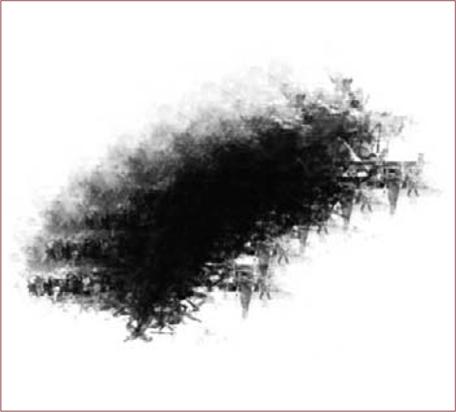
To create your brush from the image, simply go to Edit > Define Brush Preset; I’m using CS2, so the wording may be different in other versions, but basically anything that says Define Brush will work (Fig.07). This brush will now be at the end of your brush list on the Brush drop down menu. Select your new brush and give it a try. Right now the brush will look really ugly and repetitive (Fig.08) – but don’t worry, we’re about to fix that.

Next we’re going to change the brush’s settings by opening the Brush Settings window. To do this, either click the Brushes button, or go to Window > Brushes (or simply hit F5 on your keyboard). You’ll now be able to get a good-lookingbrush by playing around with these settings (Fig.09). I would advise you to spend some time dragging all the sliders back and forth so that you can get a feel of what each setting does, and find which ones you like.
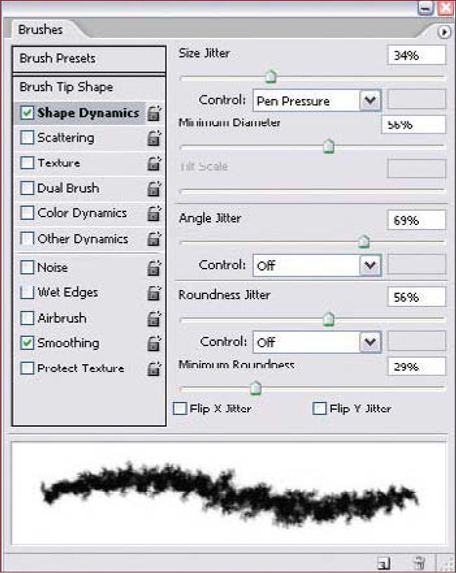
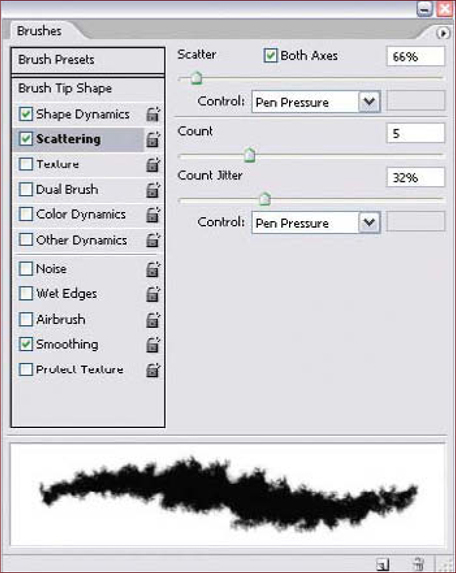
For this particular brush, click on the first setting, called “Shape Dynamics”. This will bring up different options on the side. By selecting Size and Angle Jitter we can break up some of the repetitive shapes that are found in the original brush (Fig.10a – b). Now click on the second option: Scattering. This will take the basic shape of the brush and spread it out so that you’re painting with several instances of the same shape, instead of all of them being in the same line. You can also control the density of the brush here (Fig.11a – b). To add some more texture to the brush you can click on the Texture button. Clicking on the picture of the texture brings up a dialog box where you can select which kinds of textures you want to use (Fig.12a – b). Finally, click on the Other Dynamics option. This controls the opacity of the brush based on pressure sensitivity. This is a little sample of what the new brush looks like after changing the settings (Fig.13).

Here are some examples of other custom brushes in my collection (Fig.14):
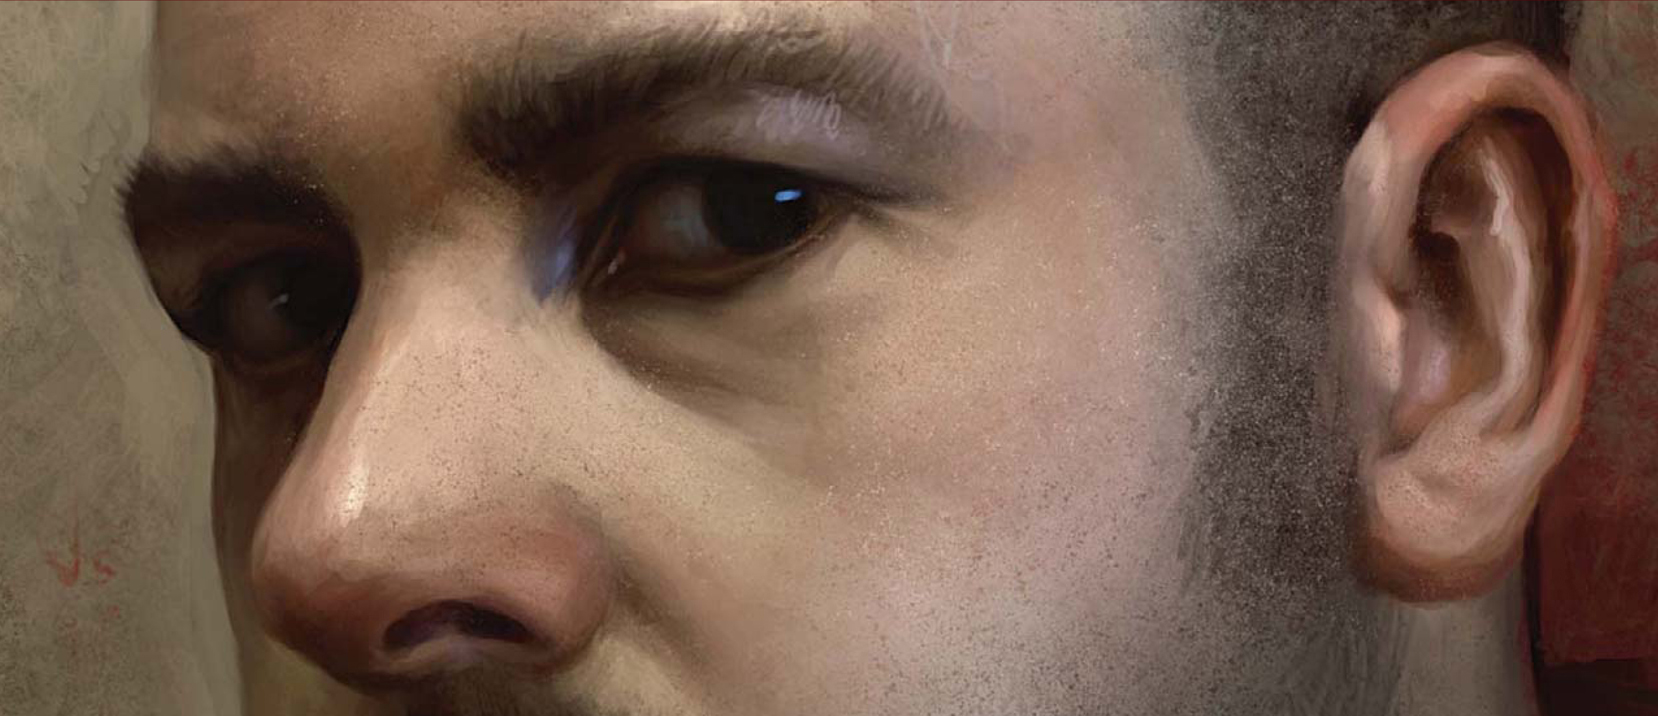
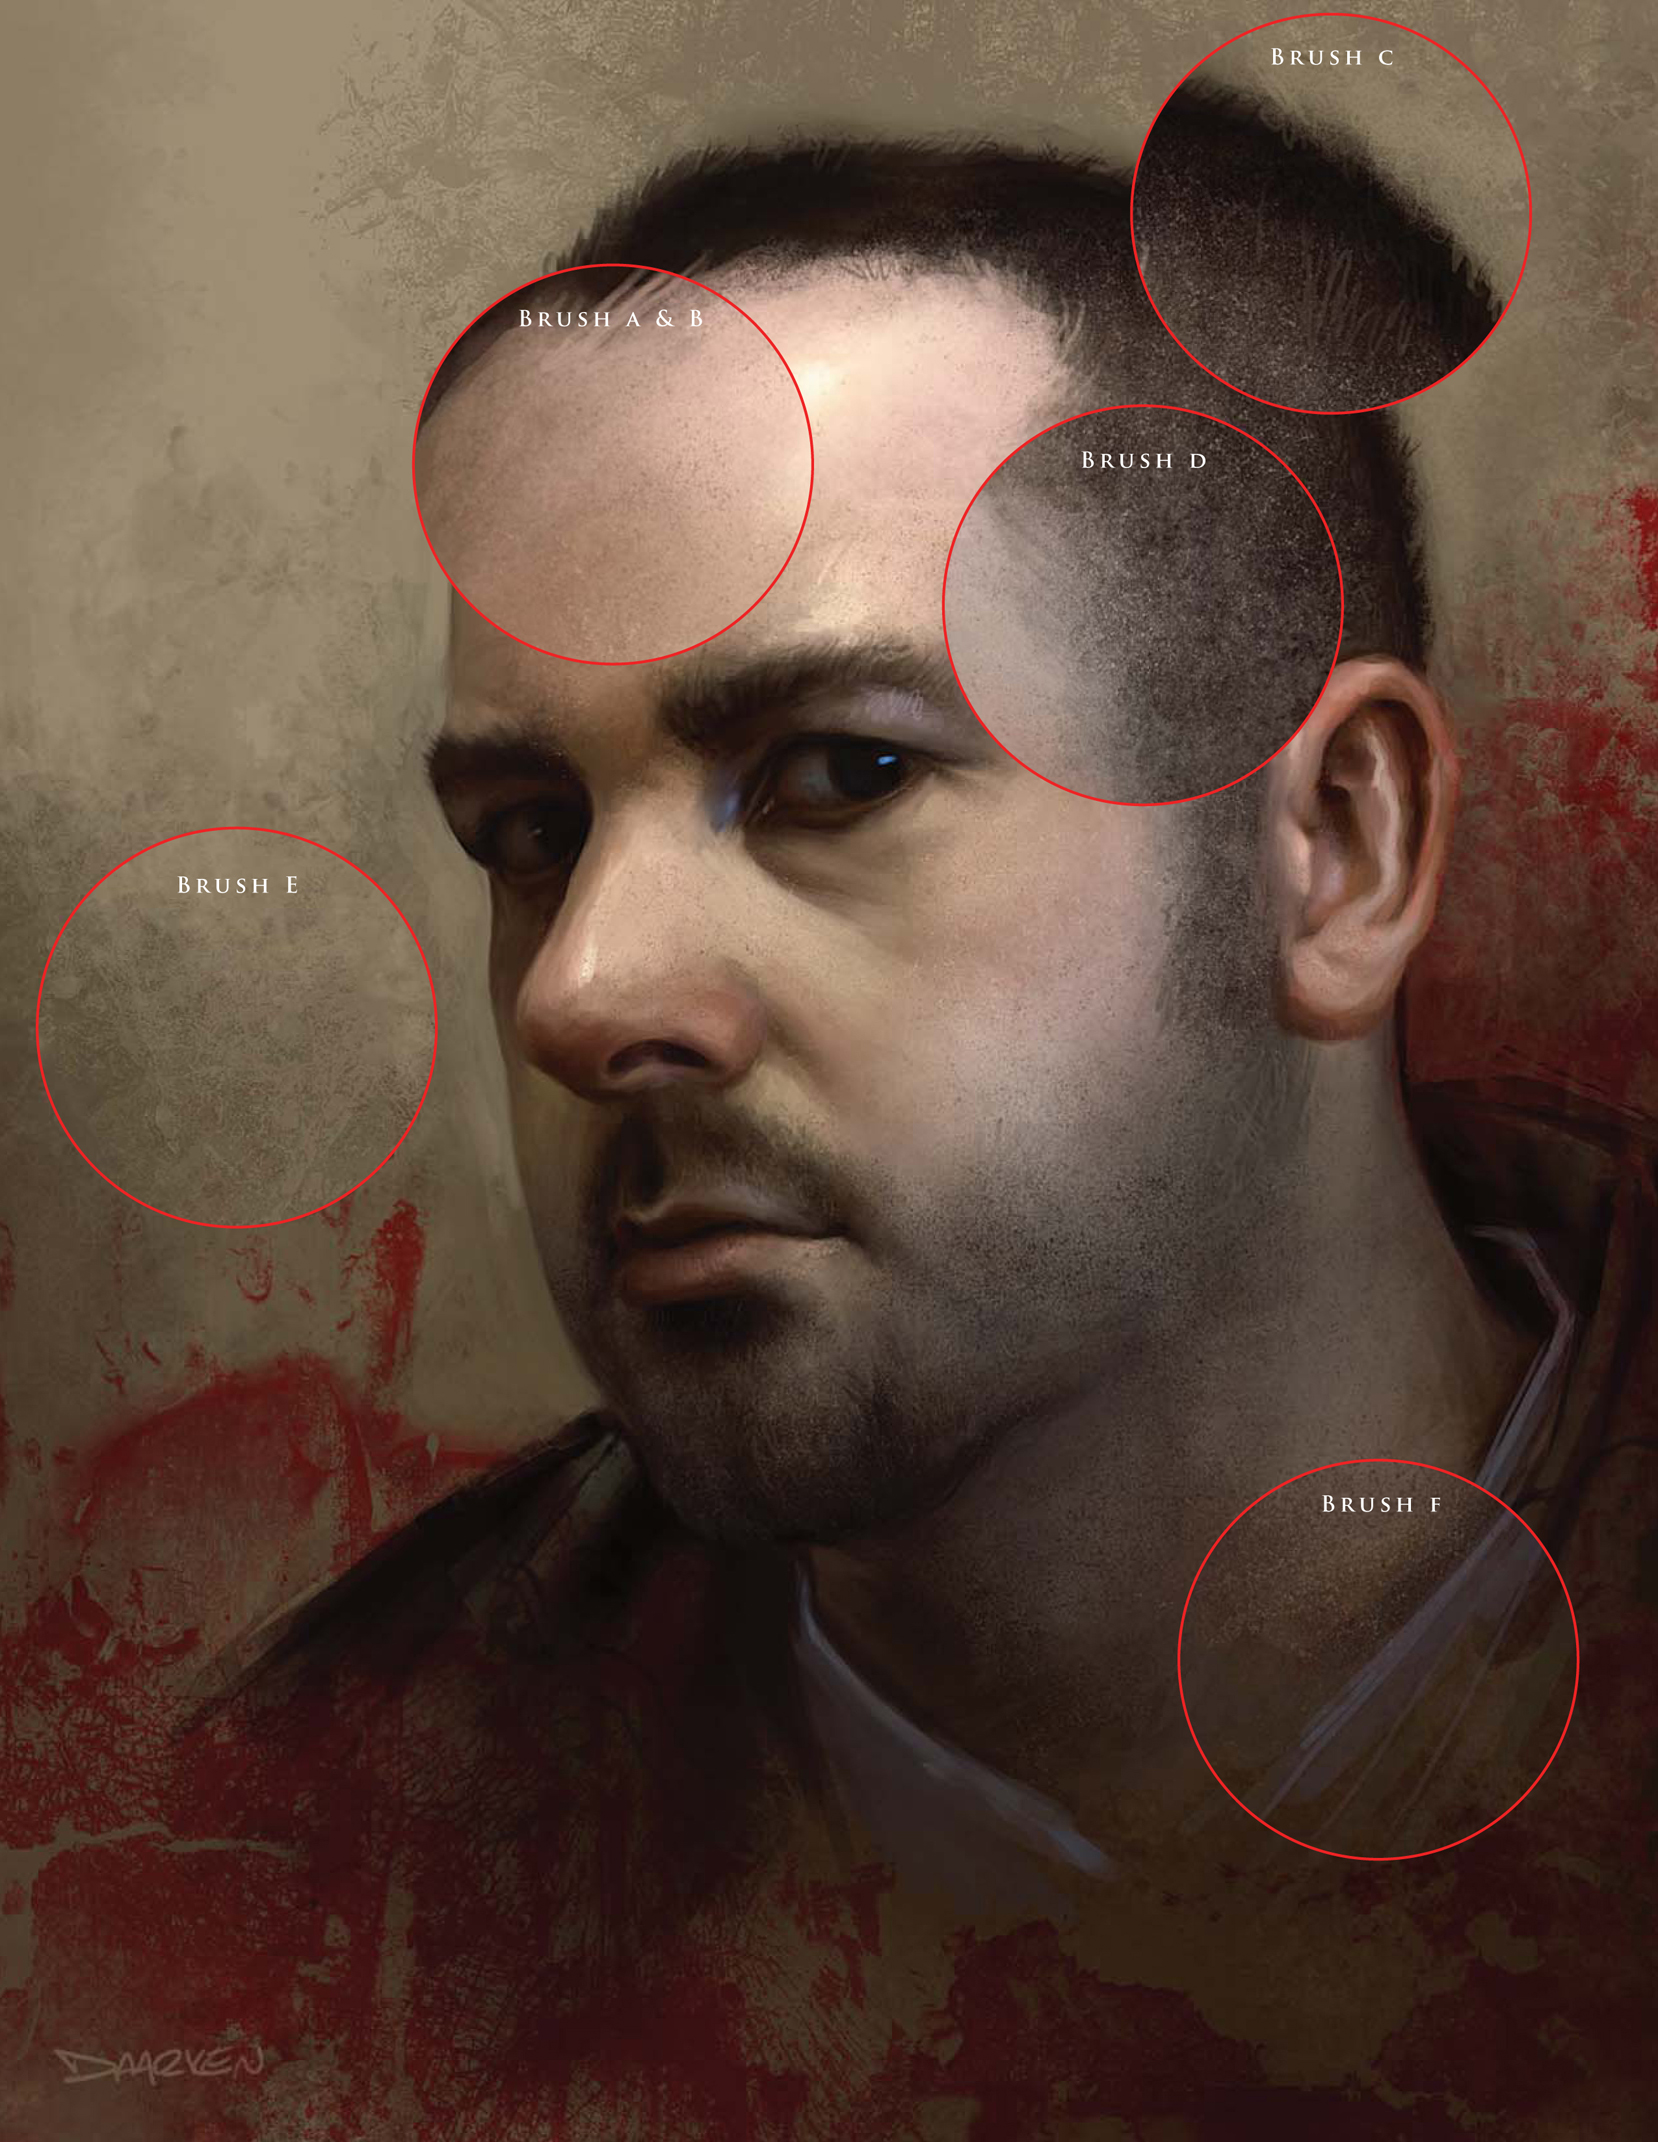
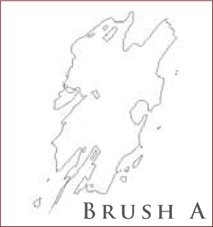
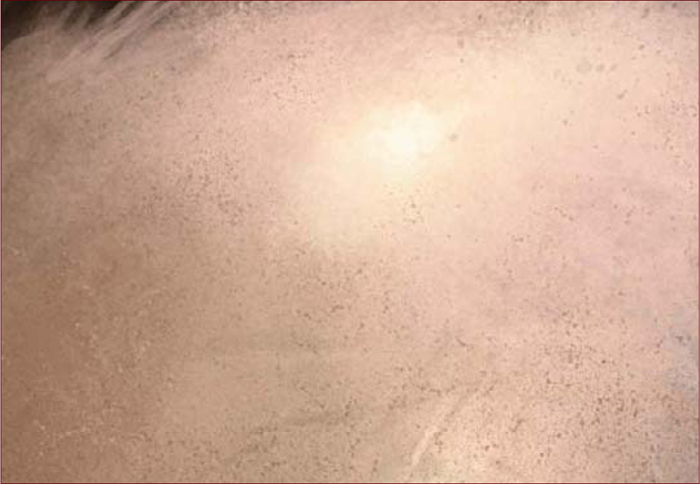
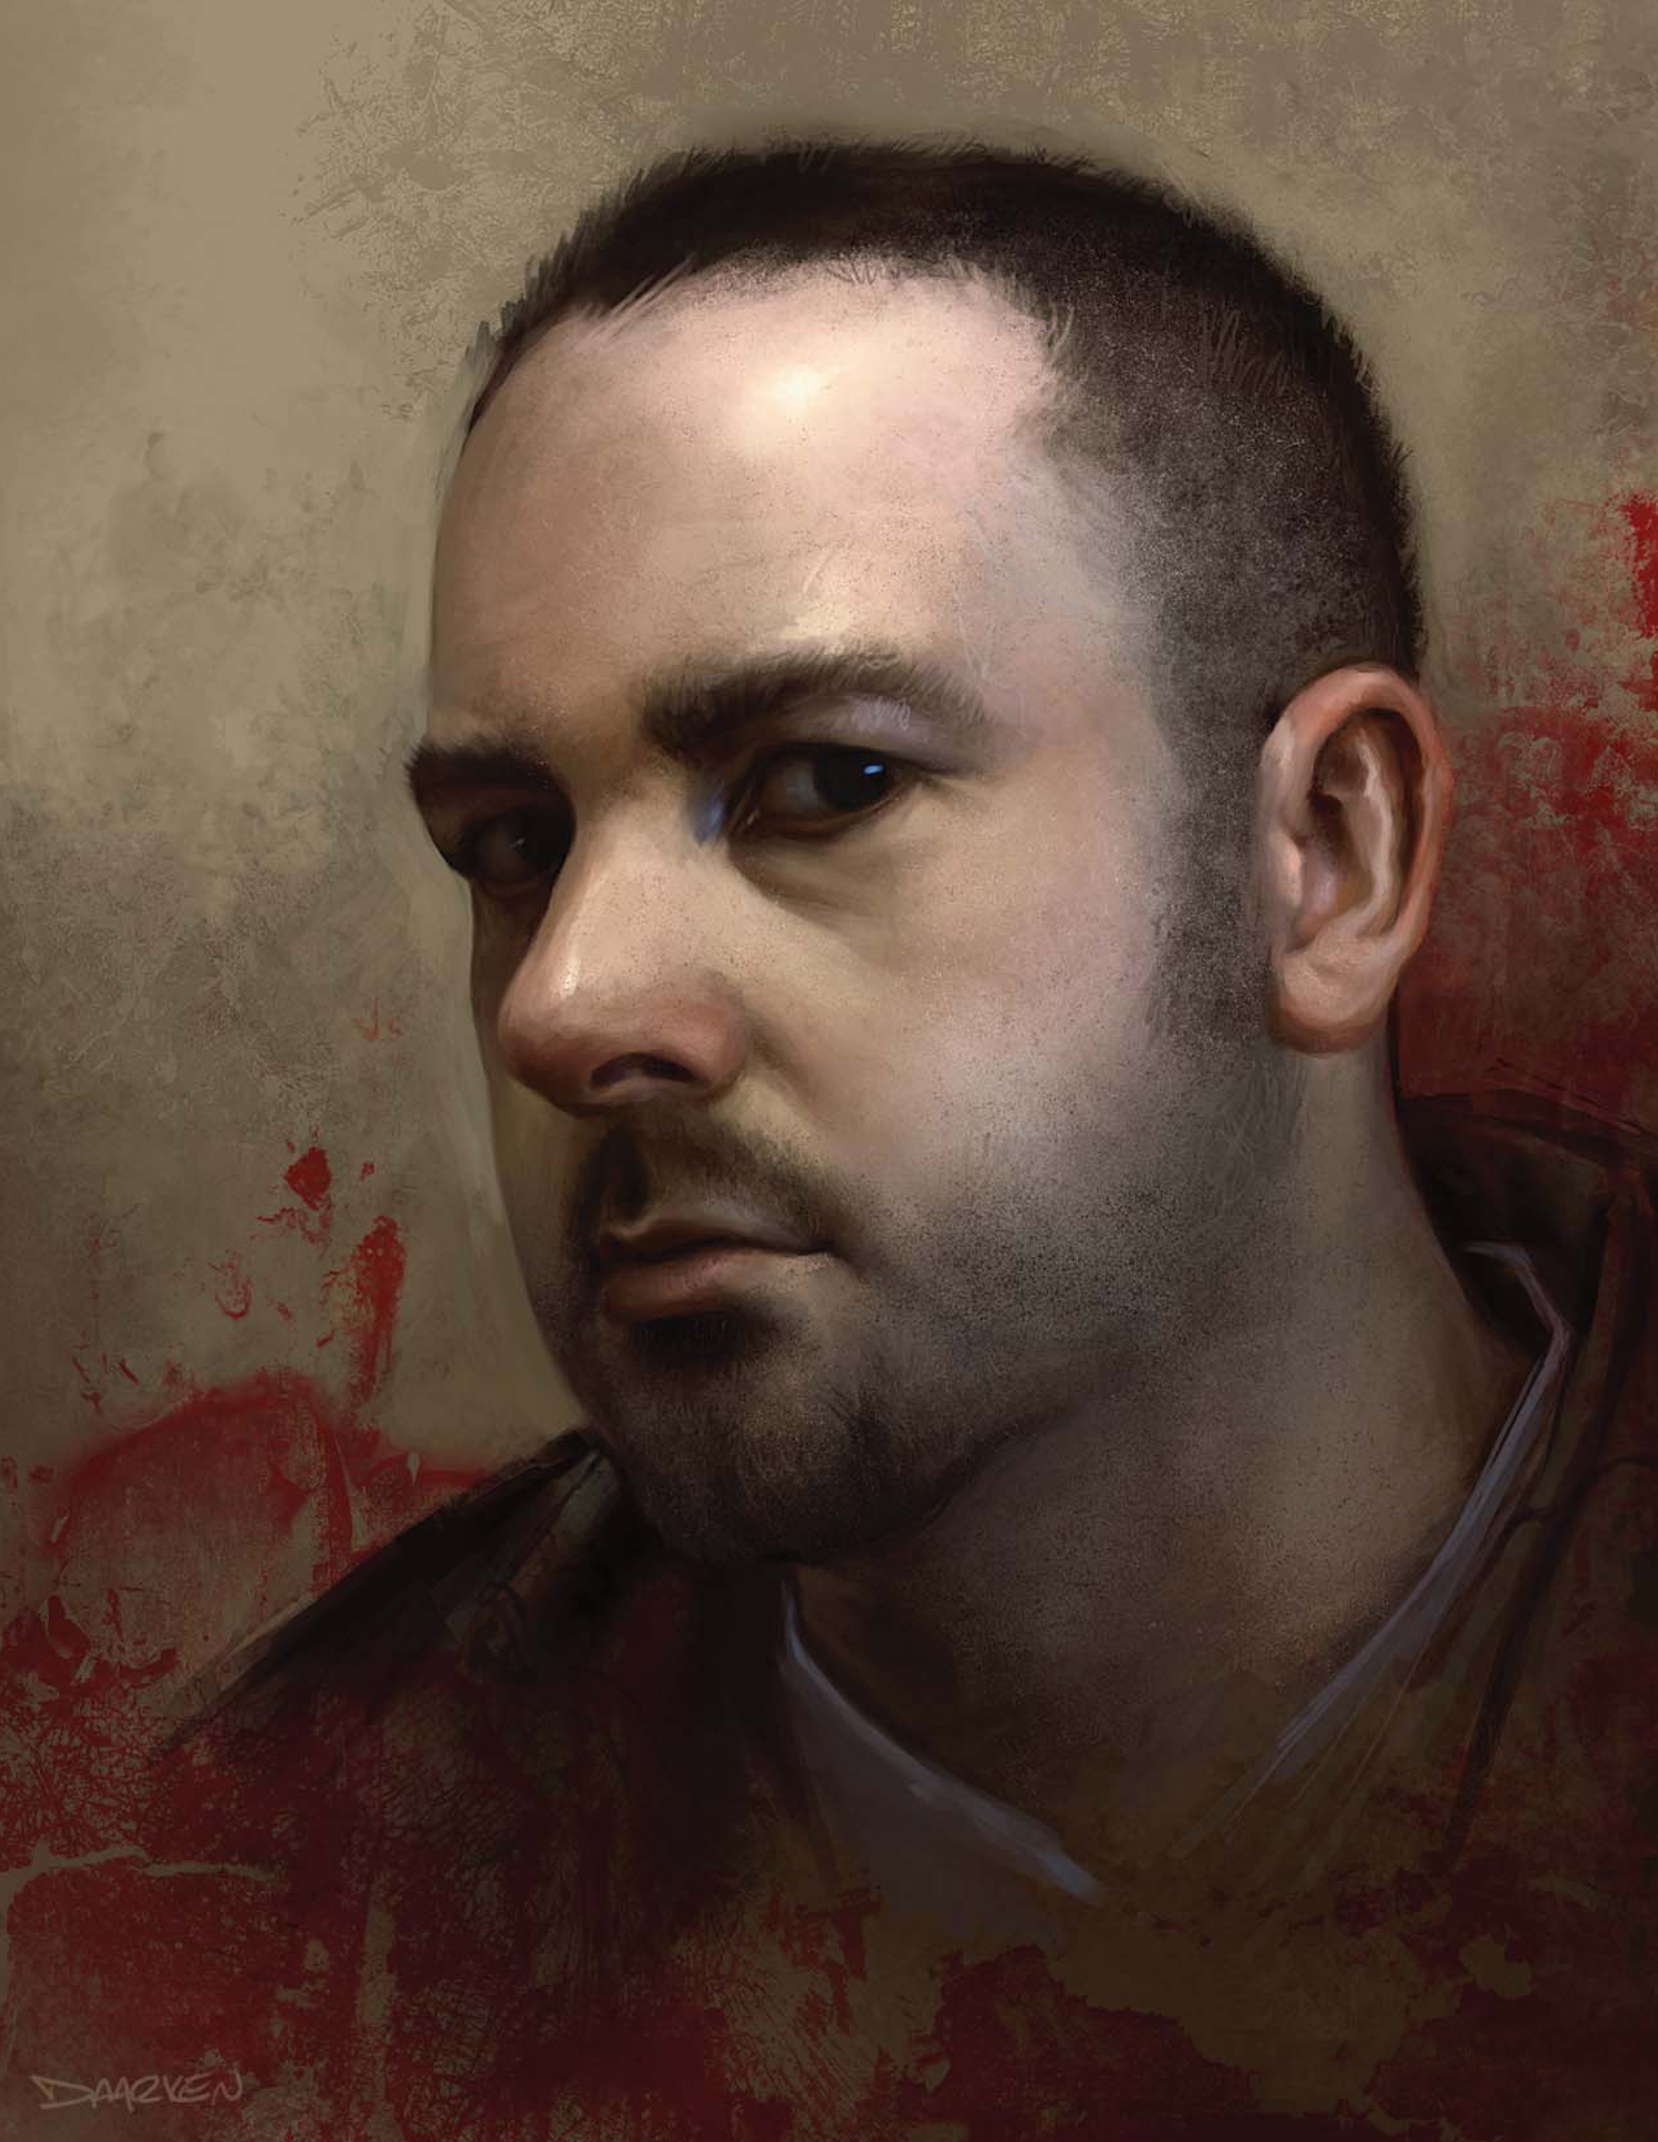
• Brush A & B: This rectangular brush has some nice texture to it that I like to use when painting skin. I usually use this brush as the base layer to get the main shapes in, and then I come in on top of it with other brushes (Fig.15a). I use this brush a lot because of its versatility. When used at a very small size, you can get some really sharp lines, while at larger sizes you can get a lot of texture (Fig.15b – c).
• Brush C: This is another brush that I use mainly for creating texture in the background (Fig.16a – b).
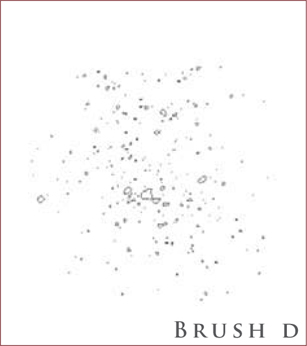
• Brush D: This speckle brush is really good for painting things like dust, hair, dirt, pores, etc. (Fig.17a – b).
• Brush E: I usually use this brush for creating texture in the background (Fig.18a – b).
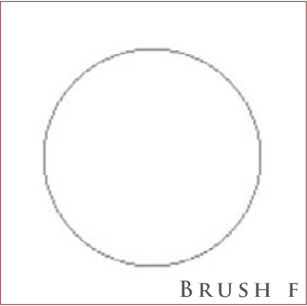
• Brush F: The brush I use the most is the default round brush. Even though it has no texture attached to it, I can still get a lot of variety with this brush (Fig.19a – b).


You can also rotate your brush in order to get brushstrokes in different directions. Just go to the Brush Tip Shape options and drag the circular slider around (Fig.20).
© Daarken
© Marc Brunet
CREATING CUSTOM BRUSHES TO SAVE TIME
Using Photoshop, we have all had this thought at one point: ‘’Man, wouldn’t it be great if there was a brush that could do all this, instead of me wasting my life on it?!’’ Well, in this tutorial, I will explain how I create my own custom brushes and how I use them in order to save me an incredible amount of time when I paint.
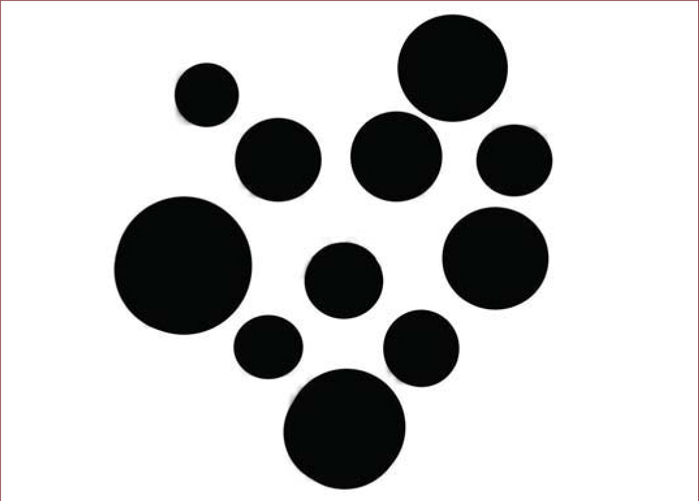
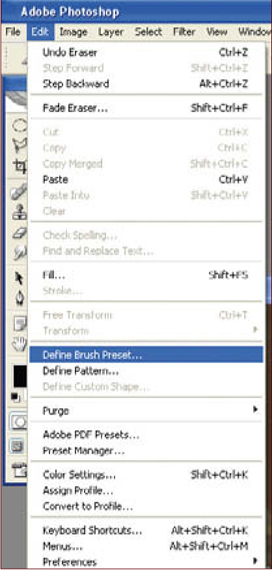
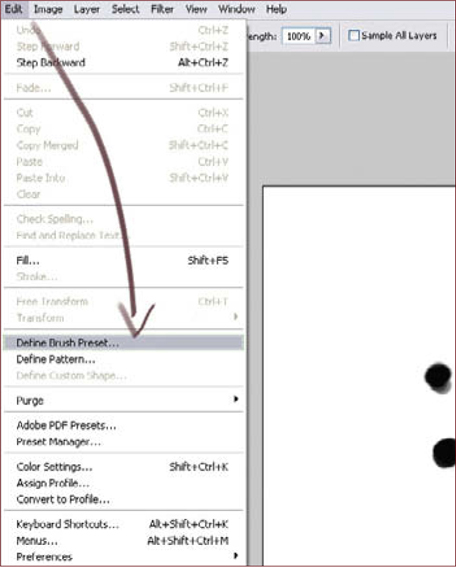
We will first try to mimic the stroke of a pencil – one of the main brushes I used to paint Sky Machina, along with a textured dry brush. At first, the brush creating process seems a bit tedious, but as soon as you get the hang of it you’ll pretty much fall in love with it. You can create a brush out of everything you paint! So first, let’s open a new file of about 500 by 500 pixels and draw whatever you want (let’s draw dots for the sake of this tutorial). Now go to Edit > Define Brush Preset (Fig.01 – 02). And that’s it! Well, that’s not exactly it, but following that the only things left to do are to rename your brush (Fig.03) and tweak it to get the effect you want, in the Brushes tab on the top menu.

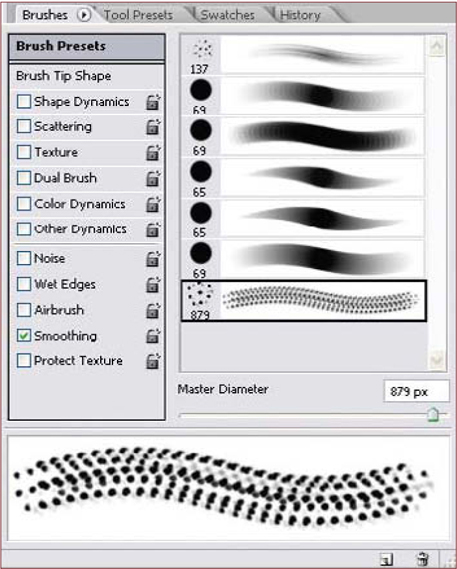
Opening the Brushes menu, we notice a bunch of options used to customize the basic brush that we just created (Fig.04). So, at this point, I suggest you open a new file with a white background to test the brush as you make the tweaks. You don’t need to change that much to get a decent result though. There might seem to be a lot of options but they’re all very intuitive and you can see the result right away in the Brush Preview window.
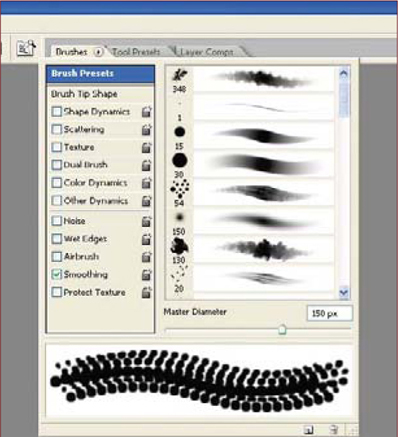
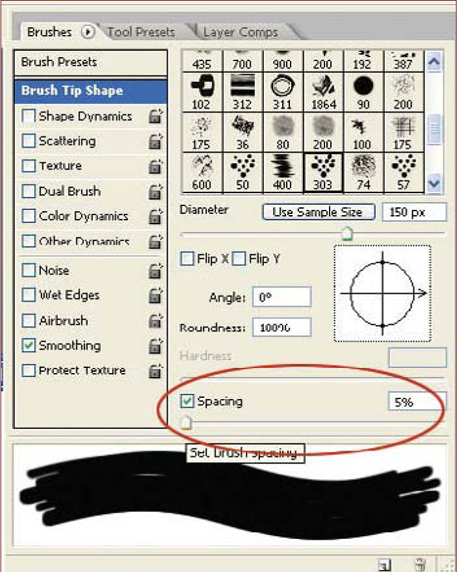
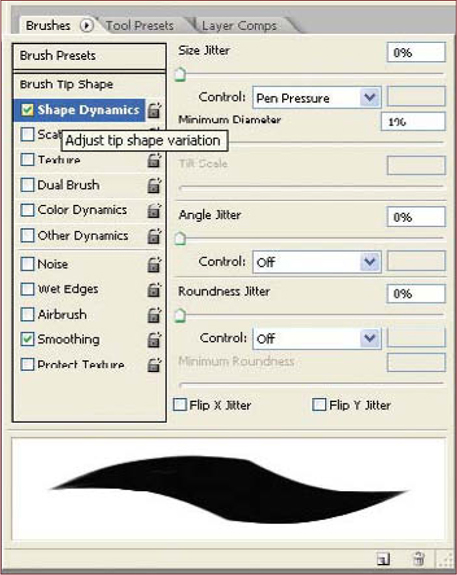
Here we’ll change the brush Spacing, since we want to eliminate the gap between each shape to make it look like a single stroke, so I’ll change the spacing from 25 to 5%. Notice how the stroke now feels even and continuous (Fig.05). I then check Shape Dynamics so that the lighter I press with the tablet pen, the thinner the stroke will be (Fig.06). You can just leave everything else at the default settings. Now skip to Dual Brush – this option is really where the party’s at! Here your brush can really become something special. For this brush I’ll use the triangular-shaped brush in the Thumbnails menu, which is full of tiny holes so it’ll give me the pencil look I’m trying to achieve. Simply change the values, as shown in (Fig.07).

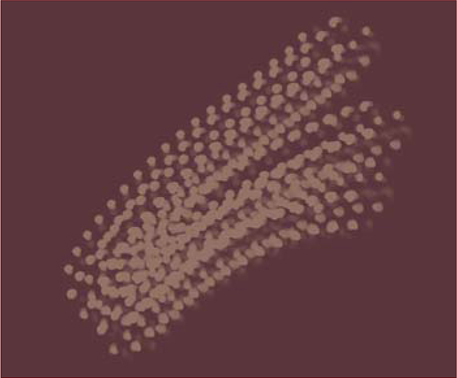
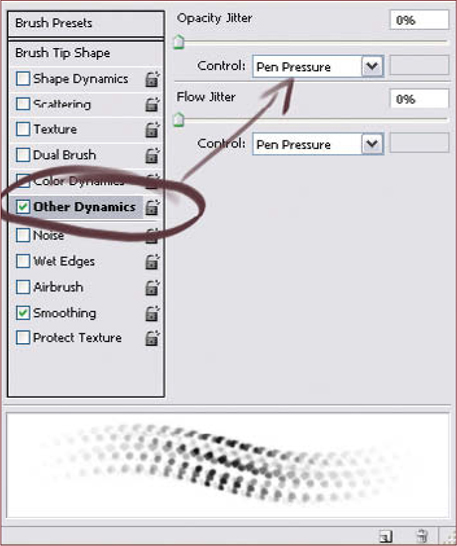
If I try the brush at this point I already get the result I wanted (Fig.08). The only thing left now is to activate the Opacity change with the Pen Pressure so that, if I press lighter on the tablet, the stroke will be lighter too (Fig.09). It’s just more intuitive and easier to work with this way. Save the newly created brush under something like “Pencil brush” – and that’s it! See the difference (Fig.10)? Use this new brush as you would use a real pencil to create all the different opacities and brush sizes you need. It’s a really nice brush to do line art digitally, or simply to get a little more texture than you would get with a regular round brush for example (Fig.11).


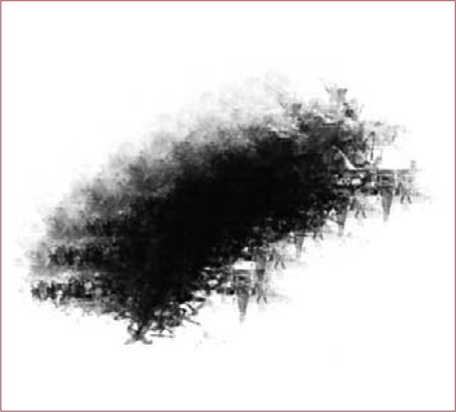
The other main brush I use, besides the regular hard-edged round brush found in the default Photoshop brush set, is another custom brush. This one is kind of like the one we just created, as it’s based on the same starting shape, but it has a texture associated to it. So let’s start with the same previous dots and save it as something like “Dry brush”. Again, in the Brushes tab menu, let’s play with a couple of the options … Firstly, drop the spacing to 5%, just like with the previous one, check Shape Dynamics and Other Dynamics, and leave everything else at default. Then check Texture, and leave everything at default there as well. Let’s step back at this point, save the brush we have here, and move on to creating the texture that the brush will use.
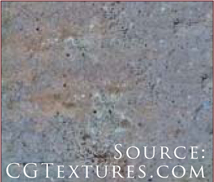
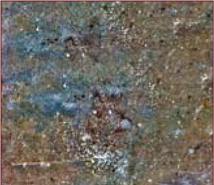
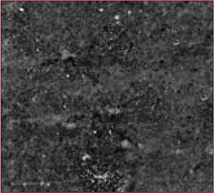
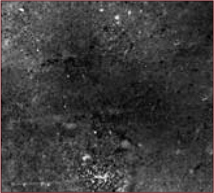
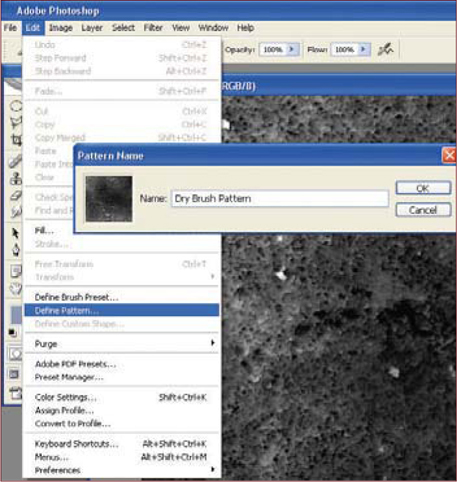
There are a bunch of default textures you can find when you click on Textures in the Brushes tab menu, but none of them will help us here. So let’s make our own! A very quick and simple way I have found is to take a photo of concrete, or any similar surfaces, take it to Photoshop, play with the Brightness/Contrast until you have a really contrasted and uneven texture, invert the colors (Ctrl + I), desaturate it, and then go to Filter > Brush Strokes and throw an Accented Edges filter on it (Fig.12 – 15). This should do! Now all you have to do is go to Edit > Define Pattern, save it under something like Dry Brush Pattern (Fig.16), and it should automatically appear in the pattern library.
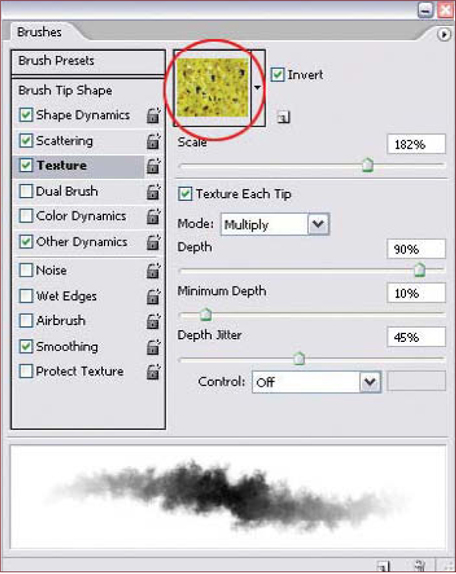
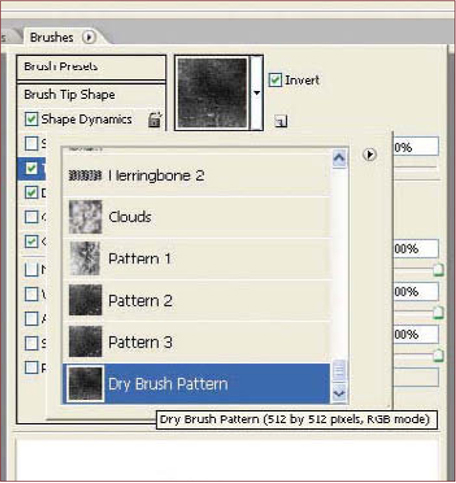
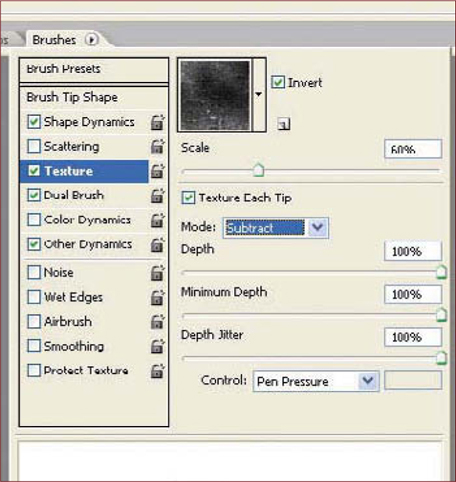
Let’s go back to where we were with our dry brush. In the Texture menu, browse the patterns and find the one we just created (Fig.17), adjust the scale to 60% and make sure that Texture Each Tip is checked. Select Subtract as the blending mode and leave everything else at 100% (Fig.18). The brush is now done, so save it and enjoy the texture madness (Fig.19)!

To get a little more diversity with the textures, I used the brushes seen in Fig.20 as well. Everything else, though, was done with the two custom brushes just created (Fig.21).

© Marc Brunet
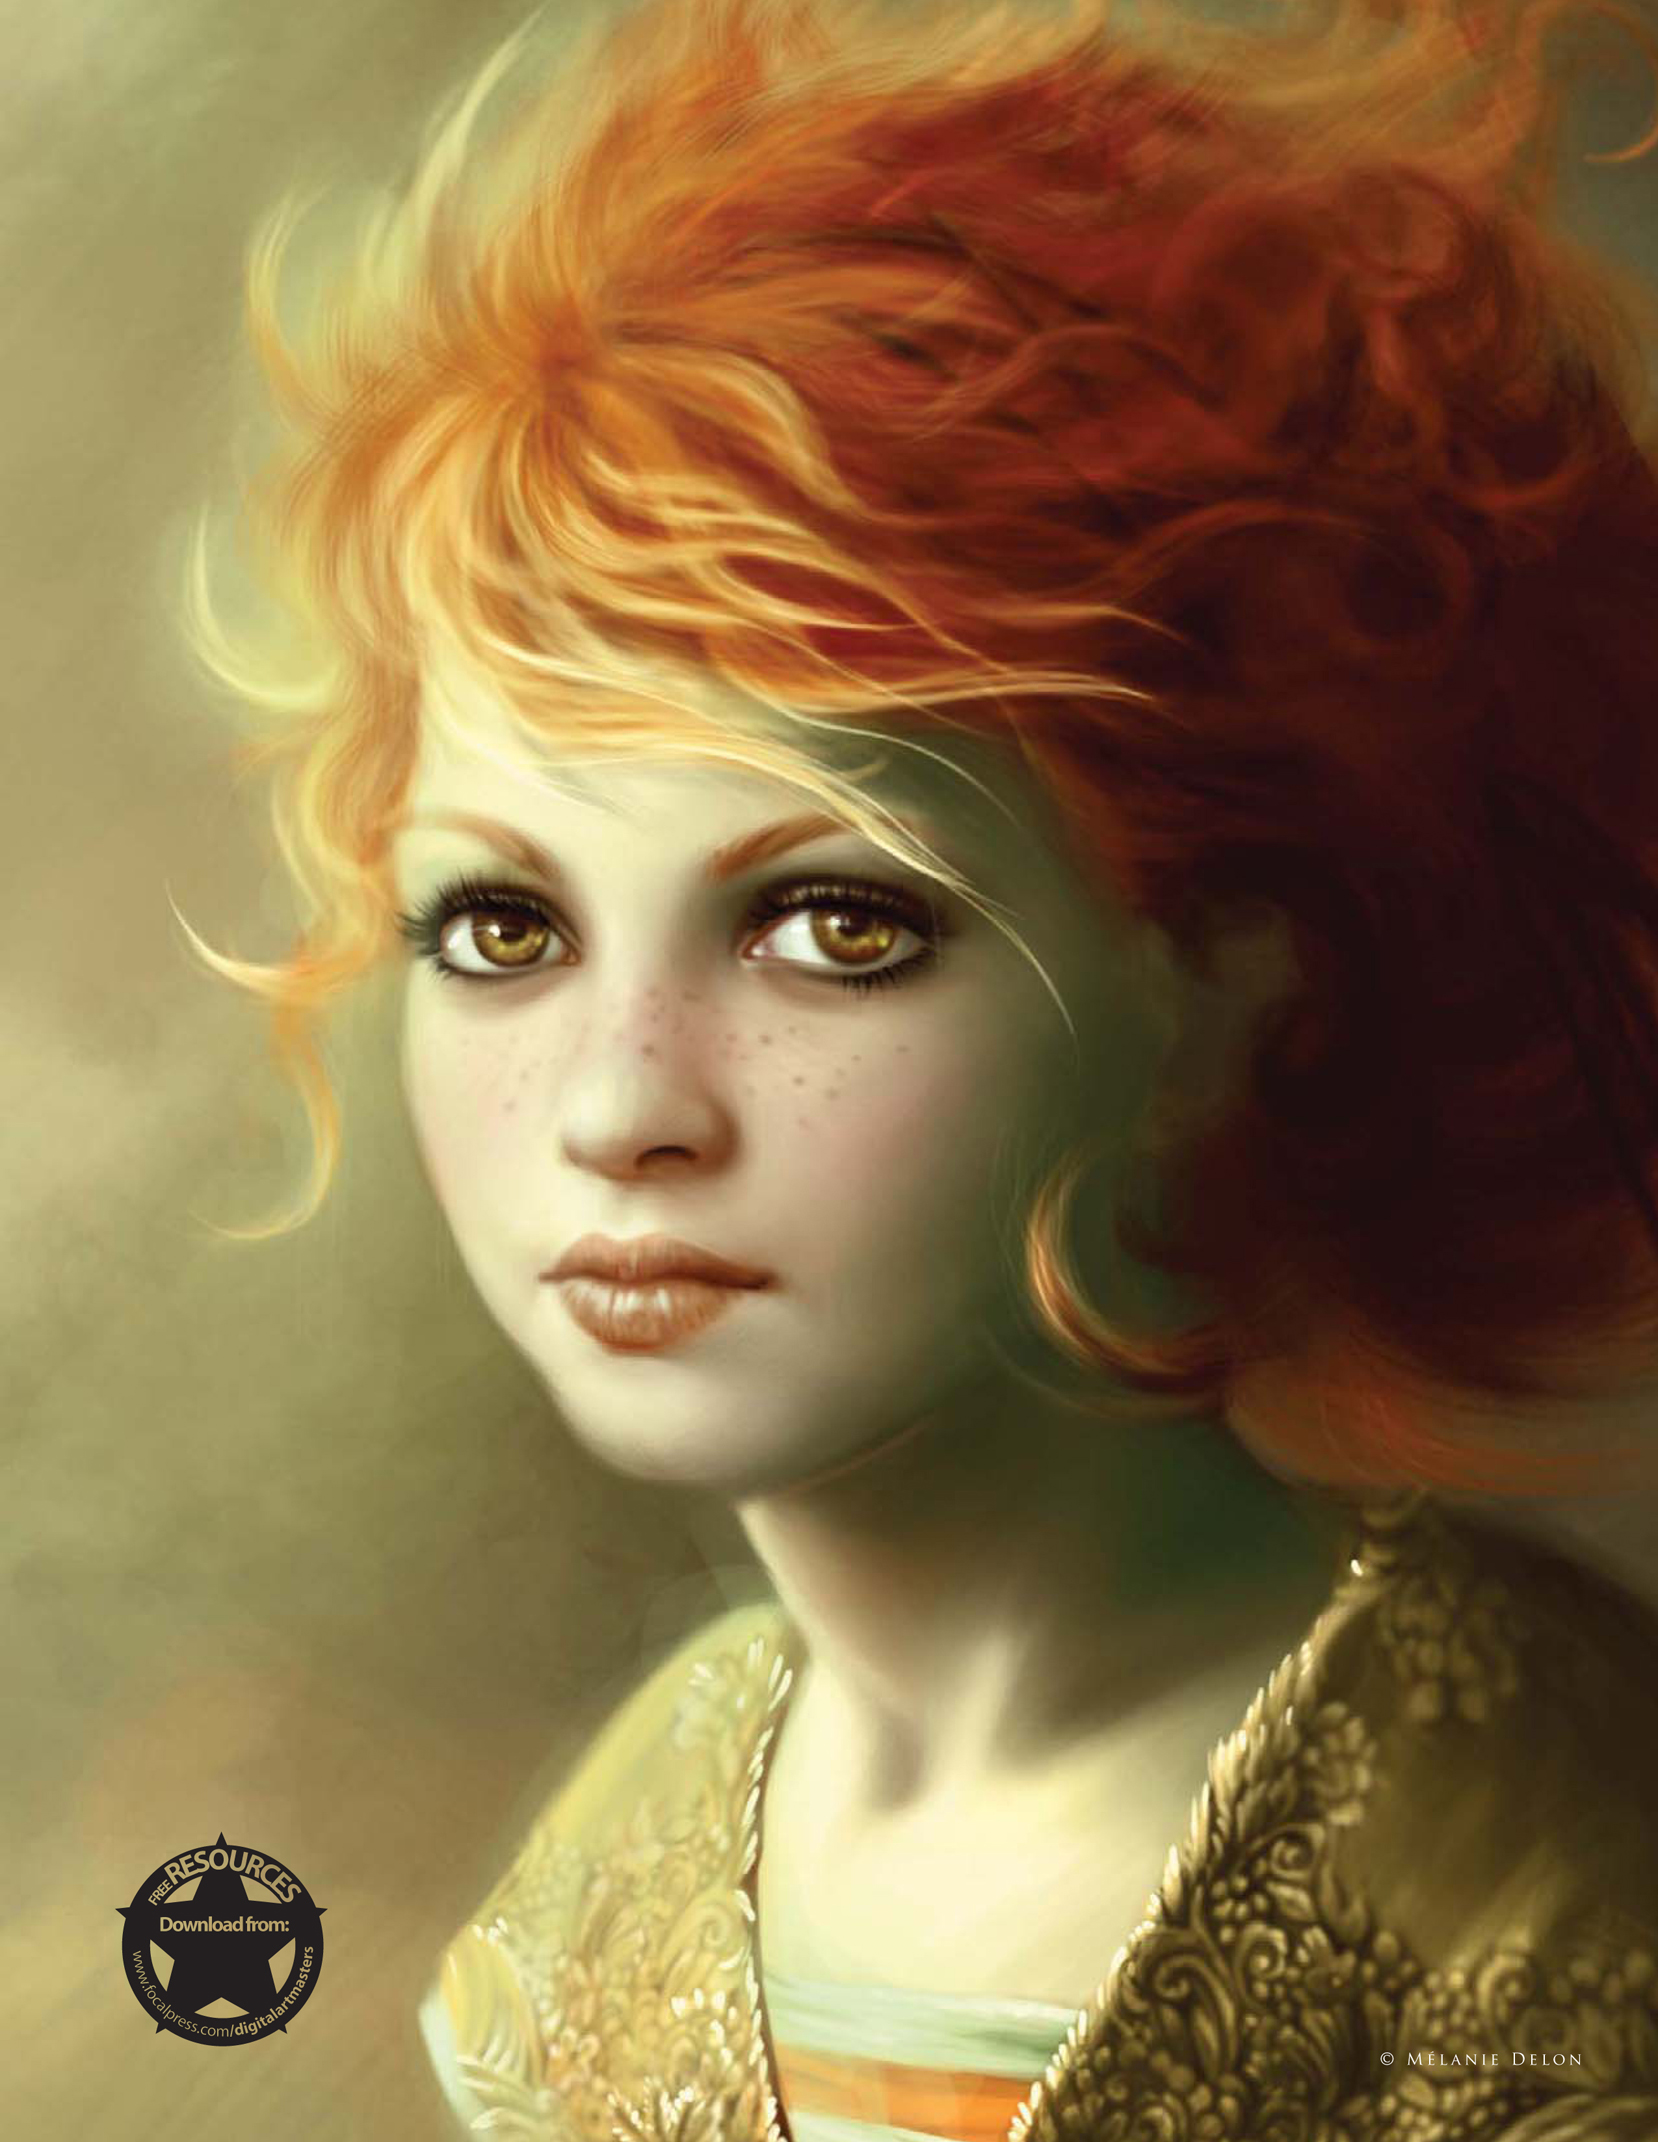
© Mélanie Delon
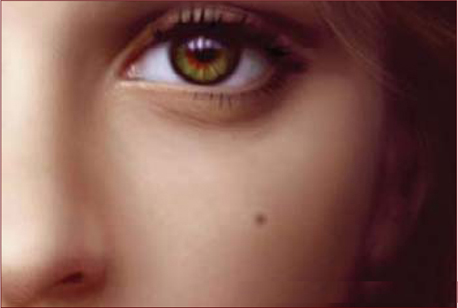
CUSTOM BRUSHES FOR SKIN
The Speckled Brush
This brush is the best that I have used so far to achieve a painterly feel, and the great thing about it is that you can use it for everything!
Create It!
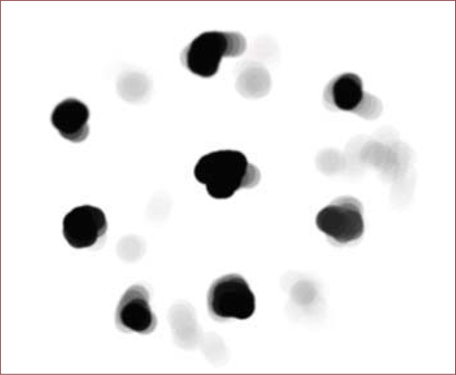
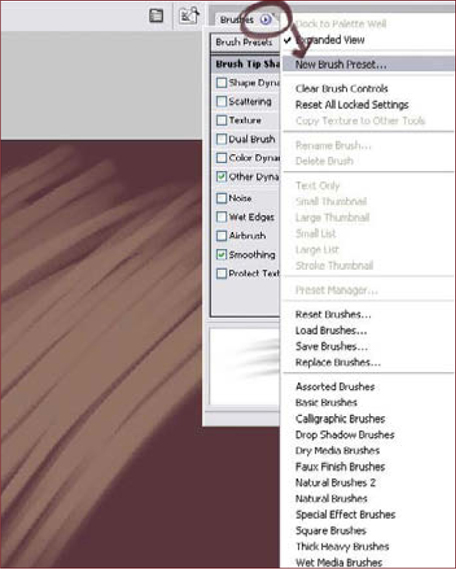
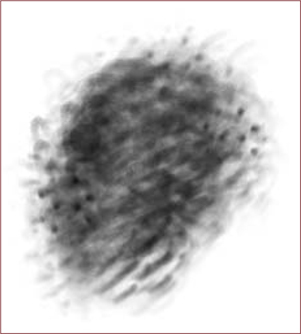
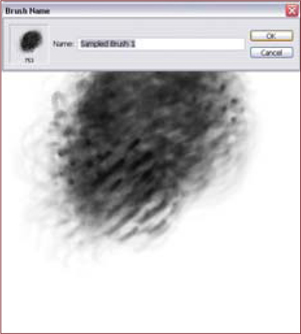
The technique is really simple … On a new white canvas with a basic round-edged brush, I’ll paint little random black dots of different shapes and sizes. I usually start without a lot of dots, and I want my brush very low in opacity (Fig.01). I’ll then add more dots, but with a very low opacity, just to bring more texture to the future brush (Fig.02). Once this step is OK I’ll define this image as a brush, by going into the Edit mode and clicking on Define Brush Preset (Fig.03), and then clicking OK in the pop-up. Now I have my new brush in the list, ready to be used.

Brush Settings
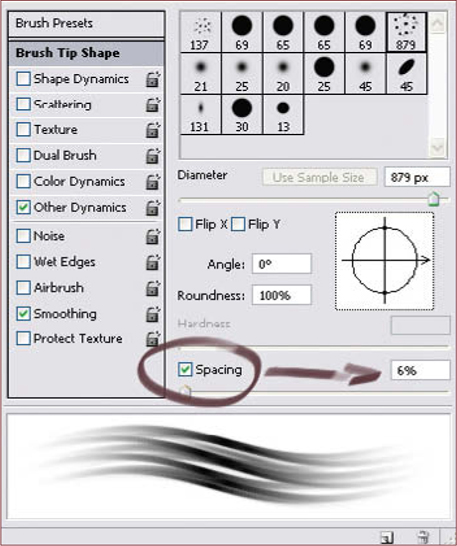
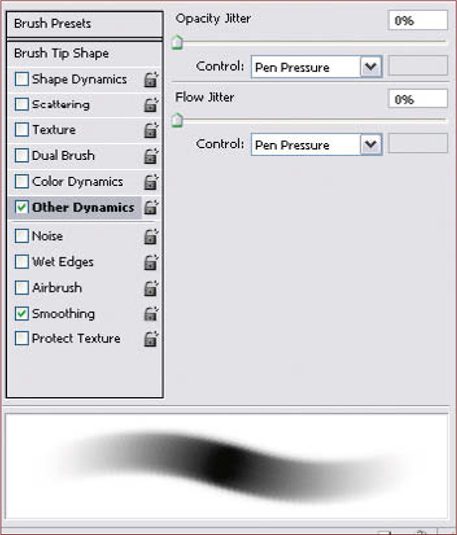
Now the fun part begins … As you can see (Fig.04), this brush is basically unusable as it is (Fig.05), so I now have to tweak it. For this, I go into the brushes palette where I set the control setting under the Opacity Jitter to Pen Pressure (Fig.06) and the Spacing to 6% (Fig.07). The settings are now OK, and this new brush looks much better (Fig.08) so I’ll save it (Fig.09).
You can make different versions of the same brush, some with more dots or less – just try them! It’s good to have several speckled brushes and combine them to create a great texture.
The Brush in Action
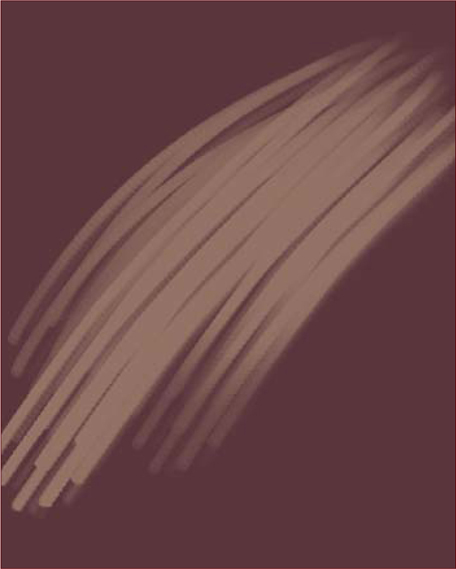
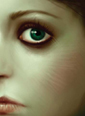
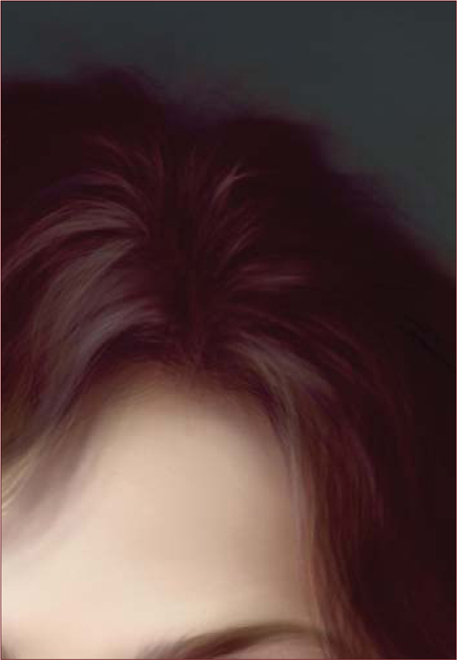
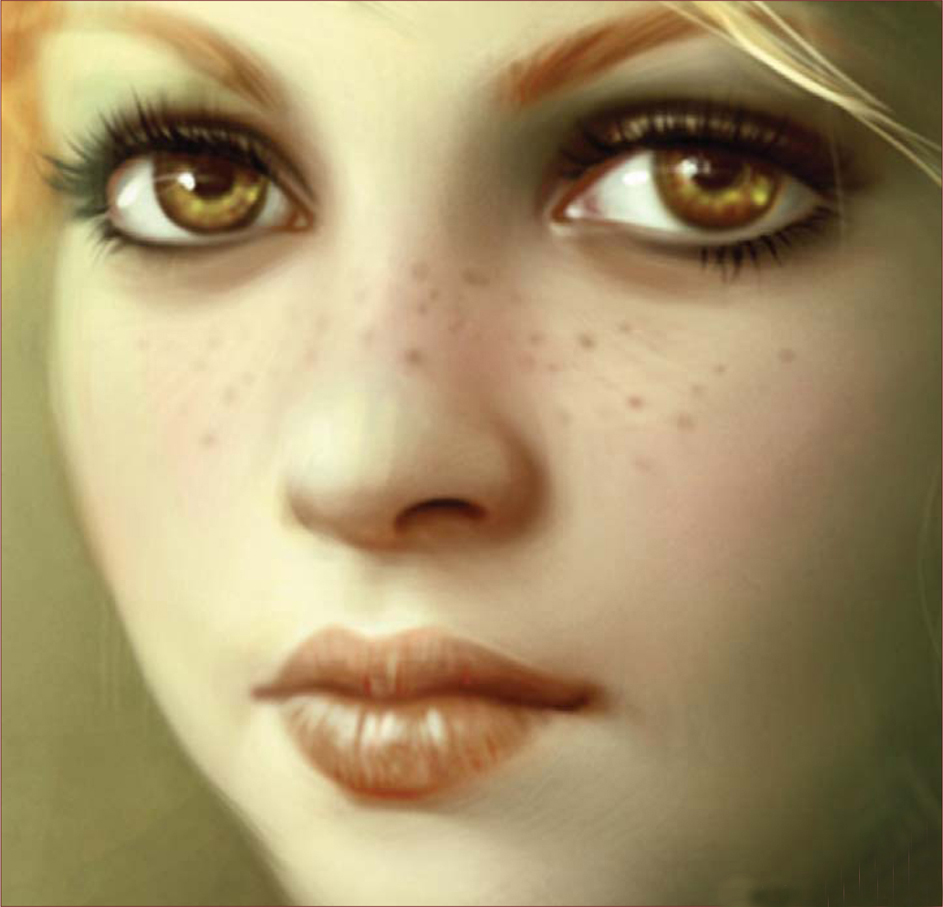
Now, how to use it … This kind of brush is good when you need to bring texture and color variation; you can use it to bring life to a base done with a basic round edge (Fig.10), to paint hair (Fig.11), or to paint fabric (Fig.12). This brush can be used for unlimited purposes!
© Mélanie Delon
© Mélanie Delon

© Mélanie Delon
The “Smooth-Textured” Brush
This one is a kind of hybrid brush; it’s a mix of a basic round edge and a speckled brush, so let’s see how to create it.
Create It!
For the base (on a white canvas), I’ll use a speckled brush and scribble an oval shape softly with a very low opacity (Fig.13). Then I’ll add more intensity here and there with another speckled brush, or a basic round edge (Fig.14). I’m now satisfied with the general shape so I’ll define it as a new brush (Edit > Define Brush Preset) (Fig.15) and move on to the settings.
Brush Settings
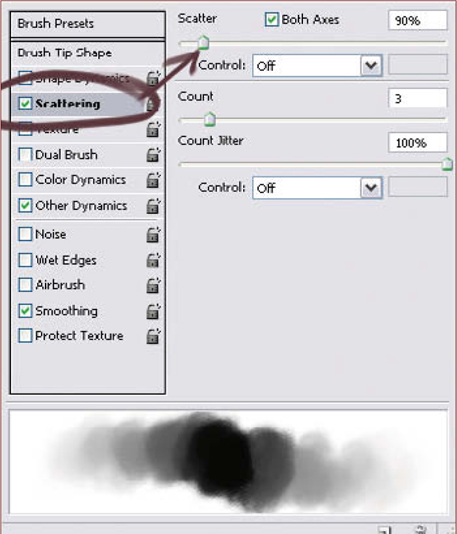
As usual, I set the Opacity Jitter to Pen Pressure and the Spacing to 12%, and then I save the new presets (Fig.16). The brush will now look like that shown in Fig.17. You can of course play with the different settings to find nice effects, like the Scattering mode (Fig.18) which is pretty handy for creating textured brushes.

The Brush in Action
Most of the time, I use this one (see Fig.17) after the speckled brush when I want to smooth the skin (Fig.19). This brush will not destroy those little color variations obtained previously, so you don’t need to worry about that – the only rule is to use it with a very low opacity. This step will bring the last smoothing touches and unify the whole texture (Fig.20). You can also use it as a starting point for most textures!
© Mélanie Delon

© Mélanie Delon
You can download a custom brush (ABR) file to accompany this tutorial from www.focalpress.com/digitalartmasters
© Mélanie Delon
© Michael Corriero
CREATING A BRUSH FROM SCRATCH IN PHOTOSHOP
The first thing to do is create a blank canvas; I usually make sure it’s set at 300 dpi resolution, around 500 by 500 pixels, so the brush itself doesn’t become pixelated or incapable of scaling to larger sizes when working on a large image.
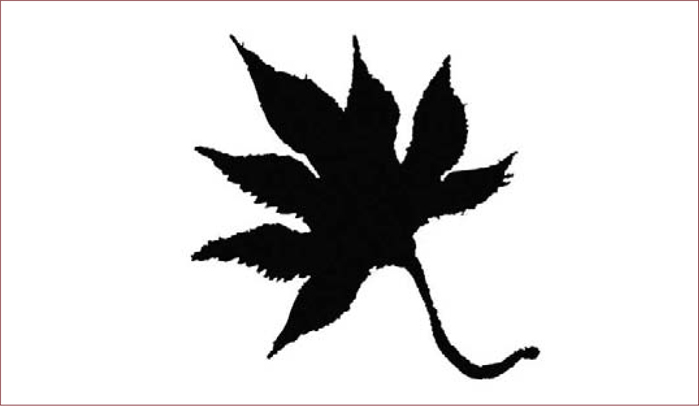
Japanese Maple Leaf Brush
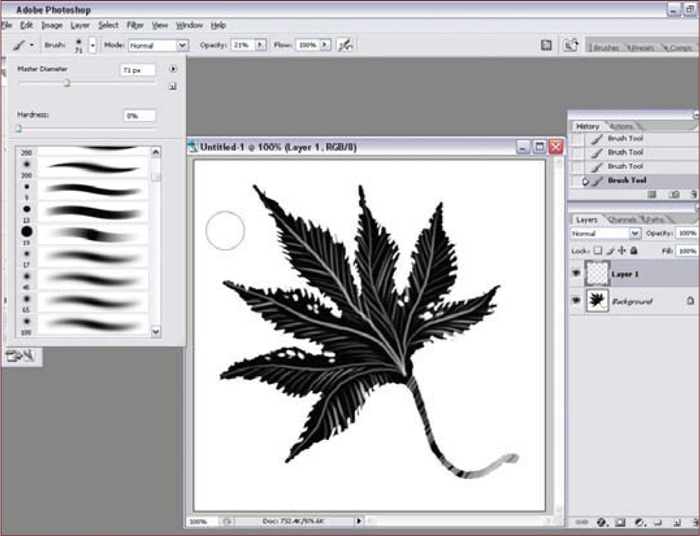
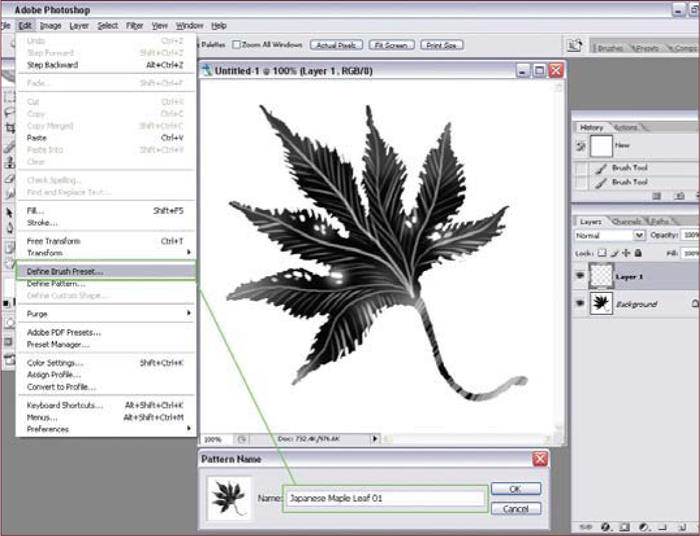
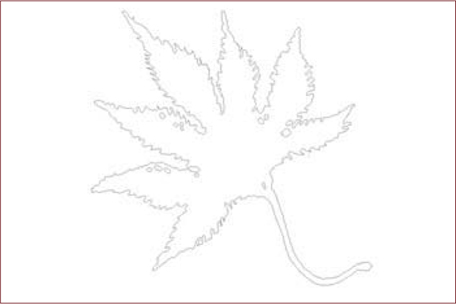
This first brush design is going to be geared toward foliage, specifically a Japanese Maple Leaf, which will be used to create quick, easy batches of leaves without going through too much rendering trouble. So to begin, grab any of the default brushes supplied by Photoshop and just start to draw out a silhouetted shape, in this case the Japanese Maple Leaf (Fig.01). Since we do want a bit of depth to the brush, block in some of the veins, rips and rugged edges of the leaf. You can also fade some areas so everything isn’t on the same level which helps give a bit of variation (Fig.02). Now that you’ve created the brush shape itself, you need to save it. Go to Edit > Define Brush Preset and then choose a name and click OK (Fig.03). You’ll notice that the new brush, with the name you’ve chosen, will show up in the brush list at the very bottom.
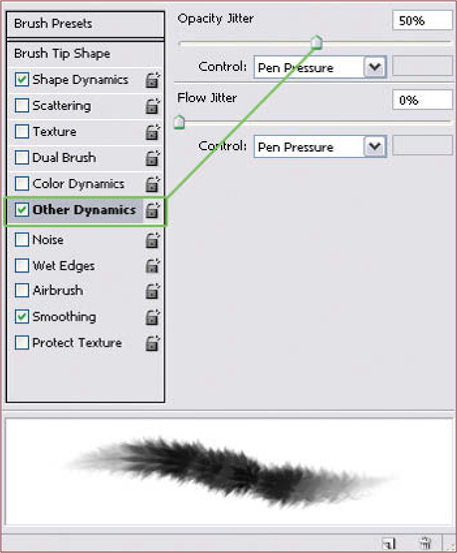
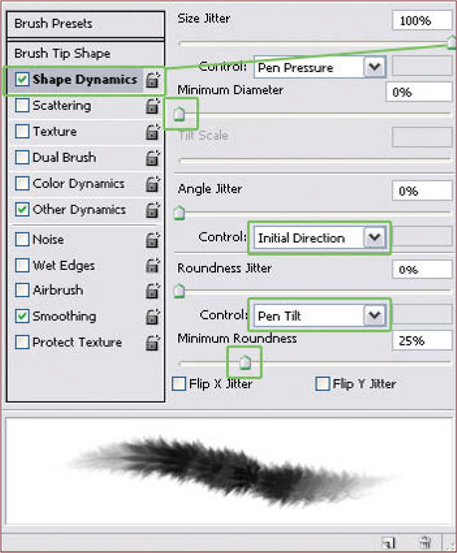
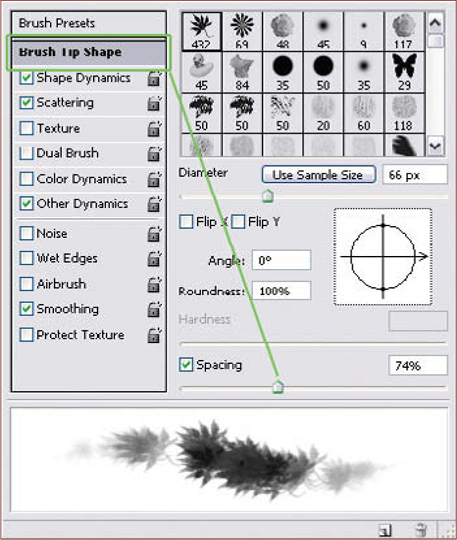
The next step is to select the new brush you’ve just created and click the Brushes Option window, located at the top right with a little arrow next to it. This brings down the brush settings you can apply to your custom brush (Fig.04). Leaving the brush settings at a default doesn’t allow for much control or variation in the strokes, so the first thing to do is allow for some pressure sensitivity; you do this using the Other Dynamics setting (Fig.05). Set the Opacity Jitter to approximately 50% and make sure the control setting is set to Pen Pressure. To provide some variation in the direction and scale of the brush, choose the Shape Dynamics settings (Fig.06). Set the Size Jitter to 100% and make sure the control settings under Angle Jitter are set to Initial Direction. The control setting under the Roundness Jitter should be set to Pen Tilt, and a minimum roundness of approximately 25% (Fig.07). Now that we know where the settings for the brush options are, feel free to test them and play around with different variations, different percentages of control and varying dynamics, including Scatter and Dual Brush modes (Fig.08). One of the last settings I adjusted before finding the right feel for this custom brush was the Brush Tip Shape (Fig.09) where I applied 74% spacing to the separation of the brush flow.


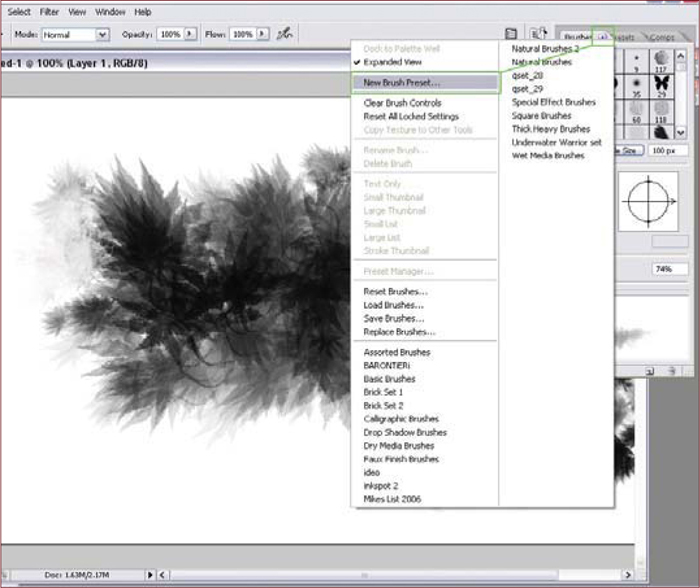
OK, so now our brush settings are complete all that we need to do is save the brush options that have been applied. It’s very important throughout this process that you don’t choose another brush, or else you may lose all the settings you have applied to your custom brush. Click the Brushes Option window, located at the top right with a little arrow next to it, as previously, and now choose New Brush Preset. Label your new brush, click OK, and the custom brush you created earlier will now be saved with the new settings you’ve applied, and located at the bottom of your brush list (Fig.10).
A Variation on the Japanese Maple Leaf Brush
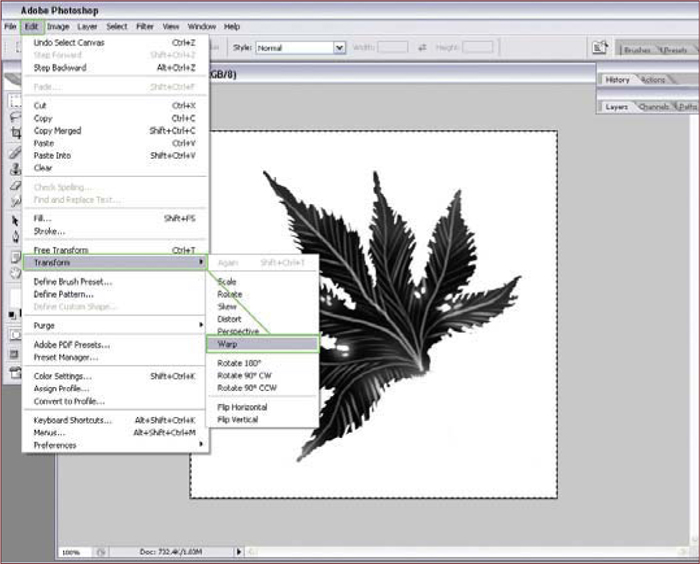
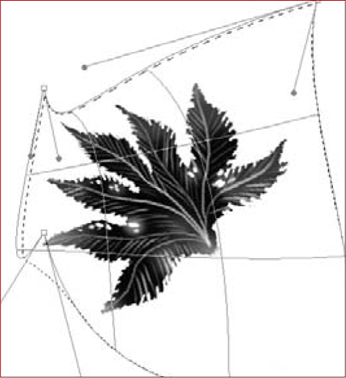
The next step is just as quick and basically a recap of what we just went over. I’m going to create a quick variation of the Japanese Maple Leaf by getting rid of the stem and adjusting the shape of the points. First, erase the stem of the original brush, then choose Select > All, then Edit > Transform > Warp (Fig.11). You’ll notice that the entire box has been selected with the dotted lines, and once you choose the Warp transformation option you can choose points on this graphed box to mould and skew the brush shape (Fig.12). You can also grab anywhere inside the box and just drag it to transform its original outline, and then apply the transformation to confirm the change (Fig.13).
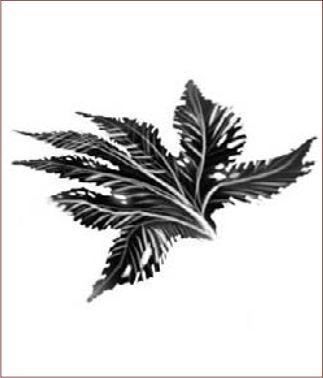
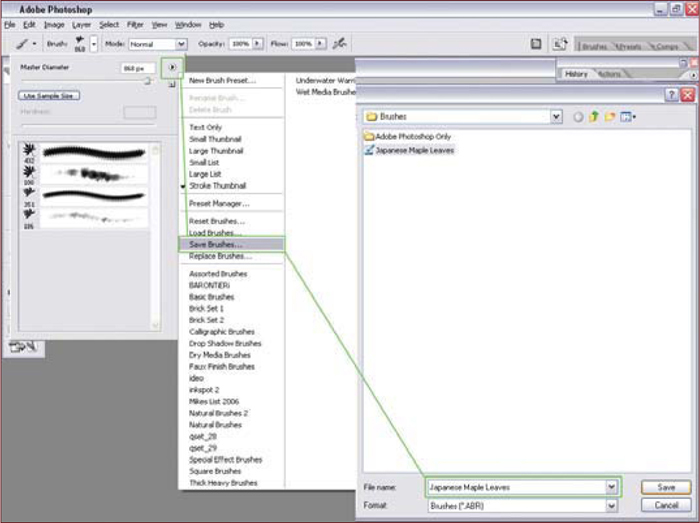
After applying a few of the same brush options as before, such as the Other Dynamics and Shape Dynamics, I’ve played around with it and I’m happy with this variation on our original brush (Fig.14). Save the brush preset, as we did previously, and it will be added to your list. Lastly, now that we have two custom Japanese Maple Leaf brushes, both with the default shape and the brush settings saved as preset brushes, you’ll want to save the brush list. On your brush list there is an arrow next to the top right of this box. Click the arrow then Save Brushes and label your brush list; they will be stored and can be used at any time you wish (Fig.15). To access your brush list, in the same manner as saving your list, choose Load Brushes and select your brush list file.
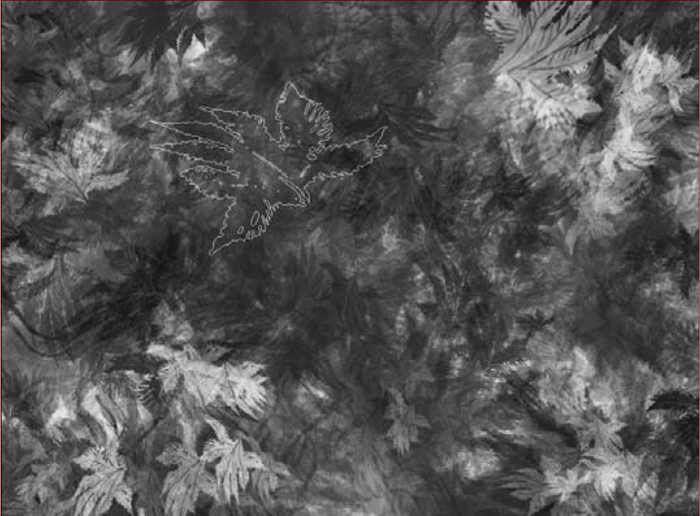
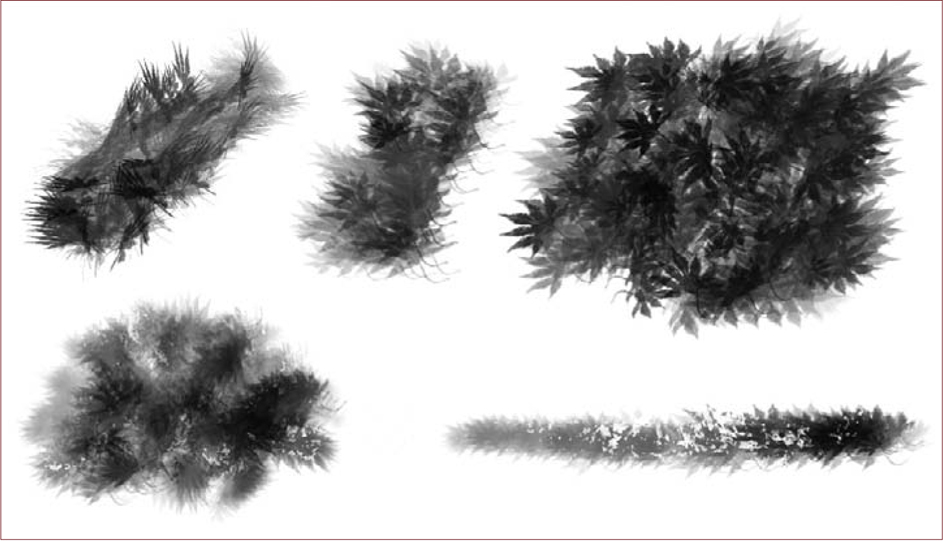
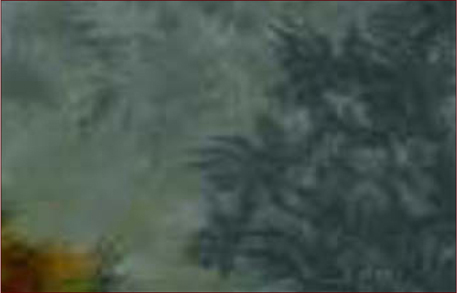
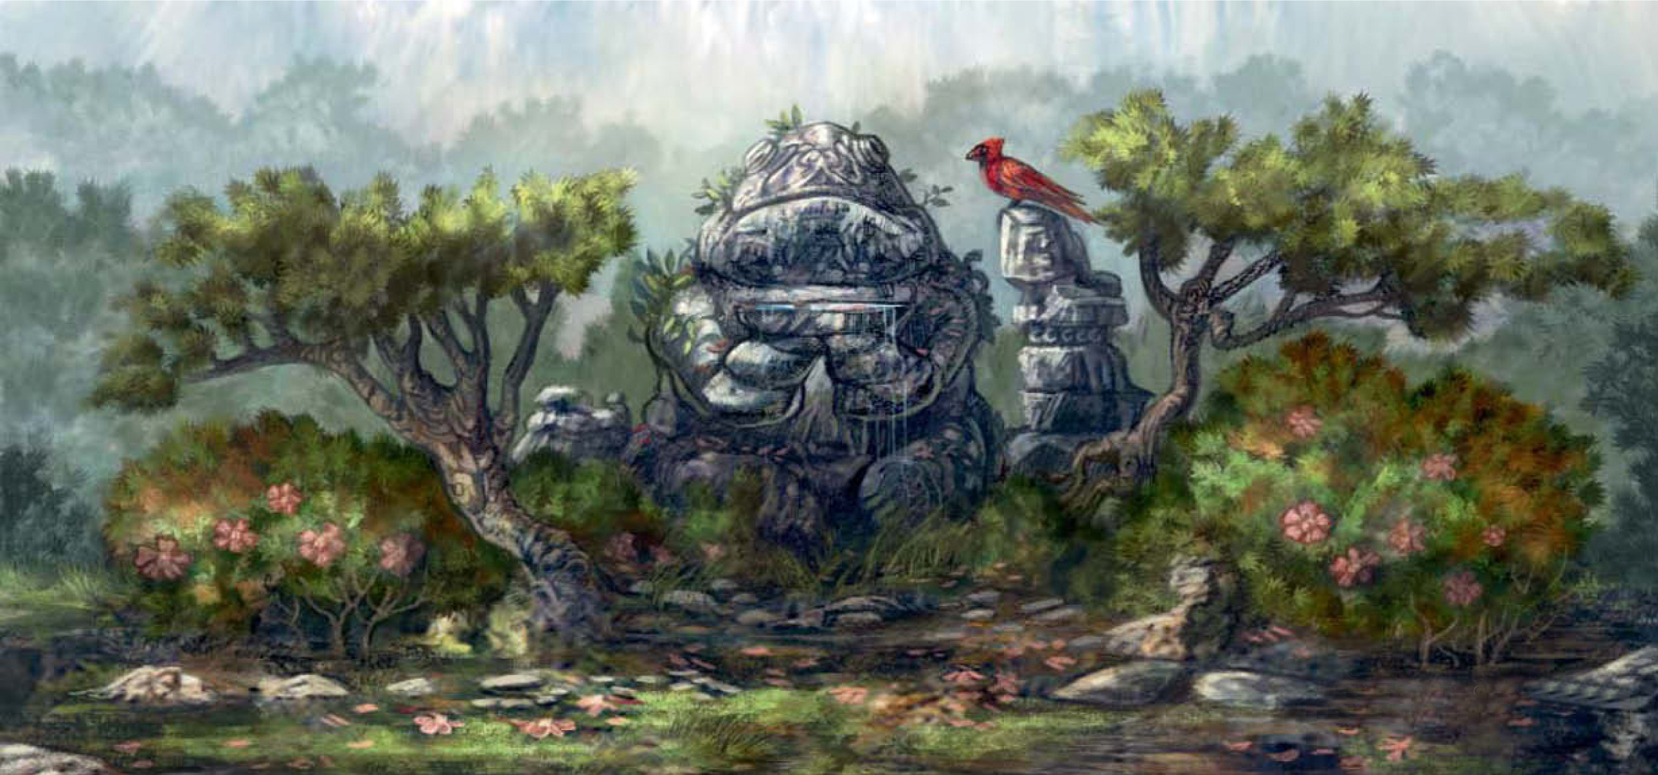
The original version of the custom Japanese Maple Leaf brush can be seen in Fig.16. The modified version of the Japanese Maple Leaf brush can be seen in Fig.17. See Figs.18 – 19 for close-up detail showing the two brushes used together in a painting, using them in a few different methods, as a more muted back drop, and applying color dynamics and lighting effects.

You can download a custom brush (ASE) file to accompany this tutorial from www.focalpress.com/digitalartmasters

©Michael Corriero