Exercise 30:
STENCIL ART
IN THIS EXERCISE, YOU WILL CUT HEAVY CARDSTOCK TO MAKE A STENCIL TEMPLATE, AND THEN PRINT YOUR DESIGN WITH A STIPPLING TECHNIQUE.
YOU HAVE TWO CHOICES FOR MAKING A STENCIL: WITH ACETATE OR WITH CARDSTOCK. YOU CAN KEEP AND REUSE AN ACETATE STENCIL, WHEREAS PAPER WILL HAVE A SHORT DESIGN LIFESPAN. THE CARDSTOCK OPTION IS AN INEXPENSIVE WAY TO TRY STENCILING BEFORE INVESTING IN MORE EXPENSIVE MATERIALS.
MATERIALS
Newspaper or large craft paper
Acetate, smooth heavy cardstock, or Bristol for the stencil
Permanent marker
Pencil
Cutting mat
Straightedge
Craft knife
Artist tape
White, black, or gray cardstock
Repositionable adhesive spray
Plastic spoon
White and black block-printing ink
Palette
Palette knife
Stenciling brush, foam dauber, art sponge, or flat sponge brush
Scrap paper

MORE STENCILED ARTWORK: A SIMPLE GEOMETRIC DESIGN AND A STEM DESIGN


1. Cover your work space with newspaper or large craft paper.
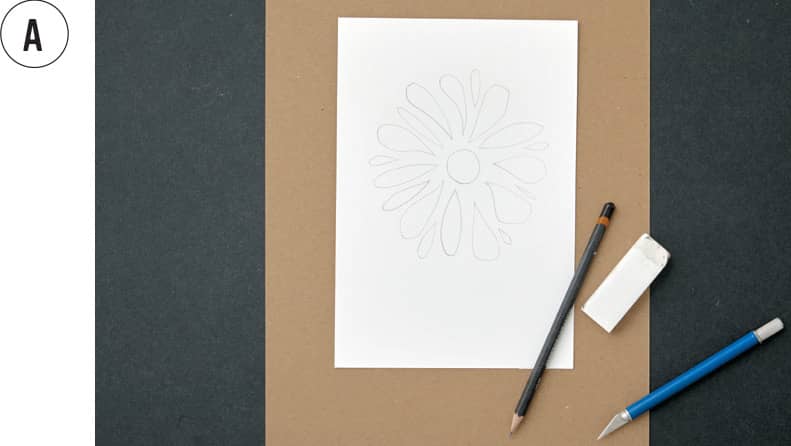
2. Draw a simple flower design onto the acetate with a permanent marker or with pencil on the cardstock. (See A.)

3. Place a cutting mat on your work surface, and use a straightedge and craft knife to cut out the stencil. Remember, the areas you cut out will be the areas that print. (See B.)

4. Tape down your cardstock, then secure the stencil template on top to avoid movement. Use removable artist tape or spray the back of the stencil with repositionable adhesive. Keep your cut edges flush on the paper. (See C.)
5. Place a spoonful of ink on your palette. Warm up the ink with a few flips of a palette knife.
6. Load ink onto the stenciling brush, art sponge, or foam dauber. Tap the coated brush on scrap paper to remove any excess ink.

7. Hold the brush perpendicular to your paper as you tap the paint in an up-and-down motion to cover the cutout areas of the stencil. This is called stippling. Apply a thin, even coat. Do not use strokes, because your edges will clog and run underneath your template. Let dry. (See D.)
8. Repeat until the coverage is evenly distributed.

9. Make sure the ink is dry before peeling up the template to reveal your design. (See E.)
10. If you are attempting a layered piece of work with additional colors, let the first layer dry completely before adding another layer of color to your art.