
Introducing HTML tables
Creating your tables in Standard mode
Sorting your table data
Importing data from other programs
Working with tables for spacing and alignment
Nesting your tables
In the early days of Web design, HTML tables offered one of the only options for creating complex page layouts. By splitting and merging table cells and using them as containers for text and images, Web developers could create intricate page designs despite the limits of HTML. Most were frustrated by this solution.
Using tables to create designs was far from ideal, and we often had to resort to special tricks, such as using a clear GIF to control spacing (see the sidebar, "The transparent, or clear, GIF trick," later in this chapter). But at least with tables you could position text, images, and other elements, anywhere you wanted on a page (well, almost anywhere). For example, you could use a table to align two columns of text side by side with a headline across the top like the format you might see in a newspaper or magazine. Because you could make the borders of a table invisible, you could use tables to create these kinds of designs without the table itself being visible on the page.
Today CSS has completely changed the way Web pages are created. Tables are still an ideal way to present tabular data on the Internet: For example, just about any content you could display in a spreadsheet can be formatted easily and effectively with a table. But tables are no longer the recommended solution for creating any other page layouts. Today, most professional designers use CSS to create page designs because these pages download faster, are easier to update, and are more flexible and accessible than tables ever were. Chapters 5 and 6 are dedicated to CSS and the latest developments in Web design.
This chapter is designed to help you appreciate how to create and edit tables in Dreamweaver. Even though tables are no longer recommended for most Web page layouts, you still find them used on many Web sites; so I've included a few tips for working with tables for page layouts, as well as formatting and sorting tabular data with tables in Dreamweaver.
Tables are made up of three basic elements: rows, columns, and cells. If you've ever worked with a spreadsheet program, you're probably familiar with tables. Tables in HTML are quite similar when it comes to working with tabular data. In most cases, you'll want to create a row of headings along the side or top of a table and then columns and rows that can be populated with text, images, and other data.
The code behind an HTML table is a complex series of <tr>, <th>, and <td> tags that indicate table rows, table header, and table data cells, respectively. Figuring out how to type those tags so that they create a series of little boxes on a Web page was never an intuitive process. If you wanted to merge or split cells to create rows or columns with varying numbers of cells, you faced a truly complex challenge.
Thank the cybergods that you have Dreamweaver to make this process easy. With Dreamweaver, you can easily
Create tables and modify both the appearance and the structure of a table by simply clicking and dragging its edges.
Add any type of content to a cell, such as images, text, and multimedia files — even nested tables.
Use the Property inspector to merge and split cells, add color to the background or borders, and change the vertical and horizontal alignment of elements within a cell.
You can create tables in Standard or Expanded mode in Dreamweaver:
Expanded mode, as shown in Figure 7-1, makes it easier to select inside and around tables by adding space around table borders. However, the display of a table changes in Expanded mode — it literally expands table cells. The added space makes editing content within tables easier, but the added space also changes the display.
Standard mode, as shown in Figure 7-2, is more consistent with how tables will appear in a browser, so generally do most of your table editing, especially resizing and moving tables, in this mode.
You can switch between these two modes by clicking the Standard and Expanded mode buttons in the Layout menu bar at the top of the work area, as shown in Figures 7-1 and 7-2.


Although Expanded mode is useful for selecting and editing the contents of a table, Standard mode is best for creating tables. The following tips can help you create a table, and the sections that follow explain how to further refine it:

When you insert a new table, the Table dialog box, as shown in Figure 7-3, makes it easy to specify many table settings at once. Don't worry about getting them all perfect; you can always change these options later.
You can edit all the table options, except the Accessibility options, in the Property inspector. When you select a table or cell, the attributes appear in the Property inspector at the bottom of the work area. Click the border of any table to select the entire table, and the Property inspector displays the table options, as shown in Figure 7-4. To view all the options, click the expander arrow in the lower-right corner of the Property inspector. (All these options are described in the next section.)
Tip
Select a table with the Select Table command. If you're having trouble selecting the table (sometimes selecting the entire table and not just an individual cell is tricky), simply place your cursor anywhere inside the table and choose Modify


When you select a table in Dreamweaver, the Property inspector gives you access to the following table options for customizing the appearance of your table:
Table: Provides a text area where you can enter a name for a table. This name, or ID, is useful for targeting the table in scripts.
Rows: Displays the number of rows in the table. You can alter the size of the table by changing the number. Be careful, though: If you enter a smaller number, Dreamweaver deletes the bottom rows — contents and all.
Cols: Displays the number of columns in the table. You can alter the size of the table by changing the number. Again, if you enter a smaller number, Dreamweaver deletes the columns on the right side of the table — contents and all.
W (width): Displays the width of the table. You can alter the width by changing the number. You can specify the width as a percentage or a value in pixels. Values expressed as a percentage increase or decrease the table's size relative to the size of the user's browser window or any enclosing container, such as another table or a
<div>tag.Tip
Table dimensions expressed as a percentage enable you to create a table that changes in size when the browser window is resized. For example, if you want a table to always take up 75 percent of the browser window, no matter how big the user's monitor or display area, set the size as a percentage. If you want a table to always be the same size — that is, to remain the same size regardless of the browser window size — choose pixels rather than percentages for your table width. See the nearby sidebar, "How wide should you make a table?" for more help selecting a width that displays well on most browsers.
Note
If a table is inserted inside another container, such as a
<div>tag or a table with a fixed width, it doesn't change size based on the browser window but is sized based on the container.Note: In Dreamweaver CS4, you no longer find an H (height) field. As a best practice, most designers don't specify a height for a table because the contents of a table, such as the font size text is displayed in) may change from one visitor to another (depending on user's system and settings).
CellPad: Specifies the space between the contents of a cell and its border.
CellSpace: Specifies the space between table cells.
Align: Controls the alignment of the table. The options are Default, Left, Center, and Right. As a general rule, the Default setting aligns the table from the left side of the browser window or other container.
Border: Controls the size of the border around the table. The larger the number, the thicker the border. If you want the border to be invisible, set it to 0.
Class: Provides easy access to style sheet options. (See Chapters 5 and 6 for more on CSS.)
Clear and Convert: The icons in the lower-left area of the Property inspector (click the expander arrow in the lower-right corner to view them) provide these formatting options:
Clear Row Heights and Clear Column Widths enable you to remove all height and width values at one time.
Convert Table Widths to Pixels and Convert Table Widths to Percents enable you to automatically change Width settings from percentages to pixels. Pixels specify a fixed width; a percent setting means the browser automatically adjusts the specified percentage of the browser display area.
Note
You can also apply formatting options and change the attributes of any element, such as text, an image, or a multimedia file, that you've placed within a table cell. To do so, click to select the element and then use the options in the CSS or HTML Property inspector to make any desired changes, just as you would if the element wasn't in a table cell.
When you develop tables, you can do a few simple things to make your Web pages and your content, more accessible. One of the most important is to use the Table Header (<th>) tag for table headings. The <th> or Table Header tag works much like the <td>, Table Data tag, to create table cells, except that the <th> tag adds bold formatting and centering to content. You can alter the formatting of the <th> tag by creating a tag style (see Chapter 5 for how to do that), but make sure you use the <th> no matter what, as any content that's contained in that tag will be recognized by screen readers and other programs as the header content of the table.
Tip
When you create a new table, don't skip the Accessibility options at the bottom of the Table dialog box (refer to Figure 7-3). They're important for anyone who uses a browser that reads Web pages, such as those used by people with limited vision. If you enter a table caption, it's displayed within the table. (You can specify with the Align Caption option where the caption appears.) The Table Summary doesn't appear in a Web browser and is used only to describe the table for visitors who can't see the table of contents.
In addition to changing overall table settings, you can specify options for individual cells within a table. When you select a cell, which you can do by clicking to place the cursor anywhere inside the cell area, the Property inspector changes to display the individual properties for that cell (see Figure 7-5), such as the formatting and alignment of the contents of a particular cell.
Note
In Dreamweaver CS4, the Property inspector features both HTML and CSS settings. CSS settings are generally preferred and work the same for the contents of a table cell as they do for content anywhere else on a Web page. (See Chapters 5 and 6 for more on using CSS.)

You can also change multiple cells at the same time. For example, suppose that you want to have some (but not all) cells in your table take on a certain color background and style of text. You can apply the same properties to multiple cells by selecting more than one cell at a time before choosing the settings in the Property inspector. To select adjacent cells, press the Shift key while clicking to select cells. To select multiple cells that aren't adjacent, press the Ctrl key (the
Tip
If you're having trouble selecting an individual cell because it contains an image, click the image and then use either the ← or → key on your keyboard to move the cursor and deselect the image, which activates the Property inspector and displays the options for that cell.
When one or more cells are selected (they have to be adjacent for this to work), the top half of the Property inspector controls the formatting of text and URLs within the table cells. The lower half of the Property inspector provides these table cell attribute options (refer to Figure 7-5):
Merge Cells icon: Merges two or more cells. To merge cells, you must first select two or more cells by clicking and dragging or by pressing either the Shift or Ctrl key while selecting multiple cells.
Split Cell icon: Splits one cell into two. When you select this option, a dialog box lets you specify whether you want to split the row (you split the cell horizontally) or the column (you split the cell vertically). You can then specify the number of columns or rows, which controls how many times the cell divides. Note that you can apply the Split Cell option to only one cell at a time.
Horz: Controls the horizontal alignment of the cell contents.
Vert: Controls the vertical alignment of the cell contents.
W: Controls the width of the cell.
H: Controls the height of the cell.
No Wrap: Prevents word wrapping within the cell. The cell widens to accommodate all text while you type or paste it into a cell. (Normally, the excess text just moves down to the next line and increases the height of the cell.)
Header: Formats a cell's contents by using a header tag, which displays the text in bold and centered by default in most Web browsers.
Bg (color): Click in the color well to select a background color from the color palette or enter a hexadecimal color code into the text field. If you use the color palette, the hexadecimal code is entered automatically into the Bg color field.
When you're working with lots of cells in a table, you may want to format multiple cells in the same way. Dreamweaver makes that task easy, whether you want to align numbers, make the headings bold, or change the color scheme. Before you start planning how to line up all your numbers perfectly, be aware that you don't have as much control in HTML as you have in a program, such as Excel, where you can align numbers to the decimal point. You can, however, align the content of columns to the left, right, or center. Thus, if you use the same number of digits after the decimal point in all your numbers, you can get them to line up. For example, if one price is $12.99 and another is $14, express the latter as $14.00; then, when you right align, the numbers line up properly. (If your columns still aren't lining up the way you want them to, consider using a monospace font, such as Courier, which lines up better.)
The steps in this section explain how to create a table in Standard mode and align all the data cells to the right so that the numbers or other content align consistently. You can use these exercises also to align the contents of table cells to the left or center and to apply other formatting options, such as bold or italic. In these steps, I insert the data into the table after I create the table in Dreamweaver.
Tip
If you want to import data from a table you've created in a program, such as Word or Excel, see the section, "Importing Table Data from Other Programs," later in this chapter. If you're working with a table that already has data in it and just want to format or align the cells, go directly to Step 7.
If you're starting from scratch, create a new, blank HTML page and follow these steps from the beginning:
Make sure that you're in Standard mode. (Choose View
Table ModeStandard Mode.)Click to place the cursor where you want to create a table.
Tip
In both Standard and Expanded modes, tables are created automatically in the top-left area of the page, unless you insert them after other content.
Click the Table icon on the Common or Layout Insert panel.
Alternatively, you can choose Insert
In the appropriate boxes, type the number of columns and rows you want to include in your table.
Remember you can always add or remove cells later with the Property inspector.
Specify the width, border, cell padding, and cell spacing.
Choose the header option that best corresponds to the layout you want for your table to create a row of header cells across the top, side, or both.
Add a caption and summary in the Accessibility section and click OK.
The table automatically appears on the page.
Click to place the cursor in a cell and then type the data you want in that cell. Repeat for each cell.
Alternatively, you can use Edit
Select the column or row for which you want to change the alignment.
Place the cursor in the first cell in the column or row you want to align; then, click and drag your mouse to highlight the other columns or rows that you want to change.
Choose an alignment option from the Horz (horizontal) or Vert (vertical) drop-down lists in the Property inspector, as shown in Figure 7-6.
The content of the cell adjusts to match the selected alignment option.
Alternatively, you can access many formatting options, including alignment options, by selecting a table and then right-clicking (Windows) or Control-clicking (Mac).
You can also apply other formatting options, such as bold or italic, to selected cells and their contents by choosing the option from the from the Property inspector.

Tip
If you want to format one cell in a column or row differently from the others, click to place the cursor in just that cell and then click one of the formatting options in the Property inspector. You can also choose to align multiple cells that aren't contiguous (they don't touch each other) by pressing and holding the Ctrl key (
Note
You can also use CSS to format the cells within a table. To do so, select the cell or cells, click the CSS button in the Property inspector, and use the CSS options to create and apply styles while you format the table. You find instructions for creating styles, which can be applied to tables as well as any other elements in a Web page, in Chapters 5 and 6.
Sometimes, the easiest way to modify the number of cells in a table is to merge cells (combine two or more cells into one) or split cells (split one cell into two or more rows or columns). With this technique, you can vary the space in table sections and customize their structures. For example, you may want a long cell space across the top of your table for a banner and then multiple cells below it so that you can control the spacing between columns of text or images. The following two sets of steps show you how to merge and split cells in a table.
To merge cells, create a new HTML page or open an existing HTML file and follow these steps (see Chapter 2 for more information on creating files):
Choose Insert
Table and create a table with 4 rows and 4 columns, a 75 percent width, and a border of 1.Choose the header option that best corresponds to the layout you want for your table to create a row of header cells across the top, side, or both.
Add a caption and summary in Accessibility section.
Click OK.
The table appears on the page.
Highlight two or more adjacent cells by clicking and dragging the mouse from the first cell to the last.
You can merge only cells that are adjacent to one another and in the same row or column.

The cells are merged into a single cell by using the Colspan or Rowspan attributes. These HTML attributes make a single cell merge with adjacent cells by spanning extra rows or columns in the table.

To split a cell, create a new table or open a page with an existing table and follow these steps:
Click to place the cursor inside any cell you want to split.

Select Rows or Columns in the dialog box, depending on how you want to divide the cell.
You can split a cell into however many new rows or columns you want.
Type the number of rows or columns you want to create.
The selected cell is split into the number of rows or columns you entered.
When you're working with lots of columnar data, you want to be able to sort that data just as you do in a spreadsheet program, such as Excel. In Dreamweaver, you can sort data even after it's formatted in HTML (something you couldn't easily do before). You still don't have as many options as you do in Excel. For example, you can sort an entire table based on a specified row, but you can't sort different rows individually.
To use the Sort Table Data feature, create a new, blank HTML page, add a table with several rows and columns, and add some content. (I explain how in the preceding section.) You may also open an existing page with a table of columnar data. Then, follow these steps:
Select the table you want to sort.
Place the cursor in any cell of the table you want to sort.
Choose View
Table ModeStandard Mode.Choose Commands
Sort Table.The Sort Table dialog box appears, as shown in Figure 7-8.
Specify which column you want to sort by and then choose Alphabetically or Numerically; and Ascending or Descending.
You can set up one or two sorts to happen simultaneously and opt whether to include the first row and whether to keep the
<tr>(Table Row) attributes with a sorted row by selecting Keep All Row Colors the Same.Click OK.
The selected cells are sorted, just as they are in a program, such as Excel. (Pretty cool, huh?)

Manually converting financial data or other spreadsheet information can be tedious. Fortunately, Dreamweaver includes a special feature that enables you to insert table data created in other applications, such as Word or Excel. To use this feature, the table data must be saved from the other program in a delimited format — the columns of data are separated by tabs, commas, colons, semicolons, or another type of delimiter. Most spreadsheet and database applications, as well as Microsoft Word, enable you to save data in a delimited format; files with a CSV (Comma Separated Values) file extension are one example. Consult the documentation for the application you're using to find out how. After the data is saved in a delimited format, you can import it into Dreamweaver.
To import table data into Dreamweaver after it's been saved in a delimited format (such as CSV) or in its native application (such as Access or Excel), create a new, blank HTML page or open an existing file and follow these steps to import the data:
Choose File
ImportTabular Data or choose InsertTable ObjectsImport Tabular Data.The Import Tabular Data dialog box appears (see Figure 7-9).
In the Data File text box, type the name of the file you want to import or use the Browse button to locate the file.
In the Delimiter drop-down list, select the delimiter format you used when you saved your file in the native application.
The delimiter options are Tab, Comma, Semicolon, Colon, and Other. You should have made this choice when you exported the data from the original program in which you created it, such as Excel or Access. If you don't remember what you chose, you can always go to the original program and export the data again. You must select the correct option for your data to import correctly.
Select the table width.
If you choose Fit to Data, Dreamweaver automatically creates the table to fit the data being imported. If you choose Set, you must specify a percent or pixel size.
(Optional) Specify the cell padding and cell spacing only if you want extra space around the data in the table to be created.
(Optional) Choose an option from the Format Top Row drop-down list only if you want to format the data in the top row of the table.
Your options are Bold, Italic, or Bold Italic.
Specify the border size.
The default is 1, which puts a small border around the table. Choose 0 if you don't want the border to be visible. Choose a larger number if you want a thicker border.
Click OK to automatically create a table with the imported data.

Dreamweaver also enables you to export data from a table into a delimited format. This capability is useful if you want to export data from a Web page so that you can import it into another program, such as Word or Excel, or into a database program, such as FileMaker or Access. To export data from Dreamweaver, place the cursor anywhere in the table and choose File
Tables have long been used on the Web to create page layouts that require more than basic alignment of elements on a page. In the early days of Web design, using tables was one of the only ways you could get around many of the limitations of basic HTML and accomplish some otherwise impossible design feats, such as evenly spacing bullets, creating columns side-by-side on a page, and spanning headlines or images across multiple columns.
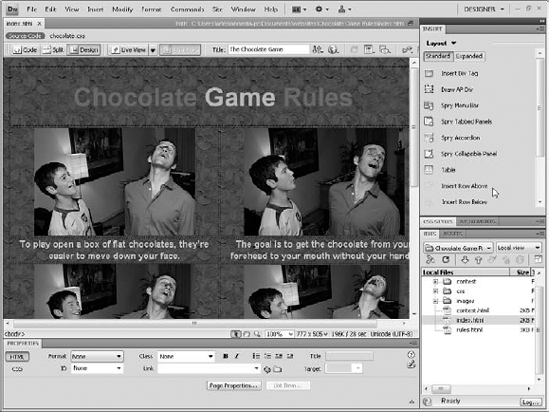
Today, CSS offers a much better option for these kinds of designs, but many people are still using tables and you may have Web sites that you created in this way (or you may inherit a design that uses them). If you're working on a site that's designed with tables to create a page layout for any content that isn't tabular, such as the Chocolate Game Rules page, as shown in Figure 7-10, consider redesigning the page layout with <div> tags and CSS, which are covered in detail in Chapter 6.
Placing tables within tables, or nested tables, can help you create extremely complex designs. For example, with a table that contains all the scores of all the baseball games in a season, you could add a smaller table inside one cell to include detailed stats of an exceptional game. You create nested tables by inserting a table within a cell of another table.
Note
The best Web designs communicate the information to your audience in the most elegant and understandable way and are easy to download. To make sure that your designs don't get too messy, remember these guidelines:
A table within a table within a table is nested three levels deep. Anything more than that gets hairy.
Pages that use nested tables take longer to download because browsers have to interpret each table individually before rendering the page. For some designs, the slightly longer download time is worth it, but in most cases, you're better off adding or merging cells in one table, as I explain in the section "Merging and splitting table cells," earlier in this chapter. One situation that makes a nested table worth the added download time is when you want to place a table of financial or other data in the midst of a complex page design.
To place a table inside another table, follow these steps:
Click to place the cursor where you want to create the first table.
Choose Insert
Table.Type the number of columns and rows you need for your design.
Set the Width option to whatever is appropriate for your design and then click OK.
The table is sized automatically to the width you set.
Click to place the cursor in the cell in which you want to place the second table.
Repeat Steps 2–4, specifying the number of columns and rows you want and the width of the table.
The new table appears inside the cell of the first table.
Type the information that you want in the nested table cells as you would enter content in any other table.