
In This Chapter
Get your Web pages singing and dancing with multimedia. Audio, video, and animation are exploding on the Web and transforming static pages into rich multimedia experiences. You can use Dreamweaver to link to multimedia files, or you can insert audio, video, and other files so that they play within your pages. You can even control when and how they play for your users.
Not all Web sites warrant multimedia; if your goal is to provide information in the fastest way possible to the broadest audience, text is still generally the best option. If you want to provide a richer experience for your users, to show rather than just tell, or to entertain as well as inform, adding sound, video, and animation can help you share more information more vividly and even make you look more professional.
The most complicated aspect of multimedia on the Web is choosing the best format for your audience, which is why you'll find a primer on audio and video formats in this chapter. You can't create or edit multimedia files in Dreamweaver; but after your files are optimized and ready for the Internet, Dreamweaver makes it relatively easy to add them to your Web pages.
As you discover in this chapter, inserting video, audio, and Flash files is similar to adding image files to Web pages, but with many more options, such as settings that control how and when multimedia files play.
When you add sound, video, or any other kind of multimedia to a Web site, your visitors may need a special player (sometimes with an associated plug-in) to play or view your files.
Players are small programs that work alone or with a Web browser to add support for functions, such as playing sound, video, and animation files. Some of the best-known multimedia players are the Flash Player, Windows Media Player, RealNetworks RealPlayer, and Apple QuickTime.
The challenge is that not everyone on the Web uses the same player, and viewers must have the correct player to view your multimedia files. As a result, you need a strategy that helps visitors play your multimedia easily, such as the following ones:
Many Web developers offer audio and video in two or three formats so users can choose the one that best fits the players they already have.
Some developers also include the same multimedia files in different file sizes so that visitors with slower connection speeds don't have to wait as long. Optimizing multimedia for the Web works much as it does with images: The smaller the file size, the lower the quality but the faster the file downloads.
Many Web developers also include information about how visitors can download and install the best player if they need it to view the files.
You can use Dreamweaver to insert or link to any type of multimedia file, but it's up to you to choose the format that's best for your audience. Although dozens of plug-ins are available for Web pages, Flash, Windows Media, and QuickTime are the most common on the Web today.
In general, I recommend that you avoid the more obscure players unless you're offering specialized content that users have a good reason to download, such as a three-dimensional game that requires a special program to run.
Flash has clearly emerged as the favorite technology for creating animations and a wide variety of interactive features on the Web. You can even integrate sound and video into Flash, making it a common choice for combining formats.
Dreamweaver supports three different kinds of Flash files:
Flash files: (extension
.swf) The most versatile Flash format is the SWF file (pronounced SWIFF). Often referred to simply as Flash files, this format is sometimes called a Flash movie, even when it doesn't include video. Flash files with a .swf extension can include illustrations, photos, animation sequences, and video. In Dreamweaver, use the Insert
Flash video: (extension
.flv) As the name implies, Flash video is a video format, although it can also be used for audio files. To convert video into the Flash video format, you need the Flash Video Encoder. In Dreamweaver, use the InsertFlash Paper: Adobe's Flash Paper makes it easy to turn documents, such as Word files, into Flash files with the
.swfextension. Flash Paper files are ideal for displaying documents on the Web. When you insert a Flash Paper file into a Web page, you can include a Flash control bar to add interactivity much as you would with any other Flash file format. In Dreamweaver, use the Insert
One thing that makes Flash files (with the .swf extension) so flexible and so fast on the Internet is that Flash uses vector graphics instead of bitmaps. Therefore, the graphics in Flash are based on mathematical descriptions (vectors) instead of dots (bitmaps), and those vector equations take up far less space than bitmapped images. Vector graphics can also be scaled up or down in size without affecting the image quality or the size of the downloaded file. This capability to scale makes Flash ideally suited for the many different monitor sizes used by Web viewers as well as for the tiny displays on cell phones and other handheld devices. You can even project Flash graphics on a wall or movie screen without losing quality, although any photographs or video files integrated into a Flash file may lose quality or look distorted at higher or lower resolutions.
Tip
To create a Flash file, you need Adobe Flash or a similar program that supports the Flash format. Because Flash is an open standard, you can create Flash files with a variety of programs, including Adobe Illustrator, which has an Export to SWF option. If want to know how to create full-featured Flash files, check out Adobe Flash CS4 For Dummies, by Ellen Finkelstein and Gurdy Leete (Wiley Publishing, Inc.).
Warning
Flash is great overall but be aware of the important drawbacks:
If you need printouts for some reason, Flash may not print as you would hope.
Flash may cause accessibility problems. Screen readers and other specialized viewers can't read the text in a Flash file any better than they can read text in an image file. To make Flash files more accessible, include detailed alternative text.
Text included in Flash files may not be read by search engines (although including alternative text can help with these limitations).
Sites created entirely in Flash are harder to link to, especially if you want to link to a particular page within a site and not just to the front page of the site.
Flash files, often called Flash movies, use the .swf extension and can include animations, graphics, photos, and even video. Thanks to Dreamweaver, these files are relatively easy to insert into a Web page. In this section, I assume you have a completed Flash file (an animation or other Flash movie), and you want to add it to your Web page.
You insert a Flash file much as you insert an image file. But because Flash can do so much more than a still image, you have a variety of settings and options for controlling how your Flash file plays.
Tip
Before you start, make sure to save the Flash file you want to insert in the main folder for your Web site. I recommend creating a multimedia folder in your main Web site folder for audio and other multimedia files, just as most designers create an image folder for image files.
To add a Flash file to a Web site, open an existing page or create a new document and save the file. Then follow these steps:
Click where you want the Flash file to appear on your Web page.
If it's not already open, choose Window
Insert and then use the drop-down list to select the Common Insert panel.From the Media drop-down list on the Common Insert panel, choose the SWF Flash option (see Figure 11-1).
You can also choose Insert
Browse to locate the Flash file that you want to insert in your page and click to select the file.
If you have accessibility options turned on, you're prompted to add alternative text to describe the Flash file. Enter a description of the file and click OK.
The dialog box closes, and the Flash file is inserted into your document.
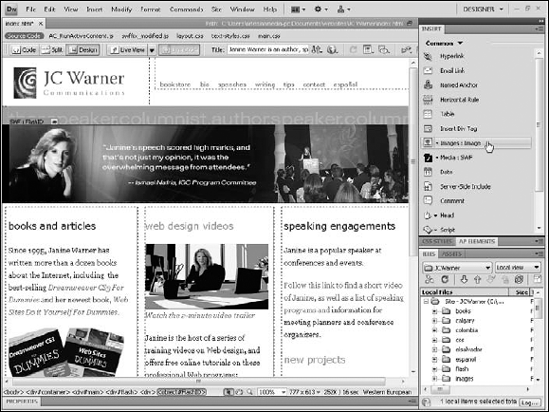
Figure 11-1. To insert a Flash file, choose the SWF option from the Media drop-down list on the Common Insert panel.
Tip
Dreamweaver displays Flash as a gray box with the dimensions of the Flash file. To display the Flash file, click to select it and then click the green Play button on the right side of the Property inspector. (In Figure 11-2, you see the Stop button because I've already clicked the Play button, which changed to the Stop button when the file began playing.) If you have the Flash player installed on your computer, the Flash file will also play when you preview the page in a browser.
Like most HTML tags, the tags that link Flash and other multimedia files to Web pages have attributes (also called properties) that define how a file is displayed within a browser, controlling such actions as whether an animation plays automatically when a page is loaded or whether a visitor must click a link for the animation to begin. Dreamweaver automatically sets some of these options, such as the height and width of the Flash file, but you may want to specify others.
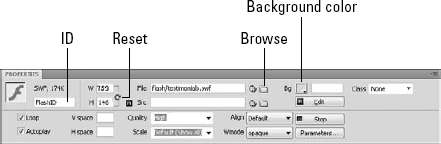
To display Flash attributes in the Property inspector, click to select the gray box that represents a Flash file after it's inserted into a Web page. The following describes the Flash options included in the Property inspector, as shown in Figure 11-2.
Tip
If you don't see all the options in the Property inspector, click the expander arrow in the lower-right corner to display the more advanced options.
ID field: Use the text field in the upper-left corner of the Property inspector, just to the right of the F icon, to assign a name to the file. Dreamweaver automatically enters a name, such as FlashID1, or FlashID2. You can change this name to something that has more meaning; just don't use any spaces or special characters other than the dash or underscore. The name is important because it can be used to refer to the file in JavaScript.
W (width): Use this option to specify the width of the file. The file is measured in pixels.
H (height): Use this option to specify the height of the file. The file is measured in pixels.
Reset Size: (This icon is only visible if you have changed the size of a Flash file.) You can change the display size of a Flash file by clicking a corner and dragging it or by entering a number in the height or width fields. When the size of a Flash file has been altered, a small, circular icon appears just to the right of the height and width fields. Clicking this circular icon reverts the Flash file to its original size. You can resize Flash files, unlike images, video, and many other file types, without affecting image quality because they're vector-based. To keep the file proportionate, hold down the Shift key while you drag to resize the file.
File: Dreamweaver automatically fills in this field when you insert a Flash file with the filename and path. You risk breaking the link to your flash file if you alter this field.
Src (source): This text field enables you to identify the source file you used to create the
.swffile inserted into a page. After this option is set, clicking the Edit button automatically opens the source file in Flash and provides a Done button to integrate changes back into Dreamweaver. Because the programs are integrated, any changes you make in Flash automatically reflect in Dreamweaver when you use this option.Edit: Click this button to open a Flash source file with the Adobe Flash program where you can edit it. Note that you can edit only the source Flash file. After saving the Flash file for Web use with the
.swfextension, return to the original Flash file to edit it again.Class: Use this drop-down list to apply any class styles defined for the document.
Loop: Selecting this box causes the Flash file to repeat (or loop). If you don't select this box, the Flash movie stops after it reaches the last frame.
Autoplay: Selecting this box causes the Flash movie to play as soon as it downloads to the viewer's computer. If you don't select this box, whatever option you've set within the Flash file itself (such as
onMouseOveroronMouseDown) is required to start the movie.V Space (vertical space): If you want blank space above or below the file, enter the number of pixels.
H Space (horizontal space): If you want blank space on either side of the file, enter the number of pixels.
Quality: This option enables you to prioritize the anti-aliasing options of your images versus the speed of playback. Anti-aliasing, which makes your files appear smoother, can slow down the rendering of each frame because the computer must first smooth the edges. The Quality parameter enables you to regulate how much the process is slowed by letting you set priorities based on the importance of appearance versus playback speed. You can choose from these Quality options:
Low: Anti-aliasing is never used. Playback speed has priority over appearance.
High: Anti-aliasing is always used. Appearance has priority over playback speed.
Auto High: With this option, playback is set to begin with anti-aliasing turned on. However, if the frame rate supported by the user's computer drops too low, anti-aliasing automatically turns off to improve playback speed. This option emphasizes playback speed and appearance equally at first but sacrifices appearance for the sake of playback speed, if necessary.
Auto Low: Playback begins with anti-aliasing turned off. If the Flash player detects that the processor can handle it, anti-aliasing is turned on. Use this option to emphasize speed at first but improve appearance whenever possible.
Scale: Specify this option only if you change the file's original height and width size settings. The Scale parameter enables you to define how the Flash movie appears within those settings. The following options in the Scale drop-down list enable you to set preferences for how a scaled Flash movie appears within the window:
Note
Default (show all): This option enables the entire movie to appear in the specified area. The width and height proportions of the original movie are maintained and no distortion occurs, but borders may appear on two sides of the movie to fill the space.
No Border: This option enables you to scale a Flash movie to fill a specified area. No borders appear and the original aspect ratio is maintained, but some cropping may occur.
Exact Fit: The Flash movie is the exact width and height that are set, but the original aspect ratio may not be maintained and the movie may look squished.
Align: This option controls the alignment of the file on the page. This setting works the same for plug-in files as for images.
Wmode: Specify Window to display the flash file in a rectangular window on a Web page. Specify Opaque to hide everything behind a Flash file when you move or resize it using JavaScript. Specify Transparent to show the background of the HTML page though any transparent portions of the Flash file.
Play button: Click the green Play button to play a Flash file in Dreamweaver. Note that when the Play button is activated, the button changes to Stop (refer to Figure 11-2).
Parameters: This button provides access to a dialog box where you can enter parameters specific to your Flash files.
When you insert Flash or other multimedia files with Dreamweaver CS4, the program creates a collection of JavaScript files that help the Flash file play properly. The files are named things like, AC_RunActiveContent.js, and are stored in a Scripts folder, which Dreamweaver automatically creates inside your root site folder. The first time Dreamweaver creates this file, a dialog box alerts you that you need to upload the script for your multimedia file to work properly. Make sure you include this script when you publish your site on your Web server.
If you don't include the script, your multimedia file may not play properly, or your visitors may be required to click the play button twice before the file begins to play.
As bandwidth has grown on the Web, the use of video files has grown more dramatically than almost any other multimedia file type. From YouTube to Google Video and MySpace to small personal Web sites, millions of video files are added to the Web every day. Adding a video file to a Web page with Dreamweaver is relatively easy, especially if you use the Flash video format described in the "Adding Flash audio and video files" section later in this chapter. If you use another video format, such as Windows Media Video or QuickTime, you find instructions for adding files in those formats in the following section, "Adding Audio and Video Files to Web Pages." You can specify video and audio settings, such as Autoplay, by changing setting parameters, an option that is a little more complicated if you use any format other than Flash video. You find instructions for managing these settings in Dreamweaver in the "Setting options for audio and video files," later in this chapter.
Note
Instead of hosting your video on your own Web server, an alternative is to upload video files to the YouTube site and then include special code from the YouTube site in the HTML code of your Web pages so that the video plays within your pages, even though it's hosted on YouTube. Visit YouTube.com and follow their instructions for uploading video files. To learn how to add code from sites like YouTube to your own pages, visit my site at www.DigitalFamily.com/dreamweaver and read the tutorial on adding code from Google, YouTube, and other sites in Dreamweaver.
The first challenge to working with multimedia is choosing the right format and optimizing your video so it downloads quickly and still looks good. Optimizing video is beyond the scope of this book, but I've included some general information about video formats to help you make more informed decisions about the type of video files to add to your pages.
Unfortunately, no single video format works for everyone on the Web (although Flash video is gaining popularity fast). Most new computers come with preinstalled video and audio players that play the most common file formats. If you use a Windows computer, you probably have Windows Media Player on your computer. If you use a Mac, you have QuickTime. Both video players can handle multiple video formats, so anyone with a relatively new computer can likely view video in common formats.
Warning
Many people surf the Web in their offices, in libraries, and in other locations where unexpected sound can be jarring, disruptive, or worse. Always give people a warning before you play video or audio and always give users a way to turn audio off quickly when necessary.
You can convert video from one file format to another relatively easily with most video-editing programs. You can open a video in AVI (Audio Video Interleave) format in a program, such as Adobe Premier Elements (a good video editor for beginners), and then choose File
The following sections provide a brief description of the most common digital video formats, their file extensions, and a Web address where you can find out more about each option.
You can create Flash videos with Adobe Flash. Because the Flash player is so popular on the Web, many developers consider Flash one of the best options available today.
Defined by Microsoft and popular on the PC, this video format supports streaming and plays with Windows Media Player as well as many other popular players.
File extension:
.wmvWeb site:
www.microsoft.com/windows/windowsmedia
RealNetworks designed the RealVideo file format to play in RealPlayer (available for Mac and PC). RealMedia provides optimization well suited to low-speed and high-speed connections but requires special software on your Web server for streaming.
File extension:
.rm,.rvWeb site:
www.real.com
The QuickTime player is built into the Macintosh operating system and is used by most Mac programs that include video or animation. QuickTime is a great format for video on the Web and supports streaming, but it's used primarily by those who favor Macs (although QuickTime files can be viewed on Windows computers as well).
File extension:
.qt,.movWeb site:
www.quicktime.com
Created by Microsoft, AVI (Audio Video Interleave) is one the most common video formats on Windows computers and can play on most common video players. AVI is fine if you're viewing video on a CD or on your hard drive, where the file doesn't have to download, but you can't optimize AVI files well for use on the Internet. If your files are in AVI, convert them to one of the other formats before adding them to your Web site. Otherwise, you force your visitors to download unnecessarily large video files.
File extension:
.aviWeb site: No one site about AVI exists, but you can find information if you search for AVI at
www.microsoft.com
Audio works much like video on the Web. You can link to a sound file or embed the file into your page; either way, your visitors need to have the right player to listen to the file. You find instructions for adding both audio and video files to your pages in the following section, "Adding Audio and Video Files to Web Pages."
The following sections provide a brief description of the most common digital audio formats, their file extensions, and a Web address where you can find out more about each option.
One of the most successful audio compression formats, MP3 supports streaming audio. Most music you can download from the Internet is in MP3 format, and it's clearly the first choice of many Web developers. MP3 files can be played by most popular multimedia players on the Web.
File extension:
.mp3Web site:
www.mp3.com
Microsoft's Windows Audio format supports streaming and can be played with Windows Media Player as well as many other popular players. It also offers digital rights management functionality.
File extension:
.wmaWeb site:
www.microsoft.com/windows/windowsmedia
RealAudio, designed by RealNetworks, is a streaming file format that plays in RealPlayer (available for Mac and PC). RealAudio is especially popular among radio stations and entertainment sites.
File extension:
.raWeb site:
www.real.com
The WAV file format is popular in digital media because it offers the highest sound quality possible. Audio files in this format are often too big for use on the Web, averaging 10MB for a minute of audio. (In comparison, an MP3 file that is five times longer can be less than one-third the size.) Although WAV files are commonly used on the Internet because of their nearly universal compatibility, I recommend that you convert WAV files (especially for long audio clips) to one of the other audio formats.
File extension: .
wavWeb site: No official Web site exists for WAV files, but you can find some documentation at
www.microsoft.comwhen you search for WAV.
Like other multimedia files, you can link to an audio or a video file or you can insert multimedia files into a page. Linking to a multimedia file is as easy as linking to any other file, as you see in the instructions that follow. Inserting an audio or a video file is a little more complicated, but it lets a visitor play the file without leaving the Web page. Inserting audio and video files is covered in this section. If you're using Flash video or audio, see the "Adding Flash audio and video files" section, later in this chapter.
To use Dreamweaver to link to a video file, an audio file, or another multimedia file, follow these steps:
Click to select the text, image, or other element you want to use to create a link.
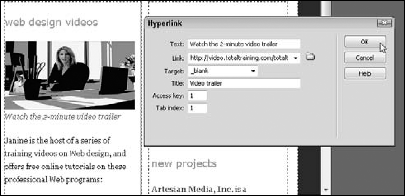
This works just like creating a link to another Web page (see Figure 11-3).
Tip
If you're linking to a video file, a good trick is to take a single still image from the video and insert that into your Web page. Then create a link from that image to the video file.
Choose Insert
Hyperlink or click the Hyperlink icon in the Common Insert panel.The Hyperlink dialog box opens, as shown in Figure 11-3.
Alternatively, you can click the Browse button just to the right of the Link field in the Property inspector. (The Browse button looks like a small file folder.)
Enter the text you want to serve as a link in the Text field.
If you selected a section of text on the page before opening the Hyperlink dialog box, that text automatically appears in the Text field.
Enter the URL where the audio or video file is located.
Alternatively, click the Browse button (the small file folder icon) to the right of the Link field and browse your hard drive to find the video or audio file you want to link to.
As with any other file you link to, make sure you've saved your audio or video files into your main Web site folder.
Note that you can link to an audio or video file on another Web site, as I've done in the example shown in Figure 11-3, but you need to have the exact URL of the file's location.
Click to select the file you want to link to and then click OK.
The dialog box closes, and the link is created automatically.
(Optional) Choose _blank from the Target drop-down list if you want the video file to open in a new browser window or tab.
To specify Accessibility settings, enter a Title, Access Key, and Tab Index.
Click OK to add the hyperlink and to close the Hyperlink dialog box.

Dreamweaver launches your specified Web browser and displays the page. If you have the necessary player, the file downloads, your player launches, and your file automatically plays.
Tip
Many people like to have multimedia files, such as video, pop up in a new browser window. To do this, create an HTML file and embed your multimedia file in it. Then use the Open Browser Window behavior in Dreamweaver to create a pop-up window that displays your multimedia page. For more on how to work with Dreamweaver behaviors, see Chapter 10.
When you insert an audio or a video file into a Web page, you can set the file to play automatically when the page loads (as long as your visitor has the necessary player), or you can require that your visitors click the Play button first. Either way, when you insert an audio or a video file into a page, the file will play within the page instead of requiring that the video or audio player be opened separately.
To use Dreamweaver to embed an audio or a video file into a Web page, follow these steps:
Click where you want the file to appear on your Web page.
If you're inserting a sound file, the play, pause, and stop controls appear wherever you insert the file. If you're inserting a video file, the first frame of the video appears where you insert the file.
Select Common from the Insert panel, and in the Media drop-down list, choose Plugin (see Figure 11-4).
You can also choose Insert
Use the Plugin option for all audio and video file types — except Flash video (
.flv) files.Browse your hard drive to locate the sound or video file you want inserted in your page and then click to select it.
Click OK.
The dialog box closes, and the file is inserted automatically into the page. A small icon (resembling a puzzle piece) represents the file.
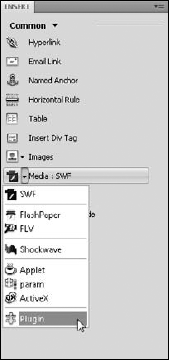
Figure 11-4. Use the Plugin option to insert any audio or video file that isn't saved in the Flash format.
Tip
When you add audio or video, Dreamweaver doesn't automatically determine the file size, so you need to add that information in the Property inspector after you insert the file. After you set the correct file size, the plug-in icon changes to reflect the specified size.
Click the Plugin icon that represents the file in the Web page to display the file options in the Property inspector and specify your desired settings.
You find a description of each option in the next section, "Setting options for audio and video files."

Dreamweaver doesn't include a Play button for audio and video files (unless they're in the Flash format). If you have the necessary player on your computer and you have the file set to Autoplay (the default setting), your file plays automatically when the page loads into the browser. To change video and audio settings that aren't included in the Property inspector, such as Autoplay, see the "Setting multimedia parameters" section later in this chapter.
When you select an inserted multimedia file, such as a sound or a video file, the Property inspector displays the options for the file, as shown in Figure 11-5. Among these settings, the height and width are the most important. Unlike image files or Flash files, Dreamweaver can't automatically detect the height and width of other audio or video formats, so it's important to set these options in the Property inspector. To determine the height and width of a video file, you may need to open the file in a video-editing program. For audio files, set the height and width based on the size required for the player you're using.
The following describes the multimedia options available from the Property inspector:
ID field: Use the text field in the upper-left corner of the Property inspector, just to the right of the plug-in icon, if you want to assign a name to the file. If you leave this field blank, Dreamweaver doesn't enter a name automatically unless you are using a file in a Flash format. The name is important because it can be used to refer to the file in JavaScript.
W (width) and H (height): Specify the measurement of the file in pixels.
Src (source): This option specifies the name and path to the file. You can type a filename or click the Browse button (which looks like a small yellow folder) to browse for the file. This field is filled in automatically when you embed the file.
Plg URL: This option enables you to provide a URL where viewers can download the plug-in if they don't already have it.
Align: This option enables you to specify how the element aligns on the page. Alignment works just as it does for images.
Play button: Click the green Play button to preview the media file. The media plug-in must be installed in Dreamweaver (in the Configuration/Plugins folder) for it to be previewed in Dreamweaver.
Class: Use this drop-down list to apply any style sheets defined for the document.
V Space (vertical space): If you want blank space above and below the plug-in, enter the number of pixels here.
H Space (horizontal space): If you want blank space on either side of the plug-in, enter the number of pixels or use a percentage to specify a portion of the browser window's width.
Border: This option specifies the width of the border around the file when it is displayed.
Parameters: Click this button to access a dialog box where you can enter additional parameters specific to the type of multimedia file you inserted. For more information, see the following section.

You can use parameters to control a wide range of multimedia options, such as whether a video file or an audio file starts playing as soon as a page is loaded. Setting parameters isn't intuitive, and Dreamweaver doesn't do the best job of helping with these settings. However, with some research on the options for the file type you're using and a little care in using the Parameters dialog box in Dreamweaver, you can have a lot more control over your multimedia files.
In fairness to the programmers who created Dreamweaver, it'd be hard to include all the parameters for all the possible multimedia file types in use on the Web today, but they could've included the common ones. Because they don't, I offer you this brief primer on using the parameters setting and a few common options for a few common file types. You also find Web addresses where you can find more complete lists of parameters for a few of the most popular audio and video formats.
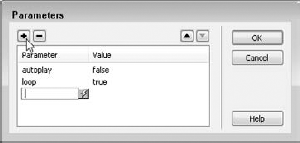
In Figure 11-6, you see the Parameter dialog box with settings for a Windows Media Video file. The following steps outline how the process works:
To access the Parameters dialog box, click to select the multimedia file in the Web page and then click the Parameters button in the Property inspector.
The Parameters dialog box opens. The dialog is blank unless you have already entered parameters for the selected file.
Use the plus sign (+) at the top of the dialog box to add a parameter; use the minus sign (-) to delete a selected parameter.
On the left side of the dialog box, enter the name of the parameter, such as autoplay; on the right side, enter the value you want, such as false, which I've entered in this example to prevent the Windows Video file from playing automatically.
Tip
You can move from the name side of the Parameters dialog box to the value side using the tab key or by clicking to insert your cursor.
To help you get started with parameters, here are some of the most common and valuable parameters:
Autoplay (or Autostart, depending on the file type): By default, when you add video or audio to an HTML file, most browsers play the file as soon as the page loads (except Firefox, which gives users more control). If you want to prevent your multimedia files from playing automatically in Internet Explorer and other browsers, set the Autoplay or Autostart parameter to
false. Think oftrueandfalseas on and off when it comes to parameters.Loop: This parameter enables you to control whether a video file or an audio file loops, or continue to play over and over.
showControls: This option makes it possible to hide the video or audio controls for a file.
Tip
Be careful about combining options like these. For example, if you set Autoplay to false and showControls to false, your visitor can never play your file. By default, the controls for most multimedia files are visible unless you set the showControls parameter to false.
Note
Find more attributes for the Windows Media format at www.microsoft.com when you search for WMV attributes. For QuickTime attributes, visit www.apple.com and search for QuickTime attributes or go directly to www.apple.com/quicktime/tutorials/embed2.html. You'll find lots of great info about working with RealMedia files, including all the settings you could want for RealPlayer, at www.realnetworks.com/resources/samples/embedded.html.
Flash video is fast becoming the video format of choice among many designers. Video on the Web has been problematic for a long time because there are so many different formats, and you can never guarantee that everyone in your audience can view your videos in any one format.
But while the video players were fighting it out, Flash stepped in to provide an option that's increasingly well supported because so many people have the Flash Player and the player's such a small and easy download for those who don't have it.
Because Adobe owns both Flash and Dreamweaver, you find much better support for Flash files in Dreamweaver. An Insert dialog box makes it easy to set parameters for Flash. The Insert FLV dialog box is displayed in Figure 11-7. Dreamweaver can even automatically detect the size of Flash video files. You can also use Flash to create and insert audio files, displaying only the player (called a skin in Flash)

Figure 11-7. You can specify how a Flash video will be displayed in a Web page in the Insert FLV dialog box.
Follow these steps to insert a Flash video file into a Web page:
Click where you want the file to appear on your Web page.
Select Common from the Insert panel, and from the Media drop-down list, choose FLV (refer to Figure 11-1).
You can also choose Insert
At the top of the dialog box, specify Streaming or Progressive.
You must have a special server for streaming video. Check with your Internet hosting service or system administrator to find out whether your Web server supports streaming Flash files. If not, choose Progressive.
Click the Browser button to the right of the URL field and browse to find the Flash FLV file you want to add to the page and Click OK.
Dreamweaver automatically adds the file name and path to your Flash file to the URL field.
Choose a skin from the Skin drop-down list.
Dreamweaver calls the controls for a Flash file a skin. As you can see in Figure 11-7, a preview of the selected skin is displayed in the dialog box so you can better decide which one is best for your Flash file and your design. You can also create custom skins in Adobe Flash.
Click the Detect Size button to insert the height and width of the inserted Flash file (if Dreamweaver hasn't already done so).
If you want the Flash video to play as soon as the page is loaded, select the Auto Play check box.
If you want the video to rewind after play is complete, select the Auto Rewind check box.
Click OK to insert the Flash file and close the dialog box.
The Flash file appears on the page, represented by a gray box that's the height and width of the file. To view the Flash video, preview the page in a Web browser.
Warning
When you insert a Flash video file and include a skin for the player, Dreamweaver creates a Flash file for the player with the .swf extension and saves the file in your root site folder. This Flash file contains the player controls and must be uploaded to your Web site when you publish the page with the Flash file for the player controls to work.
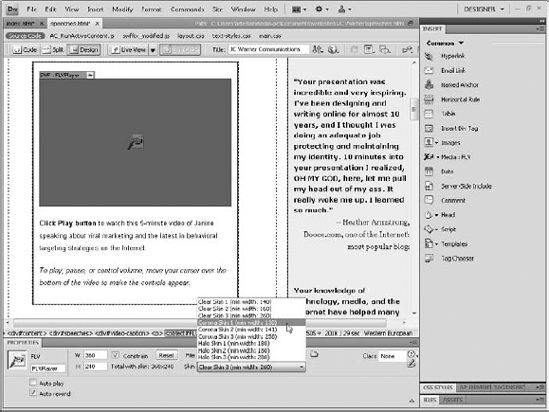
You can change the skin by clicking to select the inserted Flash file and using the Skin drop-down list in the Property inspector to select another option, as shown in Figure 11-8. Each time you choose a skin, Dreamweaver creates a new .swf file. You can delete any skins that aren't being used.
If you want to find out more about other Flash parameters, visit www.adobe.com and search for setting Flash parameters.
If you want to convert video from nearly any video format into the Flash video format, you can use the Flash video encoder. The following exercise walks you through the process of converting a video file into Flash video with the Flash video encoder. The Flash video encoder is included in the Adobe CS4 Creative Suite and can be downloaded at www.adobe.com.
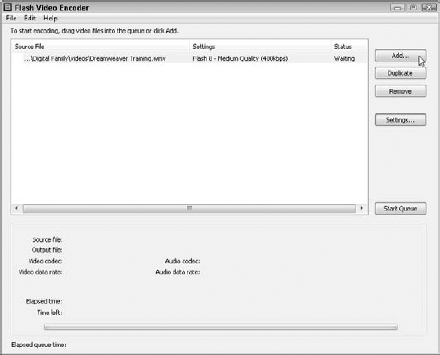
Launch the Flash video encoder, as shown in Figure 11-9.
Click the Add button to load a video into the encoder that you want to convert into a Flash video file.
In this example, I added a short video clip that was saved in the Windows Media Video (WMV) format, but you can add video in a variety of formats, including AVI and QuickTime. For best results, start with a video that hasn't already been compressed.
Click the Settings button.
The Flash Video Encoding Settings dialog box opens, as shown in Figure 11-10.
Click the Encoding Profiles tab and choose a Flash encoding profile.
The later the version of Flash, the better the encoding looks and the faster it plays, but here's the trade off: Not everyone has downloaded the latest version, so an earlier version may mean fewer visitors have to download the player to view your video. Because Flash is such a fast and easy program to download, the latest version is generally the best choice though.
Click the Video tab and specify additional video settings.
Make sure Encode Video is checked. The video codec (which controls the compression of the video) is set automatically based on the Flash version you selected in the Encoding Profiles. Select Deinterlace only if you're encoding video that's interlaced, such as video captured from a television or VCR. Video that's already been encoded in a format like Windows Media doesn't need to be Deinterlaced.
Set Framerate to the lowest setting that will look good to achieve the fastest download time. If you're encoding a video that has lots of action, you need a higher frame rate, ideally 24 or better, or your video will lose details and look fuzzy in places. If you're converting a video, such as a Windows Media file that's already been encoded, your best option is to choose Same as Source to leave the framerate unchanged.
Set the Quality to the lowest level that still looks good to get the fastest download times. Use the slider under the preview window to move through the frames of the video to see the effects of your settings.
Click the Audio tab to adjust audio settings.
Under the Audio tab, adjust the Data rate. Again the lower the number, the lower the quality but the faster the download. If your audio has only a single voice, you can set this quite low, and it'll still sound good. If your audio file has music, special sound effects, or other multifaceted audio, set the Data rate to at least 96 kbps (kilobits per second).
Use the Cue Points tab and insert cues in the file that make it easier for someone using the file to jump to a particular section.
Use the Crop and Resize tab to make the file physically smaller or larger.
Note that trying to increase the file size of a video can result in a severe loss of quality.
After the settings are complete, press OK.
The Flash Video Encoder Settings dialog box closes, returning you to the Flash video encoder.
Click Start Queue to begin the encoding process.
This process can take several minutes, even for a very short file. A small preview window in the bottom-right corner of the Flash video encoder enables you to watch the encoding process in action.
When the encoding process is complete, the Flash video encoder has created a copy of the video file in the FLV Flash video format.

Java is a programming language, similar to Basic, C, or C++, that you can use to create programs that run on a computer. What makes Java special is that it can run on any computer system and can display within a browser.
If you create a program in another programming language, you usually have to create one version for the Macintosh, another for the PC, and a third for Unix. But Java, created by Sun Microsystems, is platform-independent, so developers can use it to create almost any kind of program — even complex programs, such as a sophisticated game or even a word processing program — that works on any type of computer without the user having to customize the code for each platform.
Another advantage of Java is that the program (dubbed an applet) can run within a Web browser, allowing the program to interact with different elements of the page or with other pages on the Web. This capability has made Java popular on the Internet because it provides a way to add sophisticated capabilities to Web pages irrespective of the operating system the Web browser is running on. You can embed Java applets in Web pages, you can use Java to generate entire Web pages, or you can run Java applications separately after they download.
To insert a Java applet in your Web page, follow these steps:
Click where you want the applet to appear on your Web page.
Select Common from the Insert panel, if it isn't already selected. In the Media drop-down list on the Common Insert panel, choose Applet (refer to Figure 11-4).
Alternatively, you can choose Insert
Use the Browse button to locate the Java applet file you want to insert on the page.
Click to highlight the filename and then click OK to close the dialog box.
Dreamweaver doesn't display applets in the Dreamweaver work area. Instead, you see an icon that represents the applet. To view the applet on your Web page (the only way to see the applet in action), preview the page in a browser that supports applets, such as Navigator 4.0 and later or Internet Explorer 4.0 and later.
Click the Applet icon to open the Property inspector.
You can set many options in the Property inspector. If you want to know more about these options, read on.
Like other file formats that require plug-ins or advanced browser support, the display of Java applets can be controlled by specifying a number of options. If you select a Java applet in Dreamweaver, the Property inspector displays the following options:
Applet name: Use this field in the upper-left corner if you want to type a name for your applet. Dreamweaver doesn't apply a name if you leave this field blank. This name identifies the applet for scripting.
W (width): This option specifies the width of the applet. You can set the measurement in pixels or as a percentage of the browser window's width.
H (height): This option specifies the height of the applet. You can set the measurement in pixels or as a percentage of the browser window's height.
Code: Dreamweaver automatically enters the code when you insert the file. Code specifies the content file of the applet. You can type your own filename or click the folder icon to choose a file.
Base: Automatically entered when you insert the file, Base identifies the folder that contains the applet.
Align: This option determines how the object aligns on the page. Alignment works just as it does for images.
Alt: This option enables you to specify an alternative file, such as an image, that appears if the viewer's browser doesn't support Java. That way, the user doesn't see a broken file icon. If you type text in this field, the viewer sees this text; Dreamweaver writes it into the code by using the
Altattribute of the<applet>tag. If you use the folder icon to select an image, the viewer sees an image; Dreamweaver automatically inserts an<img>tag within the<applet>and</applet>tags of the applet.V Space (vertical space): If you want blank space above or below the applet, enter the number of pixels here.
H Space (horizontal space): If you want blank space on either side of the applet, enter the number of pixels here.
Parameters: Click this button to access a dialog box in which you can enter additional parameters for the applet.
Class: Use this drop-down list to access style sheets created with CSS (Cascading Style Sheets).
You can find lots more information in Java For Dummies, 4th Edition, by Barry Burd (Wiley Publishing, Inc.).
Adobe's Portable Document Format (PDF) has become increasingly popular on the Internet, and with good reason. Now that Acrobat Reader is widely distributed and even built into more recent browser versions, you can assume that most of your audience can read files in PDF.
PDF is a great option for files that you want to make easy to download in their entirety to be saved on a hard drive, as well as documents that you want printed exactly as they're designed.
To add a PDF file to your Web site, simply copy the file into your main root folder and link to it as you'd link to any other Web page on your site. When you upload the page with the link to your PDF file, make sure to upload the PDF as well.