
In This Chapter
Creating many pages quickly with a template
Making changes to multiple pages with templates
Using Dreamweaver's Library for frequently used elements
Designing a Web page with the Dreamweaver Tracing Image feature
Strive for consistency in all your designs — except when you're trying to be unpredictable. A little surprise here and there can keep your Web site lively. But, most Web sites work best and are easiest to navigate when they follow a consistent design theme. Case in point: Most readers take for granted that books don't change their designs from page to page, and newspapers don't change headline fonts and logos every day. Books and newspapers want to make life easier for their readers, and consistency is one of the primary tools for making sure readers find publications familiar. That doesn't mean you should limit modern Web design to what's possible in print, but it does mean we can all learn a thing or two from hundreds of years of print design.
Dreamweaver offers several features to help you develop and maintain a consistent look and feel across your site. In this chapter, you discover three of my favorite Dreamweaver features — templates, Library items, and the Tracing Image feature. Find out how they combine to make your design work faster and easier to manage, and you'll be well on your way to simplifying your work even before you start. The most important feature covered in this chapter is the ability to create templates. Templates in Dreamweaver not only make it easy to create pages with consistent design elements, they make it easy to update those pages later when things change — and things always change.
You can choose from many different kinds of templates to create Web sites; and you can find many places on the Web where you can buy them or even download them for free. At its simplest, a template is a ready-made page design, usually created in a way that makes it easy to add your own text and images. Some templates are customizable so that you can change design elements, such as colors, images, or fonts.
Dreamweaver takes this concept a few leaps further. Not only can you create templates that can be used to create new pages quickly and easily, you can also use Dreamweaver's templates to make global changes to all the pages created from a template.
Tip
Templates are best used in the following scenarios:
Templates are definitely the way to go when you're creating a number of pages that share the same characteristics, such as the same background color, navigation elements, or logo. I recommend that you use a template any time you create a site with more than a few pages. For example, you might create a template that includes your logo, a row of links at the top and bottom of each page, and styles for the text colors and fonts. After you create a template with all these features, you can use it as the basis for all the other pages in your site. This approach makes it faster and easier to create a series of pages that share the same navigation, logo, and so on. If you ever decide to change one of these elements, such as your logo, you can change it once in the template and automatically update all the pages created from the template in your site.
If you want to use different design elements in different sections, you can even create more than one template for a site. For example, if you're creating a Web site for a bed-and-breakfast inn, you might create one template for all the pages where you want to show off the rooms in the inn and another for a collection of pages that features great places to hike in the area.
When creating multiple templates for a Web site, you may benefit from a nested template, a template whose design and editable regions are based on another template.
For example, you can create a main template for elements that appear on every page across an entire site, such as a navigation bar. Then for secondary templates, start with the main template and add nested templates that have design variations for a section (or sections) of a site.
Templates are valuable when you're working with a team of people with varying skill levels. For example, say you're building a site for a real-estate company and want to let the employees update the sales listings without messing up the page design. The fact that templates have locked regions can protect the most important elements of a page, making it easy for sales staff to add new information without accidentally breaking navigation elements or other consistent features.
Note
The most powerful aspect of Dreamweaver's template feature is the capability to make global changes to every page created from a template. Even if you're working alone on a site, this aspect of templates can save hours (or even days) of time as the site grows and changes over time.
Creating a template is as easy as creating any other file in Dreamweaver. You can start by creating an HTML Template page much as you would any other page. You can also choose File
Tip
The template features work only if you define your Web site in Dreamweaver. If you haven't gone through the setup process to define your root site folder yet, see Chapter 2 and complete those set up steps first.
Perhaps the most difficult concept to grasp when it comes to templates is how editable and uneditable regions work and why they're important. Here's the short answer (I get into the details later in this chapter).
When you create a template design, every aspect of the design is locked automatically, or uneditable, until you designate it as an editable region — areas of a template that can be changed in any page created from the template. The steps for making a region editable are relatively simple (you find detailed instructions in the exercises that follow). When you create a new page from a template, only the areas you've designated as editable regions can be altered. If you want to make global changes with a template, only the areas that you've left uneditable can be used to make changes across multiple pages.
For example, suppose you create a design for an online magazine with the logo and navigation bar at the top of the page and the copyright and navigation links at the bottom, and you leave all these areas uneditable. Then you create a design area in the middle of the page where a story and photo can be added to each page created from the template and you designate that area as an editable region. When you create new pages from the template, you can replace the photo and story on each page because they're in editable regions, but you can't change the logo, navigation links, or copyright because they're in uneditable regions.
Now imagine that you've used this template to create many pages that are exactly the same, except that each features a different story and photo in the middle area designated as the editable region. Then one day you decide to change the logo for your company, so you need to change that section of the page on all the pages you've created. If the logo is in an uneditable region of the template, no problem. You simply open the template file and edit the logo on that one page. When you save the template, the new logo is applied automatically to all the pages created from that template. That saves a ton of time because you don't have to replace the logo on each page. You could make the same kinds of global changes to the navigation links at the top and bottom of the page because they're also in uneditable regions.
In contrast, if you make changes to the editable region in the template, those changes aren't applied to the pages created from the template. This is important because you wouldn't want to make a global change that overwrites all the individual stories and photos you've inserted into each page. It comes down to this: Locked areas of a template (areas you don't designate as editable) can be changed only in the template itself, and those changes can then be applied automatically to all the pages created from that template. Areas of a template designated as editable can be changed in any page created from the template, but those areas can't be updated automatically by changing the template.
If you're still a little confused after all this theory, don't worry, you'll get to see all this in action in the sections that follow.
To create a template that you can use to create new pages, follow these steps:
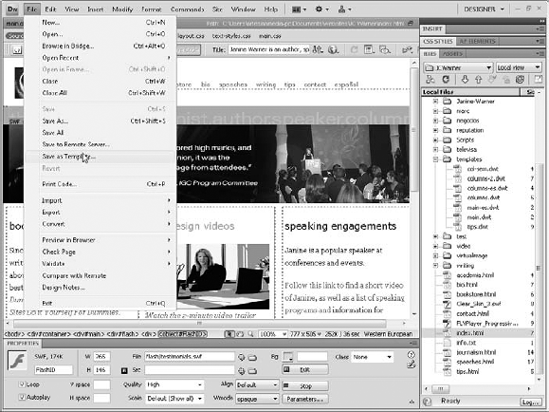
Choose File
New.
In the list on the left, click the Blank Template option, as shown in Figure 9-1.
In the Template Type list, choose HTML Template.
You can also choose from a variety of other template options, including templates for ASP (Active Server Pages), ColdFusion, JSP (Java Server Pages), and PHP (a recursive acronym for Hypertext Preprocessor). These file types are used when creating dynamic Web sites. Find an introduction to creating dynamic Web sites in Chapters 14 and 15. In this example, I'm creating a new HTML page template.

Figure 9-1. The Templates panel displays a list of all available templates in the selected site and provides access to template editing functions.
Why the head section is editable by default
In a new template, all elements are locked by default except for the document head section, which is indicated by the
<head>,</head>tags. These tags enable you to change the title in any page created from a template or to insert JavaScript if you use behaviors on the page (covered in Chapter 10). For the template to be of much use for building new pages, you must make areas in the body of the page editable as well. Remember that you can always go back to the template later to alter the design, make more areas editable, or lock areas so they can't be changed.In previous versions of Dreamweaver, if you created a template from an existing HTML page using the File
In the Layout area, choose <none> to create a blank page or select any of the predesigned CSS layouts.
Dreamweaver's many CSS layout options provide a great headstart to creating a new page design. Instructions for how to customize Dreamweaver's CSS layouts are included in Chapter 6.
Click the Create button.
A new blank template is created and opens in the main work area, and the New Document dialog box closes.
Choose File
Save.If you haven't disabled the dialog box, a warning appears stating that the template doesn't have any editable regions and asking whether you really want to save it. Click Yes to continue.
Click OK to save the page as is for now.
The Save as Template window appears, as shown in Figure 9-2.
Give the template a name and a description, as shown in Figure 9-2.
The description field is optional but can be useful if you have many templates and want to keep notes about them. Note that the Save as Template dialog box includes a list of any templates that already exist in the site. The dialog box also includes a Site field at the top with a drop-down list that includes all the sites you've defined in Dreamweaver. This makes it possible to save a template into any site you've defined when you created it.
Click Save and the template is saved automatically with a
.dwtextension.The
.dwtextension designates the file as a Dreamweaver template. You can now edit this page as you edit any other HTML page, inserting images, text, and so on.Choose Modify
Page Properties and specify the page-wide settings.Use the Page Properties dialog box to specify background, text, and link colors, as well as other options that apply to the entire page. (Page properties options are covered in Chapter 2.)
Note
When you set page properties, Dreamweaver creates the corresponding CSS styles in the template file and displays them in the CSS panel. You find more information about CSS editing options in Chapters 5 and 6.
Create a design for the page by adding images, text, and other elements as you would in any other Dreamweaver file.
You find instructions for adding all these features to your pages throughout this book. Again, remember, you create a page design in a template just like you would in any other Web page.
To create an editable region:
Select any image, text block, or content area, such as a
<div>tag.If you choose to start with a blank page, type to enter some text and select it so that you can follow along with this exercise.
Tip: If you've designed your pages with
<div>tags and CSS, as covered in Chapter 6, a good option is to select the div for an entire section. A handy way to do that is to use the tag selector at the bottom of the workspace to select the div, as shown in Figure 9-3.Choose Insert
New Template ObjectNew Editable Region (as shown in Figure 9-4).
When you finish designing the page, choose File
Save to save your template.When you save a new template page or you save an existing page as a template, Dreamweaver automatically adds the
.dwtextension and saves the file into a Templates folder. If you don't already have a Templates folder in your local root folder, Dreamweaver creates one for you. (If Dreamweaver doesn't automatically create a Template folder, make sure you create a new Templates folder and save all your template files inside it.) For templates to be listed in the New Document window, they must be saved in a Templates folder.


Note
If you save a template in Dreamweaver before you specify any editable regions, you're prompted with a warning because templates aren't useful without editable regions. You don't have to create editable regions before you save a template, but you can't make any changes in any pages created from a template until you create one or more editable regions. You can always go back and add editable regions later, so it's not a problem if you want to save your work before you create editable regions.
Sometimes you get partway through creating a page before you realize that you're likely to want more pages just like it and you should create a template so you don't have to re-create the same page design over and over. Similarly, you may be working on a page that someone else created that you want to turn into a template. No matter where the original page comes from, creating a template from an existing page is almost as easy as creating a new template from scratch.
To save a page as a template, follow these steps:
Open the page that you want to turn into a template.
Choose File
Choose File
Save as Template, as shown in Figure 9-5.The Save as Template dialog box appears (refer to Figure 9-2).
In the Site drop-down list, choose a site.
The menu lists all the sites you've defined in Dreamweaver. By default, the site you've defined and opened in the Files panel is selected when the dialog box opens. If you're working on a new site or haven't yet defined your site, read Chapter 2 for information on defining the site.
Tip
You can use the Save as Template option to save a page as a template into any defined site, which makes it easy to save a page design from one site as a template for another site.
In the Save As text box, type a name for the template.
Click the Save button.
If you haven't disabled the dialog box, a warning appears stating that the template doesn't have any editable regions and asking whether you really want to save it. Click Yes to continue.
Notice that the file now has the
.dwtextension, indicating that it's a template. You can now make changes to this template the same way you edit any other template.Update links in the template.
When you save a new template page or you save an existing page as a template, Dreamweaver automatically adds the
.dwtextension and saves the file into a Templates folder. (If Dreamweaver doesn't automatically do this, make sure you create a new Templates folder and save all your template files inside the Templates folder in your root site folder.) Because your original file probably wasn't saved in the Templates folder, any links to other pages or images must be updated when the file is saved. Click OK and Dreamweaver corrects any links in the file as it saves the file in the Templates folder.Make any changes that you want and then choose File
Save.You edit a template just as you edit any other page in Dreamweaver.
To create an editable region:
Select any content area, image, or text.
Choose Insert
Template ObjectNew Editable Region (as shown in Figure 9-4).Give the new region a name.
The region you define as editable becomes an area that can be changed in any page created from the template. You can create multiple editable regions in any template.
Click OK.
The editable region is enclosed in a highlighted area with a tab at the top left, identified by the name you gave the region.
When you finish designing the page, choose File
Save to save your completed template.
In addition to making any element in a page editable, you can also make the attributes of any element editable. This step is only necessary if you want to make an attribute editable when the tag itself is not editable. For example, when you want to make it possible to change the color attribute of an H1 heading without making it possible to change the heading tag itself. To create editable attributes in a template, follow these steps:
In any Dreamweaver template, select an item that you want to make an editable attribute.
In the example shown in Figure 9-6, I selected an image and am in the process of making one of the image attributes editable.
Choose Modify
TemplatesMake Attribute Editable.The Editable Tag Attributes dialog box appears, as shown in Figure 9-7.
From the Attribute drop-down list, choose the attribute you want to make editable.
The attribute options vary depending on whether you select an image, text, or other element on the page.
If the attribute isn't listed, click the Add button. In this example, I selected the
ALTattribute of the image tag.Click OK to make the attribute editable and close the dialog box.


After you create a template, put it to use. You can use one template to create or modify all the pages in your Web site or create different templates for different sections. For example, in a site, such as my profile site at www.JCWarner.com shown in these examples, you might create one template for each of the sections or use one template for all the pages in the site. After you create a template or a collection of templates, using a template to create a new page is similar to creating any other HTML page.
To use a template to create a page, follow these steps:
Choose File
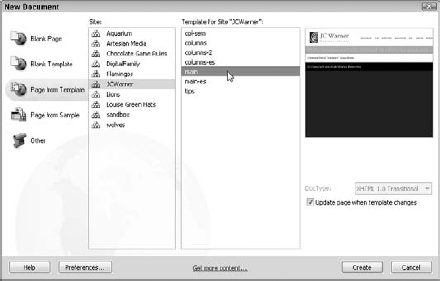
New.In the list on the left, click the Page from Template option, as shown in Figure 9-8.
In the Site list in the middle of the page, choose the name of the site that contains a template you want to use.
The templates in the selected site appear in the Template for Site section just to the right of the Site list in the New Document window (see Figure 9-8).
In the Template for Site list, select the template you want to use.
Notice that when you click the name of a template, a preview of the selected template appears on the far right of the New Document window. In the example shown in Figure 9-8, I selected the main template from the JCWarner site.
Click the Create button.
A new page is created from the template and appears in the main work area.
Edit any of the regions of the page that are editable with Dreamweaver's regular editing features and save the file as you would save any other HTML page.
Note
When you create new pages from a template, you can change only the editable regions in each file created from the template. When you edit a template, only the regions that aren't defined as editable can be used to make global changes to all the pages created from the template.
One of the greatest advantages of using templates is that you can automatically apply changes to all the pages created with a template by altering the original template. For example, if I created a series of pages with the main template shown in the preceding example, I could make changes to those pages by editing any of the uneditable regions in the template.
To update files in a site that were created from a template, follow these steps:
Open the template file.
Note that template files are distinguishable by the
.dwtextension and are saved in the Template folder.Use Dreamweaver's editing features to make any changes you want to the template.
Remember that only changes to uneditable regions are updated automatically. In this example, the logo and navigation elements are locked regions and can be edited to make global changes.
Choose File
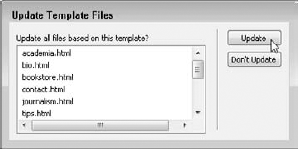
Save.The Update Template Files dialog box appears, as shown in Figure 9-9.
Click the Update button to modify all pages listed in the Update Template Files dialog box. Click the Don't Update button to leave these pages unchanged.
If you click Update, Dreamweaver automatically changes all the pages listed in the Update Template Files dialog box to reflect any changes made to uneditable regions of the template.
If you're not sure which template was used to create a page, you can open the template while you have the page open, make changes to the template, and update all the pages created with it by following these steps:
Open a document that uses the template that you want to change.
Choose Modify
TemplatesOpen Attached Template, as shown in Figure 9-10.The template opens.
Use Dreamweaver's regular editing functions to modify the template as you would edit any page or template.
Choose File
Save.The Update Template Files dialog box appears (refer to Figure 9-9).
Click the Update button to modify all the pages listed in the Update Template Files dialog box. Click the Don't Update button to leave these pages unchanged.
If you choose Update, Dreamweaver automatically changes all the pages listed in the Update Template Files dialog box.

Tip
If you have a page open that was created from the template, the changes will automatically be applied, but you'll need to save the page before closing it to save the changes.
Tip
You can also apply changes to all the pages created from a template with the Update Pages option. To do so, open the template, and then make and save your changes without applying those changes to pages created with the template. Anytime later, you can choose Modify
You can apply a template to an existing page by attaching it, and you can remove a template from a page by detaching it. When you apply a template to an existing document, the content in the template is added to the content already in the document. If a template is already applied to the page, Dreamweaver automatically matches any editable regions that have the same name in both templates and opens a dialog box with a list of regions, including any that don't match.
You can remove or detach a template from a page if you no longer want changes to the original template to affect the page created with the template. Detaching a template also unlocks all regions of a page, making it completely editable. You can detach a template by choosing Modify
You can apply a template to an existing page by using any one of the following techniques:
Choose Modify
Drag the template from the Template Assets panel into the Document window. To open the Template Assets panel, click the Assets tab behind the Files panel tab and then click the Templates icon. You can also choose Window
If the editable regions don't match, Dreamweaver asks you to match inconsistent region names in a dialog box. After the region conflicts are resolved, click OK.
The Library feature isn't a common feature in other Web design programs, so the concept may be new to you even if you've been developing Web sites for a while. The Library feature is handy when you have a single element you want to reuse on many pages, such as a copyright statement you want to appear at the bottom of each page or even something as complex as a row of navigation links.
A Library item is a snippet of code that can contain almost anything, including image references and links. After you save a section of code in the Library, you can insert it into any page with drag-and-drop ease. If you ever need to change a Library item (by adding or changing a link, for example), simply edit the stored Library item and Dreamweaver automatically updates the contents of the Library item on any or all pages where it appears throughout the site.
Like templates, Library items are a great way to share the work of your best designers with less experienced ones. For example, one designer can create a logo and another can create the navigation elements, and then these can be placed in the Library and made available to the entire team. You have more flexibility with Library items than templates because they're elements you can place anywhere on any page, even multiple times. Libraries aren't shared among sites the way templates are, but you can copy and paste the same Library item from one site into another.
Warning
Library items can't contain their own style sheets because the code for styles can appear only as part of the head area of an HTML file. You can, however, attach an external style sheet to a Library item to see how the styles affect the display of the Library item, but the same styles must be available on each page where the Library item is used for the styles to be applied. (For more on style sheets, see Chapters 5 and 6.)
The following sections show you the steps for creating a Library item, adding one to a page, and editing and updating a Library item across multiple pages. For these steps to work properly, you must do them in sequential order. Before creating or using Library items, you must first define a site and open it in the Files panel. (See Chapter 2 for instructions on defining a site in Dreamweaver.)
Note
Creating a Library item within an existing page works well because you can see how the item looks before you add it to the Library. You can edit an item after it's in the Library, but it may not look just as it will on a Web page. For example, Library items don't include <body> tags when they're saved in the Library, so link colors are displayed as default blue when viewed in the Library, even if the link colors have been changed to, say, purple in the <body> tag of the page.
To create a Library item that you can use on multiple pages on your site, follow these steps:
Open any existing file that has images, text, or other elements on the page that you want to save as a Library item.
From this page, select an element or collection of elements that you want to save as a Library item, such as the copyright information that appears at the bottom of this page.
Choose Modify
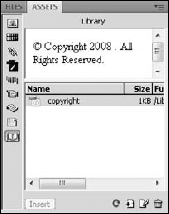
LibraryAdd Object to Library.The Library Assets panel opens and displays any existing Library items. Your new Library item appears as Untitled.
Click to select Untitled and replace it by typing a new name as you would name any file in Explorer on a PC or the Finder on a Mac.
In the example shown in Figure 9-11, I've named the Library item copyright.
When you create a Library item, Dreamweaver automatically saves it to the Library. Naming Library items makes them easier to identify when you want to use them. You can then easily apply Library items to any new or existing page in your site by following the steps in the next exercise.
You can easily add elements from the Library to your pages by simply dragging them from the Assets panel to the page. When you add a Library item to a page, the content is inserted into the document and a relationship is established between the content on the page and the item in the Library. This is important because it enables you to edit the Library item later and apply the changes to all pages where the item appears, but it also means that you can't edit the item on the page where it's inserted. You must edit Library items from within the Library, as you see in the following section.
To add a Library item to a page, follow these steps:
Create a new document in Dreamweaver or open any existing file.
From the Files panel, click the Assets tab, and then click the Library icon.
The Library opens in the Assets panel (refer to Figure 9-11).
Drag an item from the Library to the Document window.
Alternatively, you can select an item in the Library and click the Insert button. The item automatically appears on the page. After you insert a Library item on a page, you can use any of Dreamweaver's formatting features to position it on the page.
Library items are highlighted to distinguish them from other elements on a page. You can both customize the highlight color for Library items and show or hide the highlight color in the Preferences dialog box. To change or hide Library highlighting, follow these steps:
Choose Edit
Preferences (Windows) or DreamweaverPreferences (Mac).The Preferences dialog box appears.
In the Category section on the left, select Highlighting.
Click the color box to select a color for Library items and then select the Show box to display the Library highlight color on your pages.
Leave the box blank if you don't want to display the highlight color.
Click OK to close the Preferences dialog box.
One of the biggest timesaving advantages of the Dreamweaver Library feature is that you can make changes to Library items and automatically apply those changes to any or all pages where the Library item appears. To edit a Library item, follow these steps:
From the Files panel, click the Assets tab and then click the Library icon.
The Library opens in the Assets panel (refer to Figure 9-11).
Double-click any item listed in the Library to open it.
Dreamweaver opens a new window where you can edit the Library item.
Note
Because the Library item is just a snippet of code, it won't have a
<body>tag in which to specify background, link, or text colors. Don't worry about this — the Library item acquires the right settings from the tags on the page where you insert it.Change the Library item as you would edit any element in Dreamweaver.
For example, you can change a link, edit the wording of text, change the font or size, and even add images, text, and other elements. In this example, I changed the date for the copyright from 2008 to 2009.
Choose File
Save to save changes to the original item.The Update Library Items dialog box opens, displaying a list of all the pages where the Library item appears.
To apply the changes you made to the Library item on all the listed pages, click the Update button. If you don't want to apply the changes to all the pages where the Library item appears, click the Don't Update button.
If you clicked the Update button, the Update Pages dialog box appears and shows the progress of the updating. You can stop the update from this dialog box, if necessary.
If you want to create a new Library item based on an existing one without altering the original, follow Steps 1–3, and in place of Step 4, choose File
If you want to alter a Library item on a specific page where you've inserted it, or if you want to make changes to just a few pages, you can override the automated Library feature by detaching it, or breaking the link between the original item in the Library and the item inserted into the page.
To make a Library item editable, follow these steps:
Open any file that contains a Library item and select the Library item.
The Property inspector displays the Library item options, as shown in Figure 9-12.
Click the Detach from Original button.
A warning message appears, letting you know that if you proceed with detaching the Library item from the original, you can no longer update this occurrence of it when the original is edited.
Click OK to detach the Library item.

The Tracing Image feature is especially popular among designers. The concept dates back to the earliest days of design. The Tracing Image feature enables you to use graphics as guides for your page designs, much as you might copy a cartoon through thin transparent paper.
The Tracing Image feature is ideal for people who like to first create a design in a program, such as Photoshop or Fireworks, and then model their Web page after it. By using the Tracing Image feature, you can insert any Web-ready image into the background of any Dreamweaver page. Then you can position <div> tags or insert tables or other elements on top of the tracing image, making it easier to re-create your design in Dreamweaver. You can use JPG, GIF, or PNG images as tracing images and you can create them in any graphics application that supports these formats.
Note
Although the tracing image appears in the background of a page, it doesn't take the place of a background image and won't appear in a browser.
To add a tracing image to your page, follow these steps:
Create a new page or open an existing page in Dreamweaver.
Choose Modify
Page Properties.The Page Properties dialog box opens.
In the Category list, select Tracing Image.
The Tracing Image options appear on the right, as shown in Figure 9-13.
Click the Browse button to locate the image you want to use as a tracing image.
Click the image you want to trace from and then click Apply to preview how the image looks behind the page.
Set the opacity for the tracing image with the Transparency slider.
Lowering the transparency level causes the tracing image to appear faded, which makes distinguishing between the tracing image and content on the page easy. You can set the transparency level to suit your preferences, but somewhere around 50 percent works well with most images.
Click OK.
The tracing image appears in the Document window and the dialog box closes.

You have a few other options with the Tracing Image feature. Choose View
Show: Hides the tracing image if you want to check your work without it being visible but don't want to remove it.
Align with Selection: Enables you to automatically line up the tracing image with a selected element on a page.
Adjust Position: Enables you to use the arrow keys or enter X, Y coordinates to control the position of the tracing image behind the page.
Reset Position: Resets the tracing image to 0, 0 on the X, Y coordinates.
Load: Enables you to add or replace a tracing image.
After you have the tracing image in place, you can use it as a guide while you design your page. Because the tracing image is behind the page, it won't interfere with your design work, and you can add any elements over the tracing image that you could add to any other Web page. Use the tracing image as a reference as you insert and position <div> tags, images, and other elements.