

Security enhancements
IT security management is under much pressure today. Security management must deal with an explosion in data growth, a need to access data anytime and from anywhere, more sophisticated hackers, cloud initiatives, and increasing demands from law enforcement and other entities to meet compliance requirements.
IBM i is one of the most secure operating systems in the industry. From the beginning of its development, security has been an important part of its design.
IBM i 7.1 provides an important set of enhancements that, with leading-edge security solutions provided by IBM and Business Partners, reduce risk but also simplify security management and facilitate compliance requirements.
This chapter describes the following security enhancements for IBM i 7.1:
For more information about IBM and Business Partner security solutions for IBM i, go to:
2.1 User profile enhancements
IBM i 7.1 includes additional attributes in the User Profile object that set an expiration date or a days interval to disable a user profile.
The User Profile controls can be used with the Display Expiration Schedule (DSPEXPSCD) command. This combination simplifies the task of administering temporary user profiles.
2.1.1 New USREXPDATE and USREXPITV attributes
There are two new parameters for the Create User Profile (CRTUSRPRF) and Change User Profile (CHGUSRPRF) commands:
•User expiration date (USREXPDATE)
This parameter is the date when the user profile expires and is automatically disabled. Possible values are shown in Table 2-1.
Table 2-1 Values for the USREXPDATE parameter
|
Value
|
Description
|
|
*NONE
|
No expiration date.
|
|
*USREXPITV
|
Calculated based on the value that is entered in the user expiration interval parameter.
|
|
Date
|
Specifies a date when the user profile expires. The date must be in the job date format.
|
•User expiration interval (USREXPITV)
This parameter specifies the number of days (1 - 366) before the user profile is automatically disabled.
|
Important: A value must be specified if the USREXPDATE parameter has a value of *USREXPITV. If the USREXPDATE parameter has a value other than *USREXPITV, no value is allowed for this parameter.
Remember: The parameters can be seen only when you use the 5250 user interface.
|
2.1.2 CL commands to change and display the User Profile expiration schedule
The expiration schedule for a user profile can be set with either the Create User Profile (CRTUSRPRF) or Change User Profile (CHGUSRPRF) commands or the Change Expiration Schedule Entry (CHGEXPSCDE) CL command.
Display Expiration Schedule (DSPEXPSCD) shows a list of user profiles and their expiration date (Figure 2-1 on page 17). If no user profiles are set to automatically expire, an empty panel is generated.
|
Deleting a profile: The option to delete a profile on an expiration date is only available through CHGEXPSCDE. Be careful when you use the *DELETE option.
|
|
User Profile Expiration Schedule
Owned
User Expiration Object New
Profile Date Action Option Owner
CHUA 12/23/10 *DELETE *CHGOWN PREMA
MARIE 12/23/10 *DISABLE
Bottom
F3=Exit F11=Primary group info F12=Cancel F17=Top F18=Bottom
(C) COPYRIGHT IBM CORP. 1980, 2009.
|
Figure 2-1 Output from DSPEXPSCD
2.2 Object audit enhancements
Several changes are included to improve the auditing capabilities of CL commands and the usage of database objects. The audit journal provides more specific details about the execution environment for CL commands. The QIBM_DB_OPEN exit program is enhanced to provide filtering capabilities to reduce processing impact.
2.2.1 CL retrieve exit programs running after command completion
The IBM i operating system supports two exit points for control language (CL) commands: QIBM_QCA_CHG_COMMAND and QIBM_QCA_RTV_COMMAND.
For each regular CL command, and proxy CL commands in the QSYS library, one exit program can be registered for the Change Exit Point, and up to 10 exit programs can be registered for the Retrieve Exit Point:
Change Exit Point The exit program is called by the command analyzer before it passes control to the prompter.
Retrieve Exit Point The exit program is called by the command analyzer before or after execution of the command.
Before this enhancement, QIBM_QCA_RTV_COMMAND exit programs were always called just before control was transferred to the command processing program (CPP) associated with the command that is being run.
You can use the enhancement to register an exit program for the QIBM_QCA_RTV_COMMAND exit point and indicate that you want the exit program to be called after control returns from the CPP.
2.2.2 Extended auditing details for running a CL command
The IBM i operating system can be used to track the CL commands that are run by a user. After the command-level auditing is turned on for a user profile, a CD (Command String) audit record is generated for each CL command that is run by the specified user profile.
To set up the command-level auditing, complete the following steps:
1. Auditing must be active before command-level auditing can be done. Run the Change Security Auditing (CHGSECAUD) command to change the settings for the system values that control what is being audited on the system.
2. Run the Change User Audit (CHGUSRAUD) command and specify the user profile name for the USRPRF parameter and *CMD for the AUDLVL parameter.
These commands generate CD (Command String) audit records for each CL command that is run by the specified user profile. The model file QASYCDJ5 describes the fields in the CD audit records. One of these fields, CDCLP, is redefined to convey more information about how the audited CL command was run.
Before this enhancement, CDCLP had only two possible values, as shown in Table 2-2.
Table 2-2 Original CDCLP field values for a QASYCDJ5 model file
|
Value
|
Description
|
|
Y
|
If the command was run from a compiled OPM CL program, a compiled ILE CL module that is part of an ILE program or service program, or an interpreted REXX procedure.
|
|
N
|
In all other cases.
|
Now, the CDCLP field has the values that are shown in Table 2-3.
Table 2-3 New CDCLP field values for a QASYCDJ5 model file
|
Value
|
Description
|
|
Y
|
If the CL command is run from a compiled CL object, for instance an OPM CL program or an ILE CL module that is bound into an ILE program or service program.
|
|
R
|
Indicates that the CL command is being run from an interpreted REXX procedure.
|
|
E
|
Indicates that the command was submitted by passing the command string as a parameter to one of the Command Analyzer APIs: QCMDEXC, QCAPCMD, or QCAEXEC.
|
|
B
|
When the command is not being run from compiled CL or interpreted REXX or through a Command Analyzer API, and is in a batch job. The typical case for a B value is when the command is in a batch job stream that is run by using the Start Database Reader (STRDBRDR) or Submit Database Job (SBMDBJOB) command, or is specified for the CMD (Command to run) parameter on a Submit Job (SBMJOB) command.
|
|
N
|
Indicates that the command was run interactively from a command line or by choosing a menu option that runs a CL command.
|
The new values for the CDCLP field map to the values for the ALLOW (Where allowed to run) parameter on the Create Command (CRTCMD) command as follows:
•'Y' maps to *IPGM, *BPGM, *IMOD, and *BMOD
•'R' maps to *IREXX and *BREXX
•'E' maps to *EXEC
•'B' maps to *BATCH
2.2.3 Database object auditing control with the QIBM_DB_OPEN exit program
Various techniques are used by users and third-party software products to add security controls over the security functions built into IBM i.
One primary mechanism that is used to provide this added security is to obtain control through various exit points and to parse the SQL statements. However, SQL parsing is not only complicated, but continually changing as new SQL functions are introduced. In some cases, it is impossible for a SQL parsing solution to handle concepts such as aliases, user-defined functions, and user-defined table functions. For those reasons, this approach is not preferred.
Several releases ago, a single open database exit was implemented in IBM i to relieve user and third-party software from having to parse SQL statements by providing a list of the files that are referenced in the SQL statement. Although this exit solved the parsing problem, the exit was started for every full open. Depending on the amount of resources available and the number of full opens per second in a system, performance can be a problem.
IBM i 7.1 added the capability to have the exit program QIBM_DB_OPEN called only when a full open occurs where at least one of the tables that are referenced by the query has object auditing enabled.
Following are three examples that show how to add the exit program QIBM_DB_OPEN:
•The exit program is called if any object auditing is encountered by specifying *OBJAUD in the PGMDTA parameter:
ADDEXITPGM EXITPNT(QIBM_QDB_OPEN) FORMAT(DBOP0100) PGMNBR(7) PGM(MJATST/OPENEXIT2) THDSAFE(*YES) TEXT('MJA') REPLACE(*NO)
PGMDTA(*JOB *CALC '*OBJAUD')
•The exit program is called when *ALL object auditing is encountered by specifying *OBJAUD(*ALL) in the PGMDTA parameter:
ADDEXITPGM EXITPNT(QIBM_QDB_OPEN)PGMDTA(*JOB *CALC 'OBJAUD(*ALL)')
•The exit program is called when *CHANGE object auditing is encountered by specifying *OBJAUD(*CHANGE) in the PGMDTA parameter:
ADDEXITPGM EXITPNT(QIBM_QDB_OPEN) PGMDTA(*JOB *CALC 'OBJAUD(*CHANGE)')
Object auditing behavior when using join query
Assume that you have one physical file (FILE1) with object attribute *NONE and a second physical file (FILE2) with object attribute (*CHANGE). When a join query uses these two files, the QIBM_DB_OPEN exit program is called for both FILE1 and FILE2, not just for FILE2.
For performance reasons, the open exit information is using cache today. Whenever a QIBM_DB_OPEN exit point is added or removed, only new jobs pick up the change.
2.3 Data encryption enhancements
This section describes the enhancements to data encryption provided in IBM i 7.1.
2.3.1 ASP encryption enhancements
You can use ASP encryption to protect data regardless of whether it is on disk or it is transferred to and from the disk drive. This encryption is valuable in cases such as a disk replacement or to increase protection in SAN or Geographic Mirror data transmissions. More information about this topic can be found in Security Guide for IBM i V6.1, SG24-7680.
With IBM i 7.1 enhancements, ASP encryption can now be turned on and off and the data encryption key can be changed for an existing user ASP. These changes take a significant amount of time because all the data in the disk pool must be processed. This task is done in the background at low priority with a minimal impact on performance.
For more information about ASP encryption enhancements, see 8.1.4, “Encrypted ASP enhancements” on page 385.
2.3.2 Field procedures to encode and decode data
Field procedures are user-written exit programs that can modify the contents and size of the data on insert, update, and read operations. This capability can be used in many ways, but the most popular way is to provide transparent encryption and masking of data based on business logic. The term transparent encryption is important because it implies the ability to define a data encryption policy without any change in the actual application code.
For more information about field procedures, see 5.2.7, “FIELDPROC support for encoding and encryption” on page 174.
2.4 Security enhancements for DB2 for i
DB2 for i is positioned as self-protecting database because of the object-based structure of IBM i, which DB2 for i uses.
In addition to the self-protecting security features, the operating system and DB2 for i include built-in encryption capabilities that enable customers to add an additional layer of security around their data.
IBM i 7.1 includes significant enhancements in database security, including simplified authority management for DDM and IBM DRDA® environments, and significant improvements in database activity monitoring and auditing.
2.4.1 Query Manager user profile auditing
DB2 Query Manager (QM) is a function that provides a common method for accessing data and reporting the results from a relational database across the different DB2 platforms.
You can use Query Manager to design and format printed reports from processed queries. Those queries can be included in programs that are written in several high-level languages (HLLs). QM also provides data edit capabilities that you can use to update and add data to local and remote DB2 for i tables without additional application programs.
For this reason, more user profile support is also provided to allow administrators to tailor QM defaults, limits, and privileges for each user. QM is the only interface on IBM i with the option to grant and revoke permissions to a specific SQL statement (per user); this is a different capability and concept because it is not object based.
|
Note: The IBM licensed program 5770-ST1 “IBM DB2 Query Manager and SQL Development Kit for IBM i” is required only for Query Manager and SQL application development. After the applications are created, they can be run on other servers that are running IBM i that do not have this product installed by using DB2 for i database manager support.
|
Figure 2-2 shows an example of the Work with Query Manager profiles option from the STRQM menu. To get there, choose a user profile, select Y in the Select allowed SQL statements parameter, and press Enter.
|
Select Allowed SQL Statements
User profile . . . . . . . . . . . . . : OBTEST
Description . . . . . . . . . . . . . :
Type option to allow the use of the statement, press Enter.
Press F21 to select all.
1=Select
SQL SQL
Opt Statement Opt Statement
MERGE SET ENCRYPTION PASSWORD
REFRESH TABLE SET PATH
RELEASE SAVEPOINT SET SCHEMA
RENAME SET TRANSACTION
REVOKE UPDATE
ROLLBACK
SAVEPOINT
1 SELECT
SET CURRENT DEGREE
Bottom
F3=Exit F12=Cancel F21=Select all F22=QM Statement
|
Figure 2-2 Select Allowed SQL Statements panel
With IBM i 7.1, you can now audit changes that are made to a Query Manager profile if auditing is enabled for AUDLVL(*SECURITY). A new journal entry type of X2 contains the old and new Query Manager profile values.
An outfile is not provided for this journal entry. Instead, the QSYS2.SQLQMProfilesAudit view can be queried as shown in Example 2-1.
Example 2-1 Creating a permanent table that contains the new journal entries
CREATE TABLE mytablename AS
(SELECT * FROM QSYS2.SQLQMProfilesAudit) WITH DATA
There are two main parts to this solution:
•A new journal entry (X2) is sent to the QAUDJRN any time a Query Manager (QM) profile changes. The journal entry contains the before and after profile information.
•Normally, the way audit journal entries are externalized is that each has an associated output file. A particular audit entry type is output to that output file, which is tailored to the information in that journal entry. However, output files are expensive because of language translation and maintenance effort. Also, the Query Manager profile changes with each release as IBM adds more SQL statements that you can authorize.
The audit journal entry is externalized using a DB2 for i supplied view in QSYS2, similar to how the current values of profiles are provided using the QSYS2.SQLQMprofiles view.
The view entry returns a set of data that is available for all journal entries that identify when the change was made and by whom:
•Journal entry time stamp
•Current user
•Job name, job user, and job number
•Thread
Most of the values that are stored in the QM profile have only two possible values. For example, the values for the authority to use the INSERT statement are Y or N.
The following QM profile values have more than two possible values:
•Default Library
•Default object creation authority
•Relational database connection
•Sample size of Query
•Maximum records that are allowed on an interactive run
•Default collection for QM tables
•Query Data Output Type
•Table and library for output
•Job description and library for batch run
•Commitment control lock level
•Default printer name
2.4.2 Database Monitor and Plan Cache variable values masking
IBM i 7.1 includes a DB2 system procedure to protect sensitive data. After you set the secure attribute for a column in a specific table, DB2 for i creates the masking for SQL Performance Monitors (Database Monitors) and SQL Plan Cache.
When an SQL statement refers to any column that has the SECURE attribute that is set to YES, all host variable values appear as “*SECURE” when examined from the database monitor and plan cache, unless the security officer has started the database monitor or the security officer is accessing the plan cache.
|
Access: Only the QSECOFR user can see the variable values. Users that have the *SECOFR user special authority but are not the QSECOFR user see “*SECURE” for the variable values.
|
Example 2-2 illustrates how to secure a column of a particular table.
Example 2-2 Procedure to set a secure column
CALL SYSPROC.SET_COLUMN_ATTRIBUTE(Table_Schema, Table_Name, Column_Name, Attribute);
Here is a description of the parameters that are shown in Example 2-2:
•Table_Schema VARCHAR(10): Contains the system name of a table's schema (library).
•Table_Name VARCHAR(10): Contains the system name of a table (file).
•Column_Name VARCHAR(10): Contains the system column name that is secured.
•Attribute VARCHAR(10): Contains the attribute that is set for the column. The valid values are:
– ‘SECURE NO’: This column does not contain data that must be secured in a database monitor or plan cache.
– ‘SECURE YES’: This column contains data that must be secured in a database monitor or plan cache.
SECURE column added to QSYS2.SYSCOLUMNS2
QSYS2.SYSCOLUMNS2 is a DB2 catalog that returns more information that is not available in QSYS2.SYSCOLUMNS (such as the allocated length of a varying length column).
The SECURE column externalizes the security setting, if SYSPROC.SET_COLUMN_ATTRIBUTE() is used to configure the security of the column for database performance analysis tasks.
The SECURE column values are:
NULL This column is not the target of a call to SYSPROC.SET_COLUMN_ATTRIBUTE.
'0' This column does not contain data that must be secured in a database monitor or plan cache. This column was a target of a call to SYSPROC.SET_COLUMN_ATTRIBUTE with the ‘SECURE NO’ parameter.
'1' This column contains data that must be secured in a database monitor or plan cache. This column was the target of a call to SYSPROC.SET_COLUMN_ATTRIBUTE with the ‘SECURE YES’ parameter, as shown in Example 2-3.
Example 2-3 Values with ‘SECURE YES’
-- sample table creation
call qsys.create_sql_sample('PRODLIB'),
-- Change attribute on SALARY column
-- Change attribute on SALARY column
CALL SYSPROC.SET_COLUMN_ATTRIBUTE('PRODLIB', 'EMPLOYEE', 'SALARY', 'SECURE YES'),
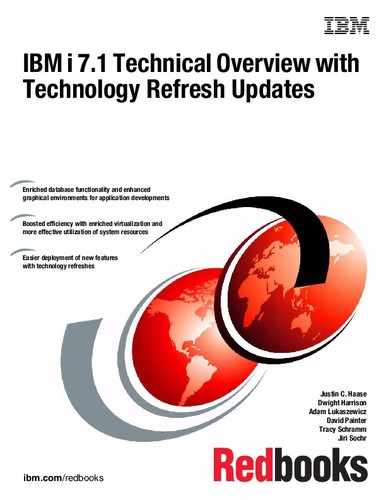
SELECT Column_name,SECURE FROM qsys2.syscolumns2
WHERE system_table_schema = 'PRODLIB' and system_table_name = 'EMPLOYEE' ;
SELECT Column_name,SECURE FROM qsys2.syscolumns2
WHERE system_table_schema = 'PRODLIB' and system_table_name = 'EMPLOYEE' ;
Figure 2-3 shows the results of the SELECT command in Example 2-3 on page 23 that shows SECURE = ‘1’ for ‘SALARY’.
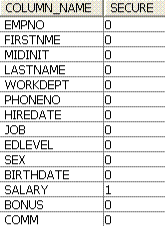
Figure 2-3 Results of the previous SELECT command that shows the SECURE columns
The database performance analyst sees the output that is shown in Figure 2-4 with the performance analysis results for this query:
select * from prodlib.employee where salary > 20000;

Figure 2-4 Performance analysis results with SECURE columns
2.4.3 Security function usage for a database
Function usage is a powerful approach to implement a granular security model. Granularity is better for users because they can use IBM i capabilities that are consistent with their job or role in the organization.
Function usage support on IBM i has been in place for many releases, providing an alternative security control for Job Watcher, Cluster Management, IBM Tivoli® Directory Server administration, Backup Recovery and Media Services for i (BRMS), and other components.
DB2 for i includes several functions for database administration, monitoring, and access control.
Function usage can be configured by the Work with Function Usage (WRKFCNUSG) and Change Function Usage (CHGFCNUSG) CL commands, IBM Navigator for i, or through the System i Navigator Application Administration feature as shown in Figure 2-5.

Figure 2-5 System i Navigator window to set up function usage authority
New authority options for SQL analysis and tuning
Before you can use this enhancement, the IBM i system administrator must grant the *JOBCTL user special authority to DB2 administrators and DB2 performance analysts.
Because *JOBCTL authority allows a user to change many system critical settings that are unrelated to database activity, it is not an easy decision for security officers to grant this authority. In many cases, the request for *JOBCTL is not granted to database analysts, thus prohibiting the usage of the full set of database tools.
IBM i 7.1 provides a new function usage group called QIBM_DB. The function IDs included for SQL analysis and tuning are:
QIBM_DB_SQLADM Function usage for IBM i Database Administrator tasks
QIBM_DB_SQLMON Function usage for IBM i Database Information tasks
These new functions allow settings where users with the *ALLOBJ special authority cannot do the DB2 administration or DB2 monitoring tasks. Also, a group profile can be specified in this function’s setting. If a user profile is associated with several supplemental group profiles, the access is granted if at least one of these group profiles is set to *ALLOWED in a particular function. The adopted authority from program owner profiles has no effect on allowing access to DB2 administration and DB2 monitoring. Access is always granted according to the user profile under which a program with adopted authority runs.
New authority options for database server inbound connections
These function usage IDs block database server inbound connections and are not based on the communication protocol. The function usage IDs ship with the default authority of *ALLOWED. The security officer can easily deny access to specific users or groups.
QIBM_DB_ZDA Restrict ODBC and JDBC Toolbox from the server side, including RUNSQL scripts, System i Navigator, and DB2 specific portions of IBM Navigator for i.
QIBM_DB_DDMDRDA Lock down DRDA and DDM application server access.
This is an alternative to a user exit program approach. Using a function usage ID has several advantages including the fact that no coding is required, and it is easy to change and is auditable.
2.4.4 Simplified DDM and Distributed Database (DRDA) authentication
In some environments, it is cumbersome to maintain server authentications in DRDA and Relational Database DDM (RDB DDM) file environments. As systems are added to the network topology, per user profile server authentications for every server must be administered. Customers with many users and many servers face the decision of whether to restrict/control access on each server using the Change DDM TCP/IP Attributes (CHGDDMTCPA) command, or on each client using the Add Server Authentication Entry (ADDSVRAUTE) command.
The dilemma that is faced when you choose to enforce password validation on the servers is that every user who needs to connect to the server needs administrative work that is done on their behalf. This work uses Add Server Authentication Entry (ADDSVRAUTE) for every target server, or requires every user to supply a user ID and password on each CONNECT statement.
You can use the special value QDDMDRDASERVER, which is added to the Add Server Authentication Entry (ADDSVRAUTE) command SERVER parameter, to simplify this process. This special value allows an administrator to configure a user to work with all possible DDM or DRDA connections to any system in the Internet Protocol network through a common user ID and password. After it is configured for a specific user, no additional changes need to be made for that user, as systems are added to the Relational Database Directory.
As before, this setup does not allow a customer to connect over DRDA/DDM unless they specify a valid user ID and password on the server authentication entry or
CONNECT statement.
CONNECT statement.
Server authentication entries
A server authentication entry is a way to define a user ID and password to send through a connect request over TCP/IP. A server authentication list is associated with every user profile on the system. By default, the list is empty, but you can add entries by using the Add Server Authentication Entry (ADDSVRAUTE) command.
When you attempt a DRDA connection over TCP/IP without specifying a user ID and password, the DB2 for i client (AR) checks the server authentication list for the user profile under which the client job is running. If it finds a match between the RDB name on the CONNECT statement and the SERVER name in an authentication entry (which must be in uppercase), the associated USRID parameter in the entry is used for the connection user ID. If a PASSWORD parameter is stored in the entry, that password is also sent on the connection request.
A server authentication entry can also be used to send a password over TCP/IP for a DDM file I/O operation. When you attempt a DDM connection over TCP/IP, DB2 for i checks the server authentication list for the user profile under which the client job is running. If it finds a match between either the RDB name (if RDB directory entries are used) or QDDMSERVER and the SERVER name in an authentication entry, the associated USRID parameter in the entry is used for the connection user ID. If a PASSWORD parameter is stored in the entry, that password is also sent on the connection request.
DDM and DRDA authentication entry management using group profiles
DDM and DRDA also can take advantage of a common user ID and password that are defined in a server authentication entry under a group profile name or supplemental group profile name. The group profile name or supplemental group profile name is specified with the USRPRF parameter of the ADDSVRAUTE command.
System administration of server authentication entries becomes much simpler when a group profile is used. A common user ID and password profile is used when you establish a group profile-based DDM or DRDA connection. Remote connection capability is managed by controlling the users that belong to the group with their authority to the group profile.
QDDMDRDASERVER usage details
The current special value QDDMSERVER allows non-RDB DDM file users to make DDM connections to servers with a common user ID and password. The new special value QDDMDRDASERVER is a superset of QDDMSERVER, expanding this support to RDB DDM files and DRDA connections.
For DRDA connection requests, if a server authentication entry that specifies the system name exists, and a user ID and password are not passed in a CONNECT statement, the user ID and password that are associated with the server authentication entry takes precedence over the server authentication entry for QDDMDRDASERVER.
For DRDA connection requests, if a server authentication entry specifies the system name exists, and a user ID and password are passed in a CONNECT statement, the user ID and password that are associated with the CONNECT statement takes precedence over any server authentication entry.
For RDB DDM file connection requests, the server authentication entry that specifies the system name takes precedence over the server authentication entry for QDDMDRDASERVER. For non-RDB DDM file connection requests, the server authentication entry QDDMSERVER takes precedence over the server authentication entry for QDDMDRDASERVER.
For example, suppose that you have an environment with three systems (SYSA, SYSB, and SYSC), where:
•SYSA is the application requester (AR).
•SYSB and SYSC are the application servers (AS).
You run the following commands on SYSA:
ADDSVRAUTE USRPRF(YOURPRF) SERVER(QDDMDRDASERVER) USRID(youruid) PASSWORD(yourpwd)
STRSQL
CONNECT TO SYSB
CONNECT TO SYSC
STRSQL
CONNECT TO SYSB
CONNECT TO SYSC
You now have two connections with shared 'youruid' and password 'yourpwd'. You run the following commands on SYSA:
ADDSVRAUTE USRPRF(YOURPRF) SERVER(QDDMDRDASERVER) USRID(youruid) PASSWORD(yourpwd)
ADDSVRAUTE USRPRF(YOURPRF) SERVER(SYSB) USRID(yourotheruid) PASSWORD(yourotherpwd)
ADDSVRAUTE USRPRF(YOURPRF) SERVER(SYSC) USRID(yourotheruid) PASSWORD(yourotherpwd)
STRSQL
CONNECT TO SYSB
CONNECT TO SYSC
ADDSVRAUTE USRPRF(YOURPRF) SERVER(SYSB) USRID(yourotheruid) PASSWORD(yourotherpwd)
ADDSVRAUTE USRPRF(YOURPRF) SERVER(SYSC) USRID(yourotheruid) PASSWORD(yourotherpwd)
STRSQL
CONNECT TO SYSB
CONNECT TO SYSC
You now have two connections with the user ID yourotheruid and password yourotherpwd. This situation occurs because server authentication entries that specify the real system name take precedence over server authentication entries that specify QDDMDRDASERVER. You run the following commands on SYSA:
ADDSVRAUTE USRPRF(YOURPRF) SERVER(QDDMDRDASERVER) USRID(youruid) PASSWORD(yourpwd)
ADDSVRAUTE USRPRF(YOURPRF) SERVER(SYSB) USRID(yourotheruid) PASSWORD(yourotherpwd)
STRSQL
CONNECT TO SYSB user testuserid using 'testpassword'
CONNECT TO SYSC
ADDSVRAUTE USRPRF(YOURPRF) SERVER(SYSB) USRID(yourotheruid) PASSWORD(yourotherpwd)
STRSQL
CONNECT TO SYSB user testuserid using 'testpassword'
CONNECT TO SYSC
You now have two connections. The connection to SYSB is made with the user ID testuserid and password testpassword. This situation occurs because specifying the user ID and password on a CONNECT statement takes precedence over server authentication entries. The connection to SYSC is made with user ID 'youruid' and password 'yourpwd', because it uses the QDDMDRDASERVER authentication entry when no other server authentication entry exists specifying the system name. You run the following commands on SYSA:
ADDSVRAUTE USRPRF(YOURPRF) SERVER(QDDMDRDASERVER) USRID(youruid) PASSWORD(yourpwd)
ADDSVRAUTE USRPRF(YOURPRF) SERVER(QDDMSERVER) USRID(youruid2) PASSWORD(yourpwd2)
ADDSVRAUTE USRPRF(YOURPRF) SERVER(SYSC) USRID(yourotheruid) PASSWORD(yourotherpwd)
CRTDDMF FILE(QTEMP/DDMF) RMTFILE(FILE) RMTLOCNAME(SYSB *IP)
CRTDDMF FILE(QTEMP/DDMF2) RMTFILE(FILE) RMTLOCNAME(*RDB) RDB(SYSB)
CRTDDMF FILE(QTEMP/DDMF3) RMTFILE(FILE) RMTLOCNAME(*RDB) RDB(SYSC)
Assume that you use the following statements:
•SBMRMTCMD CMD('DSPLIB YOURLIB') DDMFILE(QTEMP/DDMF)
The connection to SYSB is made with the user ID youruid2' and password yourpwd2. This situation occurs because non-RDB DDM files use QDDMSERVER for the user ID AND password at connection time. If QDDMSERVER does not exist, QDDMDRDASERVER is used.
•SBMRMTCMD CMD('DSPLIB YOURLIB') DDMFILE(QTEMP/DDMF2)
The connection to SYSB is made with the user ID youruid and password yourpwd. This situation occurs because the RDB DDM files use the QDDMDRDASERVER for the user ID and password at connection time if a server authentication entry does not exist that specifies the system name.
•SBMRMTCMD CMD('DSPLIB YOURLIB') DDMFILE(QTEMP/DDMF3)
The connection to SYSC is made with the user ID yourotheruid and password yourotherpwd. This situation occurs because the RDB DDM files do not use QDDMDRDASERVER for the user ID and password at connection time if a server authentication entry exists that specifies the system name.
2.4.5 Authorization list impact on database object access
Authorization lists are a useful security mechanism to control object access with a minimum of administration. DB2 for i authorization catalogs have been extended to indicate the name of the authorization list that is related to user access to an object.
The authorization list catalogs are shown in Table 2-4. They are specific for different object types.
Table 2-4 DB2 for i authorization list catalogs
|
Catalog name
|
Object information
|
|
QSYS2/SYSPACKAGEAUTH
|
*SQLPKG for packages
|
|
QSYS2/SYSUDTAUTH
|
*SQLUDT for user defined types
|
|
QSYS2/SYSTABAUTH
|
*FILE for tables
|
|
QSYS2/SYSSEQUENCEAUTH
|
*DTAARA for sequences
|
|
QSYS2/SYSSCHEMAAUTH
|
*LIB for schemas
|
|
QSYS2/SYSROUTINEAUTH
|
*PGM and *SRVPGM for procedures and functions
|
|
QSYS2/SYSCOLAUTH
|
Columns
|
|
QSYS2/SYSXSROBJECTAUTH
|
*XSROBJ for XML schema repositories
|
|
QSYS2/SYSVARIABLEAUTH
|
*SRVPGM for global variables
|
Example 2-4 shows one of the SQL commands that can be used to get data of one of the predefined catalogs listed in Table 2-4.
Example 2-4 Using QSYS2.SYSTABAUTH catalog
SELECT GRANTEE, TABLE_NAME, PRIVILEGE_TYPE, AUTHORIZATION_LIST
FROM QSYS2.SYSTABAUTH WHERE TABLE_SCHEMA = 'QGPL' AND TABLE_NAME = 'CUST'
ORDER BY GRANTEE DESC
Figure 2-6 shows the results. The result shows that QSECOFR, as the owner of the QGPL/CUST SQL table, has all authorities to the table and the authority for user CZZ62690 is derived from the authorization list CUSTAUTL.

Figure 2-6 Results of SQL query in Example 2-4
2.5 DB2 for i security services
The DB2 for i security services listed in Table 2-5 are part of the DB2 for i services. To see a complete list of all DB2 for i services, see the following website:
For more information about DB2 for i services, see 5.5.16, “DB2 for i Services” on page 272.
Table 2-5 DB2 for i security services
|
Service Name
|
Type
|
Description
|
|
QSYS2.USER_INFO
|
View
|
This view contains information about user profiles. For more information, see 2.5.1, “QSYS2.USER_INFO view” on page 30.
|
|
QSYS2.FUNCTION_INFO
|
View
|
This view contains details about function usage identifiers. For more information, see 2.5.2, “QSYS2.FUNCTION_INFO view” on page 30.
|
|
QSYS2.FUNCTION_USAGE
|
View
|
This view contains function usage configuration details. For more information, see 2.5.3, “QSYS2.FUNCTION_USAGE view” on page 31.
|
|
QSYS2.GROUP_PROFILE_ENTRIES
|
View
|
This view contains one row for each user profile that is part of a group profile. For more information, see 2.5.4, “QSYS2.GROUP_PROFILE_ENTRIES view” on page 31.
|
|
QSYS2.SQL_CHECK_AUTHORITY()
|
UDF
|
This scalar function indicates whether the user is authorized to query the specified *FILE object. For more information, see 2.5.5, “SQL_CHECK_AUTHORITY() UDF procedure” on page 31.
|
|
QSYS2.SET_COLUMN_ATTRIBUTE()
|
Procedure
|
This procedure sets the SECURE attribute for a column so variable values used for the column cannot be seen in the database monitor or plan cache. For more information, see 2.4.2, “Database Monitor and Plan Cache variable values masking” on page 22.
|
2.5.1 QSYS2.USER_INFO view
The result table of the USER_INFO view contains columns that hold values similar to the Retrieve User Information (QSYRUSRI) API.
See the following website for more information about the column names, types, and information returned:
2.5.2 QSYS2.FUNCTION_INFO view
The FUNCTION_INFO view returns function usage identifier detail built on the data that is returned by the Retrieve Function Information (QSYRTVFI or QsyRetrieveFunctionInformation) API.
Any user can examine the function usage identifiers. Each row describes the function usage defined on the system.
See the following website for more information about the column names, types, and information returned:
2.5.3 QSYS2.FUNCTION_USAGE view
The FUNCTION_USAGE view contains function usage configuration details. The detail returned corresponds to the data returned by the Retrieve Function Usage Information (QSYRTFUI or QsyRetrieveFunctionUsageInfo) API.
Only users with *SECADM special authority can examine the function usage configuration details that are returned with this view. Users without *SECADM authority who attempt to reference this view get an SQLCODE -443 error.
See the following website for more information about the column names, types, and information returned:
2.5.4 QSYS2.GROUP_PROFILE_ENTRIES view
The GROUP_PROFILE_ENTRIES view contains one row for each user profile that is part of a group profile. Both group profile (GRPPRF) and supplemental group profile (SUPGRPPRF) information is considered for each user profile.
|
Note: A *USRPRF is considered to be a group profile when at least one user profile refers to it by name in the GRPPRF or SUPGRPPRF fields.
|
Table 2-6 describes the columns in the QSYS2.GROUP_PROFILE_ENTRIES view.
Table 2-6 Columns returned by QSYS2.GROUP_PROFILE_ENTRIES
|
Column Name
|
System Column Name
|
Data Type
|
Description
|
|
GROUP_PROFILE_NAME
|
GROUPNAME
|
VARCHAR(128)
|
Group profile name
|
|
USER_PROFILE_NAME
|
USERNAME
|
VARCHAR(128)
|
User profile name
|
|
USER_TEXT
|
USER_TEXT
|
VARCHAR(50)
Nullable
|
User profile text description
|
2.5.5 SQL_CHECK_AUTHORITY() UDF procedure
The SQL_CHECK_AUTHORITY scalar function returns an indication of whether the user is authorized to query the specified *FILE object.
This function has two parameters, library name and file name, which specify the *FILE object.
Following is the syntax of QSYS2.SQL_CHECK_AUTHORITY:
>>-SQL_CHECK_AUTHORITY--(--library-name--,--file-name--)--><
One of the following values is returned:
•0: The user running this function does not have authority to query the file, the object is not a *FILE object, or the object does not exist.
•1: The user is authorized to query the file.
2.6 Real-time database activity monitoring
Databases are the primary target for external hackers and insider attacks because databases contain an organization’s most valuable information, including customer records, payment card data, and financial results.
Existing security solutions, such as intrusion detection systems (IDSs), lack knowledge about the database protocols and structures, which is required to detect inappropriate activities. For more information about IDS support on IBM i, go to the following website:
Today, an increasing number of industries ask for compliance mandates that generally require organizations to detect, record, and remediate unauthorized access or changes to sensitive data, including access or changes by privileged users, while providing a secure audit trail to validate compliance.
Information security and database managers struggle to implement these types of controls, especially regarding monitoring privileged users. Heightened focus on business reputation risk and sensitive data protection is also driving closer internal scrutiny of controls. The result is clear: Providing effective database security and compliance is not easy.
DB2 for i includes several enhancements to help administrators in this effort.
2.6.1 Enhanced audit capability for STRDBMON
The database monitor is a valuable tool for database performance analysis, but you can use its capabilities for real-time logging of database auditing and compliance reinforcement. The database monitor can generate significant processor and disk storage impact, so a targeted approach to using the Start Database Monitor (STRDBMON) command is always preferred.
The following sections discuss more logging and prefiltering capabilities that are supplied for the database monitor.
|
Prefilter: The term prefilter is related to filtering capabilities for a database monitor in the recording process and the term filter is applied to the selection criteria in the collected data.
|
Prefilters to logging RUNSQL, RUNSQLSTM, and STRSQL
The database monitor, started by Start Database Monitor (STRDBMON), can track Run SQL (RUNSQL), Run SQL Statement (RUNSQLSTM), or Start SQL Interactive Session (STRSQL) activity that is connected to a specific user profile, application, program ID, accounting code, or relational database.
Table 2-7 shows the prefilters available in the Start Database Monitor (STRDBMON) command and the corresponding client registers. Database monitor entries are created for SQL statements that are run where the client special register matches the corresponding prefilter value.
Table 2-7 STRDBMON prefilter options for SQL-related CL commands
|
Client register
|
STRDBMON prefilter parameter
|
Values
|
|
Account string (ACCTNG)
|
FTRCLTACG
|
The user’s accounting code (the ACGCDE parameter on the User Profile object)
|
|
Application Name (APPLNAME)
|
FTRCLTAPP
|
START SQL INTERACTIVE SESSION or RUN SQL statements
|
|
Program name (PROGRAMID)
|
FTRCLTPGM
|
STRSQL, RUNSQLSTM, or RUNSQL
|
|
Client User (USERID)
|
FTRCLTUSR
|
The user’s name
|
|
Workstation (WRKSTNNAME)
|
FTRCLTWS
|
The DB2 for i database name
|
There is support for a client-specific filter using the COMMENT parameter in Start Database Monitor (STRDBMON). However, this support is limited to only one parameter, which is a character value up to 50 characters long.
Figure 2-7 shows the filter parameters for STRDBMON.
|
Start Database Monitor (STRDBMON)
Type choices, press Enter.
Filter by query governor . . . . FTRQRYGOVR *NONE
Filter by accounting string . . FTRCLTACG *NONE
Filter by application name . . . FTRCLTAPP *NONE
Filter by program name . . . . . FTRCLTPGM *NONE
Filter by client user ID . . . . FTRCLTUSR *NONE
Filter by work station . . . . . FTRCLTWS *NONE
More...
F3=Exit F4=Prompt F5=Refresh F12=Cancel F13=How to use this display
F24=More keys
Messages pending on other displays.
|
Figure 2-7 STRDBMON filter parameters
Prefilter for SQLCODEs
The Start Database Monitor (STRDBMON) command is enhanced with a prefilter parameter, FTRSQLCODE, for the results of SQL statements.
There are several prefilters by SQLCODE (FTRSQLCODE) parameter values:
*NONE Filtering by SQLCODE is not specified.
*NONZERO Any non-zero SQLCODE.
*ERROR SQLCODE < 0. The SQL statement has failed.
*WARN SQLCODE > 0. A warning condition is indicated.
<user specified SQLCODE> This is your specified SQLCODE.
Example 2-5 shows how to use the FTRSQLCODE parameter to collect QQRID=1000 DBMON records for all instances of SQL failures due to lock contention.
Example 2-5 Using the FTRSQLCODE parameter
STRDBMON OUTFILE(DBMONLIB/LOCKMON) JOB(*ALL/*ALL/QZDASOINIT) TYPE(*DETAIL) FTRSQLCODE(-913)
For more information about SQLSTATEs and SQLCODEs for DB2 for IBM i 7.1, see the SQL messages and codes topic in the IBM i 7.1 Knowledge Center:
Extending the IP address prefilter to work with non-database clients
Before this enhancement was introduced, support for the Start Database Monitor (STRDBMON) command Filter by IP address (FTRINTNETA) parameter was restricted for work against database initiated connections. This enhancement allows a Filter by IP address to work as a database monitor prefilter against many non-database initiated connections.
|
Note: TELNET connections are not recognized by this parameter.
|
Extending support to prefilter against group profiles
The Start Database Monitor (STRDBMON) command has been enhanced to recognize group profile names when you use the FTRUSER(name) command parameter.
When you determine whether the current user’s SQL must be captured in the SQL Performance Monitor (database monitor) output, the command now determines whether the user is a member of the group.
Wildcard group profile names are allowed. For example, if you specify FTRUSER(ADMIN*) and both ADMINGRP and ADMINGRP2 are group profiles, any SQL run by users in either group is captured.
SQL Performance Monitor interface for “User” can be used to specify the group profile.
Identifying Query/400 users
This enhancement delivers a method to easily identify Query/400 users and the queries run. You can use this tool to audit sensitive data consumption and determine queries usage and reporting modernization strategies.
For more information, see 5.5.9, “STRDBMON pre-filtering of QUERY/400 command usage” on page 267.
2.6.2 SQL statement auditing with less resource consumption
Implementing Start Database Monitoring (STRDBMON) through a viewing mechanism enables faster SQL statement auditing.
Two view mechanisms can be used to start a database performance monitor on a view, saving both performance and storage.
Use input only columns to capture only a subset of the monitor data in an underlying table.
In DB2 for i, the database performance monitor table has 276 columns. Assume that an auditing application is interested in collecting only the SQL statement, the variable values, and the information that identifies the user and job information. This information is contained in only 20 out of the 276 columns (the columns QQRID, QQJFLD, and QQI5 must also be added to process the resulting view).
To use the first view mechanism, complete the following steps:
1. Create a table with the 23 columns that you want to view, as shown in Example 2-6. QAQQDBMN is the model monitor file that is included with DB2 for i.
Example 2-6 Create a table with 23 columns
CREATE TABLE mjatst.looptable4 AS (SELECT
QQSTIM, QQETIM, QQC81, QQ1000L, QQDBCLOB1,
QVC5001, QVC3001, QVC3002, QVC3003, QVC3005,
QVC3006, QQJOB, QQUSER, QQJNUM, QVC102,
QQI9, QQC104, QQC103, QQC183, QQSMINT2,
QQRID, QQI5, QQJFLD
FROM QAQQDBMN) WITH NO DATA;
QQSTIM, QQETIM, QQC81, QQ1000L, QQDBCLOB1,
QVC5001, QVC3001, QVC3002, QVC3003, QVC3005,
QVC3006, QQJOB, QQUSER, QQJNUM, QVC102,
QQI9, QQC104, QQC103, QQC183, QQSMINT2,
QQRID, QQI5, QQJFLD
FROM QAQQDBMN) WITH NO DATA;
2. Create a view that has 276 columns that match the database monitor table columns, as shown in Example 2-7. Only the 23 wanted columns are input / output columns; the others are input only columns (those columns that are just CAST as NULL). The columns must have the same attributes and be in the same order as in the base database monitor table.
Example 2-7 Create a table with 276 columns
CREATE VIEW mjatst.loopview4 AS SELECT
QQRID AS "Record ID", CAST(NULL AS TIMESTAMP) AS QQTIME,
QQJFLD AS "Join Field", CAST(NULL AS CHAR(18)) AS QQRDBN,
CAST(NULL AS CHAR(8)) AS QQSYS, QQJOB AS "Job Name",
QQUSER AS "Job User", QQJNUM AS "Job Number",
CAST(NULL AS DECIMAL(15,0)) AS QQUCNT , CAST(NULL AS VARCHAR(100)) AS QQUDEF ,
CAST(NULL AS DECIMAL(15,0)) AS QQSTN , CAST(NULL AS DECIMAL(15,0)) AS QQQDTN ,
CAST(NULL AS DECIMAL(15,0)) AS QQQDTL , CAST(NULL AS DECIMAL(15,0)) AS QQMATN ,
CAST(NULL AS DECIMAL(15,0)) AS QQMATL , CAST(NULL AS CHAR(10)) AS QQTLN ,
CAST(NULL AS CHAR(10)) AS QQTFN , CAST(NULL AS CHAR(10)) AS QQTMN ,
CAST(NULL AS CHAR(10)) AS QQPTLN , CAST(NULL AS CHAR(10)) AS QQPTFN ,
CAST(NULL AS CHAR(10)) AS QQPTMN , CAST(NULL AS CHAR(10)) AS QQILNM ,
CAST(NULL AS CHAR(10)) AS QQIFNM , CAST(NULL AS CHAR(10)) AS QQIMNM ,
CAST(NULL AS CHAR(10)) AS QQNTNM , CAST(NULL AS CHAR(10)) AS QQNLNM ,
QQSTIM AS "Start Time", QQETIM AS "End Time",
CAST(NULL AS CHAR(1)) AS QQKP , CAST(NULL AS CHAR(1)) AS QQKS ,
CAST(NULL AS DECIMAL(15,0)) AS QQTOTR , CAST(NULL AS DECIMAL(15,0)) AS QQTMPR ,
CAST(NULL AS DECIMAL(15,0)) AS QQJNP , CAST(NULL AS DECIMAL(15,0)) AS QQEPT ,
CAST(NULL AS CHAR(1)) AS QQDSS , CAST(NULL AS CHAR(1)) AS QQIDXA ,
CAST(NULL AS CHAR(1)) AS QQORDG , CAST(NULL AS CHAR(1)) AS QQGRPG ,
CAST(NULL AS CHAR(1)) AS QQJNG , CAST(NULL AS CHAR(1)) AS QQUNIN ,
CAST(NULL AS CHAR(1)) AS QQSUBQ , CAST(NULL AS CHAR(1)) AS QQHSTV ,
CAST(NULL AS CHAR(1)) AS QQRCDS , CAST(NULL AS CHAR(2)) AS QQRCOD ,
CAST(NULL AS DECIMAL(15,0)) AS QQRSS , CAST(NULL AS DECIMAL(15,0)) AS QQREST ,
CAST(NULL AS DECIMAL(15,0)) AS QQRIDX , CAST(NULL AS DECIMAL(15,0)) AS QQFKEY ,
CAST(NULL AS DECIMAL(15,0)) AS QQKSEL , CAST(NULL AS DECIMAL(15,0)) AS QQAJN ,
CAST(NULL AS VARCHAR(1000)) AS QQIDXD , CAST(NULL AS CHAR(1)) AS QQC11 ,
CAST(NULL AS CHAR(1)) AS QQC12 , CAST(NULL AS CHAR(1)) AS QQC13 ,
CAST(NULL AS CHAR(1)) AS QQC14 , CAST(NULL AS CHAR(1)) AS QQC15 ,
CAST(NULL AS CHAR(1)) AS QQC16 , CAST(NULL AS CHAR(1)) AS QQC18 ,
CAST(NULL AS CHAR(2)) AS QQC21 , CAST(NULL AS CHAR(2)) AS QQC22 ,
CAST(NULL AS CHAR(2)) AS QQC23 , CAST(NULL AS DECIMAL(15,0)) AS QQI1 ,
CAST(NULL AS DECIMAL(15,0)) AS QQI2 , CAST(NULL AS DECIMAL(15,0)) AS QQI3 ,
CAST(NULL AS DECIMAL(15,0)) AS QQI4 , QQI5 AS "Refresh Count",
CAST(NULL AS DECIMAL(15,0)) AS QQI6 , CAST(NULL AS DECIMAL(15,0)) AS QQI7 ,
CAST(NULL AS DECIMAL(15,0)) AS QQI8 , QQI9 AS "Thread ID",
CAST(NULL AS DECIMAL(15,0)) AS QQIA , CAST(NULL AS DECIMAL(15,0)) AS QQF1 ,
CAST(NULL AS DECIMAL(15,0)) AS QQF2 , CAST(NULL AS DECIMAL(15,0)) AS QQF3 ,
CAST(NULL AS CHAR(6)) AS QQC61 , QQC81 AS SQLSTATE_,
CAST(NULL AS CHAR(8)) AS QQC82 , CAST(NULL AS CHAR(8)) AS QQC83 ,
CAST(NULL AS CHAR(8)) AS QQC84 , CAST(NULL AS CHAR(10)) AS QQC101 ,
CAST(NULL AS CHAR(10)) AS QQC102 , QQC103 AS "Program",
QQC104 AS "Program Schema", CAST(NULL AS CHAR(10)) AS QQC105 ,
CAST(NULL AS CHAR(10)) AS QQC106 , CAST(NULL AS VARCHAR(128)) AS QQC181 ,
CAST(NULL AS VARCHAR(128)) AS QQC182 , QQC183 AS "IP Address",
CAST(NULL AS VARCHAR(30)) AS QQC301 , CAST(NULL AS VARCHAR(30)) AS QQC302 ,
CAST(NULL AS VARCHAR(30)) AS QQC303 , CAST(NULL AS VARCHAR(1000)) AS QQ1000 ,
CAST(NULL AS TIMESTAMP) AS QQTIM1 , CAST(NULL AS TIMESTAMP) AS QQTIM2 ,
CAST(NULL AS VARCHAR(128)) AS QVQTBL , CAST(NULL AS VARCHAR(128)) AS QVQLIB ,
CAST(NULL AS VARCHAR(128)) AS QVPTBL , CAST(NULL AS VARCHAR(128)) AS QVPLIB ,
CAST(NULL AS VARCHAR(128)) AS QVINAM , CAST(NULL AS VARCHAR(128)) AS QVILIB ,
CAST(NULL AS CHAR(1)) AS QVQTBLI , CAST(NULL AS CHAR(1)) AS QVPTBLI ,
CAST(NULL AS CHAR(1)) AS QVINAMI , CAST(NULL AS CHAR(1)) AS QVBNDY ,
CAST(NULL AS CHAR(1)) AS QVJFANO , CAST(NULL AS CHAR(1)) AS QVPARPF ,
CAST(NULL AS CHAR(1)) AS QVPARPL , CAST(NULL AS CHAR(1)) AS QVC11 ,
CAST(NULL AS CHAR(1)) AS QVC12 , CAST(NULL AS CHAR(1)) AS QVC13 ,
CAST(NULL AS CHAR(1)) AS QVC14 , CAST(NULL AS CHAR(1)) AS QVC15 ,
CAST(NULL AS CHAR(1)) AS QVC16 , CAST(NULL AS CHAR(1)) AS QVC17 ,
CAST(NULL AS CHAR(1)) AS QVC18 , CAST(NULL AS CHAR(1)) AS QVC19 ,
CAST(NULL AS CHAR(1)) AS QVC1A , CAST(NULL AS CHAR(1)) AS QVC1B ,
CAST(NULL AS CHAR(1)) AS QVC1C , CAST(NULL AS CHAR(1)) AS QVC1D ,
CAST(NULL AS CHAR(1)) AS QVC1E , CAST(NULL AS CHAR(1)) AS QVC1F ,
CAST(NULL AS CHAR(1)) AS QWC11 , CAST(NULL AS CHAR(1)) AS QWC12 ,
CAST(NULL AS CHAR(1)) AS QWC13 , CAST(NULL AS CHAR(1)) AS QWC14 ,
CAST(NULL AS CHAR(1)) AS QWC15 , CAST(NULL AS CHAR(1)) AS QWC16 ,
CAST(NULL AS CHAR(1)) AS QWC17 , CAST(NULL AS CHAR(1)) AS QWC18 ,
CAST(NULL AS CHAR(1)) AS QWC19 , CAST(NULL AS CHAR(1)) AS QWC1A ,
CAST(NULL AS CHAR(1)) AS QWC1B , CAST(NULL AS CHAR(1)) AS QWC1C ,
CAST(NULL AS CHAR(1)) AS QWC1D , CAST(NULL AS CHAR(1)) AS QWC1E ,
CAST(NULL AS CHAR(1)) AS QWC1F , CAST(NULL AS CHAR(2)) AS QVC21 ,
CAST(NULL AS CHAR(2)) AS QVC22 , CAST(NULL AS CHAR(2)) AS QVC23 ,
CAST(NULL AS CHAR(2)) AS QVC24 , CAST(NULL AS DECIMAL(15,0)) AS QVCTIM ,
CAST(NULL AS DECIMAL(15,0)) AS QVPARD , CAST(NULL AS DECIMAL(15,0)) AS QVPARU ,
CAST(NULL AS DECIMAL(15,0)) AS QVPARRC , CAST(NULL AS DECIMAL(15,0)) AS QVRCNT ,
CAST(NULL AS DECIMAL(15,0)) AS QVFILES , CAST(NULL AS DECIMAL(15,0)) AS QVP151 ,
CAST(NULL AS DECIMAL(15,0)) AS QVP152 , CAST(NULL AS DECIMAL(15,0)) AS QVP153 ,
CAST(NULL AS DECIMAL(15,0)) AS QVP154 , CAST(NULL AS DECIMAL(15,0)) AS QVP155 ,
CAST(NULL AS DECIMAL(15,0)) AS QVP156 , CAST(NULL AS DECIMAL(15,0)) AS QVP157 ,
CAST(NULL AS DECIMAL(15,0)) AS QVP158 , CAST(NULL AS DECIMAL(15,0)) AS QVP159 ,
CAST(NULL AS DECIMAL(15,0)) AS QVP15A , CAST(NULL AS DECIMAL(15,0)) AS QVP15B ,
CAST(NULL AS DECIMAL(15,0)) AS QVP15C , CAST(NULL AS DECIMAL(15,0)) AS QVP15D ,
CAST(NULL AS DECIMAL(15,0)) AS QVP15E , CAST(NULL AS DECIMAL(15,0)) AS QVP15F ,
CAST(NULL AS CHAR(4)) AS QVC41 , CAST(NULL AS CHAR(4)) AS QVC42 ,
CAST(NULL AS CHAR(4)) AS QVC43 , CAST(NULL AS CHAR(4)) AS QVC44 ,
CAST(NULL AS CHAR(8)) AS QVC81 , CAST(NULL AS CHAR(8)) AS QVC82 ,
CAST(NULL AS CHAR(8)) AS QVC83 , CAST(NULL AS CHAR(8)) AS QVC84 ,
CAST(NULL AS CHAR(8)) AS QVC85 , CAST(NULL AS CHAR(8)) AS QVC86 ,
CAST(NULL AS CHAR(8)) AS QVC87 , CAST(NULL AS CHAR(8)) AS QVC88 ,
CAST(NULL AS CHAR(10)) AS QVC101 , QVC102 AS "User Name",
CAST(NULL AS CHAR(10)) AS QVC103 , CAST(NULL AS CHAR(10)) AS QVC104 ,
CAST(NULL AS CHAR(10)) AS QVC105 , CAST(NULL AS CHAR(10)) AS QVC106 ,
CAST(NULL AS CHAR(10)) AS QVC107 , CAST(NULL AS CHAR(10)) AS QVC108 ,
CAST(NULL AS VARCHAR(128)) AS QVC1281 , CAST(NULL AS VARCHAR(128)) AS QVC1282 ,
CAST(NULL AS VARCHAR(128)) AS QVC1283 , CAST(NULL AS VARCHAR(128)) AS QVC1284 ,
QVC3001 AS "Client Application Name", QVC3002 AS "Client User ID",
QVC3003 AS "Client Workstation Name", CAST(NULL AS VARCHAR(300)) AS QVC3004 ,
QVC3005 AS "Client Accounting", QVC3006 AS "Client Program Name",
CAST(NULL AS VARCHAR(300)) AS QVC3007 , CAST(NULL AS VARCHAR(300)) AS QVC3008 ,
QVC5001 AS "Interface", CAST(NULL AS VARCHAR(500)) AS QVC5002 ,
CAST(NULL AS VARCHAR(1000)) AS QVC1000 , CAST(NULL AS VARCHAR(1000)) AS QWC1000 ,
CAST(NULL AS INTEGER) AS QQINT01 , CAST(NULL AS INTEGER) AS QQINT02 ,
CAST(NULL AS INTEGER) AS QQINT03 , CAST(NULL AS INTEGER) AS QQINT04 ,
CAST(NULL AS SMALLINT) AS QQSMINT1 , QQSMINT2 AS "IP Port Number",
CAST(NULL AS SMALLINT) AS QQSMINT3 , CAST(NULL AS SMALLINT) AS QQSMINT4 ,
CAST(NULL AS SMALLINT) AS QQSMINT5 , CAST(NULL AS SMALLINT) AS QQSMINT6 ,
QQ1000L AS "Statement Text", CAST(NULL AS CHAR(1)) AS QFC11 ,
CAST(NULL AS CHAR(1)) AS QFC12 , CAST(NULL AS CHAR(1)) AS QFC13 ,
CAST(NULL AS CLOB(2G)) AS QQCLOB2 , CAST(NULL AS CHAR(1)) AS QFC14 ,
CAST(NULL AS CHAR(1)) AS QFC15 , CAST(NULL AS CHAR(1)) AS QFC16 ,
CAST(NULL AS CLOB(2G)) AS QQCLOB3 , CAST(NULL AS CHAR(1)) AS QFC17 ,
CAST(NULL AS CHAR(1)) AS QFC18 , CAST(NULL AS CHAR(1)) AS QFC19 ,
QQDBCLOB1 AS "Variable Values", CAST(NULL AS CHAR(1)) AS QFC1A ,
CAST(NULL AS CHAR(1)) AS QFC1B , CAST(NULL AS CHAR(1)) AS QFC1C ,
CAST(NULL AS NCLOB(1G)) AS QQDBCLOB2 , CAST(NULL AS CHAR(1)) AS QFC1D ,
CAST(NULL AS CHAR(1)) AS QFC1E , CAST(NULL AS CHAR(1)) AS QFC1F ,
CAST(NULL AS BLOB(2G)) AS QQBLOB1 , CAST(NULL AS CHAR(1)) AS QXC11 ,
CAST(NULL AS CHAR(1)) AS QXC12 , CAST(NULL AS CHAR(1)) AS QXC13 ,
CAST(NULL AS CHAR(1)) AS QXC14 , CAST(NULL AS CHAR(1)) AS QXC15 ,
CAST(NULL AS CHAR(1)) AS QXC16 , CAST(NULL AS CHAR(1)) AS QXC17 ,
CAST(NULL AS CHAR(1)) AS QXC18 , CAST(NULL AS CHAR(1)) AS QXC19 ,
CAST(NULL AS CHAR(1)) AS QXC1A , CAST(NULL AS CHAR(1)) AS QXC1B ,
CAST(NULL AS CHAR(1)) AS QXC1C , CAST(NULL AS CHAR(1)) AS QXC1D ,
CAST(NULL AS CHAR(1)) AS QXC1E , CAST(NULL AS CHAR(2)) AS QXC21 ,
CAST(NULL AS CHAR(2)) AS QXC22 , CAST(NULL AS CHAR(2)) AS QXC23 ,
CAST(NULL AS CHAR(2)) AS QXC24 , CAST(NULL AS CHAR(2)) AS QXC25 ,
CAST(NULL AS CHAR(2)) AS QXC26 , CAST(NULL AS CHAR(2)) AS QXC27 ,
CAST(NULL AS CHAR(2)) AS QXC28 , CAST(NULL AS CHAR(2)) AS QXC29 ,
CAST(NULL AS CHAR(4)) AS QXC41 , CAST(NULL AS CHAR(4)) AS QXC42 ,
CAST(NULL AS CHAR (4) FOR BIT DATA) AS QXC43 , CAST(NULL AS CHAR(4)) AS QXC44 ,
CAST(NULL AS INTEGER) AS QQINT05 , CAST(NULL AS INTEGER) AS QQINT06 ,
CAST(NULL AS INTEGER) AS QQINT07 , CAST(NULL AS INTEGER) AS QQINT08 ,
CAST(NULL AS INTEGER) AS QQINT09 , CAST(NULL AS INTEGER) AS QQINT0A ,
CAST(NULL AS INTEGER) AS QQINT0B , CAST(NULL AS INTEGER) AS QQINT0C ,
CAST(NULL AS INTEGER) AS QQINT0D , CAST(NULL AS INTEGER) AS QQINT0E ,
CAST(NULL AS INTEGER) AS QQINT0F , CAST(NULL AS SMALLINT) AS QQSMINT7 ,
CAST(NULL AS SMALLINT) AS QQSMINT8 , CAST(NULL AS SMALLINT) AS QQSMINT9 ,
CAST(NULL AS SMALLINT) AS QQSMINTA , CAST(NULL AS SMALLINT) AS QQSMINTB ,
CAST(NULL AS SMALLINT) AS QQSMINTC , CAST(NULL AS SMALLINT) AS QQSMINTD ,
CAST(NULL AS SMALLINT) AS QQSMINTE , CAST(NULL AS SMALLINT) AS QQSMINTF
FROM MJATST.looptable4
RCDFMT QQQDBMN;
3. Start the database monitor view by running the following command:
STRDBMON mjatst.loopview4;
By enhancing the database product to allow this view, any data that is written to the database performance monitor view results in only 23 columns in the underlying base table (mjatst.looptable4). The storage that is used with this technique is a small fraction of a traditional monitor, so the performance is better. The resulting smaller table contains only the information necessary for auditing.
For the second view mechanism, use an INSTEAD OF trigger on the view to immediately process a row of monitor data without storing any data.
Complete the following steps:
1. Create a view using the same technique that is described for the first view mechanism. The view can be simplified because in this example, no data is inserted into a table. Run the following commands:
CREATE TABLE mjatst.looptable5 AS (SELECT * FROM qaqqdbmn) WITH NO DATA;
CREATE VIEW mjatst.loopview5 AS SELECT * FROM mjatst.looptable5;
2. Create an INSTEAD OF trigger:
CREATE TRIGGER instead5 INSTEAD OF INSERT ON loopview5
FOR EACH ROW MODE DB2ROW
BEGIN ... this is the body of the trigger ... END;
FOR EACH ROW MODE DB2ROW
BEGIN ... this is the body of the trigger ... END;
3. Start the database monitor using the view by running the following command:
CL: STRDBMON mjatst/loopview5;
By enhancing the database product to allow this view, any rows that are written to the database monitor file are passed directly to the INSTEAD OF trigger so no monitor storage is used.
Comparison of the view mechanisms and the traditional database monitor
Figure 2-8 provides a comparison of the elapsed time and the storage that is used by the traditional database monitor and the two view techniques.

Figure 2-8 Comparison of the two view methods
For the view with an INSTEAD OF trigger, the elapsed time and the amount of storage that is used is under the control of the INSTEAD OF trigger. For example, in Figure 2-8, the INSTEAD OF trigger sends the data to another system. This action takes some processing time, but no persistent storage is used on the system that is monitored.
2.6.3 InfoSphere Guardium database activity monitoring support for DB2 for i
IBM InfoSphere® Guardium® is an enterprise information database audit and protection solution that helps enterprises protect and audit information across a diverse set of relational and non-relational data sources. These sources include Oracle, Teradata, IBM IMS™, VSAM, Microsoft Sharepoint, IBM Netezza®, DB2 for z/OS®, and DB2 for Linux, UNIX, and Windows.
With InfoSphere Guardium V9.0, DB2 for i can now be included as a data source. You can use this configuration, plus the database security enhancements included in DB2 for i, to monitor database accesses from native interfaces and through SQL in real time without any changes to databases or applications, or impacting performance.
Introduction to InfoSphere Guardium
The IBM InfoSphere Guardium solution evolved to address the particular needs of organizations that must implement more automated and auditable data security practices.
InfoSphere Guardium continuously monitors database transactions through lightweight software probes that are installed on the database server (or file share or Microsoft Sharepoint). These probes (called software taps (S-TAPs)) monitor all database transactions, including those transactions of privileged users. The S-TAPs also do not require any changes to the database or its applications.
The probes forward transactions to a hardened collector in the network, where they are compared to previously defined policies to detect violations. The system can respond with various policy-based actions, including generating an alert, and for some databases, can block the transaction in real time. (Blocking is not currently available for DB2 for i database activity monitoring.)
InfoSphere Guardium supports a various deployments of large and geographically distributed infrastructures.
Figure 2-9 shows a typical deployment of InfoSphere Guardium database activity monitoring.

Figure 2-9 InfoSphere Guardium database activity monitoring
New InfoSphere Guardium support for IBM i
InfoSphere Guardium support for IBM i monitoring was previously available through three main methods:
•Import of audit journal entries (QSYS/QAUDJRN) and subsequent analysis and reporting
Although the audit journal support in IBM i provides good support of auditable events, the amount of detail in the audit entries is minimal compared to other Guardium database product support. For example, SQL statements and variable values are not audited in QAUDJRN. Also, because the support requires an export and import, the support is not optimal as a real-time solution.
•Import of database monitor entries and subsequent analysis and reporting
A database monitor (STRDBMON) can be used to capture SQL statements and write them to a database table. Then, the table must be imported into the Guardium collector. Although this method captures SQL statements, variables, and more, the database monitor support is primarily designed for performance analysis. The result is that a significant amount of data that is only interesting in a performance analysis context is captured resulting in the consumption of significant storage and processing resources. Also, because the support requires an import, the support is not optimal as a real-time solution. This method does not provide any support for native access to database objects.
•Network monitoring to capture SQL access
Although this method can capture SQL statements in real time that flowed over a network, any SQL statements run in programs, procedures, functions, and so on, on the IBM i server cannot be monitored. This method does not provide any support for native access to database objects.
InfoSphere Guardium V9.0
The new method that is introduced in Version 9.0 of InfoSphere Guardium provides an integrated solution that overcomes the limitations of the previous methods:
•Any SQL access, whether it is initiated on a client or the IBM i server, can be captured and audited.
•Any native access that is captured in the audit journal can also be captured and sent to the InfoSphere Guardium collector.
•Both SQL access and native access are sent to the InfoSphere Guardium collector in real time.
•Much more detail is captured than is available in the audit journal, including SQL statements, variable values, client special registers, interface information, users, jobs, TCP/IP addresses, and ports. However, unlike the traditional database monitoring, only data that is interesting in a security context is captured and sent to the InfoSphere Guardium collector. This situation reduces the storage and resource consumption that is necessary.
•Filtering can be specified on the IBM i server to capture only the information that is required by auditors. For example, it is simple to set up auditing of any SQL or native access that is performed by privileged users.
•The data that is collected for InfoSphere Guardium is never written to disk on the IBM i server, providing a level of secure logging.
The new method is primarily for auditing database access. If you require auditing on a greater variety of non-database object access, the existing IBM i auditing support of exporting and importing the audit journal can still be used.
More information about the capabilities of InfoSphere Guardium can be found on the following website:
2.7 Security enhancements for printing
Several security enhancements were introduced in IBM i 7.1 for printing. For information about security enhancements for printing, see 10.3.2, “New QIBM_QSP_SECURITY exit point and formats” on page 459.
2.8 TLS V1.1 and V1.2 support
IBM i now offers the support of TLS V1.1 and V1.2. For more information, see 9.4, “System SSL support for transport layer security version 1.2” on page 437.
Also, see the SSL concepts topic in the IBM i 7.1 Knowledge Center:
2.8.1 TLS V1.1 and V1.2 support for IBM HTTP Server for i
TLS V1.1 and V1.2 is also supported for IBM HTTPS Server for i.
For more information about how to configure this support, see 13.5, “IBM HTTP Server for i support for TLSv1.1 and TLSv1.2” on page 548.
2.9 Java security information
For Java security updates, see the following website:
For more information about Java for IBM i, see 15.7, “Java for IBM i 7.1” on page 602.
2.10 PowerSC Tools for IBM i
PowerSC™ Tools for IBM i are now offered by IBM as a service offering from IBM Systems Lab Services.
PowerSC tools for IBM i helps IBM i clients to ensure a higher level of security and compliance:
•Simplifying the management and measurement of security and compliance
•Reducing costs of security and compliance
•Reducing security exposures
•Improving audit capabilities to satisfy reporting requirements
Following are the IBM Systems Lab Services that are related to IBM i security:
•IBM i Security Assessment (iSAT)
An experienced IBM i consultant will collect and analyze data using PowerSC Tools for IBM i. The engagement results in a comprehensive report with findings and recommendations for improved compliance and security remediation.
•IBM i Single Sign On (SSO) Implementation
SSO improves user productivity and saves help desk costs. In this services engagement, an experienced IBM consultant will advise you on SSO options and provide implementation assistance on using the SSO suite components of the PowerSC Tools for IBM i.
•IBM i Security Remediation
An experienced IBM consultant will advise you on the best practices to address IBM i security and compliance issues. The consultant will provide remediation assistance on using the PowerSC Tools for IBM i.
•IBM i Encryption
An experienced IBM consultant will advise you on best practices to implement data encryption on IBM i using the PowerSC Tools for IBM i Encryption Suite. Tape encryption implementation services are also available.
Table 2-8 lists the PowerSC Toolkit for IBM i features with their functions and benefits.
Table 2-8 PowerSC toolkit for IBM i features and functions
|
Tools/Feature
|
Function
|
Benefits
|
|
Compliance Assessment and Reporting Tool
|
Daily compliance dashboard reports at LPAR, system, or enterprise level.
|
Enables compliance officer to demonstrate adherence to predefined security polices.
|
|
Security Diagnostics
|
Reports detailing security configuration settings and identifying deficiencies.
|
Reduces operator time involved in remediating security exposures.
|
|
Privileged Access Control
|
Controls the number of privileged users.
|
Ensures compliance with industry guidelines on privileged users.
|
|
Secure Administrator for SAP
|
Manages and controls access to powerful SAP administrative profiles.
|
Eliminates sharing of SAP administrative profiles with enhanced security auditing.
|
|
Access Control Monitor
|
Monitors security deviations from application design.
|
Prevents user application failures due to inconsistent access controls.
|
|
Network Interface Firewall for IBM Exit Points
|
Controls access to exit point interfaces such as ODBC, FTP, RMTCMD, and so on.
|
Reduces threat of unauthorized security breach and data loss.
|
|
Audit Reporting
|
Consolidates and reduces security audit journal information.
|
Simplifies audit analysis for compliance officer and auditors.
|
|
Certificate Expiration Manager
|
Simplifies management of digital certificates expiration.
|
Helps operators prevent system outages due to expired certificates.
|
|
Password Validation
|
Enhances IBM i operating system protection with stricter password validation.
|
Enables security officers to ensure that user passwords are not trivial.
|
|
Single Sign On (SSO) Suite
|
Simplifies implementation of SSO and password synchronization.
|
Reduces password resets and simplifies user experience.
|
|
Encryption Suite
|
Simplifies implementation of cryptography using IBM i operating system capabilities.
|
Helps application developers meet data security standards and protect critical data.
|
For more information about PowerSC Tools for IBM i, see the PowerSC Tools for IBM i presentation available at the following website:
..................Content has been hidden....................
You can't read the all page of ebook, please click here login for view all page.