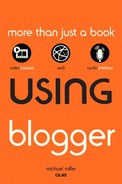
9. Creating a Blog Feed
Objective: To create a site feed for your blog.
As you learned in Chapter 2, “Visiting Blogger Blogs,” a site feed is an automatically updated stream of a blog’s contents. Users can subscribe to your site feed to be notified of new blog posts in their favorite feed reader application.
You probably want to activate feeds for your blog. This is called blog syndication; it not only is a service to your most loyal readers, but also helps your blog posts be picked up by Google Blog Search.
Activating an Atom Feed
Blogger uses the Atom format for its blog syndication. When you activate Atom syndication for your blog, Blogger automatically generates a machine-readable version of your blog that most feed readers and aggregators can read.
Show Me: Media 9.1—How to Activate an Atom Feed

To learn how add an Atom feed to your blog, see the video titled “How to Activate an Atom Feed” on the companion Using website, my.safaribooksonline.com/9780132119603/media
 LET ME TRY IT
Activating Atom Syndication
To activate an Atom feed for your blog, follow these steps:
- From the Blogger Dashboard, click the Settings link next to your blog name.
- When the Settings tab appears, click the Site Feed subtab, shown in Figure 9.1.
Figure 9.1. Configuring Atom syndication.
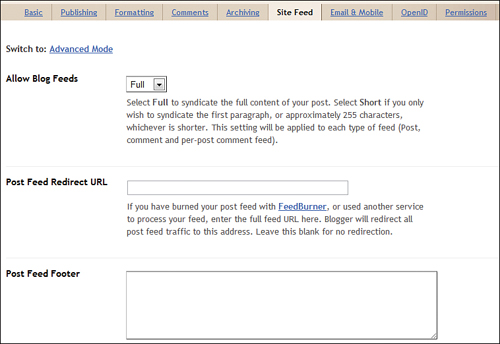
- To syndicate the full content of each post, pull down the Allow Blog Feeds list and select Full. To syndicate just the first paragraph (or 255 characters) of each post, select Short. If you don’t want to activate a feed, select None.
- Click the Save Settings button.
Tell Me More: Media 9.2—Why a Blog Feed Is Important

To discover why your blog needs an Atom or RSS feed, listen to the audio file titled “Why a Blog Feed Is Important” on the companion Using website, my.safaribooksonline.com/9780132119603/media.
Activating Feeds for All Blog Comments
Not only can you syndicate new posts that you make to your blog, you can also syndicate all the comments that visitors make to your posts. This lets all your subscribers see all the comments to your blog.
LET ME TRY IT
Activating a Comments Feed
- From the Blogger Dashboard, click the Settings link next to your blog name.
- When the Settings tab appears, click the Site Feed subtab.
- On the Site Feed page, click the Advanced Mode link. This expands the page, as shown in Figure 9.2.
Figure 9.2. Configuring advanced feed options.
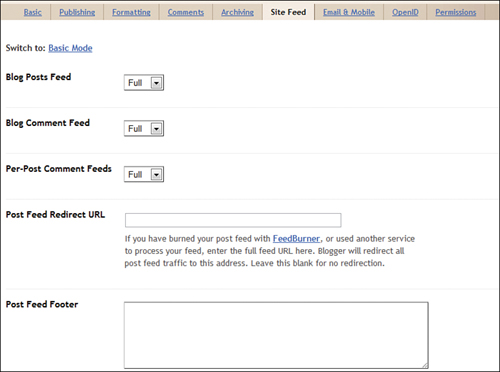
- Pull down the Blog Comment Feed list and select Full (displays full comments) or Short (displays the first 255 characters of each comment).
Creating an RSS Feed via FeedBurner
If you’d rather use RSS syndication instead of Atom, you need to employ the FeedBurner service (feedburner.google.com). FeedBurner will create an RSS feed for your blog, which you can then reference via a gadget in your sidebar.
Show Me: Media 9.3—How to Create a FeedBurner RSS Feed
To learn how to create an RSS feed with FeedBurner, see the video titled “How to Create a FeedBurner RSS Feed” on the companion Using website, my.safaribooksonline.com/9780132119603/media
LET ME TRY IT
Creating a FeedBurner RSS Feed
- Go to the main FeedBurner page at www.feedburner.com.
- Sign in to FeedBurner with your Google account email address and password.
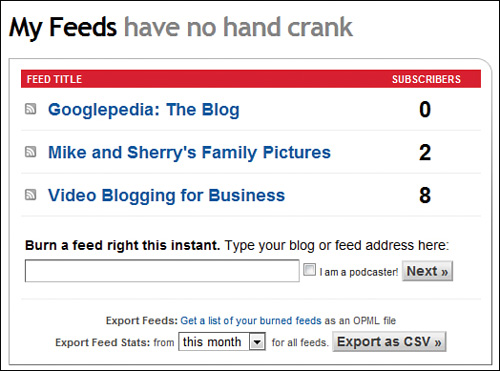
- When the My Feeds page appears, as shown in Figure 9.3, enter the URL of your blog into the Burn a Feed Right This Instant box.
Figure 9.3. Getting ready to create a new FeedBurner feed.
- Click the Next button.
- When the Identify Feed Source page appears, select the RSS feed option.
- Click the Next button.
- When the next page appears, as shown in Figure 9.4, confirm the blog name.
Figure 9.4. Creating an RSS feed for your blog.
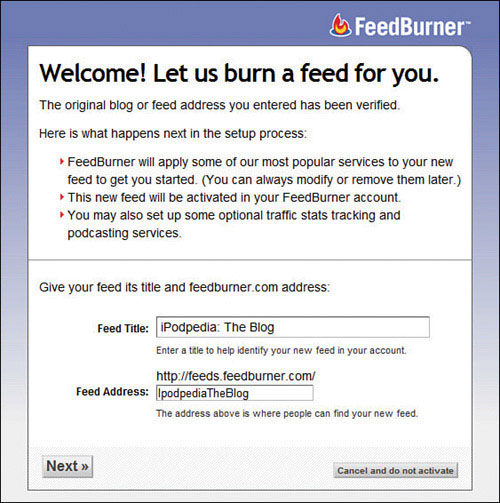
- Either accept the feed address or enter a new address.
- Click the Next button.
FeedBurner now displays a congratulations page. You can click the Next button to add statistic tracking to your feed, or stop here for a normal feed.
Configuring Blogger to Use Your FeedBurner Feed
To display your RSS feed on your blog, you have to configure Blogger to redirect all feed traffic to your FeedBurner feed. To do this, follow these steps:
- From the Blogger Dashboard, click the Settings link next to your blog name.
- When the Settings tab appears, click the Site Feed subtab.
- Enter the URL for your FeedBurner RSS feed into the Post Feed Redirect URL box.
- Click the Save Settings button.
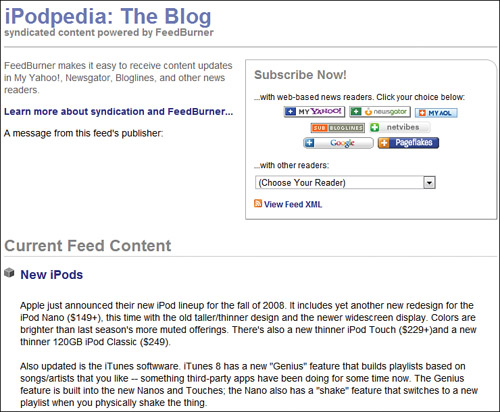
Users who click on your blog’s Subscribe To link will now be redirected to your feed’s FeedBurner page, like the one shown in Figure 9.5.
Figure 9.5. A FeedBurner page for a typical blog.
Adding a Feed Subscription to Your Sidebar
Most Blogger templates insert a Subscribe To link at the bottom of the blog page; readers click this link to subscribe to your blog feed.
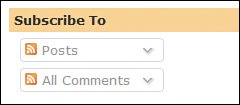
If you’d rather present a more visible way to subscribe to your blog, you can add a Subscription Links gadget to your blog’s sidebar. As you can see in Figure 9.6, this gadget includes two buttons—one to subscribe to your normal feed, and another to subscribe to a feed of your blog’s comments.
Figure 9.6. A feed subscription sidebar gadget.
Show Me: Media 9.4—How to Add a Feed Subscription Gadget
To learn how to add a feed subscription gadget to your blog, see the video titled “How to Add a Feed Subscription Gadget” on the companion Using website, my.safaribooksonline.com/9780132119603/media.
LET ME TRY IT
Adding a Feed Subscription Gadget
- From the Blogger Dashboard, click the Layout link next to your blog name.
- When the Layout tab appears, select the Page Elements subtab.
- When the Page Elements page appears, click the Add a Gadget link in the right column.
- When the Add a Gadget window appears, click the + button for the Subscription Links item.
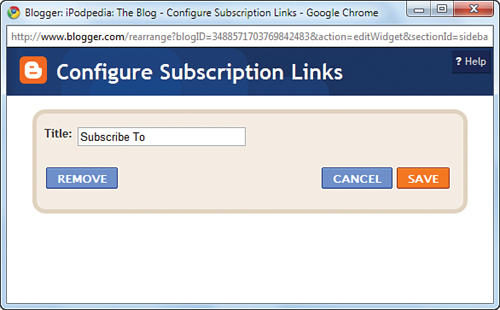
- When the Configure Subscription Links window appears, as shown in Figure 9.7, enter a title for this gadget and then click the Save button.
Figure 9.7. Creating a feed subscription gadget.
The gadget is now added at the top of your blog’s sidebar. You can go to the Page Elements page to position the gadget elsewhere in the sidebar.