6. Making Blog Posts
Objective: To add new posts to your blog—and edit the posts you’ve already made.
It’s not enough to create a blog page. You have to keep your blog fresh by making new posts to your blog.
A blog post is how you talk to the readers of your blog. A blog without fresh posts isn’t interesting or newsworthy; it really isn’t much of a blog at all. Fortunately, Blogger makes it easy to create new blog posts. It’s a matter of writing down what you’re thinking at the moment, then making a few mouse clicks.
Posting to Your Blog
After you launch your blog, it’s time to write your first blog post. You can post to your blog as frequently as you like. Many bloggers post daily, some several times a day. Fortunately, Blogger makes it easy to create new posts—from your web browser, your email program, or even your mobile phone.
Posting from the Blogger Dashboard
Most users do most of their posting from the Blogger Dashboard. This approach provides the most options in terms of formatting your posts—and including optional items.
Show Me: Media 6.1—How to Post from the Blogger Dashboard

To learn how to post from the Blogger Dashboard, see the video titled “How to Post from the Blogger Dashboard” on the companion Using website, my.safaribooksonline.com/9780132119603/media.
Posting from the Blogger Dashboard
To create a new post from the Blogger Dashboard, follow these steps:
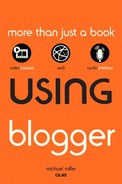
- From the Blogger Dashboard, click the New Post button for this particular blog, as shown in Figure 6.1.
Figure 6.1. Click the New Post button to create a new blog post.
- When the New Post page appears, as shown in Figure 6.2, enter a title for your post.
Figure 6.2. Creating a new blog post.

- Enter the text for your post into the large text box. If you like, you can format the text (bold, italic, colors, and so on) using the formatting toolbar above this text box.
- To view a preview of your post, click the Preview link.
- To save a draft of your post for editing and posting at a future time, click the Save Now button.
- When you finish writing and formatting, click the Publish Post button.
Blogger now publishes your post, and then displays a confirmation screen. Click the View Blog link to view your blog, with the new post at the top of the page, as shown in Figure 6.3.
Figure 6.3. Your new post is now posted.

Formatting Your Blog Post
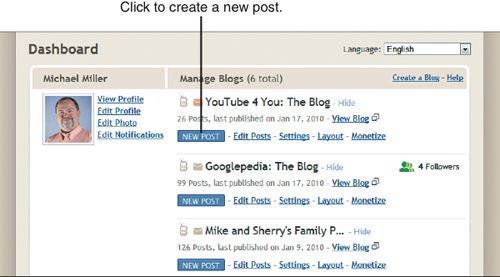
The New Post page includes many formatting options for your blog post, all available from the formatting toolbar located above the text entry box. Figure 6.4 shows the options available on this toolbar; follow these steps to format your posts:
Figure 6.4. The New Post formatting toolbar.

- To change the text font, select a block of text, click the Font button, and select a new font family—Arial, Courier, Georgia, Helvetica, Times, Trebuchet, or Verdana.
- To change the text size, select a block of text, click the Font Size button, and select a new size—Smallest, Small, Normal, Large, or Largest.
- To bold selected text, select a block of text and click the Bold button.
- To italicize selected text, select a block of text and click the Italic button.
- To strike through selected text, select a block of text and click the Strike-through button.
- To change text color, select a block of text, click the Text Color button, and make a choice from the color chooser.
- To add a color highlight behind text, select a block of text, click the Text Background Color button, and make a choice from the color chooser.
- To change the text alignment, position your cursor within a paragraph and click either the Align Left, Center, Align Right, or Justify button.
- To indent a block of text, position your cursor within the paragraph and click the Quote button.
- To start a numbered list, position your cursor at the first list item and click the Numbered List button.
- To start a bulleted list, position your cursor at the first list item and click the Bullet List button.
 LET ME TRY IT
Selecting Post Options
Blogger enables you to set several options for each individual post you make. Just follow these steps:
- From the New Post page, click the Post Options link; this expands the section beneath the text entry box, as shown in Figure 6.5.
Figure 6.5. Configuring post options.
- To allow reader comments for this post, check the Allow option. To not allow comments, check the Don’t Allow option.
- To upload this post at a selected future time, check the Scheduled At option and enter a date and time.
LET ME TRY IT
Entering HTML Code
If you want to apply even more sophisticated formatting, such as inserting tables, you can enter your post as raw HTML code. To do this, of course, you need to know HTML coding; if you do, follow these steps:
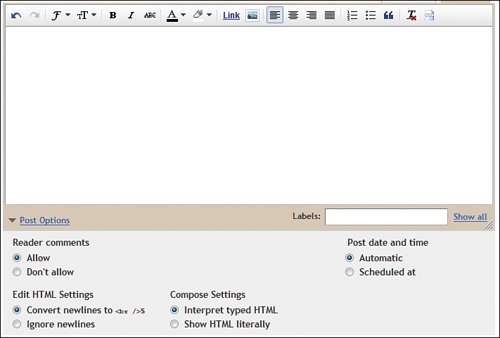
- From the New Post page, click the Edit HTML tab; this changes the standard editing box into an HTML editing box, as shown in Figure 6.6.
Figure 6.6. Entering HTML code for a blog post.
- Enter your post text and HTML tags into the editing box.
- Click the Preview link to view the results of your code.
- Click the Publish Post button to publish the blog post.
Posting via Email
Blogger also lets you email in your posts. That’s right; you can create a post in an email message, and then send that message to Blogger to post to your blog.
Show Me: Media 6.2—How to Configure Blogger for Email Posting
To learn how to configure Blogger to post emails, see the video titled “How to Configure Blogger for Email Posting” on the companion Using website, my.safaribooksonline.com/9780132119603/media.
LET ME TRY IT
Configuring Blogger for Email Posting
To post via email, you first have to create a mail-to-Blogger address. To do this, follow these steps:
- From the Blogger Dashboard, click the Settings link next to your blog name.
- On the Settings tab, select the Email & Mobile subtab.
- When the Email & Mobile page appears, go to the Posting Options section (shown in Figure 6.7) and enter one or more keywords into the Email Posting Address box.
Figure 6.7. Setting your Mail2Blogger email address.
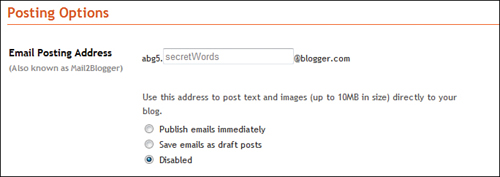
- Write down the resulting “@blogger.com” Mail2Blogger address; this will be the address to which you mail your new posts.
- Select the Publish Emails Immediately option.
- Click Save Settings.
Creating an Email Post
Once Blogger is properly configured, you can create new posts from any email program or service. Here’s how:
- From within your email program or service, create a new email message.
- Enter your blog post as the text of the new message.
- Enter your Mail2Blogger address as the recipient address for this message.
- Send the completed message.
Blogger will now receive the email and use the text of that message to create a new blog post.
Adding Items to Your Posts
You can add more value to your blog posts by including links to other web pages, as well as labels that help categorize your posts. Read on to learn more.
Adding Links to Your Posts
One of the neat things about a blog is the ability to link to other pages on the Web, via the use of inline hyperlinks. Fortunately, Blogger makes it easy to add links to your post.
LET ME TRY IT
Creating Links
You add links to your text while you’re creating a blog post. Follow these steps:
- From the New Post page, highlight the text from which you want to link.
- Click the Link button on the formatting toolbar.
- When the Edit Link dialog box appears, as shown in Figure 6.8, make sure the Web Address option is selected and enter the URL for the link.
Figure 6.8. Linking to another web page from within your post.
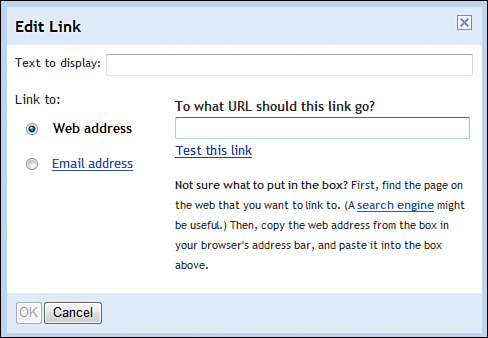
- Click OK.
Adding Labels to Your Posts
When you get a lot of posts in your blog, it becomes increasingly difficult to find any particular post. You can make this easier for your blog visitors by using labels to categorize your posts. Visitors can then click a label in the label list to view all posts related to that particular topic.
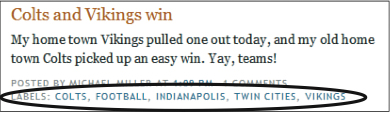
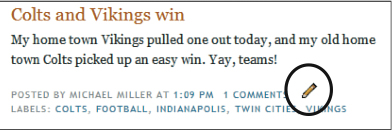
Figure 6.9 shows how labels appear underneath a blog post. These labels are clickable, so visitors can view similar posts by clicking one of the label links.
Figure 6.9. A blog post categorized with labels.
LET ME TRY IT
Adding Labels
To add a label to your post, follow these steps:
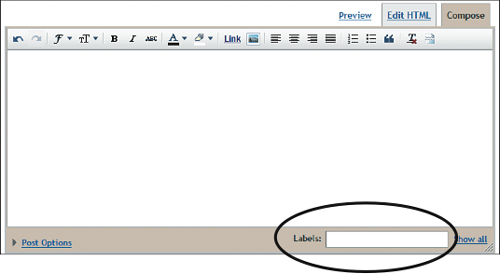
- On the New Post page, enter the label into the Labels box, as shown in Figure 6.10. You can enter multiple labels for any post; just separate the labels with commas.
Figure 6.10. Adding a label to a blog post.
- Complete your post as usual and click the Publish Post button.
Creating Jump Posts
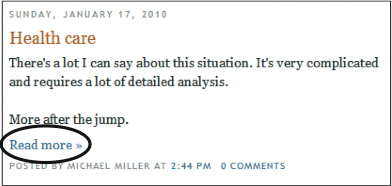
When you have a long blog post, it can take up a lot of space on your main blog page, pushing older posts several scrolls down. If you’d rather tighten up the display, Blogger lets you format long posts so that only the first part of the post appears on the main blog page. To view the balance of the post, readers click a Read More link, like the one shown in Figure 6.11.
Figure 6.11. A long post separated into two parts; click the Read More link to “jump” to the second part.
Inserting a Jump Break
To break a long post into two parts, follow these steps:
- From the New Post page, position the cursor in the text editing box where you want the post to split.
- Click the Insert Jump Break button on the formatting toolbar.
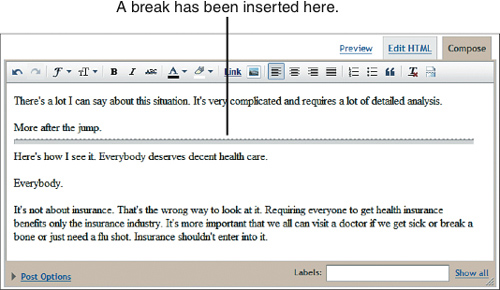
The text in the editing box now appears with the jump break displayed, as shown in Figure 6.12.
Figure 6.12. A jump break added to a blog post.
Editing and Deleting Your Posts
No one’s perfect. Every now and then you’ll post something to your blog and later discover an egregious spelling error, or a bad link, or maybe just something you wish you’d never written in the first place. Have no fear, gentle blogger; Blogger lets you edit any post you like. In fact, you can delete posts, if you so wish.
Show Me: Media 6.3—How to Edit a Blog Post
To learn how to edit a blog post, see the video titled “How to Edit a Blog Post” on the companion Using website, my.safaribooksonline.com/9780132119603/media.
LET ME TRY IT
Editing a Post from the Dashboard
To edit an existing Blogger post, follow these steps:
- From the Blogger Dashboard, click the Edit Posts link for your blog.
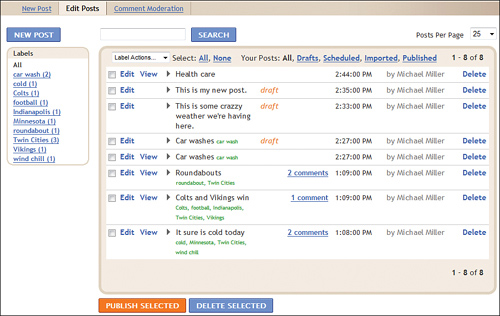
- When the list of posts appears, as shown in Figure 6.13, click the Edit link next to the post you want to edit.
Figure 6.13. Click the Edit link to edit any recent post.
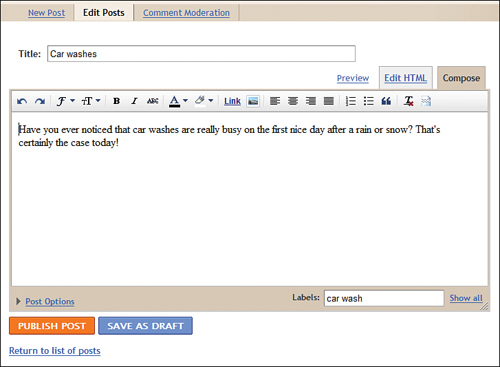
- When the Edit Posts page appears, as shown in Figure 6.14, edit your post accordingly.
Figure 6.14. Editing a post.
- When you’re done editing, click the Publish Post button.
Editing a Post from Your Blog
If you’re signed into Blogger with your Google account, you can also edit posts directly from your blog. When you view your blog, you (and only you) see a pencil icon next to each post, like the one shown in Figure 6.15; clicking this icon enables “inline editing” without having to access the Dashboard first. Just follow these steps:
- After you’ve signed into Blogger, open your blog.
- Click the pencil icon next to the post you want to edit.
- When the Edit Posts page appears, edit your post accordingly.
- When you’re done editing, click the Publish Post button.
Figure 6.15. Click the pencil icon to edit the post.
LET ME TRY IT
Deleting a Post
You can also delete any post you’ve previously made. Just follow these steps:
- From the Blogger Dashboard, click the Edit Posts link for your blog.
- When the list of posts appears, click the Delete link next to the post you want to get rid of.
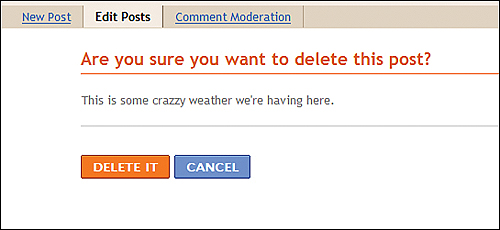
- When the confirmation page appears, as shown in Figure 6.16, click the Delete It button.
Figure 6.16. Deleting a post.
Cross-Posting from Your Blog to Facebook and Twitter
If you’re an active blogger, chances are you’re also an active participant on both Twitter and Facebook. The problem is, you really don’t want to enter the same posts three times, once for each site. Shouldn’t there be a way to make one post and send it to all three sites?
Well, there is—using a third-party tool called Twitterfeed. This website links your Blogger blog to your accounts on Twitter, Facebook, Ping.fm, Laconica, and Hellotxt. (No MySpace connection as of yet, sorry.) All you have to do is provide Twitterfeed with the URL for your blog’s RSS feed and your log-in information for your social network(s) of choice; Twitterfeed does the rest, routing your blog posts (as recorded in your RSS feed) to appear as tweets and Facebook updates and the like.
Tell Me More: Media 6.4—How Blogger and Facebook Can Work Together

Want to learn more about using Blogger and Facebook together? Listen to the audio file titled “How Blogger and Facebook Can Work Together” on the companion Using website, my.safaribooksonline.com/9780132119603/media.
LET ME TRY IT
Creating a Twitterfeed
To use Twitterfeed, go to www.twitterfeed.com. You’ll need to create a new account (it’s free), and have already created an RSS feed for your blog. You can then follow these steps:
- From the Twitterfeed Dashboard, click the Create New Feed button.
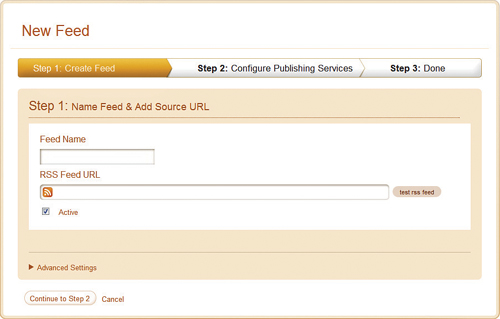
- When the New Feed page appears, as shown in Figure 6.17, enter a name for your Blogger feed, as well as the URL for the target blog’s RSS feed, then click the Continue to Step 2 button.
Figure 6.17. Adding your Blogger RSS feed to Twitterfeed.
- When the Feed Publishing page appears, as shown in Figure 6.18, click each service to which you want to cross-post.
Figure 6.18. Selecting which social networks to send your blog posts to.

- When the next page appears, click the Authenticate New Account button. When prompted, follow the on-screen instructions to link your two accounts; when you return to the previous page, click the Create Service button.
- When you return to the Feed Publishing page, click the All Done! button.