8. Draw with Live Trace
Illustrator can trace raster images, such as digital photos or scans of drawn or sketched images. It has two kinds of tracing: manual and automatic. Pages 67–74 showed how you can manually trace a reference file using drawing tools, but Illustrator’s Live Trace feature creates the tracing for you automatically.
Automatic tracing is different from the manual version in several ways.
ONE: It’s extremely fast. And after you trace an image, the finished drawing is editable, just like any other artwork in Illustrator.
TWO: It’s extremely accurate, depending on the tracing options you choose.
THREE: It’s extremely flexible. You can create vastly different drawings from the same source file.
FOUR: It’s extremely easy. Choose from tracing presets to make complex or simple tracings.
FIVE: Did we mention fast?

Live Trace presets and settings
The easiest and quickest way to trace an image is to choose a preset. Experiment with all the presets so you’ll have a good idea of what each one does.
Task 1 Trace an image using presets
1 You’re going to place an image on the page. For now, choose a photograph about 5 × 7 inches, 72 ppi (pixels per inch). You can experiment later with higher resolutions and larger images (Illustrator is fast, but there’s no point in slowing it down while exploring different settings).
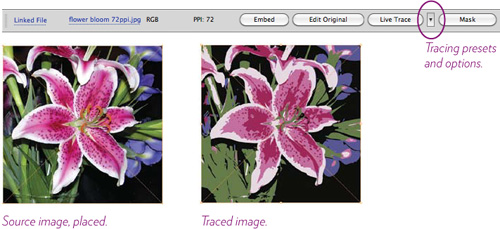
Choose File > Place..., then locate a photo to trace (below, left).
2 With the black Selection tool, click on the image to select it. The Control panel, shown below, displays some general information about the image and a few options (Embed, Edit Original, Live Trace).
3 Click the Tracing presets and options button, circled below. For now, choose “Color 6” from that menu. The tracing appears a second or two later. Wow.
4 After an image is traced (and still selected), the Control panel changes to show options specific to the preset you used. You can change these at this point, and the new options will affect the selected image.

You can also open the “Tracing Options” dialog box to tweak the selected tracing (opposite page). And be sure to read Task 4 for more options!
Task 2 Customize the tracing settings
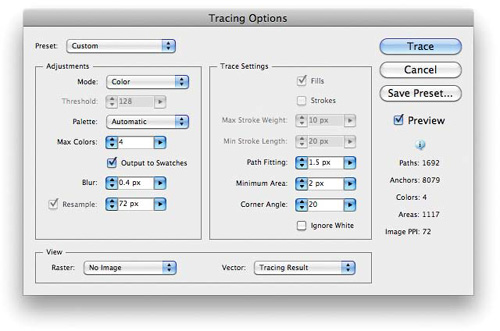
In the “Tracing Options” dialog box, as explained below, you can modify the settings, preview the results, and save the modified preset to use again. Make sure the tracing is selected if you want these options to apply.
1 To open the “Tracing Options” dialog box, click the Tracing Options icon in the Control panel (shown at the bottom of the opposite page).
Tip
You can also get this dialog box before you make the tracing in the first place: In the Tracing presets and options menu (Task 1.3), choose “Tracing Options....”
2 If your placed image is selected, click the “Preview” checkbox to see the results as you change settings.
Try these settings in the “Adjustments” section:
Change “Max Colors” to 4 to limit the colors used even further.
Check the “Output to Swatches” box. The colors created by the “Max Colors” option will be added to the Swatches panel.
Try these settings in the “Trace Settings” section:
Select “Ignore White” if you want the white parts to be transparent instead of opaque white, such as when you trace a scan of a sketch drawn on white paper (see the following page).
Change these settings only if you don’t like the preview results of a tracing: The “Path Fitting,” “Minimum Area,” and “Corner Angle” settings determine how much accuracy and detail is preserved.
3 When you’re satisfied with the preview results, click “Trace” and the image is retraced and replaced.
4 If you’d like to use these settings again, click “Save Preset....” In the “Save Tracing Preset” dialog box that opens, name the preset, then click OK. The custom preset will now appear in the preset menus, both in the Control panel and in the “Tracing Options” dialog box.
Trace your way to great art
Follow these easy steps to learn several ways to take advantage of Live Trace.
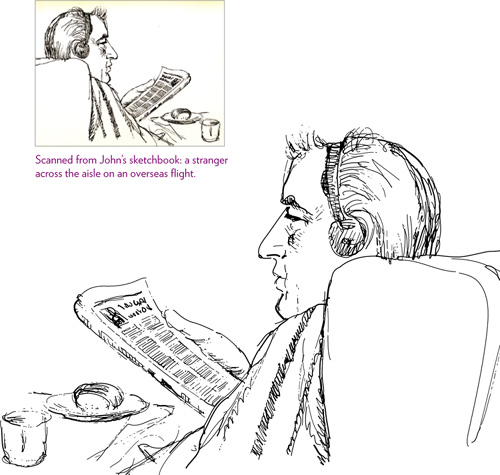
Task 3 Trace a sketch
For printed pieces, I often trace my sketches to use in the printed product, rather than printing the scanned, raster version of the file. Vector files (the traced ones) are very small compared to raster (pixel-based, scanned) files. Best of all, the tracing can be enlarged or reduced without any quality degradation.
1 Place a scan of a sketch: Choose File > Place.... It appears on the page with an X through it because it’s a linked file—that’s okay.
If you don’t have a sketch, scribble on a piece of paper and scan that.
Or, as we have often done, take a photo of the piece of paper and place that photo.
2 Choose Object > Live Trace > Tracing Options....
If a warning tells you the tracing might be slow because the file is large, don’t worry, you can resample it to a lower resolution in the next step.
3 In the “Tracing Options” dialog box, I adjusted the following settings for this specific image:

4 Click “Trace.”
The tracing might happen so fast and look so much like the original that you’re not sure if anything actually happened.
Click the Vector result preview button in the Control panel (circled below). If “Tracing Result” is selected, the tracing is what you see. The tracing has an X running through it, as seen on page 106.
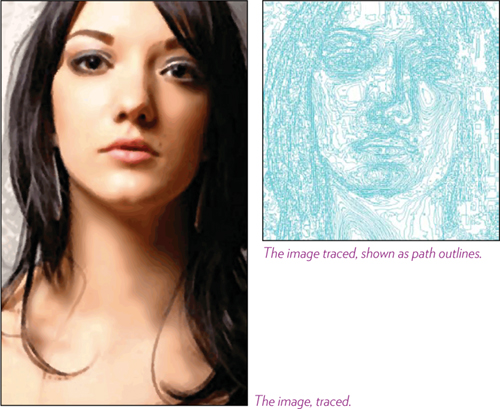
From the Vector result menu, you can also choose “Outlines” to see the paths that have been created.
The tracing is now a tracing object. To convert it into paths (as shown in red, below, right,) or a Live Paint group, see the following page.

Task 4 Expand a tracing object
The tracing object is made up of the source image and the vector art tracing. To work with the tracing as you can with any other vector art, you must expand the tracing object, which separates the vector paths from the source image so you can work with the paths.
Keep in mind that once you expand a tracing object, you can no longer change the tracing options.
1 With a tracing object selected, click the “Expand” button in the Control panel.
![]()
Or choose Object > Live Trace > Expand.
2 Now you can see and work with the paths.
Press Command Y (PC: Control Y) to view the Outline mode; press the keyboard shortcut again to return to Preview mode (or use the View menu).
Press Command H (PC: Control H) to hide the path points, but still keep the object selected.
Remember (from Chapter 3), use the black Selection tool to select the entire object, and use the white Direct Selection tool to select individual paths.
Convert a tracing object to a Live Paint group
Live Paint is a powerful painting technique that enables you to assign colors to the faces and edges (fills and strokes) of shapes in more versatile ways than with any other feature in Illustrator. Learn about Live Paint in Chapter 14.
• With a tracing object selected, click the “Live Paint” button in the Control panel.
![]()
Or choose Object > Live Paint > Convert to Live Paint.
Delete a tracing object
To delete a tracing but keep the placed source image, select the tracing object, then choose Object > Live Trace > Release.
Tip
To create a tracing object and convert it to paths in one step, choose Object > Live Trace > Make and Expand.
Other reasons to love Live Trace
We’ve just scratched the surface, but you’ll find lots of other ways to use Live Trace in your projects. We’ve traced scans of traditional paintings and also digital raster paintings created at a small size, then enlarged the vector tracing up to thirty or forty inches wide to output on stretched canvas.
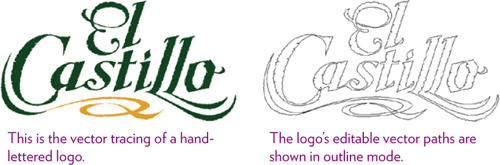
We’ve also sketched rough handlettering on paper, scanned and traced it, then expanded it and cleaned it up with the selection tools, Eraser tool, and sometimes the Blob brush.
In the example below, I handlettered the logo, cleaned it up as much as possible in Photoshop, then use Live Trace to create a vector version that I can enlarge to any size.
Try this!
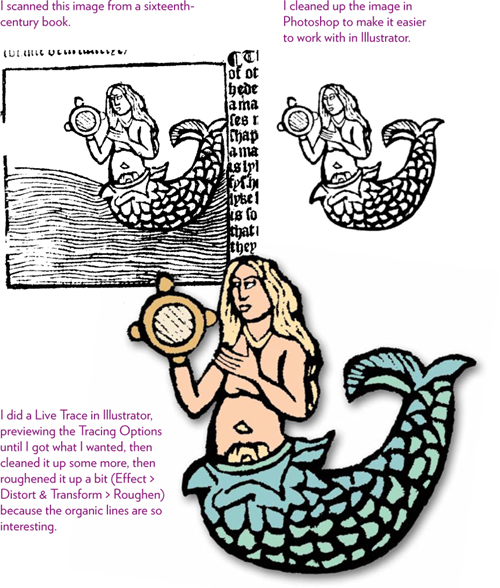
Use the Tasks in this chapter to experiment with creating a tracing object. Use a photo that you like and turn it into an art piece. Scan your signature and create a digital version of it. Trace old images from out-of-copyright books to use in your design work. Expand the tracing object and color the fills and strokes, or reshape the paths. Even if you don’t have an immediate use for this tool, you want to embed the idea into your fingers and brain so when the perfect project for tracing appears, you are ready with the tool.