
11. Dialogs
Chances are that at some point in your application, you’ll need to display a dialog to communicate with the user. The NetBeans Platform has a Dialogs API that provides a collection of predefined dialogs and related utilities. Dialog types include simple messages, Yes-No confirmations, OK-Cancel confirmations, and dialogs that request input. The standard dialogs are also configurable, but if the standard fare is not flexible enough for you, you can always create a custom dialog.
In this chapter, we’ll explore all of these offerings.
What You Will Learn
• Create standard message, confirmation, and input line dialogs.
• Customize standard dialogs.
• Process user responses in dialogs.
• Customize dialogs.
• Provide error handling with custom dialogs.
• Use dialog notifications.
• Create a custom login dialog.
11.1 Dialog Overview
The Dialogs API provides several classes that help you create, display, and obtain input from dialogs. To use the Dialog framework, specify a dependency on the Dialogs API in your module.
Dialogs, Windows, or Wizards?
Note that the Dialogs API provides separate, modal message boxes. Use TopComponents to create windows (see Chapter 8, “NetBeans Platform Window System,” on page 341). For a multi-step sequence of input panels, refer to Chapter 12, “Wizards,” on page 551.
The NotifyDescriptor class has subclasses that let you create standard dialogs. You configure dialogs either with alternate constructors or NotifyDescriptor methods. After creating the dialog, you display it with DialogDisplayer methods. You can display the dialog immediately or asynchronously, and NotifyDescriptor provides constants to help you determine user responses.
You can also provide notifications within a dialog, either by defining the notification beforehand or as a response to user input.
For the most part, then, standard dialogs (perhaps with minor configuration) provide a rich selection of dialogs in the NetBeans Platform. For more customized uses, you can build your own panel component and give it to NotifyDescriptor or one of its subclasses. You can configure the dialog title or specify the set of option buttons. For advanced customizations, you build a dialog with DialogDescriptor. We’ll show you how to create custom dialogs with DialogDescriptor later in the chapter.
The NetBeans dialog classes are similar to the Swing JOptionPane class except they provide the following features.
• NotifyDescriptor and DialogDescriptor are integrated into the NetBeans Platform window system and help system.
• Dialogs are automatically centered in the viewing area.
• You can use the ESC key to close a dialog.
• The DialogDisplayer class provides a standard look and feel for displaying dialogs and returning status.
• You can customize any dialog or notice, but many times customization is not necessary.
• You can optionally provide your own inner panel.
11.2 Standard Dialogs
Let’s first look at the standard dialogs in their simplest forms. NotifyDescriptor includes several subclasses that define certain types of standard dialogs.
NotifyDescriptor.Message
NotifyDescriptor.Message is meant to convey a message, as shown in Figure 11.1. The standard dialog includes the dialog title (Information), message text, and an OK button. Although you can access its return value, typically the user simply clicks OK to dismiss the dialog.
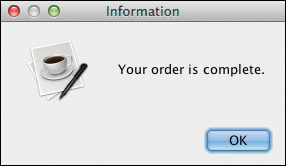
Listing 11.1 creates the standard message dialog shown in Figure 11.1, displays the dialog, and blocks until the user closes the dialog (either by clicking the OK button or closing it explicitly).
Listing 11.1 Standard Message Dialog
NotifyDescriptor nd = new NotifyDescriptor.Message("Your order is complete.");
DialogDisplayer.getDefault().notify(nd); // display and block
Variants of the NotifyDescriptor.Message include a Warning message and an Error message. Figure 11.2 shows a Warning message.
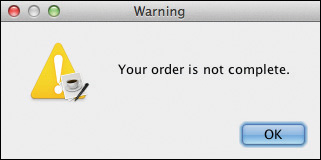
Listing 11.2 shows how to create this Warning message. Use constructor argument NotifyDescriptor.WARNING_MESSAGE to specify a warning icon and set the title to Warning.
Listing 11.2 Standard Warning Message Dialog
NotifyDescriptor nd = new NotifyDescriptor.Message(
"Your order is not complete.", NotifyDescriptor.WARNING_MESSAGE);
DialogDisplayer.getDefault().notify(nd); // display and block
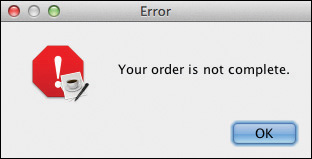
Similarly, Figure 11.3 shows the NotifyDescriptor.ERROR_MESSAGE dialog. Listing 11.3 shows how to build and display a standard Error message, which sets the title to Error and uses an error-type icon.
Listing 11.3 Standard Error Message Dialog
NotifyDescriptor nd = new NotifyDescriptor.Message(
"Your order is not complete.", NotifyDescriptor.ERROR_MESSAGE);
DialogDisplayer.getDefault().notify(nd); // display and block
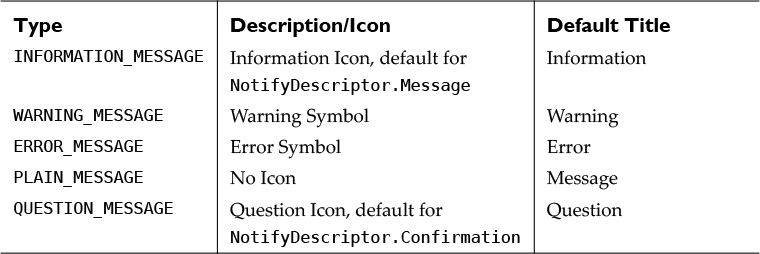
Table 11.1 lists the available NotifyDescriptor message types. Note that INFORMATION_MESSAGE is the default for NotifyDescriptor.Message and PLAIN_MESSAGE displays no icon. QUESTION_MESSAGE is the default for NotifyDescriptor.Confirmation message, which we discuss next.
NotifyDescriptor.Confirmation
Confirming or verifying an action before proceeding is a common requirement in applications. The standard Confirmation dialog uses a Question title and supplies button options for Yes, No, and Cancel. You can check for a user’s response (as well as NotifyDescriptor.CLOSED_OPTION) and react accordingly. Figure 11.4 shows the standard Confirmation dialog.
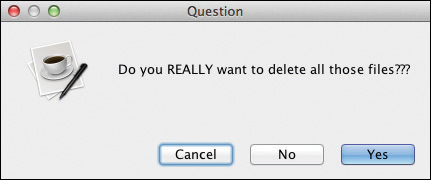
Listing 11.4 shows a typical usage with the standard Confirmation dialog. Here we check the return value against NotifyDescriptor.YES_OPTION (the user pressed the Yes button).
Listing 11.4 Standard Confirmation Dialog
NotifyDescriptor nd = new NotifyDescriptor.Confirmation(
"Do you REALLY want to delete all those files???");
if (DialogDisplayer.getDefault().notify(nd) == NotifyDescriptor.YES_OPTION) {
// Yes, really delete all those files.
}
Table 11.2 shows the possible return values for the standard dialogs.

Although you typically check for a particular response result with a dialog, you might want to make a distinction among several possible return options, including NotifyDescriptor.CLOSED_OPTION (the user closed the dialog without pressing any buttons). The code in Listing 11.5 checks all possible user responses with a Confirmation dialog (such as the dialog shown in Figure 11.4).
Listing 11.5 Checking the User’s Response
NotifyDescriptor nd = new NotifyDescriptor.Confirmation(
"Do you REALLY want to delete all those files???");
Object status = DialogDisplayer.getDefault().notify(nd);
if (status == NotifyDescriptor.YES_OPTION) {
// Yes
} else if (status == NotifyDescriptor.NO_OPTION) {
// No
} else if (status == NotifyDescriptor.CANCEL_OPTION) {
// Cancel
} else if (status == NotifyDescriptor.CLOSED_OPTION) {
// Window explicitly closed
}
Dialog Tip
Note that DialogDisplayer method notify() displays and blocks a dialog and returns the user input that closed it. If you need a dialog to remain open after the user clicks one or more of the option buttons, then you must supply an ActionListener with method actionPerformed() to process user input. We show you this technique in sections “Custom Login Dialog” on page 539 and “Putting It All Together” on page 544.
NotifyDescriptor.InputLine
Use NotifyDescriptor.InputLine to create dialogs that prompt for user input. Figure 11.5 shows the standard Input Line dialog with a preset text and after the user supplies an email address. InputLine dialogs include Cancel and OK button options.

Dialog NotifyDescriptor.InputLine constructor requires a prompt as the first argument and a dialog title as the second argument. Use setInputText() to optionally preset the text input and getInputText() to read user input after the dialog closes. Typically, you check to make sure the user clicks OK before reading the text, as shown in Listing 11.6.
Listing 11.6 Standard Input Line Dialog
NotifyDescriptor.InputLine nd = new NotifyDescriptor.InputLine(
"Email Address", "Please provide your email address");
nd.setInputText("xxx @ yyy DOT org");
if (DialogDisplayer.getDefault().notify(nd) == NotifyDescriptor.OK_OPTION) {
// OK, read the input
doSomethingWithEmailAddress(nd.getInputText());
}
11.3 Customizing Standard Dialogs
You can easily customize any of the standard dialogs, although not all combinations of possible configurations make sense. Besides the various message types listed in Table 11.1, you can also configure the option buttons for a dialog, as shown in Table 11.3.

Let’s look at an example of customizing the Confirmation dialog. In Figure 11.6, you see a customized title, button options Yes and No (instead of the default Yes, No, and Cancel), and a warning confirmation instead of the standard confirmation.
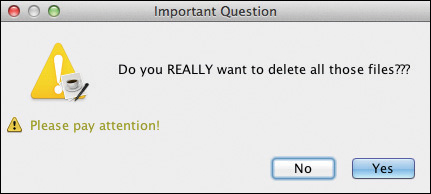
In addition, there is a notification warning (“Please pay attention!”) to emphasize the potential consequences of a wrong response. Listing 11.7 shows the code for this customized confirmation dialog.
Listing 11.7 Customized Confirmation Dialog
NotifyDescriptor nd = new NotifyDescriptor.Confirmation(
"Do you REALLY want to delete all those files???",
"Important Question",
NotifyDescriptor.YES_NO_OPTION,
NotifyDescriptor.WARNING_MESSAGE);
nd.createNotificationLineSupport();
nd.getNotificationLineSupport().setWarningMessage("Please pay attention!");
if (DialogDisplayer.getDefault().notify(nd) == NotifyDescriptor.YES_OPTION) {
// Yes, really delete all those files.
}
11.4 Custom Dialogs
The Dialogs API lets you create custom dialogs with class DialogDescriptor, a class that extends NotifyDescriptor. DialogDescriptor offers several constructors that let you build custom dialogs. The main advantage of DialogDescriptor is that you can specify additional features, such as contextual help, button listeners, button alignment, and button text. You can also build your own inner panel for display inside a dialog, so that a dialog’s view can hold any set of components that you need.
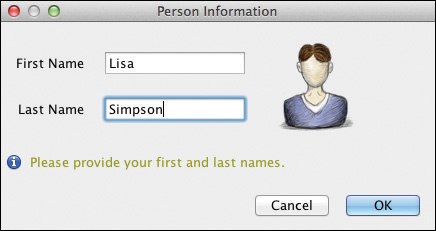
If you build a custom inner panel, you’ll also need public methods that access user input. Let’s build a simple custom dialog that asks for a person’s first and last names. Later we’ll enhance this dialog with error checking.
Figure 11.7 shows a Person Information dialog. We’ve configured the dialog with a title (Person Information), a notification line, and option buttons Cancel and OK.
For the inner panel, we’ll use a customized JPanel component that includes two labels (First Name and Last Name), two textfields, and an icon, as shown in Figure 11.8. To create this form, right-click on your module’s package and select New | JPanel Form. Call the class CustomPersonPanel. NetBeans creates a new Java class with a top-level JPanel in the Matisse form designer. Now add the labels, textfields, and icon. (Use a JLabel component with a suitable image for the icon.)
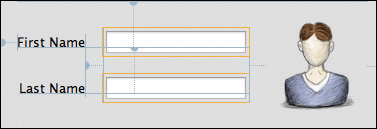
Note that you don’t add the title, notification line, or option buttons to the JPanel. You configure these dialog artifacts with DialogDescriptor.
Listing 11.8 shows the code for CustomPersonPanel.java. After the design is complete, add the public methods to access user input. Here we added methods getFirstName() and getLastName() (shown in bold).
Listing 11.8 CustomPersonPanel—Customized JPanel Form
public class CustomPersonPanel extends javax.swing.JPanel {
public CustomPersonPanel() {
initComponents();
}
public String getFirstName() {
return firstTextField.getText();
}
public String getLastName() {
return lastTextField.getText();
}
// Generated Code
. . . code omitted . . .
// Variables declaration - do not modify
private javax.swing.JTextField firstTextField;
private javax.swing.JLabel imageLabel;
private javax.swing.JLabel jLabel1;
private javax.swing.JLabel jLabel2;
private javax.swing.JTextField lastTextField;
// End of variables declaration
}
With the JPanel complete, we can now build the custom dialog and configure it with DialogDescriptor, as shown in Listing 11.9.
Listing 11.9 Build a Custom Dialog with DialogDescriptor
// Create the JPanel Form
CustomPersonPanel panel = new CustomPersonPanel();
// Create the dialog with CustomPersonaPanel panel
DialogDescriptor dd = new DialogDescriptor(panel, "Person Information");
// Configure a notification line
dd.createNotificationLineSupport();
// Specify the notification line; use Information-style
dd.getNotificationLineSupport().setInformationMessage(
"Please provide your first and last names");
// Display the dialog and wait for the response
Object status = DialogDisplayer.getDefault().notify(dd);
if (status == NotifyDescriptor.OK_OPTION) {
// Is there any input?
if (panel.getFirstName().isEmpty() && panel.getLastName().isEmpty()) {
// No, say hello to 'Anonymous'
System.out.println("Welcome, Anonymous!");
} else {
// Supply a greeting using the person's name
System.out.println("Welcome " + panel.getFirstName() + " "
+ panel.getLastName() + "!");
}
} else if (status == NotifyDescriptor.CANCEL_OPTION) {
// Cancel
} else if (status == NotifyDescriptor.CLOSED_OPTION) {
// User closed the dialog
}
Note that the above code does not specify any option buttons. As it turns out, the default provides Cancel and OK.
Error Handling
Now let’s modify the Person Information dialog to perform some error handling. Figure 11.9 shows the Person Information dialog with an error message for required input. Note that this dialog is currently marked invalid; that is, the OK button is disabled.
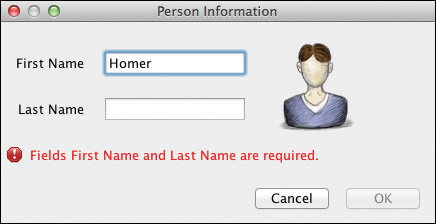
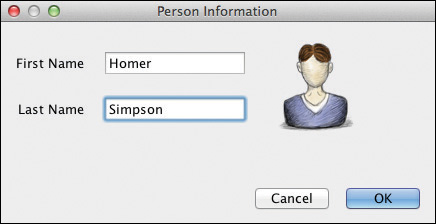
Figure 11.10 shows the same dialog. This time both fields are filled in and the dialog’s error message has been cleared. Also, the OK button is enabled, meaning that the dialog is currently valid.
A powerful feature of NetBeans dialogs is that you can install property change listeners to detect input changes and update error messages and a dialog’s valid status. This section shows you how to do this. You’ll also see this technique used to validate panels when we build wizards (see “Wizard Validation” on page 565).
First, add DocumentListeners in the inner panel and have the inner panel fire property change events when user input changes. Then, the dialog code checks the input, provides feedback, and validates the dialog.
Let’s begin by making the following modifications to the JPanel form in class CustomPersonPanel2. Here are the steps.
1. Make CustomPersonPanel2 implement DocumentListener and override methods insertUpdate(), removeUpdate(), and changeUpdate().
2. Add public static String constants PROP_FIRST_NAME and PROP_LAST_NAME to identify the property change events.
3. Add document listeners to the first and last name textfield components.
4. Fire property change events when a user modifies a textfield’s input.
Listing 11.10 shows these modifications to CustomPersonPanel2 in bold.
Listing 11.10 CustomPersonPanel2—Implement Dialog Error Handling
public class CustomPersonPanel2 extends javax.swing.JPanel implements
DocumentListener {
public static String PROP_FIRST_NAME = "firstName";
public static String PROP_LAST_NAME = "lastName";
public CustomPersonPanel2() {
initComponents();
firstTextField.getDocument().addDocumentListener(this);
lastTextField.getDocument().addDocumentListener(this);
}
public String getFirstName() {
return firstTextField.getText();
}
public String getLastName() {
return lastTextField.getText();
}
private void initComponents() {
. . . generated code omitted . . .
}
// Variables declaration - do not modify
private javax.swing.JTextField firstTextField;
private javax.swing.JLabel imageLabel;
private javax.swing.JLabel jLabel1;
private javax.swing.JLabel jLabel2;
private javax.swing.JTextField lastTextField;
// End of variables declaration
@Override
public void insertUpdate(DocumentEvent de) {
if (firstTextField.getDocument() == de.getDocument()) {
firePropertyChange(PROP_FIRST_NAME, 0, 1);
} else if (lastTextField.getDocument() == de.getDocument()) {
firePropertyChange(PROP_LAST_NAME, 0, 1);
}
}
@Override
public void removeUpdate(DocumentEvent de) {
if (firstTextField.getDocument() == de.getDocument()) {
firePropertyChange(PROP_FIRST_NAME, 0, 1);
} else if (lastTextField.getDocument() == de.getDocument()) {
firePropertyChange(PROP_LAST_NAME, 0, 1);
}
}
@Override
public void changedUpdate(DocumentEvent de) {
if (firstTextField.getDocument() == de.getDocument()) {
firePropertyChange(PROP_FIRST_NAME, 0, 1);
} else if (lastTextField.getDocument() == de.getDocument()) {
firePropertyChange(PROP_LAST_NAME, 0, 1);
}
}
}
Now let’s show you the code that creates, configures, and displays the dialog. This code implements the actual validation checking by listening for property change events, as shown in Listing 11.11. The code in bold marks the changes required to implement the error handling.
Listing 11.11 Implement Dialog Error Handling
// Create the inner panel
private CustomPersonPanel2 panel2 = new CustomPersonPanel2();
// Create the Dialog and specify title
final DialogDescriptor dd = new DialogDescriptor(panel2,
"Person Information");
// Configure a notification line
dd.createNotificationLineSupport();
// Specify the notification line; use Error-style
dd.getNotificationLineSupport().setErrorMessage(
"Fields First Name and Last Name are required.");
// Specify that the dialog is not valid; this disables the OK button
dd.setValid(false);
// Create a property change listener anonymous class
panel2.addPropertyChangeListener(new PropertyChangeListener() {
// Specify the class' propertyChange method
// Look for PROP_FIRST_NAME and PROP_LAST_NAME property change
// events and update valid status and error message
@Override
public void propertyChange(PropertyChangeEvent pce) {
if (pce.getPropertyName().equals(
CustomPersonPanel2.PROP_FIRST_NAME)
|| pce.getPropertyName().equals(
CustomPersonPanel2.PROP_LAST_NAME)) {
if (panel2.getFirstName().isEmpty() ||
panel2.getLastName().isEmpty()) {
dd.setValid(false);
dd.getNotificationLineSupport().setErrorMessage(
"Fields First Name and Last Name are required.");
} else {
dd.setValid(true);
dd.getNotificationLineSupport().clearMessages();
}
}
}
});
// Display the dialog and wait for response
Object status = DialogDisplayer.getDefault().notify(dd);
if (status == NotifyDescriptor.OK_OPTION) {
// Supply a greeting using the person's name
System.out.println("Welcome " + panel.getFirstName() + " "
+ panel.getLastName() + "!");
} else if (status == NotifyDescriptor.CANCEL_OPTION) {
// Cancel
} else if (status == NotifyDescriptor.CLOSED_OPTION) {
// Closed
}
Note that an anonymous class defines the property listener. Overridden method propertyChange() examines each property change event. If either of the panel’s textfield components is empty, we mark the dialog invalid and display an error message using the notification message dialog feature. If both textfields contain input, we mark the dialog valid and clear the notification message.
11.5 Custom Login Dialog
In the previous section you see the makings of a Login process; that is, a dialog that requests a username and password and blocks the application until the user successfully completes the dialog.
We can implement such a login process using the @OnStart annotation with a Runnable to create and display a dialog. As discussed in “Module Life Cycle Annotations” on page 242, the @OnStart Runnable executes in a background thread during initialization. As you will soon see, we make the dialog display in the EDT by using the DialogDisplayer.notifyLater() method.
Let’s examine the dialog first and then show you how to create, display, and process the login dialog.
Figure 11.11 shows a customized Login dialog. As before, we create an inner panel that contains two JLabels, a JTextField for the name, and a JPasswordField for the password.
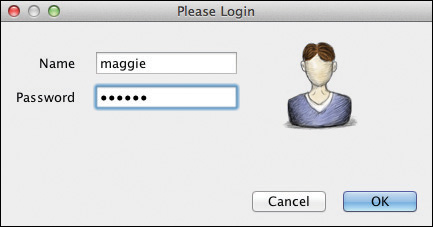
The dialog itself includes a title (“Please Login”) with the Cancel and OK buttons. Unlike the previous section, error handling for user input is not necessary. Once the user clicks OK, a login process authenticates the user.
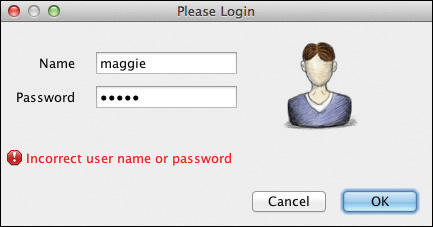
If the authentication process succeeds, the dialog closes and the application runs. If the user cancels or closes the dialog, the application exits. If the login fails, the dialog does not close. In this case, the login process displays an appropriate error message and the user attempts to log in again.
This login process must therefore carefully control a user’s ability to dismiss or close the dialog. Any early dismissal without a successful login means the application exits.
Figure 11.12 shows an incorrect login scenario.
Listing 11.12 shows the Login dialog’s inner panel, LoginPanel.java. Class LoginPanel extends JPanel and defines the Swing components that provide the dialog’s user interface. LoginPanel also includes public methods getUserName() and getPassword() to access the user-provided login credentials.
Listing 11.12 LoginPanel.java—Customized Login JPanel
package com.asgteach.dialogs;
public class LoginPanel extends javax.swing.JPanel {
public LoginPanel() {
initComponents();
}
public String getUserName() {
return nameTextField.getText();
}
public String getPassword() {
return new String(passwordTextField.getPassword());
}
private void initComponents() {
. . . generated code omitted . . .
}
// Variables declaration - do not modify
private javax.swing.JLabel imageLabel;
private javax.swing.JLabel jLabel1;
private javax.swing.JLabel jLabel2;
private javax.swing.JTextField nameTextField;
private javax.swing.JPasswordField passwordTextField;
// End of variables declaration
}
We’ll use the Module System API @OnStart annotation with Runnable to create a class that is instantiated during an application’s initialization process. We’ll put the code to create, display, and process this Login dialog in the Runnable’s run() method. (See “Module Life Cycle Annotations” on page 242 for more information on @OnStart.)
We add the @OnStart Runnable to the Dialogs module in its main source package using these steps.
1. The @OnStart annotation requires a dependency on the Module System API. In the Dialogs module, select the Libraries node, right click, and select Add Module Dependency . . . from the context menu. In the Add Module Dependencies dialog, select Module System API and click OK.
2. Right click on the com.asgteach.dialogs package and select New | Java Class . . . .
3. NetBeans displays the New Java Class dialog. For Class Name, specify LoginInstaller and click Finish. NetBeans adds file LoginInstaller.java to package com.asgteach.dialogs.
Listing 11.13 shows the code for the LoginInstaller class, which we describe here.
• Add the @OnStart annotation to LoginInstaller, implement Runnable, and override the run() method.
• Instantiate the inner panel that contains the dialog’s user input components.
• Implement the login() method, which determines whether a login is successful or not. In real-world applications, you would access a database or some other means to authenticate the user’s credentials. Here, method login() returns true if the user name and password are the same.
• Use @Messages to create application text and error messages.
• Inside the run() method, create the dialog with DialogDescriptor. In the constructor specify the inner panel and the dialog title, make the dialog modal (which blocks the application until the dialog finishes), and specify a button ActionListener (a lambda expression, described below). You need an ActionListener because you’ll display the dialog with notifyLater() instead of notify() and user responses won’t be available in the return.
• Configure the dialog. Method setClosingOptions() invoked with an empty array prevents the dialog from closing after the user clicks OK. Otherwise, any input (whether valid or not) followed by OK closes the dialog. Method createNotificationLineSupport() provides a way to give the user feedback if the login fails.
• Configure a property change listener (also a lambda expression). Listen for the presence of the DialogDescriptor.CLOSED_OPTION and exit the application. This prevents the user from closing the dialog to bypass the login procedure.
• Process the user interaction with the dialog in the ActionEventListener. If the user cancels, exit the application. Otherwise, the user clicks OK. Read the values from the dialog panel and determine if the login is successful.
If the login is successful, re-enable the normal closing options so that the dialog will close (and the application starts up).
If the login fails, display an error message. Because the closing options are disabled, the dialog remains open and the user can attempt another login.
• Display the dialog with DialogDisplayer.notifyLater(). The dialog displays in the EDT after the NetBeans Platform splash screen and blocks the application until a user completes a successful login.
Listing 11.13 LoginInstaller.java—Processing a Login
@OnStart
public class LoginInstaller implements Runnable {
private final LoginPanel panel = new LoginPanel();
private DialogDescriptor dd = null;
// stub method that says if the username and password
// are the same then the login is good!
private boolean login (String username, String password) {
return username.equals(password) && !username.isEmpty();
}
@Messages({
"LoginTitle=Please Login",
"LoginError=Incorrect user name or password"
})
@Override
public void run() {
// @Onstart runs in a background thread by default
// Here we use notifyLater to safely display the dialog.
// Create a dialog using the LoginPanel and LoginTitle, make it modal,
// and specify action listener
dd = new DialogDescriptor(panel, Bundle.LoginTitle(), true,
(ActionEvent ae) -> {
// We need to listen for button pressed because we are using
// notifyLater to display the dialog
if (ae.getSource() == DialogDescriptor.CANCEL_OPTION) {
// Adios
System.out.println("Canceled!");
LifecycleManager.getDefault().exit();
} else {
// Check login
if (login(panel.getUserName(), panel.getPassword())) {
// Using null enables all options to close dialog
// (this is retroactive, so the dialog will close
// and the app will appear)
dd.setClosingOptions(null);
} else {
// Bad login, try again
dd.getNotificationLineSupport().setErrorMessage(
Bundle.LoginError());
}
}
});
// Specify an empty array to prevent any option from closing the dialog
dd.setClosingOptions(new Object[]{});
dd.createNotificationLineSupport();
// Define a property listener in case the dialog is closed
dd.addPropertyChangeListener((PropertyChangeEvent pce) -> {
// look for CLOSED_OPTION
if (pce.getPropertyName().equals(DialogDescriptor.PROP_VALUE)
&& pce.getNewValue() == DialogDescriptor.CLOSED_OPTION) {
// Adios
System.out.println("Closed!");
LifecycleManager.getDefault().exit();
}
});
// notifyLater will display the dialog in the EDT
DialogDisplayer.getDefault().notifyLater(dd);
}
}
11.6 Putting It All Together
Now that you’ve learned about dialogs in general and Login dialogs in particular, we’re going to adapt application RoleExample (see “RoleExample Application and Role-Based TopComponents” on page 404) and use a Login dialog to set the application’s role. We’ll use the same technique we presented in the previous section with a Login dialog that we configure using the @OnStart annotation. Once the user successfully completes the Login dialog as shown in Figure 11.11 on page 540, the application sets the window system to the user’s assigned role.
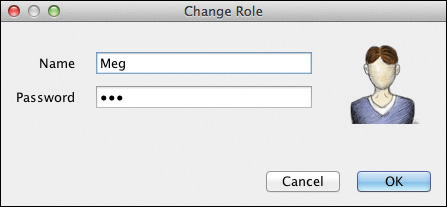
We’ll also create an always-enabled action in this application that lets a user change roles with a Change Role dialog. This dialog processes a user’s login credentials, but unlike the Login dialog, Cancel and Close do not exit the application. Also, the Change Role dialog does not close if a user login fails. This means we must supply an ActionListener to process user input instead of reading the return from method notify(). Figure 11.13 shows the Change Role dialog, which has a different title but otherwise looks the same as the Login dialog.
RoleExample Application
Let’s start with the RoleExample application from Chapter 8 (see “Window Layout Roles” on page 401). Follow these steps to add the Login dialog to the Runnable class, RoleLogin.java. Figure 11.14 shows the files in module AdminModule when you’re finished adding the Login dialog and Change Role action to application RoleExample.

1. Open project RoleExample and expand project AdminModule.
2. In AdminModule, delete LoginTopComponent, since we’ll replace the TopComponent with a dialog.
3. Create a LoginPanel form with New | JPanel Form to hold the Login/Change Role dialog GUI components, as shown in the previous section. Use personIcon100.png for the dialog’s icon. Provide the same getter methods for LoginPanel.java as shown in Listing 11.12 on page 541.
4. In AdminModule, add Java class RoleLogin.java. Implement Runnable, override the run() method, and specify the @OnStart annotation. Provide code for the run() method as shown in Listing 11.14. This code is very similar to the LoginInstaller class in Listing 11.13 on page 543, except we use the UserRole module to authenticate the login process. Note that this code also prevents a user from canceling or closing the dialog to bypass authentication.
Listing 11.14 RoleLogin.java—Processing a Role-Based Login
@OnStart
public class RoleLogin implements Runnable {
private final LoginPanel panel = new LoginPanel();
private DialogDescriptor dd = null;
@Override
public void run() {
// Create a dialog using the LoginPanel and LoginTitle, make it modal,
// and specify action listener
dd = new DialogDescriptor(panel, Bundle.LoginTitle(), true,
((ActionEvent ae) -> {
// We need to listen for button pressed because we are using
// notifyLater to display the dialog
if (ae.getSource() == DialogDescriptor.CANCEL_OPTION) {
// Adios
System.out.println("Canceled!");
LifecycleManager.getDefault().exit();
} else {
// Check login
UserRole userRole = Lookup.getDefault().lookup(UserRole.class);
if (userRole != null) {
User thisUser = userRole.findUser(panel.getUserName(),
panel.getPassword());
WindowManager wm = WindowManager.getDefault();
if (thisUser != null) {
// switch to new role
wm.setRole(thisUser.getRole());
// Using null enables all options to close dialog
// (this is retroactive, so the dialog will close
// and the app will appear)
dd.setClosingOptions(null);
} else {
// Bad login, try again
dd.getNotificationLineSupport().setErrorMessage(
Bundle.LoginError());
}
} else {
// No UserRole instance, bail!
System.out.println("No UserRole!");
LifecycleManager.getDefault().exit();
}
}
}));
// Specify an empty array to prevent any option from closing the dialog
dd.setClosingOptions(new Object[]{});
dd.createNotificationLineSupport();
// Define a property listener in case the dialog is closed
dd.addPropertyChangeListener((PropertyChangeEvent pce) -> {
// look for CLOSED_OPTION
if (pce.getPropertyName().equals(DialogDescriptor.PROP_VALUE)
&& pce.getNewValue() == DialogDescriptor.CLOSED_OPTION) {
System.out.println("Closed!");
LifecycleManager.getDefault().exit();
}
});
// notifyLater will display the dialog on the EDT
DialogDisplayer.getDefault().notifyLater(dd);
}
}
5. Next, create an always-enabled Action called ChangeRole with New | Action. Put the action under Menu/Tools and use display text Change Role.
6. NetBeans generates class ChangeRole.java, which implements ActionListener. Provide code for the actionPerformed() method, as shown in Listing 11.15.
Listing 11.15 Action Class ChangeRole.java
@ActionID(category = "Tools",
id = "com.asgteach.adminmodule.ChangeRole")
@ActionRegistration(displayName = "#CTL_ChangeRole")
@ActionReferences({
@ActionReference(path = "Menu/Tools", position = 0, separatorAfter = 50)
})
@Messages("CTL_ChangeRole=Change Role")
public final class ChangeRole implements ActionListener {
private DialogDescriptor dd = null;
@Override
public void actionPerformed(ActionEvent e) {
final LoginPanel panel = new LoginPanel();
dd = new DialogDescriptor(panel, Bundle.CTL_ChangeRole(), true,
(ActionEvent ae) -> {
if (ae.getSource() == DialogDescriptor.OK_OPTION) {
// Check login
UserRole userRole = Lookup.getDefault().lookup(UserRole.class);
if (userRole != null) {
User thisUser = userRole.findUser(
panel.getUserName(), panel.getPassword());
WindowManager wm = WindowManager.getDefault();
if (thisUser != null) {
// switch to new role
wm.setRole(thisUser.getRole());
// Using null enables all options to close dialog
dd.setClosingOptions(null);
} else {
// Bad login, try again
dd.getNotificationLineSupport().setErrorMessage(
Bundle.LoginError());
}
}
}
});
// Allow Cancel to close the dialog, but OK should not
dd.setClosingOptions(new Object[]{DialogDescriptor.CANCEL_OPTION});
dd.createNotificationLineSupport();
DialogDisplayer.getDefault().notify(dd); // display and block
}
}
The ChangeRole class registers an always-enabled action with Java annotations @ActionID, @ActionRegistration, and @ActionReferences. Class ChangeRole implements ActionListener and overrides method actionPerformed(), which is invoked when a user selects the Change Role menu item.
Note that there are two actionPerformed() methods here. The outer actionPerformed() method instantiates the LoginPanel and dialog with DialogDescriptor. The inner actionPerformed() belongs to the ActionListener in the DialogDescriptor constructor. When DialogDescriptor method notify() returns, the dialog has already closed. The ActionListener lets you process user input without closing the dialog. The Change Roles dialog must stay open until we verify the UserRole credentials. If the credentials are bad, the dialog remains open and the user can try again.
The code in Listing 11.15 is subtly different than the application Login code in the RoleLogin class (Listing 11.14 on page 545). In Listing 11.15 we allow the user to either cancel or close the dialog, but specifically prohibit OK from closing the dialog. With the RoleLogin dialog, however, we detect both close and cancel, and exit the application.
11.7 Key Point Summary
The Dialogs API provides classes that help you create, display, and obtain input from dialogs. You specify a dependency on the Dialogs API to use dialogs in your application. You can use standard dialogs and notifications or customize these. Here are the main features of the Dialogs API.
• NotifyDescriptor provides several standard dialogs. NotifyDescriptor.Message provides an information dialog with text and OK button.
• Option NotifyDescriptor.WARNING_MESSAGE provides a warning dialog with text, OK button, and warning icon.
• Option NotifyDescriptor.ERROR_MESSAGE provides an error dialog with text, OK button, and error icon.
• NotifyDescriptor.Confirmation provides a question dialog with text and option buttons Cancel, No, and Yes.
• NotifyDescriptor.InputLine provides a dialog that prompts for user input with option buttons Cancel and OK. You include a prompt and dialog title with the constructor. Use method getInputText() to read user input.
• You can configure the option buttons for any of the dialog types.
• Use DialogDisplayer.getDefault() to obtain the NetBeans Platform default DialogDisplayer.
• DialogDisplayer method notify() displays a modal dialog (message box) and blocks until the dialog closes.
• Customize dialogs with DialogDescriptor, a class that extends NotifyDescriptor. DialogDescriptor provides flexibility in handling button clicks and blocking closure. You can also customize button alignment and button text.
• Customize a dialog’s components by providing your own inner panel.
• DialogDisplayer method notifyLater() displays a modal dialog and may be called from any thread. This is useful, for example, for implementing a Login dialog with a Runnable class and the @Onstart annotation. With the notifyLater() method, you configure an ActionEventListener in the DialogDescriptor constructor to listen for and process user button events.
• To implement a Login dialog, override the run() method in an @OnStart Runnable class. With a dialog that implements both PropertyChangeListener and ActionListener, you can block an application until a user provides the necessary login credentials.