
Lesson 7. Creating a Keepsake Book
Lesson Files
Desktop > APTS iPhoto Book Files > APTS iPhoto Library > Greg and Caren’s Wedding
Time
This lesson takes approximately 55 minutes to complete.
Goals
Create a keepsake book
Edit photos in a book
Order printed books
Weddings, graduations, and many other events are times of celebration. They are times you want to keep with you forever. Smaller, yet no less cherished, occasions such as birthdays and family vacations are also times you’d like to remember. Making a personal coffee table book may seem out of reach or too expensive for you, but iPhoto makes it possible and very affordable to design and publish a wide range of photo books.
In this lesson, you’ll take your perfected pictures to the next level by designing a professional-looking photo book so you can enjoy your special occasions one vibrant, full-color page at a time.
Creating a Book Layout
In this exercise, you’ll create a beautiful keepsake book in iPhoto. You can quickly place photos into any one of the Apple-designed book themes, professionally print it using Apple print services, and have it delivered right to your house.
Exploring Book Themes
To begin creating a book, you’ll select an event containing the photos you want to use, and then select a theme.
1. Enter full-screen view, if necessary.
2. In the toolbar, click the Events button, and double-click the Greg and Caren’s Wedding event.
3. Select the flowers picture. Hold down Shift, scroll down the window, and select the last picture in the event.
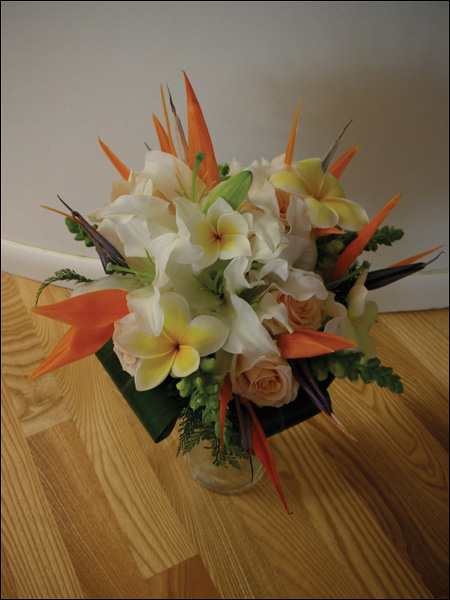
These photos you selected will be used in the book.
Tip
If you press Command-Shift-A to ensure that no photos are selected, in an event, it will ensure that all the photos in that event will be used in the book.
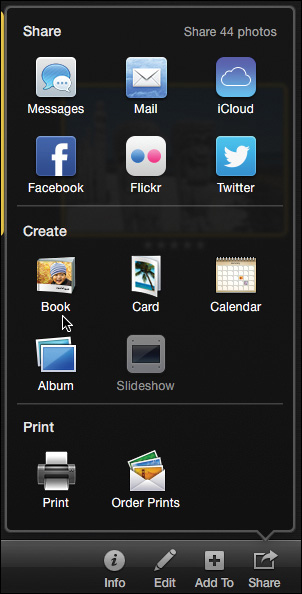
4. Click the Share button and choose Book.
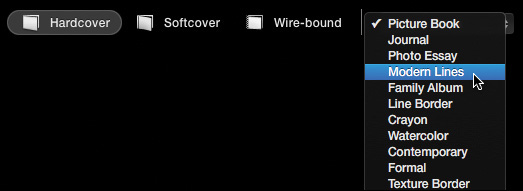
The book theme view fills the screen with several designs. In addition to selecting a theme, you can choose whether to produce a hardcover, softcover, or wire-bound book.
In the lower left of the viewing area, you can also select a size for the book. Because this is a wedding book, you may want to make it an extra-large hardcover book.
5. In the lower-left corner of the viewing area, click the XL button.
Note
The extra-large book type is available only in hardcover. The medium and small book types are available only in softcover. The large book type is available in both soft- and hardcover. Wire-bound books are available in large and medium options.
6. To preview the themes, in the viewing area, click the books on either side of the centered book.
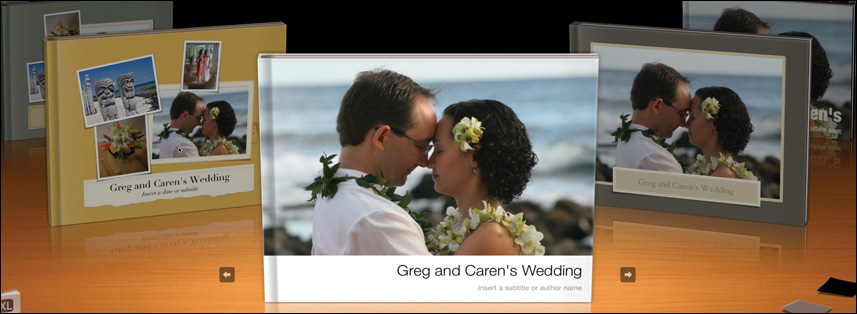
Clicking the book to the right or left brings it to the center. The theme name is shown with its pricing information. You can also choose a theme from the menu at the top of the window.
Note
The displayed printing cost is estimated for a 20-page book using the current size and style. The Apple printing service is available in 23 countries throughout Europe, Asia, and North America.
7. From the Theme pop-up menu, choose Modern Lines. This simple, elegant theme will work nicely for these wedding pictures.
Now that you’ve selected your event and theme, you’re ready to make your photo book.
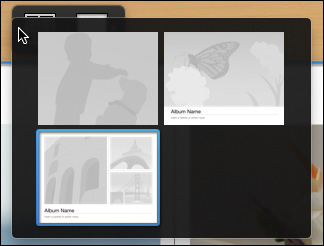
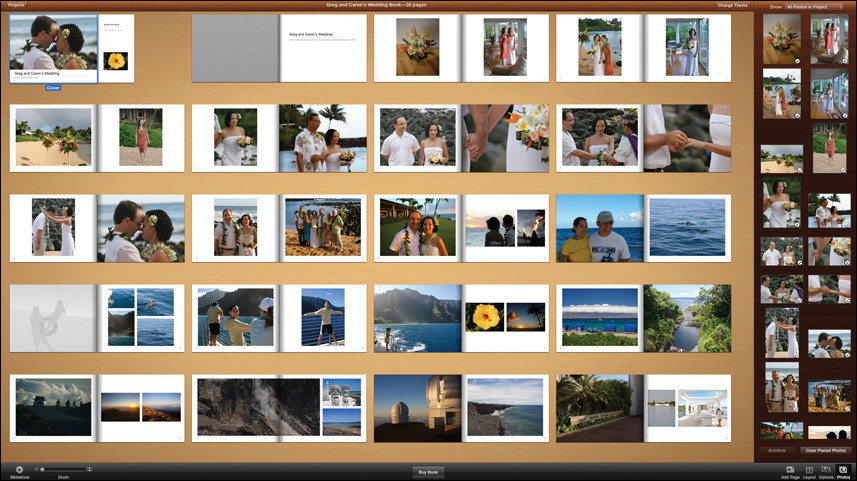
The book layout appears with all your photos presented. The pages are displayed from left to right and top to bottom with the cover placed in the upper-left corner. The book also appears as a project in the Source list. If you need to stop in the middle of creating a book, you can also access it later from the Source list.
Although a book is initially formatted with pictures on each page, you can change the photos, the layout, and even the theme at any time. In the next few exercises, you’ll modify a few of these.
Changing Pictures on Pages
With all the book’s pages displayed in front of you, you can scan them to see if you want to make some changes.
1. Double-click the book’s front cover.
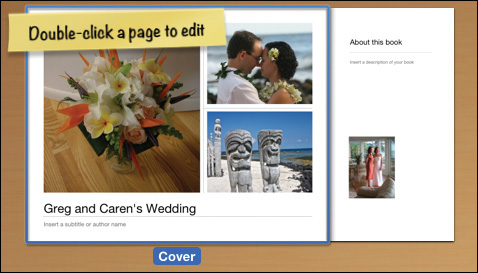
Double-clicking any page opens it in full screen.
The photo of the flowers may not be the best photo for the cover of the book when you have a beautiful picture of the couple right next to it. Let’s swap them.
2. Drag the photo of the couple onto the flowers photo to swap their locations.
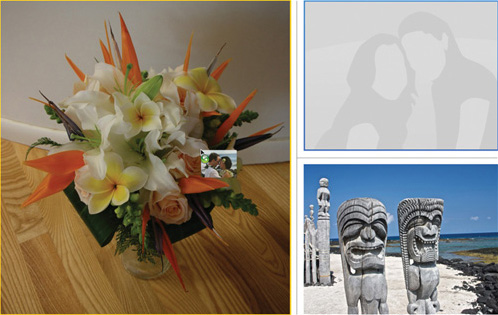
The inside flap should also be changed to a more symbolic photo than the one of the bride and maid of honor.
3. Click the Photos button to display all the photos in the book.

4. Scroll down to find the photo of the yellow hibiscus flower from page 27.
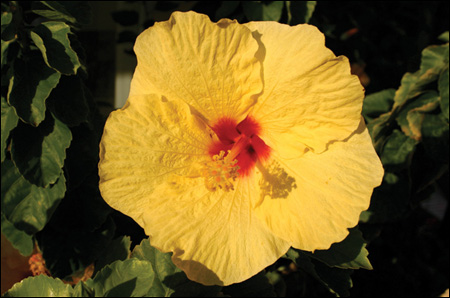
5. Drag the hibiscus flower photo on top of the inside flap photo of the bride and maid of honor to replace it.

The inside flap photo highlights in yellow when you are directly over it. When you release the mouse button the photo is replaced.
Changing photos and photo locations are two ways to customize your book, but you can also change the page layout.
Selecting New Page Layouts
As you browse the pages, you’ll notice that some have multiple photos. These page layouts can be changed to place fewer or more photos per page.
1. On the cover, click the white background to deselect the current photo. A blue highlight surrounds the cover page and the Design pop-up menu appears.

2. From the Design pop-up menu, click the Layout menu on the left to view the cover page layout options. A blue outline highlights the current selection.
3. In the upper-right corner, click the cover layout to create a single photo cover with an area for a book title. The cover changes to a single-photo layout with text.
You have even more choices when changing the layout of pages in the book.
4. Click the All Pages button to return to All Pages view.

Pages 21 and 22 both have full-page photos of dolphins. I’m sure that each of us loves dolphins as much as the next guy, but you are paying for each page, so this wedding photo book doesn’t need two full pages dedicated to sea-going mammals. Let’s combine them with page 23, which also has a dolphin photo on it.
5. Double-click page 23 to open it full screen.
6. Click the area above the photos to open the Design pop-up menu, and then choose 4 Photos.
7. From the layouts area, select the four-photo layout on the left.
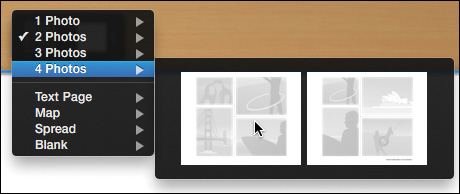
The layout changes to include two empty photo frames. You’ll move the Dolphins from pages 21 and 22, and into those new frames on page 23.
8. Drag the full-page photo from page 22 into one of the empty photo frames on page 23.
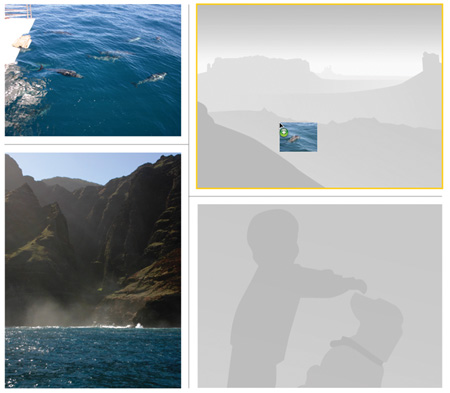
9. From the Photos pane, scroll down until you locate the dolphin photo from page 21.
10. Drag the dolphin photo from the photo’s pane into the remaining empty photo frame on page 23.
Changing the page layouts not only can provide opportunities to group similar photos into a nice little montage, but it allows you to save pages. Let’s now take a look at deleting some unwanted pages.
Deleting Photos and Pages
As you change page layouts, some photos will be duplicated. You can either choose to replace those photos or delete the page altogether.
1. Click the All Pages button to return to All Pages view.
By dragging the dolphin photo on page 22 into a photo frame on page 23, you’ve left behind an empty photo frame you no longer need.
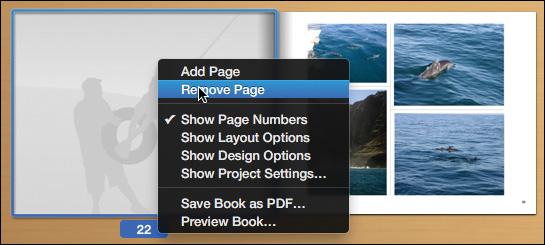
2. Control-click (or right-click) page 22, and from the shortcut menu choose Remove Page.
3. In the dialog warning about the even number of pages, click Delete. This warning will appear even when you have an odd number of pages.
When you remove a page, iPhoto reflows the page numbers to fill in the empty space. To leave a page empty, you can remove a photo without removing the page.
4. Double-click page 15 (the couple photo you used on the cover) to open it full screen.
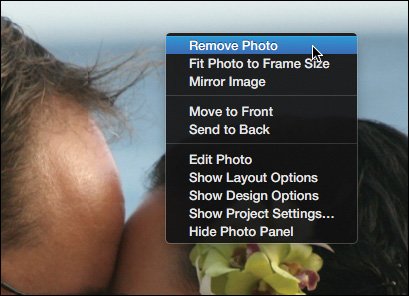
5. Control-click (or right-click) the page.
6. From the shortcut menu, choose Remove Photo.
The page now has an empty photo frame you can fill in later.
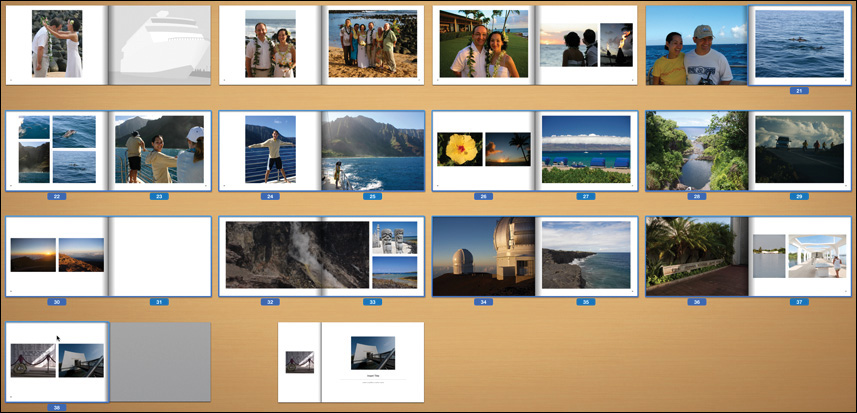
7. Click the All Pages button to return to viewing the entire book.
Large books can include up to 100 pages, but the pricing displayed at the start of this lesson showed the standard 20-page book price. Right now, that’s what the budget will allow, so you need to remove four additional pages. Let’s cut these off the end of the book.
8. Click page 21, and then Shift-click page 38.
You’ve selected the pages you’ll delete.
9. Press Delete, and in the warning dialog, click Delete.
You now have a book that fits the budget, but still has an empty photo frame on page 15.
Framing Photos on a Page
With your basic book structure getting close to complete, let’s check to see if some photos don’t fit comfortably on the page.
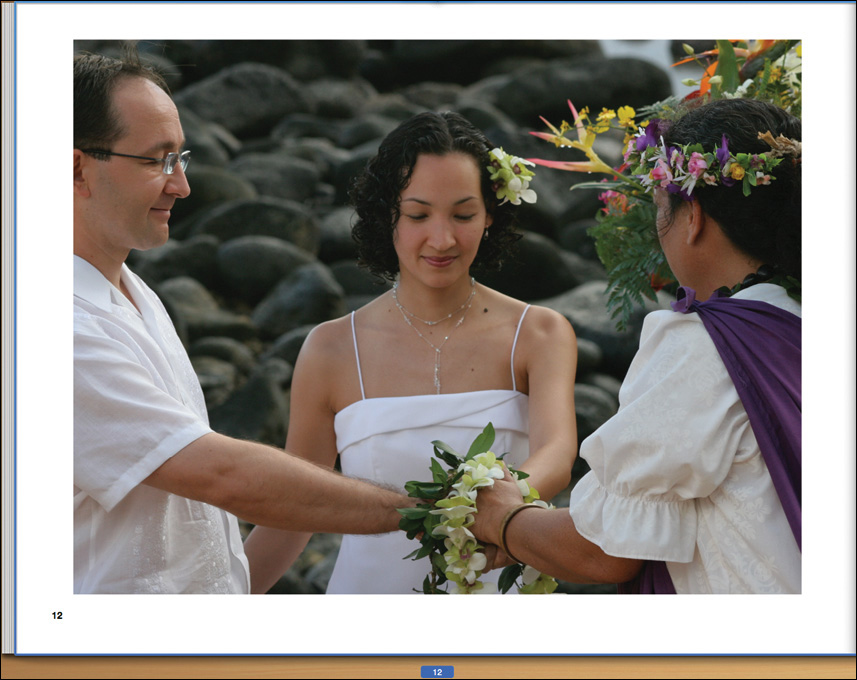
This photo shows the central part of the ceremony. It deserves to have a special layout.
2. In the toolbar, click the Layout button to open the Layout pane.
In the Layout pane, you can find the same layout options as are available in the Design pop-up menu.
3. In the Layout pane, choose Spread from the pop-up menu.
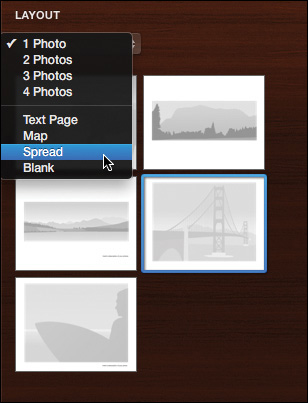
Spread extends a single photo across two pages. For very special photos this can create a stunning presentation.
4. Click the first spread in the list to extend the photo across two pages.
Well, the thought was nice, but the execution leaves a bit to be desired. The page crease is right over the bride’s face and the groom’s head is mostly cut off.
5. In the viewer, drag the photo down to reposition it until the top of the groom’s head is no longer cropped off the page.
6. To move the bride out from under the crease, drag the Image Scale slider slightly to the right to increase the size of the image.
7. Drag the photo to the right to reposition the crease between the bride and groom.

8. Continue to reposition the image until you are happy with the framing.
When you are done, you’ll have a nicely framed photo that spans two pages.
You’ll often adjust a picture’s framing when fixing pages of your book.
Using Unplaced Photos
You still have an empty photo frame on page 15 to fill. Let’s use one of the nice photos that was deleted earlier.
1. Click the All Pages button to return to All Pages view.
2. Click the Photos button to show the Photos pane, if necessary.
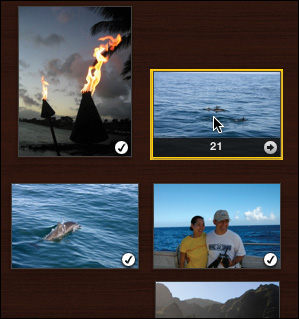
The Photos pane shows all the selected photos from the event. The photos with a checkmark are used in the book. This graphic also helps you determine which photos haven’t been used. Still, viewing all the photos at once might cause you to miss an unused photo you’d like to include. Setting the Photos pane to display only the unused photos would be clearer.
3. From the Show menu, choose Unplaced Photos.
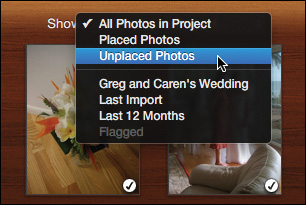
The pane now displays only those event photos not currently placed in the book. The first photo is a fairly important part of the book’s story: the wedding ring!
4. Double-click page 15, and then drag the wedding ring photo onto the empty photo frame.

5. Click the All Pages button to view the entire book.
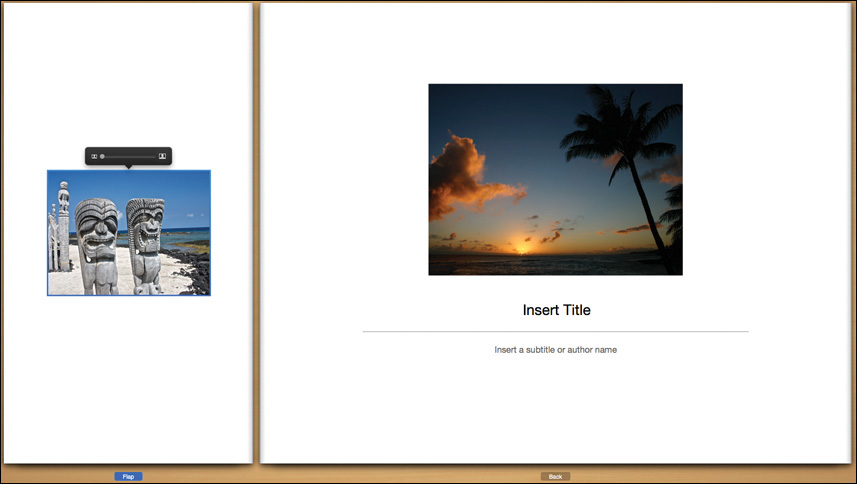
The book’s back cover and back flap should have nice closing photos to end the story—or let’s be more positive, to start the next chapter. Either way, you could find better photos for them.
6. Double-click the back cover page to show the back cover and the back flap.
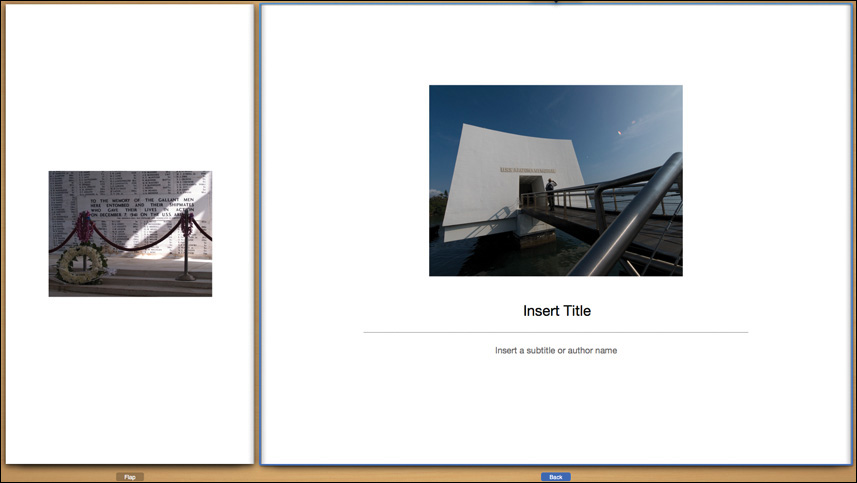
The Photos pane is still showing the photos you haven’t used in this book. Let’s choose photos from there.
7. In the Photos pane, find the sunset photo with the palm tree.

8. Drag the sunset photo onto the back cover photo to replace it.
9. For a bit of whimsy, find the totem photo and drag it to replace the flap photo.
10. Click the All Pages button to view the entire book.
Now you have filled all the pages in the correct order for your 20-page keepsake book.
Customizing Maps
Some themes can integrate maps into your book. If your photos already have locations assigned, the map can automatically show the correct locations on the page, or you can manually add a map and locations.
1. Double-click page 20 (the couple on the boat) to open it full screen.
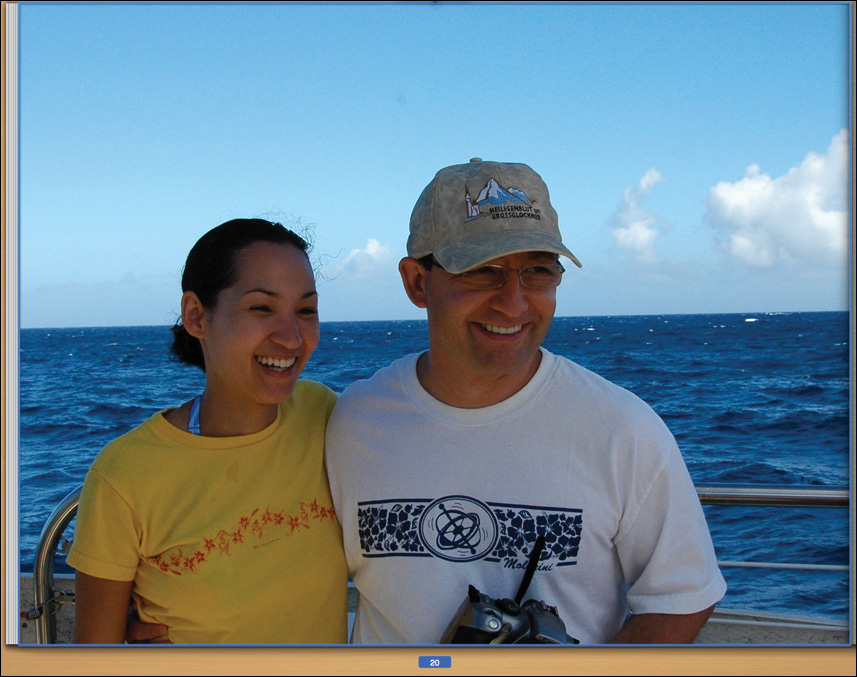
Yes, it’s a nice photo of the couple, but wouldn’t an eye-catching map bring more visual variety than another shot of the happy couple? In this exercise, we’re putting in the map!
2. Click the page, and then in the toolbar, click the Layout button.
3. From the Layout pop-up menu, choose Map, and click the map thumbnail to apply it to the page.
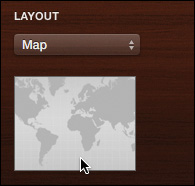
A map fills the page. Because these photos have some places assigned already, the map focuses on Hawaii.
4. In the toolbar, click the Options button to open the Options pane, where you can customize the map. Let’s first choose the style of map.
Note
The Options pane changes to show available formatting options depending on the type of object selected on a page.
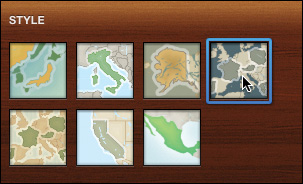
5. Click the map page to activate the map’s Options pane.
6. Click the last map in the top row to choose that map style.
You can add and remove map locations in the Places list. Although these photos don’t show it, the wedding party also went to the big island of Hawaii, as well as Maui and Oahu. So let’s add those locations.
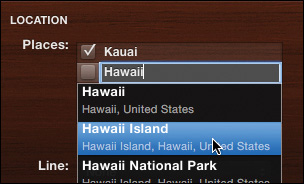
7. Under the Places list, click the Add Location button (+) to add a new location.
8. Type the name Hawaii, and from the list of found locations that appears, choose Hawaii Island.
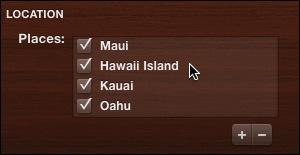
9. Add another location, and enter Maui as its name. Then select the first Maui from the location list.
10. Add another location named Oahu, and then select the first Oahu from the list.
The map now includes the additional three islands.
Tip
You can remove a location by clicking the Remove Location button (–) under the Places list.
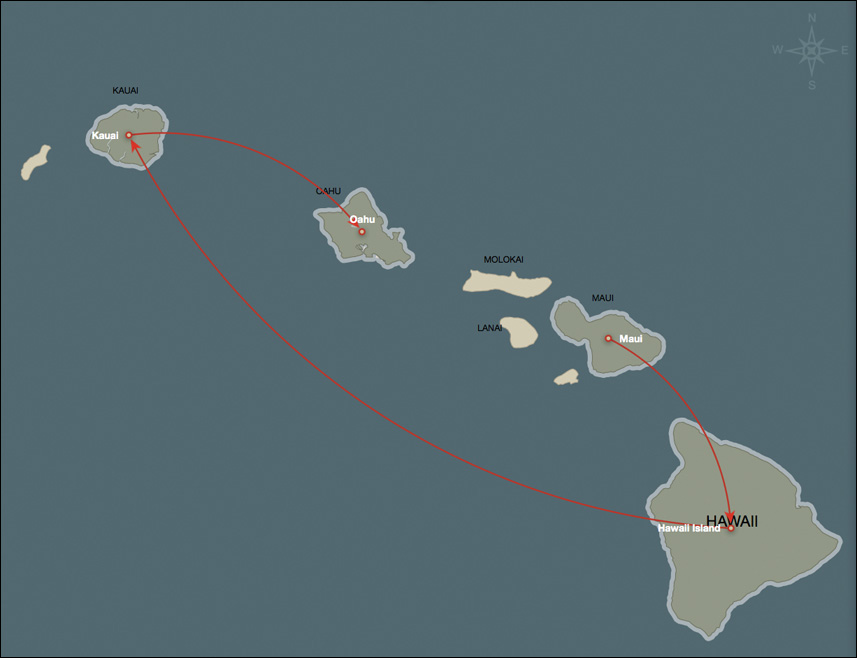
The map shows places the couple visited, but you can do better than that. You can add travel lines to show the route they traveled.
11. From the Line pop-up menu, choose Curved.
To place the travel lines in the exact order the couple traveled, you can rearrange the locations in the Places list.
12. In the Places list, drag Maui to the top, Hawaii Island below it, followed by Kauai, and at the bottom Oahu.
13. Click the All Pages button to return to All Pages view.
Using the other options in the Options pane, you can experiment with adding a title to the map or removing some of the existing map details. It’s a great way to supplement your photos with additional visual variety.
Rearranging Pages
With many of your event photos placed in the book, you may find that some photos seem out of order. To address that situation, you can rearrange pages at will. Pages 4 and 5 seem out of order in the book.
1. While viewing all the pages, drag the Zoom slider all the way to the right to increase the pages’ size.
Page 4 shows the bride and maid of honor already outside, while page 5 shows the bride indoors. Swapping these photos’ positions would put them in a more logical order, moving from inside to outside.
2. Drag page 5 to the left of page 4.
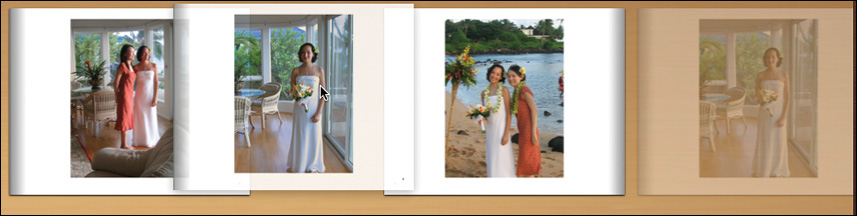
As you drag, the pages separate to indicate where the page can be placed.
3. When the page is located between pages 3 and 4, release the mouse button.
Now you have the wedding party moving naturally from indoors to out.
Editing Photos and Text
When you have all your photos inserted and arranged in your book, you may find that you want to tweak individual elements to increase their impact. To do this, some of the effects you used in a previous lesson can be applied directly to the photos in your book. In addition, you have instant access to all the Edit pane adjustments.
1. Double-click the photo on page 15, and make sure the Options pane is still open.
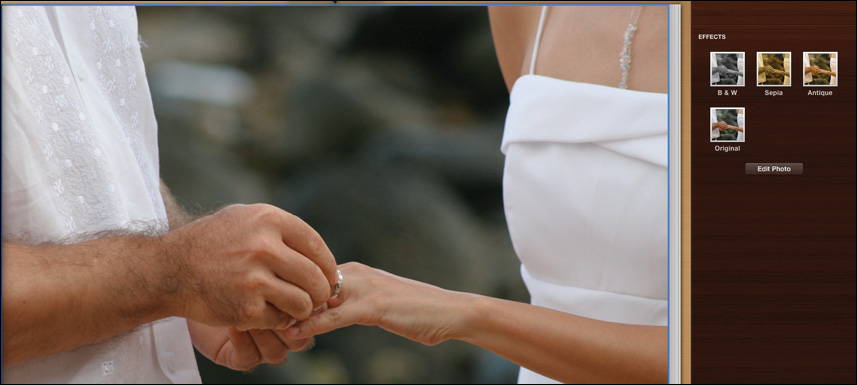
2. Click the photo to select it and display the effects in the Options pane.
This photo shows the ring being placed. It’s an important photo, to say the least, but not the best photo in the book. You can enhance it using the effects in the Options pane.
3. Click the B & W effect thumbnail to apply that effect to the selected photo.
The photo changes to black and white. Applying the effects from the Options pane will only modify this photo within the photo book. If you need to perform more adjustments, you have access to all of the other iPhoto editing features.
4. In the Options pane, click the Edit Photo button to open the photo in edit view.
Any effects you select and apply from the book’s Options pane will not show up in the edit view. The rule is that any changes you make to a photo within the photo book are confined to that photo book. Any changes made outside the photo book will also affect the photo within the context of the photo book.
5. In the Effects tab, click the Matte effect once, and then click the Edge Blur effect four times.
6. Click the Fade effect four times.

7. In the viewing area, double-click the photo to return to the wedding book.
The photo still has the B & W effect you applied in the Options pane. Note that the B & W thumbnail reads “on.”
8. Click the photo to select it, and then open the Options pane.
9. In the Options pane, click the B & W thumbnail to turn off the effect.

10. Click the All Pages button to return to viewing the entire book.
You now have a soft, dreamily faded photo that highlights this special moment.
Entering and Formatting Text
Each book theme includes areas for text on the front and back covers. Some page layouts also include areas to enter text. In this exercise, you’ll customize the text on the cover and the front flap to fit your book.
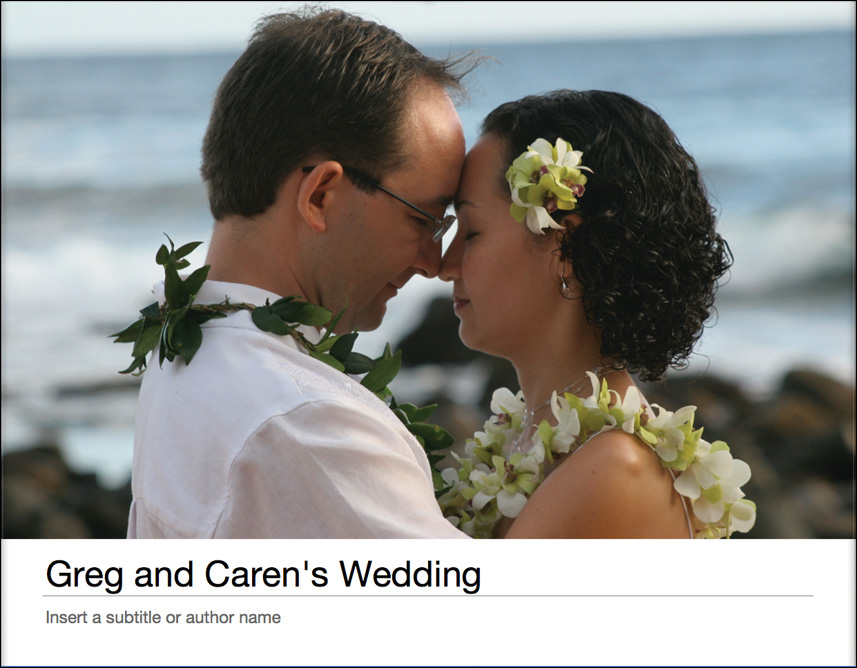
1. Double-click the cover of the book to open it full screen.
This cover text is taken directly from the event name, and in this case, that works well, so you needn’t edit it. The layout also includes a subtitle to the book, which you do need to enter.
2. Click the “insert a subtitle” text field, and type November 2005.

Text formatting options are located in the Options pane.
3. Click the Options button to open the Options pane, if necessary.
4. Triple-click in the text field to select the words “November 2005.”
With the words selected, you can now use the Options pane to format the text.
5. In the Fonts list, choose Medium Italic to change the style of the font.
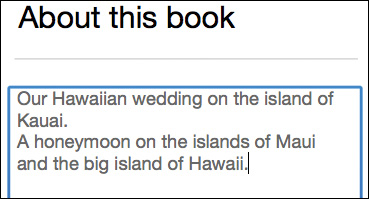
The inside flap also contains an “About this Book” area that you’ll fill in.
6. In the lower left of the iPhoto window, drag the square in the Navigation window to the right to view the inside flap.
7. Click the “Insert a description of your book” text to highlight it.
8. Type Our Hawaiian wedding on the island of Kauai.
9. Press Return to start a new line, and then type:
A honeymoon on the islands of Maui and the big island of Hawaii.
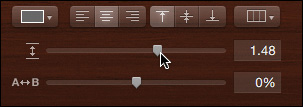
The other formatting options allow you to align the text and increase the space between letters and lines.
10. Click the Center Alignment button to center the text in the box.

Pressing Return created two paragraphs, and depending on the mouse cursor location, only that paragraph is changed by the text options.
11. Click within the first line of text, and then click the Center Alignment button to center the text.
With all the text center aligned, let’s space out the lines to make them easier to read.
12. Select all the text in the text box.
13. Drag the Line Spacing slider to 1.5 to increase the spacing between each line of text.
14. Click the All Pages button to return to viewing the entire book.
Two other pages in your book have areas for custom text. For this exercise, let’s leave the default text in them. When you don’t replace the default placeholder text, it will not show up in a book printed by Apple, or if you save the book as a PDF format file for printing by another vendor.
Ordering Books
When you are done designing your book, you can use the Apple print service to have it professionally printed. The end result is a vibrant, high-quality publication delivered to your doorstep. In this exercise, you’ll use an Apple account in preparation for placing a book order.
Note
If you don’t actually want to set up the account now, just follow along with the steps in this exercise.
1. In the viewer, click Buy Book.

iPhoto quickly examines the book, and if it finds any problems such as unchanged placeholder text, it displays an alert.
Tip
If you click Cancel, iPhoto will take you to the page that contains the default text.
The Your Order window appears with the price and shipping options.
Note
If you are not ready to purchase the book, you can access any book or card you create by clicking the Projects button in full-screen view or from the projects section in the Source list.
3. Enter your zip code, and from the Ship Via pop-up menu, choose a shipping method. The cost of your order is adjusted to include the price of shipping.
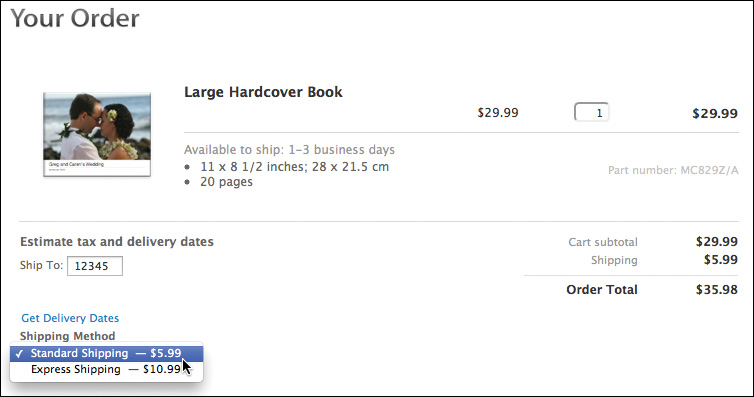
4. If the order looks correct, click the Check Out button.
The next window will require your Apple ID login information, the same ID you use in iTunes. After you log in, the final order form is shown with the shipping address and your payment method displayed.
5. If you currently wish to buy a $50 photo book of a stranger’s wedding, I cannot stop you, but you might get into trouble from other members of your household. You should probably click Cancel right now.
When you place an actual order, iPhoto uploads all of the photos and sends the book to the print service. In a few days, your book will be on its way.
Lesson Review
1. How do you start creating a photo book?
2. How do you locate all the unplaced photos in a book?
3. Where can you change a page’s layout?
4. Where are the book effects located?
5. True or false? The locations on a map in a book can only come from photos that have been assigned a location in Places.
Answers
1. Select your photos (or an event or album) and then click the Create button in the toolbar.
2. In the Photos pane, choose Unplaced Photos from the Show pop-up menu.
3. You can change a page layout in the Design pop-up menu, or in the Layout pane.
4. Book effects are located in the Options pane.
5. False. You can manually add locations to a map in a book.