
Lesson 11. Learning the Fundamentals of iPhoto for iOS
Lesson Files
None
Time
This lesson takes approximately 50 minutes to complete.
Goals
Understand iPhoto on iOS
Save photos from an email
Beam photos
Sync photos from a Mac and Windows PC
Import from a memory card
View and delete photos
Welcome to iPhoto for iOS. You’re probably skeptical that all the great things about iPhoto for Mac could be squished down to fit into your iPad screen, let alone your iPhone. I see it in your eyes (figuratively, I’m not looking through your FaceTime camera. That’s creepy). And even if they can successfully fit it into an iOS device, why would you want to use it when you have iPhoto on your Mac with a big screen?
The answer is: For the same reason you take photos with your iPhone when you have a big fancy camera sitting at home. It’s the extraordinary convenience of having iPhoto where you need it, when you need it.
In this section, you’ll learn all about iPhoto for iOS using many of the same photos from the previous iPhoto on OS X lessons. Once again, however, you are encouraged not to copy those photos onto your iOS device. Unlike your Mac, your iOS device doesn’t have a lot of memory for extra photos and video clips. These lessons are designed so you can follow the step-by-step instructions using your own photos.
Understanding iPhoto on iOS
When you take a photo or video clip on your iPhone, iPod touch, or iPad, it saves them in the iOS Photos app. So, you now have photos in iPhoto on your iOS device because iPhoto has access to all the photos in the Photos app.
Tip
If you don’t have iPhoto installed on your iOS 7 device, you can download it free from the App Store.
The moment you take a photo on your iOS device, it’s available in the iPhoto app, without importing or saving from one place to another. It’s just there. Of course, taking a picture using the iOS device’s camera isn’t the only way to get a photo into iPhoto.
The Photos app, and therefore iPhoto on iOS, receives photos in three ways:
![]() Photos taken by your iOS device or saved from an email or text message (and, in some cases, other photo apps). These appear in the Camera Roll.
Photos taken by your iOS device or saved from an email or text message (and, in some cases, other photo apps). These appear in the Camera Roll.
![]() Photos you’ve shared to iCloud from your other devices or that others have shared with you. These are placed into an iCloud album.
Photos you’ve shared to iCloud from your other devices or that others have shared with you. These are placed into an iCloud album.
![]() Photos and videos synced from your Mac through iTunes. These photos are displayed as they are in iPhoto on your Mac in events and albums.
Photos and videos synced from your Mac through iTunes. These photos are displayed as they are in iPhoto on your Mac in events and albums.
Note
The screenshots in this lesson were taken on an iPad held horizontally (that is, with the Home button to the left or right side). When the iPhoto screen on the iPad differs significantly from an iPhone, screenshots from both devices are shown.
To view your photos, you start by opening iPhoto.
1. On the iOS Home screen, tap iPhoto.
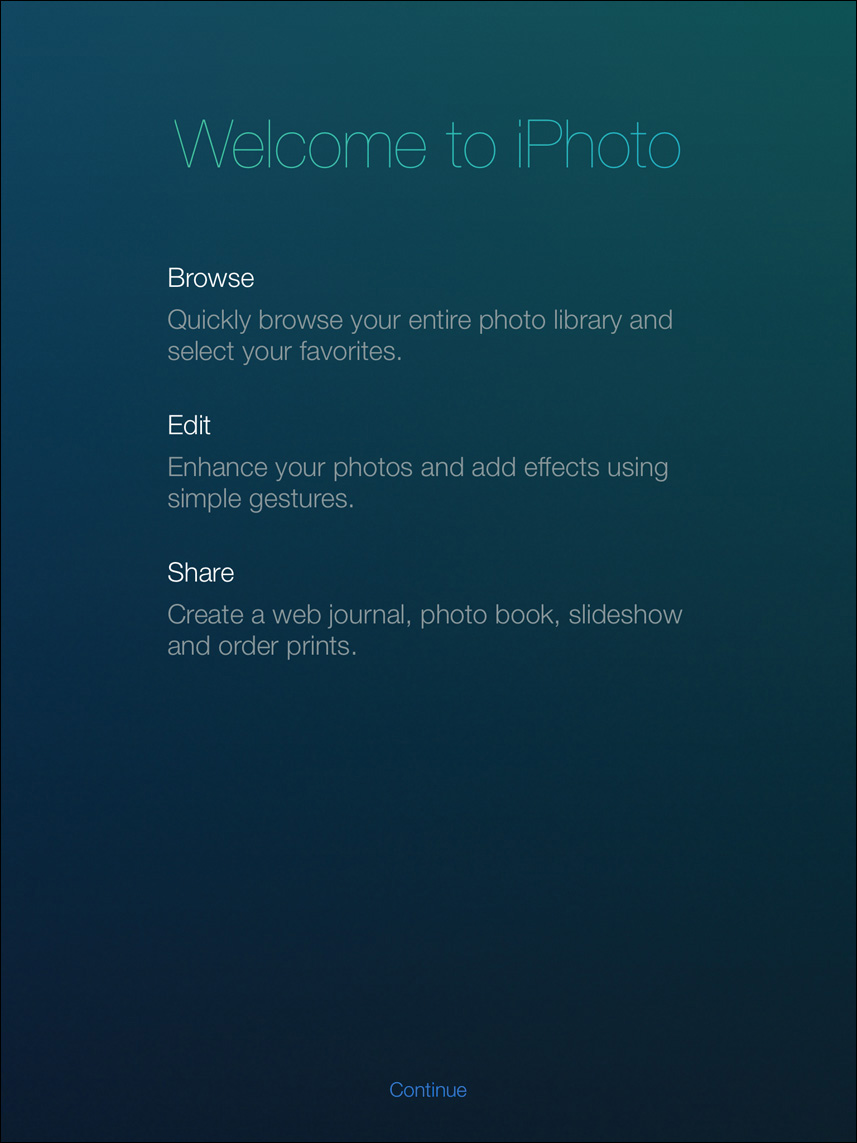
When you open iPhoto for the first time, you’ll see the iPhoto welcome window with an outline displayed to help you get started.
Note
If you’ve previously opened iPhoto, this note may not appear and you may already have an iPhoto library with personal photos.
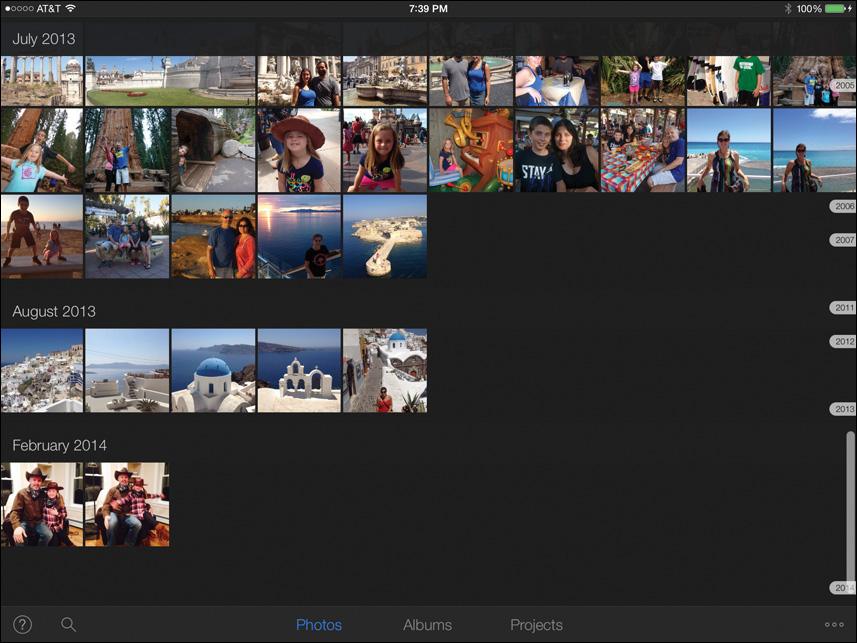
The iPhoto app has three main grouping of photos. Each grouping is accessed by tapping a button at the bottom of the screen.
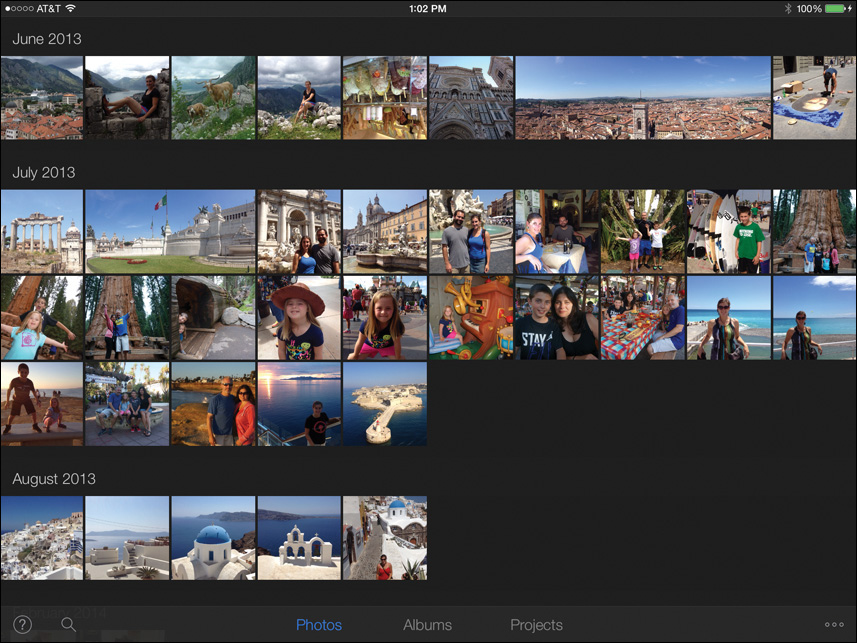
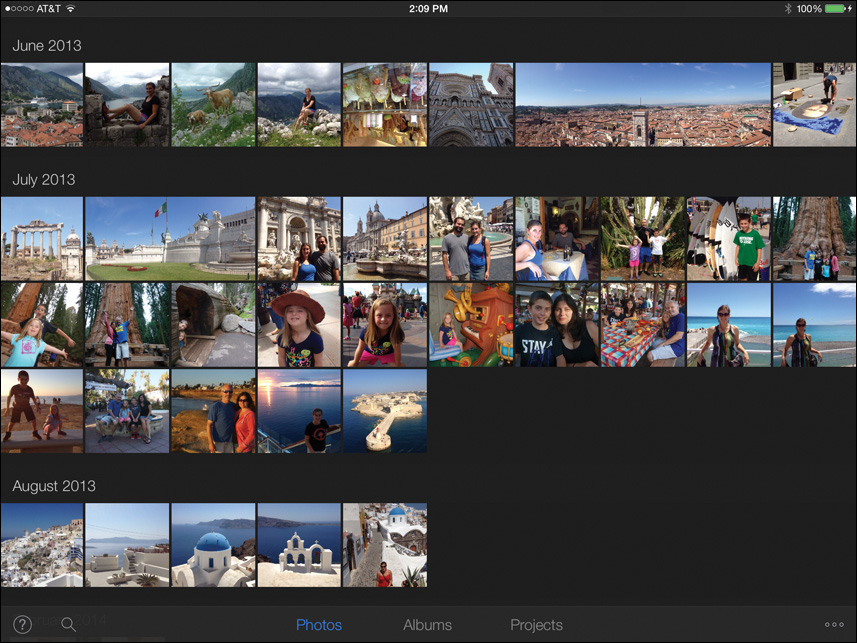
This view shows all the photos you’ve taken or imported on your iOS device grouped in chronological order by month.

This view shows your photos grouped into collections, similar to those found in your Mac iPhoto library: some collections you created, and some created by iPhoto.
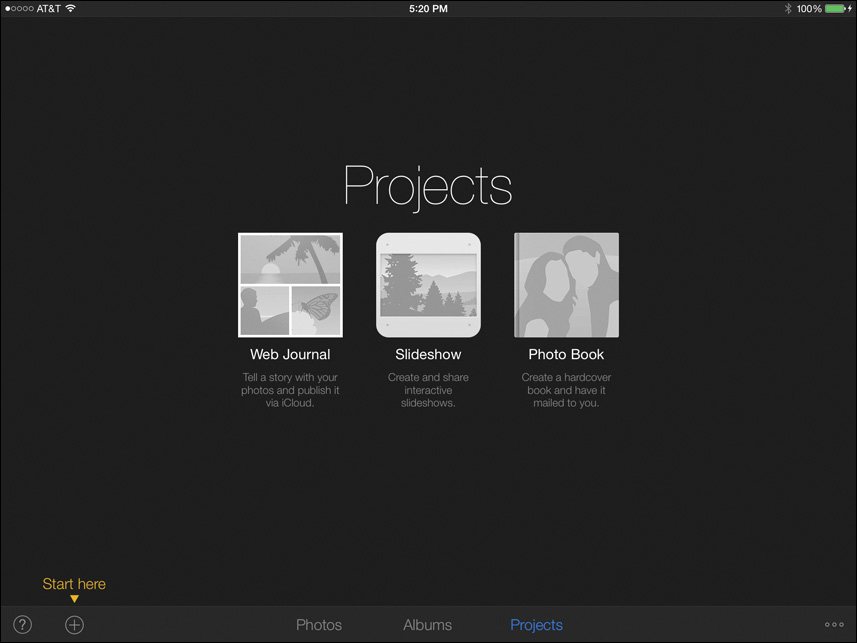
This view shows web journals, slideshows, and books you created in iPhoto on iOS.
Depending on how these photos arrived on your mobile device, you may have photos in only one or two of these categories.
Adding Photos to iPhoto
Photos most commonly show up on your iOS device when you shoot pictures with the Camera app. Snap a picture and it shows up in iPhoto; but you can get photos into iPhoto in a number of other ways.
Saving a Photo from Email
Everyone gets photos in emails, and some may even be worth saving. Instead of trying to use your Mail app as a photo library, there’s an easy way to get those attachments into iPhoto where they will be easier to keep.
1. In iOS Mail, touch and hold the photo attachment, until a menu appears.
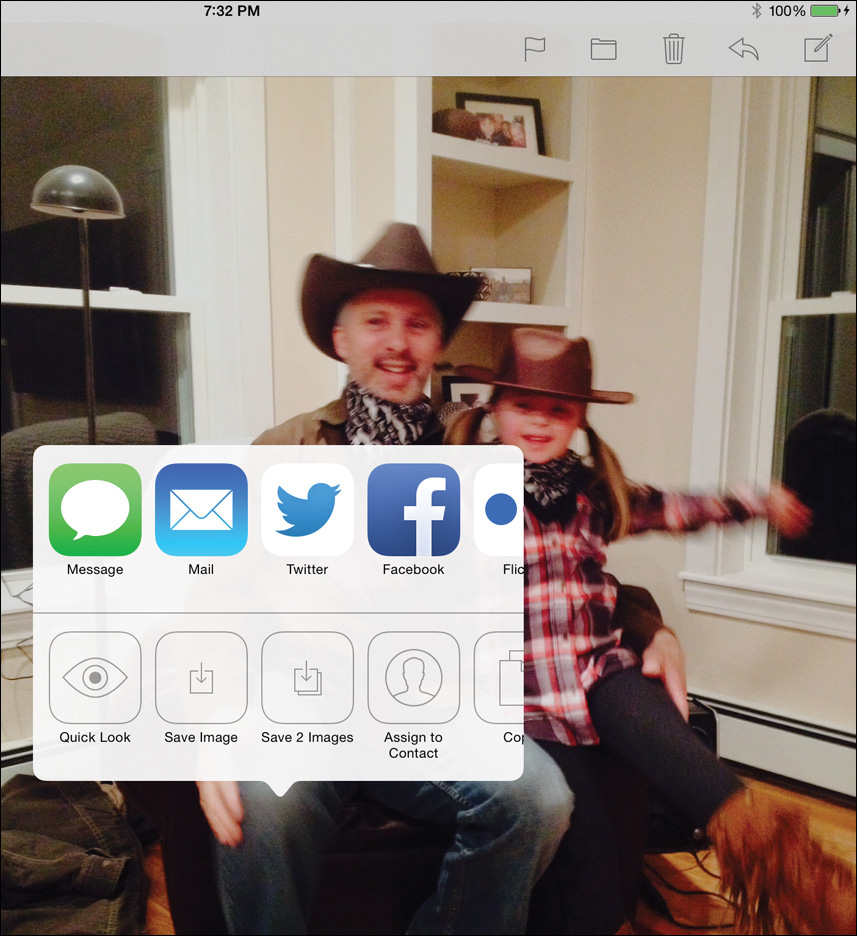
2. Choose Save Image to save the photo in the Camera Roll.
3. To view the photo, open iPhoto.
4. To view the photo by date, choose Photos, and then swipe up or down to find the photo.
The photos are not organized by the date you add them, but rather, the date they were taken.
Beaming Photos
One of the easiest ways to get a photo from one iOS device to another is to wirelessly beam the photo. Yes, I see that imagination of yours going wild, with pointy-eared aliens saying that this is highly illogical, but it’s not. The only requirements are that both devices—the one beaming the photo and the one receiving it—must be on the same wireless network and be running iPhoto.
1. Open iPhoto on both the sending and the receiving device.
2. On both iOS devices, tap the Options button ![]() and ensure that Wireless Beaming is turned on.
and ensure that Wireless Beaming is turned on.
Tip
When viewing a photo, the Options button is located in the lower right of the iPad, but to the upper right on the iPhone.
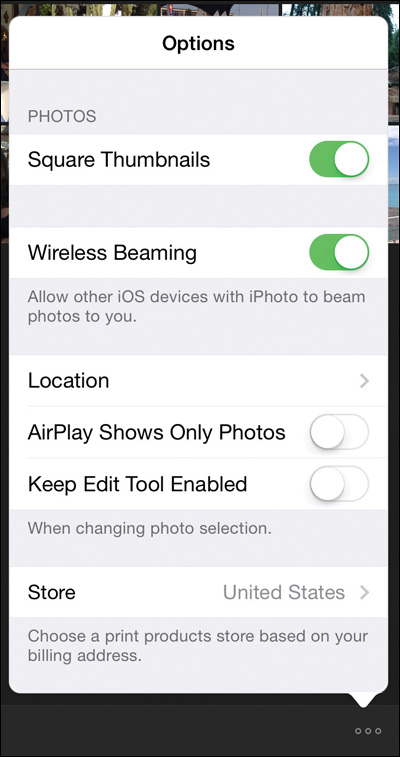
3. Tap the Options button on each device to close the Options windows.
4. On the sending iOS device, select a photo.
The photo displays larger on the screen.

5. Tap the Share button ![]() .
.
The Share menu displays the sharing options.
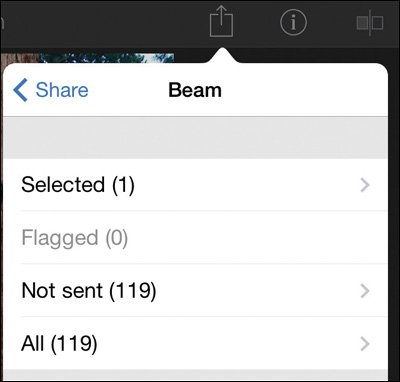
6. Choose Beam.
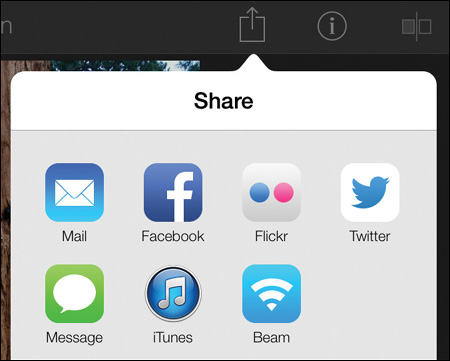
The options for beaming open. Here you can select the current photo or choose other photos to beam.
7. Choose Selected to beam the selected photo, and then choose Beam.
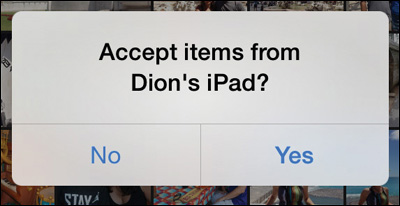
8. On the receiving iOS device, in the pop-up dialog, choose Yes to accept the beamed photo(s).
9. Once the beaming is completed, on the device that sent the photos, tap Done in the pop-up dialog.
The beamed photo appears in iPhoto according to its chronological order. You can view it by tapping the Photos button, or in the Camera Roll by tapping the Albums button.
Syncing Photos from a Mac or Windows PC
Even though you may have one of the most popular cameras in the world with you at all times—your iPhone—you inevitably end up adding photos from other cameras to your Mac iPhoto library. Alternatively, some of you may have those photos in your Pictures folder on a PC. To get those photos to your iOS device, you perform syncing.
To Sync with iTunes on a Mac
You’ll start by establishing a physical connection between your Mac and your iOS device.
1. Using the cable that came with your iOS device, connect that device to your Mac, and open iTunes on your Mac, if it doesn’t open automatically.
2. In the upper-right corner of iTunes, select the device you want to sync.

3. In the iTunes window, click Photos to view the photo settings.

You can sync your entire library, or just specific iPhoto albums and events.
4. Select the “Sync Photos from” option to enable the other photo syncing options, and choose the Mac folder in which the photos are located.
5. To select the events and albums you want on your iOS device, choose “Selected albums, Events, and Faces.”

The pop-up menu for this option allows you to select recently added events from various time frames (such as events from the last three months, six months, and so on).
6. Make sure the pop-up menu is set to No Events.
This setting doesn’t mean events won’t be synced, it just means you will select them by name.
7. From the Albums and Events lists, select the checkbox next to each album or event you want to transfer to your iOS device.

Remember, you have only so much memory on your iOS device, and some of that memory is devoted to music and apps. The bar at the bottom of the iTunes window displays how much free space will be available after you sync the selected photos. Each time you add an event or album, the bar adjusts to show the additional memory requirements.
8. Monitor the free space by watching the bar at the bottom of the iTunes window.

Tip
If you place the pointer over any section of the bar, a help tag displays exact memory usage of the content you are syncing.
9. When you have finished selecting your events and albums, click Apply.
10. After the sync is complete, click Done. Click the Eject button next to your iOS device and disconnect it.

To Sync with iTunes on a Windows PC
Although the hardware is different, the process of syncing iOS devices with Windows is similar to iOS and Mac syncing.
1. Make sure iTunes is installed on your PC.
2. Use the cable that came with your iOS device to connect your iOS device to your Windows computer. Open iTunes, if it doesn’t open automatically.
3. At the upper-right corner of iTunes, select the device you want to sync.
4. In the iTunes window, click Photos to view the photo settings.
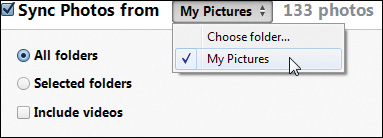
5. Select the “Sync Photos from” option, and from the pop-up menu, choose My Pictures.
6. Click Apply.
7. After the sync is complete, click Done. Click the eject button next to your iOS device and disconnect it.
You can enable Wi-Fi syncing under the Summary tab in iTunes. Doing so eliminates the need to physically connect the iOS device to your computer, but both the computer and iOS device must be logged in to the same Wi-Fi network. Wireless syncing is handy for apps and songs, or if you are only syncing a few photos. When syncing a large number of photos, using a physical connection is faster.
Importing from a Camera or Memory Card
Apple makes available an optional Camera Connection Kit for the iPad. It includes two connectors: One connects SD memory cards directly to your iPad; the other is a USB connector for connecting a digital camera that doesn’t use SD memory. When you are traveling, this kit enables you to view your photos without having to wait until you can get to your Mac.
Understand that the photos are imported through the Photos app and not through iPhoto.
1. Connect one of the connectors from the connection kit to the iPad Dock connector port.
2. Either insert the SD memory card into the connector, or for the USB connector, insert a USB cable directly from your digital camera. (You’ll need to have a USB cable that is not supplied with the kit.)
The Photos app opens automatically.
3. At the bottom of the screen, tap the Import button.

4. Select each photo you want to import, or tap the Import All button.

After the photos are imported, they automatically appears in the iPhoto Camera Roll.
On a 16 GB iPad, you can safely store about 4000 JPEG photos from an eight-megapixel camera, assuming nothing else is stored on your iPad. But even on a half-full 16 GB iPad you’ll have enough available storage to view your photos during a long weekend getaway.
Viewing and Deleting Photos
Now that you know all the ways to place iPhoto images on your iOS device, you probably want to view them.
1. On your Home screen, tap iPhoto to open it, if necessary.
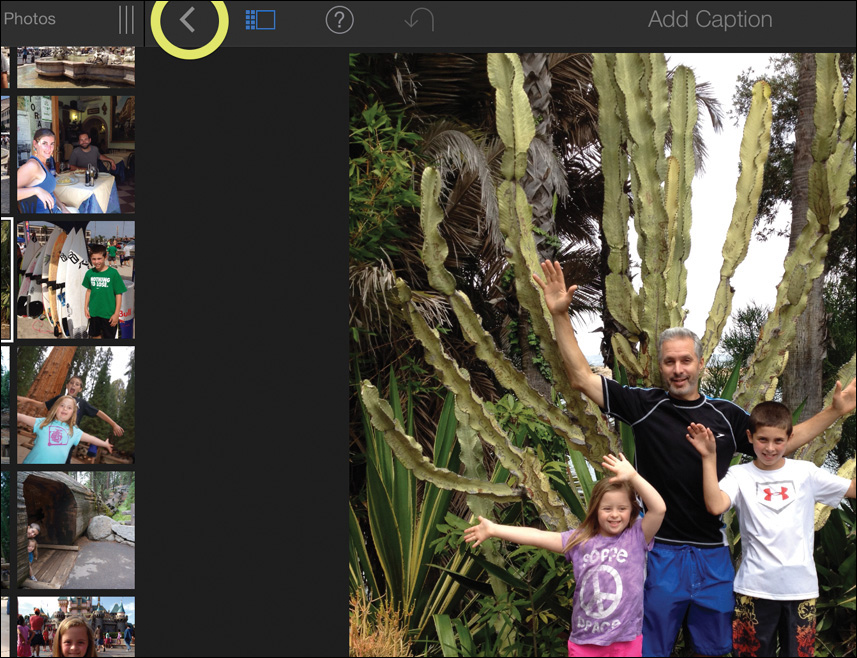
2. Tap the Back button ![]() to view all the photos.
to view all the photos.
3. Tap the Photos button to view thumbnails of your photos in chronological order.
Note
Tapping the Photos button shows only the photos taken by your iOS device, synced from iTunes, and beamed to you. It does not show iCloud-shared photos.
The photos are grouped by month with tabs along the right side that allow you to jump to specific years.
4. To scroll through the months of photos, swipe down to view photos with earlier dates, or swipe up to view more recent photos.
5. When you find a thumbnail of a photo you want to view, tap the thumbnail to display a larger image in the viewing area.

The current photo scales to fill the viewing area. All the photo thumbnails are placed in a thumbnail grid to the left of the current photo.
Note
The screen captures displayed here use a horizontal layout. Holding your iOS device vertically will rearrange the layout compared to what you see in these figures.
6. On the iPhone, tap the Split View button ![]() to display the thumbnail grid.
to display the thumbnail grid.
7. To view the next photo in chronological order, swipe to the left, over the current photo.
8. To view the previous photo in chronological order, swipe to the right, over the current photo.
You can use the thumbnail grid to jump to any photo.
9. Tap a different photo in the thumbnail grid to make it the current photo.

If the photo you want to view isn’t visible in the grid, you can swipe the grid up or down to view more recent or earlier dated photos.
10. In the thumbnail grid, swipe up to view more recent photos, or swipe down to view photos taken earlier.
Tip
To limit the thumbnail grid to display only the photos from a particular month, while in the Photos view, tap the month text above a group of photos instead of directly tapping a photo.
Along the top and bottom of the screen are toolbars with buttons that perform various editing and sharing functions.
11. To hide the toolbars and thumbnail grid, tap the current photo.
The current photo now fills your iPad or iPhone screen.
12. Tap the current photo again to display the thumbnail grid and toolbars.
13. Tap the Back button ![]() to view all the photos.
to view all the photos.
Deleting Photos
Unlike on your Mac or PC, memory space is at a premium on your iOS device. If photos that you don’t really care too much about occupy too much space, delete them. However, before you delete, remember when you learned how to import in Lesson 2? Make sure you import any photos you want to keep to the iPhoto library on your Mac.
1. In the Photos view, select a photo you want to delete from your iOS device.
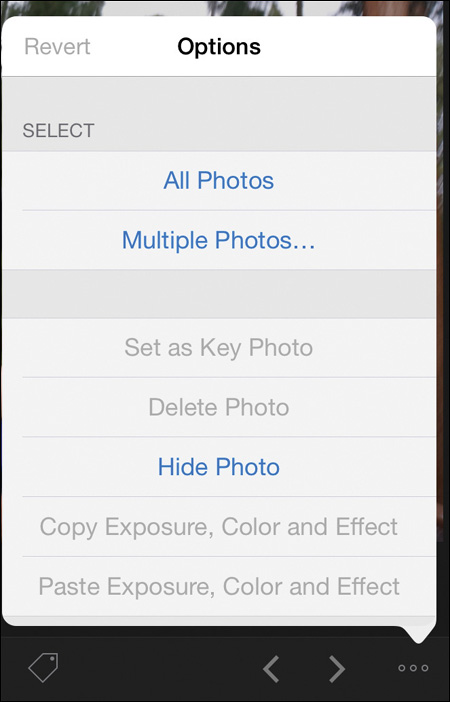
2. Tap the Options button to open the Options menu.
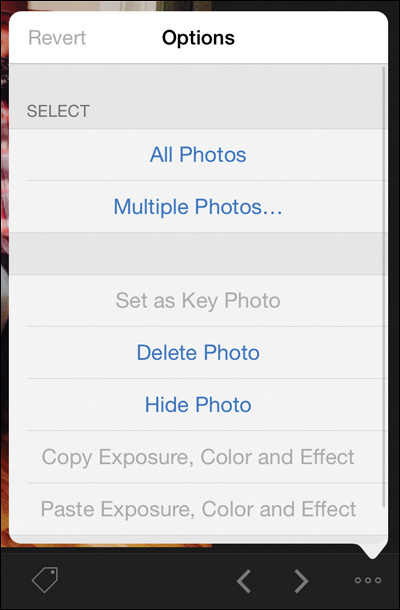
3. Choose Delete Photo, and then in the alert dialog, choose Delete to confirm the deletion.
Note
You cannot delete photos synced through iTunes. You must sync your iOS device again with a new selection of events and albums.
That photo is gone. Unlike on your Mac, iOS doesn’t have a Trash from which you can retrieve a deleted photo. Once you confirm the deletion, that photo is removed from your iOS device. Deleting is really deleting in iPhoto for iOS.
Now that you are sufficiently aware of the finality of iOS deletion, you can go hog wild and select multiple photos to delete.
4. In the Photos view, select any photo.
5. Tap the Options button to open the Options menu.
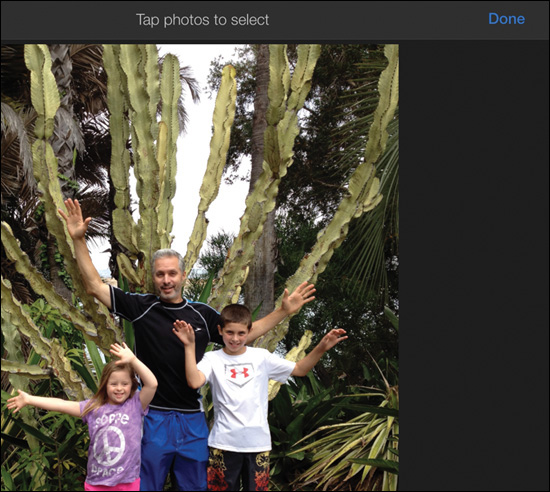
6. In the Options menu, choose Multiple Photos.
7. In the thumbnail grid, tap each photo you want to delete.
A white checkmark is added to each selected photo to be deleted.

Tip
If you accidentally tap a photo you don’t want to delete, tap it again to deselect it.
8. When you have finished selecting the photos, tap Done.
A white checkmark is added to each selected photo and all the selected photos are displayed in the viewing area.
9. Tap the Options button, and then tap Delete Photos.
10. In the alert dialog, choose Delete to confirm the deletion.
Because iPhoto and the Photos app are very friendly with each other, when you delete a photo from iPhoto on the Mac, it is also deleted from the Photos app, and vice versa. As a safety measure, however, photos in iPhoto that you have edited, flagged, or used in a project cannot be deleted from the Photos app.
View a Photo’s Location
You can display information about the current photo in the viewing area by tapping the Info button. The Info pane shows the photo’s date, the camera model used, and many of the camera settings at the time of the photo.
1. Return to the Photos view to see all your photos.
2. Select a photo that was taken by an iOS device.
If the photo was taken with an iPhone or iPad, the GPS location of the photo is saved. A map appears showing the photo’s location.
3. In the toolbar, tap the Info button ![]() .
.
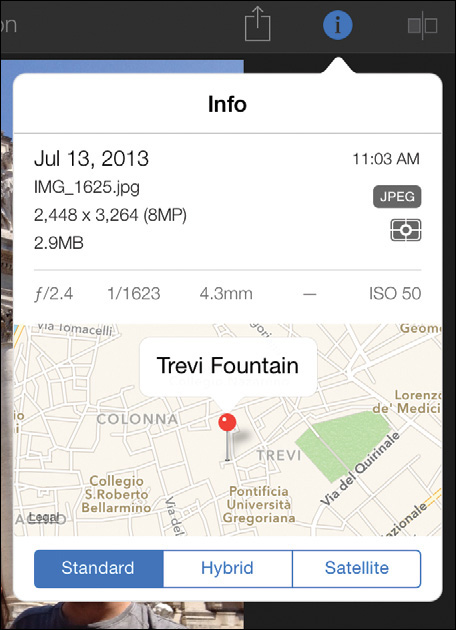
Information about your camera and its settings are displayed along with the map.
4. Tap the Info button again to close the window.
If you want to add location information to photos that were not taken with an iOS device, you can do so using iPhoto on the Mac. When you sync the photos to the iOS device, the location will be displayed.
Lesson Review
1. What are the two requirements to beam a photo?
2. What button do you tap to view your photos in chronological order?
3. To view a photo full screen without the toolbar or thumbnail grid, what do you have to do?
4. When viewing the current photo, how do you get back to viewing all your photos in chronological order?
5. True or false? All photos you delete from the Photos app are deleted in iPhoto.
Answers
1. The two devices must be on the same Wi-Fi network, and iPhoto must be open on both devices.
2. Tap the Photos button.
3. Tap the photo to view it in the viewing area, then tap it again to view it full screen.
4. Tap the Back button ![]() .
.
5. False. Only photos that are not flagged, edited, or used in a project in iPhoto can be deleted in the Photos app.