
Chapter 15. Styles
A while back I taught InDesign to a group of designers that included a young woman who was responsible for a yearly 100-page catalog of her company’s products. When I got to the part of the class where I showed what text styles could do, she began to cry.
I’d never had a student break down and cry in a class, so I was very concerned. I didn’t know what to do. “What’s wrong?” I asked.
It took her a while to speak, but she eventually explained that it was “those styles.” Turns out she had never been taught what styles did and she had been formatting the thousands of entries in the catalog by hand.
She now realized just how much time she could have saved by using text styles. Of course, this was before InDesign added object styles. And even more before table styles.
I dedicate this chapter to all of you who have been slaving away, working without text, object, and table styles. May the techniques you learn here bring smiles, not tears, to your faces.
Working with Paragraph Styles
InDesign has two types of text styles. Paragraph styles apply formatting for both character and paragraph attributes. Character styles apply formatting for only character attributes.
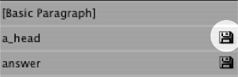
The Basic Paragraph style is the style that is always part of a document and is automatically applied to all new text ![]() . When you change the definition of the Basic Paragraph style, it automatically updates all text that has been styled with the Basic Paragraph style.
. When you change the definition of the Basic Paragraph style, it automatically updates all text that has been styled with the Basic Paragraph style.
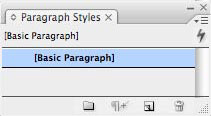
![]() The Basic Paragraph is the default style that appears in all new documents.
The Basic Paragraph is the default style that appears in all new documents.
To set the Basic Paragraph attributes by example:
- Click inside a text frame and use the Control panel, Character panel, or Paragraph panel to change the text attributes.
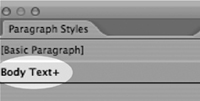
- A plus sign (+) appears next to the Basic Paragraph listing in the Paragraph Styles panel
 . This indicates that local formatting has been applied to the Basic Paragraph.
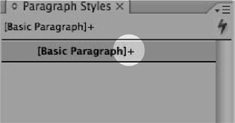 The plus sign (+) next to the style name indicates that local formatting has been applied to the text.
 - Choose Redefine Style from the Paragraph Styles panel menu. This changes the definition of the Basic Paragraph to match the local formatting. The plus sign disappears.
To set the Basic Paragraph attributes by definition:
- Double-click the Basic Paragraph listing in the Paragraph Styles panel. This opens the Paragraph Styles Options dialog box.
- Make whatever changes to the style definition you like as explained on the following pages.
- Click OK to make the changes.
You can use the Paragraph Styles panel to define new paragraph styles for a document.
To define a paragraph style manually:
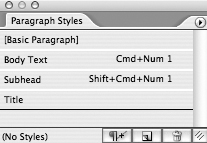
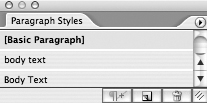
- Choose Type > Paragraph Styles. This opens the Paragraph Styles panel
 .
.
 The Paragraph Styles panel lets you define and apply paragraph styles.
 - Choose New Paragraph Style from the Paragraph Styles panel menu.
or
Opt/Alt-click the New Style icon in the Paragraph Styles panel. This opens the New Paragraph Style dialog box set to the General options
 .
.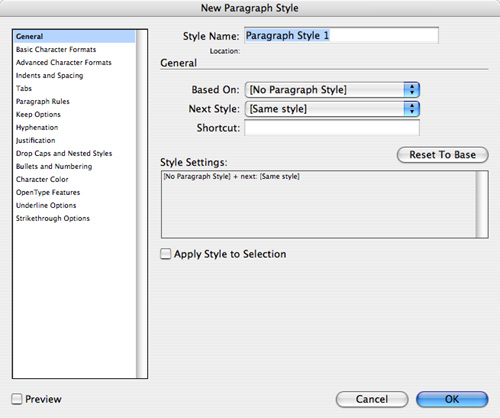 The New Paragraph Style dialog box set to the General options.
 - Use the Style Name field to name the style.
- Set the Based On, Next Style, and Shortcuts options as described later in this chapter.
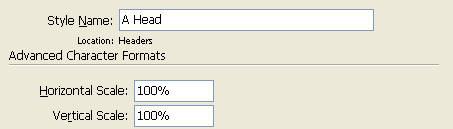
- Click each category on the left side of the dialog box and set the criteria for each one
 . (These categories are the same as the character and paragraph formatting described in Chapter 3, “Basic Text.”)
 Click each category in the Paragraph Styles dialog box to set the format of the style.
 - Click OK to define the style. The name of the style appears in the Paragraph Styles panel.
The easier way to define a style is to format the selection and define the style by example.
To define a paragraph style by example:
- Select some text.
- Use any of the commands to format the text.
- Leave the insertion point in the formatted text.
- Choose Type > Paragraph Styles.
- With the insertion point blinking in the formatted text, click the New Style icon. This adds a new style to the Paragraph Styles panel.
The Next Style command for paragraph styles has two features. For typists who enter text directly into InDesign, it allows you to automatically switch to a new style as you type text. For instance, as I type this paragraph, I press the paragraph return after the period. This automatically switches to the next style, which is the exercise header.
To set the next paragraph style:
- Select the General category in the New Paragraph Style dialog box.
- Choose a style from the Next Style list in the New Paragraph Style dialog box
 . The chosen style is applied to the next paragraph when you press the Return key
  .
.
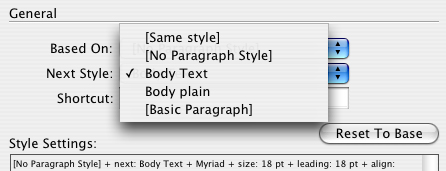 The Next Style menu lets you choose [Same Style] or an already defined style.
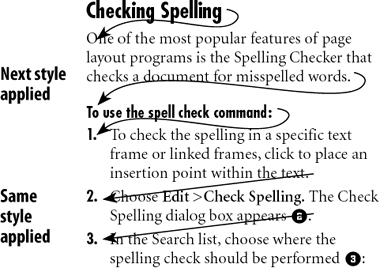 The Next Style command changes the paragraph style when the return key is pressed. The Same Style command keeps the style when the return is pressed.
or
Choose Same Style from the Next Style list
. This retains the original style until you manually change the style.
The Next Style feature does even more magic when you use it to apply the next style to selected text. This allows you to format many paragraphs in one simple click.
To apply the Next Style to multiple paragraphs:
- Highlight the text that you want to style.
or
Select the text frame that contains the text that you want to style.
- Position your cursor over the name of the paragraph style that you want to apply to the first paragraph.
- Right-click (Windows) or Control-click (Mac) the name of the style. A contextual menu appears
 .
.
 The contextual menu over a style name allows you to apply a paragraph style and then the Next Style to the rest of the selected text.
 - Choose Apply “name of style” then Next Style. This styles the text according to the Next Style controls
 .
.
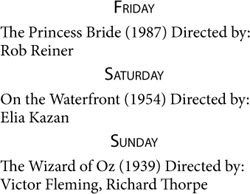 An example of how the Next Style command applies for the style for the day. This changes to the movie listing and then back to the day, and so on.
Working with Character Styles
Character styles allow you to set specific attributes that override the paragraph style character attributes. For instance, this bold text was set by applying a character style to the paragraph style.
- Choose Type > Character Styles. This opens the Character Styles panel
 .
.
 The Character Styles panel lets you define and apply character styles.
 - Choose New Character Style from the Character Styles panel menu. This opens the New Character Style dialog box
 .
.
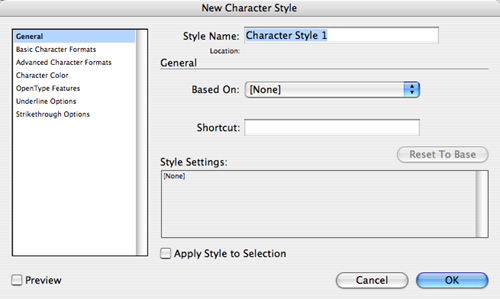 The New Character Style dialog box lets you specify settings for each of the categories for character styles.
 - Name the style.
- Set the Based On and Shortcut controls as described later in this chapter.
- Click each category to set the character attributes
 .
.
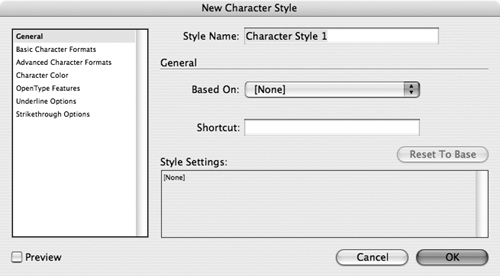 Click each category in the Character Style dialog box to set the format of the style.
 - Click OK to define the style. The name of the style appears in the Character Styles panel.
You can also format the text and then define a character style by example.
To define a character style by example:
- Select some sample text.
- Format the text.
- Leave the insertion point in the newly formatted text.
- Choose Type > Character Styles.
- Click the New Style icon. This adds a new style to the Character Styles panel.
Working with Styles
The great thing about styles is that once you understand the basics of paragraph and character styles, you also know the basics for object and table styles. However, rather than wait till the end of this chapter to cover working with styles, I’m going to cover those techniques now. You can then use these techniques for the other types of styles.
Basing one style on another makes it easy to coordinate multiple text styles.
- Start with at least one style.
- Open the New Style dialog box to define a new style.
- From the Based On pop-up menu, choose the style you want to use as the foundation of the new style.
- Make changes to define the second style’s attributes.
Tip
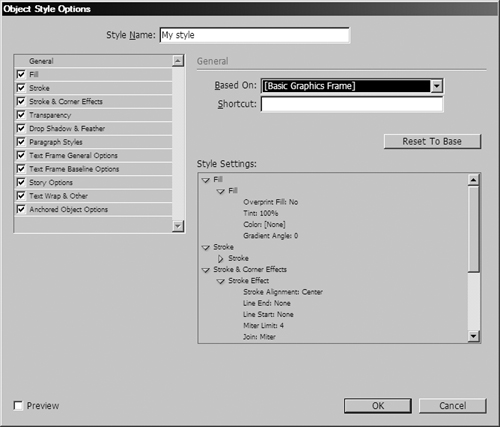
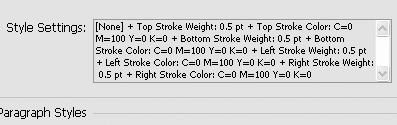
The changes to the second style are displayed in the Style Settings area
 .
.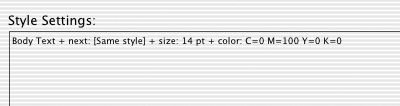 When you base a new style on an existing style, you can see how they differ in the Style Settings field of the New Character Style dialog box.
If you have based one style on another, at some point you may want to remove any changes to the style so that it is like the first.
To reset to the base style:
• Click the Reset To Base button.
You can also set the text so that it no longer is governed by the style.
To break the link to a style:
• Choose Break Link to Style from the style panel menu.
Rather than create a new style from scratch, it may be easier to duplicate an existing style and then redefine it.
- Select the style.
- Drag the style onto the New Style icon in the styles panel.
or
Choose Duplicate Style from the Styles panel menu.
To sort styles:
• Drag the style to the position where you want it to be.
or
Choose Sort by Name from the Styles panel menu.
You can also set keyboard shortcuts for styles. This makes it easy to apply styles as you type.
To set style keyboard shortcuts:
- Open the New Style dialog box.
or
Double-click the name of the style to open the Style Options dialog box.
- Click in the Shortcut field.
- Press a keyboard modifier plus a number from the number pad. The keyboard modifiers can be a combination of one or more of the following keys:
• Cmd (Mac) or Ctrl (Win) keys.
• Shift key.
• Opt (Mac) or Alt (Win) keys.
Creating Style Groups
Just as you can create folders to organize files on your computer, so can you create folders (style groups) that allow you to organize your styles. Style groups are available for all types of styles.
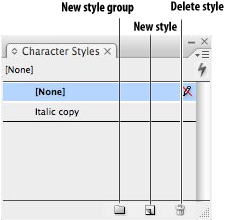
- Click the New Style Group icon in the styles panel. A new style group folder appears
 .
.
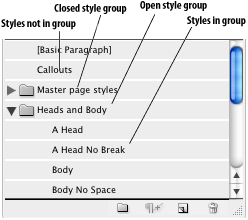 The style groups as they appear in a styles panel.
or
Choose New Style Group from the styles panel. The Style Group Options dialog box appears
 .
.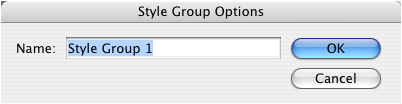 The Style Group Options dialog box lets you name a style group.
or
Opt/Alt-Click the New Style Group icon in the styles panel. The Style Group Options dialog box appears.
- You can double-click a style group folder to open the Style Group Options dialog box.
- Choose a name for the Style Group and Click OK.
To move styles into a style group:
- Select the styles you wish to move.
- Drag them into the style group folder.
Tip
You can also select several styles and choose New Group from Styles in the styles panel menu to create a group and put the styles in the folder at once.
Loading and Importing Styles
You can transfer or load styles from one document into another.
To transfer text styles into an InDesign document:
- Choose one of the following from the Paragraph or Character Styles panel menus:
• Load Character Styles transfers the character styles.
• Load Paragraph Styles transfers the paragraph styles.
• Load All Text Styles transfers both character and paragraph styles.
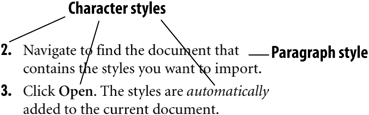
- Navigate to find the document with the text styles you want to import.
- Click Open. The text styles are added to the current document.
To transfer other styles into an InDesign document:
- Choose Load [type of] Styles from the styles panel menu.
- Navigate to find the document with the styles you want to import.
- Click Open. The styles are added to the current document.
When you load styles from one document to another, there may be times when the styles coming into the document have the same name, but different definitions. This is called a style conflict. When this happens you need to resolve the conflict between the styles.
- Choose one of the Load Styles commands. If there are conflicts, the Load Styles dialog box displays the incoming styles that have the same name as the existing styles
 .
.
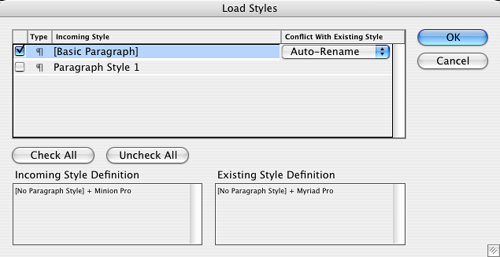 Load Styles dialog box allows you to choose how style conflicts should be resolved.
 - Check the styles that you want to load into the document, and resolve the conflict
 .
.
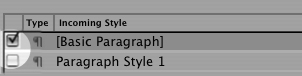 A check mark next to the style name indicates the incoming style definition should be resolved. No check mark indicates the existing style definition should be used.
or
Uncheck the styles that you don’t want to load into the document.
- For all the checked styles choose one of the following from the Conflict With Existing Style menu
 :
:
• Auto-Rename imports the style with a suffix to differentiate it from the existing style.
• Use Incoming Style Definition changes the existing style to match the imported style definition.
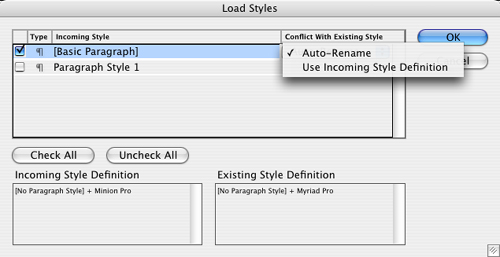 Use the Conflict With Existing Style menu to resolve a style conflict.
Importing Text Styles from Word
When you place text from word processing programs such as Microsoft Word into InDesign, the text styles from the imported text are added to the document.
To import styles in Microsoft Word text:
- Choose File > Place and navigate to find the Word file you want to import.
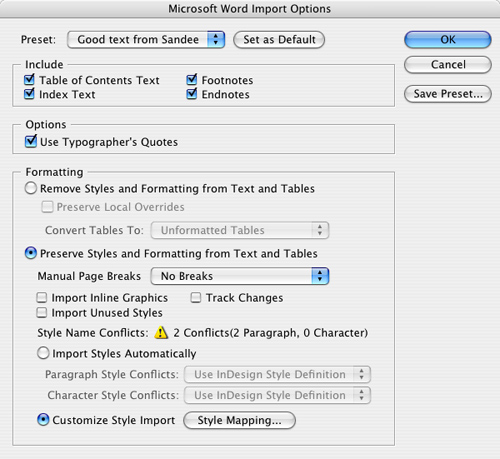
- Check Show Import Options and click Open. This opens the Microsoft Word Import Options dialog box
 .
.
 The Microsoft Word Import Options dialog box allows you to control how styles are imported from Word files.
 - Check Preserve Styles and Formatting from Text and Tables.
- Check Import Styles Automatically.
or
Check Customize Style Import.
If you chose to import the styles automatically, you can choose how style conflicts are resolved.
To resolve style conflicts automatically:
- To resolve paragraph style conflicts, choose one of the following from the Paragraph Style Conflicts menu
 .
.
• Choose Use InDesign Style Definition to have the InDesign style override the incoming style.
• Choose Redefine InDesign Style to have the incoming style override the InDesign style.
• Choose Auto Rename to add the incoming style to the list of styles in the InDesign style panel.
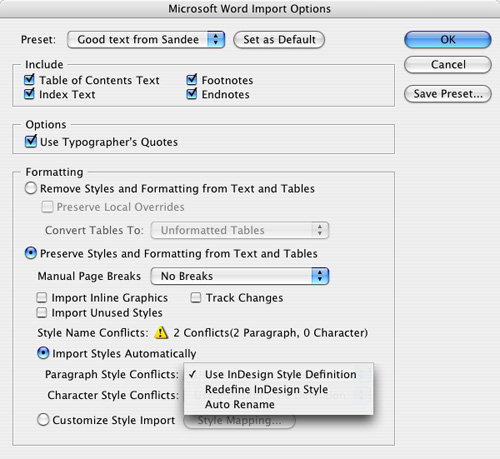 Use the Paragraph Style Conflicts or Character Style Conflicts menu to resolve a style conflict.
 - To resolve character style conflicts choose from the Character Style Conflicts menu.
Tip
A disk icon indicates the style definition came from the imported text
 .
. The disk icon indicates that the style definition came from an imported text file.
What if you have a style name in Word that is totally different from the name of the style in the InDesign document? You need a way to tell InDesign which existing style to apply to the Word text. The custom style mapping controls let you change an incoming style to a specific existing style.
- In the Microsoft Word Import Options dialog box, check Customize Style Import
 . This makes the Style Mapping button available.
 Choose Customize Style Import to click the Style Mapping button.
 - Click the Style Mapping button. This opens the Style Mapping dialog box
 .
.
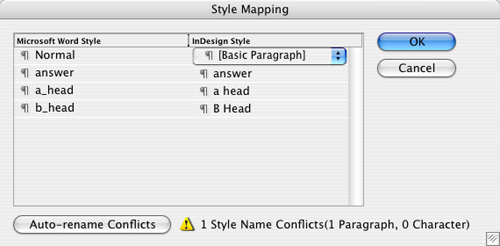 The Style Mapping dialog box lets you choose how each Microsoft Word style should be applied.
 - Under the InDesign Style column, choose one of the styles from the pop-up menu for each of the incoming Word styles
 .
.
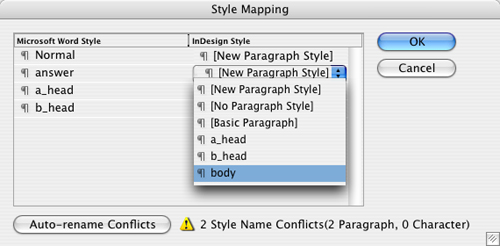 The style choices list lets you map one style to another. Here the Word style answer has been mapped to the InDesign style body.
 - Click OK to close the Style Mapping dialog box.
- Click OK to close the Style Mapping dialog box.
- Click OK in the Microsoft Word Import Options dialog box to import the text.
Applying Styles and Style Overrides
Defining styles is just half of the process. You reap the benefits of your planning when you apply styles.
You can apply paragraph and character styles as you type new text, or you can add the styles to existing text ![]() .
.
![]() An example of paragraph and character styles applied to text.
An example of paragraph and character styles applied to text.
- Select the paragraphs.
- Click the name of the paragraph style.
or
Type the keyboard shortcut.
You can override the paragraph style by applying a character style or local formatting.
- Select the text.
- Use the Control Panel or Character panel to format the text.
Rather than use local formatting, I prefer to use character styles on text. That way if I want to make changes later on, I can just redefine the character style.
- Select the text.
- Click the name of the character style.
or
Type the keyboard shortcut.
Clearing Style Overrides
When you apply local formatting or character styles, you have different ways to clear those style overrides.
You can use the Clear Overrides button to clear the overrides in a text selection.
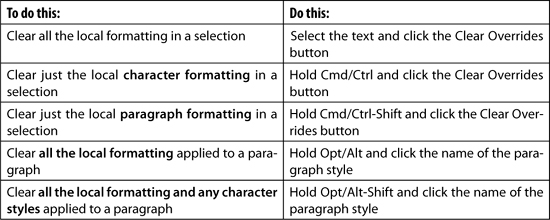
To clear the local formatting in a text selection:
- Select the text you want to clear.
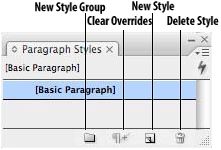
- Click the Clear Overrides button in the Paragraph Styles panel
 . This changes the local formatting in the selection to the underlying paragraph style.
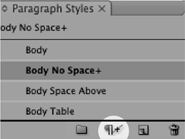 The Clear Overrides button lets you remove local formatting applied to text.
You may find that you want to clear just the character attributes that were applied as local formatting, but you want to keep any paragraph attributes.
To clear only local character formatting in a text selection:
- Select the text you want to clear.
- Hold Cmd/Ctrl and click the Clear Overrides button. This changes the local character formatting in the selection to the underlying paragraph style.
The opposite to the previous exercise allows you to clear just the paragraph attributes that were applied as local formatting, but keep any character attributes.
To clear only local paragraph formatting in a text selection:
- Select the text you want to clear.
- Hold Cmd/Ctrl-Shift and click the Clear Overrides button. This changes the local paragraph formatting in the selection to the underlying paragraph style.
You can also remove all local formatting without making a specific text selection.
- Place your insertion point in the paragraph you want to override.
- Hold the Opt/Alt key as you click the name of the paragraph style
 .
.
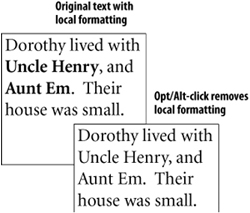 Opt/Alt-click a paragraph style name to remove any local formatting applied to text.
You may want to clear the character styles and local formatting applied to the text.
To override character styles and local formatting:
- Place your insertion point in the paragraph you want to override.
- Hold the Opt/Alt and Shift keys as you click the name of the paragraph style. This deletes both the character styles and the local formatting applied to the text
 .
.
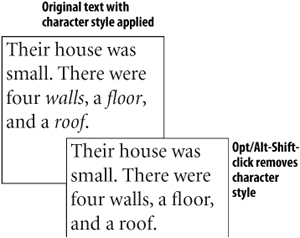 Press Opt/Alt-Shift and click a paragraph style name to remove character styles and local formatting.
- Place your insertion point in the paragraph you want to override.
- Choose Break Link to Style from the Paragraph Styles or Character Styles panel. This removes the style from the text, but does not change the formatting.
Redefining and Deleting Styles
One of the advantages of using text or other styles is that when you redefine the style, it changes all the existing text or objects that have that style applied to it.
- Double-click the style name in the panel. This opens the Style Options dialog box, where you can change the style attributes.
- Click OK. The style is redefined, and text and objects that have the style applied are modified to reflect the new definition of the style.
To redefine a style by example:
- Select the text or objects that have the style applied.
- Use the commands to make any changes to the text or objects.
- Choose Redefine Style from the Styles panel. The style is redefined based on the modified example.
You may have styles that you do not need in your InDesign document. You can shorten the styles list by deleting unused styles.
- Select the styles you want to delete.
- Drag the styles onto the Delete Style icon.
or
Choose Delete Styles from the Style panel menu.
You can also delete styles that are being used in the document. In that case, you have a choice as to how to handle the text that has the style applied to it.
To delete paragraph styles that are in use:
- Select the style you want to delete.
- Delete the style as described in the previous exercise. An alert box appears
 .
.
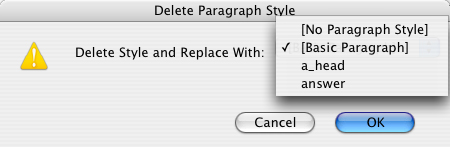 The Delete Paragraph Style alert box lets you assign another paragraph style to deleted styles.
 - Use the pop-up menu in the alert box to choose [No Paragraph Style], [Basic Paragraph], or one of the other paragraph styles.
To delete character styles that are in use:
- Select the style you want to delete.
- Delete the style as described in the previous exercise. An alert box appears
 .
.
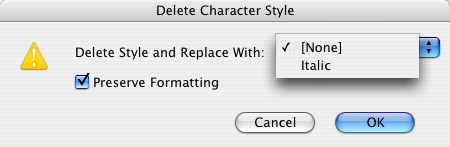 The Delete Character Style alert box lets you assign another character style to deleted styles.
 - Use the pop-up menu in the alert box to choose [None] or one of the other character styles.
- Check Preserve Formatting to convert the character style into local formatting.
Automatic Drop Cap Styling
Each chapter of this book has a drop cap that is not the same font as the rest of the text in the paragraph. This is an example of an automatic drop cap with a character style.
To apply automatic drop cap character styling:
- Define a character style that contains the formatting for the drop cap character.
- Select the paragraph that you want to style with the drop cap.
- Choose Drop Caps and Nested Styles from the Paragraph panel menu. The Drop Caps and Nested Styles dialog box appears
 .
.
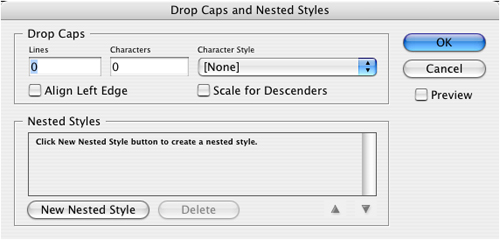 The Drop Caps and Nested Styles dialog box allows you to automate the style applied to drop caps.
 - Use the Lines field to set the number of lines that the drop cap character will descend into the text
 .
.
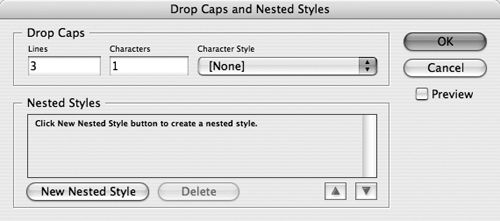 Set the Lines and Characters fields to the number of lines for the drop cap and the number of characters to be formatted.
 - Use the Characters field to set the number of characters for drop cap characters .
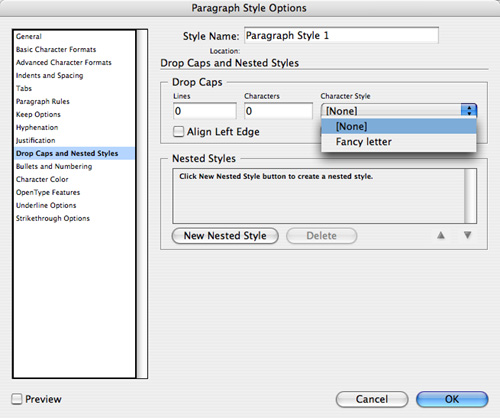
- Use the Character Style menu to choose the predefined character style
 .
.
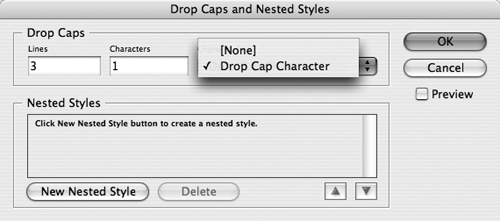 Use the Character Style menu to assign a character style to format the drop cap character.
 - Click Align Left Edge to force the left edge of the character to align to the left indent of the text.
- Click Scale for Descenders to scale and adjust the drop cap so that descenders don’t collide with the lines below
 .
.
 An example of how the Scale for Descenders command avoids problems when descenders are used in drop caps.
 - Click OK.
Using Nested Styles
Every once in a while I see a feature that is revolutionary in the field of desktop publishing. Nested styles are such a feature. Nested styles allow you to automate how character styles are applied to paragraphs.
Imagine you are formatting a phone directory. Each paragraph starts with a person’s name followed by a colon. After that comes a phone number, and then a new line symbol forces the rest of the address to the end of the paragraph. These are repeating elements that you can reliably count on to use as markers for formatting using nested styles.
You want the person’s name to be italic, the phone number to be bold, and the text after the new line symbol to be the regular paragraph style.
Before nested styles, you would have had to manually highlight each element in the paragraph and apply a character style. With nested styles all the formatting is applied in one fell swoop ![]() !
!
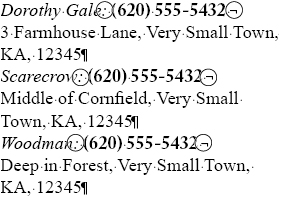
![]() An example of the kind of formatting that can be automated using nested styles. The predictable elements can be used to apply the automatic formatting.
An example of the kind of formatting that can be automated using nested styles. The predictable elements can be used to apply the automatic formatting.
Tip
As you work with nested styles, remember that you need predictable elements that you can use as part of the automatic formatting. If you can’t predict where the elements will be in the text, you probably can’t use nested styles for that text.
To prepare to use nested styles:
• Define all the character styles that will be used to apply the formatting for nested styles.
Tip
You can only use character styles as part of nested styles, not local formatting from the Character panel.
Once you have defined the character styles, you can apply them using the Nested Styles command.
To apply the Nested Styles command to text:
- Place your insertion point inside the paragraph that you want to format.
- Choose Drop Caps and Nested Styles from the Paragraph panel menu. The Drop Caps and Nested Styles dialog box appears
 .
.
 The Nested Styles area of the Drop Caps and Nested Styles dialog box allows you to apply multiple character styles to predictably occurring text elements.
 - Click the New Nested Style button. This adds a new listing under the Nested Styles area
 .
.
 The New Nested Style button creates a new listing in the Nested Styles area.
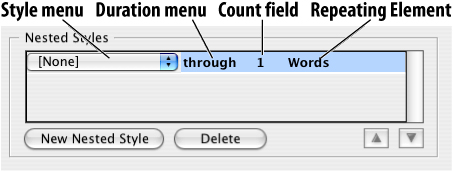
 - Use the Character Style menu to choose which character style will be applied to the repetitive element
 .
.
 Click the Character Style menu to choose the character style that should be applied as the formatting for the nested style.
 - Use the Duration menu to choose the extent to which the character style is applied
 :
:
• Through applies the style so it includes the repeating character.
• Up to applies the style so it ends before the repeating character.
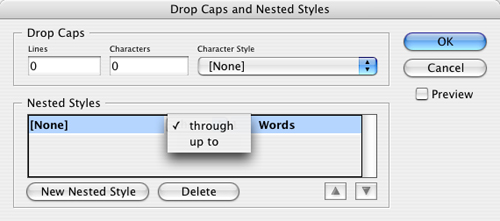 Click the Duration menu to set the extent to which the formatting is applied.
 - Use the Count field to set how many repeating characters should occur before the character style ends.
- Use the Repeating Element menu to set which element controls the nested style
 .
.
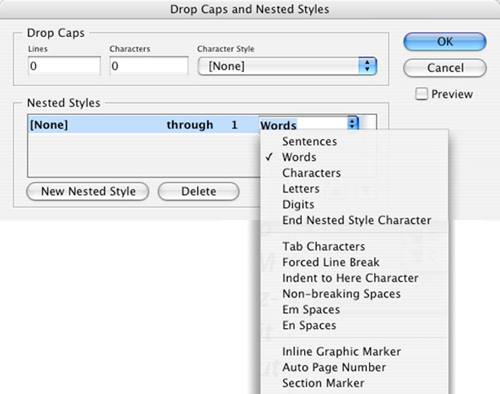 Click the Repeating Element menu to choose the element that ends the nested style.
 - Click OK to apply the nested style.
or
Click the New Nested Style button to add more nested styles for other parts of the text.
To change the order of multiple nested styles:
- Select the nested style you want to move.
- Click the up or down arrow to move the nested style to a new position
 .
.
 Use the up/down arrows to change the order of nested styles.
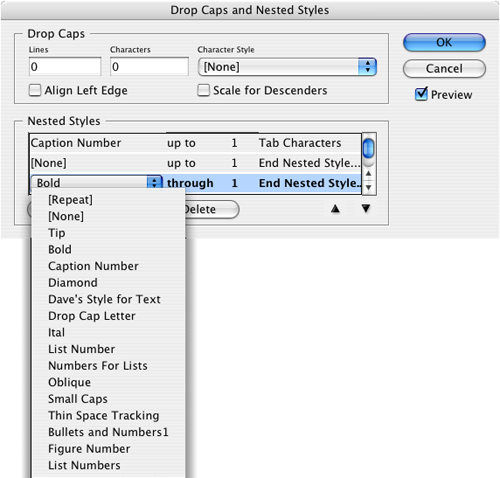
What if you know your repeating elements are going to repeat over and over? For instance, you want to change from bold to italic after every comma. Instead of setting a long string of nested styles, you can loop them.
To loop two or more nested styles:
- Choose Repeat from the Character Style list
 .
.
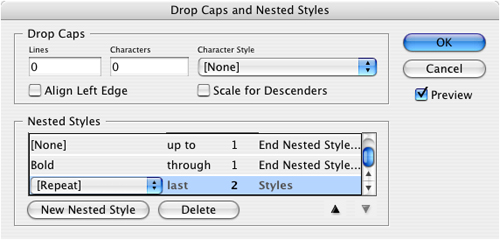 The Repeat command in the Character Style list is used to loop two or more nested styles.
 - Set the number for how many styles should loop.
If you don’t have any repeating element in the text, you can insert the End Nested Style Here Character to control the appearance of a nested style.
To manually insert the End Nested Style Here Character:
- Place your insertion point where you want the End Nested Style Here Character to appear.
- Choose Type > Insert Special Character > Other > End Nested Style Here. This inserts the End Nested Style Here character into the text
 .
.
 The End Nested Style Here character can be inserted to end the effects of a nested style.
Defining Object Styles
Just as character and paragraph styles make it easy to apply formatting to text, object styles make it easy to apply formatting to objects. InDesign comes with three built-in object style settings.
To apply the built-in object styles:
- Select the object you want to style.
- Choose Window > Object Styles to open the Object Styles panel
 .
.
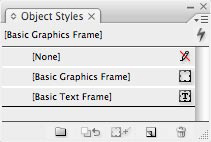 The three built-in object style settings in the Object Styles panel.
 - Click one of the following in the Object Styles panel:
• [Basic Graphics Frame] applies the default object settings for graphic frames.
• [Basic Text Frame] applies the default settings for text frames.
• [None] removes all formatting from the object.
- Double-click the Basic Graphics Frame or Basic Text Frame style. This opens the Object Style Options dialog box.
- Click each of the categories on the left side of the dialog box. This displays the settings for each category
 .
.
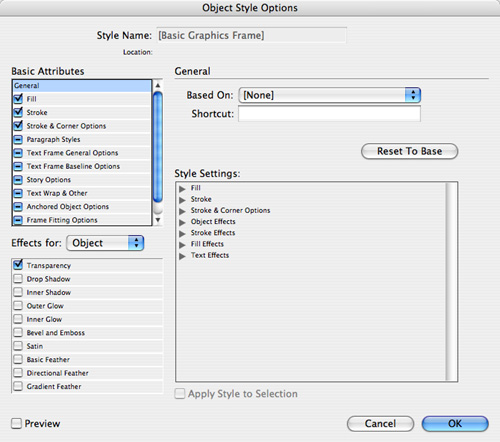 The Object Style Options dialog box lets you modify the object style attributes.
 - Make whatever changes you like to each of the category settings.
- Use the Style Settings controls to see a description of the settings for each category
 .
.
 Click the Style Settings controls to see the description of the settings for each category.
You will most likely want to create your own object styles.
- Choose New Style from the Object Styles panel menu.
or
Hold the Opt/Alt key and click the New Object Style icon in the Object Styles panel. The New Object Styles dialog box appears
 .
.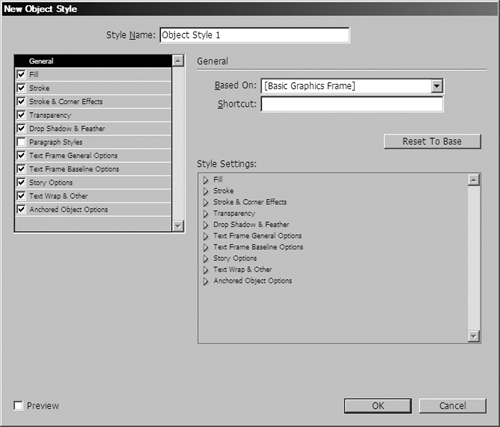 Use the New Object Styles dialog box to define the attributes of an object style.
 - Use the Name field to name the style.
- Use the checkboxes to control which categories are part of the style
 . Unchecked categories are not part of the style .
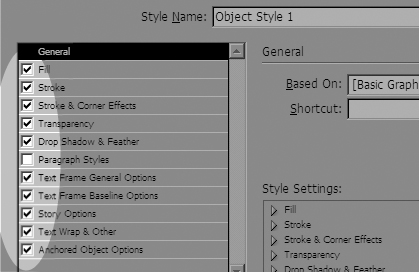 Click the category controls to choose which attributes should be included in the object style.
 - Use the Based On field to base one style on another.
- Click the Reset To Base button to remove all differences between one style based on another.
- Click OK to create the style.
The easier way to define an object style is to format the object and define the style by example.
To define an object style by example:
- Select a sample object.
- Use the panels and commands to format the object.
- Choose New Object Style from the Object Styles panel menu.
or
Hold the Opt/Alt key and click the New Style icon in the Object Styles panel. The New Object Styles dialog box appears.
- Name the style.
- Click OK to create the style.
Working with Object Styles
For the most part, you work with object styles as you would text styles. However, there is a difference in how the default object style is applied. With text styles, whichever style is highlighted with no text selected will become the default style. But with object styles, you need to choose a default for either graphic frames or text frames.
To change the default object styles:
• Drag the default graphic frame icon to a new object style ![]() .
.
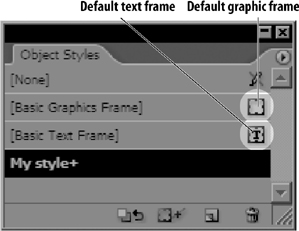
![]() The two default icons for objects styles indicate which style is the default for new objects.
The two default icons for objects styles indicate which style is the default for new objects.
or
Drag the default text frame icon to a new object style.
Like text styles, a plus (+) sign next to an object style name indicates that local formatting changes have been made to the object. However, you may also have made changes to the object in categories that were not selected in the object style. This local formatting is not indicated by a plus sign.
To clear local formatting not defined in the style:
- Select the object that has the modifications to the object style.
- Click the Clear Overrides Not Defined in the Style icon to clear the local formatting applied to the object
 .
.
 There are two ways to clear overrides applied to object styles.
Defining Table and Cell Styles
If you create just one or two tables in a document, you most likely won’t have to worry about table and cell styles. But anyone who creates a lot of tables will enjoy how these features automate their work. As you work with table and cell styles, it is best to start by defining cell styles.
- Choose New Cell Style from the Cell Styles panel menu. The New Cell Style dialog box appears
 .
.
 Use the New Cell Style dialog box to define the attributes of cells.
 - Name the style and set the Style Info controls.
- If you want, you can use the Paragraph Style list to choose a default paragraph style for table cells.
- If desired, choose each of the Cell Styles categories to select the attributes of the style
 .
.
 The Cell Styles categories let you define the attributes of a cell style.
Tip
Unlike the relationship between paragraph and character styles, the formatting of cell styles is not duplicated by a table style. This means you must define a cell style if you want the cells in a table to be controlled by a style.
Once you have defined your cell styles, you can then “move up the ladder” to define table styles.
- Choose New Table Style from the Table Styles panel menu. The New Table Style dialog box appears
 .
.
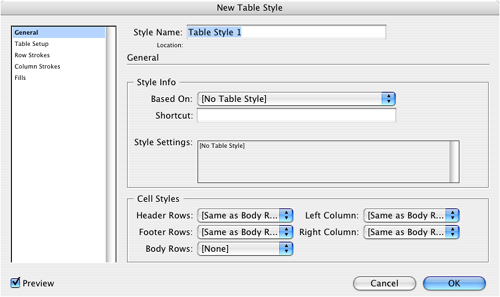 Use the New Table Style dialog box to define the attributes of tables.
 - Use the Cell Styles pop-up lists to apply a cell style to the cells in each position of the table
 . (That’s why you needed to define the cell styles first.)
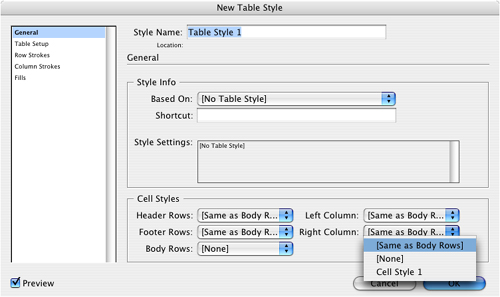 Use the Cell Styles pop-up lists to apply a cell style to the cells in the various positions of the table.
 - If desired, choose each of the Table Styles Categories to select the attributes of the style
 .
.
 The Table Styles categories let you define the attributes of a table style.
Tip
The Style Settings area displays a description of the attributes for the table style
 .
.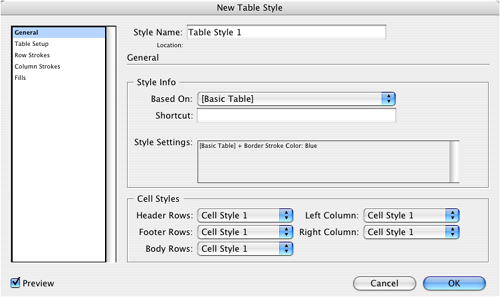 The Style Settings area shows you the defined attributes of a table style.
Using the Quick Apply Feature
Once you have defined your text and object styles, there is a very easy way to quickly apply them to text and objects. The Quick Apply feature works entirely from the keyboard—no mouse required!
To use Quick Apply to apply styles:
- Select the text, table, or object that you want to apply the style to.
- Press Cmd/Ctrl and then press Return/Enter to open the Quick Apply panel
 .
.
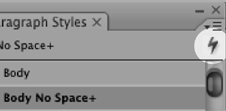 The Quick Apply icon appears in all the style panels as well as the Control panel.
or
Click the Quick Apply icon on any of the style panels or the Control panel.
- Type a few of the letters that appear in the name of the style. As you type, the Quick Apply area shows just those styles that contain the letters.
- Keep typing until you have the style you want
 .
.
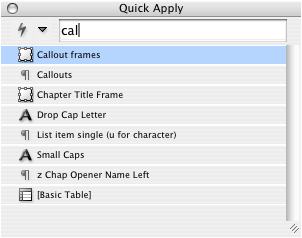 As you type in the Quick Apply field, the list shows just the styles that contain those letters.
or
Use the up and down arrow keys to move to the style you want.
- Press the Return/Enter key to select the style.
Tip
Quick Apply remembers the last selected style, so you can open Quick Apply and simply press Return/Enter to apply the same style to another selection.
You can even use Quick Apply to edit the styles dialog box for the selected Quick Apply style.
To edit a style through Quick Apply:
- Open the Quick Apply panel.
- Type or navigate to get to the style that you want to edit.
- Press Cmd-Return (Mac) or Control-Enter (Windows). This opens the dialog box for that style.
In addition to paragraph, character, object, table, and cell styles, Quick Apply can also apply menu commands, text variables, and scripts. However, you may not want to wade through hundreds of menus and scripts before getting to your own style. That’s when you can customize the settings for Quick Apply.
To customize the results for Quick Apply:
- Open the Quick Apply panel.
- Press the menu control to open the list of items that Quick Apply will apply
 .
.
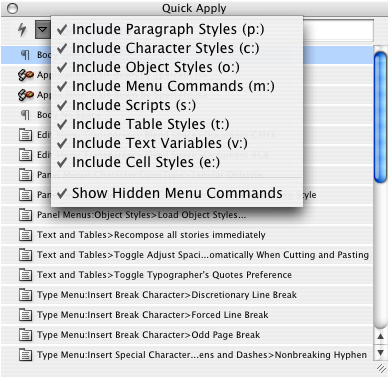 Use the Quick Apply menu control to open the list of items that will be displayed as part of Quick Apply.
 - Check those items you want to have displayed using Quick Apply. Unchecked items are not displayed using Quick Apply.
You can also use the prefix letters for each of the styles, commands, or scripts that are part of a Quick Apply display.
To use the letter commands with Quick Apply:
- Open Quick Apply.
- Type one of the following prefixes before the name of the item you want to apply:
• p: for paragraph styles
• c: for character styles
• o: for object styles
• m: for menu commands
• s: for scripts
• t: for table styles
• v: for text variables
• e: for cell styles
- Type the rest of the command or style name.
- Press Return/Enter to apply the Quick Apply item.