Chapter 23. Greasemonkey: Enhancing the Web with JavaScript
One of the recent trends is that JavaScript is being used in new ways, both inside and outside web browsers. In this chapter, you’ll look at Greasemonkey, a Firefox extension that enables you to write scripts to modify the appearance and behavior of sites you visit. User scripts can also work in Internet Explorer, Opera, and Safari with the right add-ons, and Chrome has native support for user scripts.
Introducing Greasemonkey
So far in this book, you’ve been using JavaScript to work on your own sites. In this chapter, you’ll take a break from that and learn about a way to use JavaScript on other people’s sites. Greasemonkey is an extension for the Firefox browser that enables user scripts. These are scripts that run as soon as you load a page and can make changes to the page’s DOM.
A user script can be designed to work on all web pages or to only affect particular sites. Here are some of the things user scripts can do:
• Change the appearance of one or more sites—colors, font size, and so on
• Change the behavior of one or more sites with JavaScript
• Fix a bug in a site before the site author does
• Add a feature to your browser, such as text macros—see the Try It Yourself section later in this chapter for an example
As a simple example, a user script called Linkify is provided with Greasemonkey. It affects all pages you visit and turns unlinked URLs into hyperlinks. In other words, the script looks for any string that resembles a URL in the page, and if it finds a URL that is not enclosed in an <a> tag, it modifies the DOM to add a link to the URL.
Greasemonkey scripts can range from simple ones such as Linkify to complex scripts that add a feature to the browser, rearrange a site to make it more usable, or eliminate annoying features of sites such as pop-up ads.
Note
Greasemonkey was created in 2004 by Aaron Boodman. Its official site is http://www.greasespot.net/. At this writing, the current version of Greasemonkey is 0.9.10.
Keep in mind that Greasemonkey doesn’t do anything to the websites you visit—it strictly affects your personal experience with the sites. In this way, it’s similar to other browser customizations, such as personal style sheets and browser font settings.
Installing Greasemonkey in Firefox
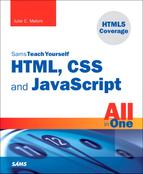
Greasemonkey works in Firefox for Windows, Macintosh, and Linux platforms. You can install it by visiting the http://www.greasespot.net/ and following the Download link. Use the Add To Firefox button to install Greasemonkey (see Figure 23.1). After installation, you might be asked to restart Firefox before Greasemonkey can be used.
Figure 23.1 Use the Add To Firefox button to install Greasemonkey.
Note
When you first install Greasemonkey, the extension doesn’t do anything—you’ll need to install one or more user scripts, as described later in this chapter in “Working with User Scripts,” to make it useful.
Trixie for Internet Explorer
The Greasemonkey extension was written as a Firefox extension and does not work on other browsers (although user scripts do with the right helpers). Fortunately, there’s an alternative for those that prefer Internet Explorer: Trixie is an add-on for Internet Explorer that supports user scripts. Trixie is available free from its official site at http://www.bhelpuri.net/Trixie/. To install Trixie, you will need to make sure that you have the .NET Framework installed.
Trixie supports most of Greasemonkey’s features, and user scripts for Greasemonkey often work with Trixie without modification; however, due to differences between Firefox and Internet Explorer, not all Greasemonkey scripts can be run within IE. See the Trixie site for more detailed information on installing and running Trixie.
Other Browsers
User script features have also appeared for other browsers. Along with Trixie for IE, some other browsers can support user scripts:
• Opera, the cross-platform browser from Opera Software ASA, has built-in support for user scripts and supports Greasemonkey scripts in many cases. See Opera’s site for details at http://www.opera.com/.
• From version 4.0, Google’s Chrome browser has included native support for Greasemonkey scripts. Behind the scenes, these are converted into Chrome extensions.
• Creammonkey is a beta add-on for Apple’s Safari browser to support user scripts. You can find it at http://8-p.info/CreamMonkey/index.html.en.
User Script Security
Before you get into user scripting, a word of warning: Don’t install a script unless you understand what it’s doing or you’ve obtained it from a trustworthy source. Although the Greasemonkey developers have spent a great deal of time eliminating security holes, it’s still possible for a malicious script to cause you trouble—at the very least, it could send information about which sites you visit to a third-party website.
To minimize security risks, be sure you’re running the latest version of Greasemonkey or Trixie. Only enable scripts you are actively using and limit scripts you don’t trust to specific pages so that they don’t run on every page you visit.
Working with User Scripts
User scripts are a whole new way of working with JavaScript—rather than uploading them for use on your website, you install them in the browser for your own personal use. The following sections show you how to find useful scripts and install and manage them.
Finding Scripts
Anyone can write user scripts, and many people have. Greasemonkey sponsors a directory of user scripts at http://userscripts.org/. There you can browse or search for scripts or submit scripts you’ve written.
The script archive has thousands of scripts available. Along with general-purpose scripts, many of the scripts are designed to add features to—or remove annoying features from—particular sites.
Installing a Script
After you’ve found a script you want to install, you can install it from the Web:
• In Firefox with Greasemonkey, open the script in the browser, and then select Tools, Install This User Script from the menu.
• In IE with Trixie, download the script into the Scripts directory under the Trixie installation folder. By default, this is at Program FilesBhelpuriTrixieScripts. Then, go to the Tools menu and select Trixie Options (Alt-T, X). This will show the Trixie Options dialog where you can click on the Reload Scripts button and select OK. This will load your new script and enable it.
You can also install a script from a local file. You’ll use this technique to install your own script later this chapter.
Managing Scripts
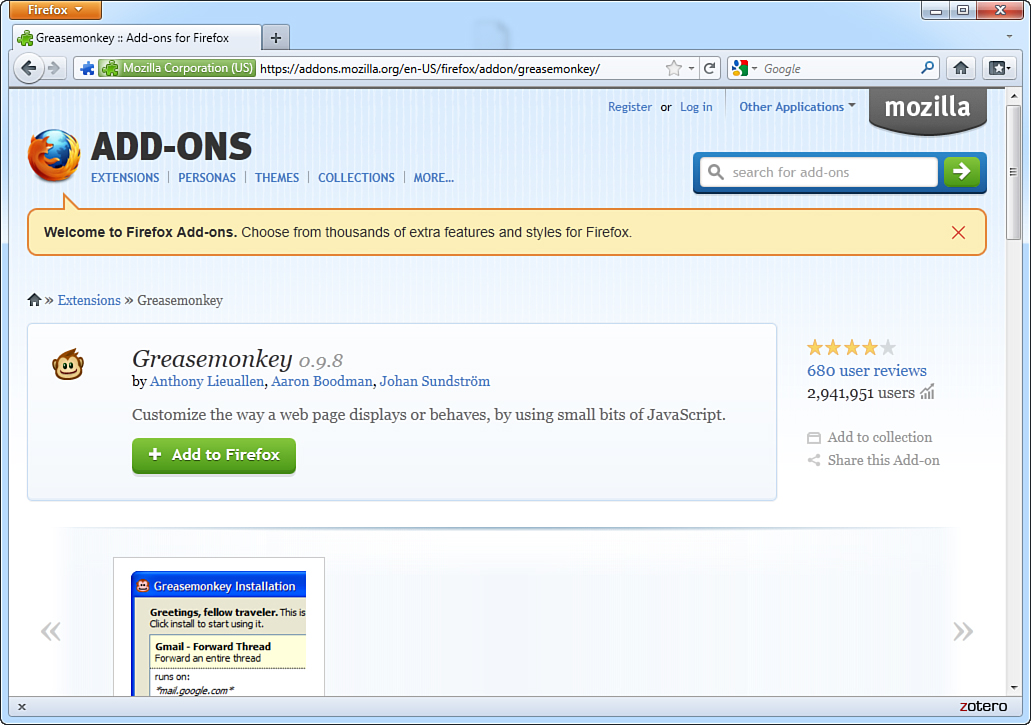
After you’ve installed one or more scripts with Greasemonkey, you can manage them by selecting Greasemonkey, Manage User Scripts from the Firefox menu. The Manage User Scripts dialog is shown in Figure 23.2.
Figure 23.2 Managing user scripts in Greasemonkey.
The user scripts you have available are listed in the right column. Click on a script name to manage it:
• Use the Enable/Disable button to enable or disable each script.
• Click the Remove button to remove a script.
• Right-click and choose Edit to open a script in a text editor. When it is saved, it will immediately take effect on pages you load.
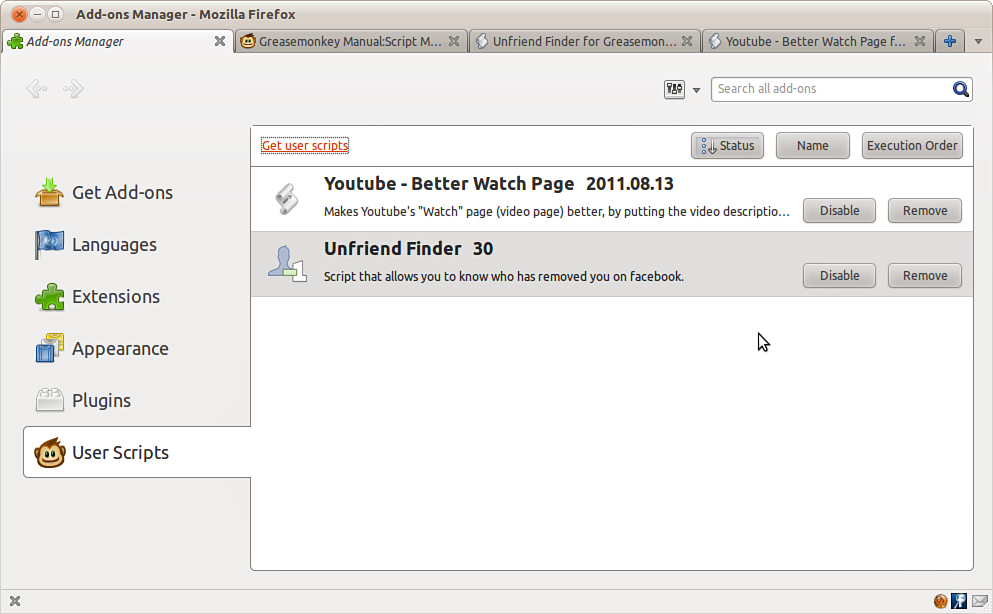
Trixie for IE has a similar dialog. The Trixie Options dialog (Alt-T, X) can be used to manage the scripts you have installed. From this dialog, as shown in Figure 23.3, you can view the scripts installed, enable or disable scripts, or reload scripts. The dialog also shows which sites or pages the script will execute on.
Figure 23.3 The Trixie Options dialog.
Testing User Scripts
If you have a script enabled, it will be activated as soon as you load a page that matches one of the Included Pages specified for the script. (The script is run after the page is loaded, but before the onload event.) If you want to make sure Greasemonkey is running, either try one of the scripts available for a script enabled (it will activate as soon as you load a page that matches one download) or type in the simple script in the next section.
Activating and Deactivating Greasemonkey or Trixie
Sometimes when a script is enabled, it will be activated as soon as you load a page that matches one where you’ll want to turn off Greasemonkey altogether, especially if one of the scripts you’ve installed is causing an error. To do this, right-click on the monkey icon in the lower-right corner of the browser window and select the Enabled option to deselect it. The monkey icon changes to a gray sad-faced monkey, and no user scripts will be run at all. You can re-enable it at any time using the same option.
With Trixie for Internet Explorer, use Explorer’s Manage Add-Ons menu to disable Trixie.
Creating Your Own User Scripts
You’ve already learned most of what you need to know to create user scripts since they’re written in JavaScript. In this section, you’ll create and test a simple script and look at some features you’ll use when creating more advanced scripts.
Creating a Simple User Script
One of the best uses for Greasemonkey is to solve annoyances with sites you visit. For example, a site might use green text on an orange background. Although you could contact the webmaster and beg for a color change, user scripting lets you deal with the problem quickly yourself.
As a simple demonstration of user scripting, you can create a user script that changes the text and background colors of paragraphs in sites you visit. Listing 23.1 shows this user script.
Listing 23.1 A Simple User Script to Change Paragraph Colors
// Change the color of each paragraph
var zParagraphs = document.getElementsByTagName("p");
for (var i=0; i<zParagraphs.length; i++) {
zParagraphs[i].style.backgroundColor="#000000";
zParagraphs[i].style.color="#ffffff";
}
This script uses the getElementsByTagName() DOM method to find all the paragraph tags in the current document and store their objects in the zParagraphs array. The for loop iterates through the array and changes the style.color and style.backgroundColor properties for each one.
Describing a User Script
Greasemonkey supports metadata at the beginning of your script. These are JavaScript comments that aren’t executed by the script, but provide information to Greasemonkey. To use this feature, enclose your comments between // ==UserScript== and // ==/UserScript comments.
The metadata section can contain any of the following directives. All of these are optional, but using them will make your user script easier to install and use.
• @name—A short name for the script, displayed in Greasemonkey’s list of scripts after installation.
• @namespace—An optional URL for the script author’s site. This is used as a namespace for the script: Two scripts can have the same name as long as the namespace is different.
• @description—A one-line description of the script’s purpose.
• @include—The URL of a site on which the script should be used. You can specify any number of URLs, each in its own @include line. You can also use the wildcard * to run the script on all sites or a partial URL with a wildcard to run it on a group of sites.
• @exclude—The URL of a site on which the script should not be used. You can specify a wildcard for @include, and then exclude one or more sites that the script is incompatible with. The @exclude directive can also use wildcards.
Listing 23.2 shows the color-changing example with a complete set of metadata comments added at the top.
Listing 23.2 The Color-Changing Script with Metadata Comments
// ==UserScript==
// @name WhiteOnBlack
// @namespace http://www.thickbook.com/
// @description Display paragraphs in white text on black
// @include *
// ==/UserScript==
//
// Change the color of each paragraph
var zParagraphs = document.getElementsByTagName("p");
for (var i=0; i<zParagraphs.length; i++) {
zParagraphs[i].style.backgroundColor="#000000";
zParagraphs[i].style.color="#ffffff";
}
Testing Your Script
Now that you’ve added the metadata, installing your script is simple. Follow these steps to install the script in Firefox:
1. Save the script file as colors.user.js. The filename must end in .user.js to be recognized as a Greasemonkey script.
2. In Firefox, choose File, Open from the menu.
3. Select your script from the Open File dialog.
4. After the script is displayed in the browser, select Tools, Install This User Script.
5. An alert will display to inform you that the installation was successful. The new user script is now running on all sites.
Both Greasemonkey and Trixie for IE will use the metadata you specified to set the script’s included pages, description, and other options when you install it.
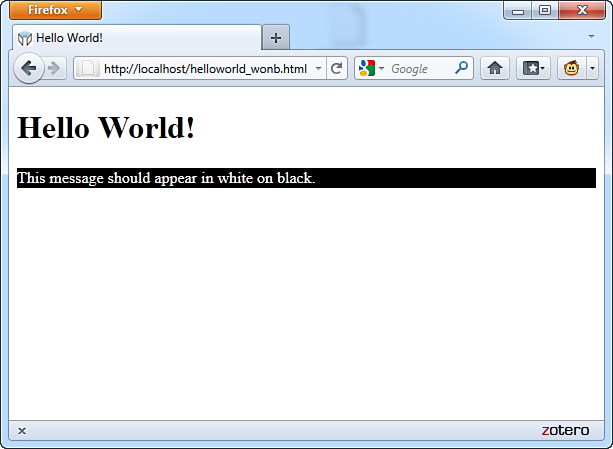
After you’ve installed and enabled the script, any page you load will have its paragraphs displayed in white text on a black background. For example, Figure 23.4 shows the user script’s effect on a simple “Hello World” script. Because the body text is enclosed in a <p> tag, it is displayed in white on black.
Figure 23.4 A basic page altered by the color-changing user script.
Note
You probably don’t want to make a change this drastic to all sites you visit. Instead, you can use @include to make this script affect only one or two sites whose colors you find hard to read. Don’t forget that you can also change the colors in the script to your own preference.
Greasemonkey API Functions
You can use all the DOM methods covered in this book to work with pages in user scripts, along with JavaScript’s built-in functions. In addition to these, Greasemonkey defines an API (application programming interface) with a few functions that can be used exclusively in user scripts:
• GM_log(message, level)—Inserts a message into the JavaScript console. The level parameter indicates the severity of the message: 0 for information, 1 for a warning, and 2 for an error.
• GM_setValue(variable, value)—Sets a variable stored by Greasemonkey. These variables are stored on the local machine. They are specific to the script that set them and can be used in the future by the same script. (These are similar to cookies, but are not sent to a server.)
• GM_getValue(variable)—Retrieves a value previously set with GM_setValue.
• GM_registerMenuCommand(command, function)—Adds a command to the browser menu. These commands appear under Tools, User Script Commands. The command parameter is the name listed in the menu, and function is a function in your script that the menu selection will activate.
• GM_xmlhttpRequest(details)—Requests a file from a remote server, similar to the AJAX features described in Chapter 24, “AJAX: Remote Scripting.” The details parameter is an object that can contain a number of properties to control the request. See the Greasemonkey documentation for all the properties you can specify.
Creating a Site-Specific Script
You might want to use a user script to fix a problem or add a feature to a specific site. For example, you might want to remove all of the advertisements that display on your Facebook profile page—there are numerous Greasemonkey scripts at http://userscripts.org/ to address such an issue. To create such custom scripts, in addition to using @include to specify the site’s URL, you’ll need to know something about the site’s DOM.
You can use the DOM Inspector in Firefox (or the similar feature in Internet Explorer’s developer toolbar) to browse the DOM for the site and find the objects you want to work with. Depending on how they are marked up, you can access them through the DOM:
• If an element has an id attribute, you can simply use document.getElementById() in your script to find its object.
• If a nearby element has an id defined, you can use DOM methods to find it—for example, if the parent element has an id, you can use a method such as firstChild() to find the object you need.
• If all else fails, you can use document.getElementsByTagName() to find all objects of a certain type—for example, all paragraphs. If you need to refer to a specific one, you can use a loop and check each one for a certain attribute.
As an example, Listing 23.3 shows a simple user script you could use as a site-specific script to automatically fill out certain fields in forms.
Listing 23.3 A User Script to Fill Out Form Fields Automatically
// ==UserScript==
// @name AutoForm
// @namespace http://www.thickbook.com/
// @description Fills in forms automatically
// @include *
// ==/UserScript==
// this function fills out form fields
//
var zTextFields = document.getElementsByTagName("input");
for (var i=0; i<zTextFields.length; i++) {
thefield=zTextFields[i].name;
if (!thefield) thefield=zTextFields[i].id;
// Set up your auto-fill values here
if (thefield == "yourname") zTextFields[i].value="Your Name Here";
if (thefield == "phone") zTextFields[i].value="(xxx) xxx-xxxx";
alert("field:" + thefield + " value: " + zTextFields[i].value);
}
This script uses getElementsByTagName() to find all the <input> elements in a document, including text fields. It uses a for loop to examine each one. If it finds a field with the name or id value "yourname" or "phone", it inserts the appropriate value.
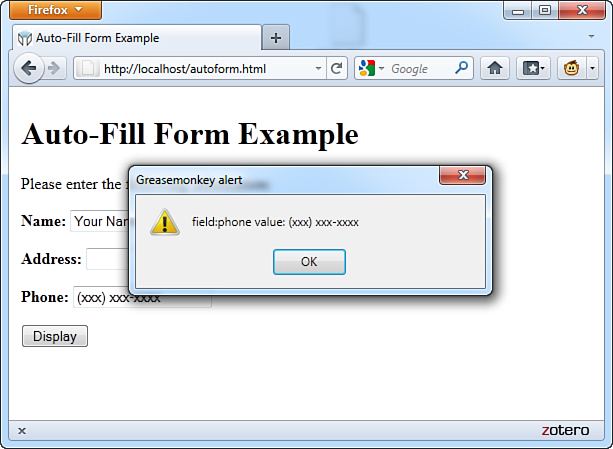
To test this script, save it as autoform.user.js and install the user script as described earlier in this chapter. To test it, save Listing 23.4 as form.html and load it into Firefox—it happens to have both of the field names the script looks for. The yourname and phone fields will be automatically filled out with the value shown first in an alert, as shown in Figure 23.5.
Figure 23.5 The form-filling user script in action.
Listing 23.4 An HTML Form to Test AutoForm
<?xml version="1.0" encoding="UTF-8"?>
<!DOCTYPE html PUBLIC "-//W3C//DTD XHTML 1.1//EN"
"http://www.w3.org/TR/xhtml11/DTD/xhtml11.dtd">
<html xmlns="http://www.w3.org/1999/xhtml" xml:lang="en">
<head>
<title>Auto-Fill Form Example</title>
</head>
<body>
<h1>Auto-Fill Form Example</h1>
<p>Please enter the following information:</p>
<form method="post" action="">
<p><strong>Name:</strong>
<input type="text" size="20" name="yourname" /></p>
<p><strong>Address:</strong>
<input type="text" size="20" name="address" /></p>
<p><strong>Phone:</strong>
<input type="text" size="20" name="phone" /></p>
<p><input type="button" value="Display" onclick="display();" /></p>
</form>
</body>
</html>
To make it easy to test, Listing 23.3 doesn’t include specific sites in the @include line. To make a true site-specific script, you would need to find out the field names for a particular site, add if statements to the script to fill them out, and use @include to make sure the script only runs on the site.
Debugging User Scripts
Debugging a user script is much like debugging a regular JavaScript program—errors are displayed in the JavaScript Console in Firefox or in an error message in Internet Explorer. Here are a few debugging tips:
• As with regular scripts, you can also use the alert() method to display information about what’s going on in your script.
• The browser may display a line number with an error message, but when you’re working with user scripts, these line numbers are meaningless—they refer neither to lines in your user script nor to the page you’re currently viewing.
• Use the GM_log() method described earlier in this chapter to log information about your script, such as the contents of variables, to the JavaScript console.
• If you’re trying to write a cross-browser user script, watch for methods that are browser specific. See Chapter 21, “Using Unobtrusive JavaScript,” for information about cross-browser issues.
• Watch for conflicts with any existing scripts on the page.
• If you’re using multiple user scripts, be sure they don’t conflict. Use unique variable and function names in your scripts.
Most of the issues with user scripts are the same as for regular JavaScript.
Summary
In this chapter, you’ve learned how to use Greasemonkey for Firefox—and its counterpart for Internet Explorer, Trixie—to enable user scripting in your browser. You’ve learned how user scripts work and how to install and manage them. Finally, you created two examples of functioning user scripts.
Q&A
Q. Is there any way to prevent users from using Greasemonkey while viewing my site?
A. Because Greasemonkey affects only the user who installed it, it’s usually harmless to allow it. If you still want to prevent its use, this is difficult, but not impossible, and varies with different versions of Greasemonkey. Search the Web to find current solutions.
Q. What if I want to do something more sophisticated, such as modifying Firefox’s menu?
A. This capability does not exist in Greasemonkey, but Firefox extensions are also written in JavaScript. In fact, you can compile a user script into a Firefox extension, and then add more advanced features. See http://www.ghacks.net/2009/08/31/greasemonkey-to-firefox-add-on-compiler/ for details.
Q. What happens when a new version of Firefox or Internet Explorer is released?
A. Although I have faith in the Greasemonkey developers, there’s no guarantee that this extension will work in future browser versions. If you’re concerned about this, you might want to write your own Firefox extension instead.
Q. Are there limits to how much I can modify a page using Greasemonkey?
A. No—in fact, you can yank the entire content of the page’s DOM out and replace it with HTML of your choosing using the innerHTML property. You’d have to do quite a bit of work to make something as useful as the original page, of course.
Workshop
The workshop contains quiz questions and exercises to help you solidify your understanding of the material covered. Try to answer all questions before looking at the “Answers” section that follows.
Quiz
1. Which of the following offers user scripting for Microsoft Internet Explorer?
a. Greasemonkey
b. Microsoft Live Scripting Toolbar
c. Trixie
2. Which of the following is not a valid Greasemonkey API function?
a. GM_log()
b. GM_alert()
c. GM_setValue()
3. Which is the correct @include directive to run a script on both www.google.com and google.com?
a. @include *.google.com
b. @include www.google.com.*
c. @include google.com
Answers
1. c. Trixie is a user script add-on for Internet Explorer.
2. b. There is no GM_alert() method, although the standard alert() method will work in a user script.
3. a. Using @include *.google.com will run the script on any page on any site within the google.com domain.
Exercises
• Modify the color-changing user script in Listing 23.2 to use different colors and add another style attribute—for example, use style.fontSize to change the font size.
• The color-changing example works on paragraphs, but text often appears in other places, such as bullet lists. Modify Listing 23.2 to make the changes to <li> tags and paragraphs.
• Currently, the macro example in the Try It Yourself section only works on text inputs that use <textarea> tags. Modify the script in Listing 23.3 to work on <input> tags also. (You’ll need to add a second call getElementsByTagName() and a loop to add the event handlers.)