Chapter 13. Understanding Dynamic Websites
The term dynamic means something active or something that motivates another to become active.
When talking about websites, a dynamic website is one that incorporates interactivity into its functionality and design, but also motivates a user to take an action—read more, purchase a product, and so on. In this chapter, you’ll learn a little bit about the different types of interactivity that can make a site dynamic, including information about both server-side and client-side scripting (as well as some practical examples of the latter, leading to the all the remaining chapters in this book that are specifically geared toward programming with JavaScript).
You’ve had a brief introduction to client-side scripting in Chapter 4, “Understanding JavaScript,” and you used a little of it in Chapter 11, “Using CSS to Do More with Lists, Text, and Navigation,” when you used event attributes and JavaScript to change the styles of particular elements—that is called manipulating the Document Object Model (DOM). You will do a bit more of that type of manipulation in this chapter before attacking the language with gusto in the following chapters.
Understanding the Different Types of Scripting
In web development, there are two different types of scripting: server-side and client-side. Server-side scripting is beyond the scope of this book, although not too far beyond. In fact, Sams Teach Yourself PHP, MySQL and Apache All in One is a natural extension of this book—in my not-so-humble opinion of it (as its author).
Server-side scripting refers to scripts that run on the web server, which then sends results to your web browser. If you have ever submitted a form at a website, which includes using a search engine, you have experienced the results of a server-side script. Popular server-side scripting languages include the following (to learn more, visit the websites listed here):
• PHP (PHP: Hypertext Preprocessor)—http://www.php.net/
• JSP (Java Server Pages)—http://java.sun.com/products/jsp/
• ASP (Active Server Pages)—http://www.asp.net/
• Perl—http://www.perl.org/
• Python—http://www.python.org/
• Ruby—http://www.ruby-lang.org/
Note
Despite its name, JavaScript is not a derivation or any other close relative to the object-oriented programming language called Java. Released by Sun Microsystems in 1995, Java is very closely related to the server-side scripting language JSP. JavaScript was created by Netscape Communications, also in 1995, and given the name to indicate a similarity in appearance to Java but not a direct connection with it.
On the other hand, client-side scripting refers to scripts that run within your web browser; there is no interaction with a web server in order for the scripts to run. The most popular client-side scripting language, by far, is JavaScript. For several years, research has shown that more than 93% of all web browsers have JavaScript enabled.
Another client-side scripting language is Microsoft’s VBScript (Visual Basic Scripting Edition). This language is only available with Microsoft Internet Explorer web browser, and therefore, it should not be used unless you are sure that users will access your site with that web browser (such as in a closed corporate environment).
Including JavaScript in HTML
Much of this chapter is a refresher from Chapter 4; I thought it would be a good idea to revisit some of the basics of JavaScript after the HTML and CSS chapters and before the heavy-duty client-side application programming begins.
If you recall, JavaScript code can live in one of two places within your files:
• In its own file with a .js extension
• Directly in your HTML files
External files are often used for script libraries (code you can reuse throughout many pages), whereas code appearing directly in the HTML files tends to achieve functionality specific to those individual pages. Regardless of where your JavaScript lives, your browser learns of its existence through the use of the <script></script> tag pair.
When you store your JavaScript in external files, it is referenced in this manner:
<script type="text/javascript" src="/path/to/script.js">
These <script></script> tags are typically placed between the <head></head> tag because it is not, strictly speaking, content that belongs in the <body> of the page. Instead, the <script> makes available a set of JavaScript functions or other information that the rest of the page can then use. However, you can also just encapsulate your JavaScript functions or code snippets with the <script> and place them anywhere in the page, as needed. Listing 13.1 shows an example of a JavaScript snippet placed in the <body> of an HTML document.
Listing 13.1 Using JavaScript to Print Some Text
<?xml version="1.0" encoding="UTF-8"?>
<!DOCTYPE html PUBLIC "-//W3C//DTD XHTML 1.1//EN"
"http://www.w3.org/TR/xhtml11/DTD/xhtml11.dtd">
<html xmlns="http://www.w3.org/1999/xhtml" xml:lang="en">
<head>
<title>JavaScript Example</title>
</head>
<body>
<h1>JavaScript Example</h1>
<p>This text is HTML.</p>
<script type="text/javascript">
<!-- Hide the script from old browsers
document.write('<p>This text comes from JavaScript.</p>'),
// Stop hiding the script -->
</script>
</body>
</html>
Between the <script></script> tags is a single JavaScript command that outputs the following HTML:
<p>This text comes from JavaScript.</p>
When the browser renders this HTML page, it sees the JavaScript between the <script></script> tags, stops for a millisecond to execute the command, and then returns to rendering the output that now includes the HTML output from the JavaScript command. Figure 13.1 shows that this page appears as any other HTML page appears. It’s an HTML page, but only a small part of the HTML comes from a JavaScript command.
Figure 13.1 The output of a JavaScript snippet looks like any other output.

Note
You might have noticed these two lines in Listing 13.1:
<!-- Hide the script from old browsers
// Stop hiding the script -->
This is an HTML comment. Anything between the <!-- start and the --> end will be visible in the source code, but will not be rendered by the browser. In this case, JavaScript code is surrounded by HTML comments on the off chance that your visitor is running a very old web browser or has JavaScript turned off.
Displaying Random Content
You can use JavaScript to display something different each time a page is loaded. Maybe you have a collection of text or images that you find interesting enough to include in your pages?
I’m a sucker for a good quote. If you’re like me, you might find it fun to incorporate an ever-changing quote into your web pages. To create a page with a quote that changes each time the page loads, you must first gather all your quotes together, along with their respective sources. You’ll then place these quotes into a JavaScript array, which is a special type of storage unit in programming languages that is handy for holding lists of items.
After the quotes are loaded into an array, the JavaScript used to pluck out a quote at random is fairly simple. You’ve already seen the snippet that will print the output into your HTML page.
Listing 13.2 contains the complete HTML and JavaScript code for a web page that displays a random quote each time it loads.
Listing 13.2 A Random-Quote Web Page
<?xml version="1.0" encoding="UTF-8"?>
<!DOCTYPE html PUBLIC "-//W3C//DTD XHTML 1.1//EN"
"http://www.w3.org/TR/xhtml11/DTD/xhtml11.dtd">
<html xmlns="http://www.w3.org/1999/xhtml" xml:lang="en">
<head>
<title>Quotable Quotes</title>
<script type="text/javascript">
<!-- Hide the script from old browsers
function getQuote() {
// Create the arrays
quotes = new Array(4);
sources = new Array(4);
// Initialize the arrays with quotes
quotes[0] = "When I was a boy of 14, my father was so " +
"ignorant...but when I got to be 21, I was astonished " +
"at how much he had learned in 7 years.";
sources[0] = "Mark Twain";
quotes[1] = "Everybody is ignorant. Only on different " +
"subjects.";
sources[1] = "Will Rogers";
quotes[2] = "They say such nice things about people at " +
"their funerals that it makes me sad that I'm going to " +
"miss mine by just a few days.";
sources[2] = "Garrison Keilor";
quotes[3] = "What's another word for thesaurus?";
sources[3] = "Steven Wright";
// Get a random index into the arrays
i = Math.floor(Math.random() * quotes.length);
// Write out the quote as HTML
document.write("<dl style='background-color: lightpink'>
");
document.write("<dt>" + ""<em>" + quotes[i] + "</em>"
");
document.write("<dd>" + "- " + sources[i] + "
");
document.write("<dl>
");
}
// Stop hiding the script -->
</script>
</head>
<body>
<h1>Quotable Quotes</h1>
<p>Following is a random quotable quote. To see a new quote just
reload this page.</p>
<script type="text/javascript">
<!-- Hide the script from old browsers
getQuote();
// Stop hiding the script -->
</script>
</body>
</html>
Although this code looks kind of long, if you look carefully, you’ll see that a lot of it consists of the four quotes available for display on the page. After you get past the length, the code itself isn’t too terribly complex.
The large number of lines between the first set of <script></script> tags is creating a function called getQuote(). After a function is defined, it can be called in other places in the same page. Note that if the function existed in an external file, the function could be called from all your pages.
If you look closely at the code, you will see some lines like this:
// Create the arrays
and
// Initialize the arrays with quotes
These are code comments. The developer uses these comments to leave notes in the code so that anyone reading it has an idea of what the code is doing in that particular place. After the first comment about creating the arrays, you can see that two arrays are created—one called quotes and one called sources—each containing four elements:
quotes = new Array(4);
sources = new Array(4);
After the second comment (about initializing the arrays with quotes), four items are added to the arrays. We’ll look closely at one of them, the first quote by Mark Twain:
quotes[0] = "When I was a boy of 14, my father was so " +
"ignorant...but when I got to be 21, I was astonished at " +
"how much he had learned in 7 years.";
sources[0] = "Mark Twain";
You already know that the arrays are named quotes and sources. But the variable to which values are assigned (in this instance) are called quotes[0] and sources[0]. Because quotes and sources are arrays, the items in the array will each have their own position. When using arrays, the first item in the array is not in slot #1; it is in slot #0. In other words, you begin counting at 0 instead of 1. Therefore, the text of the first quote (a value) is assigned to quotes[0] (a variable). Similarly, the text of the first source is assigned to source[0].
Text strings are enclosed in quotation marks. However, in JavaScript, a line break indicates an end of a command, such that the following would cause problems in the code:
quotes[0] = "When I was a boy of 14, my father was so
ignorant...but when I got to be 21, I was astonished at
how much he had learned in 7 years.";
Therefore, you see that the string is built as a series of strings enclosed in quotation marks, with a plus sign (+) connecting the strings.
The next chunk of code definitely looks the most like programming; this line gets a random number:
i = Math.floor(Math.random() * quotes.length);
But you can’t just pick any random number because the purpose of the random number is to determine which of the quotes and sources should be printed—and there are only four quotes. So, this line of JavaScript does the following:
• Uses Math.random() to get a random number between 0 and 1. For example, 0.5482749 might be a result of Math.random().
• Multiplies the random number by the length of the quotes array, which is currently 4; the length of the array is the number of elements in the array. If the random number is 0.5482749 (as shown previously), multiplying that by 4 results in 2.1930996.
• Uses Math.floor() to round the result down to the nearest whole number. In other words, 2.1930996 turns into 2.
• Assigns the variable i a value of 2.
The rest of the function should look familiar, with a few exceptions. First, as you learned earlier this chapter, document.write() is used to write HTML, which is then rendered by the browser. Next, the strings are separated to make it clear when something needs to be handled differently, such as escaping the quotation marks with a backslash when they should be printed literally (”) or when the value of a variable is substituted. The actual quote and source that is printed is the one that matches quotes[i] and sources[i], where i is the number determined by the mathematical functions shown previously.
But the act of simply writing the function doesn’t mean that any output will be created. Further on in the HTML, you can see getQuote(); between two <script></script> tags; that is how the function is called. Wherever that function call is made, that is where the output of the function will be placed. In this example, the output displays below a paragraph that introduces the quotation.
Figure 13.2 shows the Quotable Quotes page as it appears when loaded in a web browser. When the page reloads, there is a one in four chance a different quote displays—it is random, after all!
Figure 13.2 The Quotable Quotes page displays a random quote each time it is loaded.
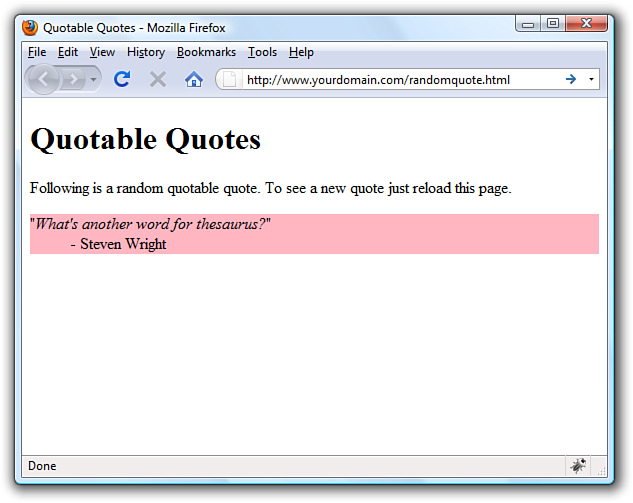
Keep in mind that you can easily modify this page to include your own quotes or other text that you want to display randomly. You can also increase the number of quotes available for display by adding more entries in the quotes and sources arrays in the code.
If you use the Quotable Quotes page as a starting point, you can easily alter the script and create your own interesting variation on the idea. And if you make mistakes along the way, so be it. The trick to getting past mistakes in script code is to be patient and carefully analyze the code you’ve entered. You can always remove code to simplify a script until you get it working, and then add new code one piece at a time to make sure each piece works.
Understanding the Document Object Model
Client-side interactivity using JavaScript typically takes the form of manipulating the DOM in some way. The DOM is the invisible structure of all documents—not the HTML structure or the way in which you apply levels of formatting, but a sort of overall framework or container. If this description seems vague, that’s because it is; it’s not a tangible object.
The overall container object is called the document. Any container within the document that has an ID is referenced by that ID. For example, if you have a <div> with an ID called wrapper, then in the DOM that element is referenced by the following:
document.wrapper
In Chapter 11, you changed the visibility of a specific element by changing something in the style object associated with it. If you wanted to access the background-color style of the <div> with an ID called wrapper, it would be referred to as:
document.wrapper.style.background-color
To change the value of that style to something else, perhaps based on an interactive user event, use the following to change the color to white:
document.wrapper.style.background-color="#ffffff"
The DOM is the framework behind your ability to refer to elements and their associated objects in this way. Obviously, this is a brief overview of something quite complicated, but at least you can now begin to grasp what this document-dot-something business is all about. To learn a lot more about the DOM, visit the World Wide Web Consortium’s information about the DOM at http://www.w3.org/DOM/.
Changing Images Based on User Interaction
In Chapter 11, you were introduced to the different types of user interaction events, such as onclick, onmouseover, onmouseout, and so on. In that chapter, you invoked changes in text based on user interaction; in this section, you’ll see an example of a visible type of interaction that is both practical and dynamic.
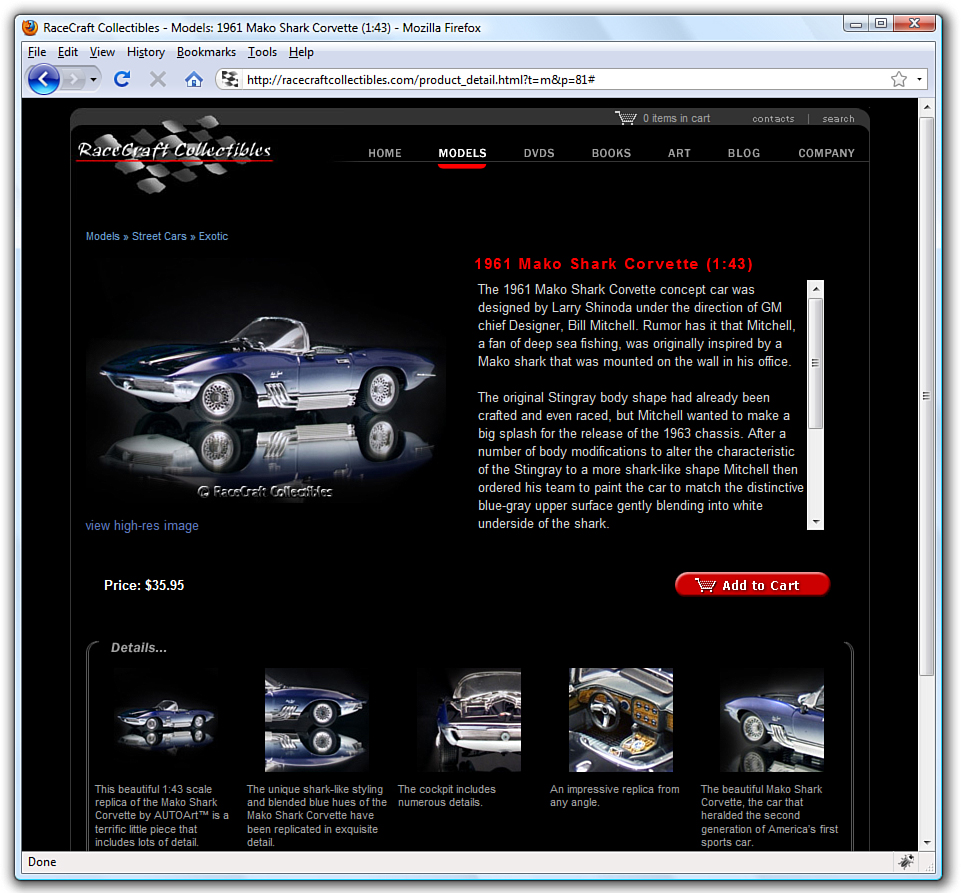
Figure 13.3 shows a page from an online catalog for a collectibles company. Each page in the catalog shows a large image, information about the item, and a set of smaller images at the bottom of the page. In this type of catalog, close-up images of the details of each item are important to the potential buyer, but several large images on a page becomes unwieldy from both a display and bandwidth point of view.
Figure 13.3 The catalog item page when first loaded by the user.
The large image on the page is called using this <img/> tag:
<img name="product_img" src="/path/to/image.jpg" alt="photo" />
As you can see, this image is given a name of product_img. Therefore, this image exists in the DOM as document.product_img. This is important because a little bit of JavaScript functionality enables us to dynamically change the value of document.product_img.src, which is the source (src) of the image.
The following code snippet creates the fourth small image in the group of five images shown at the bottom of Figure 13.3. The onmouseover event indicates that when the user rolls over this small image, the value of document.product_img.src—the large image slot—is filled with the path to a matching large image.
<a href="#" onmouseover="javascript:document.product_img.src =
'/path/to/large4.jpg'"><img src="/path/to/small4.jpg"
width="104" height="104" style="padding: 4px; border: 0px"
alt="photo" /></a>
Figure 13.4 shows the same page—not reloaded by the user—whereby the slot for the large image is filled by a different image when the user rolls over a smaller image at the bottom of the page. The mouse pointer hovers over the second image from the right. As the user rolls over the small version of the interior photo, the large version of it is shown in the top area on the page.
Figure 13.4 The large image is replaced when the user rolls over a smaller one.

Summary
In this brief chapter, you were reminded of the differences between server-side scripting and client-side scripting, and you got a refresher for including JavaScript in your HTML files to add a little interactivity to your websites. You also learned how to use the JavaScript document.write() method to display random quotes upon page load. Lastly, you learned what the DOM is all about.
By applying the knowledge you’ve gained from previous chapters, you’ve learned how to use client-side scripting to make images on a web page respond to mouse movements. None of these tasks requires much in the way of programming skills, but it should inspire you to continue on throughout the book and to learn more about JavaScript to give your pages more complex interactive features.
Q&A
Q. If I want to use the random quote script from this chapter, but I want to have a library of a lot of quotes, do I have to put all the quotes in each page?
A. Yes. Each item in the array has to be there. This is where you can begin to see a bit of a tipping point between something that can be client-side and something that is better dealt with on the server side. If you have a true library of random quotations and only one is presented at any given time, it’s probably best to store those items in a database table and use a little piece of server-side scripting to connect to that database, retrieve the text, and print it on the page. Alternately, you can always continue to carry all the quotes with you in JavaScript, but you should at least put that JavaScript function into a different file that can be maintained separately from the text.
Q. I’ve seen some online catalogs that display a large image in what looks to be a layer on top of the website content. I can see the regular website content underneath it, but the focus is on the large image. How is that done?
A. The description sounds like an effect created by a JavaScript library called Lightbox. The Lightbox library enables you to display an image, or a gallery of images, in a layer that is placed over your site content. This is a popular library used to show the details of large images or just a set of images deemed important enough to showcase “above” the content, as it were. (To install and use it, follow the instructions included with the software. You will be able to integrate it into your site using the knowledge you’ve gained in this book so far.)
Workshop
The workshop contains quiz questions and exercises to help you solidify your understanding of the material covered. Try to answer all questions before looking at the “Answers” section that follows.
Quiz
1. You’ve made a picture of a button and named it button.gif. You’ve also made a simple GIF animation of the button whereby it flashes green and white. You’ve named that GIF flashing.gif. What HTML and JavaScript code would you use to make the button flash whenever a user moves the mouse pointer over it and also link to a page named gohere.html when a user clicks the button?
2. How would you modify the code you wrote for question 1 so that the button flashes when a user moves his mouse over it and continues flashing even if he moves the mouse away from it?
3. What does the plus sign (+) mean in the following context?
document.write('This is a text string ' + 'that I have created.'),
Answers
1. Your code might look something like this:
<a href="gohere.html"
onmouseover="javascript:document.flasher.src='flashing.gif'"
onmouseout="javascript:document.flasher.src='button.gif'">
<img src="button.gif" id="flasher" style="border-style:none" /></a>
2. Your code might look something like this:
<a href="gohere.html"
onmouseover="javascript:document.flasher.src='flashing.gif'">
<img src="button.gif" id="flasher" style="border-style:none" /></a>
3. The plus sign (+) is used to join two strings together.
Exercises
• Do you have any pages that would look flashier or be easier to understand if the navigation icons or other images changed when the mouse passed over them? If so, try creating some highlighted versions of the images and try modifying your own page using the information presented in this chapter.
• You can display random images—such as graphical banners or advertisements—in the same way you learned to display random content using JavaScript earlier in this chapter. Instead of printing text, just print the <img/> tag for the images you want to display.