Chapter 18. Controlling Flow with Conditions and Loops
Statements in a JavaScript program generally execute in the order in which they appear, one after the other. Because this isn’t always practical, most programming languages provide flow control statements that let you control the order in which code is executed. Functions, which you learned about in the previous chapter, are one type of flow control—although a function might be defined first thing in your code, its statements can be executed anywhere in the script.
In this chapter, you’ll look at two other types of flow control in JavaScript: conditions, which allow a choice of different options depending on a value, and loops, which allow repetitive statements.
The if Statement
One of the most important features of a computer language is the capability to test and compare values. This allows your scripts to behave differently based on the values of variables or based on input from the user.
The if statement is the main conditional statement in JavaScript. This statement means much the same in JavaScript as it does in English—for example, here is a typical conditional statement in English:
If the phone rings, answer it.
This statement consists of two parts: a condition (If the phone rings) and an action (answer it). The if statement in JavaScript works much the same way. Here is an example of a basic if statement:
if (a == 1) window.alert("Found a 1!");
This statement includes a condition (if a equals 1) and an action (display a message). This statement checks the variable a and, if it has a value of 1, displays an alert message. Otherwise, it does nothing.
If you use an if statement like the preceding example, you can use a single statement as the action. You can also use multiple statements for the action by enclosing them in braces ({}), as shown here:
if (a == 1) {
window.alert("Found a 1!");
a = 0;
}
This block of statements checks the variable a once again. If it finds a value of 1, it displays a message and sets a back to 0.
Conditional Operators
The action part of an if statement can include any of the JavaScript statements you’ve already learned (and any others, for that matter), but the condition part of the statement uses its own syntax. This is called a conditional expression.
Note
Either side of the conditional expression can be a variable, a constant, or an expression. You can compare a variable and a value or compare two variables. (You can compare two constants, but there’s usually no reason to.)
A conditional expression usually includes two values to be compared (in the preceding example, the values were a and 1). These values can be variables, constants, or even expressions in themselves.
Between the two values to be compared is a conditional operator. This operator tells JavaScript how to compare the two values. For instance, the == operator is used to test whether the two values are equal. A variety of conditional operators is available:
• ==—Is equal to
• !=—Is not equal to
• <—Is less than
• >—Is greater than
• >=—Is greater than or equal to
• <=—Is less than or equal to
Caution
Be sure not to confuse the equality operator (==) with the assignment operator (=), even though they both might be read as “equals.” Remember to use = when assigning a value to a variable, and == when comparing values. Confusing these two is one of the most common mistakes in JavaScript programming.
Combining Conditions with Logical Operators
Often, you’ll want to check a variable for more than one possible value or check more than one variable at once. JavaScript includes logical operators, also known as Boolean operators, for this purpose. For example, the following two statements check different conditions and use the same action:
if (phone == "") window.alert("error!");
if (email == "") window.alert("error!");
Using a logical operator, you can combine them into a single statement:
if ((phone == "") || (email == "")) window.alert("Something's Missing!");
This statement uses the logical Or operator (||) to combine the conditions. Translated to English, this would be, “If the phone number is blank or the email address is blank, display an error message.”
An additional logical operator is the And operator, &&. Consider this statement:
if ((phone == "") && (email == "")) window.alert("Both are Missing!");
Tip
If the JavaScript interpreter discovers the answer to a conditional expression before reaching the end, it does not evaluate the rest of the condition. For example, if the first of two conditions separated by the && operator is false, the second is not evaluated. You can take advantage of this to improve the speed of your scripts.
This statement uses &&, so the error message will only be displayed if both the email address and phone number variables are blank. (In this particular case, Or is a better choice.)
The third logical operator is the exclamation mark (!), which means Not. It can be used to invert an expression—in other words, a true expression would become false, and a false one would become true. For example, here’s a statement that uses the Not operator:
if (!(phone == "")) alert("phone is OK");
In this statement, the ! (Not) operator inverts the condition, so the action of the if statement is executed only if the phone number variable is not blank. The extra parentheses are necessary because all JavaScript conditions must be in parentheses. You could also use the != (Not equal) operator to simplify this statement:
if (phone != "") alert("phone is OK");
Tip
The logical operators are powerful, but it’s easy to accidentally create an impossible condition with them. For example, the condition ((a < 10) && (a > 20)) might look correct at first glance. However, if you read it aloud, you get “If a is less than 10 and a is greater than 20”—an impossibility in our universe. In this case, Or (||) should have been used.
As with the previous statement, this alerts you if the phone number field is not blank.
The else Keyword
An additional feature of the if statement is the else keyword. Much like its English equivalent, else tells the JavaScript interpreter what to do if the condition isn’t true. The following is a simple example of the else keyword in action:
if (a == 1) {
alert("Found a 1!");
a = 0;
} else {
alert("Incorrect value: " + a);
}
This is a modified version of the previous example. This displays a message and resets the variable a if the condition is met. If the condition is not met (if a is not 1), a different message is displayed.
Note
Like the if statement, else can be followed either by a single action statement or by a number of statements enclosed in braces.
Using Shorthand Conditional Expressions
In addition to the if statement, JavaScript provides a shorthand type of conditional expression that you can use to make quick decisions. This uses a peculiar syntax that is also found in other languages, such as C. A conditional expression looks like this:
variable = (condition) ? (true action) : (false action);
This assigns one of two values to the variable: one if the condition is true, and another if it is false. Here is an example of a conditional expression:
value = (a == 1) ? 1 : 0;
This statement might look confusing, but it is equivalent to the following if statement:
if (a == 1) {
value = 1;
} else {
value = 0;
}
In other words, the value after the question mark (?) will be used if the condition is true, and the value after the colon (:) will be used if the condition is false. The colon represents the else portion of this statement and, like the else portion of the if statement, is optional.
These shorthand expressions can be used anywhere JavaScript expects a value. They provide an easy way to make simple decisions about values. As an example, here’s an easy way to display a grammatically correct message about a variable:
document.write("Found " + counter +
((counter == 1) ? " word." : " words."));
This will print the message Found 1 word if the counter variable has a value of 1 and Found 2 words if its value is 2 or greater. This is one of the most common uses for a conditional expression.
Testing Multiple Conditions with if and else
You can now create an example script using if and else. In Chapter 4, “Understanding JavaScript,” you created a simple script that displays the current date and time. This example will use conditions to display a greeting that depends on the time: “Good morning,” “Good afternoon,” “Good evening,” or “Good day.” To accomplish this, you can use a combination of several if statements:
if (hours < 10) {
document.write("Good morning.");
} else if (hours >= 14 && hours <= 17) {
document.write("Good afternoon.");
} else if (hours >= 17) {
document.write("Good evening.");
} else {
document.write("Good day.");
}
The first statement checks the hours variable for a value less than 10—in other words, it checks whether the current time is before 10:00 a.m. If so, it displays the greeting “Good morning.”
The second statement checks whether the time is between 2:00 p.m. and 5:00 p.m. and, if so, displays “Good afternoon.” This statement uses else if to indicate that this condition will only be tested if the previous one failed—if it’s morning, there’s no need to check whether it’s afternoon. Similarly, the third statement checks for times after 5:00 p.m. and displays “Good evening.”
The final statement uses a simple else, meaning it will be executed if none of the previous conditions matched. This covers the times between 10:00 a.m. and 2:00 p.m. (neglected by the other statements) and displays “Good day.”
The HTML File
To try this example in a browser, you’ll need an HTML file. We will keep the JavaScript code separate, so Listing 18.1 is the complete HTML file. Save it as timegreet.html, but don’t load it into the browser until you’ve prepared the JavaScript file in the next section.
Listing 18.1 The HTML File for the Time and Greeting Example
<?xml version="1.0" encoding="UTF-8"?>
<!DOCTYPE html PUBLIC "-//W3C//DTD XHTML 1.1//EN"
"http://www.w3.org/TR/xhtml11/DTD/xhtml11.dtd">
<html xmlns="http://www.w3.org/1999/xhtml" xml:lang="en">
<head>
<title>Time Greet Example</title>
</head>
<body>
<h1>Current Date and Time</h1>
<script type="text/javascript" src="timegreet.js" > </script>
</body>
</html>
The JavaScript File
Listing 18.2 shows the complete JavaScript file for the time greeting example. This uses the built-in Date object functions to find the current date and store it in hours, mins, and secs variables. Next, document.write statements display the current time, and the if and else statements introduced earlier display an appropriate greeting.
Listing 18.2 A Script to Display the Current Time and a Greeting
// Get the current date
now = new Date();
// Split into hours, minutes, seconds
hours = now.getHours();
mins = now.getMinutes();
secs = now.getSeconds();
// Display the time
document.write("<h2>");
document.write(hours + ":" + mins + ":" + secs);
document.write("</h2>");
// Display a greeting
document.write("<p>");
if (hours < 10) {
document.write("Good morning.");
} else if (hours >= 14 && hours <= 17) {
document.write("Good afternoon.");
} else if (hours >= 17) {
document.write("Good evening.");
} else {
document.write("Good day.");
}
document.write("</p>");
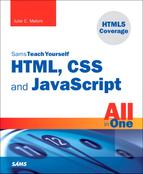
To try this example, save this file as timegreet.js, and then load the timegreet.html file into your browser. Figure 18.1 shows the results of this script.
Figure 18.1 The output of the time greeting example.
Using Multiple Conditions with switch
In the previous example, you used several if statements in a row to test for different conditions. Here is another example of this technique:
if (button=="next") {
window.location="next.html";
} else if (button=="previous") {
window.location="prev.html";
} else if (button=="home") {
window.location="home.html";
} else if (button=="back") {
window.location="menu.html";
}
Although this is a compact way of doing things, this method can get messy if each if statement has its own block of code with several statements. As an alternative, JavaScript includes the switch statement, which enables you to combine several tests of the same variable or expression into a single block of statements. The following shows the same example converted to use switch:
switch(button) {
case "next":
window.location="next.html";
break;
case "previous":
window.location="prev.html";
break;
case "home":
window.location="home.html";
break;
case "back":
window.location="menu.html";
break;
default:
window.alert("Wrong button.");
}
The switch statement has several components:
• The initial switch statement. This statement includes the value to test (in this case, button) in parentheses.
• Braces ({ and }) enclose the contents of the switch statement, similar to a function or an if statement.
• One or more case statements. Each of these statements specifies a value to compare with the value specified in the switch statement. If the values match, the statements after the case statement are executed. Otherwise, the next case is tried.
• The break statement is used to end each case. This skips to the end of the switch. If break is not included, statements in multiple cases might be executed whether they match or not.
• Optionally, the default case can be included and followed by one or more statements that are executed if none of the other cases were matched.
Note
You can use multiple statements after each case statement within the switch structure. You don’t need to enclose them in braces. If the case matches, the JavaScript interpreter executes statements until it encounters a break or the next case.
Using for Loops
The for keyword is the first tool to consider for creating loops, much like you saw in the previous chapter during the random number example. A for loop typically uses a variable (called a counter or an index) to keep track of how many times the loop has executed, and it stops when the counter reaches a certain number. A basic for statement looks like this:
for (var = 1; var < 10; var++) { // more code }
There are three parameters to the for loop, separated by semicolons:
• The first parameter (var = 1 in the example) specifies a variable and assigns an initial value to it. This is called the initial expression because it sets up the initial state for the loop.
• The second parameter (var < 10 in the example) is a condition that must remain true to keep the loop running. This is called the condition of the loop.
• The third parameter (var++ in the example) is a statement that executes with each iteration of the loop. This is called the increment expression because it is typically used to increment the counter. The increment expression executes at the end of each loop iteration.
After the three parameters are specified, a left brace ({) is used to signal the beginning of a block. A right brace (}) is used at the end of the block. All the statements between the braces will be executed with each iteration of the loop.
The parameters for a for loop might sound a bit confusing, but after you’re used to it, you’ll use for loops frequently. Here is a simple example of this type of loop:
for (i=0; i<10; i++) {
document.write("This is line " + i + "<br />");
}
These statements define a loop that uses the variable i, initializes it with the value of zero, and loops as long as the value of i is less than 10. The increment expression, i++, adds one to the value of i with each iteration of the loop. Because this happens at the end of the loop, the output will list the numbers zero through nine.
When a loop includes only a single statement between the braces, as in this example, you can omit the braces if you want. The following statement defines the same loop without braces:
for (i=0; i<10; i++)
document.write("This is line " + i + "<br />");
Tip
It’s a good style convention to use braces with all loops whether they contain one statement or many. This makes it easy to add statements to the loop later without causing syntax errors.
The loop in this example contains a document.write statement that will be repeatedly executed. To see just what this loop does, you can add it to a <script> section of an HTML document, as shown in Listing 18.3.
Listing 18.3 A Loop Using the for Keyword
<?xml version="1.0" encoding="UTF-8"?>
<!DOCTYPE html PUBLIC "-//W3C//DTD XHTML 1.1//EN"
"http://www.w3.org/TR/xhtml11/DTD/xhtml11.dtd">
<html xmlns="http://www.w3.org/1999/xhtml" xml:lang="en">
<head>
<title>Using a for Loop</title>
</head>
<body>
<h1>Using a for Loop</h1>
<p>The following is the output of the <strong>for</strong> loop:</p>
<script type="text/javascript">
for (i=1;i<10;i++) {
document.write("This is line " + i + "<br />");
}
</script>
</body>
</html>
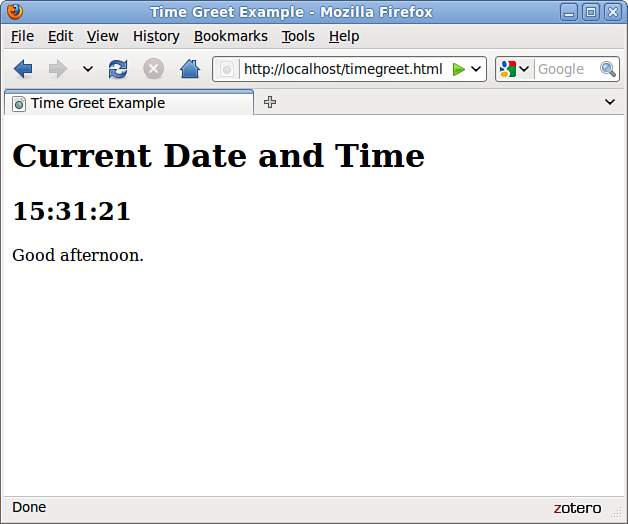
This example displays a message with the loop’s counter during each iteration. The output of Listing 18.3 is shown in Figure 18.2.
Figure 18.2 The results of the for loop example.
Notice that the loop was only executed nine times. This is because the conditional is i<10. When the counter (i) is incremented to 10, the expression is no longer true. If you need the loop to count to 10, you can change the conditional; either i<=10 or i<11 will work fine.
The for loop is traditionally used to count from one number to another, but you can use just about any statement for the initialization, condition, and increment. However, there’s usually a better way to do other types of loops with the while keyword, as described in the next section.
Using while Loops
Another keyword for loops in JavaScript is while. Unlike for loops, while loops don’t necessarily use a variable to count. Instead, they execute as long as a condition is true. In fact, if the condition starts out as false, the statements won’t execute at all.
The while statement includes the condition in parentheses, and it is followed by a block of statements within braces, just like a for loop. Here is a simple while loop:
while (total < 10) {
n++;
total += values[n];
}
This loop uses a counter, n, to iterate through the values array. Rather than stopping at a certain count, however, it stops when the total of the values reaches 10.
You might have noticed that you could have done the same thing with a for loop:
for (n=0;total < 10; n++) {
total += values[n];
}
As a matter of fact, the for loop is nothing more than a special kind of while loop that handles an initialization and an increment for you. You can generally use while for any loop. However, it’s best to choose whichever type of loop makes the most sense for the job, or that takes the least amount of typing.
Using do...while Loops
JavaScript, like many other programming languages, includes a third type of loop: the do...while loop. This type of loop is similar to an ordinary while loop, with one difference: The condition is tested at the end of the loop rather than the beginning. Here is a typical do...while loop:
do {
n++;
total += values[n];
}
while (total < 10);
As you’ve probably noticed, this is basically an upside-down version of the previous while example. There is one difference: With the do loop, the condition is tested at the end of the loop. This means that the statements in the loop will always be executed at least once, even if the condition is never true.
Note
As with the for and while loops, the do loop can include a single statement without braces or a number of statements enclosed in braces.
Working with Loops
Although you can use simple for and while loops for straightforward tasks, there are some considerations you should make when using more complicated loops. In the next sections, we’ll look at infinite loops and the break and continue statements, which give you more control over your loops.
Creating an Infinite Loop
The for and while loops give you quite a bit of control over the loop. In some cases, this can cause problems if you’re not careful. For example, look at the following loop code:
while (i < 10) {
n++;
values[n] = 0;
}
There’s a mistake in this example. The condition of the while loop refers to the i variable, but that variable doesn’t actually change during the loop. This creates an infinite loop. The loop will continue executing until the user stops it or until it generates an error of some kind.
Infinite loops can’t always be stopped by the user, except by quitting the browser—and some loops can even prevent the browser from quitting or cause a crash.
Obviously, infinite loops are something to avoid. They can also be difficult to spot because JavaScript won’t give you an error that actually tells you there is an infinite loop. Thus, each time you create a loop in a script, you should be careful to make sure there’s a way out.
Note
Depending on the browser version in use, an infinite loop might even make the browser stop responding to the user. Be sure you provide an escape route from infinite loops and save your script before you test it just in case.
Occasionally, you might want to create an infinite loop deliberately. This might include situations when you want your program to execute until the user stops it, or if you are providing an escape route with the break statement, which is introduced in the next section. Here’s an easy way to create an infinite loop:
while (true) {
Because the value true is the conditional, this loop will always find its condition to be true.
Escaping from a Loop
There is one way out of an infinite loop. You can use the break statement during a loop to exit it immediately and continue with the first statement after the loop. Here is a simple example of the use of break:
while (true) {
n++;
if (values[n] == 1) break;
}
Although the while statement is set up as an infinite loop, the if statement checks the corresponding value of an array. If it finds a value of 1, it exits the loop.
When the JavaScript interpreter encounters a break statement, it skips the rest of the loop and continues the script with the first statement after the right brace at the loop’s end. You can use the break statement in any type of loop, whether infinite or not. This provides an easy way to exit if an error occurs or if another condition is met.
Continuing a Loop
One more statement is available to help you control the execution of statements in a loop. The continue statement skips the rest of the loop, but, unlike break, it continues with the next iteration of the loop. Here is a simple example:
for (i=1; i<21; i++) {
if (score[i]==0) continue;
document.write("Student number ",i, " Score: ", score[i], "
");
}
This script uses a for loop to print out scores for 20 students, stored in the score array. The if statement is used to check for scores with a value of 0. The script assumes that a score of 0 means that the student didn’t take the test, so it continues the loop without printing that score.
Looping Through Object Properties
Yet another type of loop is available in JavaScript. The for...in loop is not as flexible as an ordinary for or while loop. Instead, it is specifically designed to perform an operation on each property of an object.
For example, the navigator object contains properties that describe the user’s browser. You can use for...in to display this object’s properties:
for (i in navigator) {
document.write("property: " + i);
document.write(" value: " + navigator[i] + "<br>");
}
Like an ordinary for loop, this type of loop uses an index variable (i in the example). For each iteration of the loop, the variable is set to the next property of the object. This makes it easy when you need to check or modify each of an object’s properties.
names = new Array();
i = 0;
do {
next = prompt("Enter the Next Name", "");
if (next > " ") names[i] = next;
i = i + 1;
}
while (next > " ");
Tip
If you’re interested in making your scripts as short as possible, remember that you could use the increment (++) operator to combine the i = i + 1 statement with the previous statement: names[i++]=1.
document.write("<h2>" + (names.length) + " names entered.</h2>");
document.write("<ol>");
for (i in names) {
document.write("<li>" + names[i] + "</li>");
}
document.write("</ol>");
Listing 18.4 A Script to Prompt for Names and Display Them (HTML)
<?xml version="1.0" encoding="UTF-8"?>
<!DOCTYPE html PUBLIC "-//W3C//DTD XHTML 1.1//EN"
"http://www.w3.org/TR/xhtml11/DTD/xhtml11.dtd">
<html xmlns="http://www.w3.org/1999/xhtml" xml:lang="en">
<head>
<title>Loops Example</title>
</head>
<body>
<h1>Loops Example</h1>
<p>Enter a series of names and I will display them in a
numbered list.</p>
<script type="text/javascript" src="loops.js" > </script>
</body>
</html>
Listing 18.5 A Script to Prompt for Names and Display Them (JavaScript)
// create the array
names = new Array();
i = 0;
// loop and prompt for names
do {
next = window.prompt("Enter the Next Name", "");
if (next > " ") names[i] = next;
i = i + 1;
} while (next > " ");
document.write("<h2>" + (names.length) + " names entered.</h2>");
// display all of the names
document.write("<ol>");
for (i in names) {
document.write("<li>" + names[i] + "</li>");
}
document.write("</ol>");
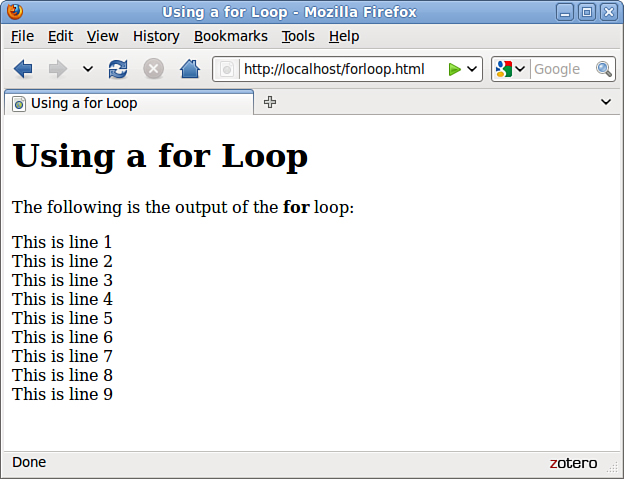
Figure 18.3 The output of the names example.
Summary
In this chapter, you learned two ways to control the flow of your scripts. First, you learned how to use the if statement to evaluate conditional expressions and react to them. You also learned a shorthand form of conditional expression using the ? operator and the switch statement for working with multiple conditions.
You also learned about JavaScript’s looping capabilities using for, while, and other loops and how to control loops further using the break and continue statements. Lastly, you looked at the for...in loop for working with each property of an object.
Q&A
Q. What happens if I compare two items of different data types (for example, a number and a string) in a conditional expression?
A. The JavaScript interpreter does its best to make the values a common format and compare them. In this case, it would convert them both to strings before comparing. In JavaScript 1.3 and later, you can use the special equality operator === to compare two values and their types—using this operator, the expression will be true only if the expressions have the same value and the same data type.
Q. Why would I use switch if using if and else is just as simple?
A. Either one works, so it’s your choice. Personally, I find switch statements confusing and prefer to use if. Your choice might also depend on what other programming languages you’re familiar with because some support switch and others don’t.
Q. Why don’t I get a friendly error message if I accidentally use = instead of ==?
A. In some cases, this will result in an error. However, the incorrect version often appears to be a correct statement. For example, in the statement if (a=1), the variable a will be assigned the value 1. The if statement is considered true, and the value of a is lost.
Q. It seems like I could use a for loop to replace any of the other loop methods (while, do, and so on). Why so many choices?
A. You’re right. In most cases, a for loop will work, and you can do all your loops that way if you want. For that matter, you can use while to replace a for loop. You can use whichever looping method makes the most sense for your application.
Workshop
The workshop contains quiz questions and exercises to help you solidify your understanding of the material covered. Try to answer all questions before looking at the “Answers” section that follows.
Quiz
1. Which of the following operators means “is not equal to” in JavaScript?
a. !
b. !=
c. <>
2. What does the switch statement do?
a. Tests a variable for a number of different values
b. Turns a variable on or off
c. Makes ordinary if statements longer and more confusing
3. Which type of JavaScript loop checks the condition at the end of the loop?
a. for
b. while
c. do...while
4. Within a loop, what does the break statement do?
a. Crashes the browser
b. Starts the loop over
c. Escapes the loop entirely
5. The statement while (3==3) is an example of
a. A typographical error
b. An infinite loop
c. An illegal JavaScript statement
Answers
1. b. The != operator means is not equal to.
2. a. The switch statement can test the same variable or expression for a number of different values.
3. c. The do...while loop uses a condition at the end of the loop.
4. c. The break statement escapes the loop.
5. b. Because the condition (3==3) will always be true, this statement creates an infinite loop.
Exercises
• Modify Listing 18.4 to sort the names in alphabetical order before displaying them. You can use the sort method of the Array object, described in Chapter 16, “Using JavaScript Variables, Strings, and Arrays.”
• Modify Listing 18.4 to prompt for exactly 10 names. What happens if you click the Cancel button instead of entering a name?