Chapter 15. Working with the Document Object Model (DOM)
The previous chapter introduced you to the basic concepts of programming in JavaScript; this chapter will help you better understand the Document Object Model (DOM), which is the framework that properties and method of JavaScript explicitly control so that you may develop rich user experiences.
Understanding the Document Object Model (DOM)
One advantage that JavaScript has over plain HTML is that these client-side scripts can manipulate the web document and its contents right there in the browser after the content has been loaded. Your script can load a new page into the browser, work with parts of the browser window and document, open new windows, and even modify text within the page dynamically.
To work with the browser and documents, JavaScript uses a hierarchy of parent and child objects called the DOM. These objects are organized into a tree-like structure and represent all the content and components of a web document.
The objects in the DOM have properties—variables that describe the web page or document—and methods—functions that enable you to work with parts of the web page.
When you refer to an object, you use the parent object name followed by the child object name or names, separated by periods. For example, JavaScript stores objects to represent images in a document as children of the document object. The following refers to the image9 object, a child of the document object, which is a child of the window object:
window.document.image9
Using window Objects
At the top of the browser object hierarchy is the window object, which represents a browser window. You’ve already used at least one method of the window object: method, or simply alert(), displays a message in an alert box.
Note
The DOM is not part of JavaScript or any other programming language—rather, it’s an API (application programming interface) built in to the browser.
There can be several window objects at a time, each representing an open browser window. Frames are also represented by window objects. You’ll learn more about windows and frames in Chapter 20, “Using Windows and Frames.”
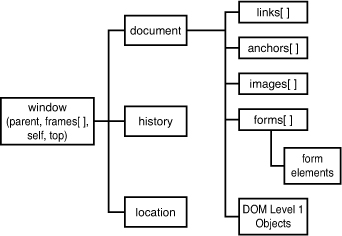
The window object is the parent object for all the objects we will be looking at in this chapter. Figure 15.1 shows the window section of the DOM object hierarchy and a variety of its objects.
Figure 15.1 The window section of the DOM object hierarchy.
Working with the document Object
The document object represents a web document or page. Web documents are displayed within browser windows, so it shouldn’t surprise you to learn that the document object is a child of the window object.
Note
You’ve already used the document.write method to display text within a web document. The examples in earlier chapters only used a single window and document, so it was unnecessary to use window.document.write—but this longer syntax would have worked equally well.
Because the window object always represents the current window (the one containing the script), you can use window.document to refer to the current document. You can also simply refer to document, which automatically refers to the current window.
If multiple windows or frames are in use, there might be several window objects, each with its own document object. To use one of these document objects, you use the name of the window and the name of the document.
In the following sections, you will look at some of the properties and methods of the document object that will be useful in your scripting.
Getting Information About the Document
Several properties of the document object include information about the current document in general:
• document.URL specifies the document’s URL. This is a simple text field. You can’t change this property. If you need to send the user to a different location, use the window.location object, which you will learn about further along.
• document.title lists the title of the current page, defined by the HTML <title> tag.
• document.referrer is the URL of the page the user was viewing prior to the current page—usually, the page with a link to the current page.
• document.lastModified is the date the document was last modified. This date is sent from the server along with the page.
• document.cookie enables you to read or set a cookie for the document.
• document.images returns a collection of images used in the document.
As an example of a document property, Listing 15.1 shows a short HTML document that displays its last modified date using JavaScript.
Listing 15.1 Displaying the Last Modified Date
<?xml version="1.0" encoding="UTF-8"?>
<!DOCTYPE html PUBLIC "-//W3C//DTD XHTML 1.1//EN"
"http://www.w3.org/TR/xhtml11/DTD/xhtml11.dtd">
<html xmlns="http://www.w3.org/1999/xhtml" xml:lang="en">
<head>
<title>Displaying the Last Modified Date</title>
</head>
<body>
<h1>Displaying the Last Modified Date</h1>
<p>This page was last modified on:</p>
<script type="text/javascript">
document.write(document.lastModified);
</script>
</body>
</html>
Figure 15.2 shows the output of Listing 15.1.
Figure 15.2 Viewing the last modified date of a document.
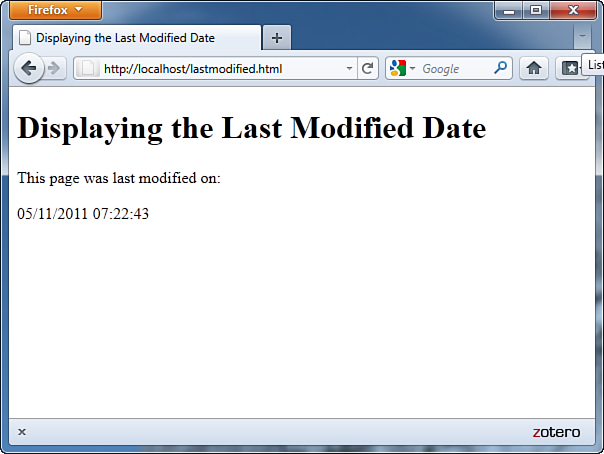
If you use JavaScript to display the value of this document property, you don’t have to remember to update the date each time you modify the page, should you choose to expose this information to the user. (You could also use the script to always print the current date instead of the last modified date, but that would be cheating.)
Note
You might find that the document.lastModified property doesn’t work on your web pages or returns the wrong value. The date is received from the web server, and some servers do not maintain modification dates correctly.
Writing Text in a Document
The simplest document object methods are also the ones you will use most often. In fact, you’ve used one of them already even in the most basic examples in this book so far. The document.write method prints text as part of the HTML in a document window. An alternative statement, document.writeln, also prints text, but it also includes a newline (
) character at the end. This is handy when you want your text to be the last thing on the line.
Caution
Bear in mind that the newline character is displayed as a space by the browser, except inside a <pre> container. You will need to use the <br/> tag if you want an actual line break.
You can use these methods only within the body of the web page, so they will be executed when the page loads. You can’t use these methods to add to a page that has already loaded without reloading it. You can write new content for a document, however, as the next section explains.
The document.write method can be used within a <script> tag in the body of an HTML document. You can also use it in a function, provided you include a call to the function within the body of the document, as you saw in Listing 15.1.
Note
You can also directly modify the text on a web page by using more advanced features of the DOM, which you’ll learn about later in this chapter.
Using Links and Anchors
Another child of the document object is the link object. Actually, there can be multiple link objects in a document. Each one includes information about a link to another location or an anchor.
You can access link objects with the links array. Each member of the array is one of the link objects in the current page. A property of the array, document.links.length, indicates the number of links in the page.
Each link object (or member of the links array) has a list of properties defining the URL. The href property contains the entire URL, and other properties define portions of it. These are the same properties as the location object, defined later in this chapter.
You can refer to a property by indicating the link number and property name. For example, the following statement assigns the entire URL of the first link to the variable link1:
link1 = links[0].href;
The anchor objects are also children of the document object. Each anchor object represents an anchor in the current document—a particular location that can be jumped to directly.
Like links, you can access anchors with an array: anchors. Each element of this array is an anchor object. The document.anchors.length property gives you the number of elements in the anchors array.
Accessing Browser History
The history object is another child (property) of the window object. This object holds information about the URLs that have been visited before and after the current one, and it includes methods to go to previous or next locations.
Note
The history object has current, previous, and next properties that store URLs of documents in the history list. However, for security and privacy reasons, these objects are not normally accessible by browsers.
The history object has one property you can access:
• history.length keeps track of the length of the history list—in other words, the number of different locations that the user has visited.
The history object has three methods you can use to move through the history list:
• history.go() opens a URL from the history list. To use this method, specify a positive or negative number in parentheses. For example, history.go(-2) is equivalent to pressing the Back button twice.
• history.back() loads the previous URL in the history list—equivalent to pressing the Back button.
• history.forward() loads the next URL in the history list, if available. This is equivalent to pressing the Forward button.
You can use the back and forward methods of the history object to add your own Back and Forward buttons to a web document. The browser already has Back and Forward buttons, of course, but it’s occasionally useful to include your own links that serve the same purpose.
Suppose you wanted to create a script that displays Back and Forward buttons and use these methods to navigate the browser. Here’s the code that will create the Back button:
<input type="button" onClick="history.back();" value="Go Back">
The <input> tag defines a button labeled Go Back. The onClick event handler uses the history.back() method to go to the previous page in history. The code for the Go Forward button is similar:
<input type="button" onClick="history.forward();" value="Go Forward">
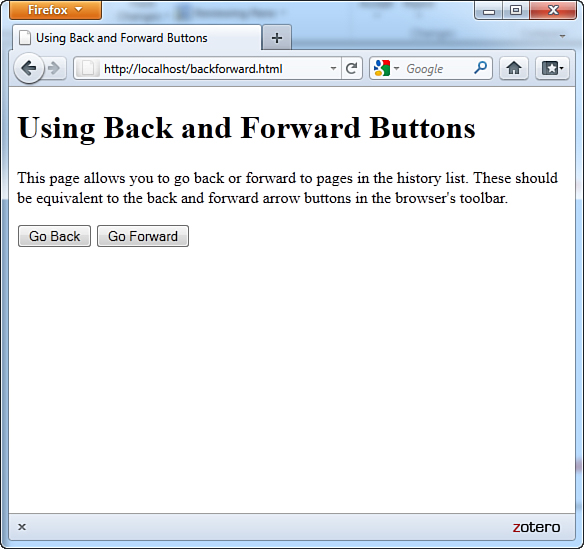
With these out of the way, you just need to build the rest of the HTML document. Listing 15.2 shows a complete HTML document, and Figure 15.3 shows a browser’s display of the document. After you load this document into a browser, visit other URLs and make sure the Back and Forward buttons work as expected.
Figure 15.3 Showing custom Back and Forward buttons.
Listing 15.2 A Web Page That Uses JavaScript to Include Back and Forward Buttons
<?xml version="1.0" encoding="UTF-8"?>
<!DOCTYPE html PUBLIC "-//W3C//DTD XHTML 1.1//EN"
"http://www.w3.org/TR/xhtml11/DTD/xhtml11.dtd">
<html xmlns="http://www.w3.org/1999/xhtml" xml:lang="en">
<head>
<title>Using Back and Forward Buttons</title>
</head>
<body>
<h1>Using Back and Forward Buttons</h1>
<p>This page allows you to go back or forward to pages in
the history list. These should be equivalent to the back
and forward arrow buttons in the browser's toolbar.</p>
<p>
<input type="button"
onclick="history.back();"
value="Go Back" />
<input type="button"
onclick="history.forward();"
value="Go Forward" />
</p>
</body>
</html>
Working with the location Object
A third child of the window object is the location object. This object stores information about the current URL stored in the window. For example, the following statement loads a URL into the current window:
window.location.href="http://www.google.com";
The href property used in this statement contains the entire URL of the window’s current location. You can also access portions of the URL with various properties of the location object. To explain these properties, consider the following URL:
http://www.google.com:80/search?q=javascript
The following properties represent parts of the URL:
• location.protocol is the protocol part of the URL (http: in the example).
• location.hostname is the host name of the URL (www.google.com in the example).
• location.port is the port number of the URL (80 in the example).
• location.pathname is the filename part of the URL (search in the example).
• location.search is the query portion of the URL, if any (q=javascript in the example).
Unused in this example but also accessible are
• location.host is the hostname of the URL plus the port number.
• location.hash is the anchor name used in the URL, if any (#anchor in the example) .
Caution
Although the location.href property usually contains the same URL as the document.URL property described earlier in this chapter, you can’t change the document.URL property. Always use location.href to load a new page.
The link object, introduced earlier this chapter, also includes this list of properties for accessing portions of the URL.
The location object has three methods:
• location.assign() loads a new document when used as follows:
location.assign("http://www.google.com")
• location.reload() reloads the current document. This is the same as the Reload button on the browser’s toolbar. If you optionally include the true parameter, it will ignore the browser’s cache and force a reload whether the document has changed or not.
• location.replace() replaces the current location with a new one. This is similar to setting the location object’s properties yourself. The difference is that the replace method does not affect the browser’s history. In other words, the Back button can’t be used to go to the previous location. This is useful for splash screens or temporary pages that it would be useless to return to.
More About the DOM Structure
Previously in this chapter, you learned how some of the most important DOM objects are organized: The window object contains the document object, and so on. Although these objects were the only ones available originally, the modern DOM adds objects under the document object for every element of a page.
To better understand this concept, let’s look at the simple HTML document in Listing 15.3. This document has the usual <head> and <body> sections, a heading and a single paragraph of text.
Listing 15.3 A Simple HTML Document
<?xml version="1.0" encoding="UTF-8"?>
<!DOCTYPE html PUBLIC "-//W3C//DTD XHTML 1.1//EN"
"http://www.w3.org/TR/xhtml11/DTD/xhtml11.dtd">
<html xmlns="http://www.w3.org/1999/xhtml" xml:lang="en">
<head>
<title>A Simple HTML Document</title>
</head>
<body>
<h1>This is a Level-1 Heading.</h1>
<p>This is a simple paragraph.</p>
</body>
</html>
Like all HTML documents, this one is composed of various containers and their contents. The <html> tags form a container that includes the entire document, the <body> tags contain the body of the page, and so on.
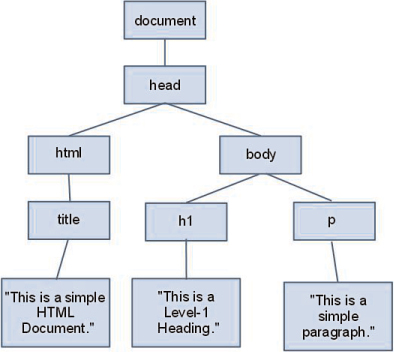
In the DOM, each container within the page and its contents are represented by an object. The objects are organized into a tree-like structure, with the document object itself at the root of the tree, and individual elements such as the heading and paragraph of text at the leaves of the tree. Figure 15.4 shows a diagram of these relationships.
Figure 15.4 How the DOM represents an HTML document.
Note
Don’t worry if this tree structure confuses you; you can do almost anything by simply assigning IDs to elements and referring to them. This is the method used in some earlier examples in this book. Further on, you will look at more complicated examples that require you to understand the way objects are organized in the DOM.
In the following sections, you will examine the structure of the DOM more closely.
Nodes
Each container or element in the document is called a node in the DOM. In the example in Figure 15.4, each of the objects in boxes is a node, and the lines represent the relationships between the nodes.
You will often need to refer to individual nodes in scripts. You can do this by assigning an ID or by navigating the tree using the relationships between the nodes.
Parents and Children
As you have already learned, each JavaScript object can have a parent—an object that contains it—and can also have children—objects that it contains. The DOM uses the same terminology.
In Figure 15.4, the document object is the parent object for the remaining objects and does not have a parent itself. The html object is the parent of the head and body objects, and the h1 and p objects are children of the body object.
Text nodes work a bit differently. The actual text in the paragraph is a node in itself and is a child of the p object. Similarly, the text within the <h1> tags is a child of the h1 object.
Siblings
The DOM also uses another term for organization of objects: siblings. As you might expect, this refers to objects that have the same parent—in other words, objects at the same level in the DOM object tree.
In Figure 15.4, the h1 and p objects are siblings, as both are children of the body object. Similarly, the head and body objects are siblings under the html object.
Working with DOM Nodes
As you’ve seen, the DOM organizes objects within a web page into a tree-like structure. Each node (object) in this tree can be accessed in JavaScript. In the next sections, you will learn how you can use the properties and methods of nodes to manage them.
Note
The following sections only describe the most important properties and methods of nodes and those that are supported by current browsers. For a complete list of available properties, see the W3C’s DOM specification at http://www.w3.org/TR/DOM-Level-2/.
Basic Node Properties
You have already used the style property of nodes to change their style sheet values. Each node also has a number of basic properties that you can examine or set. These include the following:
• nodeName is the name of the node (not the ID). For nodes based on HTML tags, such as <p> or <body>, the name is the tag name: p or body. For the document node, the name is a special code: #document. Similarly, text nodes have the name #text.
• nodeType is an integer describing the node’s type: 1 for normal HTML tags, 3 for text nodes, and 9 for the document node.
• nodeValue is the actual text contained within a text node. This property is not valid for other types of nodes.
• innerHTML is the HTML content of any node. You can assign a value including HTML tags to this property and change the DOM child objects for a node dynamically.
Note
The innerHTML property is not a part of the W3C DOM specification. However, it is supported by the major browsers and is often the easiest way to change content in a page. You can also accomplish this in a more standard way by deleting and creating nodes, as described further on.
Node Relationship Properties
In addition to the basic properties described previously, each node has a number of properties that describe its relation to other nodes. These include the following:
• firstChild is the first child object for a node. For nodes that contain text, such as h1 or p, the text node containing the actual text is the first child.
Caution
Remember that, like all JavaScript objects and properties, the node properties and functions described here are case sensitive. Be sure you type them exactly as shown.
• lastChild is the node’s last child object.
• childNodes is an array that includes all of a node’s child nodes. You can use a loop with this array to work with all the nodes under a given node.
• previousSibling is the sibling (node at the same level) previous to the current node.
• nextSibling is the sibling after the current node.
Document Methods
The document node itself has several methods you might find useful. You have already used one of these, getElementById, to refer to DOM objects by their ID properties. The document node’s methods include the following:
• getElementById(id) returns the element with the specified id attribute.
• getElementsByTagName(tag) returns an array of all of the elements with a specified tag name. You can use the wildcard * to return an array containing all the nodes in the document.
• createTextNode(text) creates a new text node containing the specified text, which you can then add to the document.
• createElement(tag) creates a new HTML element for the specified tag. As with createTextNode, you need to add the element to the document after creating it. You can assign content within the element by changing its child objects or the innerHTML property.
Node Methods
Each node within a page has a number of methods available. Which of these are valid depends on the node’s position in the page and whether it has parent or child nodes. These include the following:
• appendChild(new) appends the specified new node after all of the object’s existing nodes.
• insertBefore(new, old) inserts the specified new child node before the specified old child node, which must already exist.
• replaceChild(new, old) replaces the specified old child node with a new node.
• removeChild(node) removes a child node from the object’s set of children.
• hasChildNodes() returns a Boolean value of true if the object has one or more child nodes or false if it has none.
• cloneNode() creates a copy of an existing node. If a parameter of true is supplied, the copy will also include any child nodes of the original node.
Creating Positionable Elements (Layers)
Now that you understand a little more about how the DOM is structured, you should be able to start thinking about how you can control any element in a web page, such as a paragraph or an image. For example, you can use the DOM to change the position, visibility, and other attributes of an element.
Before the W3C DOM and CSS2 standards, you could only reposition layers, special groups of elements defined with a proprietary tag. Although you can now position any element, it’s still useful to work with groups of elements in many cases.
You can effectively create a layer, or a group of HTML objects that can be controlled as a group, using the <div> or <span> tags, which you learned about early in this book.
To create a layer with <div>, enclose the content of the layer between the two division tags and specify the layer’s properties in the style attribute of the <div> tag. Here’s a simple example:
<div id="layer1" style="position:absolute; left:100px; top:100px">
<p>This is the content of the layer.</p>
</div>
Note
As you’ve learned in earlier chapters, you can specify CSS properties, such as the position property and other layer properties, in a <style> block, in an external style sheet, or in the style attribute of an HTML tag, and then control these properties using JavaScript. The code snippets shown here use properties in the style attribute rather than in a <style> block because it is a snippet of an example and not a full code listing.
This code defines a layer with the name layer1. This is a moveable layer positioned 100 pixels down and 100 pixels to the right of the upper-left corner of the browser window.
You’ve already learned about the positioning properties and seen them in action in Parts II and III of this book. This includes setting object size (such as height and width) and position (such as absolute or relative), object visibility, and object background and borders. The remaining examples in this chapter will use HTML and CSS much like what you’ve already seen in this book, but will show you JavaScript-based interactions with the DOM in action.
Controlling Positioning with JavaScript
Using the code snippet from the previous section, you’ll see an example of how you can control the positioning attributes of an object, using JavaScript.
Here is our sample layer (a <div>):
<div id="layer1" style="position:absolute; left:100px; top:100px">
<p>This is the content of the layer.</p>
</div>
To move this layer up or down within the page using JavaScript, you can change its style.top attribute. For example, the following statements move the layer 100 pixels down from its original position:
var obj = document.getElementById("layer1");
obj.style.top=200;
The document.getElementById() method returns the object corresponding to the layer’s <div> tag, and the second statement sets the object’s top positioning property to 200px; you can also combine these two statements:
document.getElementById("layer1").style.top = 200;
This simply sets the style.top property for the layer without assigning a variable to the layer’s object.
Note
Some CSS properties, such as text-indent and border-color, have hyphens in their names. When you use these properties in JavaScript, you combine the hyphenated sections and use a capital letter: textIndent and borderColor.
Now let’s create an HTML document that defines a layer and combine it with a script to allow the layer to be moved, hidden, or shown using buttons. Listing 15.4 shows the HTML document that defines the buttons and the layer. The script itself (position.js) will follow in Listing 15.5.
Listing 15.4 The HTML Document for the Movable Layer Example
<?xml version="1.0" encoding="UTF-8"?>
<!DOCTYPE html PUBLIC "-//W3C//DTD XHTML 1.1//EN"
"http://www.w3.org/TR/xhtml11/DTD/xhtml11.dtd">
<html xmlns="http://www.w3.org/1999/xhtml" xml:lang="en">
<head>
<title>Positioning Elements with JavaScript</title>
<script type="text/javascript" src="position.js"></script>
<style text="text/css">
#buttons {
text-align:center;
}
#square {
position:absolute;
top: 150px;
left: 100px;
width: 200px;
height: 200px;
border: 2px solid black;
padding: 10px;
background-color: #e0e0e0;
}
</style>
</head>
<body>
<h1>Positioning Elements</h1>
<form action="" name="form1">
<div id="buttons">
<input type="button" name="left" value="Left"
onclick="pos(-1,0);" />
<input type="button" name="right" value="Right"
onclick="pos(1,0);" />
<input type="button" name="up" value="Up"
onclick="pos(0,-1);" />
<input type="button" name="down" value="Down"
onclick="pos(0,1);" />
<input type="button" name="hide" value="Hide"
onclick="hideSquare();" />
<input type="button" name="show" value="Show"
onclick="showSquare();" />
</div>
</form>
<hr />
<div id="square">
<p>This square is an absolutely positioned
layer that you can move using the buttons above.</p>
</div>
</body>
</html>
In addition to some basic HTML, Listing 15.4 contains the following:
• The <script> tag in the header reads a script called position.js, which is shown in Listing 15.5.
• The <style> section is a brief style sheet that defines the properties for the movable layer. It sets the position property to absolute to indicate that it can be positioned at an exact location, sets the initial position in the top and left properties, and sets border and background-color properties to make the layer clearly visible.
• The <input> tags within the <form> section define six buttons: four to move the layer left, right, up, or down and two to control whether it is visible or hidden.
• The <div> section defines the layer itself. The id attribute is set to the value "square". This id is used in the style sheet to refer to the layer and will also be used in your script.
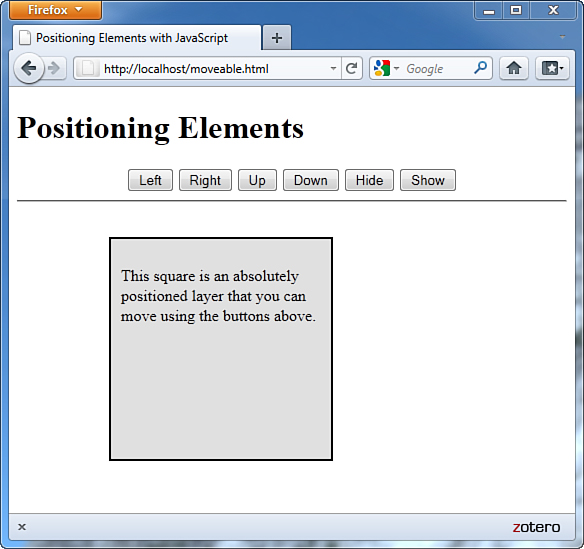
If you load it into a browser, you should see the buttons and the "square" layer, but the buttons won’t do anything yet. The script in Listing 15.5 adds the ability to use the actions. When you load the code in Listing 15.4 into your browser, it should look like Figure 15.5.
Figure 15.5 The moveable layer is ready to be moved.
Listing 15.5 shows the JavaScript variables and functions that are called in the HTML in Listing 15.4. This code is expected (by the <script> tag) to be in a file called position.js.
Listing 15.5 The Script for the Movable Layer Example
var x=100,y=150;
function pos(dx,dy) {
if (!document.getElementById) return;
x += 10*dx;
y += 10*dy;
obj = document.getElementById("square");
obj.style.top=y + "px";
obj.style.left=x + "px";
}
function hideSquare() {
if (!document.getElementById) return;
obj = document.getElementById("square");
obj.style.display="none";
}
function showSquare() {
if (!document.getElementById) return;
obj = document.getElementById("square");
obj.style.display="block";
}
The var statement at the beginning of the script defines two variables, x and y, that will store the current position of the layer. The pos function is called by the event handlers for all four of the movement buttons.
The parameters of the pos() function, dx and dy, tell the script how the layer should move: If dx is negative, a number will be subtracted from x, moving the layer to the left. If dx is positive, a number will be added to x, moving the layer to the right. Similarly, dy indicates whether to move up or down.
The pos() function begins by making sure the getElementById() function is supported, so it won’t attempt to run in older browsers. It then multiplies dx and dy by 10 (to make the movement more obvious) and applies them to x and y. Finally, it sets the top and left properties to the new position (including the “px” to indicate the unit of measurement), thus moving the layer.
Two more functions, hideSquare() and showsquare(), hide or show the layer by setting its display property to "none" (hidden) or "block" (shown).
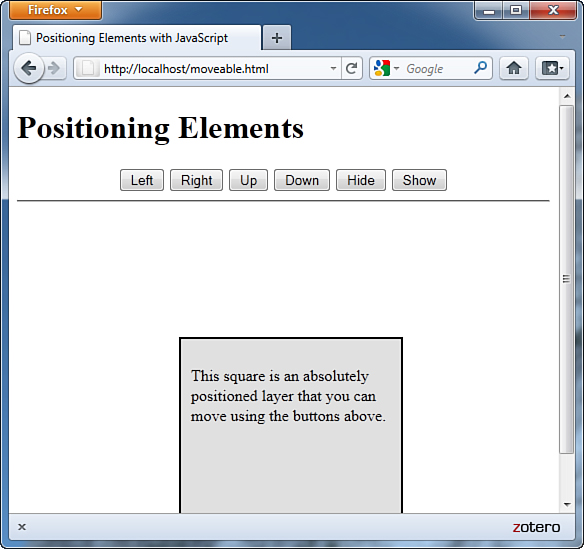
To use this script, save it as position.js, and then load the HTML document in Listing 15.4 into your browser. Figure 15.6 shows this script in action—well, after an action, at least. Figure 15.6 shows the script after pressing the Right button seven times and the Down button ten times.
Figure 15.6 The moveable layer has been moved.
Hiding and Showing Objects
In the previous example, you saw some functions that could be used to hide or show the “square.” In this section, we’ll take a closer look at hiding and showing objects within a page.
As a refresher, objects have a visibility style property that specifies whether they are currently visible within the page:
Object.style.visibility="hidden"; // hides an object
Object.style.visibility="visible"; // shows an object
Using this property, you can create a script that hides or shows objects in either browser. Listing 15.6 shows the HTML document for a script that allows two headings to be shown or hidden.
Listing 15.6 Hiding and Showing Objects
<?xml version="1.0" encoding="UTF-8"?>
<!DOCTYPE html PUBLIC "-//W3C//DTD XHTML 1.1//EN"
"http://www.w3.org/TR/xhtml11/DTD/xhtml11.dtd">
<html xmlns="http://www.w3.org/1999/xhtml" xml:lang="en">
<head>
<title>Hiding or Showing Objects</title>
<script type="text/javascript">
function ShowHide() {
if (!document.getElementById) return;
var head1 = document.getElementById("head1");
var head2 = document.getElementById("head2");
var showhead1 = document.form1.head1.checked;
var showhead2 = document.form1.head2.checked;
head1.style.visibility=(showhead1) ? "visible" : "hidden";
head2.style.visibility=(showhead2) ? "visible" : "hidden";
}
</script>
</head>
<body>
<h1 id="head1">This is the first heading</h1>
<h1 id="head2">This is the second heading</h1>
<p>Using the W3C DOM, you can choose whether to show or hide
the headings on this page using the checkboxes below.</p>
<form action="" name="form1">
<div>
<input type="checkbox" name="head1"
onclick="ShowHide();" checked="checked" />
<span style="font-weight:bold">Show first heading</span><br/>
<input type="checkbox" name="head2"
onclick="ShowHide();"checked="checked" />
<span style="font-weight:bold">Show second heading</span><br/>
</div>
</form>
</body>
</html>
The <h1> tags in this document define headings with the identifiers head1 and head2. The <form> section defines a form with two check boxes, one for each of the headings. When a check box is modified, the onClick method is used to call the ShowHide() function.
Tip
The lines that set the visibility property might look a bit strange. The ? and : characters create conditional expressions, a shorthand way of handling if statements. To review conditional expressions, see Chapter 18, “Controlling Flow with Conditions and Loops.”
This function is defined within the <script> statements in the header. The function assigns the head1 and head2 variables to the objects for the headings, using the getElementById() method. Next, it assigns the showhead1 and showhead2 variables to the contents of the check boxes. Finally, the function uses the style.visibility attributes to set the visibility of the headings.
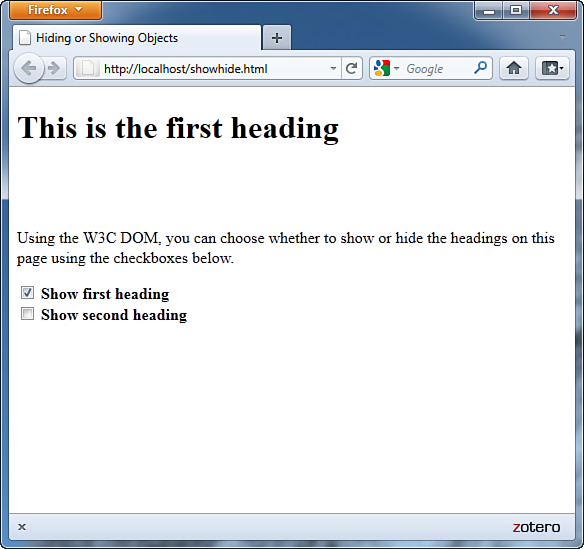
Figure 15.7 shows this example in action. In the figure, the second heading’s check box has been unchecked, so only the first heading is visible.
Figure 15.7 The text hiding/showing example in action.
Modifying Text Within a Page
Next, you can create a simple script to modify the contents of a heading within a web page. As you learned earlier in this chapter, the nodeValue property of a text node contains its actual text, and the text node for a heading is a child of that heading. Thus, the syntax to change the text of a heading with the identifier head1 would be the following:
var head1 = document.getElementById("head1");
head1.firstChild.nodeValue = "New Text Here";
This assigns the variable head1 to the heading’s object. The firstChild property returns the text node that is the only child of the heading, and its nodeValue property contains the heading text.
Using this technique, it’s easy to create a page that allows the heading to be changed dynamically. Listing 15.7 shows the complete HTML document for this script.
Listing 15.7 The Complete Text-Modifying Example
<?xml version="1.0" encoding="UTF-8"?>
<!DOCTYPE html PUBLIC "-//W3C//DTD XHTML 1.1//EN"
"http://www.w3.org/TR/xhtml11/DTD/xhtml11.dtd">
<html xmlns="http://www.w3.org/1999/xhtml" xml:lang="en">
<head>
<title>Dynamic Text in JavaScript</title>
<script type="text/javascript">
function ChangeTitle() {
if (!document.getElementById) return;
var newtitle = document.form1.newtitle.value;
var head1 = document.getElementById("head1");
head1.firstChild.nodeValue=newtitle;
}
</script>
</head>
<body>
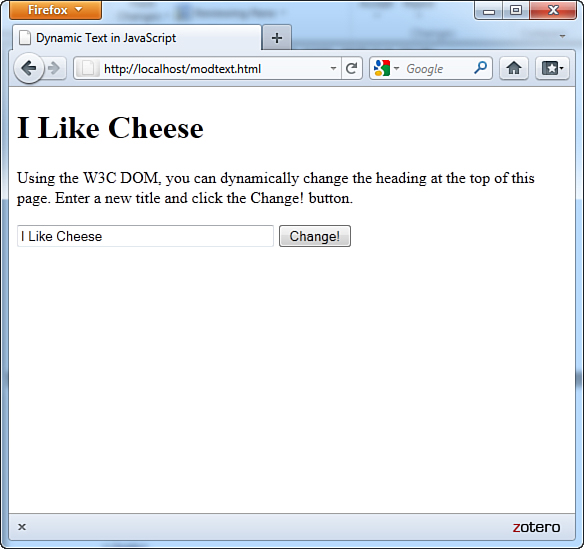
<h1 id="head1">Dynamic Text in JavaScript</h1>
<p>Using the W3C DOM, you can dynamically change the
heading at the top of this page. Enter a new title and
click the Change! button. </p>
<form action="" name="form1">
<div>
<input type="text" name="newtitle" size="40" />
<input type="button" value="Change!" onclick="ChangeTitle();" />
</div>
</form>
</body>
</html>
This example defines a form that enables the user to enter a new heading for the page. Pressing the button calls the ChangeTitle() function, defined in the header. This function gets the value the user entered in the form and changes the heading’s value to the new text.
Figure 15.8 shows this page in action after a new title has been entered and the Change! button has been clicked.
Figure 15.8 The heading modification example in action.
Adding Text to a Page
Next, you can create a script that actually adds text to a page. To do this, you must first create a new text node. This statement creates a new text node with the text “this is a test”:
var node=document.createTextNode("this is a test");
Next, you can add this node to the document. To do this, you use the appendChild method. The text can be added to any element that can contain text, but we will use a paragraph. The following statement adds the text node defined previously to the paragraph with the identifier p1:
document.getElementById("p1").appendChild(node);
Listing 15.8 shows the HTML document for a complete example that uses this technique, using a form to allow the user to specify text to add to the page.
Listing 15.8 Adding Text to a Page
<?xml version="1.0" encoding="UTF-8"?>
<!DOCTYPE html PUBLIC "-//W3C//DTD XHTML 1.1//EN"
"http://www.w3.org/TR/xhtml11/DTD/xhtml11.dtd">
<html xmlns="http://www.w3.org/1999/xhtml" xml:lang="en">
<head>
<title>Adding Text to a Page</title>
<script type="text/javascript">
function AddText() {
if (!document.getElementById) return;
var sentence=document.form1.sentence.value;
var node=document.createTextNode(" " + sentence);
document.getElementById("p1").appendChild(node);
document.form1.sentence.value="";
}
</script>
</head>
<body>
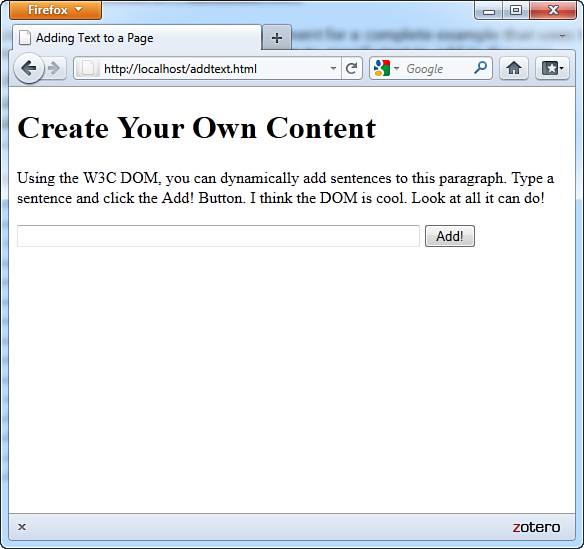
<h1 id="head1">Create Your Own Content</h1>
<p id="p1"> Using the W3C DOM, you can dynamically add
sentences to this paragraph. Type a sentence and click
the Add! Button.</p>
<form action="" name="form1">
<div>
<input type="text" name="sentence" size="65" />
<input type="button" value="Add!" onclick="AddText();" />
</div>
</form>
</body>
</html>
In this example, the <p> section defines the paragraph that will hold the added text. The <form> section defines a form with a text field called sentence, and an Add button, which calls the AddText() function. This function is defined in the header.
The AddText() function first assigns the sentence variable to the text typed in the text field. Next, it creates a new text node containing the sentence and appends the new text node to the paragraph.
Load this document into a browser to test it and try adding several sentences by typing them and clicking the Add button. Figure 15.9 shows this document after several sentences have been added to the paragraph.
Figure 15.9 The text addition example in action.
Summary
In this chapter, you’ve learned about the DOM, JavaScript’s hierarchy of web page objects. You’ve learned how you can use the document object to work with documents and used the history and location objects to control the current URL displayed in the browser.
Additionally, you learned the functions and properties you can use to manage DOM objects and used example scripts to hide and show elements within a page, modify text, and add text. You also learned how to use HTML and CSS to define a positionable layer and how you can use positioning properties dynamically with JavaScript.
This foundational knowledge of the DOM puts you in position (no pun intended) to more effectively work with JavaScript in more advanced ways, as you’ll learn in the chapters that follow.
Q&A
Q. Can I avoid assigning an id attribute to every DOM object I want to handle with a script?
A. Yes. Although the scripts in this chapter typically use the id attribute for convenience, you can actually locate any object in the page by using combinations of node properties such as firstChild and nextSibling. However, keep in mind that any change you make to the HTML can change an element’s place in the DOM hierarchy, so the id attribute is a reliable recommended way to handle this.
Q. I can use history and document instead of window.history and window.document. Can I leave out the window object in other cases?
A. Yes. For example, you can use alert instead of window.alert to display a message. The window object contains the current script, so it’s treated as a default object. However, be warned that you shouldn’t omit the window object’s name when you’re using frames, layers, or multiple windows or in an event handler.
Q. Can I change history entries or prevent the user from using the Back and Forward buttons?
A. You can’t change the history entries. You can’t prevent the use of the Back and Forward buttons, but you can use the location.replace() method to load a series of pages that don’t appear in the history. There are a few tricks for preventing the Back button from working properly, but I don’t recommend them—that’s the sort of thing that gives JavaScript a bad name.
Q. What happens when my web page includes multiple HTML documents, such as when frames are used?
A. In this case, each window or frame has its own document object that stores the elements of the HTML document it contains.
Q. If the DOM allows any object to be dynamically changed, why does the positioning example need to use <div> tags to define a layer?
A. The example could just as easily move a heading or a paragraph. The <div> is just a convenient and standard way to group objects and to create a square object with a border.
Workshop
The workshop contains quiz questions and exercises to help you solidify your understanding of the material covered. Try to answer all questions before looking at the “Answers” section that follows.
Quiz
1. Which of the following DOM objects never has a parent node?
a. body
b. div
c. document
2. Which of the following is the correct syntax to get the DOM object for a heading with the identifier head1?
a. document.getElementById("head1")
b. document.GetElementByID("head1")
c. document.getElementsById("head1")
3. Which of the following tags can be used to create a layer?
a. <layer>
b. <div>
c. <style>
4. Which property controls an element’s left-to-right position?
a. left
b. width
c. lrpos
5. Which of the following CSS rules would create a heading that is not currently visible in the page?
a. h1 {visibility: invisible;}
b. h1 {display: none;}
c. h1 {style: invisible;}
Answers
1. c. The document object is the root of the DOM object tree and has no parent object.
2. a. getElementById has a lowercase g at the beginning and a lowercase d at the end, contrary to standard English grammar.
3. b. The <div> tag can be used to create positionable layers.
4. a. The left property controls an element’s left-to-right position.
5. b. The none value for the display property makes it invisible. The visibility property could also be used, but its possible values are visible or hidden.
Exercises
If you want to gain more experience using the DOM features you learned in this chapter, try the following:
• Modify the Back and Forward example in Listing 15.2 to include a Reload button along with the Back and Forward buttons. (This button would trigger the location.reload() method.)
• Modify the positioning example in Listings 15.4 and 15.5 to move the square one pixel at a time rather than 10 at a time.
• Add a third check box to Listing 15.6 to allow the paragraph of text to be shown or hidden. You will need to add an id attribute to the <p> tag, add a check box to the form, and add the appropriate lines to the script.