The best way to learn about how MVC 3 works is to get started with building an application, so let's do that.
Software Requirements for ASP.NET MVC 3
MVC 3 runs on the following Windows client operating systems:
- Windows XP
- Windows Vista
- Windows 7
It runs on the following server operating systems:
- Windows Server 2003
- Windows Server 2008
- Windows Server 2008 R2
The MVC 3 development tooling installs in both Visual Studio 2010 and Visual Web Developer 2010 Express.
Installing ASP.NET MVC 3
After ensuring you've met the basic software requirements, it's time to install ASP.NET MVC 3 on your development and production machines. Fortunately, that's pretty simple.
Side-by-Side Installation with MVC 2
MVC 3 installs side-by-side with MVC 2, so you can install and start using MVC 3 right away. You'll still be able to create and update existing MVC 2 applications as before.
Installing the MVC 3 Development Components
The developer tooling for ASP.NET MVC 3 supports Visual Studio 2010 or Visual Web Developer 2010 Express (free).
You can install MVC 3 using either the Web Platform Installer (http://www.microsoft.com/web/gallery/install.aspx?appid=MVC3) or the executable installer package (available at http://go.microsoft.com/fwlink/?LinkID=208140). I generally prefer to use the Web Platform Installer (often called the WebPI, which makes me picture it with a magnificent Tom Selleck moustache for some reason) because it downloads and installs only the components you don't already have; the executable installer is able to run offline so it includes everything you might need, just in case.
Installing MVC 3 on a Server
The installers detect if they're running on a computer without a supported development environment and just install the server portion. Assuming your server has Internet access, WebPI is a lighter weight install, because there's no need to install any of the developer tooling.
When you install MVC 3 on a server, the MVC runtime assemblies are installed in the Global Assembly Cache (GAC), meaning they are available to any website running on that server. Alternatively, you can just include the necessary assemblies in your application without requiring that MVC 3 install on the server at all. This process, called bin deployment, is accomplished by adding project references to the following assemblies and setting them to “Copy Local” in the Visual Studio property grid:
- Microsoft.Web.Infrastructure
- System.Web.Helpers
- System.Web.Mvc
- System.Web.Razor
- System.Web.WebPages
- System.Web.WebPages.Deployment
- System.Web.WebPages.Razor
For more information on these installation options, see Scott Guthrie's blog post titled “Running an ASP.NET MVC 3 app on a web server that doesn't have ASP.NET MVC 3 installed,” available at http://weblogs.asp.net/scottgu/archive/2011/01/18/running-an-asp-net-mvc-3-app-on-a-web-server-that-doesn-t-have-asp-net-mvc-3-installed.aspx.
Creating an ASP.NET MVC 3 Application
After installing MVC 3, you'll have some new options in Visual Studio 2010 and Visual Web Developer 2010. The experience in both IDEs is very similar; because this is a Professional Series book we'll be focusing on Visual Studio development, mentioning Visual Web Developer only when there are significant differences.
MVC Music Store
We'll be loosely basing some of our samples on the MVC Music Store tutorial. This tutorial is available online at http://mvcmusicstore.codeplex.com and includes a 150-page e-book covering the basics of building an MVC 3 application. We'll be going quite a bit further in this book, but it's nice to have a common base if you need more information on the introductory topics.
To create a new MVC project:
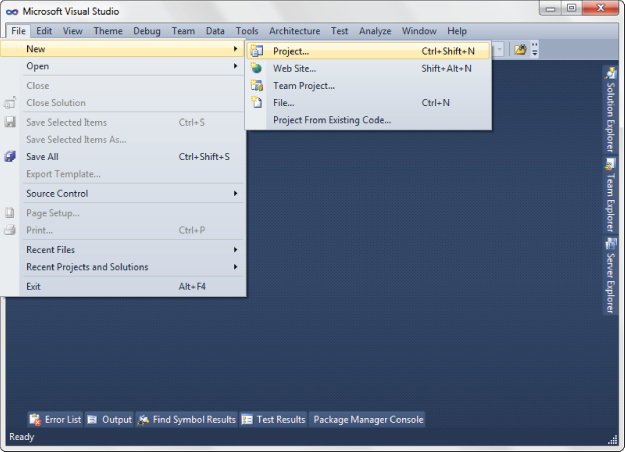
1. Begin by choosing File ⇒ New ⇒ Project as shown in Figure 1.2.
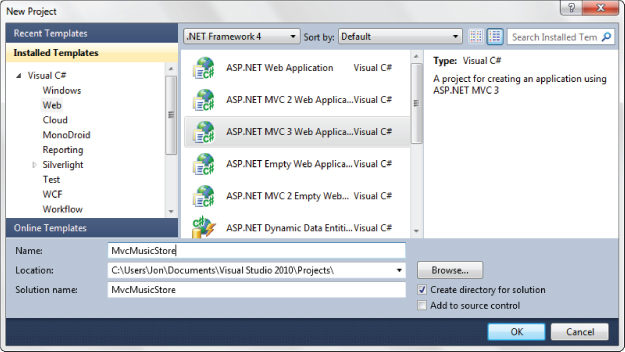
2. In the Installed Templates section on the left column of the New Project dialog, shown in Figure 1.3, select the Visual C# ⇒ Web templates list. This displays a list of web application types in the center column.
3. Select ASP.NET MVC 3 Web Application, name your application MvcMusicStore, and click OK.
The New ASP.NET MVC 3 Dialog
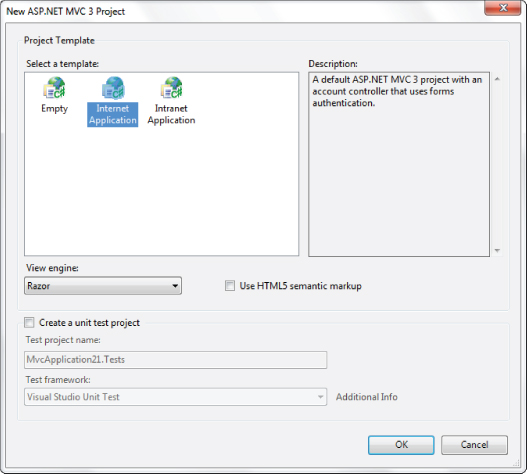
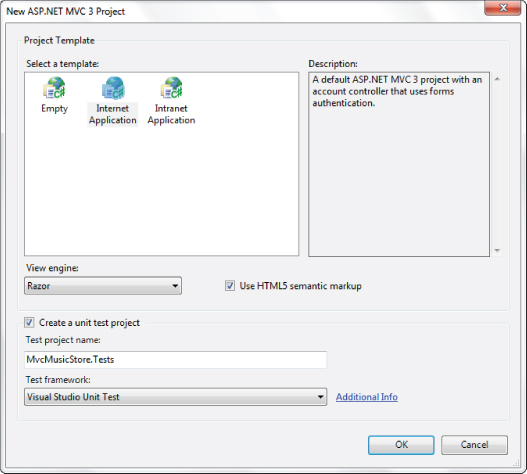
After creating a new MVC 3 application, you'll be presented with an intermediate dialog with some MVC-specific options for how the project should be created, as shown in Figure 1.4. The options you select from this dialog can set up a lot of the infrastructure for your application, from account management to view engines to testing.
Application Templates
First, you have the option to select from two preinstalled project templates (shown in Figure 1.4).
- The Internet Application template: This contains the beginnings of an MVC web application—enough so that you can run the application immediately after creating it and see a few pages. You'll do that in just a minute. This template also includes some basic account management functions which run against the ASP.NET Membership system (as discussed in Chapter 7).
The Intranet Application template was added as part of the ASP.NET MVC 3 Tools Update. It is similar to the Intranet Application template, but the account management functions run against Windows accounts rather than the ASP.NET Membership system.
- The Empty template: This template is, well, mostly empty. It still has the basic folders, CSS, and MVC application infrastructure in place, but no more. Running an application created using the Empty template just gives you an error message—you need to work just to get to square one. Why include it, then? The Empty template is intended for experienced MVC developers who want to set up and configure things exactly how they want them. We'll take a brief look at the Empty application structure later in this chapter; for more information consult the MVC Music Store application, which starts with the Empty template.
View Engines
The next option on the New ASP.NET MVC 3 Project dialog is a View Engine drop-down. View engines offer different templating languages used to generate the HTML markup in your MVC application. Prior to MVC 3, the only built-in option was the ASPX, or Web Forms, view engine. That option is still available, as shown in Figure 1.5.

However, MVC 3 adds a new option here: the Razor view engine. We'll be looking at that in a lot more detail, especially in Chapter 3.
Testing
If you're using either the Internet Application or Intranet Application templates, you'll have one more option on the New ASP.NET MVC 3 Project dialog. This section deals with testing, as shown in Figure 1.6.
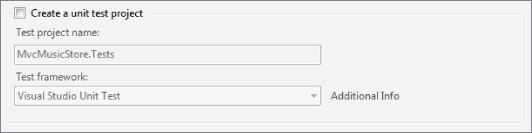
Leaving the Create a Unit Test Project checkbox unselected means that your project will be created without any unit tests, so there's nothing else to do.
Recommendation: Check the Box
I'm hoping you'll get in the habit of checking that Create a Unit Test Project box for every project you create.
I'm not going to try to sell you the Unit Testing religion—not just yet. We'll be talking about unit testing throughout the book, especially in Chapter 12, which covers unit testing and testable patterns, but we're not going to try to ram it down your throat.
Most developers I talk to are convinced that there is value in unit testing. Those who aren't using unit tests would like to, but they're worried that it's just too hard. They don't know where to get started, they're worried that they'll get it wrong, and are just kind of paralyzed. I know just how you feel, I was there.
So here's my sales pitch: just check the box. You don't have to know anything to do it; you don't need an ALT.NET tattoo or a certification. We'll cover some unit testing in this book to get you started, but the best way to get started with unit testing is to just check the box, so that later you can start writing a few tests without having to set anything up.
After checking the Create a Unit Test Project box, you'll have a few more choices:
- The first is simple: You can change the name of your unit test project to anything you want.
- The second option allows selecting a test framework, as shown in Figure 1.7.
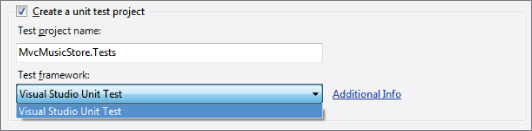
You may have noticed that there's only one test framework option shown, which doesn't seem to make a whole lot of sense. The reason there's a drop-down is that unit testing frameworks can register with the dialog, so if you've installed other unit testing frameworks (like xUnit, NUnit, MbUnit, and so on) you'll see them in that drop-down list as well.
The Visual Studio Unit Test Framework is available only with Visual Studio 2010 Professional and higher versions. If you are using Visual Studio 2010 Standard Edition or Visual Web Developer 2010 Express, you will need to download and install the NUnit, MbUnit, or XUnit extensions for ASP.NET MVC in order for this dialog to be shown.
Registering Unit Testing Frameworks with the Unit Testing Framework Drop-down
Ever wondered what's involved in registering a testing framework with the MVC New Project dialog?
The process is described in detail on MSDN (http://msdn.microsoft.com/en-us/library/dd381614.aspx). There are two main steps:
1. Create and install a template project for the new MVC Test Project.
2. Register the test project type by adding a few registry entries under HKEY_CURRENT_USERSoftwareMicrosoftVisualStudio10.0_ConfigMVC3TestProjectTemplates.
These are both of course things that can be included in the installation process for a unit testing framework, but you can customize them if you'd like without a huge amount of effort.
Review your settings on the New MVC 3 Project dialog to make sure they match Figure 1.8 and click OK.
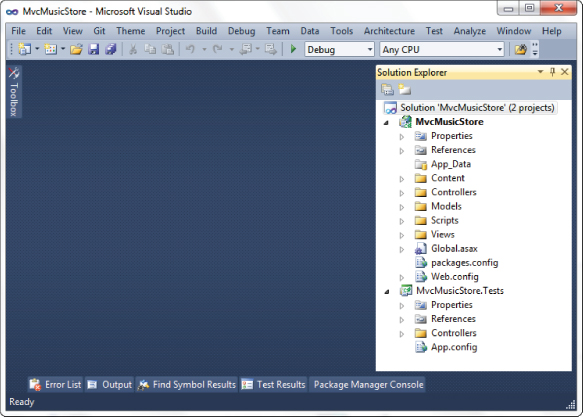
This creates a solution for you with two projects—one for the web application and one for the unit tests, as shown in Figure 1.9.