Chapter 8
Using PowerShell
IN THIS CHAPTER
![]() Getting started with PowerShell
Getting started with PowerShell
![]() Using PowerShell cmdlets
Using PowerShell cmdlets
![]() Working with parameters
Working with parameters
![]() Understanding the pipeline
Understanding the pipeline
![]() Using scripts
Using scripts
In the preceding chapter, you learn how to use a variety of Windows commands from a standard command prompt to perform various Windows administrative chores. In this chapter, you learn how to use a significantly more advanced command-line interface called PowerShell. PowerShell is to the Windows command prompt what a Tesla is to a Model A. Both cars look good, but the Model A was popular 90 years ago and took forever to get to its top speed of 65 miles per hour. The Tesla will get you to 155 miles per hour in less than 30 seconds.
Truth be told, I’d rather drive the Model A. But that’s because I like things that are old like me. For real command-line performance, however, I suggest you spend some time learning PowerShell. You won’t regret it.
 This short chapter can’t possibly cover everything there is to know about Power-Shell. For more information, see Microsoft’s PowerShell site at
 www.microsoft.com/powershell.
Using PowerShell
PowerShell runs in a command window that’s very similar to the standard Windows command prompt. However, the procedure to open it is a bit different:
- Press the Windows key on your keyboard, and then type PowerShell.
Press the Enter key.
The PowerShell window appears, as shown in Figure 8-1.
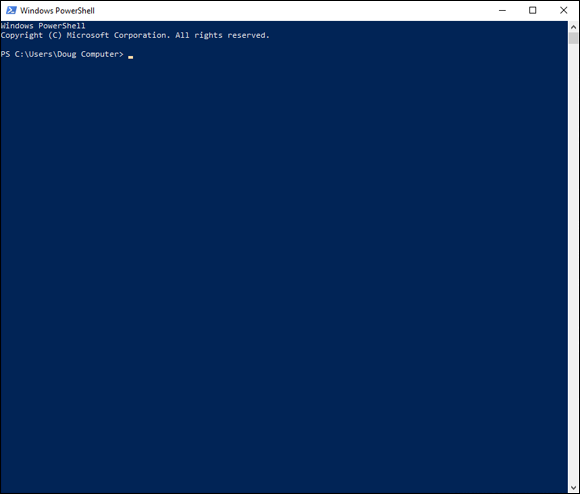
FIGURE 8-1: The PowerShell window.
If you want to perform administrative functions while in PowerShell, you’ll need to open PowerShell as an administrator. To do that, right-click the Windows PowerShell icon and choose Run As Administrator.
 PowerShell is an incredibly powerful administrative tool, and opening a PowerShell window as an administrator can be risky if you aren’t sure what you’re doing. I suggest that while you’re learning PowerShell, you do so on your desktop computer rather than on one of your servers. At least if you make serious mistakes on your own desktop computer, you won’t bring down everyone else! (I’m half joking here. As a network administrator, you know how to be careful. But it’s a good idea to experiment on your own computer or one you’ve designated as a sandbox rather than on a critical server!)
As with a standard command shell, you can type any commands you want in the window. However, you’ll notice a few differences right off the bat:
- Though it’s not apparent in the figure, the background for a PowerShell window is blue rather than black.
- The title bar indicates that you’re in Windows PowerShell.
- The welcome banner at the top of the window announces that you’re using PowerShell.
- Although the command prompt is similar to the prompt for a standard command shell, the current directory is prefixed with PS to remind you that you’re in PowerShell.
You can formally exit PowerShell by typing exit and pressing Enter. Or, you can just close the window.
You can enter and edit commands within a PowerShell window pretty much the same as you do in a standard command shell. However, one difference you’ll find useful is that the Tab key serves as an auto-complete feature: If you type a partial command and then press the Tab key, Windows will try to finish the command for you. Because most PowerShell commands are a bit long compared to their standard Windows command counterparts, this can be a real timesaver.
Give it a try: Open a PowerShell window and then type get-r and press the Tab key. PowerShell automatically expands this to the first standard PowerShell command that starts with get-r:
PS C:UsersDoug> Get-Random
596196043
PS C:UsersDoug>
As you can see, the shell expands your text to Get-Random, a PowerShell command that returns a random number. (Run this command several times; you'll see a different number each time.)
Understanding PowerShell Commands
PowerShell supports four distinctly different kinds of commands you can run directly from the PowerShell prompt:
- Native commands: A native command is a standard Windows command that you would ordinarily run at a normal command prompt. Traditional commands such as
xcopy,ipconfig, andpingcan all be run from a PowerShell prompt. - Cmdlets: A cmdlet (which is short for commandlet) is the basic built-in PowerShell command. All cmdlet names follow a consistent verb-noun format. In the example in the preceding section, the verb is
Getand the noun isRandom. (For more information about cmdlets, see the section “Using Cmdlets” later in this chapter.) - Scripts: A script is a collection of PowerShell commands saved to a text file with the extension
.ps1. You can run a script at a PowerShell prompt simply by typing the name of the script, without the extension. In short, scripts are PowerShell's equivalent for batch files. (For more information about scripts, see the section “Using Scripts” later in this chapter.) - Functions: A function is a set of PowerShell commands that you give a name. Then you can run the named set of commands using the function's name as if it were a command. Here’s a simple example that creates and then calls a function:
PS C:UsersDoug> function rnd {Get-Random}
PS C:UsersDoug> rnd
948203949
PS C:UsersDoug>
The first command entered above creates a function named
rnd. The list of commands to be executed for the function is enclosed within curly braces; in this example, just a single command is used (Get-Random). This line creates a function namedrndthat runs theGet-Randomcmdlet.The second command calls the
rndfunction. As you can see, PowerShell responds to therndfunction by displaying another random number.Note that functions are usually used within scripts. And because they're a somewhat advanced topic, I won’t be covering them further in this chapter. (For more information, you can refer to Microsoft’s PowerShell website at
www.microsoft.com/powershell.)
Using Cmdlets
Cmdlets are the bread and butter of PowerShell. At first glance, cmdlets seem similar to native commands, but actually they’re quite different. The most obvious difference is how they’re named. All cmdlets are named using a simple verb-name convention, where the first word is one of several standardized verbs (such as get, create, or show) and the noun is a somewhat less standardized name of the object that the verb acts on. For example, in the Get-Random cmdlet, the verb is Get and the noun is Random.
Nouns in PowerShell are always singular. For example, the command that retrieves a list of all system services is called get-service, not get-services.
All cmdlets follow this naming convention, which makes it easy to remember cmdlet names, at least once you work with PowerShell long enough to learn the most common verb and noun names.
You can see a listing of all the verbs by running the get-verb cmdlet (again, singular: get-verb, not get-verbs). The get-verb command displays a list of 98 different verbs that can be used in cmdlets — too many to show here. Run the command at a PowerShell prompt to get a feel for the types of verbs that are used in cmdlets.
Incidentally, PowerShell names are not case-sensitive. Thus, you don't have to capitalize the verbs and nouns when you type PowerShell commands. Get-Random and get-random have exactly the same effect.
Using Parameters
Most cmdlets let you use parameters that allow you to customize the behavior of the cmdlet. Parameter names are preceded by a hyphen and followed by the parameter value. For example:
PS C:UsersDoug> Get-Random -Minimum 1 -Maximum 10
2
PS C:UsersDoug>
This cmdlets returns a random number between 1 and 10; in the above example, the number returned happens to be 2, but each time you run the cmdlet you'll get a different random value.
Many parameters have default values, so if you omit a parameter, the default value is used. For the Get-Random cmdlet, the default value for -Minimum is 1, so you can omit it, as in this example:
Get-Random -Maximum 10
Some parameters can accept two or more values. In that case, you simply separate the values by commas.
You don't always have to type the full name of a parameter; PowerShell will do its best to figure out which parameter you intend. For example, the following command works:
Get-Random 1 -Max 10
In fact, this command works, too, because Ma is enough to distinguish -Maximum from -Minimum:
Get-Random -Ma 10
However, the following command doesn't work:
Get-Random -M 10
Here, PowerShell can't tell whether you mean to use the -Minimum parameter or the -Maximum parameter.
Some parameters don't have values; in that case, you just list the parameter name without a subsequent value, as in this example:
PS C:UsersDoug> Get-ChildItem -recurse
This cmdlet, Get-ChildItem, is PowerShell's equivalent to the dir command: It lists the contents of the current directory. The -recurse parameter tells Get-ChildItem to list not just the current directory, but all subdirectories as well.
PowerShell defines a set of common parameters that work in a consistent way across many different cmdlets. These common parameters are listed in Table 8-1. Note that not all cmdlets implement all the common parameters. But the point is that when a cmdlet provides the feature indicated by one of these common parameters, the name of the common parameter will be used. (Of special interest is the -whatif parameter, which lets you check out what a complicated cmdlet will do before you actually run it.)
TABLE 8-1 PowerShell Common Parameters
Parameter |
What It Does |
|---|---|
|
Displays a message that indicates what the cmdlet will do without actually doing anything. |
|
Prompts the user before proceeding. |
|
Displays additional explanatory information. |
|
Indicates what to do if an error occurs. Possible actions are |
|
Provides the name of a variable used to hold error information. |
|
Indicates what to do if a warning message is generated. Actions are the same as for |
|
Provides the name of a variable used to hold warning information. |
|
Provides the name of a variable used to hold the cmdlet's output. |
|
Displays messages that are sometimes helpful when debugging a cmdlet. |
Some cmdlet parameters are positional, which means that you can omit the parameter name and just list the parameter values. For the Get_Random cmdlet, -Maximum is the first positional parameter. So, if you simply specify a value without a parameter name, Get-Random uses the value as the -Maximum parameter:
Get-Random 10
One final bit about parameters: If you omit a required parameter, PowerShell will prompt you to enter its value. You'll see an example of this in the section, “Using Aliases” later in this chapter.
Getting Help
PowerShell includes an extensive collection of help information that you can access via the Get-Help cmdlet. Simply provide the name of the cmdlet you need help with as a positional parameter. For example, here is the Get-Help output for the Get-Random cmdlet:
PS C:UsersDoug> Get-Help Get-Random

NAME
    Get-Random

SYNOPSIS
    Gets a random number, or selects objects randomly from a
    collection.


SYNTAX
    Get-Random [-InputObject] <Object[]> [-Count <Int32>]
    [-SetSeed <Int32>] [<CommonParameters>]


    Get-Random [[-Maximum] <Object>] [-Minimum <Object>]
    [-SetSeed <Int32>] [<CommonParameters>]

DESCRIPTION
    The Get-Random cmdlet gets a randomly selected number. If you
    submit a collection of objects to Get-Random , it gets one
    or more randomly selected objects from the collection.

    Without parameters or input, a Get-Random command returns a
    randomly selected 32-bit unsigned integer between 0 (zero)
    and Int32.MaxValue (0x7FFFFFFF, 2,147,483,647).

    You can use the parameters of Get-Random to specify a seed
    number, minimum and maximum values, and the number of objects
    returned from a submitted collection.


RELATED LINKS
    Online Version:
    http://go.microsoft.com/fwlink/?LinkId=821799

REMARKS
    To see the examples, type: "get-help Get-Random -examples".
    For more information, type: "get-help Get-Random -detailed".
    For technical information, type: "get-help Get-Random -full".
    For online help, type: "get-help Get-Random -online"

PS C:UsersDoug>
You can use several additional parameters to get even more help information:
-Examples: Displays examples of the cmdlet, along with a detailed explanation of what each example does.-Detailed: Provides more detailed help.-Full: Displays all available help information.-Online: Opens a web browser homed on Microsoft's help page for the cmdlet. (This is actually the most useful form of help; see Figure 8-2 for an example of the help page for theGet_Randomcmdlet.)
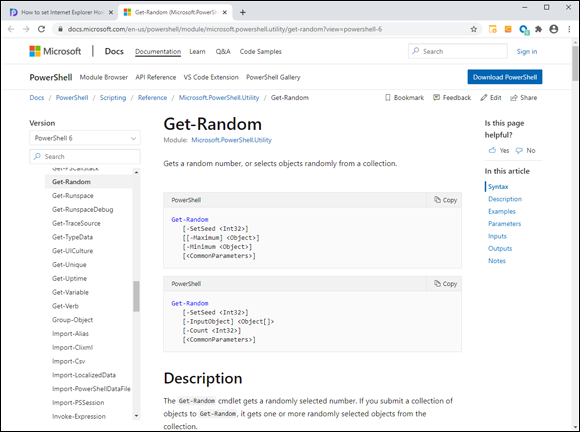
FIGURE 8-2: Online help for a PowerShell cmdlet.
Using Aliases
By now, you may be grumbling that PowerShell is a bit verbose. Indeed, most cmdlet names are pretty long. And although PowerShell will attempt to figure out what parameter names you mean if you don’t spell them out completely, PowerShell doesn’t give you the same grace with cmdlet names: If you don’t spell out a cmdlet name in its entirety, PowerShell displays a rude error message.
Fortunately, PowerShell does provide relief in the form of aliases. An alias is an alternative name for a cmdlet. You can make up your own aliases, or you can use a somewhat large number of built-in aliases.
For example, earlier I show an example of the Get-ChildItem cmdlet used to list the contents of a folder. Get-ChildItem is the PowerShell equivalent of the dir command, and PowerShell provides dir as an alias for the Get-ChildItem command. So although Get-ChildItem is the cmdlet to list the contents of a folder, you can call the Get-ChildItem cmdlet by entering dir at a PowerShell prompt.
Thus, you can display the contents of a folder like this:
PS C:UsersDoug> dir

    Directory: C:UsersDoug

Mode                LastWriteTime         Length Name
----                -------------         ------ ----
d-r---         1/4/2018  10:18 PM                Contacts
d-r---         1/4/2018  10:18 PM                Desktop
d-r---         1/4/2018  10:18 PM                Documents
d-r---         1/4/2018  10:18 PM                Downloads
d-r---         1/4/2018  10:18 PM                Favorites
d-r---         1/4/2018  10:18 PM                Links
d-r---         1/4/2018  10:18 PM                Music
d-r---         1/4/2018  10:19 PM                OneDrive
d-r---         1/4/2018  10:18 PM                Pictures
d-r---         1/4/2018  10:18 PM                Saved Games
d-r---         1/4/2018  10:18 PM                Searches
d-r---         1/4/2018  10:18 PM                Videos

PS C:UsersDoug>
If you want to see a list of all the aliases that are available, use the Get-Alias cmdlet. To narrow the list down to show just the aliases for a particular cmdlet, use the -Definition parameter, as in this example:
PS C:UsersDoug> Get-Alias -Definition Get-ChildItem

CommandType   Name                          Version    Source
-----------   ----                          -------    ------
Alias         dir -> Get-ChildItem
Alias         gci -> Get-ChildItem
Alias         ls -> Get-ChildItem

PS C:UsersDoug>
Here, you can see that three aliases are defined for the Get-ChildItem cmdlet: dir, gci, and ls. Dir is the Windows equivalent to Get-ChildItem, gci is simply an abbreviation for Get-ChildItem, and ls is the Linux equivalent.
If you want to create your own aliases, you can use the Set-Alias command. This cmdlet requires two parameters: -name, which provides the name of the alias, and -value, which indicates the cmdlet that will be aliases. For example:
Set-Alias -Name ListFiles -Value Get-ChildItem
This creates a new alias for the Get-ChildItem cmdlet named ListFiles.
To remove an alias, you have to use the Remove-Item cmdlet, as in this example:
Remove-Item Alias:ListFiles
In this case, you indicate that you want to remove an Alias item, followed by a colon and the name of the alias you want to remove.
Using the Pipeline
The verb-noun naming convention isn't the most important difference between PowerShell and other command shells. The real difference is how PowerShell cmdlets deal with piped input and output. PowerShell takes the idea of piping to a new level.
In Chapter 7 of this minibook, I explain how to use piping to chain two standard Windows commands together so that the output from the first command is piped into the second command. For example:
C:>type users.txt | sort
Here, the type command displays the contents of a text file named users.txt. But instead of being displayed on the screen, the output from the type command is fed into the sort command, which sorts the text and then displays it on the screen. The result is that the contents of the users.txt file are displayed on the screen in sorted order.
With a standard Windows command, the input and output for commands that can use piping is always simple text. Thus, the type command creates text output, and the sort command reads text input and creates more text output. When the shell gets to the end of a sequence of piped commands, the output from the last command is displayed on the screen.
With cmdlets, the information that is piped is not simple text but complete objects. An object is an amalgamation of data, as well as executable code. Objects have properties, which are named characteristics of the object, and methods, which are named functions that the object can perform. Methods are important in PowerShell, but using them is an advanced topic that's beyond the scope of this chapter. So I'm focusing here on properties.
Consider the Get-ChildItem cmdlet, which lists the contents of a folder:
PS C:UsersDoug> Get-ChildItem

    Directory: C:UsersDoug

Mode                LastWriteTime         Length Name
----                -------------         ------ ----
d-r---         1/4/2018  10:18 PM                Contacts
d-r---         1/4/2018  10:18 PM                Desktop
d-r---         1/4/2018  10:18 PM                Documents
d-r---         1/4/2018  10:18 PM                Downloads
d-r---         1/4/2018  10:18 PM                Favorites
d-r---         1/4/2018  10:18 PM                Links
d-r---         1/4/2018  10:18 PM                Music
d-r---         1/4/2018  10:19 PM                OneDrive
d-r---         1/4/2018  10:18 PM                Pictures
d-r---         1/4/2018  10:18 PM                Saved Games
d-r---         1/4/2018  10:18 PM                Searches
d-r---         1/4/2018  10:18 PM                Videos

PS C:UsersDoug>
This cmdlet doesn’t actually produce the text that is displayed in the PowerShell window. Instead, it returns a collection of file system objects. These file system objects have a number of important properties, among them Name, Length, LastWriteTime, and Mode.
The Get-ChildItem cmdlet puts this collection in the pipeline, which is a repository for objects that passed from one cmdlet to another. In most cases, you only invoke one cmdlet at a time in PowerShell. In that case, the output from the cmdlet you invoke is passed to the end of the pipeline, which automatically renders the contents of the pipeline as text. Hence, the list of file system objects is converted to text form and displayed in the PowerShell window.
You can easily manipulate the output displayed for a cmdlet by piping the output to one of several commonly used cmdlets that sort, filter, or otherwise format the objects in the pipeline. For example, if you want to show the contents of a folder in reverse alphabetical order, you can pipe the Get-ChildItem cmdlet's output into the Sort-Object cmdlet and use the -Descending parameter to reverse the order:
PS C:UsersDoug> Get-ChildItem | Sort-Object -Descending

    Directory: C:UsersDoug

Mode                LastWriteTime         Length Name
----                -------------         ------ ----
d-r---         1/4/2018  10:18 PM                Videos
d-r---         1/4/2018  10:18 PM                Searches
d-r---         1/4/2018  10:18 PM                Saved Games
d-r---         1/4/2018  10:18 PM                Pictures
d-r---         1/4/2018  10:19 PM                OneDrive
d-r---         1/4/2018  10:18 PM                Music
d-r---         1/4/2018  10:18 PM                Links
d-r---         1/4/2018  10:18 PM                Favorites
d-r---         1/4/2018  10:18 PM                Downloads
d-r---         1/4/2018  10:18 PM                Documents
d-r---         1/4/2018  10:18 PM                Desktop
d-r---         1/4/2018  10:18 PM                Contacts

PS C:UsersDoug>
As you can see, PowerShell uses the vertical-bar character (also known as the pipe character) to indicate piping.
If you want to pick and choose which properties to display when you use Get-ChildItem, you can use the Select-Object cmdlet. For example:
PS C:UsersDoug> Get-ChildItem | Select-Object -Property Name

Name
----
Contacts
Desktop
Documents
Downloads
Favorites
Links
Music
OneDrive
Pictures
Saved Games
Searches
Videos

PS C:UsersDoug>
In this example, the Select-Object cmdlet's Property method indicates that you want to include only the Name property. The result is a list of filenames.
You can select more than one property by separating the property names with commas, as in this example:
PS C:UsersDoug> Get-ChildItem | Select-Object -Property Name, LastWriteTime

Name        LastWriteTime
----        -------------
Contacts    1/4/2018 10:18:49 PM
Desktop     1/4/2018 10:18:49 PM
Documents   1/4/2018 10:18:49 PM
Downloads   1/4/2018 10:18:49 PM
Favorites   1/4/2018 10:18:49 PM
Links       1/4/2018 10:18:49 PM
Music       1/4/2018 10:18:49 PM
OneDrive    1/4/2018 10:19:05 PM
Pictures    1/4/2018 10:18:49 PM
Saved Games 1/4/2018 10:18:49 PM
Searches    1/4/2018 10:18:49 PM
Videos      1/4/2018 10:18:49 PM

PS C:UsersDoug>
Here's an example that invokes three cmdlets: The first gets the contents of the current folder, the second selects just the Name property, and the third sorts the list in descending order:
PS C:UsersDoug> Get-ChildItem | Select-Object -Property Name | Sort-Object -Descending
Name
----
Pictures
OneDrive
Music
Videos
Searches
Saved Games
Documents
Desktop
Contacts
Links
Favorites
Downloads
PS C:UsersDoug>
The more you learn about PowerShell, the more you’ll come to rely on the pipeline to tailor PowerShell to meet your precise needs.
Using Providers
One of the most interesting things about PowerShell is the concept of providers. A provider is a source of data that is consumed by many of PowerShell’s commands. For example, the Get-ChildItem command consumes information from a provider called FileSystem, which represents the host computer's file system.
PowerShell provides several providers besides FileSystem. To see them all, you can use the Get-PSProvider command:
PS C:UsersDoug> Get-PSProvider

Name         Capabilities                         Drives
----         ------------                         ------
Registry     ShouldProcess, Transactions          {HKLM, HKCU}
Alias        ShouldProcess                        {Alias}
Environment  ShouldProcess                        {Env}
FileSystem   Filter, ShouldProcess, Credentials   {C}
Function     ShouldProcess                        {Function}
Variable     ShouldProcess                        {Variable}

PS C:UsersDoug>
Depending on the environment in which you run the Get-PSProvider cmdlet, you may see additional providers as well.
All providers are modeled on the concept of a file system, meaning that providers present their data to PowerShell cmdlets through one or more drives which contain items organized into folders. This might seem confusing at first, but you'll get used to it once you start to work with it.
Looking at the output from the Get-PSProvider cmdlet, you can see that the FileSystem provider lists just one drive, identified as C. If more disk drives were available on the computer, additional drive letters would appear.
Other providers list their drives using short words or abbreviations rather than single letters. For example, the Alias provider has a single drive, named Alias. Similarly, the Registry provider has two drives, named HKLM and HKCU. (If you're familiar with the Windows Registry, you'll recognize these as the common abbreviations for HKEY_Local_Machine and HKEY_Current_User, respectively.)
By default, the Get-ChildItem cmdlet uses the FileSystem provider, starting at the current folder location. However, you can easily switch the provider for Get-Children by specifying an alternative path. For example, to see a list of all available aliases, you can use this command:
Get-Children Alias:
Notice that the drive name Alias is followed by a colon and a single backslash in much the same way that the root folder of the FileSystem C drive would be written as C:.
You can change the default location for cmdlets that work with providers by using the Set-Location cmdlet. For example:
Set-Location Alias:
Having set the default location to the root of the Alias drive, subsequent cmdlets such as Get-ChildItem will automatically pull data from the Alias provider rather than from the FileSystem provider.
Using Scripts
A script is a collection of PowerShell commands saved to a text file with the extension .ps1. You can run a script at a PowerShell prompt simply by typing the name of the script, without the extension. Thus, scripts are PowerShell's equivalent for batch files.
Scripts are a great way to simplify routine Windows administration tasks. Any time you find yourself entering the same cmdlets over and over again, consider placing the cmdlets in a script. Then you can simply run the script, and let the script take care of the details of each command.
For example, suppose you routinely want to know what processes are consuming the most memory resources. You can do that using a combination of several cmdlets:
- Use
Get-Processto get a list of active processes. - Use
Select-Objectto select just theProcessNameandWSproperties. (WSstands for working set, which is one of the key memory indicators in a Windows system.) - Use
Sort-Objectto sort the result in descending order on theWSproperty. - Use
Select-Objectagain to select just the top ten results.
The resulting command would look like this:
PS C:UsersDoug> Get-Process | Select-Object -Property ProcessName, WS | Sort-Object -descending WS | Select-Object -first 10

ProcessName            WS
-----------            --
MicrosoftEdgeCP 269713408
MicrosoftEdgeCP 243097600
WINWORD         169254912
SearchUI        158670848
MsMpEng         120512512
SelfService      98873344
EXCEL            89866240
explorer         87056384
MicrosoftEdge    78503936
powershell       70873088


PS C:UsersDoug>
But that's a lot to type. To save all the wear and tear on your fingers and your keyboard, you can create a .ps1 file with the command, as shown in Figure 8-3.
Get-Process | Select-Object -Property ProcessName, WS | Sort-Object -descending WS | Select-Object -first 10
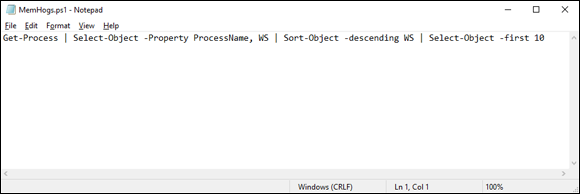
FIGURE 8-3: A PowerShell script.
Then you can invoke the whole thing just by running the .ps1 file.
However, before you can run scripts in PowerShell, you have to make a few preparations:
- Run PowerShell with administrator permissions. You can do that by right-clicking the PowerShell icon and choosing Run As Administrator.
- Enable script execution by using the
Set-ExecutionPolicycmdlet. For example:Set-ExecutionPolicy unrestrictedWhen you run this command, the cmdlet will ask for your permission to enable unrestricted script execution.
- Save your scripts to a location you can easily access. For example, use
C:Scripts.
After you've enabled scripting, you can run a script by entering the script filename (including path) at the prompt:
PS C:Windowssystem32> c:scriptsmemhogs

ProcessName            WS
-----------            --
MicrosoftEdgeCP 269381632
MicrosoftEdgeCP 237064192
WINWORD         179699712
SearchUI        164970496
MsMpEng         117723136
SelfService      98873344
explorer         89452544
MicrosoftEdge    77590528
EXCEL            75345920
powershell       74674176


PS C:Windowssystem32>
There is much more to scripting than the limits of this short chapter allows me to go into. Here are some additional features you can explore on Microsoft’s PowerShell website:
- Variables, which let you store and later retrieve values and objects.
- Functions, which let you create a set of PowerShell commands that you give a name to. Then you can run the named set of commands using the function’s name as if it were a command.
- Advanced Functions, which let you create functions with parameters.
- Logic statements, including
While,Do…While,Do…Until,For,Foreach,If, andSwitch.