Chapter 4
Amazon Web Services
IN THIS CHAPTER
![]() Looking at AWS cloud service offerings
Looking at AWS cloud service offerings
![]() Signing up for an AWS account
Signing up for an AWS account
![]() Creating a virtual machine in AWS
Creating a virtual machine in AWS
![]() Managing an AWS virtual machine instance
Managing an AWS virtual machine instance
![]() Connecting to an AWS virtual machine instance
Connecting to an AWS virtual machine instance
Like Microsoft Azure, Amazon Web Services (AWS) is a cloud computing service that includes numerous ways to virtualize your IT infrastructure in the cloud. AWS is the grandfather of cloud-based infrastructure providers — it got its start way back in 2002. Since then, AWS has developed into the largest cloud provider in the world. Amazon’s online retail space itself is hosted on AWS, as are many other familiar services, including Netflix, Hulu, and Ancestry.com.
AWS provides services that span the full range of cloud-based services, including Infrastructure as a Service (IaaS), Platform as a Service (PaaS), and Software as a Service (SaaS). In this chapter, I give you a brief look at the range of cloud services that AWS provides. Then you’ll learn how to create and manage a virtual machine (VM) on AWS.
Looking at What Amazon Web Services Can Do
AWS has well over 2,000 distinct services available on its platform. They’re organized into several categories, including (but not limited to), the following:
Compute: Provides cloud-base virtual computing resources. The main service in this category is Amazon’s cloud-based virtualization platform, known as Amazon Elastic Compute Cloud (EC2). With EC2, you can create and manage VMs that run at Amazon’s data centers. You can select from several different pricing models, depending on your needs. Multiple operating system (OS) choices are available, including Windows Server 2016 and several variations of Linux. And you can configure VMs with a single processor and as little as 1GB of RAM to as many as 64 processors and 488GB of RAM.
Naturally, the larger the machine configuration and the more it is used, the more it will cost. The smallest server can be run for just a few dollars per month (in fact, free for 12 months) — perfect for experimenting with AWS to familiarize yourself with its features.
- Networking & Content Delivery: Lets you set up virtual networks that enable your AWS cloud components to communicate with one another and also with your physical network. Amazon Virtual Private Cloud (VPC) lets you set up a private network at Amazon’s data centers so that you can extend your own private network into Amazon’s cloud, allowing EC2 machines to seamlessly integrate into your own network. In addition, this category includes several other specialized features for delivering various types of content.
- Storage: Amazon Elastic File System (EFS) is a cloud-based storage system designed to work with EC2 VMs to provide cloud-based data storage.
- Database: Relational Database Service (RDS) provides basic relational database capabilities similar to Microsoft SQL Server, and several other database offerings provide non-relational database services.
- Business Applications: Features such as Alexa for Business, email, and Chime (a cloud-based phone system).
- Security, Identity & Compliance: Provides basic directory and security services for AWS.
- Developer Tools: Provides features for developers creating and managing custom applications on AWS.
- Management & Governance: Features for managing the AWS environment.
- Machine Learning: A variety of tools for artificial intelligence (AI).
- Analytics: Features for managing and analyzing large data sets.
- End-User Computing: Provides several features aimed at end users, including a desktop virtualization solution called Workspaces and a document-management solution called WorkDocs.
But wait, there’s more! AWS also includes Internet of Things (IoT) solutions for managing your coffee pots and toasters, features for game development features, and who knows what else!
Creating an Amazon Web Services Account
Before you can use AWS, you must first set up an AWS account. The good news is that Amazon offers a free account you can use to experiment with AWS. Basic AWS services are free for 12 months, which gives you plenty of time to familiarize yourself with the many capabilities and features of AWS.
Setting up the free account is easy, but you’ll have to fork over a credit card number. So you’ll want to keep a good eye on your account, just in case you step over the line of what’s free and begin incurring monthly charges.
To set up your account, just browse to http://aws.amazon.com and follow the links to set up a free account.
Here’s what you get your first year with the free account:
- 750 hours per month of compute usage on a small VM called a micro instance, which has just one processor core and 1GB of RAM)
- 5GB of EFS storage
- 750 hours per month of Amazon RDS relational database
- An assortment of other free services, too detailed to list here
Note that all these services are free for a period of one year. After the first year, normal charges are incurred.
 The full list of what is free for 12 months is detailed and definitely subject to change. I suggest you examine the details to be sure you understand exactly what’s free and what will be charged. And check your billing summary frequently to avoid surprises.
Examining the Amazon Web Services Console
When you’ve created your free AWS account, you can access the AWS Console by following these steps:
Go to
http://aws.amazon.com.The AWS home page appears, as shown in Figure 4-1.
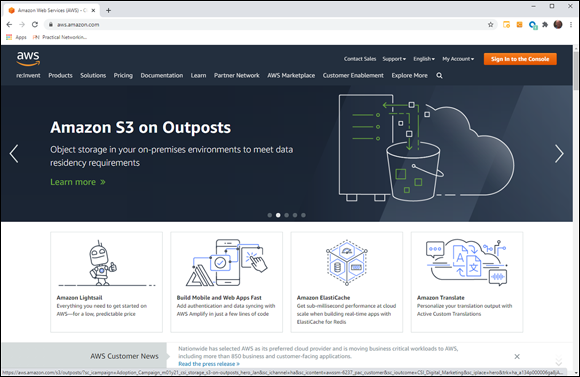
FIGURE 4-1: The AWS home page.
Click the Sign In to the Console button.
You’re taken to a sign-in screen.
Enter your username and click Next.
You’re prompted for your password.
Enter your password and click Sign In.
The AWS Console appears, as shown in Figure 4-2.
Explore the console! Start by clicking Services in the menu bar at the top of the page. This reveals a menu of services you can access via the console, as shown in Figure 4-3.
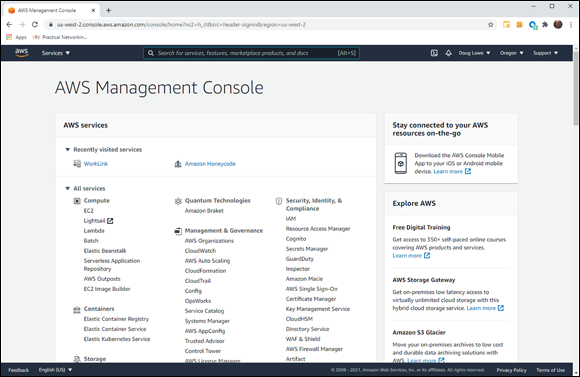
FIGURE 4-2: The AWS Console.
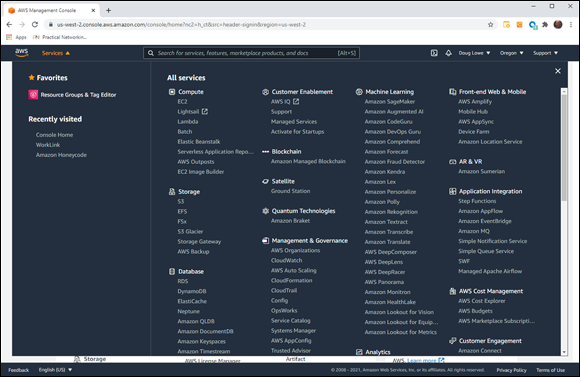
FIGURE 4-3: The Services menu.
You can click any of the services listed in this menu to view the dashboards for the various services. For example, Figure 4-4 shows the EC2 Dashboard, which shows information about EC2 VMs.

FIGURE 4-4: The EC2 Dashboard.
Creating a Windows Virtual Machine
To create a VM, navigate to the EC2 Dashboard as described in the previous section (refer to Figure 4-4). Then follow these steps:
Click the Launch Instance button.
Step 1 of the Launch Instance Wizard is displayed, as shown in Figure 4-5. This page displays a list of machine images you can choose for your VM.
Scroll through the list to see the variety of images that are available for your VMs. You’ll find a wide array of both Linux- and Windows-based images.
Click the Microsoft Windows Server 2019 Base image.
This image provides a basic Windows Server 2019 VM.
You’re taken to Step 2 of the Launch Instance Wizard, which invites you to choose an instance type, as shown in Figure 4-6. The instance type determines the performance characteristics of the VM. Here, you’ll find various combinations of virtual CPUs, memory, storage, and network performance options.
For this example, we select the t2.micro type, which provides one CPU and 1GB of memory. This instance type is eligible for the AWS free-usage tier, which gives you 750 hours of usage per month for the first 12 months of your account.

FIGURE 4-5: Choosing a machine image.
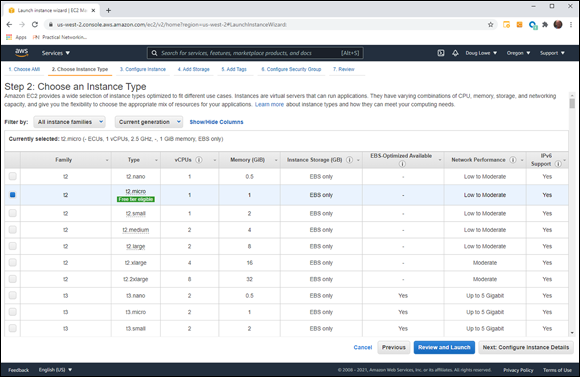
FIGURE 4-6: Choosing an instance type.
Select the t2.micro instance type and click Next: Configure Instance Details.
This summons Step 3 of the wizard, which allows you to set a variety of options for the VM, as shown in Figure 4-7.

FIGURE 4-7: Configuring instance details.
Select the configuration options you want.
The following options are available on this page:
- Number of Instances: Use this option if you want to create more than one VM instance.
- Purchasing Option: This option doesn’t apply to the t2.micro instance type.
- Network: Select the virtual network you want to use. If you haven’t yet created a virtual network, you can click Create New VPC to create one.
- Subnet: Select the subnet you want to use.
- Auto-Assign Public IP: Use this option to enable automatic assignment of an IP for the instance.
- Placement group: If you have a large number of VMs, you can place them in separate groups to simplify management, provide redundancy, or improve performance. Leave this option unchecked for now.
- Capacity Reservation: Lets you choose among several options for reserving capacity for your instance. The default setting, Open, is suitable for most VMs.
- Domain Join Directory: Use this option to join an Active Directory domain. (Click Create New Directory to create a new directory if one doesn’t already exist.)
- IAM Role: To join a directory, you must select an IAM role to authenticate your identity. To create one, click Create New IAM Role.
- CPU Options: Lets you customize the number of processor cores and threads per core.
- Shutdown Behavior: Use this option to select what happens when the host OS is shut down. The options are Stop or Terminate; in most cases, you should leave this setting set to Stop.
- Stop – Hibernate Behavior: If you enable hibernation, space is set aside on the OS volume to store the contents of RAM when the computer is stopped.
- Enable Termination Protection: Enable this feature to prevent the instance from being stopped. If you enable this feature, you’ll have to disable it before you can shut down the machine.
- Monitoring: Enables monitoring, which gathers statistics about the machine’s performance. Amazon charges for monitoring, so enable this option only if you’re sure you need it.
- Tenancy: Use this option to select whether you want this instance to run in shared hardware or on dedicated hardware. Amazon charges more for dedicated tenancy, so select shared tenancy unless you specifically need dedicated hardware.
- Elastic Graphics: Provides high-quality graphics. Most servers do not require this.
- Credit Specification: If you check Unlimited, your instance is allowed to temporarily burst beyond its normal performance specification without additional charge, provided the hourly average stays within the performance spec of the instance type you selected.
- Advanced Details: There are also several advanced details you can provide. For demonstration purposes, you can skip these details.
Click Next: Add Storage.
This brings up Step 4 of the wizard, which lets you configure the storage for the VM (see Figure 4-8).
Configure the storage for the VM.
By default, a single disk volume called the root volume is created for the instance. You can change the amount of space allocated for the root volume (in Figure 4-8, 30GB has been allocated by default), and you can change the disk type. The default is General Purpose SSD, but you can change it to less expensive Magnetic Disk if you want.
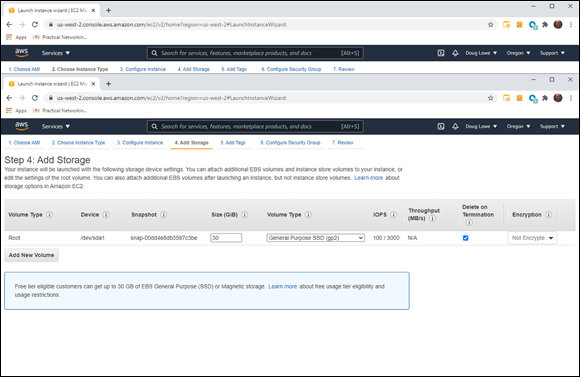
FIGURE 4-8: Adding storage.
You can add additional disk volumes by clicking the Add New Volume button. When you click this button, an additional disk volume is added; you can then specify the size and volume type for the new volume.
Click Next: Add Tags.
The page shown in Figure 4-9 is displays.
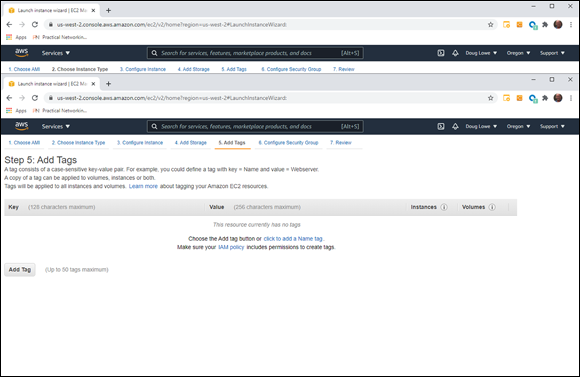
FIGURE 4-9: Adding tags.
If you want, add one or more tags to the instance.
AWS tags let you add keywords and associated values to your instances, as well as to other types of resources, such as volumes.
For your first experimental VM instance, you don’t need to add tags. But if you end up using more than a few VMs in AWS, you may want to apply tags to help keep them organized. For example, you might create a keyword named Stack to indicate whether a machine is part of your production stack or your test stack. For production machines, you would specify Production for the Stack keyword; for test machines, you’d specify Test.
To add a tag, simply click the Add Tag button. Then enter the tag and value.
Click Next: Configure Security Group.
This brings up the Configure Security Group page, shown in Figure 4-10. This page lets you configure one or more firewall rules that limit access to the VM.

FIGURE 4-10: Configuring the security group.
Configure the firewall rules.
The default security group provides a single firewall rule that allows Remote Desktop Protocol (RDP) access from any IP address. If you want, you can limit RDP access to a specific address by entering the address in the Source column.
Change the source drop-down from Anywhere to My IP; AWS will figure out the IP address of your computer and set the rule to allow access only from that IP address.If you want to allow other types of traffic to the machine, you’ll need to add additional rules. For example, to enable HTTP or HTTPS traffic, you’ll need to add rules to allow HTTP and HTTPS.
Click Review and Launch.
This takes you to the final page of the wizard, which displays a summary of the instance settings that you can review before you create the instance (see Figure 4-11).

FIGURE 4-11: Reviewing the instance settings.
Review the settings.
You can click the Edit links to the right of each group of settings if you need to make any changes.
Click Launch.
AWS prompts you to select a key pair to provide security for your instance. A key pair is a combination of a public key that AWS keeps and a private key stored in a file that you’re responsible for storing. You must keep the private key file in a safe place; without it, you won’t be able to access your instance!
Initially, the key pair prompt tries to find existing key pairs. If you haven’t created any, you can select Create a New Key Pair instead of Use an Existing Key Pair from the drop-down list. Then, as shown in Figure 4-12, AWS asks you to enter a name for the key pair. You can then download the key pair file and save it on your computer.
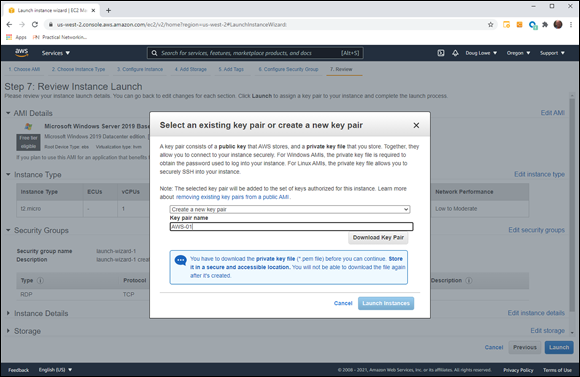
FIGURE 4-12: Creating a key pair.
Enter a name for the key pair.
Use whatever name you want, but make sure it’s memorable.
Click Download Key Pair.
Windows asks what you want to do with the downloaded file.
Save the key pair file to a safe location.
The procedure to do this depends on the web browser you’re using.
Click Launch Instances.
AWS displays a Launch Status page that indicates the status of your request, as shown in Figure 4-13.
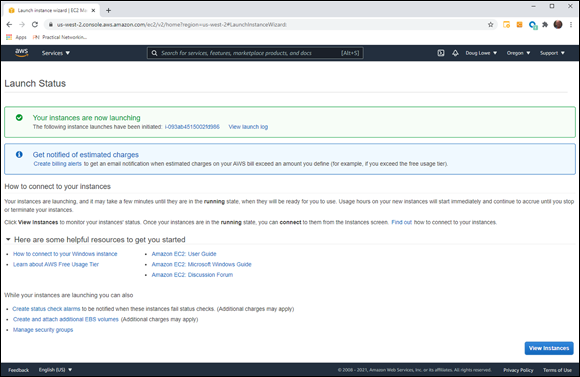
FIGURE 4-13: Your instances are being created!
Managing an Amazon Web Services Virtual Machine
You can manage your VM instances by opening the EC2 Dashboard and then clicking Instances in the menu that appears at the left side of the Dashboard page. This brings up a list of all EC2 VM instances, as shown in Figure 4-14.
To add or change the name of an instance, hover the mouse over the Name column for the instance you want to rename and click the pencil icon that appears. You can then type a name for the instance. (In Figure 4-14, I’ve already changed the name of the instance created in the previous section to WIN19-01.)
To manage an instance, right-click anywhere in the row for the instance you want to manage. This brings up a context menu with the following commands:
- Launch Instances: Lets you create a new AWS instance.
- Launch Instances from Template: Lets you create a new AWS instance from a template.
- Connect: Connects to the instance using Remote Desktop Connection.
- Stop Instance: Shuts down the OS.
- Start Instance: Starts the VM.
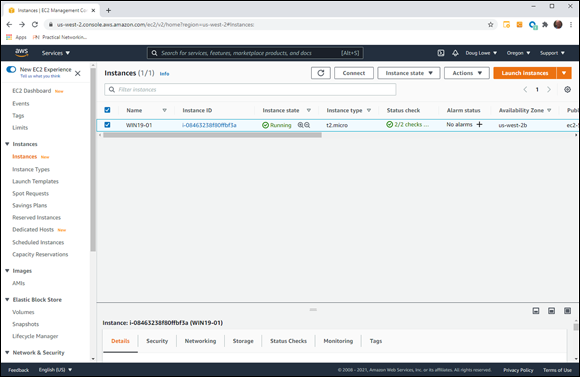
FIGURE 4-14: Managing EC2 instances.
- Reboot Instance: Reboots the VM.
- Hibernate Instance: Hibernates the instance, if allowed.
- Terminate Instance: Terminates the instance. This permanently deletes the instance, so use this option only when you no longer need the instance.
- Instance Settings: Lets you change settings for the instance. Note that if the instance is stopped, you can change the instance type to increase the amount of RAM or the processor resources available to the instance.
- Networking: Changes network settings for the instance.
- Image and Templates: Create an image of the instance that you can later use to create new instances. Or, create a template from this image so you can easily create other similar instances.
- Monitor and Troubleshooting: Enables monitoring services for the instance.
Connecting to an Amazon Web Services Virtual Machine
When an AWS VM is up and running, you can connect to it remotely using Remote Desktop Connection, just as you can connect to any other VM. The easiest way to do so is to follow these steps:
In the EC2 Instance Dashboard, right-click the instance you want to connect to and choose Connect, and then click the RDP Client tab.
The Connect to Instance page appears (see Figure 4-15).
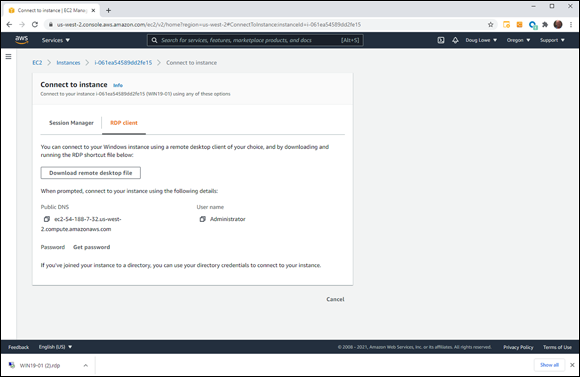
FIGURE 4-15: Connecting to an instance.
Click Download Remote Desktop File.
This downloads a remote desktop connection file (
.rdp).Save the RDP file to your computer.
The procedure to do this varies depending on the browser you're using.
Back in the Connect to Your Instance dialog box, click Get Password.
AWS asks you to specify the key pair file you downloaded when you created the instance, as shown in Figure 4-16.
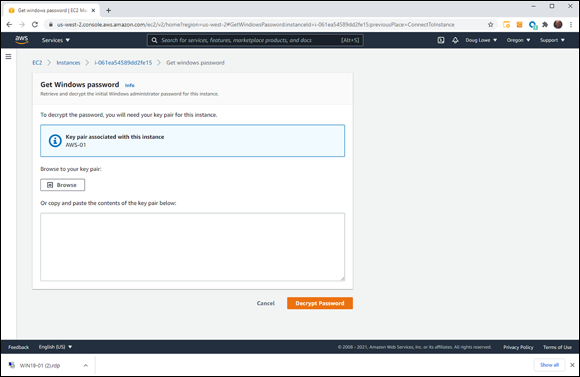
FIGURE 4-16: Entering the path to the key pair file.
Click the Browse button, navigate to your key path file, select it, and click Open.
AWS shows the contents of the key path file in the text box.
Click Decrypt Password.
AWS decrypts the password and displays it, as shown in Figure 4-17. (Well, sort of — I airbrushed out the actual password. Don’t get all excited, though. I’ve already terminated this machine, so don’t waste your time trying to hack into it!)
Notice that the password generated by AWS consists of 32 random characters. You’ll never in a lifetime commit that to memory, and you should under no circumstances copy and paste this password into a document on your computer. My recommendation is that when you log in to the server, you change its Administrator password to something you can remember without writing down. Notice also the Copy to Clipboard icon next to the decrypted password. Click this button to copy the password to the clipboard. Then, in Step 9 (coming up!), you can just paste the random password to log in to the server.
Navigate to the
.rdpfile you saved in Step 4 and double-click to open it.Remote Desktop Connection fires up, connects to the instance, and prompts you for credentials to log in.
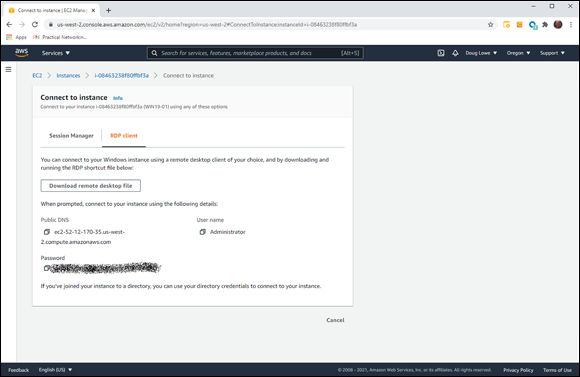
FIGURE 4-17: AWS shows you the Administrator password.
Enter the username (Administrator) and password (see Step 7) and click OK.
Congratulations! You’ve successfully logged in to your first AWS EC2 instance, as shown in Figure 4-18!
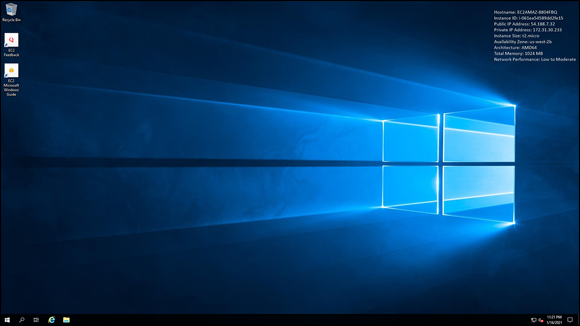
FIGURE 4-18: The console of an EC2 instance.