
Chapter 7
Typing Windows Commands
IN THIS CHAPTER
![]() Getting started with a command window
Getting started with a command window
![]() Taking advantage of command tricks and techniques
Taking advantage of command tricks and techniques
![]() Looking at batch files
Looking at batch files
![]() Using the amazing Net commands
Using the amazing Net commands
Although Windows sports a fancy graphical interface that makes it possible to perform most network management tasks by pointing and clicking, you can also do almost any network management task from a command prompt. Whether you choose to do so is largely a matter of personal style. Some network administrators pride themselves on being able to type Windows commands blindfolded and with two fingers on each hand tied behind their backs. Others have fully embraced the graphical user interface and think the command line is for administrators with Unix envy.
So the choice is yours. Skip this chapter if the thought of typing commands causes you to lose sleep. If you’re willing to venture forth, this chapter begins with an overview of working from the command prompt. Then it describes some of the more useful Windows commands. Finally, this chapter introduces the fine (and almost lost) art of writing batch files.
 Windows Server 2019 also includes an alternative command environment known as PowerShell. PowerShell is an advanced command processor that has many sophisticated features that are designed especially for creating powerful scripts. For more information, see Chapter 8 of this minibook.
Using a Command Window
Command prompts are even older than video monitors. The first computer I worked on used a teletype machine as its terminal, so the command prompt was printed on paper rather than displayed onscreen. Surprisingly, though, the concept of the command prompt hasn’t changed much since those days. The system displays a prompt to let you know it’s waiting for a command. When you type the command and press the Enter key, the system reads your command, interprets it, executes it, displays the results, and then displays the prompt again so that you can enter another command.
Opening and closing a command window
To get to a command prompt on a Windows server, follow these steps:
- Press the Windows key on your keyboard, and then type cmd.
Press the Enter key.
The command prompt window appears, as shown in Figure 7-1.
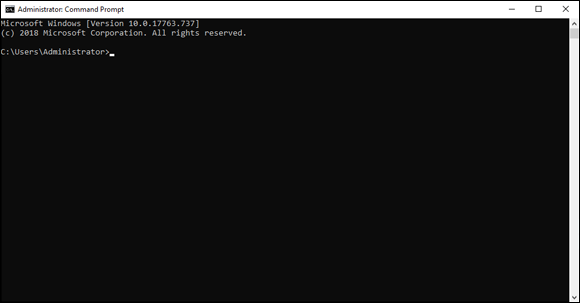
FIGURE 7-1: The command prompt.
You can type any commands you want in the window.
To exit the command prompt, type Exit, and press Enter. This action properly terminates cmd.exe and closes the command prompt window. If you try to close the command prompt window by clicking its Close button, Windows is forced to shut down cmd.exe. The process works, but you have to click your way through an intervening dialog box and wait a few seconds while Windows terminates cmd.exe. Entering the Exit command is a much faster method.
Sometimes it's helpful to open a command prompt in elevated mode, which means that you have full administrative privileges while in the prompt window. To do that, click Start and type cmd; then right-click the Command Prompt icon and choose Run As Administrator.
Editing commands
Most of the time, you just type commands by using the keyboard. If you make a mistake, you just retype the command, being careful not to repeat the mistake. cmd.exe, however, has several built-in editing features that can simplify the task of correcting a mistaken command or entering a sequence of similar commands:
- Press the right-arrow key to recall the text of the last command that you entered, one letter at a time. When you get to the spot where the new command should differ from the previous command, start typing.
- Press F3 to recall all the previous commands from the current cursor position to the end of the line.
- If you want to repeat a command that you’ve used recently, press the up-arrow key. This action recalls up to 50 of the most recently executed commands. You can press Enter to execute a command as is, or you can edit the command before you execute it.
Using the Control menu
Although the command window has no menu bar, it does have a menu that you can access via the control box in the top-left corner of the window. Besides the commands found on this menu for all windows (such as Move, Size, and Minimize), this menu includes three additional commands:
Edit: The Edit command leads to a submenu with several choices. Several of these commands work together so that you can copy information from the command window to the clipboard, and vice versa. If you choose Edit⇒ Mark, you’re placed in a special editing mode that lets you highlight text in the command window with the mouse. (Normally, the mouse doesn’t do anything in the command window.) Then you can choose Edit⇒ Copy or just press Enter to copy the text that you selected to the clipboard.
You can also use the Edit menu to paste text from the clipboard, to scroll the window, and to search the window for text.
- Default: This command lets you set default properties for the command window.
- Properties: This command displays a Properties dialog box that you can use to change the appearance of the window. You can change the font size, choose background colors, and make other adjustments to make the command window look good on your computer.
Special Command Tricks
Before I get into the details of using specific commands, I want to describe some techniques you should familiarize yourself with. In many cases, these techniques can let you accomplish in a single command what would otherwise take dozens of separate commands.
Wildcards
Wildcards are among the most compelling reasons to use the command prompt. With wildcards, you can process all the files that match a particular naming pattern with a single command. Suppose that you have a folder containing 500 files, and you want to delete all the files that contain the letters Y2K and end with the extension .doc, which happens to be 50 files. If you open a Documents window, you'll spend ten minutes picking these files out from the list. From a command window, you can delete them all with the single command del *Y2K*.doc.
You can use two wildcard characters. An asterisk stands for any number of characters, including zero, and an exclamation point stands for just one character. Thus, !Text.doc would match files with names like aText.doc, xText.doc, and 4Text.doc, but not abcText.doc or just Text.doc. *Text.doc, however, would match any of the names mentioned in the previous sentence.
Wildcards work differently in Windows than they did in MS-DOS. In MS-DOS, anything you typed after an asterisk was ignored. Thus, ab*cd.doc was the same as ab*.doc. In Windows, the asterisk wildcard can come before static text, so ab*cd.doc and ab*.doc are not the same.
Chaining commands
You can enter two or more commands on the same line by separating the commands with an ampersand (&), like this:
C:>copy *.doc a: & del *.doc
Here, the copy command copies all the .doc files to the A: drive. Then, the del command deletes the .doc files.
Although that technique may be convenient, it's also dangerous. What if the A: drive fills up so that all the files can't be copied? In that case, the del command executes anyway, deleting the files that didn’t get copied.
A safer alternative is to use two ampersands, telling Windows to execute the second command only if the first command finishes successfully:
C:>copy *.doc a: && del *.doc
Now the del command will be executed only if the copy command succeeds.
You can also use two pipe characters (the pipe is the vertical-bar character that's above the backslash on the keyboard) to execute the second command only if the first command fails. Thus,
C:>copy *.doc a: || echo Oops!
displays the message Oops! if the copy command fails.
Finally, you can use parentheses to group commands. Then you can use the other symbols in combination:
C:>(copy *.doc a: && del *.doc) || echo Oops!
Here, the files are copied and then deleted if the copy was successful. If either command fails, the message is displayed.
Redirection and piping
Redirection and piping are related techniques. Redirection lets you specify an alternative destination for output that will be displayed by a command or an alternative source for input that should be fed into a command. You can save the results of an ipconfig /all command to a file named myconfig.txt like this:
C:>ipconfig /all > myconfig.txt
Here, the greater-than sign (>) is used to redirect the command's console output.
If a command accepts input from the keyboard, you can use input redirection to specify a file that contains the input you want to feed to the command. You can create a text file named lookup.txt with subcommands for a command such as nslookup. Then you can feed those scripted subcommands to the nslookup command, like this:
C:>nslookup < lookup.txt
Piping is a similar technique. It takes the console output from one command and feeds it into the next command as input. Piping is often used with special commands called filters, which are designed to read input from the console, modify the data in some way, and then write it to the console.
Suppose that you want to display the contents of a file named users.txt sorted into alphabetical order. You can use the Type command, which displays a file on the console, and then pipe the output into the Sort command, a filter that sorts its input and displays the sorted output on the console. The resulting command looks like this:
C:>type users.txt | sort
The vertical bar is often called the pipe character because it's the symbol used to indicate piping.
Environment variables
The command shell makes several environment variables available to commands. Environment variables all begin and end with percent signs. You can use an environment variable anywhere in a command. The command
C:>echo %OS% running on a %PROCESSOR_IDENTIFIER%
displays a line such as this:
Windows_NT running on an x86 Family 15 Model 2 Stepping 8, GenuineIntel
Interestingly, later versions of Windows Server all display Windows_NT for the operating-system name.
If the environment variable represents a path, you may need to enclose it in quotation marks, like this:
C:>dir "%HOMEPATH%"
This command displays the contents of the user's home directory. The quotation marks are required here because the environment variable expands to a pathname that may include spaces, and the command shell requires that long filenames that include spaces be enclosed in quotation marks.
Table 7-1 lists the environment variables that are available to you and your commands.
TABLE 7-1 Environment Variables
Variable |
Description |
|---|---|
|
The location of the All Users profile |
|
The path where applications store data by default |
|
The path to the current directory |
|
The command line that was used to start the command shell |
|
The version number of the command shell |
|
The computer's name |
|
The path to the command shell executable (cmd.exe) |
|
The current date in the format generated by the |
|
The error returned by the most recent command |
|
The drive letter of the user's home directory |
|
The path to the user’s home directory |
|
The network path to the user's shared home directory |
|
The name of the domain controller the user logged on to |
|
The number of processors on the computer |
|
The name of the operating system |
|
The current search path |
|
A list of the extensions the operating system treats as executable files |
|
The chip architecture of the processor |
|
A description of the processor |
|
The revision level of the processor |
|
The current prompt string |
|
A random number between 1 and 32,767 |
|
The drive containing the operating system |
|
The path to the operating system |
|
The path to a temporary folder for temporary files |
|
Same as |
|
The time in the format produced by the |
|
The name of the user's domain |
|
The user’s account name |
|
The path to the user's profile |
|
The path to the operating-system directory |
Batch files
A batch file is simply a text file that contains one or more commands. Batch files are given the extension .bat and can be run from a command prompt as though they were commands or programs. You can also run a batch file from the Start menu by choosing Start⇒ Run, typing the name of the batch file, and clicking OK.
As a network administrator, you'll find plenty of uses for batch files. Most of them won't be very complicated. Here are some examples of very simple batch files I’ve used:
- I once used a one-line file to copy the entire contents of an important shared network drive to a user’s computer every night at 10 p.m. The user wanted a quick-and-dirty backup solution that would complement the regular tape backups that ran every night.
- I’ve also used a pair of short batch files to stop and then restart an Exchange server before and after nightly backups.
- If I frequently need to work with several related folders at the same time, I create a short batch file that opens Explorer windows for each of the folders. (You can open an Explorer window from a batch file simply by typing the path to the folder that you want to open as a command.) Then I place the batch file on my desktop so that I can get to it quickly.
You can also use batch files to create logon scripts that are executed whenever a user logs on. Microsoft keeps trying to get users to use profiles instead of logon scripts, but many networks still use logon scripts.
The EventCreate Command
The EventCreate command lets you create an event that’s added to one of the Windows event logs. This command can be useful if you want to make a note of something unusual that’s happened. It’s often used in batch files to mark the start or completion of a task such as a nightly backup.
Here’s the basic syntax:
eventcreate [options]
eventcreate /T type /D "description" /ID eventide
[/L logname] [/SO sourcename]
[/S system [/U username [/P password]]]
Here’s a description of the options:
/T: Specifies the type. The options areInformation,Warning, andError./D: Provides a descriptive message that's saved in the log. Use quotes if the message contains more than one word./ID: A number from 1 to 1,000./L: The name of the log to write the event to. The default isApplication./SO: A string that represents the source of the event. The default isEventCreate. If you specify this option, you must also specify the/Loption./S: The name of the system on which the event should be recorded./U: The user account to use when logging the event. You can specify this option only if you also specify/S./P: The password. You can specify this option only if you also specify/U.
Here's an example that writes an informational message to the Application log:
eventcreate /t information /id 100 /d "Nightly processing completed" /L Application /SO Nightly
Figure 7-2 shows an event created by the preceding command.

FIGURE 7-2: An event generated by the EventCreate command.
Net Commands
Among the most useful commands for network administrators are the Net Services commands. All these commands are two-word commands beginning with Net — such as Net Use and Net Start. In the following sections, I present the Net commands in alphabetical order for handy reference. First, though, I want to point out a few details about the Net commands:
- You can get a quick list of the available
Netcommands by typing net /? at a command prompt. - You can get brief help for any
Netcommand by typing net help command. To display help for theNet Usecommand, for example, type net help use. (Yes, we all could use some help.) - Many of the
Netcommands prompt you for confirmation before completing an operation. For these commands, you can specify/Yor/Nto bypass the confirmation prompt. You'll want to do that if you include these commands in a batch file that runs unattended. Note that you can use/Yor/Non anyNetcommand, even if it doesn't prompt you for confirmation. So I suggest that you place/Yon everyNetcommand in a batch file that you intend to run unattended.
The Net Accounts command
This command updates user account policies for password requirements. Here's the command syntax:
net accounts [/forcelogoff:{minutes | no}]
    [/minpwlen:length] [/maxpwage:{days | unlimited}]
    [/minpwage:days] [/uniquepw:number]
    [/domain]
The following paragraphs describe the parameters for the Net Accounts command:
forcelogoff: Specifies how long to wait before forcing a user off the system when the user's logon time expires. The default value,no, prevents users from being forced to log off. If you specify a number, the user will be warned a few minutes before being forcibly logged off.minpwlen: Specifies the minimum length for the user's password.Lengthcan be 0 through 127. The default is 6.maxpwage: Specifies the number of days a user's password is considered to be valid.Unlimitedmeans that the password will never expire.Dayscan be from 1 through 49,710, which is about 135 years. The default is 90.minpwage: Specifies the minimum number of days after a user changes a password before the user can change it again. The default value is 0. You usually should set this value to 1 day to prevent users from bypassing theUniquepwpolicy.uniquepw: Indicates how many different passwords the user must use before he or she is allowed to reuse the same password. The default setting is 5. The range is 0 through 24.domain: Specifies that the operation should be performed on the primary domain controller rather than on the local computer.
If you enter Net Accounts without any parameters, the command simply displays the current policy settings.
Here's an example that sets the minimum and maximum password ages:
C:>net accounts /minpwage:7 /maxpwage:30
The Net Computer command
This command creates or deletes a computer account. Here's the syntax:
net computer \computername {/add | /del}
The following paragraphs describe the parameters for the Net Computer command:
Computername: Specifies the computer to add or deleteadd: Creates a computer account for the specified computerdel: Deletes the specified computer account
Here's an example that adds a computer named Theodore:
C:>net computer \theodore /add
The Net Config command
This command lets you view or configure various network services. Here's the syntax:
net config [{server|workstation}] [options]
To configure server settings, use this syntax:
net config server [/autodisconnect:time] [/srvcomment:"text"] [/hidden:{yes | no}]
The following paragraphs describe the parameters for the Net Config command:
server: Lets you display and configure the Server service while it's running.workstation: Lets you display and configure the Workstation service while it’s running.autodisconnect: Specifies how long a user's session can be inactive before it's disconnected. Specify –1 to never disconnect. The range is –1 to 65,535 minutes, which is about 45 days. The default is 15 minutes.srvcomment: Specifies a description of the server. The comment can be up to 48 characters long and should be enclosed in quotation marks.hidden: Specifies whether the server appears in screens that display available servers. Hiding a server doesn't make the server unavailable; it just means that the user will have to know the name of the server to access it. The default isNo.
Here's an example that sets a server’s descriptive comment:
C:>net config server /srvcomment:"DHCP Server"
The Net Continue command
This command continues a service you’ve suspended with the net pause command. Here's the syntax:
net continue service
Here are some typical services that you can pause and continue:
netlogon: The Net Logon service.schedule: The Task Scheduler service.server: The Server service.workstation: The Workstation service.
Here's an example that continues the Workstation service:
C:>net continue workstation
If the service name has embedded spaces, enclose the service name in quotation marks. This command continues the NT LM Security Support Provider service:
C:>net continue "nt lm security support provider"
The Net File command
This command lists all open shared files and the number of file locks placed on each file. You can also use this command to close files and remove locks, which is a useful procedure when a user manages to accidentally leave a file open or locked. Here's the syntax:
C:>net file [id [/close]]
The following paragraphs describe the Net File command’s parameters:
id: The file's identification number.close: Closes an open file and releases any locks that were placed on the file.
To close a file, you must issue the command from the server where the file is shared.
net files works, too.
To close an open file, first run net file without any parameters to list the open files. Here's a sample of the output that you can expect from net file:
File Path Username #locks
---------------------------------------------
0 C:BUDGET.DOC WARD 0
1 C:RECIPE.MDF JUNE 4
Next, run net file again, specifying the file number displayed for the file that you want to close. To close the RECIPE.MDF file, for example, use this command:
C:>net file 1 /close
The Net Group command
This command lets you add, display, or change global groups. This command has several different syntaxes, depending on how you intend to use it.
To display information about a group or to change a group's comment, use this syntax:
net group groupname [/comment:"text"] [/domain]
To create a new group, use this syntax:
net group groupname /add [/comment:"text"] [/domain]
To delete a group, use this syntax:
net group groupname /delete [/domain]
Finally, to add or remove users from a group, use this syntax:
net group groupname username[ …] {/add | /delete} [/domain]
The following paragraphs describe the parameters that you can use with the net group command:
groupname: Specifies the name of the group to add, change, or delete. If you specify this parameter and no others, a list of users in the group appears.comment: Specifies a comment for the group. The comment can be up to 48 characters in length and should be enclosed in quotation marks.domain: Specifies that the operation should be performed on the primary domain controller rather than on the local computer.add: Creates a new group or adds users to an existing group. Before you add a user to a group, you must create a user account for the user.delete: Removes a group or removes users from the group.username: Specifies one or more usernames to be added to or removed from the group. If you list more than one name, separate the names with spaces.
Windows isn't picky: You can specify net groups rather than net group if you want.
This example lists all the groups on a server:
C:>net group
This example adds a group named Admin:
C:>net group Admin /add
This example adds three users to the Admin group:
C:>net group Admin Ward Wally June /add
This example lists the users in the Admin group:
C:>net group Admin
The Net Help command
This command displays help for the net command or for a specific net subcommand. Here's the basic syntax:
net help [command]
The command parameter can be any of the following commands:
accounts
computer
config
continue
file
group
help
helpmsg
localgroup
pause
session
share
start
statistics
stop
time
use
user
view
You can type net help services to display a list of services that you can start via the Net Start command.
The Net Helpmsg command
This command displays an explanation of network error codes. Here's the syntax:
net helpmsg message#
The message# parameter should be the four-digit number displayed when the error occurred. If you get an error with message 2180, for example, use this command to see an explanation of the error:
C:>net helpmsg 2180
The service database is locked.
EXPLANATION
Another program is holding the service database lock.
ACTION
Wait for the lock to be released and try again later. If it is possible to determine which program is holding the lock, then end that program.
The Net Localgroup command
This command lets you add, display, or change local groups. This command has several different syntaxes, depending on how you intend to use it.
To display information about a local group or to change a local group’s comment, use this syntax:
net localgroup groupname [/comment:"text"] [/domain]
To create a new group, use this syntax:
net localgroup groupname /add [/comment:"text"] [/domain]
To delete a group, use this syntax:
net localgroup groupname /delete [/domain]
Finally, to add users to or remove users from a group, use this syntax:
net localgroup groupname username[ …] {/add | /delete} [/domain]
The following paragraphs describe the parameters that you can use with the net localgroup command:
groupname: Specifies the name of the group to add, change, or delete. If you specify this parameter and no others, a list of users in the group appears.comment: Specifies a comment for the group. The comment can be up to 48 characters in length and should be enclosed in quotation marks.domain: Specifies that the operation should be performed on the primary domain controller rather than on the local computer.add: Creates a new group or adds users to an existing group. Before you add a user to a group, you must create a user account for the user.delete: Removes a group or removes users from the group.username: Specifies one or more usernames to be added to or removed from the group. If you list more than one name, separate the names with spaces.
This example lists all the local groups:
C:>net localgroup
This example adds a local group named Admin:
C:>net localgroup Admin /add
This example adds three users to the Admin local group:
C:>net localgroup Admin Ward Wally June /add
This example lists the users in the Admin group:
C:>net localgroup Admin
The Net Pause command
This command temporarily pauses a service. It's a good idea to pause a service for a while before you stop the service altogether. That gives users who are currently using the service a chance to finish any pending tasks, while at the same time preventing other users from beginning new sessions with the service. To reactivate the service later, use the net continue command.
The syntax to pause a service is
net pause service
Here are some typical services that you can pause:
netlogon: The Net Logon serviceschedule: The Task Scheduler serviceserver: The Server serviceworkstation: The Workstation service
Here's an example that pauses the Workstation service:
CL>net pause workstation
If the service name has embedded spaces, enclose the service name in quotation marks. This command pauses the NT LM Security Support Provider service, for example:
C:>net pause "nt lm security support provider"
The Net Session command
This command lets you view current server connections and kick users off, if you feel inclined. Here’s the syntax:
net session [\ComputerName] [/delete]
Here’s what the parameters do:
computerName: Indicates which computer’s session you want to view or disconnect. If you omit this parameter, all sessions are listed.delete: Disconnects the computer's session. Any open files are immediately closed. If you use this parameter without specifying a computer name, all computers currently connected to the server are disconnected. This command is an obviously dangerous one. If you disconnect users while they're updating files or before they have a chance to save their work, they'll be hopping mad.
To find out who is connected to a computer, use this command:
C:>net session
Computer User name Client type Opens Idle time
------------------------------------------------------------
\DEN Ward Windows XP 1 00:00:4
\BEDROOM Administrator Windows 2008 0 02:15:17
The Net Share command
This command lets you manage shared resources. To display information about all shares or a specific share, use this syntax:
net share [ShareName]
To create a new share, use this syntax:
net share ShareName=path [{/users:number|/unlimited}] [/remark:"text"] [/cache: {manual|automatic|no}]
To change the properties of an existing share, use this syntax:
net share ShareName [{/users:number|unlimited}] [/remark:"text"] [/cache: {manual|automatic|no}]
To delete an existing share, use this syntax:
net share {ShareName|drive:path} /delete
Here’s what the parameters do:
ShareName: Specifies the share name. Use this parameter by itself to display information about the share.path: Specifies the path to the folder to be shared. The path should include a drive letter. If the path includes spaces, enclose it in quotation marks.users: Specifies how many users can access the share concurrently.unlimited: Specifies that an unlimited number of users can access the share concurrently.remark: Creates a descriptive comment for the share. The comment should be enclosed in quotation marks.cache: Specifies the caching option for the share.delete: Stops sharing the folder.
If you use net share without any parameters, all the current shares are listed, as shown in this example:
Share name   Resource                        Remark

-------------------------------------------------------------
C$           C:                             Default share
IPC$                                         Remote IPC
ADMIN$       C:WINDOWS                      Remote Admin
Users        C:Users
The command completed successfully.
The following example creates a share named Docs:
C:>net share Docs=C:SharedDocs /remark:"Shared documents"
The Net Start command
This command lets you start a networking service or display a list of all the services that are currently running. The syntax is
net start [service]
In most cases, you'll use this command to start a service that you’ve previously stopped with the net stop command. In that case, you should first run the net start command without any parameters to find the name of the service that you want to stop. Make a note of the exact spelling of the service that you want to stop. Then use the net stop command to stop the service. When you want to restart the service, use the net start command again — this time specifying the service to start.
Suppose that you need to stop your DNS server. Using net start, you discover that the name of the service is DNS Server, so you use the following command to stop it:
C:>net stop "DNS Server"
Later, you can use this command to restart the service:
C:>net start "DNS Server"
The Net Statistics command
This command lists the statistics log for the local Workstation or Server service. The syntax is
net statistics [{workstation | server}]
You can specify workstation or server to indicate the service for which you'd like to view statistics.
If you use net statistics workstation, the following information appears:
- The computer name
- The date and time when the statistics were last updated
- The number of bytes and server message blocks (SMB) received and transmitted
- The number of read and write operations that succeeded or failed
- The number of network errors
- The number of sessions that failed, disconnected, or were reconnected
- The number of connections to shared resources that succeeded or failed
If you use Net Statistics Server, the following information is listed:
- The computer name
- The date and time when the statistics were last updated
- The number of sessions that have been started, disconnected automatically, and disconnected because of errors
- The number of kilobytes sent and received, and the average response time
- The number of password and permission errors and violations
- The number of times the shared files, printers, and communication devices were used
- The number of times the size of the memory buffer was exceeded
The Net Stop command
This command lets you stop a networking service. The syntax is
net stop service
To use this command, first run the net start command to determine the exact spelling of the service that you want to stop. If the service name includes spaces, enclose it in quotation marks.
You can restart the service later by using the net start command.
The following example stops the DNS service:
C:>net stop "DNS Server"
The Net Time command
This command synchronizes the computer's clock with the clock on another computer. To access a clock on another computer in the same domain or workgroup, use this form:
net time \ComputerName [/set]
To synchronize time with a domain, use this form:
net time /domain[:DomainName] [/set]
To use an RTS time server, use this syntax:
net time /rtsdomain[:DomainName] [/set]
To specify the computer to use for Network Time Protocol, use this syntax:
net time [\ComputerName] [/querysntp] [/setsntp[:NTPServerList]]
To set the computer’s clock to match the Server01 clock, use this command:
C:>net time \Server01 /set
The Net Use command
This command connects to or disconnects from a shared resource on another computer and maps the resource to a drive letter. Here’s the complete syntax:
net use [{drive | *}]
[{\computernamesharename]
[{password | *}]]
[/user:[domainname]username]
[/savecred]
[/smartcard]
[{/delete | /persistent:{yes | no}}]
To set up a home directory, use this syntax:
net use [drive [/home[{password | *}]
[/delete:{yes | no}]]
And to control whether connections should be persistent, use this:
net use [/persistent:{yes | no}]
Here’s what the parameters do:
drive: Specifies the drive letter. (Note that for a printer, you should specify a printer device such as LPT1: here instead of a drive letter.) If you specify an asterisk, Windows will determine what drive letter to use.\computernamesharename: Specifies the server and share name to connect to.password: Provides the password needed to access the shared resource. If you use an asterisk, you're prompted for the password.user: Specifies the username to use for the connection.savecred: Saves the credentials for reuse later if the user is prompted for a password.smartcard: Specifies that the connection should use a smart card for authorization.delete: Deletes the specified connection. If you specify an asterisk (*), all network connections are canceled.persistent: Specifies whether connections should be persistent.home: Connects to the home directory.
To display all current connections, type net use with no parameters.
The following example shows how to create a persistent connection to a drive named Acct on a server named Server01, using drive K::
C:>net use k: \Server01Acct /persistent: yes
The following example drops the connection:
C:>net use k: /delete
The Net User command
This command creates or changes user accounts. To display a user's information, use this form:
net user username
To update user information, use this form:
net user [username [password | *] [options]] [/domain]
To add a new user, use this form:
net user username [password | *] /add [options] [/domain]
To delete a user, use this form:
net user username /delete [/domain]
Most of the parameters for this command are straightforward. The options parameters, however, can have a variety of settings. Table 7-2 lists the descriptions of these options as presented by the Net Help Users command.
TABLE 7-2 The Options Parameters
Options |
Description |
|---|---|
|
Activates or deactivates the account. If the account isn't active, the user can't access the server. The default is |
|
Provides a descriptive comment about the user's account (maximum of 48 characters). Enclose the text in quotation marks. |
|
Uses the operating-system country code to implement the specified language files for a user's help and error messages. A value of 0 signifies the default country code. |
|
Causes the account to expire if date is set. |
|
Is a user's full name (rather than a username). Enclose the name in quotation marks. |
|
Sets the path for the user's home directory. The path must exist. |
|
Specifies whether users can change their own passwords. The default is |
|
Specifies whether a user account must have a password. The default is |
|
Sets a path for the user's logon profile. |
|
Is the location of the user's logon script. |
|
Is the logon hours. |
|
Lets an administrator add or change the User Comment for the account. |
|
Lists as many as eight computers from which a user {ComputerName[,…] | *} can log on to the network. If |
To display information for a particular user, use the command like this:
C:>net user Doug
To add a user account for Theodore Cleaver with the username Beaver, use this command:
C:>net user Beaver /add /fullname:"Theodore Cleaver"
The Net View command
This command displays information about your network. If you use it without parameters, it displays a list of the computers in your domain. You can use parameters to display resources that are being shared by a particular computer. Here's the syntax:
net view [\computername] [/domain[:domainname]]
net view /network:nw [\computername]
Here's what the parameters do:
computername: Specifies the computer whose shared resources you want to view.domainname: Specifies the domain you want to view, if it's other than the current domain.
Here's typical output from a net view command:
C:>net view
Server Name Remark
-------------------------------------------------
\Server01 Main file server
\Print01 Main print server
The RunAs Command
The runas command lets you run a program from a command prompt by using the credentials of another user account. Here's the basic syntax:
runas /user:username [other parameters] program
To run the Microsoft Management Console with the dom1 domain’s administrator account, for example, you can use this command:
runas /user:dom1administrator mmc
Assuming that the username is valid, you’ll be prompted for the user’s password. Then the program will be run using the specified user’s account.
Here are some of the parameters you can use with the RunAs command:
/user: Specifies the domain and username. You can use either of two forms to specify the domain and username:domainusernameorusername@domain./profile: Specifies that the user's profile should be loaded. (This option is on by default, so you don’t have to specify it explicitly.)/noprofile: Doesn’t load the user’s profile. Although this parameter can cause the application to load faster, it can also prevent some applications from functioning properly./env: Uses the current environment instead of the user's./netonly: Indicates that the user account isn’t valid in the current domain. (If you use/netonly, the username must be specified in the formdomainusername; theusername@domainform won't work.)/savecred: Saves the password so that it has to be entered only the first time the RunAs command is used. Using the /savecredparameter is an extremely bad idea, as it creates a gaping security hole. In short, after you've used/savecred, any user at the computer can use theRunAscommand to run any program with administrator privileges./smartcard: Specifies that the user’s credentials will be supplied by a smart card device.