C H A P T E R 3
Getting Started with HTML
Every developer knows at least something about HTML. It has become all-pervasive in recent years, and the chances are good that you have at least seen some HTML, even if you have never needed to write any. In this chapter, I am going back to the basics of HTML to make sure you get the fundamentals right—beginning with what HTML is for and how it works. I'll define the basic terminology HTML uses and show you some of the core HTML elements that pretty much every web page uses.
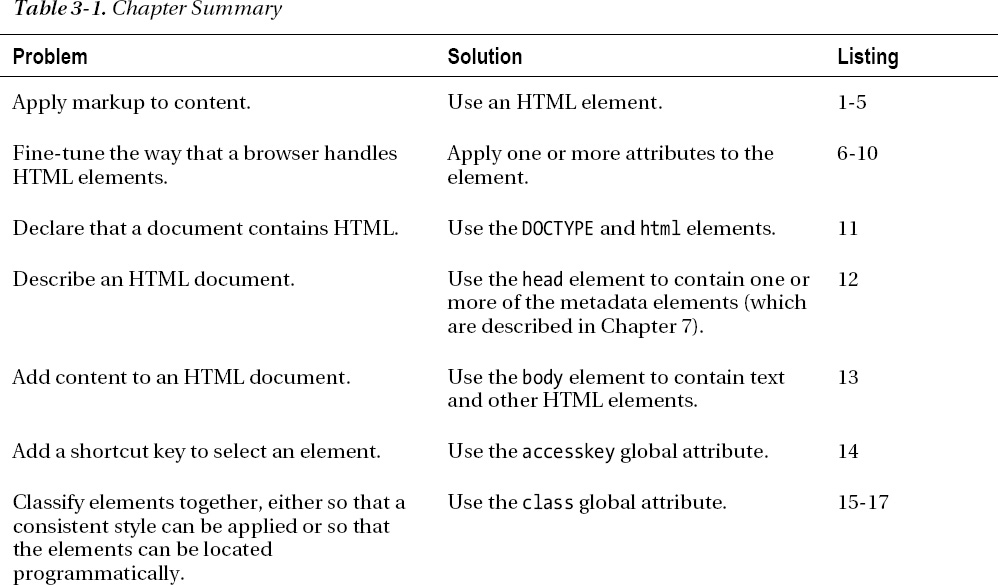
As its name suggests, HTML is a markup language. This markup takes the form of elements applied to content, typically text. In the following sections, I'll explain the different aspects of HTML elements, explain how you can configure the elements with attributes, and describe the set of global attributes that can be used on all HTML elements. Table 3-1 provides the summary for this chapter.
Using Elements
Listing 3-1 shows a simple example of an HTML element applied to some text.
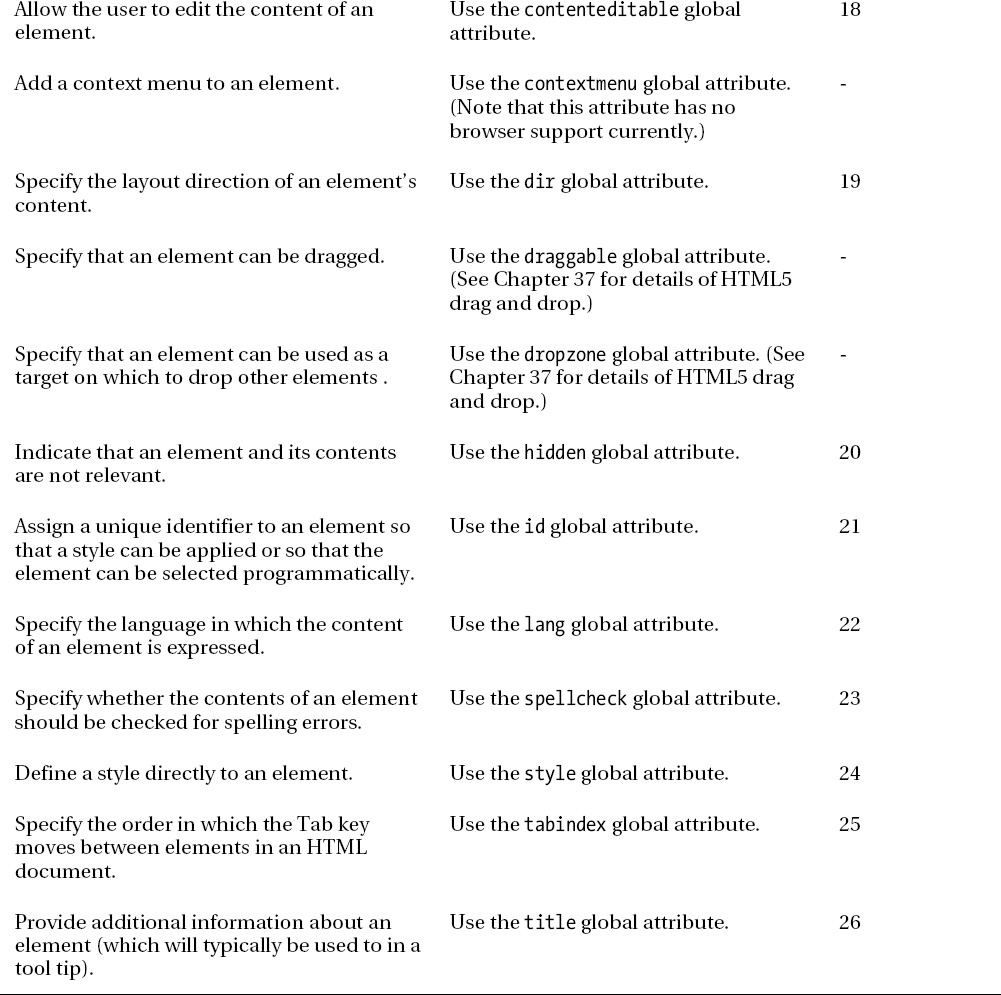
I have shown the element in bold—it has three parts. The first two are called tags. The start tag is <code>, and the end tag is </code>. Between the tags is the element's content (in this case, the word apples). Together, the tags and the content form the code element, as shown in Figure 3-1.
Figure 3-1. The anatomy of an HTML element
Elements are the way you tell the browser about your content. The effect of the element is applied to the element contents. Each of the HTML elements has a different and quite specific meaning—the code element, for example, represents a fragment of computer code.
![]() Tip Element names are not case sensitive—browsers will recognize
Tip Element names are not case sensitive—browsers will recognize <CODE> and <code>, and even <CoDe>, as start tags for the code element. In general, the convention is to adopt a single case format and stick to it. In recent years, the more common style has been to use lowercase characters throughout. This is the format I will use in this book.
HTML defines different types of element that fulfill various roles in an HTML document—the code element is an example of a sematic element. Semantic elements allow us to define the meaning of our content and the relationships between different parts of the content. I'll explain more about this in Chapter 8. You can see the effect of the code element in Figure 3-2.
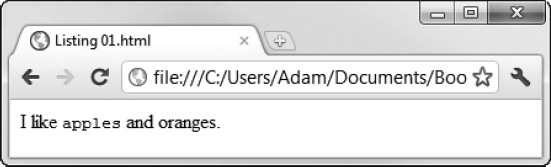
Figure 3-2. The effect of the code element displayed in a broswer
Notice that the browser doesn't display the element tags—its job is to interpret your HTML and render a view to the user that takes your elements into account.
THE SEPARATION OF PRESENTATION AND CONTENT
Understanding the Elements Used in This Chapter
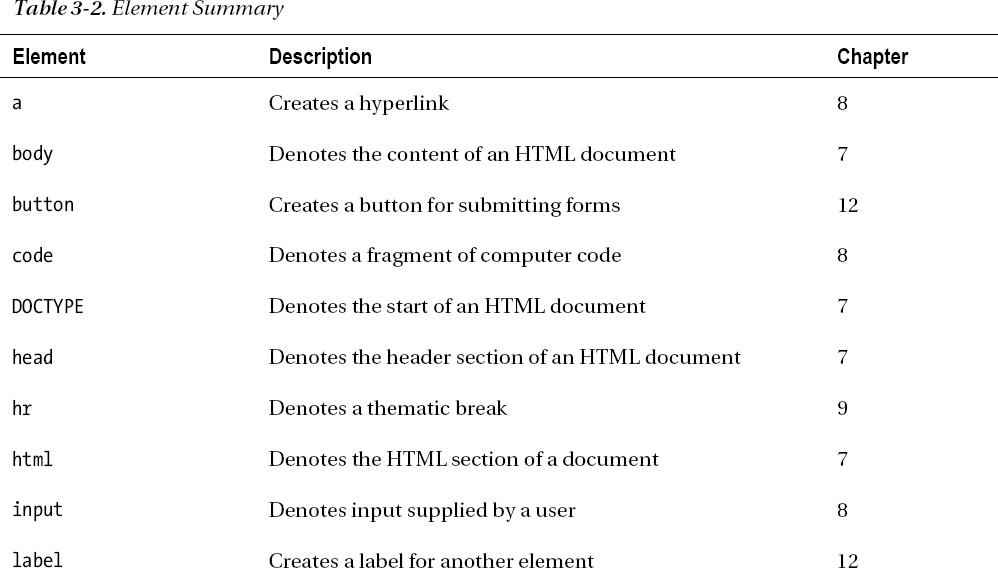
To provide a refresher on HTML, I need to use some elements that I don't describe until later chapters. Table 3-2 lists these elements, along with a brief description and the chapter in which you can find full details.
Using Empty Elements
You are not required to place any content between the start and end tags. If you don't, you create an empty element, like the one shown in Listing 3-2.
Listing 3-2. An Empty HTML Element
I like <code></code> apples and oranges.
Not all elements make sense when they are empty (and code is one of these), but even so, this is still valid HTML.
Using Self-Closing Tags
You can express empty elements more concisely by using a single tag, as shown in Listing 3-3.
Listing 3-3. Expressing an Empty Element Using a Single Tag
I like <code/> apples and oranges.
You combine the start and end tag into one—the stroke character (/), which is usually used to signify the start of the end tag, is placed at the end of the single tag. The element in Listing 3-2 and the element in Listing 3-3 are equivalent—the single tag is a more concise way of expressing the empty element.
Using Void Elements
There are some elements that must be expressed using a single tag—the HTML specification makes it illegal to place any content in them. These are known as void elements. One such element is hr, which is a grouping element and is used to denote a paragraph-level break in the content. (You'll see the other grouping elements in Chapter 9.) You can use void elements in one of two ways—the first is to specify only a start tag, as shown in Listing 3-4.
Listing 3-4. Specifying a Void Element Using Just a Start Tag
I like apples and oranges.

<hr>

Today was warm and sunny.
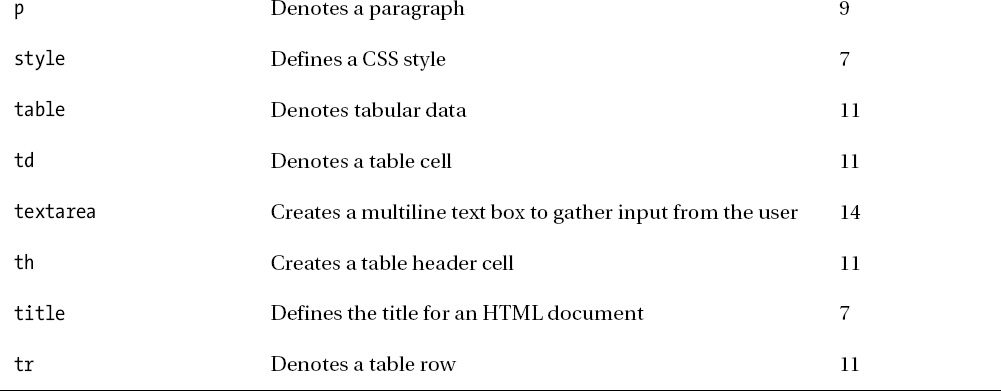
The browser knows that hr is a void element and doesn't expect to see a closing tag. You can also include a stroke to make the element consistent with empty elements, as shown in Listing 3-5.
Listing 3-5. Expressing Void Elements Using the Empty Element Structure
I like apples and oranges.

<hr />

Today was warm and sunny.
This is the format I prefer and will use in this book. As an aside, the hr element is another example of an element that had presentational meaning—in this case, to display a horizontal rule (hence the name). You can see the default interpretation of the hr element in Figure 3-3.
Figure 3-3. The default presentation of the hr element
(NOT) USING OPTIONAL START AND END TAGS
Using Element Attributes
You can configure your elements by using attributes. Listing 3-6 shows an attribute that applies to the a element. This element lets you create a hyperlink that, when it's clicked on, loads a different HTML document.
Listing 3-6. Using an Element Attribute
I like <a href="/apples.html">apples</a> and oranges.
Attributes can be added only to start tags or single tags—they can never be added to end tags. Attributes have a name and a value, as shown in Figure 3-4.
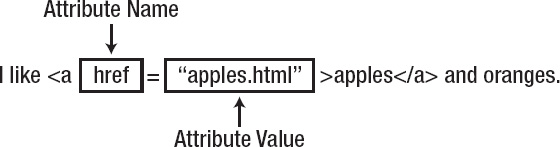
Figure 3-4. Applying attributes to HTML elements
There are a set of global attributes that can be applied to any HTML element—I describe these in later in this chapter. In addition to these global attributes, elements can define their own attributes that provide configuration information that is specific to the role of the element. The href attribute is local to the a element, and it configures the URL that is the destination of the hyperlink. The a element defines a number of specific attributes, which I describe in Chapter 8.
![]() Tip I have used double quotes (
Tip I have used double quotes ("myvalue") to delimit the attribute value in the listing, but you can also use single quotes ('myvalue'). If you want to specify a value for an attribute that itself must contain quotes, you use both styles ("my'quoted'value" or 'my"quoted"value').
Applying Multiple Attributes to an Element
You can apply multiple attributes to an element by separating them with one or more space characters. Listing 3-7 provides an example.
Listing 3-7. Defining Multiple Attributes in an Element
I like <a class="link" href="/apples.html" id="firstlink">apples</a> and oranges.
The order of the attributes is not important, and you can freely mix global attributes with the ones that are element specific, which is what I have done in the listing. The class and id attributes are global. (I explain these attributes later in this chapter.)
Using Boolean Attributes
Some attributes are Boolean attributes. You don't have to specify a value for these attributes—just add the attribute name to the element, as shown in Listing 3-8.
Listing 3-8. A Boolean Attribute
Enter your name: <input disabled>
The Boolean attribute in this example is disabled, and I have just added the attribute name to the element. The input element provides a means for the user to enter data into an HTML form (which I describe in Chapter 12). Adding the disabled attribute stops the user from entering data. Boolean attributes are a little odd because it is the presence of the attribute that configures the element, not the value you assign to the attribute. I didn't specify disabled="true"—I just added the word disabled. You can achieve the same effect by assigning the empty string ("") or by setting the value to be the name of the attribute, as shown in Listing 3-9.
Listing 3-9. A Boolean Attribute Assigned the Empty String Value
Enter your name: <input disabled="">

Enter your name: <input disabled="disabled">
Using Custom Attributes
You can define your own attributes as long as the name you use is prefixed with data-. Listing 3-10 shows the use of such attributes.
Listing 3-10. Applying Custom Attributes to an Element
Enter your name: <input disabled="true" data-creator="adam" data-purpose="collection">
The proper name for these attributes is author defined attributes, which are sometimes referred to as expando attributes, but I prefer the more commonly used term custom attribute.
Custom attributes are a formal definition of a widely used HTML4 technique where browsers would ignore any attribute they didn't recognize. You prefix these attributes with data- to avoid clashing with attribute names that might be created by future versions of HTML. Custom attributes are useful when working with CSS (introduced in Chapter 4) and with JavaScript (introduced in Chapter 5).
Creating an HTML Document
Elements and attributes don't exist in isolation—you use them to mark up your content in an HTML document. The simplest way to create an HTML document is to create a text file—the convention is that these files have the .html file extension. You can then load the file into a browser, either directly from the disk or via a web server. (In this book, I generally use a web server. My server is called titan, and you'll often see this name in browser windows shown in screenshots.)
BROWSERS AND USER AGENTS
An HTML document has a particular structure—you need to have some key elements in place as a minimum. Most of the examples in this book are shown as complete HTML documents—this means you can quickly and easily see how an element is applied and the effect it has. I explain all of the elements in the listings in later chapters, but as a quick jump start I am going to give you a tour of a basic HTML document. I will also provide references to the later chapters where you can get more detail.
HTML VS. XHTML
The Outer Structure
There are two elements that provide the outer structure of an HTML document—the DOCTYPE and html elements, as shown in Listing 3-11.
Listing 3-11. The Outer Structure of an HTML Document
<!DOCTYPE HTML>

<html>

    <!-- elements go here -->

</html>
The DOCTYPE element tells the browser it is dealing with an HTML document. This is expressed through the HTML boolean attribute:
<!DOCTYPE HTML>
You follow the DOCTYPE element with the start tag of the html element. This tells the browser that the contents of the element should be treated as HTML all the way through until the html close tag. It may seem odd that you use the DOCTYPE element and then immediately use the html element, but back when HTML emerged as a standard there were other markup languages that were given equal weight and it was expected that documents would contain a mix of markup types.
These days, HTML is the dominant markup language and most browsers will assume they are dealing with HTML even if you omit the DOCTYPE element and html elements. That doesn't mean you should leave them out. These elements serve an important purpose, and relying on the default behavior of a browser is like trusting strangers—things will be fine most of the time, but every now and again something will go very badly wrong. See Chapter 7 for more details of the DOCTYPE and html elements.
The Metadata
The metadata region of an HTML document allows you to provide information about your document to the browser. The metadata is contained inside a head element, as shown in Listing 3-12.
Listing 3-12. Adding the head Element to an HTML Document
<!DOCTYPE HTML>

<html>

    <head>

        <!-- metadata goes here -->

        <title>Example</title>

    </head>

</html>
In the listing, I have provided the minimum amount of metadata, which is the title element. All HTML documents are expected to contain a title element, although browsers will generally ignore any omissions. Most browsers display the contents of the title element in the menu bar of the browser window or at the top of the tab that displays the page. The head and title elements are described fully in Chapter 7, along with all of the other metadata elements that can be placed in the head element.
![]() Tip The listing demonstrates how you create comments in HTML document. You begin with the tag
Tip The listing demonstrates how you create comments in HTML document. You begin with the tag <!-- and end with -->. The browser will ignore anything you put inside these tags.
In addition to containing elements that describe the HTML document, the head element is also used to define relationships to external resources (such as CSS stylesheets), define inline CSS styles, and define and load scripts. All of these activities are demonstrated in Chapter 7.
The Content
The third and final part of the document is the content, which you put inside a body element, as shown in Listing 3-13.
Listing 3-13. Adding the body Element to an HTML Document
<!DOCTYPE HTML>

<html>

    <head>

        <!-- metadata goes here -->

        <title>Example</title>

    </head>

    <body>

        <!-- content and elements go here -->

        I like <code>apples</code> and oranges.

    </body>

</html>
The body element tells the browser which part of the document is to be displayed to the user—and, of course, a lot of this book is given over to what you can put inside the body element. With the addition of the body element, you have the skeletal HTML document I will use for most of the examples in this book.
Understanding Parents, Children, Descendants, and Siblings
HTML elements have defined relationships with the other elements in an HTML document. An element that contains another element is the parent of the second element. In Listing 3-13, the body element is the parent to the code element, because the code element is contained between the start and end tags of the body element. Conversely, the code element is a child of the body element. An element can have multiple children, but only one parent.
Elements can contain elements that, in turn, contain other elements. You can also see this in Listing 3-13: the html element contains the body element, which contains the code element. The body and code elements are descendents of the html element, but only the body element is a child of the html element. Children are direct descendants. Elements that share the same parent are known as siblings. In Listing 3-13, the head and body elements are siblings because they are both children of the html element.
The importance of the relationship between elements runs through HTML. As you'll see in the following section, elements have restrictions as to which other elements can be their parents or children. These restrictions are expressed through element types. Element relationships are also essential in CSS—which I introduce in Chapter 4—and one of the ways you select elements to apply styles to is through their parent/child relationships. Finally, when you read about the Document Object Model (DOM) in Part IV, you will find specific elements in a document by navigating through the document tree, which is a representation of the relationships between elements. Knowing your siblings from your descendants is an important skill in the world of HTML.
Understanding Element Types
The HTML5 specification groups elements into three categories: metadata elements, flow elements, and phrasing elements.
Metadata elements are used to create the basic structure of an HTML document and to provide information and direction to the browser about how the document should be processed. I describe the metadata elements in Chapter 7.
The other two categories are slightly different—you use them to specify the valid set of parents and children for an element. The phrasing elements are the basic building blocks of HTML. Chapter 8 contains descriptions of the most commonly used phrasing elements. The flow elements category is a super-set of the phrasing elements—which is to say that all phrasing elements are also flow elements, but not all flow elements are phrasing elements.
Not all elements belong to one of the element categories—those that don't either have special significance or can be used only in very restrictive circumstances. An example of a restricted element is the li element, which denotes a list item and is limited to one of three parent elements: ol (which denotes an ordered list), ul (which denotes an unordered list), and menu (which denotes a menu). You can learn more about the li element in Chapter 9. I tell you which category each element belongs to as part of the element descriptions that start in Chapter 6.
Using HTML Entities
As you can see from the examples in this chapter, there are some characters that have special meaning in HTML document—the obvious ones being the < and > characters. You will sometimes need to use these characters in your content without wanting them to be interpreted as HTML. To do this, you use HTML entities. An entity is a code the browser substitutes for the special character. You can see some common entities in Table 3-3.

Each special character has an entity number that you can include in your content to represent the character—for example, the ampersand character is . The more popular special characters also have a name—for example,  and & have the same meaning to the browser.
The HTML5 Global Attributes
Earlier in this chapter, I showed you how to configure elements using attributes. Each element can define its own attributes—these are known as local attributes. When I begin describing elements in detail in Chapter 6, I will give you a list of each of the local attributes that an element defines and show you how to use them. Each local attribute gives you the ability to control some aspect of the unique behavior of an element.
There is a second category of attributes—the global attributes. These configure the behavior that is common to all elements. You can apply every global attribute to every element, although this doesn't always lead to a meaningful or useful behavior change. In the following sections, I describe each of the global attributes and give a demonstration. Some of these attributes are linked to broader HTML features that I cover in more depth later in this book. In these cases, I give a reference to the relevant chapters.
The accesskey Attribute
The accesskey attribute lets you specify one or more keyboard shortcuts that will select the element on the page. Listing 3-14 shows the use of this attribute in a simple form. Forms are the topic of Chapters 12 through 14, so you might want to come back to this example after reading those chapters.
Listing 3-14. Using the accesskey Attribute
<!DOCTYPE HTML>

<html>

    <head>

        <title>Example</title>

    </head>

    <body>

       <form>

            Name: <input type="text" name="name" accesskey="n"/>

            <p/>

            Password: <input type="password" name="password" accesskey="p"/>

            <p/>

            <input type="submit" value="Log In" accesskey="s"/>

       </form>

    </body>

</html>
In this example, I have added the accesskey attribute to three input elements. (I describe the input element in Chapters 12 and 13.) The idea is to enable users who are regular users of a page or site to use keyboard shortcuts to move between commonly used elements. The key combination required to trigger the accesskey setting differs between platforms—for Windows, it is the Alt key and the accesskey value pressed together. You can see the effect of the accesskey attribute in Figure 3-5. I press Alt+n to focus on the first input element and enter my name. I then press Alt+p to focus on the second input element and enter my password. Alt+s presses the Log In button, which submits the form.
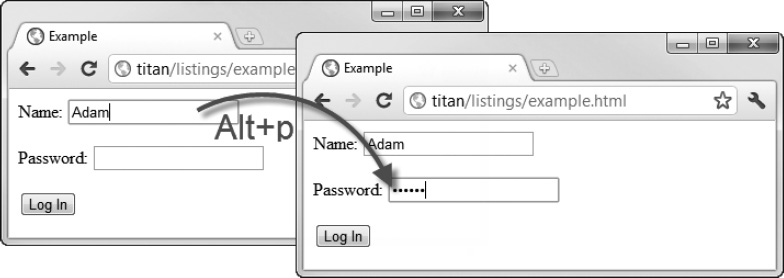
Figure 3-5. The effect of the accesskey attribute
The class Attribute
The class attribute is used to classify or categorize elements. You usually do this so that you can locate elements in the document that belong to a given class or to apply a CSS style. Listing 3-15 shows how you can apply the class attributes.
Listing 3-15. Applying the class Attribute
<!DOCTYPE HTML>

<html>

    <head>

        <title>Example</title>

    </head>

    <body>

        <a class="class1 class2" href="http://apress.com">Apress web site</a>

        <p/>

        <a class="class2 otherclass" href="http://w3c.org">W3C web site</a>

    </body>

</html>
You can apply multiple classes to each element by separating the class names with a space. The names of the classes that you create are arbitrary, but it is a good idea to make the names meaningful, especially if you have a document that contains many classes. On its own, the class attribute doesn't do anything. Figure 3-6 shows the HTML displayed in a browser. As you can see, you just get a couple of hyperlinks.
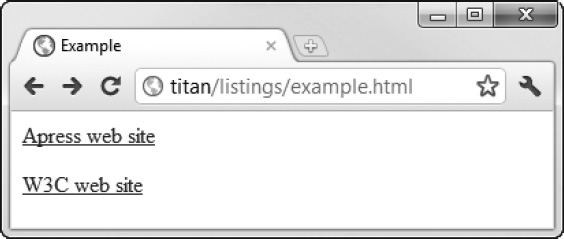
Figure 3-6. A pair of a elements to which the class attribute has been applied
The first way you can take advantage of the class attribute is to create a style that targets one of more of the classes you have defined. Listing 3-16 provides an example.
Listing 3-16. Defining a Style That Relies on Classes
<!DOCTYPE HTML>

<html>

    <head>

        <title>Example</title>

        <style type="text/css">

            .class2 {

                background-color:grey;

                color:white;

                padding:5px;

                margin:2px;

            }

            .class1 {

                font-size:x-large;

            }

        </style>

    </head>

    <body>

        <a class="class1 class2" href="http://apress.com">Apress web site</a>

        <p/>

        <a class="class2 otherclass" href="http://w3c.org">W3C web site</a>

    </body>

</html>
In this example, I used a style element to define two styles—the first is applied to elements that are assigned to class2 and the second is applied to class1.
I explain the style element in Chapter 7, and I provide an introduction to styles and how they can be used to target elements in different ways in Chapter 4.
When you load the HTML in a browser, the styles are applied to the elements. The effect is shown in Figure 3-7. The advantage of using classes to assign styles is that you don't have to duplicate the same style settings on each element.
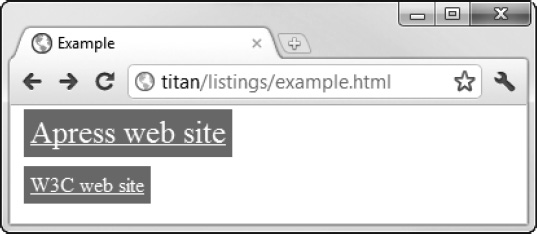
Figure 3-7. Using the class attribute to apply styles
Another way to use the class attribute is in a script. Listing 3-17 provides a demonstration.
Listing 3-17. Using the class Attribute in a Script
<!DOCTYPE HTML>

<html>

    <head>

        <title>Example</title>

    </head>

    <body>

        <a class="class1 class2" href="http://apress.com">Apress web site</a>

        <p/>

        <a class="class2 otherclass" href="http://w3c.org">W3C web site</a>

        <script type="text/javascript">

            var elems = document.getElementsByClassName("otherclass");

            for (i = 0; i < elems.length; i++) {

                var x = elems[i];

                x.style.border = "thin solid black";

                x.style.backgroundColor = "white";

                x.style.color = "black";

            }

        </script>

    </body>

</html>
The script in this example finds all of the elements that have been assigned to the otherclass class and applies some styling. I explain the script element in Chapter 7, each of the style properties in Chapters 19 through 24, and how to find elements in the document in Chapter 26. The effect of this script is shown in Figure 3-8.
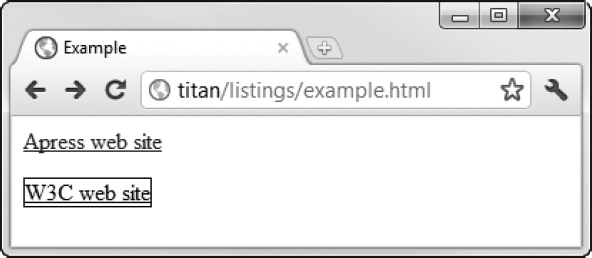
Figure 3-8. Using the class attribute in a script
The contenteditable Attribute
The contenteditable attribute is new in HTML5 and allows the user to change the content in the page. Listing 3-18 provides a simple demonstration.
Listing 3-18. Using the contenteditable Attribute
<!DOCTYPE HTML>

<html>

    <head>

        <title>Example</title>

    </head>

    <body>

        <p contenteditable="true">It is raining right now</p>

    </body>

</html>
I have applied the contenteditable attribute to a p element (which I describe in Chapter 9). Setting the attribute value to true allows the user to edit the element contents, and setting it to false disables this feature. (If you don't specify a value, the element inherits the setting for this property from its parent.) You can see the effect that the attribute has in Figure 3-9. The user clicks on the text and starts to type.
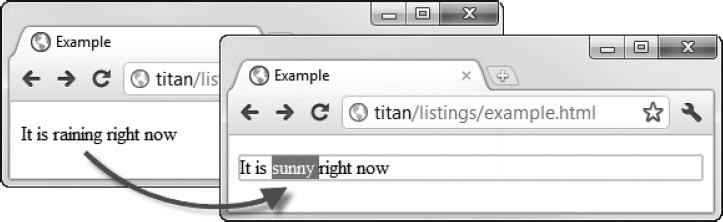
Figure 3-9. Enabling editing with the contenteditable attribute
The contextmenu Attribute
The contextmenu attribute allows you to define context menus for elements. These menus pop up when the user triggers them (for example, when a Windows PC user right-clicks). At the time of this writing, no browser supports the contextmenu attribute.
The dir Attribute
The dir attribute specifies the direction of an element's text. The two supported values are ltr (for left-to-right text) and rtl (for right-to-left text). Listing 3-19 shows both values being used.
Listing 3-19. Using the dir Attribute
<!DOCTYPE HTML>

<html>

    <head>

        <title>Example</title>

    </head>

    <body>

        <p dir="rtl">This is right-to-left</p>

        <p dir="ltr">This is left-to-right</p>

    </body>

</html>
You can see the effect of the dir attribute in Figure 3-10.
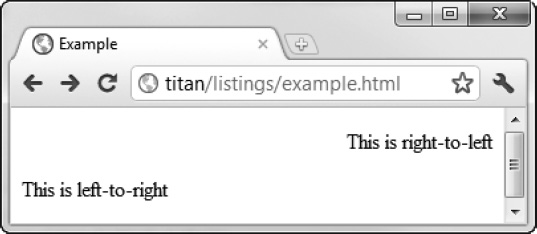
Figure 3-10. Displaying left-to-right and right-to-left text
The draggable Attribute
The draggable attribute is part of the HTML5 support for drag and drop, and it is used to indicate whether an element can be dragged. I explain drag and drop in detail in Chapter 37.
The dropzone Attribute
The dropzone attribute is part of the HTML5 support for drag and drop. It is the counterpart to the draggable attribute I just described. I explain both elements in Chapter 37.
The hidden Attribute
The hidden attribute is a Boolean attribute that indicates an element is not presently relevant. Browsers interpret this attribute by hiding the element from view. Listing 3-20 shows the effect of the hidden attribute.
Listing 3-20. Using the hidden Attribute
<!DOCTYPE HTML>

<html>

    <head>

        <title>Example</title>

        <script>

            var toggleHidden = function() {

                var elem = document.getElementById("toggle");

                if (elem.hasAttribute("hidden")) {

                    elem.removeAttribute("hidden");

                } else {

                    elem.setAttribute("hidden", "hidden");

                }

            }

        </script>

    </head>

    <body>

        <button onclick="toggleHidden()">Toggle</button>

        <table>

            <tr><th>Name</th><th>City</th></tr>

            <tr><td>Adam Freeman</td><td>London</td></tr>

            <tr id="toggle" hidden><td>Joe Smith</td><td>New York</td></tr>

            <tr><td>Anne Jones</td><td>Paris</td></tr>

        </table>

    </body>

</html>
I made this example somewhat more elaborate than it needs to be. I defined a table element that contains a tr element (which represents a row in the table) for which the hidden attribute is present. I also defined a button element that, when pressed, invokes the toggleHidden JavaScript function defined in the script element. This script removes the hidden attribute when it is present and adds it otherwise. Don't worry about how this all works for the moment. I explain the table, tr, th, and td elements in Chapter 11, the script element in Chapter 7, and events in Chapter 30.
I put this all in place to demonstrate what happens when the hidden attribute is applied, You can see the effect of pressing the button in Figure 3-11.

Figure 3-11. The effect of removing and adding the hidden element
When the hidden attribute is applied to an element, the browser doesn't render it at all. It is as though it were not contained in the HTML, so the table is rendered with the reduced number of rows.
The Id Attribute
The id attribute is used to assign a unique identifier to an element. These identifiers are commonly used to apply styles to an element or to select an element with JavaScript. Listing 3-21 demonstrates how to apply a style based on the value of the id attribute.
Listing 3-21. Using the id Attribute
<!DOCTYPE HTML>

<html>

    <head>

        <title>Example</title>

    </head>

    <style>

        #w3clink {

            background:grey;

            color:white;

            padding:5px;

            border: thin solid  black;

        }

    </style>

    <body>

        <a href="http://apress.com">Apress web site</a>

        <p/>

        <a id="w3clink" href="http://w3c.org">W3C web site</a>

    </body>

</html>
To apply a style based on an id attribute value, you prefix id with the # character when defining the style. I give more details about CSS selectors in Chapters 17 and 18, and I describe the various styles that can be applied in Chapters 19 through 24. You can see the effect of applying the style in Figure 3-12.
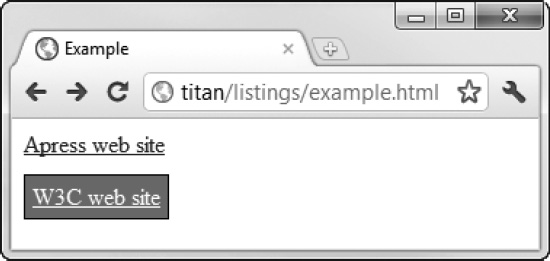
Figure 3-12. Applying a style based on an element's id attribute value
![]() Tip The
Tip The id attribute can also be used to navigate to a particular section in a document. If you imagine a document called example.html that contains an element with an id attribute value of myelement, you can navigate directly to the element by requesting example.html#myelement. This last part of the URL (the # plus the element id) is known as the URL fragment identifier.
The lang Attribute
The lang attribute is used to specify the language of an element's contents. Listing 3-22 demonstrates how to use this attribute.
Listing 3-22. Using the lang Attribute
<!DOCTYPE HTML>

<html>

    <head>

        <title>Example</title>

    </head>

    <body>

        <p lang="en">Hello - how are you?</p>

        <p lang="fr">Bonjour - comment êtes-vous?</>

        <p lang="es">Hola - ¿cómo estás?</p>

    </body>

</html>
The value for the lang attribute must be a valid ISO language code. You can get full details of how to specify languages at http://tools.ietf.org/html/bcp47. Be warned, though: dealing with languages can be a complex and technical business.
The lang attribute is intended to allow the browser to adjust its approach to displaying an element. This can mean changing quotation marks, for example, and also having to properly pronounce text when a text-to-speech reader (or other accessibility) tool is used.
You can also use the lang attribute to select content of a given language—perhaps to apply a style or display only content in a language the user selects.
The spellcheck Attribute
The spellcheck attribute is used to specify if the browser should check the spelling of an element's content. Using this attribute makes sense only when it is applied to an element the user can edit, as shown in Listing 3-23. I describe the textarea element in Chapter 14.
Listing 3-23. Using the spellcheck Attribute
<!DOCTYPE HTML>

<html>

    <head>

        <title>Example</title>

    </head>

    <body>

        <textarea spellcheck="true">This is some mispelled text</textarea>

    </body>

</html>
The permitted values for the spellcheck attribute are true (spellchecking is enabled) and false (spellchecking is disabled). The way that spellchecking is implemented differs between browsers. In Figure 3-13, you can see how Google Chrome handles this feature, which is a check-as-you-type approach. Other browsers require the user to explicitly perform a spellcheck.
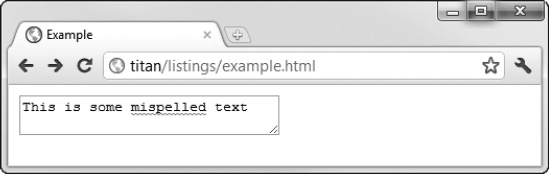
Figure 3-13. Spellchecking as implemented by Chrome
![]() Caution The current implementation of spellchecking in the most commonly used browsers ignores the
Caution The current implementation of spellchecking in the most commonly used browsers ignores the lang element I just described. Spellchecking will be performed using the language defined by the user's operating system or by a separate browser setting.
The style Attribute
The style attribute allows you to define a CSS style directly on an element (as opposed to in a style element or external stylesheet). Listing 3-24 provides a demonstration.
Listing 3-24. Using the style Attribute
<!DOCTYPE HTML>

<html>

    <head>
        <title>Example</title>

    </head>

    <body>

        <a href="http://apress.com" style="background: grey; color:white; padding:10px">

            Visit the Apress site

        </a>

    </body>

</html>
I describe CSS styles in more detail in Chapter 5, and you can learn about the different style options available in Chapters 19 through 24.
The tabindex Attribute
The tabindex attribute allows you to control the order in which the Tab key moves the focus through the HTML page, overriding the default order. Listing 3-25 demonstrates how to use this attribute.
Listing 3-25. Using the tabindex Attribute
<!DOCTYPE HTML>

<html>

    <head>

        <title>Example</title>

    </head>

    <body>

        <form>

            <label>Name: <input type="text" name="name" tabindex="1"/></label>

            <p/>

            <label>City: <input type="text" name="city" tabindex="-1"/></label>

            </p>

            <label>Country: <input type="text" name="country" tabindex="2"/></label>

            </p>

            <input type="submit" tabindex="3"/>

        </form>

    </body>

</html>
The first element that will be selected is the one that has the tabindex value of 1. When the user presses the Tab key, the element with a tabindex of 2 will be selected, and so on. A tabindex value of -1 ensures that an element will not be selected when the user presses the Tab key. The effect of the tabindex values in the listing is that, as the Tab key is pressed, the focus shifts from the first input element to the third and then to the Submit button, as shown in Figure 3-14.

Figure 3-14. Controlling the focus sequence with the tabindex attribute
The title Attribute
The title attribute provides additional information about an element, which is commonly used by the browser to display tool tip information. Listing 3-26 shows how the title attribute is used.
Listing 3-26. Using the title Attribute
<!DOCTYPE HTML>

<html>

    <head>

        <title>Example</title>

    </head>

    <body>

        <a title="Apress Publishing" href="http://apress.com">Visit the Apress site</a>

    </body>

</html>
Figure 3-15 shows how this value is handled by Google Chrome.

Figure 3-15. A title attribute value displayed as a tool tip
Useful HTML Tools
There are only two tools that I think help when working with HTML. The first is a good HTML editor, which will highlight invalid elements and attributes and generally keep you on the right path. As I mentioned in Chapter 2, I get on well with Komodo Edit, but there are innumerable editors available and you are bound to find one that suits your working style (just be sure that it supports HTML5).
The other tool is the View Source menu (or its equivalent), which is built into most browsers. Being able to see the HTML markup behind a document is a great way to validate your own work and to learn new techniques from others.
Summary
In this chapter, I gave you a quick tour through the structure and nature of an HTML document and showed you how to apply HTML elements to mark up content and create an HTML document. I explained how you can configure the way that elements are interpreted by the browser with attributes and described the difference between local and global attributes. I described each of the global attributes and briefly explained the basic elements and structure that make up an HTML document.