
Chapter 19
Handling Rotation
Some Android devices offer a slide-out keyboard that triggers rotating the screen from portrait to landscape orientation. Other devices use accelerometers to determine when the screen rotates. As a result, it is reasonable to assume that switching from portrait to landscape orientation and back again may be something that users of your application will want to do.
As this chapter describes, Android has a number of ways for you to handle screen rotation so that your application can properly handle either orientation. Keep in mind, though, that these facilities only help you to detect and manage the rotation process—you still must make sure your layouts and fragments look decent in each orientation.
A Philosophy of Destruction
By default, when there is a change in the device configuration that might affect resource selection, Android will destroy and re-create any running or paused activities the next time they are to be viewed. This could happen for a variety of different configuration changes, including these:
- Rotating the screen (i.e., orientation change)
- Extending or hiding a physical keyboard on devices that have a sliding keyboard
- Putting the device in a car or desk dock, or removing it from a dock
- Changing the locale, and thereby changing the preferred language
Screen rotation is the change most likely to trip you up, since a change in orientation can cause your application to load a different set of resources (e.g., layouts).
The key here is that Android's default behavior of destroying and re-creating any running or paused activities is probably the behavior that is best for most of your activities. You do have some control over the matter, though, and can tailor how your activities respond to orientation changes or similar configuration switches.
It's All the Same, Just Different
Since, by default, Android destroys and re-creates your activity on a rotation, you may only need to hook into the same onSaveInstanceState() that you would if your activity were destroyed for any other reason (e.g., low memory or other reasons we discussed in Chapter 18). Implement that method in your activity and fill in the supplied Bundle with enough information to get you back to your current state. Then, in onCreate() (or onRestoreInstanceState(), if you prefer), pick the data out of the Bundle and use it to restore your activity to the way it was.
To demonstrate this, let's take a look at the Rotation/RotationOne project. This and the other sample projects in this chapter use a pair of main.xml layouts, one in res/layout/ for use in portrait mode and one in res/layout-land/ for use in landscape mode. Here is the portrait layout:
<?xml version="1.0" encoding="utf-8"?>

<LinearLayout xmlns:android="http://schemas.android.com/apk/res/android"

  android:orientation="vertical"

  android:layout_width="fill_parent"

  android:layout_height="fill_parent"

  >

  <Button android:id="@+id/pick"

    android:layout_width="fill_parent"

    android:layout_height="fill_parent"

    android:layout_weight="1"

    android:text="Pick"

    android:enabled="true"

    android:onClick="pickContact"

  />

  <Button android:id="@+id/view"

    android:layout_width="fill_parent"

    android:layout_height="fill_parent"

    android:layout_weight="1"

    android:text="View"

    android:enabled="false"

    android:onClick="viewContact"

  />

</LinearLayout>
Here is the similar landscape layout:
<?xml version="1.0" encoding="utf-8"?>

<LinearLayout xmlns:android="http://schemas.android.com/apk/res/android"

  android:orientation="horizontal"

  android:layout_width="fill_parent"

  android:layout_height="fill_parent"

  >

  <Button android:id="@+id/pick"

    android:layout_width="fill_parent"

    android:layout_height="fill_parent"

    android:layout_weight="1"

    android:text="Pick"

    android:enabled="true"

    android:onClick="pickContact"
  />

  <Button android:id="@+id/view"

    android:layout_width="fill_parent"

    android:layout_height="fill_parent"

    android:layout_weight="1"

    android:text="View"

    android:enabled="false"

    android:onClick="viewContact"

  />

</LinearLayout>
Basically, both layouts contain a pair of buttons, each taking up half the screen. In portrait mode, the buttons are stacked; in landscape mode, they are side by side.
If you were to simply create a project, put in those two layouts, and compile it, the application would appear to work just fine—a rotation (Ctrl+F12 in the emulator) will cause the layout to change. And while buttons lack state, if you were using other widgets (e.g., EditText), you would even find that Android hangs onto some of the widget state for you (e.g., the text entered in the EditText).
What Android cannot help you with automatically is anything held outside the widgets.
Picking and Viewing a Contact
This application lets users pick a contact and then view the contact, via separate buttons. The View button is enabled only after the user picks a contact via the Pick button. Let's take a closer look at how this feat is accomplished.
When the user clicks the Pick button, we call startActivityForResult(). This is a variation on startActivity(), designed for activities that are set up to return some sort of result—a user's choice of file, contact, or whatever. Relatively few activities are set up this way, so you cannot expect to call startActivityForResult() and get answers from any activity you choose.
In this case, we want to pick a contact. There is an ACTION_PICKIntent action available in Android that is designed for this sort of scenario. An ACTION_PICKIntent indicates to Android that we want to pick…something. That “something” is determined by the Uri we put in the Intent.
In our case, it turns out that we can use an ACTION_PICKIntent for certain system-defined Uri values to let the user pick a contact from the device's list of contacts. In particular, on Android 2.0 and higher, we can use android.provider.ContactsContract.Contacts.CONTENT_URI for this purpose:
public void pickContact(View v) {

  Intent i=new Intent(Intent.ACTION_PICK,

                     Contacts.CONTENT_URI);


  startActivityForResult(i, PICK_REQUEST);

}
For Android 1.6 and earlier, there is a separate android.provider.Contacts.CONTENT_URI that we could use.
The second parameter to startActivityForResult() is an identifying number, to help us distinguish this call to startActivityForResult() from any others we might make. Calling startActivityForResult() with an ACTION_PICKIntent for the Contacts.CONTENT_URI will bring up a contact-picker activity, supplied by Android.
When the user taps a contact, the picker activity ends (e.g., via finish()), and control returns to our activity. At that point, our activity is called with onActivityResult(). Android supplies us with three pieces of information:
- The identifying number we supplied to
startActivityForResult(), so we can match this result to its original request - A result status, either
RESULT_OKorRESULT_CANCELED, to indicate whether the user made a positive selection or abandoned the picker (e.g., by pressing the Back button) - An
Intentthat represents the result data itself, for aRESULT_OKresponse
The details of what is in the Intent will need to be documented by the activity that you called. In the case of an ACTION_PICKIntent for the Contacts.CONTENT_URI, the returned Intent has its own Uri (via getData()) that represents the chosen contact. In the RotationOne example, we stick that in a data member of the activity and enable the View button:
@Override

protected void onActivityResult(int requestCode, int resultCode,

                                 Intent data) {

  if (requestCode==PICK_REQUEST) {

    if (resultCode==RESULT_OK) {

      contact=data.getData();

      viewButton.setEnabled(true);

    }

  }

}
If the user clicks the now-enabled View button, we create an ACTION_VIEWIntent on the contact's Uri, and call startActivity() on that Intent:
public void viewContact(View v) {

  startActivity(new Intent(Intent.ACTION_VIEW, contact));

}
This will bring up an Android-supplied activity to view details of that contact.
Saving Your State
Given that we have used startActivityForResult() to pick a contact, now we need to hang onto that contact when the screen orientation changes. In the RotationOne example, we do this via onSaveInstanceState():
package com.commonsware.android.rotation.one;


import android.app.Activity;
import android.content.Intent;

import android.net.Uri;

import android.os.Bundle;

import android.provider.ContactsContract.Contacts;

import android.view.View;

import android.widget.Button;

import android.util.Log;


public class RotationOneDemo extends Activity {

  static final int PICK_REQUEST=1337;

  Button viewButton=null;

  Uri contact=null;


  @Override

  public void onCreate(Bundle savedInstanceState) {

    super.onCreate(savedInstanceState);

    setContentView(R.layout.main);


    viewButton=(Button)findViewById(R.id.view);

    restoreMe(savedInstanceState);


    viewButton.setEnabled(contact!=null);

  }


  @Override

  protected void onActivityResult(int requestCode, int resultCode,

                                   Intent data) {

    if (requestCode==PICK_REQUEST) {

      if (resultCode==RESULT_OK) {

        contact=data.getData();

        viewButton.setEnabled(true);

      }

    }

  }


  public void pickContact(View v) {

    Intent i=new Intent(Intent.ACTION_PICK,

                       Contacts.CONTENT_URI);


    startActivityForResult(i, PICK_REQUEST);

  }


  public void viewContact(View v) {

    startActivity(new Intent(Intent.ACTION_VIEW, contact));

  }


  @Override

  protected void onSaveInstanceState(Bundle outState) {

    super.onSaveInstanceState(outState);


    if (contact!=null) {

      outState.putString("contact", contact.toString());

    }

  }


  private void restoreMe(Bundle state) {
    contact=null;


    if (state!=null) {

      String contactUri=state.getString("contact");


      if (contactUri!=null) {

        contact=Uri.parse(contactUri);

      }

    }

  }

}
By and large, it looks like a normal activity…because it is. Initially, the “model”—a Uri named contact—is null. It is set as the result of spawning the ACTION_PICK subactivity. Its string representation is saved in onSaveInstanceState() and restored in restoreMe() (called from onCreate()). If the contact is not null, the View button is enabled and can be used to view the chosen contact.
Visually, it looks pretty much as you would expect, as shown in Figures 19–1 and 19–2.
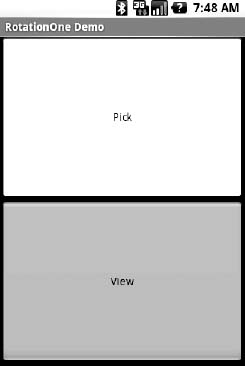
Figure 19–1. The RotationOne application, in portrait mode
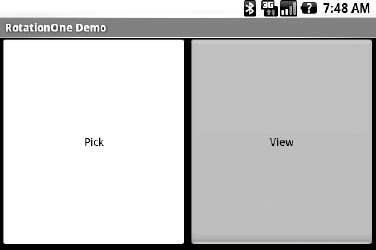
Figure 19–2. The RotationOne application, in landscape mode
The benefit to this implementation is that it handles a number of system events beyond mere rotation, such as being closed by Android due to low memory.
For fun, comment out the restoreMe() call in onCreate() and try running the application. You will see that the application “forgets” a contact selected in one orientation when you rotate the emulator or device.
Now with More Savings!
The problem with onSaveInstanceState() is that you are limited to a Bundle. That's because this callback is also used in cases where your whole process might be terminated (e.g., low memory), so the data to be saved must be something that can be serialized and has no dependencies on your running process.
For some activities, that limitation is not a problem. For others, it is more annoying. Take an online chat, for example. You have no means of storing a socket in a Bundle, so by default, you have to drop your connection to the chat server and reestablish it. That not only may be a performance hit, but it might also affect the chat itself, such as showing in the chat logs that you are disconnecting and reconnecting.
One way to get past this is to use onRetainNonConfigurationInstance() instead of onSaveInstanceState() for “light” changes like a rotation. Your activity's onRetainNonConfigurationInstance() callback can return an Object, which you can retrieve later via getLastNonConfigurationInstance(). The Object can be just about anything you want. Typically, it will be some kind of “context” object holding activity state, such as running threads, open sockets, and the like. Your activity's onCreate() can call getLastNonConfigurationInstance(), and if you get a non-null response, you now have your sockets and threads and whatnot. The biggest limitation is that you do not want to put in the saved context anything that might reference a resource that will get swapped out, such as a Drawable loaded from a resource.
Let's take a look at the Rotation/RotationTwo sample project, which uses this approach to handling rotations. The layouts, and hence the visual appearance, are the same as with Rotation/RotationOne. Where things differ slightly is in the Java code:
package com.commonsware.android.rotation.two;


import android.app.Activity;

import android.content.Intent;

import android.net.Uri;

import android.os.Bundle;

import android.provider.ContactsContract.Contacts;

import android.view.View;

import android.widget.Button;

import android.util.Log;


public class RotationTwoDemo extends Activity {

  static final int PICK_REQUEST=1337;

  Button viewButton=null;

  Uri contact=null;


  @Override

  public void onCreate(Bundle savedInstanceState) {

    super.onCreate(savedInstanceState);

    setContentView(R.layout.main);


    viewButton=(Button)findViewById(R.id.view);

    restoreMe();


    viewButton.setEnabled(contact!=null);

  }


  @Override

  protected void onActivityResult(int requestCode, int resultCode,

                                   Intent data) {

    if (requestCode==PICK_REQUEST) {

      if (resultCode==RESULT_OK) {

        contact=data.getData();

        viewButton.setEnabled(true);

      }

    }

  }


  public void pickContact(View v) {

    Intent i=new Intent(Intent.ACTION_PICK,

                       Contacts.CONTENT_URI);


    startActivityForResult(i, PICK_REQUEST);

  }


  public void viewContact(View v) {

    startActivity(new Intent(Intent.ACTION_VIEW, contact));

  }


  @Override

  public Object onRetainNonConfigurationInstance() {

    return(contact);
  }


  private void restoreMe() {

    contact=null;


    if (getLastNonConfigurationInstance()!=null) {

      contact=(Uri)getLastNonConfigurationInstance();

    }

  }

}
In this case, we override onRetainNonConfigurationInstance(), returning the actual Uri for our contact, rather than a string representation of it. In turn, restoreMe() calls getLastNonConfigurationInstance(), and if it is not null, we hold onto it as our contact and enable the View button.
The advantage here is that we are passing around the Uri rather than a string representation. In this case, that is not a big saving. But our state could be much more complicated, including threads, sockets, and other things we cannot pack into a Bundle.
However, even the onRetainNonConfigurationInstance() approach to handling rotations may be too intrusive to your application. Suppose, for example, you are creating a real-time game, such as a first-person shooter. The “hiccup” your users experience as your activity is destroyed and re-created might be enough to get them shot, which they may not appreciate. While this would be less of an issue on the T-Mobile G1, since a rotation requires sliding open the keyboard and therefore is unlikely to be done mid-game, other devices might rotate based solely on the device's position as determined by accelerometers. For applications such as this, there is a third possibility for handling rotations, which is to tell Android that you will handle them yourself, without any assistance from the framework.
DIY Rotation
To handle rotations without Android's assistance, do the following:
- Put an
android:configChangesentry in yourAndroidManifest.xmlfile, listing the configuration changes you want to handle yourself versus allowing Android to handle them for you. - Implement
onConfigurationChanged()in yourActivity, which will be called when one of the configuration changes you listed inandroid:configChangesoccurs.
Now, for any configuration change you want, you can bypass the whole activity-destruction process and simply get a callback letting you know of the change.
To see this in action, turn to the Rotation/RotationThree sample application. Once again, our layouts are the same, so the application looks the same as the preceding two samples. However, the Java code is significantly different, because we are no longer concerned with saving our state, but rather with updating our UI to deal with the layout.
But first, we need to make a small change to our manifest:
<?xml version="1.0" encoding="utf-8"?>

<manifest xmlns:android="http://schemas.android.com/apk/res/android"

 package="com.commonsware.android.rotation.three" android:versionCode="1"

 android:versionName="1.0.0">

  <uses-sdk android:minSdkVersion="5" android:targetSdkVersion="6"/>

    <application android:label="@string/app_name" android:icon="@drawable/cw">

        <activity android:name=".RotationThreeDemo" android:label="@string/app_name"

 android:configChanges="keyboardHidden|orientation">

            <intent-filter>

                <action android:name="android.intent.action.MAIN"/>

                <category android:name="android.intent.category.LAUNCHER"/>

            </intent-filter>

        </activity>

    </application>

  <supports-screens android:largeScreens="true" android:normalScreens="true"

  android:smallScreens="true" android:anyDensity="true"/>

  </manifest>
Here, we state that we will handle keyboardHidden and orientation configuration changes ourselves. This covers us for any cause of the rotation, whether it is a sliding keyboard or a physical rotation. Note that this is set on the activity, not the application. If you have several activities, you will need to decide for each which of the tactics outlined in this chapter you wish to use.
In addition, we need to add an android:id to our LinearLayout containers, such as follows:
<?xml version="1.0" encoding="utf-8"?>

<LinearLayout xmlns:android="http://schemas.android.com/apk/res/android"

  android:id="@+id/container"

  android:orientation="vertical"

  android:layout_width="fill_parent"

  android:layout_height="fill_parent"

  >

  <Button android:id="@+id/pick"

    android:layout_width="fill_parent"

    android:layout_height="fill_parent"

    android:layout_weight="1"

    android:text="Pick"

    android:enabled="true"

    android:onClick="pickContact"

  />

  <Button android:id="@+id/view"

    android:layout_width="fill_parent"

    android:layout_height="fill_parent"

    android:layout_weight="1"

    android:text="View"

    android:enabled="false"

    android:onClick="viewContact"

  />

</LinearLayout>
The Java code for this project is shown here:
package com.commonsware.android.rotation.three;
import android.app.Activity;

import android.content.Intent;

import android.content.res.Configuration;

import android.net.Uri;

import android.os.Bundle;

import android.provider.ContactsContract.Contacts;

import android.view.View;

import android.widget.Button;

import android.widget.LinearLayout;


public class RotationThreeDemo extends Activity {

  static final int PICK_REQUEST=1337;

  Button viewButton=null;

  Uri contact=null;


  @Override

  public void onCreate(Bundle savedInstanceState) {

    super.onCreate(savedInstanceState);


    setContentView(R.layout.main);

    viewButton=(Button)findViewById(R.id.view);

    viewButton.setEnabled(contact!=null);

  }


  @Override

  protected void onActivityResult(int requestCode, int resultCode,

                                   Intent data) {

    if (requestCode==PICK_REQUEST) {

      if (resultCode==RESULT_OK) {

        contact=data.getData();

        viewButton.setEnabled(true);

      }

    }

  }


  public void pickContact(View v) {

    Intent i=new Intent(Intent.ACTION_PICK,

                       Contacts.CONTENT_URI);


    startActivityForResult(i, PICK_REQUEST);

  }


  public void viewContact(View v) {

    startActivity(new Intent(Intent.ACTION_VIEW, contact));

  }


  public void onConfigurationChanged(Configuration newConfig) {

    super.onConfigurationChanged(newConfig);


    LinearLayout container=(LinearLayout)findViewById(R.id.container);


    if (newConfig.orientation==Configuration.ORIENTATION_LANDSCAPE) {

      container.setOrientation(LinearLayout.HORIZONTAL);

    }

    else {
      container.setOrientation(LinearLayout.VERTICAL);

    }

  }

}
Our onConfigurationChanged() needs to update the UI to reflect the orientation change. Here, we find our LinearLayout and tell it to change its orientation to match that of the device. The orientation field on the Configuration object will tell us how the device is oriented.
…BUT GOOGLE DOES NOT RECOMMEND THIS
Forcing the Issue
Some activities simply are not meant to change orientation. Games, camera previews, video players, and the like may make sense only in landscape orientation, for example. While most activities should allow the user to work in any desired orientation, for activities where only one orientation makes sense, you can control it.
To block Android from rotating your activity, all you need to do is add android:screenOrientation = "portrait" (or "landscape", as you prefer) to your AndroidManifest.xml file, as follows (from the Rotation/RotationFour sample project):
<?xml version="1.0" encoding="utf-8"?>

<manifest xmlns:android="http://schemas.android.com/apk/res/android"

 package="com.commonsware.android.rotation.four" android:versionCode="1"
 android:versionName="1.0.0">

  <uses-sdk android:minSdkVersion="5" android:targetSdkVersion="6"/>

    <application android:label="@string/app_name" android:icon="@drawable/cw">

        <activity android:name=".RotationFourDemo" android:screenOrientation=

"portrait" android:label="@string/app_name">

            <intent-filter>

                <action android:name="android.intent.action.MAIN"/>

                <category android:name="android.intent.category.LAUNCHER"/>

            </intent-filter>

        </activity>

    </application>

  <supports-screens android:largeScreens="true" android:normalScreens="true"

 android:smallScreens="true" android:anyDensity="true"/>

</manifest>
Since this is applied on a per-activity basis, you will need to decide which of your activities may need this turned on.
At this point, your activity is locked into whatever orientation you specified, regardless of what you do. Figures 19–3 and 19–4 show the same activity as in the previous three sections, but using the preceding manifest and with the emulator set for both portrait and landscape orientation. Note that the UI does not move a bit, but remains in portrait mode.
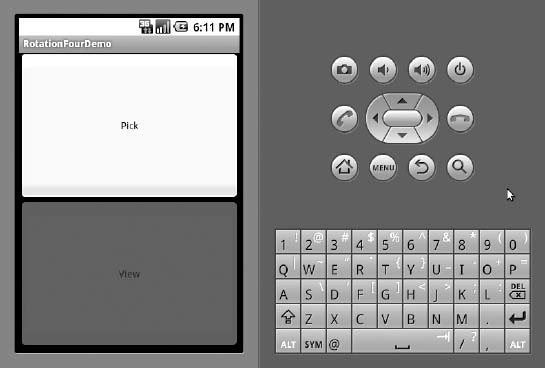
Figure 19–3. The RotationFour application, in portrait mode
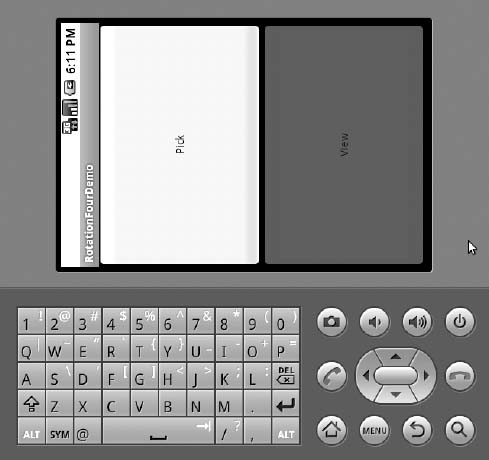
Figure 19–4. The RotationFour application, in landscape mode
Note that Android will still destroy and re-create your activity, even if you have the orientation set to a specific value as shown here. If you wish to avoid that, you also need to set android:configChanges in the manifest, as described earlier in this chapter. Or, you can still use onSaveInstanceState() or onRetainNonConfigurationInstance() to save your activity's mutable state.
Making Sense of It All
As noted at the beginning of this chapter, devices with a slide-out keyboard (such as T-Mobile G1, Motorola DROID/Milestone, etc.) change screen orientation when the keyboard is exposed or hidden, whereas other devices change screen orientation based on the accelerometer. If you have an activity that should change orientation based on the accelerometer, even if the device has a slide-out keyboard, just add android:screenOrientation = "sensor" to your AndroidManifest.xml file as follows (from the Rotation/RotationFive sample project):
<?xml version="1.0" encoding="utf-8"?>

<manifest xmlns:android="http://schemas.android.com/apk/res/android"

 package="com.commonsware.android.rotation.five" android:versionCode="1"

 android:versionName="1.0.0">
  <uses-sdk android:minSdkVersion="5" android:targetSdkVersion="6"/>

    <application android:label="@string/app_name" android:icon="@drawable/cw">

      <activity android:name=".RotationFiveDemo" android:screenOrientation="sensor"

 android:label="@string/app_name">

            <intent-filter>

                <action android:name="android.intent.action.MAIN"/>

                <category android:name="android.intent.category.LAUNCHER"/>

            </intent-filter>

        </activity>

    </application>

  <supports-screens android:largeScreens="true" android:normalScreens="true"

 android:smallScreens="true" android:anyDensity="true"/>

</manifest>
The sensor, in this case, tells Android you want the accelerometers to control the screen orientation, so the physical shift in the device orientation controls the screen orientation.
Android 2.3 added a number of other possible values for android:screenOrientation:
reverseLandscapeandreversePortrait: Indicate that you want the screen to be in landscape or portrait orientation, respectively, but upside down compared to the normal landscape and portrait orientationssensorLandscapeandsensorPortrait: Indicate that you want the screen to be locked in landscape or portrait orientation, respectively, but the sensors can be used to determine which side is “up”fullSensor: Allows the sensors to put the screen in any of the four possible orientations (portrait, reverse portrait, landscape, reverse landscape), whereassensortoggles only between portrait and landscape
Later versions of Android added even more possibilities:
behind: Matches the orientation of whatever is behind this activityuser: Adopts the user's handset-wide preference for orientation behavior (this is obviously dependent on using a device that offers a global setting as an option)
Your preferences and options are expanded further by using fragments, which are discussed in their own dedicated section in Chapter 28.