
![]()
Sounds and Asset Management
Sound effects and music are a crucial part of your games. Adding background music and audible feedback will instantly increase its polish and overall entertainment value tremendously. This chapter will cover how SoundJS is used in game development, and how sound restrictions on mobile can be avoided.
Along with playing and controlling sounds, you’ll take a deep look at how asset management can help organize your games to make them easier to update and read. With the inclusion of sound files into your applications, a self-contained class to handle the ids, loading, and organizing of these sound files, along with other assets, becomes essential. To handle this, an asset manager class will be built in this chapter and will be used to create a simple game.
SoundJS
SoundJS is extremely easy to use. In fact, it’s so easy to use that the brief intro in Chapter 1 covers quite a lot. In this section, a quick review of SoundJS will be covered, and some more techniques will be introduced, including loading and mobile considerations.
Using the Sound Class
The Sound class is the API for creating and controlling sounds. A sound can be played directly on the Sound class by passing in either an id or the full path to the sound file.
createjs.Sound.play("soundID",createjs.Sound.INTERRUPT_NONE,0,0,10,.5,0);
The additional, optional parameters passed into the play method are as follows:
- interrupt: How to handle other sounds of the same source currently playing.
- delay: The delay in milliseconds before the sound starts.
- offset: How far into the sound to begin playback, in milliseconds.
- loop: Number of times to loop the audio, -1 for infinite.
- volume: The volume of the sound.
- pan: The pan of the sound between -1 (left) and 1 (right)
The play method returns an instance of the class, SoundInstance, which can give you more control over when and what to do with the sound. You can alternatively create an instance without first playing it by using the createInstance method. Listing 9-1 shows this procedure, along with a few of the methods you can call on a SoundInstance object.
Listing 9-1. Creating a Sound Instance Using createInstance
var mySound = createjs.Sound.createInstance("myID");
mySound.setVolume(.5);
mySound.addEventListener("fileload", handleComplete);

function handleComplete(e){
   mySound.play();
}
In Listing 9-1, methods were assigned directly to the sound instance, as opposed to passing them into the constructor.
Registering Sounds
Before playing sounds, you must register them. This was covered in Chapter 1 when introducing SoundJS. As a recap, the following is an example of how a sound is registered:
createjs.Sound.registerSound("path/sound.mp3", "soundId", 4);
The first parameter is the path to the sound file, and the second is the id, which will be used when accessing it later for playback. The third parameter is one that was not previously covered, and it dictates the number of concurrent sounds that should be allowed to play.
It’s unlikely that you will only play one sound in your game, so registering multiple files is a must. You can handle this by building a manifest, similar to when using PreloadJS. Listing 9-2 shows a series of sounds being registered.
Listing 9-2. Registering Multiple Sound Files
var manifest = [
    {src:"boom.mp3", id:"boom"},
    {src:"snap.mp3 ", id:"snap", data:6},
    {src:"crack.mp3 ", id:"crack"}
];
createjs.Sound.alternateExtensions = ["ogg"];

createjs.Sound.registerManifest(manifest, "sounds/");
If you want to load in multiple file types for each sound, you’ll need to set the alternateExtensions property on Sound. In this example, an ogg file will load, if needed, for each sound object in the manifest. You want to include at least these two file types, mp3 and ogg, so you can be assured your sound will play across all browsers and devices.
The second object in the previous manifest example includes a third property, data. This value is used to set the number of allowed concurrent sounds to play, similar to the third parameter that is used in the registerSound method.
createjs.Sound.registerSound("boom.mp3", "snap", 6);
Preloading Sounds with PreloadJS
Because you will be preloading several assets, along with registering multiple sounds, it would be convenient to handle the entire process with one manifest using PreloadJS. Luckily, this can be achieved by tacking on the sound assets to the load queue’s manifest. PreloadJS will handle and register the sound files appropriately as the files are loaded into your application by installing the plug-in createjs.Sound. Listing 9-3 shows how you can mix file types, including sounds, into one manifest for preloading.
Listing 9-3. Preloading Sounds with PreloadJS
var manifest = [
   {src:"boom.mp3", id:"boom"},
   {src:"crack.mp3", id:"crack"},
   {src:"spritesheet.png", id:"ss"},
   {src:"ssData.json", id:"ssData"},
];
queue = new createjs.LoadQueue();
queue.installPlugin(createjs.Sound);
createjs.Sound.alternateExtensions = ["ogg"];
queue.loadManifest(queue);
Considering Mobile
Sound on mobile is the one of the major issues game developers have today when targeting devices. There are many issues with mobile and audio, one of the larger ones is the restriction from playing sound without a user initiating an event, such as a tap or click event.
This doesn’t have to be a deal-breaker in many cases. For example, a play game button will initiate this event, which can start some background music when your game level begins. Many other game interactivity events and sounds will work fine as well since mobile games tend to be more touch-centric.
SoundJS takes care of this all as much as possible behind the scenes, depending on the device and browser. However, the appropriate plug-in must first be installed. To do this, use this convenient method, which will install the needed plug-in for mobile optimization:
createjs.Sound.initializeDefaultPlugins();
This method prevents the need to set up plug-ins manually. The default plug-ins used are WebAudioPlugin, followed by HTMLAudioPlugin.
Many more methods and properties can be used with SoundJS, and can give you the power to create amazing applications. We’ll stick with the needs for most games, which have been explored in this chapter. For more information on the SoundInstance class, as well as current support and limitations on mobile, visit the extensive documentation at www.createjs.com/Docs/SoundJS/modules/SoundJS.html.
Before moving on to using sound in a real world example, some organization is needed to properly load and access all game assets, including sound files within your applications.
Creating an Asset Manager Class
Adding sounds to your games means loading even more assets. Because of this, proper management of these assets is important. Creating a class to store the ids for these files as properties makes it much easier to access them throughout the game code. In this section, all asset references, including sounds, will be declared and stored in one class. This class will also handle the loading and event dispatching of their progress and completion.
Extending the EventDispatcher Class
Because preloading files is a functionality needed in this class, the ability to dispatch events is necessary. The class will handle the preloading work using PreloadJS, but will not handle any actual messaging to the stage, nor will it reference properties or call methods from the application that is using it. It merely needs to send messages when progress on a load has changed and when the load is complete. In order to achieve this, the class will extend from CreateJS’s EventDispatcher class.
The EventDispatcher class is used throughout the entire CreateJS suite. If you recall, all EaselJS display objects extend DisplayObject, which itself inherits from EventDispatcher. This is how you can set event listeners on shapes, sprites, and containers. You can also create your own events on these objects and dispatch them. This will be done in the “Creating and Dispatching Events” section when handling the preloading of assets in the AssetManager class.
To extend EventDispatcher, set up an object the same as you would when extending display objects (see Listing 9-4).
Listing 9-4. Extending the EventDispatcher Class
(function () {

   var AssetManager = function () {
      this.initialize();
   }

   var p = AssetManager.prototype = new createjs.EventDispatcher();

   p.EventDispatcher_initialize = p.initialize;

   p.initialize = function () {
      this.EventDispatcher_initialize();
   }

   window.AssetManager = AssetManager;

}());
This should look familiar to you already as it uses the exact same structure you used when extending display objects in Chapter 8. To use this class, simply instantiate it like you did with your custom display objects.
var assets = new AssetManager();
This class will be meant to handle assets, so naturally you are going to need to reference the actual assets.
Declaring the Assets and Events
For each asset needed in the application, a string constant should be made. This will be a property that will hold the string used when identifying the file in the load manifest. Listing 9-5 shows an example of some assets being declared.
Listing 9-5. Constants Used for File Ids
//sounds
p.EXPLOSION = 'explosion';
p.SHIP_FIRE = 'ship fire';
p.POWER_UP = 'power up';
p.SOUNDTRACK = 'soundtrack';

//graphics
p.GAME_SPRITES = 'game sprites';
p.UI_SPRITES = 'ui sprites';

//data
p.GAME_SPRITES_DATA = 'game sprites data';
p.UI_SPRITES_DATA = 'ui game sprites data';
These values will be used when building the manifest for the load queue. You’ll also need to declare a property for this queue, along with a few others, shown in Listing 9-6.
Listing 9-6. Properties for the AssetManager Class
p.queue = null;
p.assetsPath = 'assets/';
p.loadManifest = null;
p.loadProgress = 0;
Along with the queue, the assets path is created for use when building the manifest, which will also be stored as a property named loadManifest. Lastly, a loadProgress property is made so the progress can be easily accessed from outside the class. Next, a few event strings are declared in Listing 9-7.
Listing 9-7. Events Used in AssetManager
//events
p.ASSETS_PROGRESS = 'assets progress';
p.ASSETS_COMPLETE = 'assets complete';
These strings will be the names of the events that are dispatched from the class. As with manifest ids, events are created using simple strings, so setting them to the value of a property makes it much easier to access in the future.
Now that the properties are set, the manifest needs to be built so it can be loaded into PreloadJS.
Preloading in the AssetManager Class
The manifest will be built directly in the initialize method, which assures you that all property values have been set and ready to use. Listing 9-8 extends on to the initialize method.
Listing 9-8. Creating a Load Manifest
p.initialize = function () {
 this.EventDispatcher_initialize();
 this.loadManifest = [
   {id:this.EXPLOSION, src:this.assetsPath + 'explosion.mp3'},

   {id:this.SHIP_FIRE, src:this.assetsPath + 'fire.mp3'},

   {id:this.POWER_UP, src:this.assetsPath + 'powerup.mp3'},

   {id:this.SOUNDTRACK, src:this.assetsPath + 'dreamRaid1.mp3'},

   {id:this.GAME_SPRITES_DATA, src:this.assetsPath +
      'gameSpritesData.json'},

   {id:this.UI_SPRITES_DATA, src:this.assetsPath +
      'uiSpritesData.json'},
   {id:this.GAME_SPRITES, src:this.assetsPath + 'gameSprites.png'},

   {id:this.UI_SPRITES, src:this.assetsPath + 'uiSprites.png'}
 ];
}
By the time the AssetManager class completely instantiates, the manifest will be ready to use. The next method, preloadAssets, will be called on the instance of the class and will trigger the loading process (see Listing 9-9).
Listing 9-9. The preloadAssets Method Is Called from the Game to Load all Assets
p.preloadAssets = function () {
   createjs.Sound.initializeDefaultPlugins();
   this.queue = new createjs.LoadQueue();
   this.queue.installPlugin(createjs.Sound);
   this.queue.on('progress',this.assetsProgress,this);
   this.queue.on('complete',this.assetsLoaded,this);
   createjs.Sound.alternateExtensions = ["ogg"];
   this.queue.loadManifest(this.loadManifest);
}
The necessary plug-ins are used to properly handle sounds in the preload and to take care of mobile situations before loading the manifest. Next, the on method is used to listen for events that are dispatched when the load progress has changed and when it is complete. This addEventListener shortcut was used in Chapters 7 and 8, but its other useful features have not been examined yet. One of those features is its ability to manage scope.
Managing Scope with the on Method
In Chapter 1, the issue of scope was briefly discussed when we were going over the call function in TweenJS. The issue is that in JavaScript, it’s easy to lose scope of objects within callback functions. In the case of the AssetManager class that we are currently outlining, the progress and complete event handlers on the load queue will not be in scope of AssetManager. Instead, the scope will actually be in Window by default. This is a problem because you need to dispatch events during those updates within the class.
This is where the on method helps. The first two parameters in the on method are identical to addEventListener, the type of event to listen for and the callback function to handle it. The third parameter allows you to declare the scope of the event handler function.
this.queue.on('progress',this.assetsProgress, this);
Now within the assetsProgress function, you will be in scope of this, or in this case, the AssetManager class. This is set up for the queue’s complete event as well. Now you can be assured that when these event handlers fire, you will still be in scope of the class you are building, and can safely access its instance variables and call on its methods.
Creating and Dispatching Events
With scope under control, the handler functions are created next and are used to dispatch events back to the application (see Listing 9-10).
Listing 9-10. Dispatching the AssetManager Events
p.assetsProgress = function (e) {
   this.loadProgress = e.progress;
   this.dispatchEvent(this.ASSETS_PROGRESS);
}
p.assetsLoaded = function (e) {
   this.dispatchEvent(this.ASSETS_COMPLETE);
}
The assetsProgress and assetsLoaded methods dispatch the appropriate events by using the two constant strings that were declared earlier. Now the application that instantiates this object can listen for these events. In the “Exploding Asteroids” section, you’ll see this being applied in a full working example that uses this class. But first, there is one more method that needs to be created.
Accessing Assets from the AssetManager Class
The assets are all preloaded and ready to use. Next, the getAsset method is created to help access these assets (see Listing 9-11).
Listing 9-11. The getAsset Function Returns Results from the Load Queue
p.getAsset = function (asset) {
   return this.queue.getResult(asset);
}
This method takes a string and returns the result from the load queue. Of course, this queue could be accessed from the instance of this object, but this makes it a little less verbose when accessing assets. Listing 9-12 shows how the AssetManager class can be used to access assets for both data and sound.
Listing 9-12. Example of AssetManager in Use
assets = new AssetManager();
assets.on(assets.ASSETS_COMPLETE, assetsComplete);

function assetsComplete(e){
   var data = assets.getAsset(assets.GAME_SPRITES_DATA);
   spritesheet = new createjs.SpriteSheet(data);
   createjs.Sound.play(assets.EXPLODE);
}
A similar, fully working class will be built in the next section, “Exploding Asteroids,” where you will get a chance to see the full benefits to creating this functionality.
Exploding Asteroids is a simple game created to put sound effects and music into a working example. The point of this exercise is to access sounds and other assets using a fully working asset manager class. The same techniques learned in this chapter will be applied.
Asteroids will eternally fall down the screen at various speeds. The player must destroy them by clicking them, where they will explode into oblivion. The following is a list of features you wish to accomplish:
- Create a class to handle all loading and accessing of assets, including sprite sheet data, the sprite sheet image, and sounds.
- Use the preloader and button components built in Chapter 8.
- Create an asteroid sprite class that can play sounds and dispatch an event when it is destroyed.
- Click on asteroids to play their explosion animation and explosion sound.
- Play background music when the game starts.
- No ending or scoring is needed in this exercise.
Setting Up the Game Files
In this section, you will set up the HTML document that includes a canvas element and the necessary CreateJS file includes. A few JavaScript files will also be needed in this exercise: one for the application named exploadingAsteroids.js, one for the asteroid sprite named Asteroid.js, and another for the asset manager named AssetManager.js. Be sure to also include the UI components Preloader.js and SimpleButton.js that were built in Chapter 8 (see Listing 9-13).
Listing 9-13. index.html for Exploding Asteroids
<!DOCTYPE html>
<html>
<head>
    <title>Exploding Asteroids</title>
    <script src="lib/easeljs-0.7.1.min.js"></script>
    <script src="lib/soundjs-0.5.2.min.js"></script>
    <script src="lib/preloadjs-0.4.1.min.js"></script>
    <script src="js/AssetManager.js"></script>
    <script src="js/Preloader.js"></script>
    <script src="js/SimpleButton.js"></script>
    <script src="js/Asteroid.js"></script>
    <script src="js/exploadingAsteroids.js"></script>
</head>

<body onload="init()">

<canvas id="canvas" width="800" height="600" style="background-color:
   #000"></canvas>

</body>

</html>
The Complete AssetManager for Exploding Asteroids
The first thing that should be created is the AssetManager class. The procedures for building this class were fully examined earlier in the “Creating an Asset Manager Class” section, so the code in this class should be easy to follow. The complete code for AssetManager.js is shown in Listing 9-14.
Listing 9-14. The AssetManager class – AssetManager.js
(function () {

    window.game = window.game || {};

    var AssetManager = function () {
        this.initialize();
    }
    var p = AssetManager.prototype = new createjs.EventDispatcher();

    p.EventDispatcher_initialize = p.initialize;

    //sounds
    p.EXPLOSION = 'explosion';
    p.SOUNDTRACK = 'soundtrack';

    //graphics
    p.GAME_SPRITES = 'game sprites';

    //data
    p.GAME_SPRITES_DATA = 'game sprites data';

    //events
    p.ASSETS_PROGRESS = 'assets progress';
    p.ASSETS_COMPLETE = 'assets complete';

    p.assetsPath = 'assets/';

    p.loadManifest = null;
    p.queue = null;
    p.loadProgress = 0;

    p.initialize = function () {
        this.EventDispatcher_initialize();
        this.loadManifest = [
            {id: this.EXPLOSION, src: this.assetsPath + 'explosion.mp3'},
            {id: this.SOUNDTRACK, src: this.assetsPath + 'dreamRaid1.mp3'},
            {id:this.GAME_SPRITES_DATA, src:this.assetsPath +
               'gameSpritesData.json'},
            {id:this.GAME_SPRITES, src:this.assetsPath +
               'gameSprites.png'}
        ];
    }
    p.preloadAssets = function () {
        createjs.Sound.initializeDefaultPlugins();
        this.queue = new createjs.LoadQueue();
        this.queue.installPlugin(createjs.Sound);
        this.queue.on('progress',this.assetsProgress,this);
        this.queue.on('complete',this.assetsLoaded,this);
        createjs.Sound.alternateExtensions = ["ogg"];
        this.queue.loadManifest(this.loadManifest);
    }
    p.assetsProgress = function (e) {
        this.loadProgress = e.progress;
        this.dispatchEvent(this.ASSETS_PROGRESS);
    }
    p.assetsLoaded = function (e) {
        this.dispatchEvent(this.ASSETS_COMPLETE);
    }
    p.getAsset = function (asset) {
        return this.queue.getResult(asset);
    }

    window.game.AssetManager = AssetManager;

}());
Next, the asteroid sprite will be created. The Asteroid.js file contains the entire Asteroid class (see Listing 9-15).
Listing 9-15. The Asteroid Class – Asteroid.js
(function () {

   window.game = window.game || {};

   var Asteroid = function (spritesheet) {
      this.initialize(spritesheet);
   }
   var p = Asteroid.prototype = new createjs.Sprite();

   p.Sprite_initialize = p.initialize;

   p.EXPLOSION_COMPLETE = 'explosion complete';

   p.bounds = null;
   p.speed = null;

   p.initialize = function (spritesheet) {
      this.Sprite_initialize(spritesheet);
      var frame = this.speed = Math.floor(Math.random() * 4) + 1;
      this.gotoAndStop('asteroid' + this.frame);
      this.bounds = this.getBounds();
      this.regX = this.bounds.width / 2;
      this.regY = this.bounds.height / 2;
      this.on('tick', this.move);
   }
   p.move = function (e) {
      this.rotation += this.speed;
      this.y += this.speed * 2;
      if (this.y > canvas.height + this.bounds.height) {
         this.y = -this.bounds.height;
      }
   }
   p.explode = function () {
      this.speed /= 2;
      this.on('animationend', this.explosionComplete);
      this.gotoAndPlay('explosion'),
      createjs.Sound.play(game.assets.EXPLOSION);
   }
   p.explosionComplete = function (e) {
      this.stop();
      this.dispatchEvent(this.EXPLOSION_COMPLETE);
   }

   window.game.Asteroid = Asteroid;

}());
The Asteroid class has a few properties for speed and to store the bounds of the sprite. There is also a string that will be used for the event that will be dispatched when destroyed. The asteroid has four possible frames to randomly pick from, which are shown in the sprite sheet image in Figure 9-1.

Figure 9-1. Exploding Asteroids sprite sheet – gameSprites.png
The sprite sheet also includes an explosion animation that will play when the asteroid is clicked and destroyed. The registration point is centered so the rock can spin as it moves down the screen in the move method, which runs on the tick. If the asteroid makes it past the bottom of the stage without being destroyed, it is recycled by resetting its y position back at the top.
Next are the methods that handle its explosion. The explode method will be called from the game when the asteroid is clicked. The speed is slowed down for effect, and an event listener is set for when the explosion animation has ended. Next, the animation is played, and the explosion sound is referenced from the AssetsManager instance that will be created in the game code. Using SoundJS, the sound is played.
When the animation is complete, the explosionComplete handler is called, which stops the animation and dispatches the explosion complete event, which is set to the property EXPLOSION_COMPLETE.
With the AssetManager and Asteroid classes complete, it’s time to create the game.
Creating the Exploding Asteroids Game
The game code will be written in the explodingAsteroids.js file. Open the file and start by declaring the game variables and writing the init function, shown in Listing 9-16.
Listing 9-16. Game Variables and init Function
window.game = window.game || {};

var canvas, stage, assets, preloader, spritesheet;

var spawnDelay = 40;
var count = 0;

function init() {
   canvas = document.getElementById('canvas'),
   stage = new createjs.Stage(canvas);
   createjs.Ticker.setFPS(30);
   game.assets = new game.AssetManager();
   preloadAssets();
}
The spawnDelay value will be the count at which another asteroid will be spawned, which is determined by the incrementing count variable. The init function, which is called when the body loads, sets up the stage and Ticker. An instance of AssetManager is created and set to the game namespace, which will be accessible throughout the game. Next, the assets are loaded using the functions shown in Listing 9-17.
Listing 9-17. Using the Preloader Component with AssetManager Events
function preloadAssets() {
   preloader = new ui.Preloader('#0F0', '#FFF'),
   preloader.x = (stage.canvas.width / 2) - (preloader.width / 2);
   preloader.y = (stage.canvas.height / 2) - (preloader.height / 2);
   stage.addChild(preloader);
   game.assets.on(game.assets.ASSETS_PROGRESS, assetsProgress);
   game.assets.on(game.assets.ASSETS_COMPLETE, assetsComplete);
   game.assets.preloadAssets();
}
function assetsProgress(e) {
   preloader.update(e.target.loadProgress);
   stage.update();
}
function assetsComplete(e) {
   stage.removeChild(preloader);
   createSpriteSheet();
   buildStartMenu();
}
The preloader component is first positioned and added to the stage. Next, some listeners are set on the AssetManager instance to handle the load progress and completion. Finally, the preloadAssets method is called, which will kick start the loading of the assets.
When the load progress has updated, the preloader component is updated by accessing the loadProgress property from the assets object that fired the handler function. Figure 9-2 demonstrates the preloader component displaying the load progress.
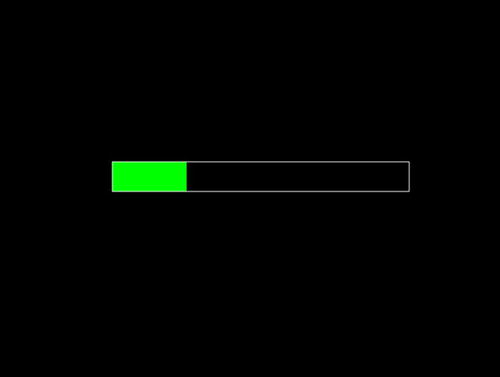
Figure 9-2. Preloader component displapying loading progress
When all files are loaded, the assetsComplete function removes the preloader container, and calls on the functions to create the sprite sheet and create the start menu (see Listing 9-18).
Listing 9-18. Sprite Sheet Creation and a Simple Start Menu
function createSpriteSheet() {
   var assets = game.assets;
   spritesheet = new
      createjs.SpriteSheet(assets.getAsset(assets.GAME_SPRITES_DATA));
}
function buildStartMenu() {
   var button = new ui.SimpleButton('PLAY GAME'),
   button.regX = button.width / 2;
   button.regY = button.height / 2;
   button.x = canvas.width / 2;
   button.y = canvas.height / 2;
   button.on('click', startGame);
   stage.addChild(button);
   stage.update();
}
The spritesheet object is created and stored away. Notice how the sprite sheet data is utilizing the assets class to retrieve the preloaded JSON file. Next, in buildStartMenu, a simple button is created that will start the game ticker by calling the startGame function (see Figure 9-3).
Figure 9-3. Start menu using the SimpleButton component
When the play game button is clicked, startGame is called (see Listing 9-19).
Listing 9-19. Starting the Game with Some Sounds and a Simple Game Loop
function startGame() {
   var assets = game.assets;
   stage.removeAllChildren();
   createjs.Sound.play(assets.EXPLOSION)
   createjs.Sound.play(assets.SOUNDTRACK,0,0,0,10,.5);
   createjs.Ticker.on('tick', onTick);
}
function onTick(e) {
   count++;
   checkForSpawn();
   stage.update();
}
An explosion is first played as an effect for the button click. Then some background music is started, which will loop 10 times and play at a volume of .5. Finally, the ticker is set to fire the onTick function. This function increments the count variable, checks if a new asteroid should be created, and finally updates the stage. The asteroid functions are written next (see Listing 9-20).
Listing 9-20. The Game Functions That Create and Destory Asteroids
function checkForSpawn() {
   if (count == spawnDelay) {
      spawnAsteroid();
      count = 0;
   }
}
function spawnAsteroid() {
   var a = new game.Asteroid(spritesheet);
   a.x = Math.random() * canvas.width;
   a.on('click', onAsteroidClick);
   a.on(a.EXPLOSION_COMPLETE, destroyAsteroid);
   stage.addChild(a);
}
function onAsteroidClick(e) {
   var asteroid = e.target;
   asteroid.explode();
}
function destroyAsteroid(e) {
   var asteroid = e.target;
   stage.removeChild(asteroid);
   asteroid = null;
}
An asteroid is created when the count has reached the predetermined value by calling the spawnAsteroid function, which will then reset the counter back to 0. Each asteroid is an instance of the Asteroid class and given a random x value. Two listeners are then set on the sprite, one for a click and another for the event you created inside of the sprite that dispatches after its explosion animation.
The click event will fire the function to explode the asteroid instance. This is done by calling on its explode function, which will play the explosion animation, play a sound, and dispatch the EXPLOSION_COMPLETE event, which will remove it from the stage. Figure 9-4 shows an asteroid exploding during gameplay.

Figure 9-4. Mid-game asteroid explosion
The Complete Exploding Asteroids Game Code
The complete game code for Exploding Asteroids is shown in Listing 9-21.
Listing 9-21. Exploding Asteroids - explodingAsteroids.js
window.game = window.game || {};

var canvas, stage, assets, preloader, spritesheet;

var spawnDelay = 40;
var count = 0;

function init() {
   canvas = document.getElementById('canvas'),
   stage = new createjs.Stage(canvas);
   createjs.Ticker.setFPS(30);
   game.assets = new game.AssetManager();
   preloadAssets();
}
function preloadAssets() {
   preloader = new ui.Preloader('#0F0', '#FFF'),
   preloader.x = (stage.canvas.width / 2) - (preloader.width / 2);
   preloader.y = (stage.canvas.height / 2) - (preloader.height / 2);
   stage.addChild(preloader);
   game.assets.on(game.assets.ASSETS_PROGRESS, assetsProgress);
   game.assets.on(game.assets.ASSETS_COMPLETE, assetsComplete);
   game.assets.preloadAssets();
}
function assetsProgress(e) {
   preloader.update(e.target.loadProgress);
   stage.update();
}
function assetsComplete(e) {
   stage.removeChild(preloader);
   createSpriteSheet();
   buildStartMenu();
}
function createSpriteSheet() {
   spritesheet = new
     createjs.SpriteSheet(game.assets.getAsset(game.assets.GAME_SPRITES_DATA));
}
function buildStartMenu() {
   var button = new ui.SimpleButton('PLAY GAME'),
   button.regX = button.width / 2;
   button.regY = button.height / 2;
   button.x = canvas.width / 2;
   button.y = canvas.height / 2;
   button.on('click', startGame);
   stage.addChild(button);
   stage.update();
}
function startGame() {
   var assets = game.assets;
   stage.removeAllChildren();
   createjs.Sound.play(assets.EXPLOSION)
   createjs.Sound.play(assets.SOUNDTRACK,0,0,0,10,.5);
   createjs.Ticker.on('tick', onTick);
}
function spawnAsteroid() {
   var a = new game.Asteroid(spritesheet);
   a.x = Math.random() * canvas.width;
   a.on('click', onAsteroidClick);
   a.on(a.EXPLOSION_COMPLETE, destroyAsteroid);
   stage.addChild(a);
}
function onAsteroidClick(e) {
   var asteroid = e.target;
   asteroid.explode();
}
function destroyAsteroid(e) {
   var asteroid = e.target;
   stage.removeChild(asteroid);
   asteroid = null;
}
function checkForSpawn() {
   if (count == spawnDelay) {
      spawnAsteroid();
      count = 0;
   }
}
function onTick(e) {
   count++;
   checkForSpawn();
   stage.update();
}
Summary
In this chapter, you learned how to use SoundJS to add sounds and music to your games. The robust and easy-to-use Sound class makes adding sound a breeze, and by installing plug-ins you were able to preload sounds and even play them on a mobile platform. Asset management was also introduced by creating an asset management class to handle the loading and accessing of loaded files. In the next chapter, code management and organization will be extended even further by building a state machine to run your game.