In this chapter, you’ll move from using the HTTP protocol to using HTTPS, and you’ll apply the SSL/TLS protocols to implement cryptography for a secure communication between the clients and the web server of your site. The messages exchanged after this between the client and the web server will be encrypted, and it will be extremely difficult for “any man in the middle” to decrypt them. The HTTPS protocol implementation will be indicated in the protocol part of the URLs as https:// instead of http://, which was used in the previous chapters for simple HTTP connections. For this to work, the public key infrastructure (PKI) of the web server (Apache or Lighttpd) has to be configured correctly.
You’ll create two more projects in this chapter. The first one uses HTTP cookies to allow the otherwise stateless HTTP protocol to retain some user-specific data for each visitor, such as the user’s name, which is stored on the client side. The second project utilizes HTTP cookies to implement PHP sessions and allow users to switch from one page to another in your site while maintaining the user-defined customization settings, which are stored on the server side.
Implementing SSL/TLS
PKI is considered one of the previous century’s most important inventions. The ability to transfer sensitive data, such as account numbers in bank transactions or credit card details when online shopping, is essential for the reliable operation of all web services. Web security relies on the protocols of public key cryptography, also referred as asymmetric cryptography. The adjective asymmetric means two different cryptographic keys are used for the encryption and the decryption of a message—the private key and the public key. A key in cryptography is a string of bits of a specific length, and it used by a cryptographic algorithm to transform plain text into cipher text, or vice versa. A message encrypted with the public key, which is usually publicly available for the clients, can be decrypted only by its corresponding private key, which is kept secret on the server side. While a PKI session between a client and a server initiates with the public/private key pair, at the end of the session a symmetric key is established to be used for the client-server communication.
Secure HTTP (HTTPS) is implemented by including Secure Sockets Layer (SSL)—or its successor the Transport Layer Security (TLS) protocol—in the TCP/IP protocol stack just below the application protocol, which is HTTP for the World Wide Web.
SSL Certificates
To establish a secure communication with SSL/TLS, the client and the server exchange the information required to create a common symmetric key. The server sends to the client its public key in the form of a digital certificate. A digital certificate, commonly called an SSL certificate, is a data file that binds the public key of the web server with other attributes that identify the specific server. A valid certificate adds authentication to the communication by ensuring that an imposter, or the man in the middle of the communication path, will not assume the identity of the other communication’s end.
Hint!
While the TLS protocol tends to replace SSL, the name SSL is used broadly when referring to the cryptographic protocol used, even when the underlying mechanism is actually TLS. Because of this, certificates are generally called SSL certificates even though the right term is SSL/TLS certificates.
Digital certificates are granted by root certificate authorities (CAs), which are trusted third parties that issue SSL certificates after verifying the identity of their clients. The certificates of root CAs, called root certificates, are self-signed. That is, in a way, they guarantee for themselves and also are pre-installed in the browsers so that they can readily be used to verify the applicant’s domain certificate. To enhance the security of the root certificate, other intermediate certificates may be utilized, with one signing another and thus creating a “chain of trust” with the domain certificate of the web server at the one end and the root CA certificate at the other.
The public key of a certain site is retrieved by the browser through the site’s domain SSL certificate. To create a digital certificate for a domain, the applicant has to create a certificate-signing request (CSR) file and submit it to a CA or otherwise can self-sign it. A self-signed certificate enables a site with HTTPS; however, it will not be trusted by certain browsers, and users will be warned by some browsers against visiting the potentially insecure site. The CSR is a digital document including the public key and other identifying information and is usually created along with the matching private key. The CA may request identifying information. For instance, the applicant may be asked to prove ownership of a domain, e.g., by responding to an e-mail sent to the address of the specific domain. Next, the CA generates the certificate, signs it using its private key, and issues it to the applicant, who then imports the CA signed certificate to their own web server.
Hint!
What does digital signing mean?
The CA signs a certificate by implementing a hash algorithm on the certificate to generate a message digest, which is a fixed-length string that is typically shorter than the algorithm’s input and—theoretically—a unique output string. A hash algorithm is a one-way algorithm. You cannot derive the algorithm’s input from its output. The digest is then encrypted with the CA’s private key. The signed certificate, which is the certificate attached to the digest, is sent then to the recipient.
The recipient can verify that the certificate is received unaltered by decrypting its digest with the CA’s public key. Also, it generates another digest from the received certificate using the same hashing algorithm as the sender. The two digests are compared, and if found to be identical, the certificate is considered a valid one.
After receiving a copy of the certificate, the client side (e.g., the browser) checks which CA has signed the certificate. When the validation process succeeds, the public key of the server is used on the client side, and the private key of the server is used on the server side to encrypt the messages of the SSL handshake process. This process involves exchanging a number of messages between the client and the server that result in creating a symmetric key used for the client-server communication.
Creating Self-Signed Certificates with OpenSSL
As mentioned in the previous section, an inexpensive option for your site, especially when you are just experimenting with cryptography and do not have to run an absolutely trustworthy commercial site, is to self-sign an SSL certificate instead of using a CA. Obtaining a certificate from a CA costs money and usually requires purchasing a non-DDNS domain name. On the other hand, this cost is not prohibitive, and you certainly avoid the browser warning messages viewed by your visitors about entering an insecure site.
Hint!
In this chapter, you will create and use a self-signed certificate and configure the web server to use it. In the following chapters, you will learn how to obtain and use one from a certificate authority. However, you don’t have to obtain a CA certificate to run the projects in the next chapters.
To generate a self-signed certificate and also your private key, use the openssl req (request) command in your home directory as follows:
The openssl req command creates a certificate request in the PKCS#10 format, which is the common format used with CAs. It can additionally create self-signed certificates, which is how it will be used here.
The command’s arguments are as follows:
-nodes (no DES) creates a certificate that does not require a Data Encryption Standard (DES) passphrase.
-newkey rsa:2048 creates a 2048-bit RSA (Rivest-Shamir-Adleman) key for use with the certificate.
-x509 creates a self-signed certificate instead of a certificate request.
-keyout specifies server.key as the private key file that will be created.
-out specifies server.crt as the certificate file.
-days determines the length of time in days that the certificate will be issued for.
You will be asked to enter the following information; you can press Enter for the default values or insert a period for a blank value:
Country Name (2 letter code) [AU]:
State or Province Name (full name) [Some-State]:
Locality Name (eg, city) []:
Organization Name (eg, company) [Internet Widgits Pty Ltd]:
Organizational Unit Name (eg, section) []:
Common Name (e.g. server FQDN or YOUR name) []:
Email Address []:
As the common name, you can specify your name or the fully qualified domain name (FQDN), e.g., secureserver.ddns.net.
Two files, server.key and server.crt, are created in your home directory. Restrict the file’s access rights to be read-only by the root. Use the following:
$ sudo chmod 400 server.key server.crt
Hint!
To read the file contents of server.key or server.crt, use cat as follows:
$ sudo cat server.key
The command’s output will look like the following:
Unlike with your public key, you should never display your private key (the previous key has been exposed and therefore was replaced by another one). From the private key created previously, you can extract the public key. To include the public key in another file, e.g., file public.key, use the following in your home directory:
Concatenate the two files created, server.key and server.crt, as a .pem file. PEM stands for Privacy Enhanced Mail and is the de facto file format for storing and sending cryptographic keys and certificates.
$ sudo cat server.key server.crt > server.pem
Change the access right of server.pem.
$ sudo chmod 400 server.pem
Set root as the owner of server.pem.
$ sudo chown root:root server.pem
You need to import the server.pem file into the configuration of both the Lighttpd and Apache web servers to enable the HTTPS protocol. In the following two sections, you will first configure SSL for Lighttpd and then do the same for Apache.
Configuring SSL for Lighttpd
To use the PEM file created in the previous section to configure SSL with Lighttpd, use the steps in this section.
Copy the file server.pem in /etc/lighttpd.
$ sudo cp server.pem /etc/lighttpd
Edit lighttpd.conf, the Lighttpd configuration file. Use any text editor like gedit.
$ sudo gedit /etc/lighttpd/lighttpd.conf
Replace the server.port value currently used (port 80 or 8080) with port number 443, which is the one used by HTTPS.
server.port = 443
Also, set the value of the ssl.engine directive to enable, and set the ssl.pemfile directive to the filepath of your .pem file.
ssl.engine = "enable"
ssl.pemfile = "/etc/lighttpd/server.pem"
After saving lighttpd.conf, it should look like the following:
At this point it is assumed that the Lighttpd server runs. If Apache is currently used stop this server and start lighttpd:
$ sudo service apache2 stop
$ sudo service lighttpd start
To enable the changes in the configuration file, enter the following at the Linux terminal:
$ sudo service lighttpd force-reload
Configuring SSL for Apache
The same PEM file as used previously for the Lighttpd server can be used for Apache. To test Apache, stop the Lighttpd process. At the Linux terminal, enter the following:
$ sudo service lighttpd stop
$ sudo service apache2 start
You can start the Lighttpd server using this:
$ sudo service lighttpd start
Copy the PEM file used for Lighttpd to the /etc/apache2 directory.
$ sudo cp /etc/lighttpd/server.pem /etc/apache2
You can find the default-ssl.conf configuration file in the /etc/apache2/sites-available directory. Make a backup of this file to use it as the configuration file for the Apache HTTPS server.
The default-ssl.conf file (with most comments omitted) will look like the following:
<IfModule mod_ssl.c>
<VirtualHost _default_:443>
ServerAdmin webmaster@localhost
DocumentRoot /var/www/html
ErrorLog ${APACHE_LOG_DIR}/error.log
CustomLog ${APACHE_LOG_DIR}/access.log combined
# SSL Engine Switch:
# Enable/Disable SSL for this virtual host.
SSLEngine on
SSLCertificateFile /etc/apache2/server.pem
<FilesMatch ".(cgi|shtml|phtml|php)$">
SSLOptions +StdEnvVars
</FilesMatch>
<Directory /usr/lib/cgi-bin>
SSLOptions +StdEnvVars
</Directory>
</VirtualHost>
</IfModule>
Next, you need to enable the ssl module. Use the following:
$ sudo a2enmod ssl
The command’s output is as follows:
Considering dependency setenvif for ssl:
Module setenvif already enabled
Considering dependency mime for ssl:
Module mime already enabled
Considering dependency socache_shmcb for ssl:
Enabling module socache_shmcb.
Enabling module ssl.
See /usr/share/doc/apache2/README.Debian.gz on how to configure SSL and create self-signed certificates.
To activate the new configuration, you need to run:
$ systemctl restart apache2
To enable the site with the configuration defined in default-ssl.conf, use the following:
$ sudo a2ensite default-ssl
The command’s output is as follows:
Enabling site default-ssl.
The last action is to reload Apache with the new configuration. Use the command suggested by the a2enmod output.
$ sudo systemctl restart apache2
Or use the following:
$ sudo service apache2 force-reload
Test your site using either Apache or Lighttpd with the steps included in the following section.
Testing the Self-Signed Certificate
Test your site locally first using the following URL:
https://localhost
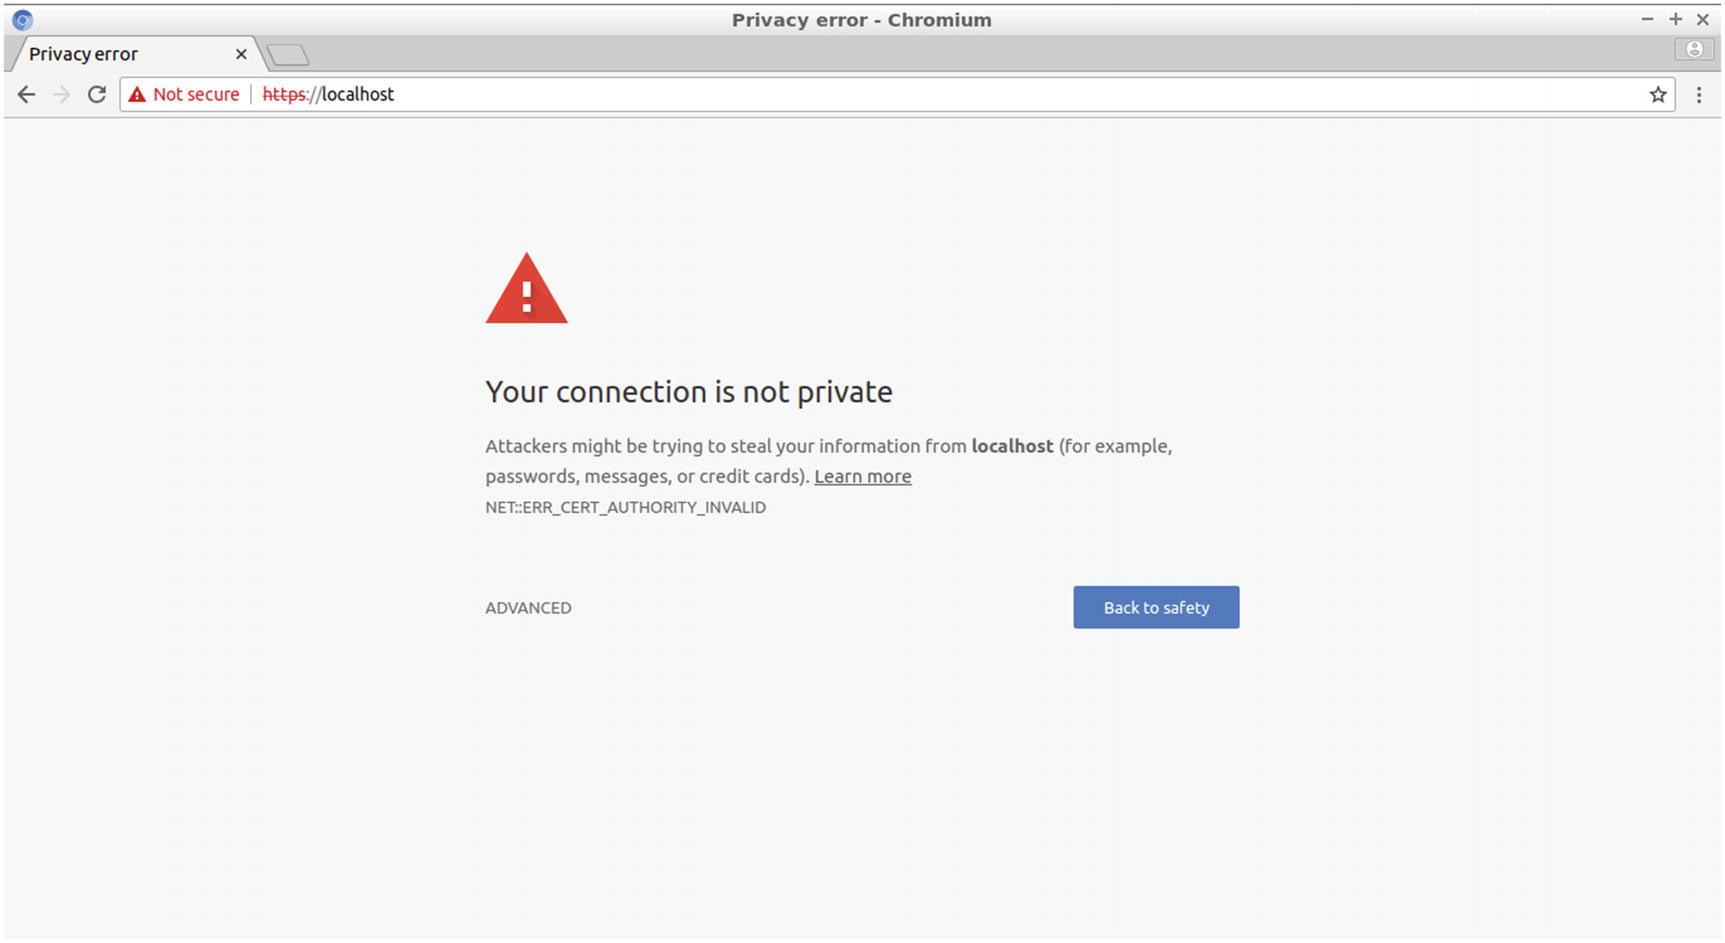
Because the HTTPS connection to this site is not verified by a certificate authority, the user will see a warning message, like the one shown in Figure 8-1, to urge the user to skip visiting an untrusted site.
Figure 8-1
Chromium warning against visiting an untrusted site
Since you know that it is your own site, proceed by clicking the Advanced link. The following message appears (for the Chromium browser), displayed in Figure 8-2:
“This server could not prove that it is localhost; its security certificate is not trusted by your computer’s operating system. This may be caused by a misconfiguration or an attacker intercepting your connection.”
Click the “Proceed to localhost (unsafe)” link.
Figure 8-2
By clicking the Advanced link, you have the option to proceed to a potentionally “untrusted” site
The directory index of the site appears, as displayed in Figure 8-3.
Figure 8-3
The directory index of your site, as viewed with Chromium, when a self-signed certificate is implemented
As you’ll notice, the Chromium browser strikes out the protocol part of the URL in the address bar with a red line. Firefox, on the other hand, is more tactful. Using the same URL in Firefox, you get the message displayed in Figure 8-4.
Figure 8-4
A warning message from Firefox about an insecure connection
Click the Advanced button. A frame that includes the Add Exception button appears, as shown in Figure 8-5.
Figure 8-5
The Add Exception button in Firefox enables the user to visit the untrusted site
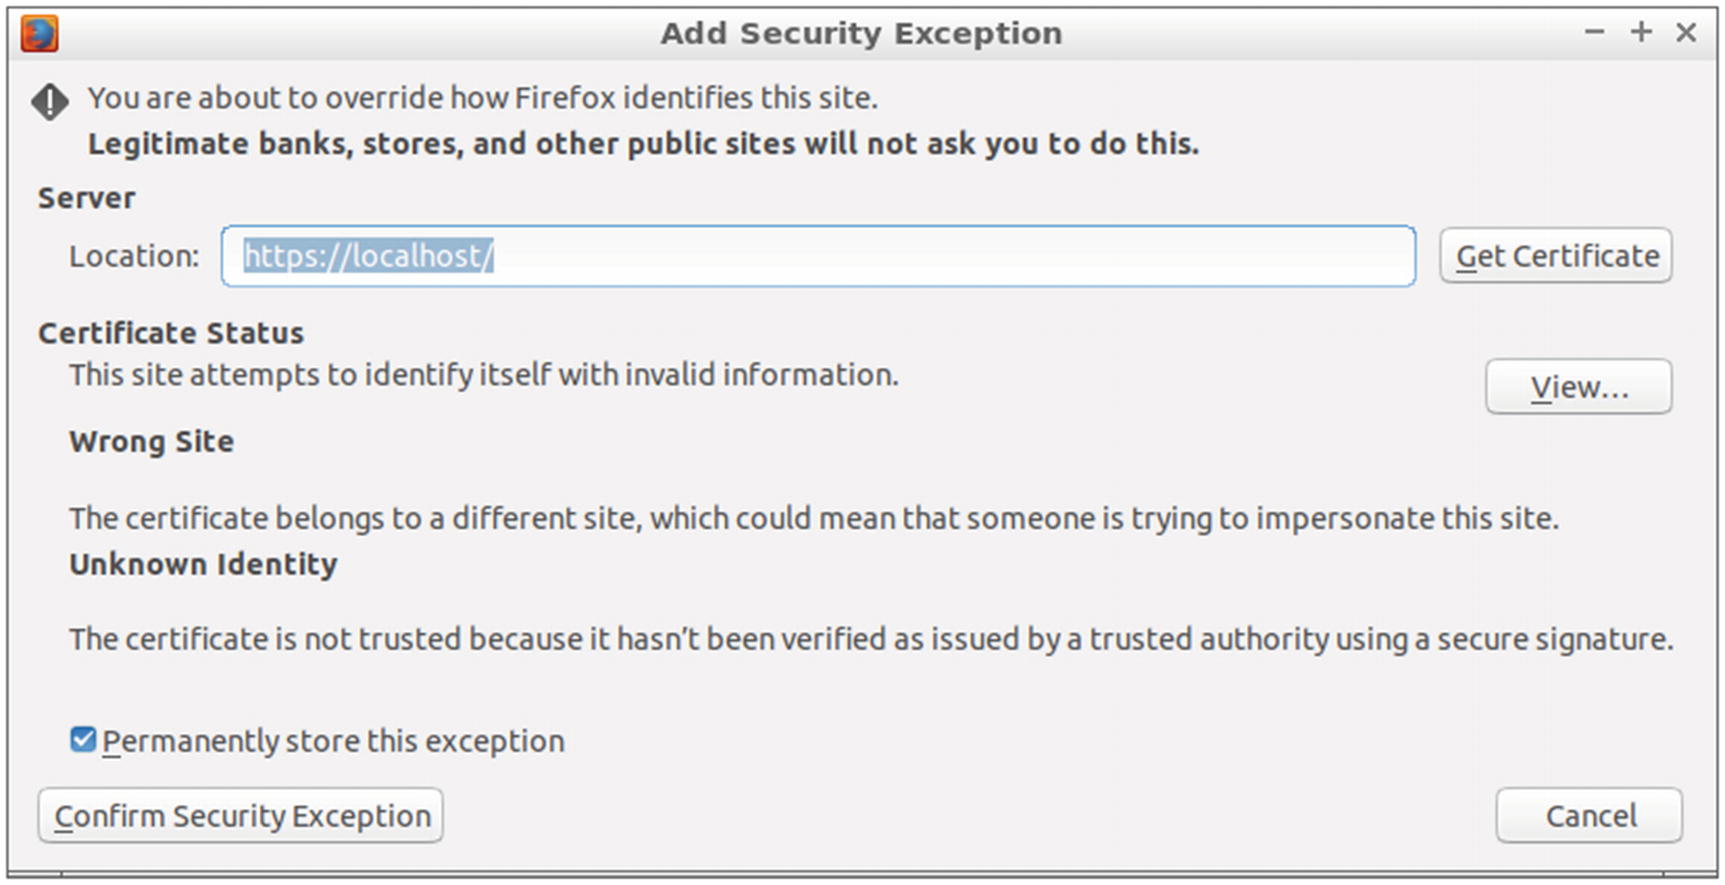
Click the Add Exception button. A new dialog, displayed in Figure 8-6, requests that you add a security exception for https://localhost/. Click the Confirm Security Exception button.
Figure 8-6
The dialog requesting a confirmation for the security exception
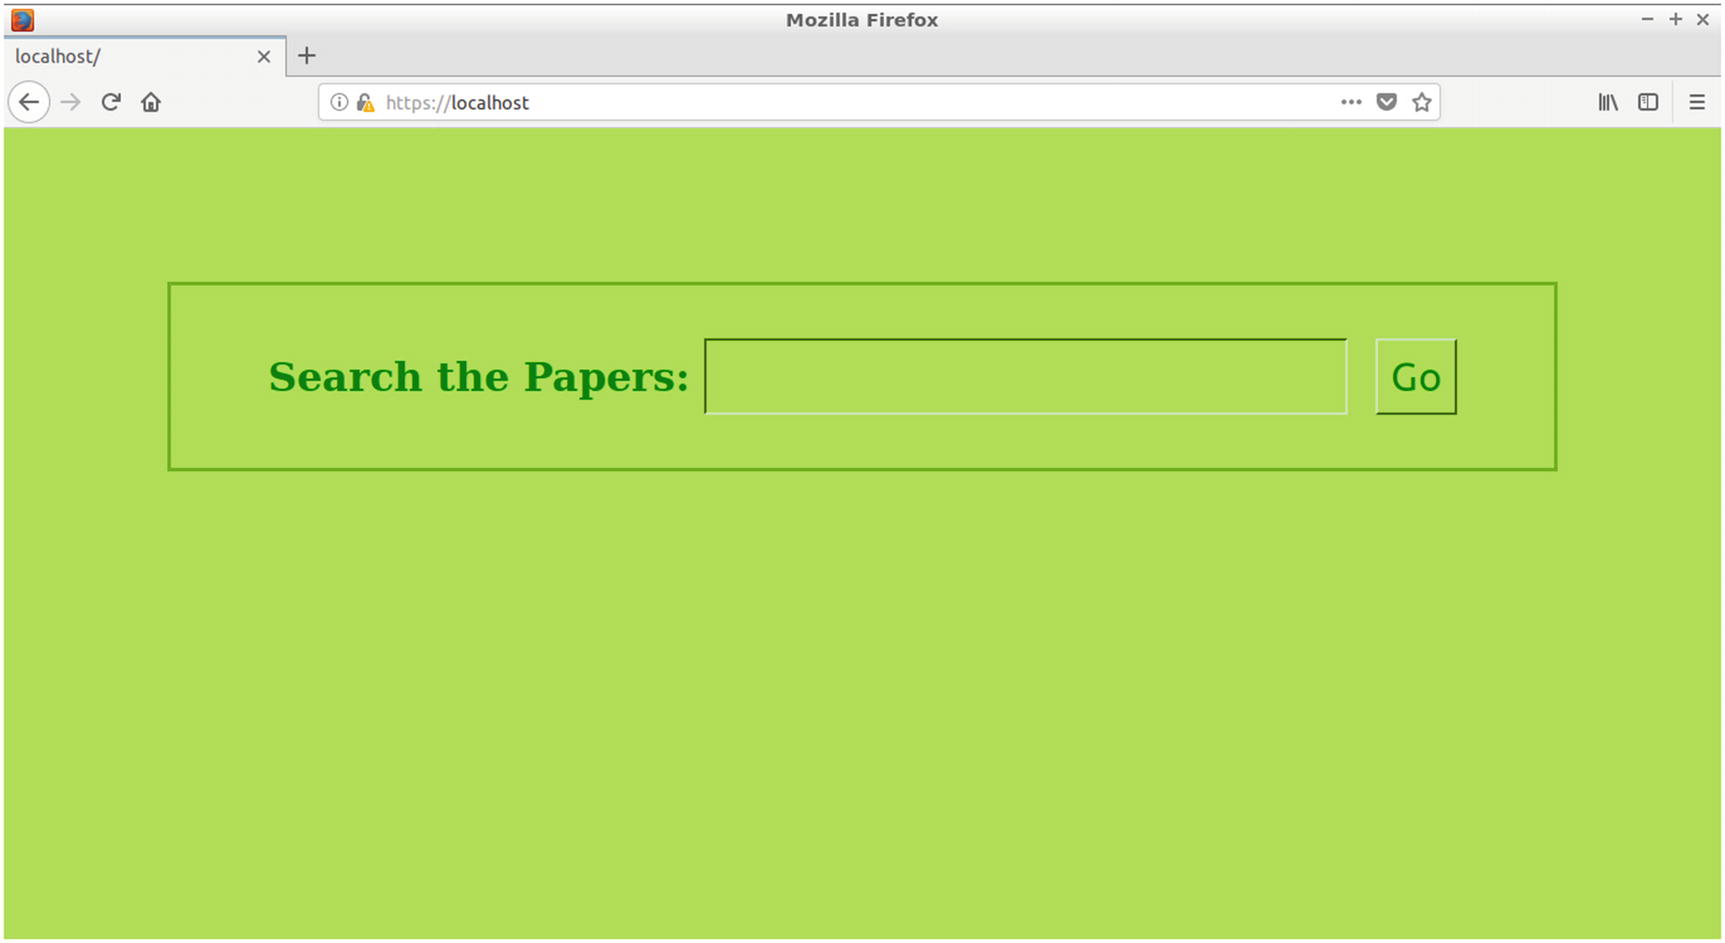
The directory index of the site appears, as shown in Figure 8-7.
Figure 8-7
The directory index of your site, as viewed in Firefox, when a self-signed certificate is implemented
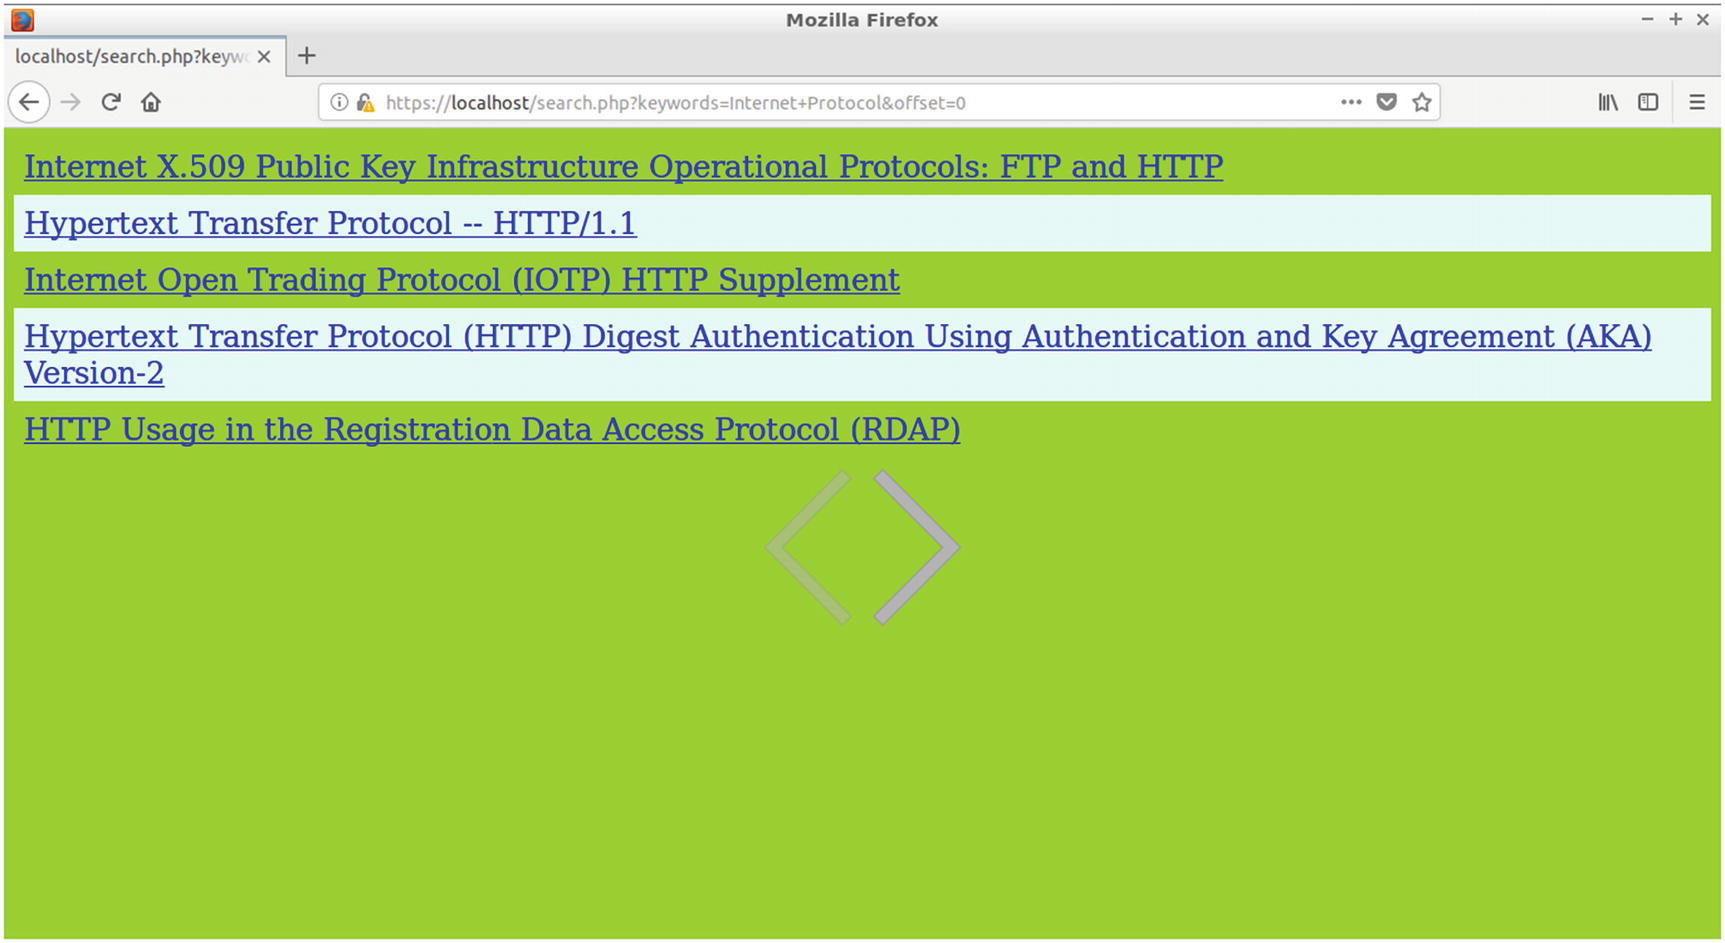
Test the site as usual. In the search textbox, enter, for instance, the Internet protocolkeywords and click the Go button. The results appear in the user’s browser, as shown in Figure 8-8. Click any link in the results. As expected, the corresponding web page is served with the HTTPS protocol.
Figure 8-8
The online search for the web site is carried out with HTTPS
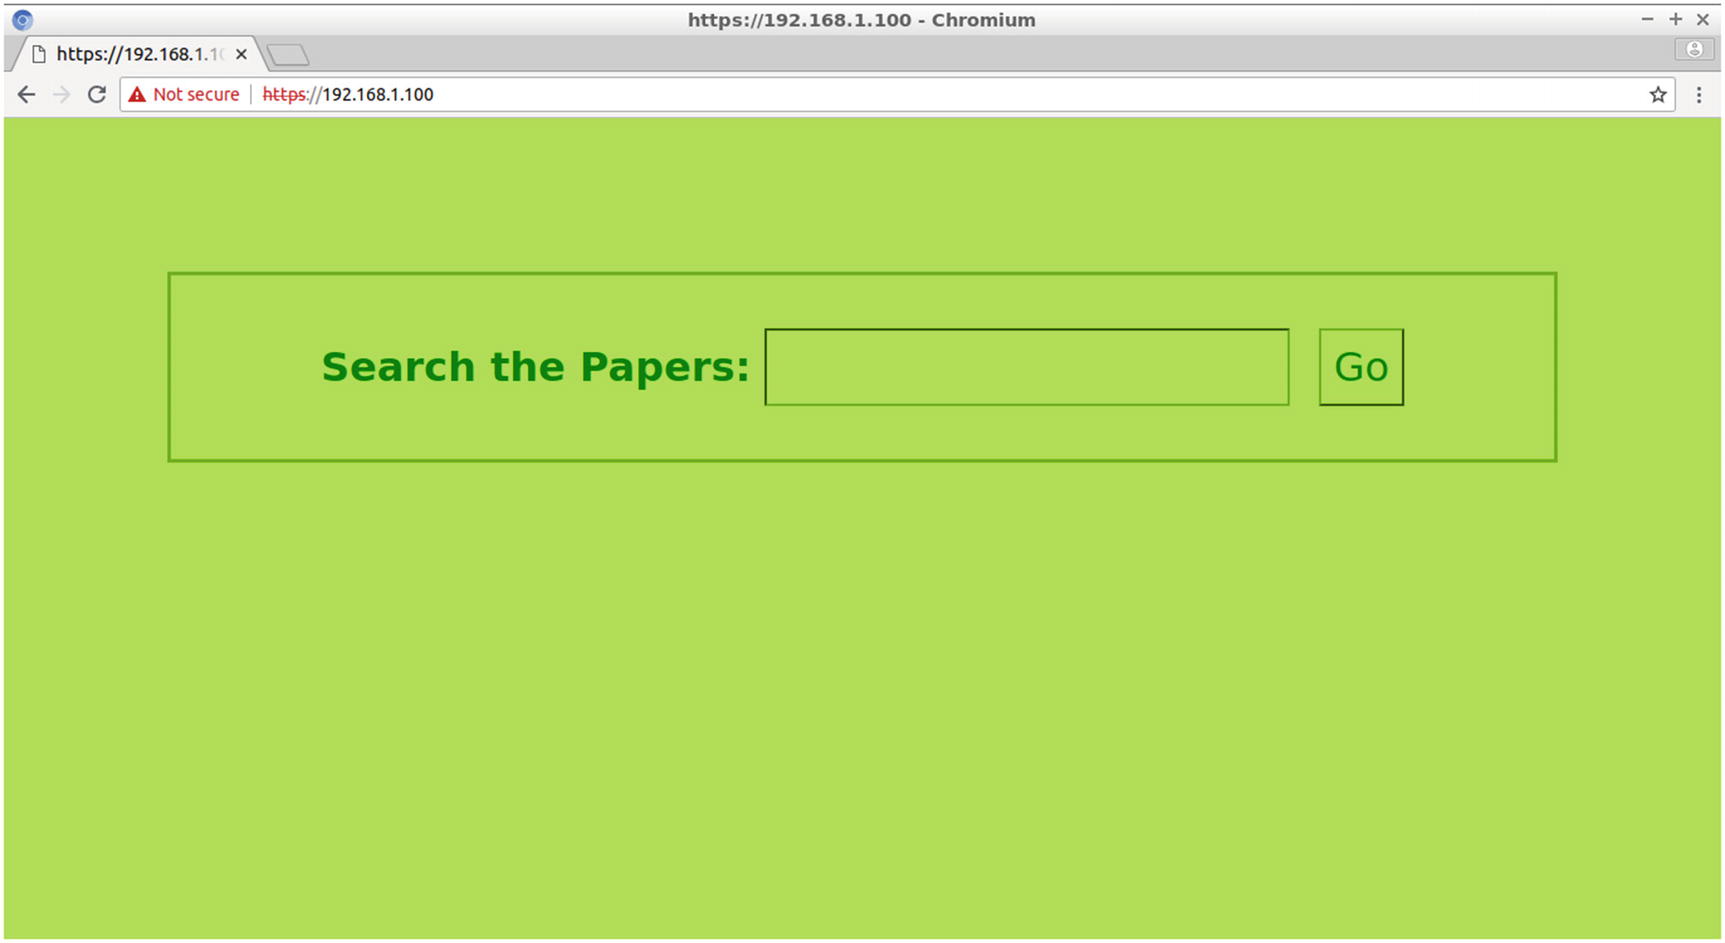
You can alternatively test your site using the private IP address of your server, as displayed in Figure 8-9.
Figure 8-9
Testing the site with the private IP address of your server
Enabling Your Site to Be Viewed Outside of Your LAN
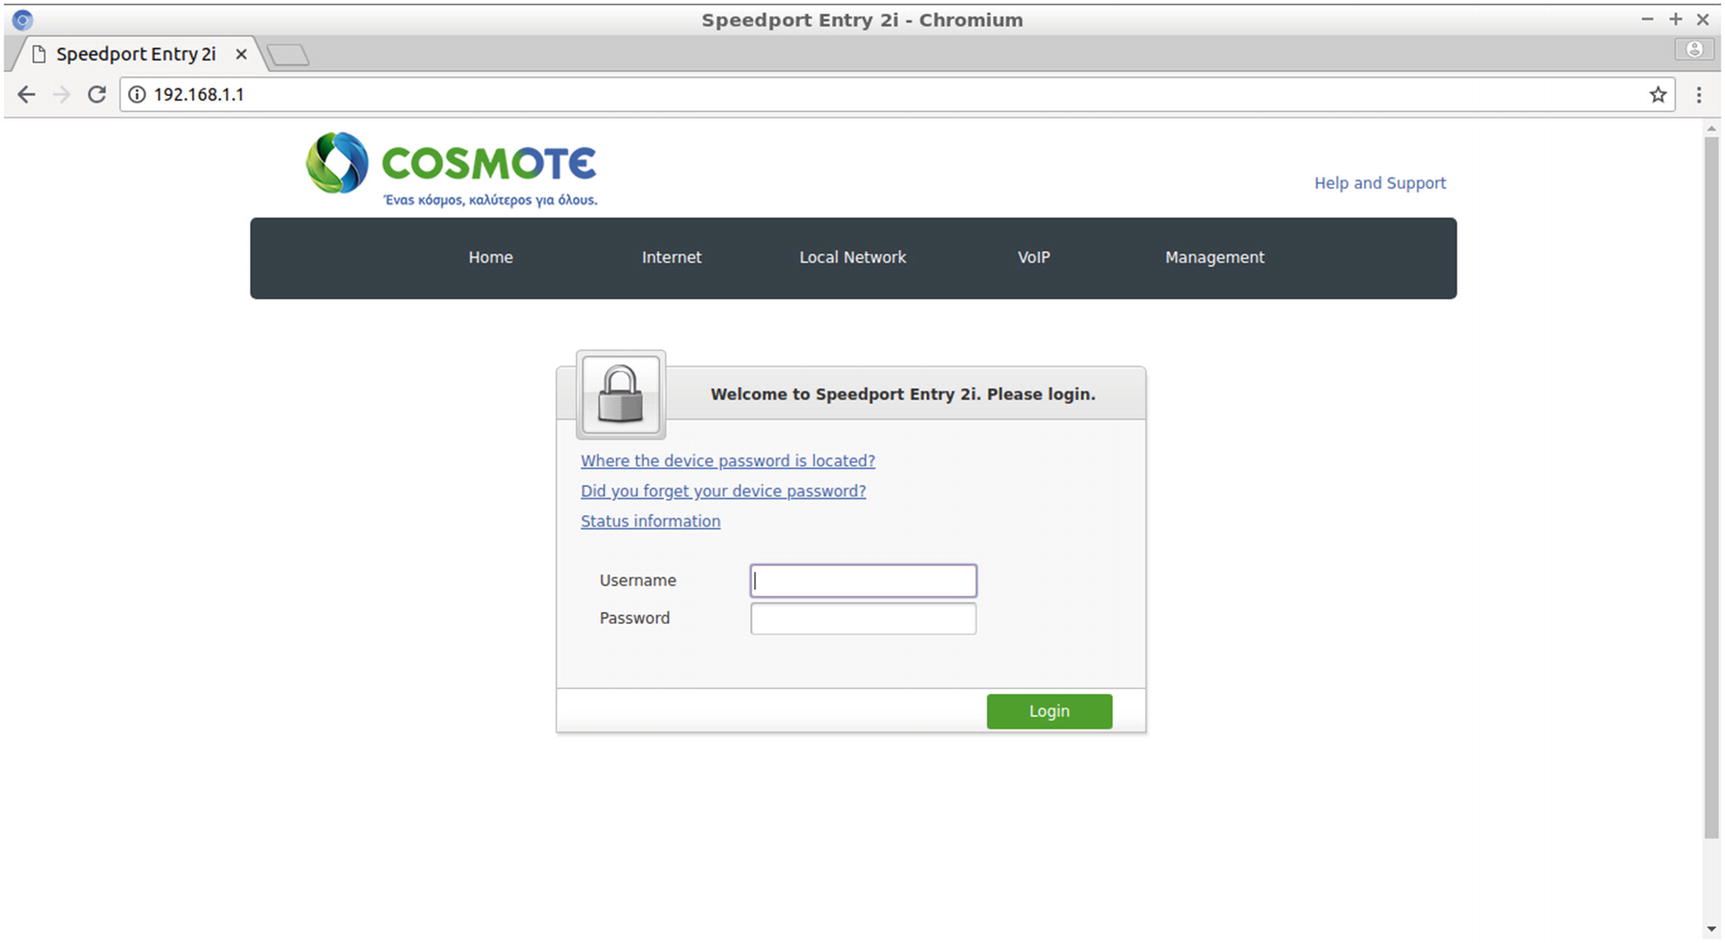
As with port 80 for the HTTP protocol in the previous chapters (or port 8080 if your ISP bans inbound port 80 connections), you have to enable port forwarding for port 443, the default HTTPS port number. Connect using the web interface of your router by entering its private IP address in the address bar of your browser. As displayed in Figure 8-10, the router’s private IP address is 192.168.1.1 in this example.
Figure 8-10
Connecting to a router’s web interface
Locate the Port Forwarding (or similar name) tab, as shown in Figure 8-11.
Figure 8-11
Locating the port forwarding service in the router’s web interface
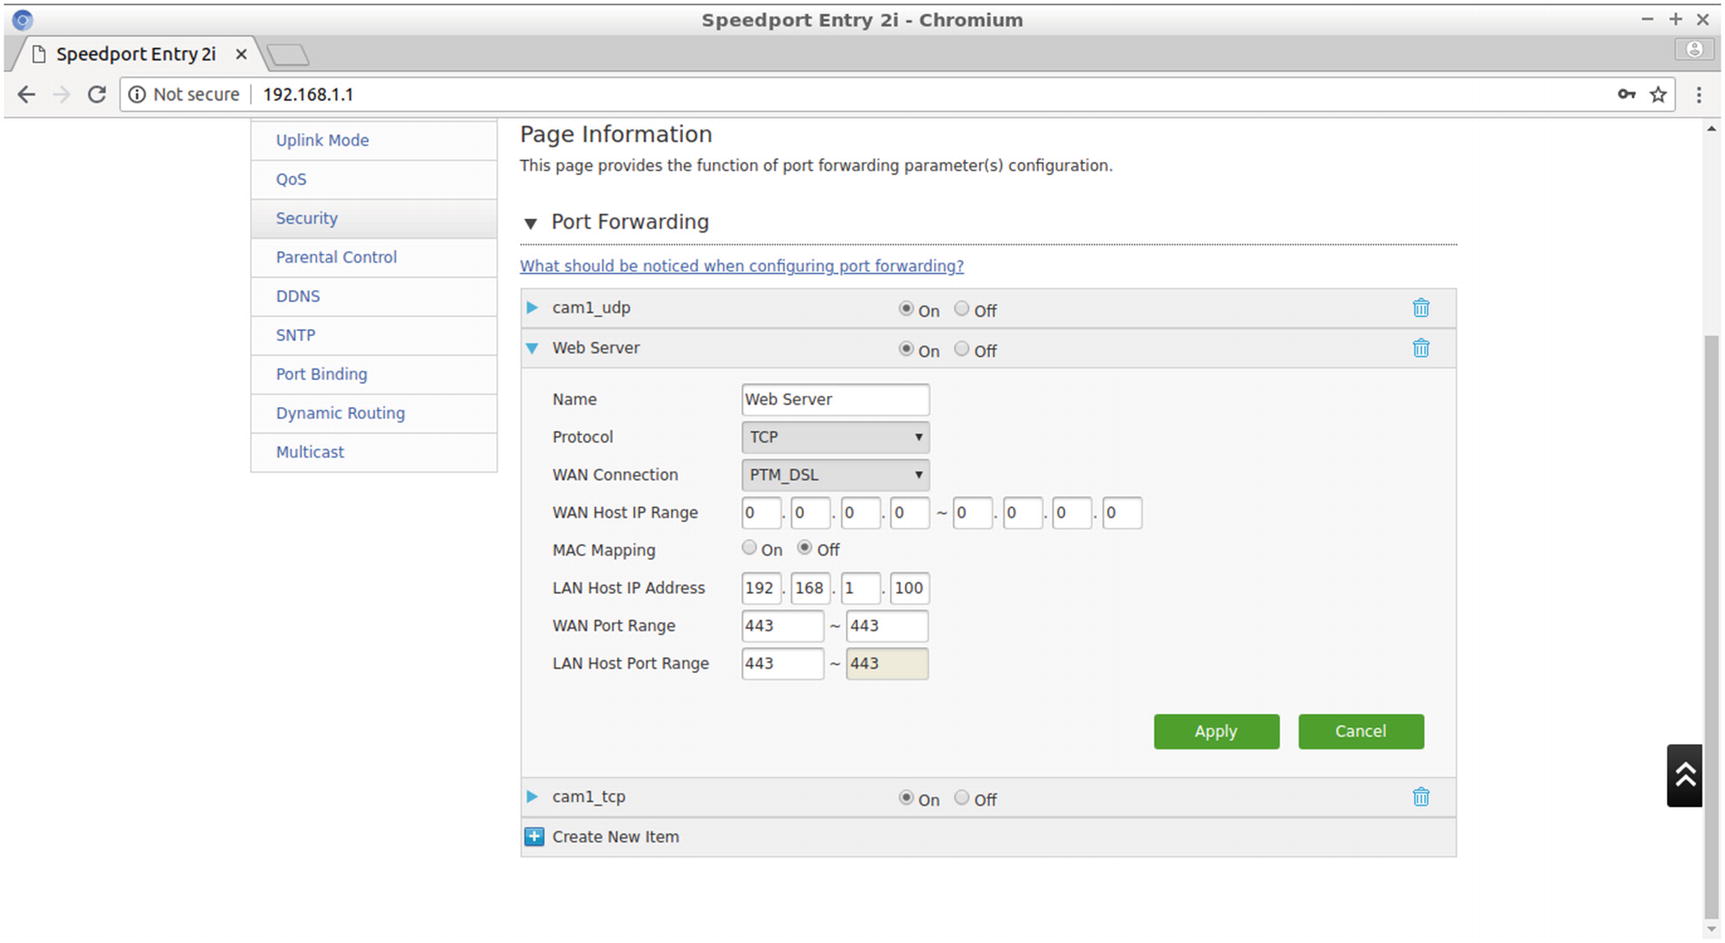
Create a new entry for port 443, as displayed in Figure 8-12, and save the new configuration.
Figure 8-12
Creating a new entry in the router’s Port Forwarding section for port 443
Your site is now available from outside your LAN. You can access it with the public IP address of your router or with the domain name of your web server. Test this using the router’s public IP address in the address bar of your browser. To find the public IP address of your router, use a “find my IP” online service or enter the following in the Linux terminal:
$ curl ifconfig.me
The command’s output consists just of the public IP address of your router. Here’s an example:
94.69.57.219
Enter the following URL in your browser’s address bar:
https://94.69.57.219
The web browser displays the “not secure” warnings discussed in the previous section, and if you proceed to download the web page, the directory index of your site is displayed, as shown in Figure 8-13.
Figure 8-13
Testing the HTTPS connection to your site using the router’s public IP address
You can also use the one of the FQDN DNS names you registered in Chapter 4. For instance, you can use the following:
https://christos.ddns.net
Or, you can use the one registered last with a more appropriate name.
https://secureserver.ddns.net
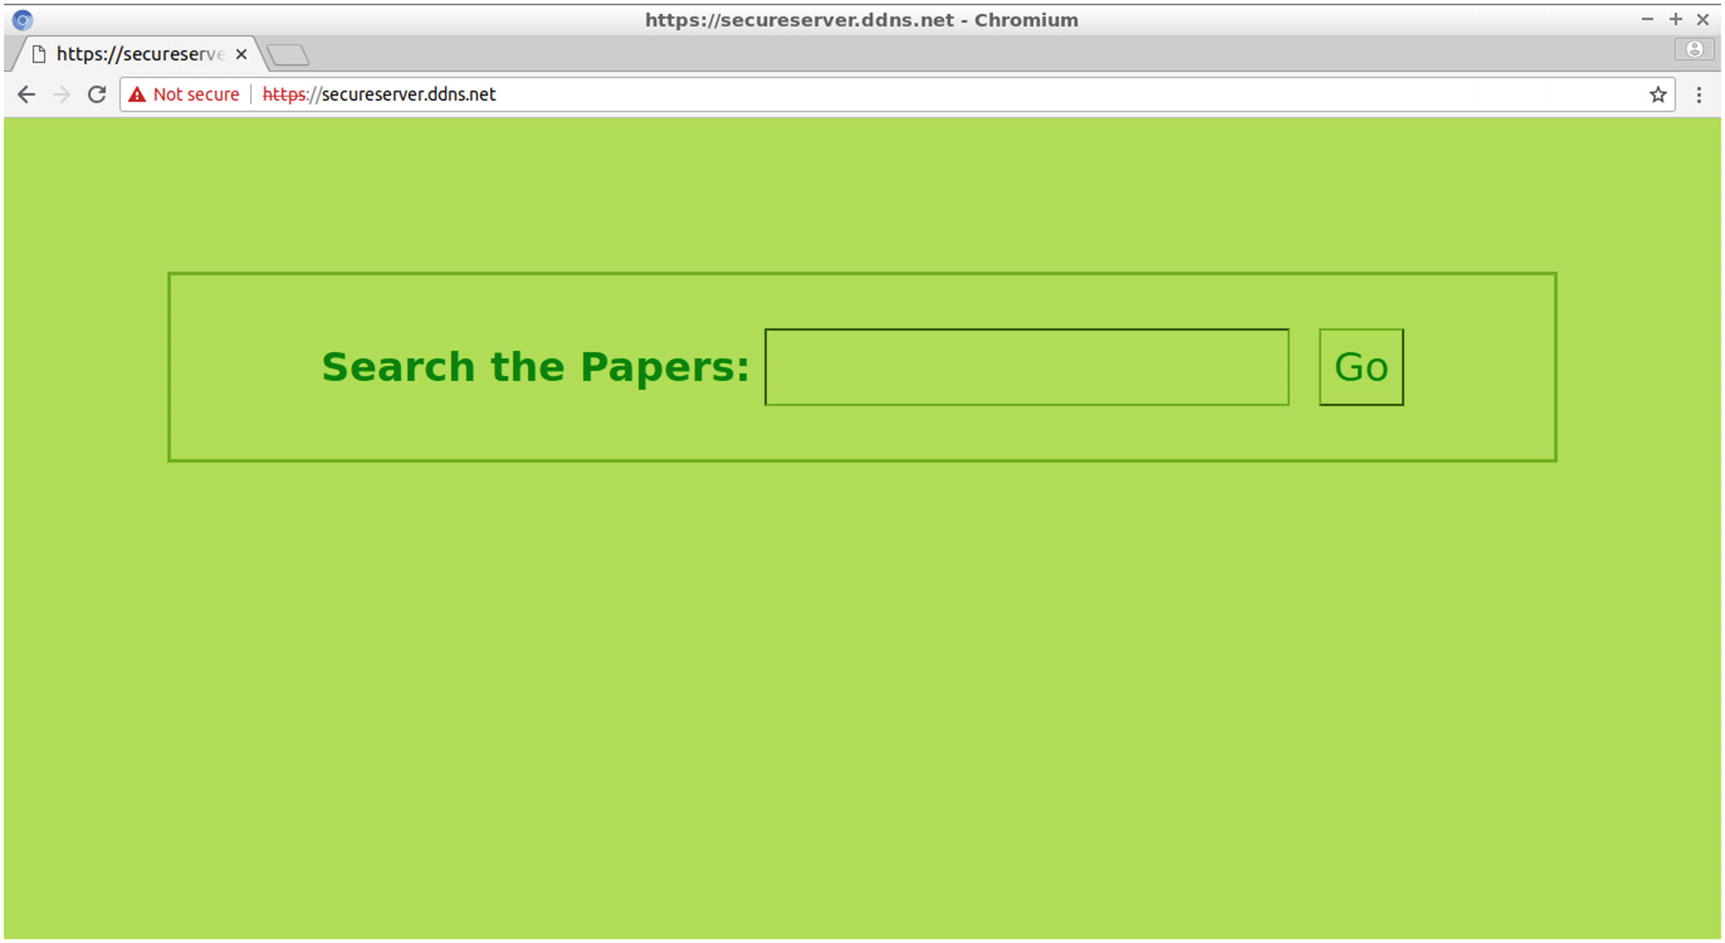
The directory index of the site also appears, as displayed in Figure 8-14.
Figure 8-14
Testing the HTTPS connections to your site using an FQDN
At this point, you might expect that everything works fine. It doesn’t, at least until you check the connection from outside your LAN. Using a online network tool, like webpagetest.org or geoscreenshot.com, you may discover that the web page test fails. At this point, you have to check the following:
Your router (port forwarding)
Your firewall
Your ISP’s inbound port 443 policy
Having set up the port forwarding feature on the router as described previously, the next immediate step is to check your firewall. You can use the ufw as follows:
$ sudo ufw enable
$ sudo ufw allow 443
$ sudo ufw status verbose
The previous command’s output for this example, shown next, indicates that the ports used in the previous chapters are all opened:
80,443/tcp (Apache Full (v6)) ALLOW IN Anywhere (v6)
443 (v6) ALLOW IN Anywhere (v6)
8080 (v6) ALLOW IN Anywhere (v6)
8181 (v6) ALLOW IN Anywhere (v6)
If this still doesn’t work, you have to contact your ISP and request unblocking the ports if they were indeed blocked. The ISP used for the examples of the book was blocking all inbound ports from 0 up to 1023 (the primary ports). While a connection to the site was achieved internally with the FQDN, the external test with the online service webpagetest.org failed. After a request to the ISP, the primary ports were opened. Online services like www.canyouseeme.org and www.yougetsignal.com can verify whether a specific port number of the computer whose IP address is entered in the corresponding textbox is open. Figure 8-15 displays the test run by yougetsignal.com, which shows that port 443 used for the connection to the server’s address was closed.
Figure 8-15
The online service yougetsignal.com verifies that port 443 is closed
After the primary ports were opened by the ISP, the same online service ascertains that port 443 is open, as shown in Figure 8-16.
With port 443 released, you can make the final test for the connections to your site issued externally to your LAN. Use an online service like webpagetest or geoscreenshot.com, as displayed in Figure 8-17, that displays your site from various locations in the world, or you can simply test the site using the mobile Internet connection from your cell phone.
Figure 8-17
Checking the HTTPS connection to your site from an online service
HTTP Cookies and PHP Sessions
The HTTP protocol is stateless, which means there is no recording of any previous client request activity by default. Therefore, when a client logs in to an e-commerce site and adds an item to the shopping basket, a second login would be required to make a second purchase. To overcome this situation, commercial sites implement mainly two methods to maintain user-specific data: HTTP cookies and PHP sessions. A third method, using input elements of type hidden, was examined in the previous chapter. However, its use is temporary. When a user exits the browser, the information contained in a hidden field is lost forever.
In the project for this chapter, PHP sessions will be used. A PHP session is a technique that is based on HTTP cookies, which are small pieces of data that are sent by the web server to the browser and are stored in text files as name-value pairs on the client’s file system. With any further requests to the web server, the information stored in the specific client’s cookies is attached to the HTTP request message headers. Therefore, cookies are carried back and forth between the client and the server with their values updated by the web server programs.
While with cookies the data is stored on the client side, with PHP sessions, all the data is stored on the server side, except the session ID, which is stored on the client side, usually in the form of a cookie. With PHP sessions, users or spyware programs do not have access to the stored information, and for this reason, PHP sessions are considered a more secure method than cookies.
Because PHP sessions are based on the cookies in the current chapter, you’ll first create a cookies-based project and then a PHP sessions project. Also, in the following chapter, when you implement SSL certificates issued from a certificate authority, you’ll create a project that utilizes PHP sessions to allow a client to log in to the site and while connected view the user-specific data.
Setting a Cookie with PHP
There are three basic reasons to use cookies for your site.
Session maintenance, for allowing the user to log in to the site and stay connected, e.g., to add new items to a shopping card
Customization, for recalling user preferences set by the user in previous visits to the site, e.g., maintaining a specific background color when the user e-mails are displayed in a webmail service
User tracking, for recording and analyzing user behavior, e.g., e-commerce sites providing advertisements with products relevant to the ones included in web pages visited in the past by the user
The setcookie() PHP function defines a cookie to be sent along with the rest of the HTTP headers. This function has the following syntax:
Except name, the parameters are optional. The parameters of setcookie() are described next:
name: Specifies the name of the cookie.
value: Specifies the value of the cookie.
expires: Specifies the time, set in Unix timestamp format, after which the cookie will become invalid.
path: Specifies the URL path on the server for which the cookie will be available. If path is set to / (root), the cookie will be available within the entire domain.
secure: Indicates that the cookie should be sent only in secure HTTPS connections.
httponly: Indicates that the cookie will be available only through the HTTP protocol, without being accessible from scripting languages, e.g., JavaScript.
The following PHP code creates a cookie named username, assigns the value tyler to it, and specifies that the cookie expires in 30 days (30 days * 24 hours * 60 minutes * 60 seconds) from now. The function time() returns an integer containing the current time as a Unix timestamp.
This function setcookie() calls should be placed before sending any output because cookies are sent in the headers of HTTP requests, and the headers of http requests come before the content of a web document.
Retrieving a Cookie Value from PHP
The PHP $_COOKIE superglobal variable is used to retrieve a cookie previously set. The following PHP code snippet types the value of the username cookie:
<?php
echo $_COOKIE["username"];
?>
Removing Cookies with PHP
To remove a cookie, you just call setcookie() for the cookie you want to delete with an expiration data that refers to the past. For instance to delete the username cookie, you could call the following:
<?php
setcookie("username", "", time()-3600);
?>
Creating a Site That Uses Cookies
You can create a PHP site that asks the visitor’s first name and recalls it every time the user returns to the site until the cookie is expired.
In the document root of your web server (/var/www/html for both Apache and Lighttpd), create cookies, a new directory for this project, at the Linux terminal.
$ sudo mkdir /var/www/html/cookies
Create index.php, the directory index for this directory.
$ sudo gedit /var/www/html/cookies/index.php
Enter the following HTML and PHP source code:
<?php
if(isset($_POST)){
if (!(isset($_COOKIE["username"])) && (isset($_POST['t1']))){
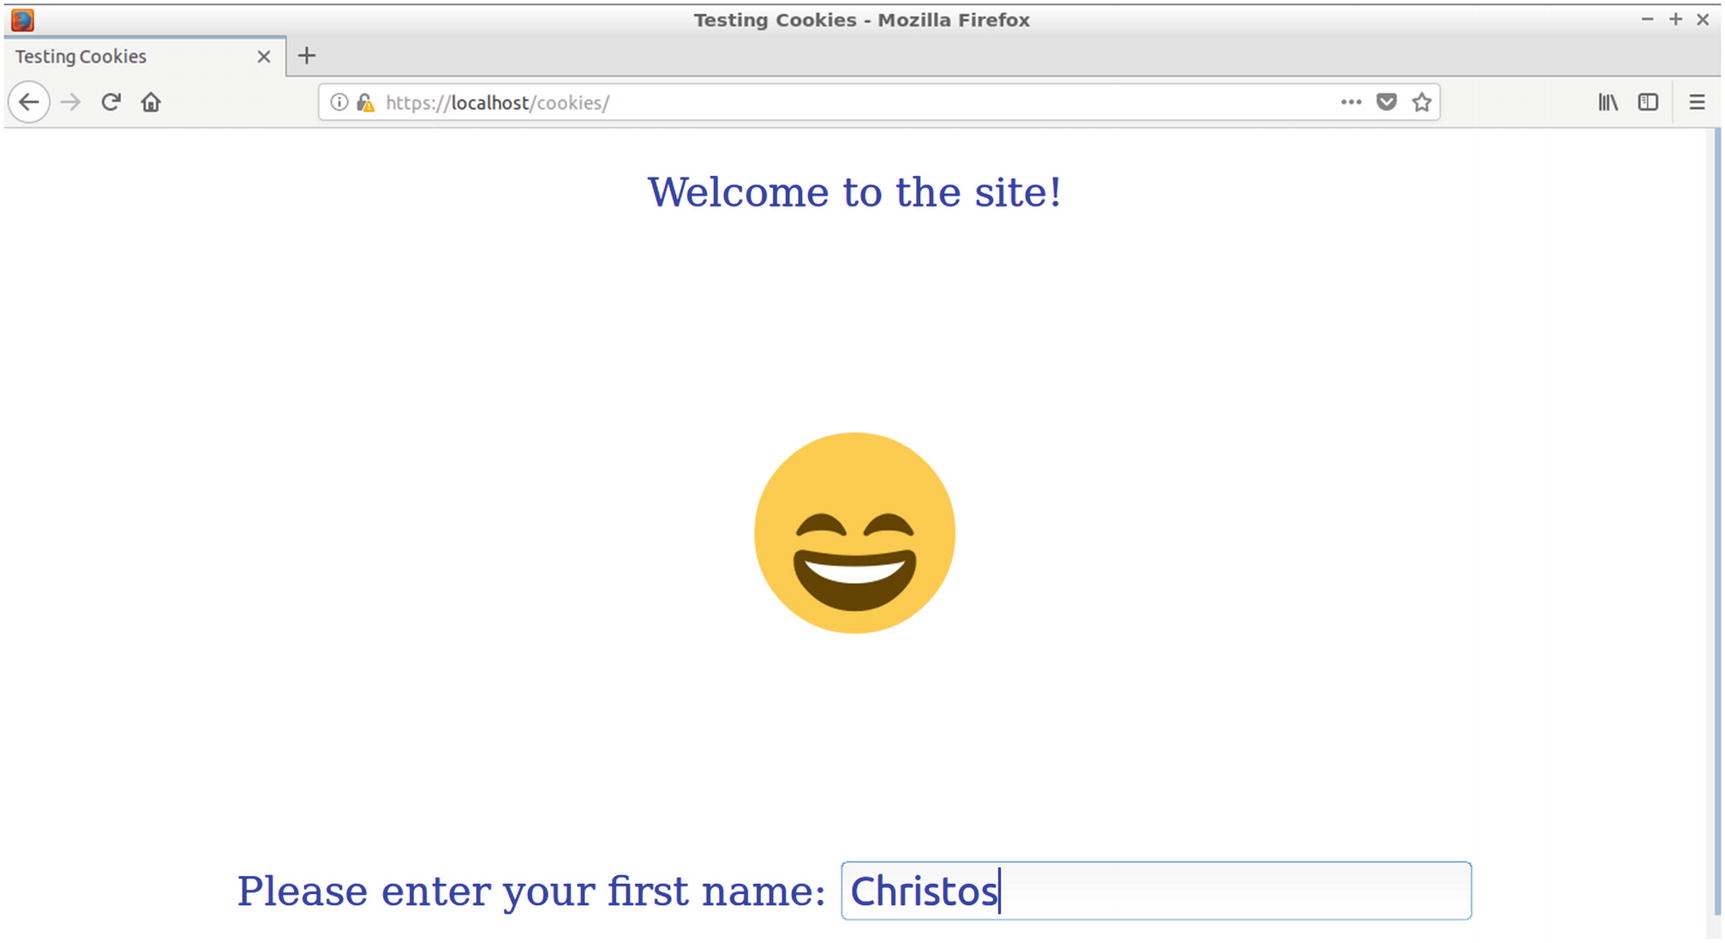
The first time the PHP code evaluates, the PHP global variable $_COOKIE["username"] is not set yet. Therefore, on the first visit of the user at the site, the second block of PHP code runs the else part, which prints a general welcome message and also a smiley Unicode character in a large size, displayed in Figure 8-18.
The smiley chosen is a smiling face with open mouth and smiling eyes. This is Unicode character 😄.
Figure 8-18
The smiley with the closed eyes appears before the user submits the first name
<p class="p1">
<?php
if(isset($_COOKIE["username"])){
echo "Hi " . htmlspecialchars( $_COOKIE["username"]) . " I can see it is you!";
echo '<p class="smiley">😃</p>';
} else{
echo "Welcome to the site!";
echo '<p class="smiley">😄</p>';
}
?>
<p>
Any time the visitor returns to the site, the user will remain anonymous until deciding to enter their first name. In that case, the name, e.g., Christos, is entered in the textbox, as shown in Figure 8-18, and submitted by pressing the Enter key. The action attribute of the form, as evaluated in the following PHP block, specifies the same file, index.php, as the one that will receive the form’s data:
In this code block, because the username cookie has not been set yet and also because a value (the user’s name) was sent via the POST method by the t1 textbox, the username cookie is assigned the value sent by textbox t1.
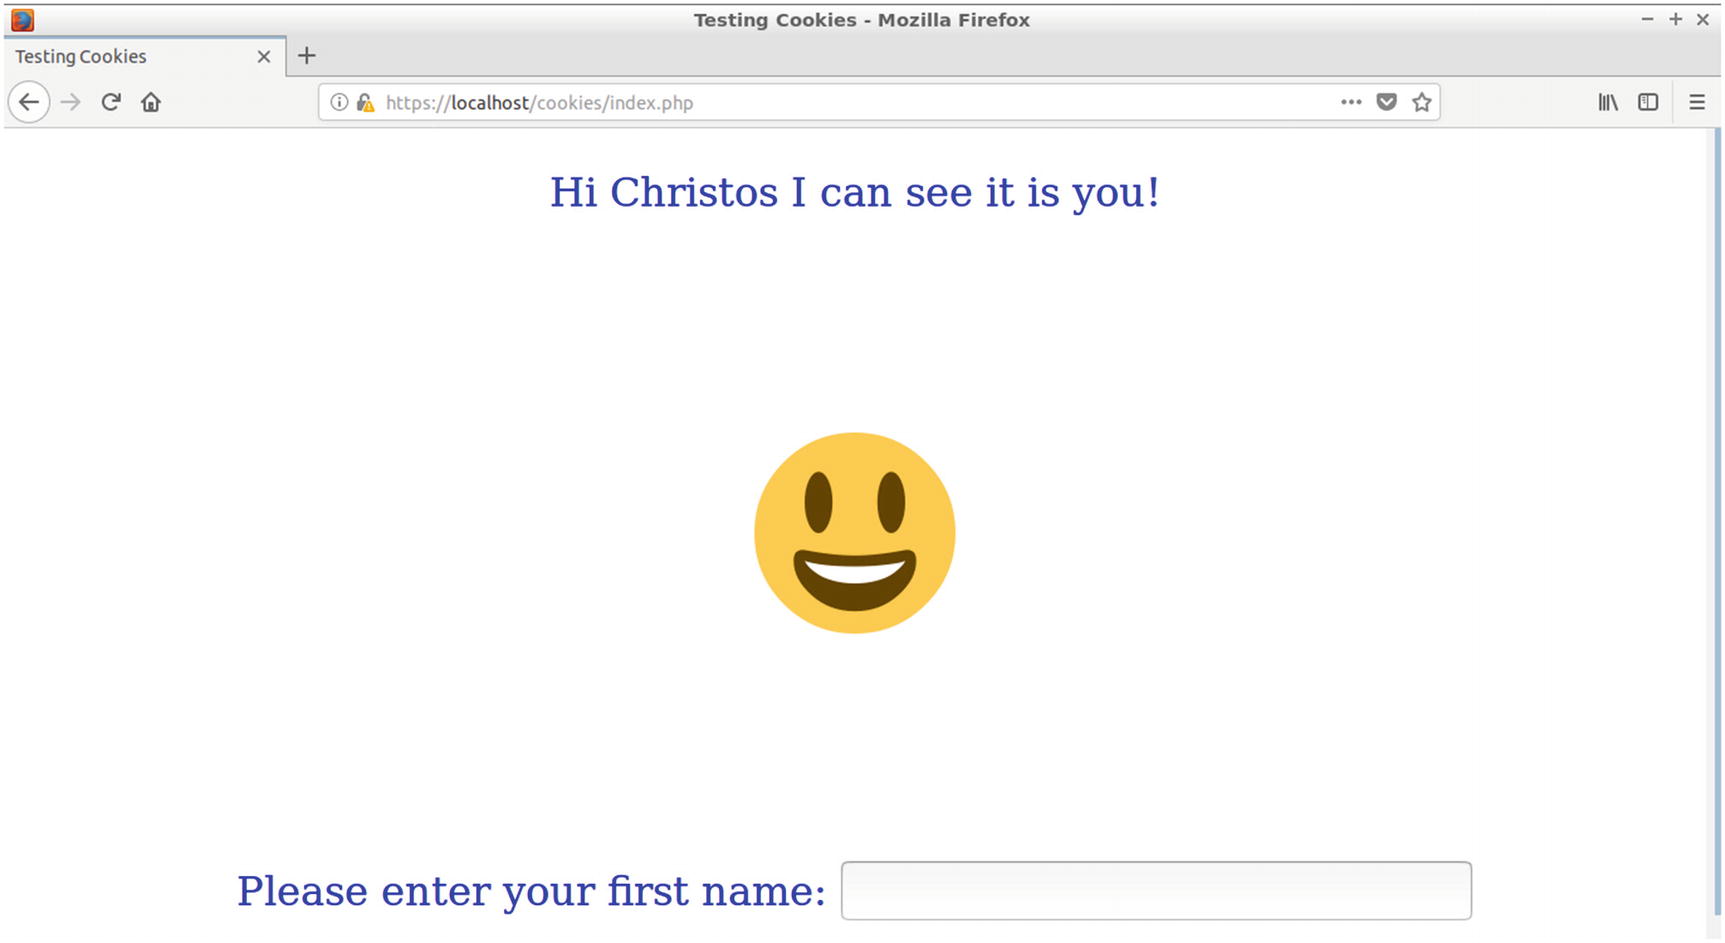
For the next hour (3,600 seconds), when someone connects to the site, using the same browser at the same computer, the if part of the second PHP block runs and they receive a personalized welcoming with the specific name previously sent. Also, the smiley changes from the one with the smiling eyes to the one with the open eyes (Unicode character 😃). See Figure 8-19.
Hint!
Each browser maintains its own cookies. To display this, visit with Chromium and with Firefox and provide different names in the textbox. Then visit the site another time using both Chromium and Firefox. Each browser recalls you with the specific name you submitted in the form of each browser.
Figure 8-19
The smiley with the opened eyes along with a personalized welcome message appears when the user submits their first name
Hint!
To run the previous project, cookies must be enabled on your browser. For instance, for Google Chromium, use the following steps:
1.
Click the Customize and Control Chromium button (the control button with the three dots in the upper-right corner of the browser window) and select Settings.
2.
On the new tab with the settings, click the Advanced link at the bottom to expand the page contents.
3.
Under “Privacy and security,” click “Content settings.”
4.
Click Cookies and ensure that the “Allow sites to save and read cookie data (recommended)” option is on.
Viewing the Cookie Details in Your Browser
For the next hour for which the username cookie is valid, you can view the cookie’s details in your browser. For instance, for Google Chromium, use the following steps.
Click the Customize and Control Chromium button and select Settings. On the new tab with the settings, click the Advanced link at the bottom to expand the page contents. Under “Privacy and security,” click “Content settings.” Click Cookies and then “See all cookies and site data.” In the list that appears, locate the URL used for the site, e.g., localhost. Click the URL and locate the cookie’s name, e.g., username. Click the arrow at the right to view details about the cookie, as displayed in Figure 8-20.
Figure 8-20
Displaying cookies details in the browser
Using Wireshark to View the HTTP Cookie Header
The cookies are transferred between the client (the browser) and the web server in the Cookie field in the HTTP protocol headers. You can use the Wireshark packet analyzer to view a cookie’s fields. To install Wireshark, use the following command:
$ sudo apt-get install wireshark
To invoke Wireshark, use the following at the terminal:
$ sudo wireshark
The Wireshark program loads in a new window. As indicated in Figure 8-21, you can choose the interface from the interface list, for instance the wired Ethernet interface denoted as eno1 or with a similar name. If you are not sure about the interface name, you can run ifconfig at the terminal. Click the “Edit/apply display filter” button (the second one that depicts a funnel icon) to display only the packets that carry HTTP protocol messages. In the filter string textbox of the dialog that appears, enter http. Click the Apply and OK buttons. The text http appears in the Filter toolbar.
For this chapter, it is assumed that the ISP has released ports 80 and 443. In the previous chapters, the web servers were listening either to port 80 or to port 8080, and in a few examples to port 8181. Because the emphasis in those examples was to cover the case where the ISP bans inbound connections to port 80, examples using port 8080 were mostly used. Because HTTPS encrypts the HTTP headers, it is more straightforward with Wireshark to examine unencrypted headers. Therefore, an HTTP connection will be used next. If you have not used port 80 so far with Lighttpd, follow the next steps.
Change the Lighttpd configuration file for the server to accept also HTTP (except HTTPS) by using the following:
$ sudo gedit /etc/lighttpd/lighttpd.conf
In the configuration file, add the following conditional directive for the web server to utilize port 80 (except port 443):
Save the file and reload the server to enable the new configuration by using the following:
$ sudo service lighttpd force-reload
For Apache to use HTTP port 80, the default configuration file 000-default.conf should contain at a minimum the following directives:
<VirtualHost 192.168.1.100:80>
DocumentRoot "/var/www/html"
</VirtualHost>
If you have altered the file 000-default.conf, enable the new configuration by using the following:
$ sudo service apache2 force-reload
Next, open Wireshark by entering the following at the Linux terminal:
$ sudo wireshark
In the Wireshark main toolbar, click the “Start capturing packets” button, which is the blue fin button, and from another computer connect to the web server via port 80, using the following URL:
http://192.168.1.100/cookies
In the textbox of the directory index enter a name (Christos was used in this example) and press Enter to set the username cookie. The requests from this browser for the specific URL will carry the cookie in the HTTP headers of the packets sent to the web server.
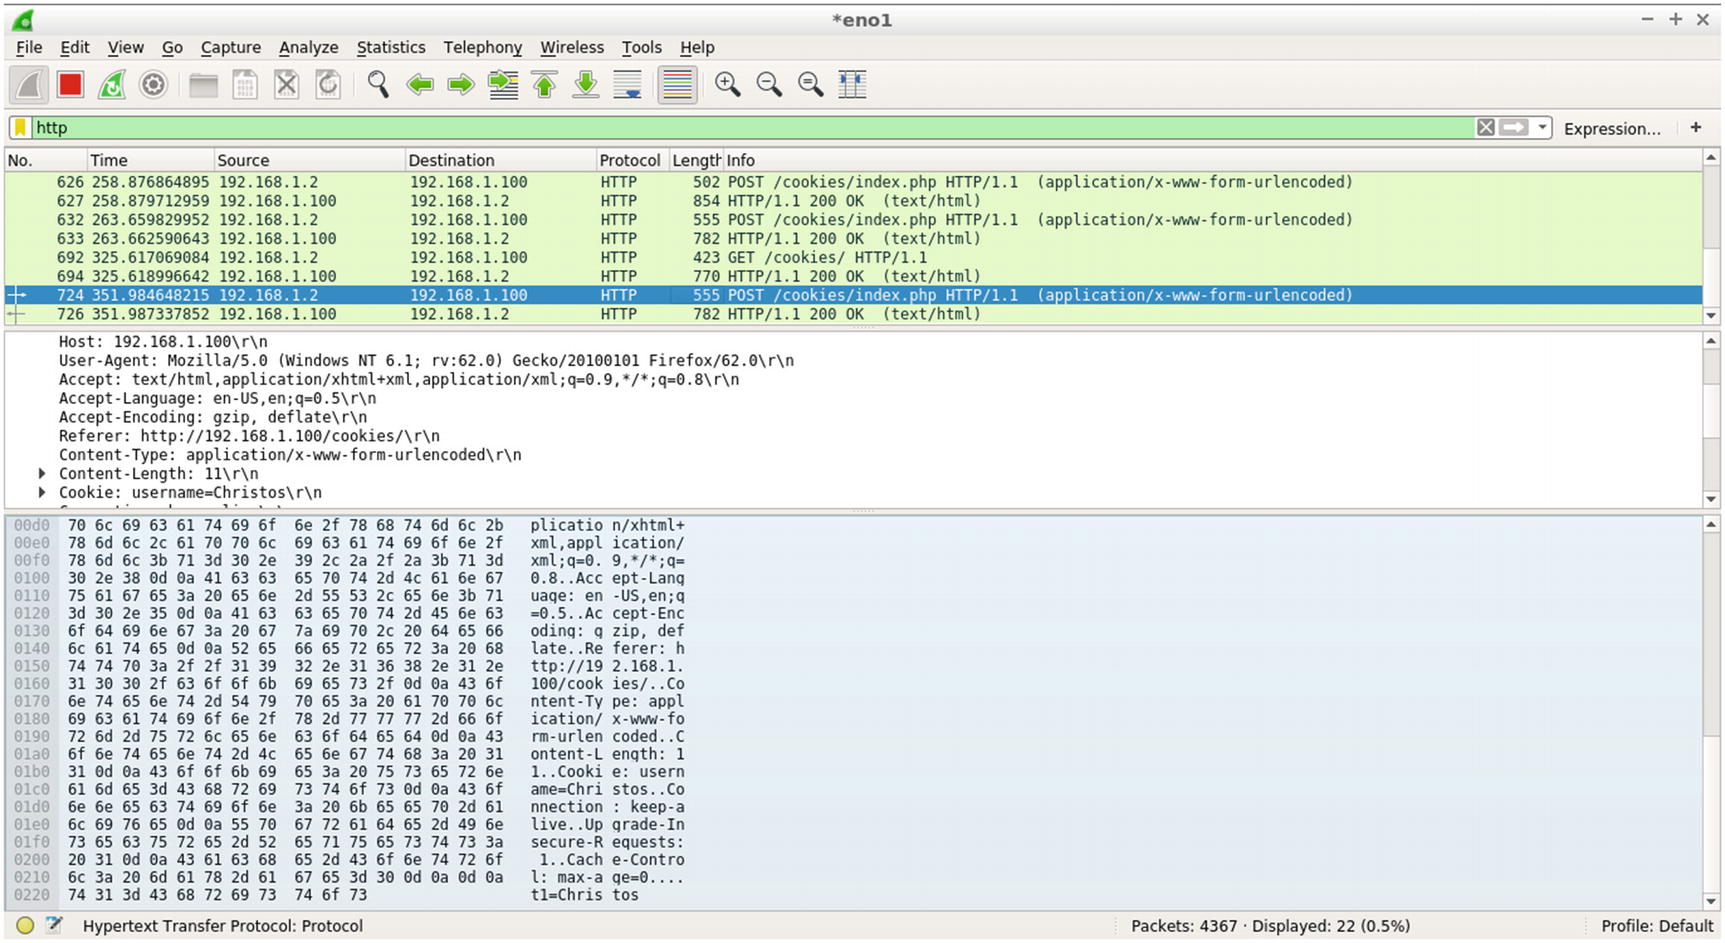
On the web server, terminate the packet capturing process using the “Stop capturing packets” button, which is the red square button. You can also enter http in the “Apply a display filter” textbox to list only HTTP packets. In Figure 8-21, an HTTP packet is selected destined for the web server (IP address 192.168.1.100).
Figure 8-21
The Wireshark window displays the client request, carrying the cookie
The following are the HTTP headers for the specific packet:
POST /cookies/index.php HTTP/1.1
Host: 192.168.1.100
User-Agent: Mozilla/5.0 (Windows NT 6.1; rv:62.0) Gecko/20100101 Firefox/62.0
The cookie with the name username and the value Christos is included in the cookie header in this and any other packet sent to the web server from the specific browser.
Using Browser Tools to View the HTTP Cookie Header
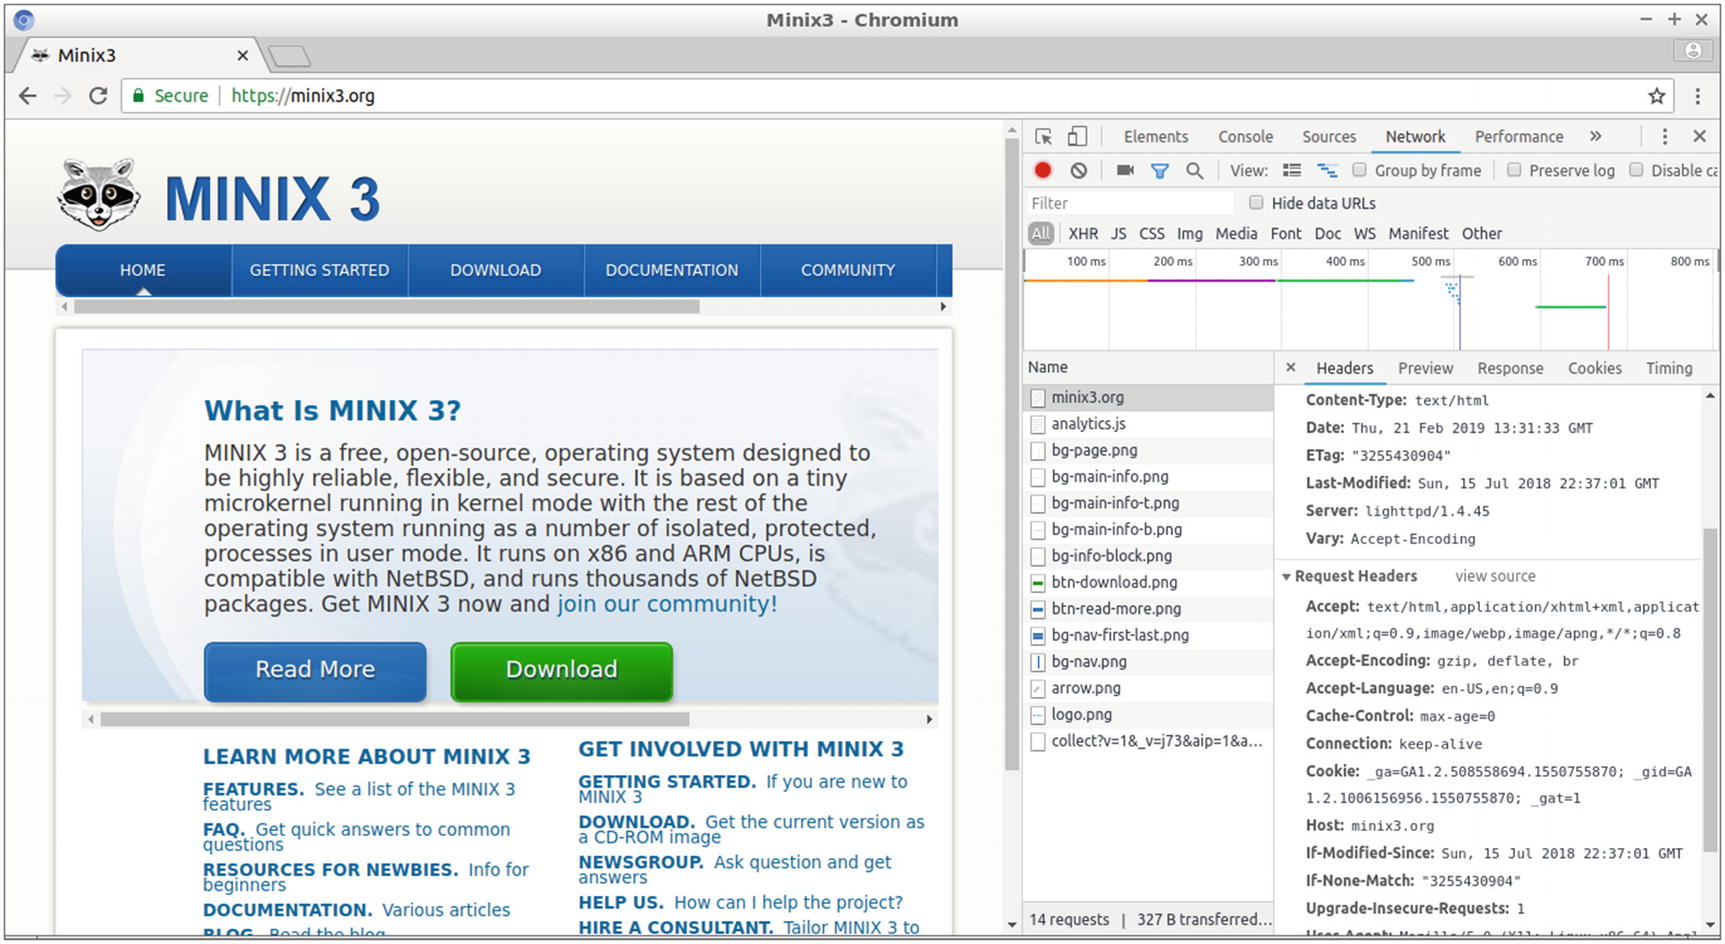
Many web browsers like Chromium and Firefox enable the user to view many details about the web page content and the connections, and this feature can be used to display the cookie header. In this section, you’ll use Chromium to display the cookies set from another site, e.g., from minix3.org, using an HTTPS connection.
Visit the site and respond positively to the message about accepting cookies to the site (if such a message is used). Click the Customize and Control Chromium button (the three dots in the upper right of the window) and select “More tools” and then “Developer tools.” A new pane appears on the right of the window with the Network tab selected by default. Reload the page to view the client request messages and the web server replies. Click the web page request called, e.g., minix3.org. The HTTP header fields appear, as displayed in Figure 8-22. Scroll down to locate the cookie header.
Figure 8-22
Viewing the HTTP headers from the Chromium browser
Similarly, you can view the cookie header from Firefox by clicking the Open menu button (the three stripes on the upper right of the window) and then selecting Web Developer and then Network. Reload the web page to view the request messages and the web server replies. Click the GET request of type html. The HTTP protocol headers, among them the cookie header, appear, as shown in Figure 8-23 after scrolling.
Figure 8-23
Viewing the HTTP headers from the Firefox browser
Using PHP Sessions
Retaining data from the client and server interaction using cookies has some security drawbacks. First, because they are stored on the user’s system, they are less secure against potential attacks that could modify the cookie contents. With PHP sessions, sensitive data is safely stored in a centralized way on the web server. There is also another disadvantage. With cookies, each time the client makes a request to the server for a specific URL, all the cookies for this site are carried to the server along with the request. For ten cookies, each one with a size of 4KB, the browser will upload 40KB of extra data for each page being viewed, which will decrease the performance of your site.
Data with PHP sessions, on the other hand, is stored to temporary text files locally on the web server. Only the session ID, which is the unique identity of the session, is saved on the client side, usually as a cookie. Therefore, all sensitive information is stored in a centralized place under the authority of the site administrator.
To begin a new session, use the PHP session_start() function, for instance:
<?php
session_start();
?>
The function session_start() checks whether the session is already established by searching for a session ID on the client computer with a value of an alphanumeric string. The session ID is the only piece of data that is stored on the client side. If a session ID is found, i.e., the session is already started, session variables stored on the server computer for the specific client can be set and retrieved. Otherwise, a new session is started by creating a new session ID and storing it on the client as a cookie with the name PHPSESSID. The file that stores the session variables is automatically created on the server in a designated directory and with a file name consisting of the ID value prefixed by sess_ , e.g., sess_hg7egmhroh4vbk9925v8vu8op4.
The PHP function session_start() (for the same reasons as setcookie()) should be called at the beginning, before the HTML tags, of each page of your site that will participate in the given session. All session data, stored as variable-value pairs, are then shared among the current page and the other web pages of the site for the specific session. This session is identified by the PHPSESSID cookie, which is valid for a specific browser on the client’s system for the specified period of time.
The global PHP variable $_SESSION is the array used to store the session variables. The following PHP code creates a session and stores the values Henrik and Ibsen in the session variables firstname and lastname, respectively:
<?php
session_start();
?>
<!DOCTYPE html>
<html>
<body>
<?php
$_SESSION["firstname"] = "Henrik";
$_SESSION["lastname"] = "Ibsen";
?>
</body>
</html>
The session is terminated with the session_unset() and session_destroy() PHP functions. The function session_unset() removes all session variables, and session_destroy() deletes the session.
<?php
session_start();
?>
<!DOCTYPE html>
<html>
<body>
<?php
session_unset();
session_destroy();
?>
</body>
</html>
Running a PHP Session Example
In the document root of your server (usually /var/www/html for both Apache and Lighttpd), create sessions, which is the new directory for this project.
$ sudo mkdir /var/www/html/sessions
Create a site consisting of three web pages: index.php used as the directory index and page1.php and page2.php, which are two web pages linked from the directory index.
$ cd /var/www/html/sessions
$ sudo touch index.php page1.php page2.php
On index.php, the site’s home page, the user has the option to personalize the web pages and choose one of three available background colors (orange, light blue, and lime) by clicking the corresponding colored button. The user can also choose the white button to reset the background color to the initial one. By clicking a colored button, the corresponding color applies to not only the home page but also to any other web page of the site. In this example, the home page includes two links called Books and Magazines, leading to page1.html and page2.html, respectively. As displayed in Figure 8-24, light blue is selected after the user clicks the light blue button (the second one).
Figure 8-24
The home page of the PHP sessions site with the light blue background color selected
The user can click a link to see the background color of the corresponding web page. Figure 8-25 displays page1.php after the Books link is clicked.
Figure 8-25
The Books web page retains the user’s color selection
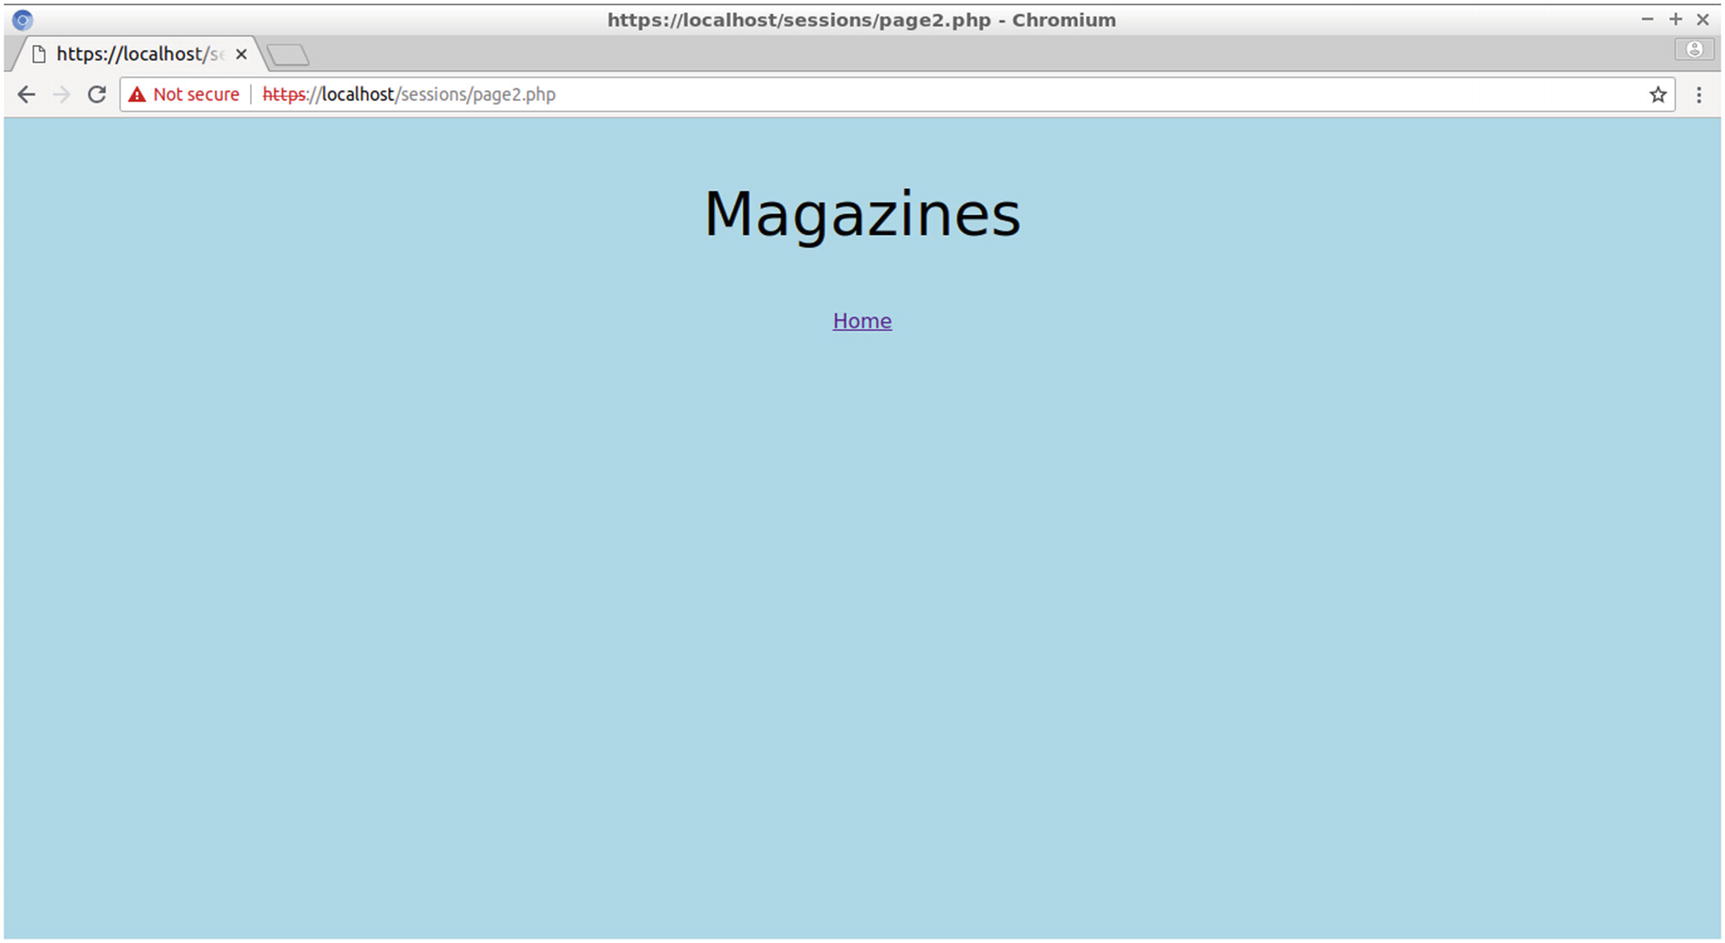
Figure 8-26 displays page2.php after the Magazines link is clicked.
Figure 8-26
The Magazines web page retains the user’s color selection
The PHP session mechanism is implemented in this project to store the user preferences as PHP session variables that are automatically available to any PHP web page of the site that calls the function session_start() in a PHP block before the web page’s HTML source code. The session variable’s value is used to change the background color of the current page but is also available to all other web pages of the site and is used as the background-color property of the body selector in the CSS section. Next you’ll create the home page of the site.
The Source Code for index.php
Use the gedit command to edit index.php.
$ sudo gedit /var/www/html/sessions/index.php
Enter the following source code in the gedit window and click the Save button:
The first block of the PHP code starts a new session (if not already started).
<?php
session_start();
?>
Next comes the CSS part inside the HTML head element. Certain styles are being applied, such as the position of the buttons and the links and the color and size of the text, but the noticeable part is the one that sets the background color of the page.
body{
background-color:<?php
if(isset($_SESSION["favcolor"])){
echo $_SESSION["favcolor"] . ";";
} else {
echo "white;";
}
?>
}
The first time the user views the home page—and until the user clicks a colored button—the web page’s background color is white. The four colored buttons for selecting the background color are actually input elements of the submit type of the same form that submits the user selection to the same PHP page, as indicated by the global variable $_SERVER['PHP_SELF']. Each submit button is differentiated by a distinct name. The names used are s1, s2, s3, and s4. For instance, the second button is created with the following input element:
Then, according to the button’s name used for the data submission, the PHP and JavaScript source code runs.
With PHP, the PHP session variable favcolor is set. For instance, if s2 (the light blue button) was the one submitted, the data favcolor is assigned to lightblue.
} else if(isset($_POST['s2'])){
$_SESSION["favcolor"] = "lightblue";
echo '
<script>
document.body.style.background = "lightblue";
</script>
Also, JavaScript runs locally in the web browser and sets instantly the background of the current web page to light blue.
Hint!
As is the case with any other CSS property, background-color changes its name when accessed by JavaScript. For the background-color property, the name in JavaScript becomes background.
All other web pages of the site when visited retain the light blue background with the favcolor value setting in the CSS section of the background-color property of the body selector. The following code snippet can be used in any other web page of the site:
body{
background-color:<?php
if(isset($_SESSION["favcolor"])){
echo $_SESSION["favcolor"] . ";";
} else {
echo "white;";
}
?>
}
With the white button, there is an exception. By clicking this button, JavaScript is used locally on the client to set instantly the background color of the current web page, but the PHP code does not set favcolor; rather, it destroys the session. When favcolor is not set for any other web page visited, the else part of the previous source code runs, and the CSS background-color property for the body selector defaults to white.
?>
The last part of code in index.php creates two links to page1.php and page2.php called Books and Magazines, respectively.
<div class="center2">
<div class="div1">
<a href="page1.php">Books</a>
</div>
<div class="div1">
<a href="page2.php">Magazines</a>
</div>
</div>
You’ll create the two web pages page1.html and page2.html next.
The Source Code for page1.html and page2.html
With the user selections, the favcolor PHP session variable obtains a value, and this value will be available to the other two web pages of the site, e.g., page1.php and page2.php, given that they also implement PHP sessions. Here you’ll create page1.html, the Books page, and page2.html, the Magazines page.
At the Linux terminal, use gedit to insert the source code to page1.php.
$ sudo gedit /var/www/html/sessions/page1.php
Enter the following source code and save the file:
<?php
session_start();
?>
<!DOCTYPE html>
<html>
<head>
<style>
body{
background-color:<?php
if(isset($_SESSION["favcolor"])){
echo $_SESSION["favcolor"] . ";";
} else {
echo "white;";
}
?>
}
p{
text-align:center;
font-size:48px;
}
.center{
text-align:center;
}
</style>
</head>
<body>
<div>
<p>Books</p>
</div>
<div class="center">
<a href="index.php">Home</a>
</div>
</body>
</html>
The first PHP block connects to the session started from index.php using the same function call with index.php, session_start().
<?php
session_start();
?>
After the function session_start() is called, if the PHP session variable favcolor was previously set in index.php, it becomes also available to page1.php. Its value is used to set the background color of page1.php. If the user decides to click the Books link and navigate to page1.php without first selecting one of the three colors, the favcolor variable is not set, and the default color (white) applies for the background color of the page.
body{
background-color:<?php
if(isset($_SESSION["favcolor"])){
echo $_SESSION["favcolor"] . ";";
} else {
echo "white;";
}
?>
In the body of page1.php, there is some text (Books) and a link for returning to the home page.
<body>
<div>
<p>Books</p>
</div>
<div class="center">
<a href="index.php">Home</a>
</div>
</body>
Create the web page page2.php.
$ sudo gedit /var/www/html/sessions/page2.php
Enter the following for the page1.html source code and save the file:
<?php
session_start();
?>
<!DOCTYPE html>
<html>
<head>
<style>
body{
background-color:<?php
if(isset($_SESSION["favcolor"])){
echo $_SESSION["favcolor"] . ";";
} else {
echo "white;";
}
?>
}
p{
text-align:center;
font-size:48px;
}
.center{
text-align:center;
}
</style>
</head>
<body>
<div>
<p>Magazines</p>
</div>
<div class="center">
<a href="index.php">Home</a>
</div>
</body>
</html>
From index.html, select one of the available background colors, and you’ll see they also apply on page1.html and page2.html by visiting the corresponding links, Books and Magazines.
Experimenting with the Sessions Project
Comment out the session_start() function for page2.php to temporarily deactivate it.
<?php
//session_start();
?>
Click one of the three colored buttons on the home page to select a color. Visit then the Books and Magazines links. As expected, only page1.php has the same color background as the one selected. Uncomment the session_start function to enable again the session for page2.php.
Visit the home page of the site and select a color, e.g., orange. Locate the file where the session data is stored and view its contents. You can find this information in the php.ini file, which is the PHP configuration file. Load the info.php web page created in Chapter 2 that evaluates the phpinfo() function, which displays lots of information about the PHP configuration. Use, for instance, the following in your browser’s address bar:
The output for the favcolor icon set to orange is as follows:
favcolor|s:6:"orange";
Switch to your browser and click the white button. The PHP session is destroyed, as revealed from the ls –l command:
$ sudo ls -l /var/lib/php/sessions
The command’s output is as follows:
total 0
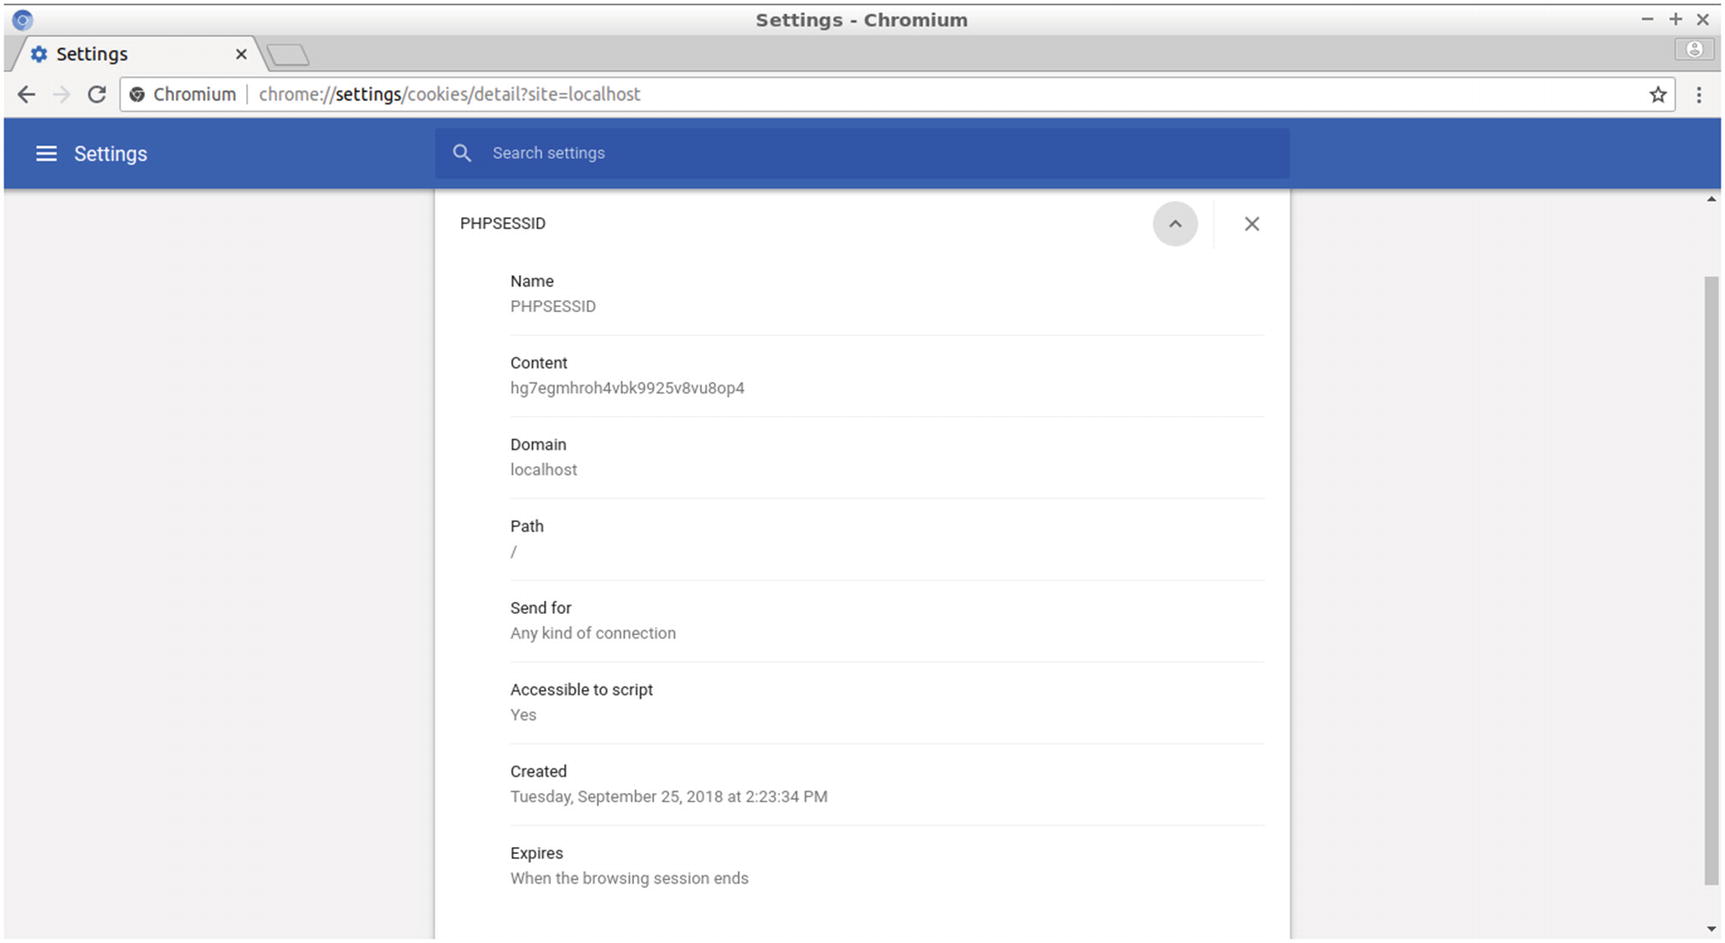
While all the information about the session is stored on the server side, the session ID is stored as a cookie on the client’s computer. Use the settings of your browser to locate the specific cookie. For the Chromium browser, click the Customize and Control Chromium button (the one with the three dots in the upper right of the window) and select Settings. On the new Chromium tab that opens with the available settings, click the Advanced link at the bottom to expand the page contents. Under “Privacy and security,” click “Content settings.” Click Cookies and then “See all cookies and site data.” In the list that appears, locate the URL used for the site, e.g., localhost. Click the URL and locate the cookie’s name, which is PHPSESSID. Click the arrow at the right to view details about the cookie. Figure 8-28 displays the cookie properties.
Figure 8-28
Displaying the properties of the PHPSESSID cookie
As expected, the value of the cookie is hg7egmhroh4vbk9925v8vu8op4.
This cookie for the default session remains until the time indicated in the Expires section under “When the browsing session ends.” Close the browser and open again the Settings web page. The cookie is now deleted.
Summary
In this chapter, you did the following:
Implemented SSL for your site using a self-signed certificate
Used HTTP cookies to maintain the state of the otherwise stateless HTTP protocol by storing data across web pages on the client side
Used PHP sessions to store to store sensitive data across web pages on the web server side
In the next chapter, you’ll enhance your site’s credibility by enabling HTTPS connections with an SSL certificate from a certificate authority.