In the beginning of the Internet, web servers dispatched only static content to the client. Soon, though, web servers became capable of dispatching dynamic content as well. To do this, a mechanism was needed that offered programming capabilities as well as the possibility of interfacing the terminal with other programs. Popular mechanisms for this purpose were the Common Gateway Interface (CGI) and later the PHP language. PHP is a recursive acronym for PHP: Hypertext Preprocessor. PHP is a general-purpose open source language that can be embedded in an HTML file or be included in its own stand-alone PHP file.
In this chapter, you will connect the Apache server to a PHP engine to create sites that accept client-specific data from HTML forms, which are processed, and then the results are dispatched back to the client’s browser, thus serving dynamic content. You will be introduced to PHP, and then you will compare client-side programming in JavaScript to server-side programming in PHP. Last, you’ll build a PHP-based site that validates the feature codes that can be entered online at a website in exchange for prizes.
The PHP Engine
A PHP-enabled web server can receive a request for a PHP file mainly in two ways.
By using the URL of the PHP file in the web browser’s address bar
By submitting an HTML form, where the action attribute is set to the URL of the PHP file
On receiving the request for a PHP file, the web server locates the file and passes it to the PHP engine for processing. The PHP engine is a PHP interpreter that the web server is currently assigned. What the user actually views in the browser is not the PHP file itself but rather the output of all the PHP commands, sent back by the web server. For instance, the echo PHP command is the one used to output messages. Here’s an example:
echo "Hello world!";
The start/end PHP tags (<?php and ?>) are used as the delimiters for a PHP program.
<?php
echo "Hello world!";
?>
The PHP engine evaluates the previous program to a string, which is what the user actually sees when requesting hello.php.
Hello world!
Other than PHP commands, the PHP engine accepts HTML tags, for instance:
<?php
echo "<b>Hello <br>world!</b>";
?>
The user views the following message in bold:
Hello
world!
This capability makes PHP an ideal language for use on the Web.
PHP is a full-fledged programming language that you can use to make programs that run on the server side, limited only by your creativity. Here are a few epigrammatic uses for PHP:
Interfacing with the operating system’s shell, for instance the Linux terminal, and running terminal commands
Interfacing with user programs, most commonly databases, and thus allowing the user to conduct a search and have the web server offer dynamic content
Interfacing with the filesystem and allowing for reading and writing files on the server side
Interfacing with remote servers by establishing network connections
You’ll see examples of all these uses for PHP in the following chapters.
Installing and Testing PHP
In this book, PHP version 7.0 is used. To install PHP 7.0, follow the steps in this section.
Add the ondrej/php personal package archive (PPA).
$ sudo add-apt-repository ppa:ondrej/php
Run the update.
$ sudo apt-get update
Install PHP 7.
$ sudo apt-get install php7.0
Enable the Apache module php7.0, also installed with the previous command.
$ sudo a2enmod php7.0
Ensure that the mpm_prefork (prefork multiprocessing) Apache module is enabled and the mpm_event module is disabled.
Install also the CLI (Command Line Interface) PHP:
$ sudo apt-get install php7.0-cli
Restart Apache.
$ sudo systemctl restart apache2
To test your newly installed PHP engine, create a PHP file, named info.php, at the document root directory. Enter the following PHP source code:
<?php
phpinfo();
?>
The previous code snippet includes just one command, the phpinfo() function call. As with each PHP command, it ends with a semicolon. The function phpinfo() returns a plethora of information about the PHP version, the operating system, the web server, etc., that spans multiple screens.
In your browser’s address bar, type the URL that leads to info.php, for instance:
192.168.1.100/info.php
192.168.1.100 in this example is the private IP address of the web server.
The information on the info.php web page will be used in the following examples. In the following section, you will try PHP independently from a web server; you’ll use the command line to simulate the process followed by a web server equipped with a PHP engine.
Testing PHP Without a Web Server
Sometimes it is useful to run and test PHP source code and view the result as it would appear in the user’s browser without requiring a web server. There are PHP interpreters, like CLI PHP, that run from the command line of your operating system; however, they do not deliver the exact effect because they do not process HTML tags. There are also online PHP editors, some of which like phptester.net process HTML tags, but you can’t combine them with the software of your computer. For this purpose, the following example can be used, which relies on CLI PHP.
To test whether you have already installed PHP CLI installed, enter the following at the command line:
with Zend OPcache v7.1.17-0ubuntu0.17.10.1, Copyright (c) 1999-2018, by Zend Technologies
To view the available options, use the -h (help) switch.
To simulate the process of using PHP code inside a web page and viewing the result with a browser, without requiring a web server, use the following steps. First create a PHP file that uses HTML tags and also PHP source code. Specifically, create a file called a.php in your home directory using these commands:
$ cd ~
$ gedit a.php
Enter the following source code and save the file:
<html>
<head>
<title>Testing PHP without a web server</title>
</head>
<body>
<b>
<?php
$command = "users";
$output = shell_exec($command);
echo $output;
?>
</b>
</body>
</html>
Three PHP commands are included between the start (<?php) and the end (?>) PHP tags. The first one sets the $command variable to the value of the command name that will be executed by the operating system. In this example, the shell command users was used, which lists the logged-in users. The second command uses shell_exec(), which is the PHP function that interfaces with the shell and executes the command given in the argument, in this case users, which is the value of $command. As a result, the users command is executed, and its output is stored to the $output variable. The third command prints the contents of the variable $output in bold since the PHP block is included between the <b> start and end tags.
The file a.php is the original PHP file that will be evaluated and viewed from a browser; however, for this file, the auxiliary file c.php is required to run. Create the file c.php next.
$ gedit c.php
Enter the following source code and save the file:
<?php
shell_exec("php a.php > b.html");
shell_exec("firefox b.html");
?>
What the program c.php does is run the code of file a.php with PHP CLI and then redirect (>) the output to the HTML file b.html.
$ php a.php > b.html
Next the Firefox web browser is invoked from the command line to open the web page b.html. This is the equivalent of running the next command from the command line:
$ firefox b.html
After creating a.php and c.php, the command you issue from the command line that starts everything is as follows:
$ php c.php
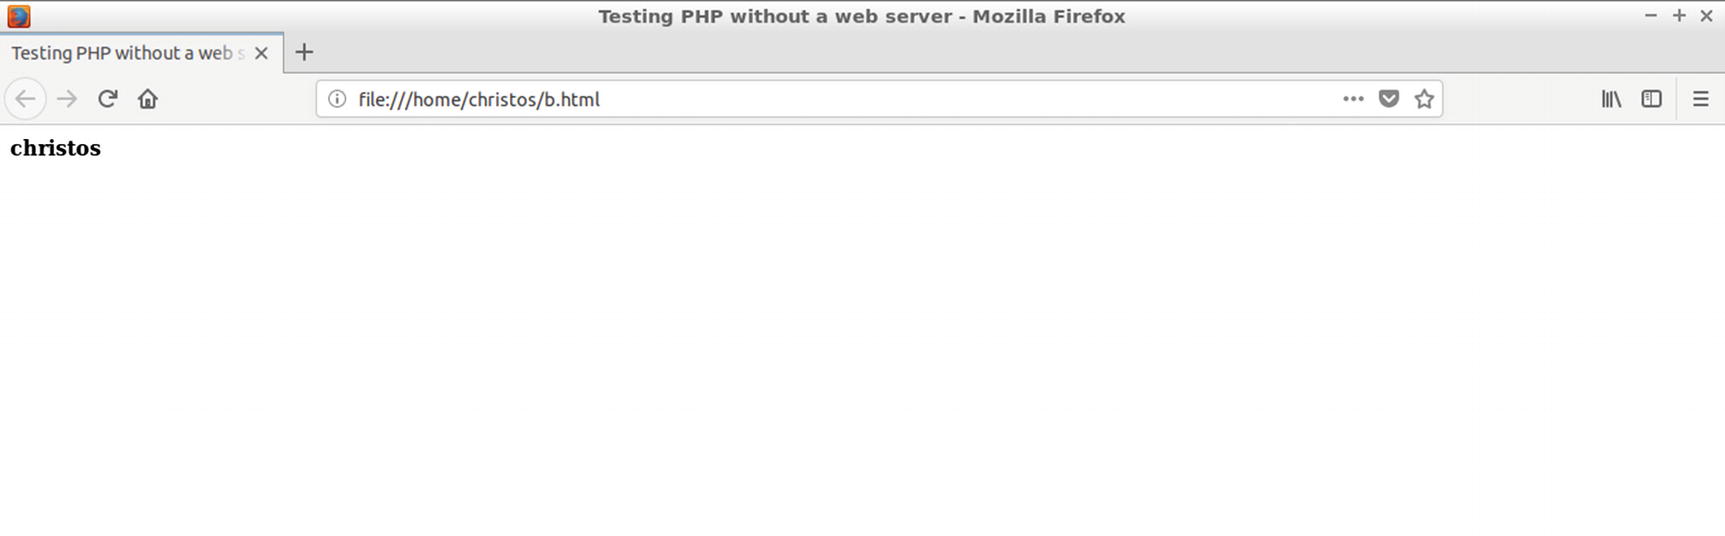
Figure 2-2 displays the result of running the previous command: the Firefox window opens and lists the currently logged-in users.
Figure 2-2
Running c.php from CLI PHP results in displaying file a.php in a web page
A simple but efficient way to debug PHP code received from a web server by the user browser is to right-click the web page and select View Page Source (or similar) from the pop-up menu. As shown in Figure 2-3, a new tab opens with the evaluated PHP code.
Figure 2-3
The source code of the evaluated PHP code
As shown in the web page source resulting from the evaluated PHP code, just one user is currently logged in, and the username is included between the start/end bold tags in the body section of the HTML source code. Starting in the next section, all PHP examples will run through the web server. The Apache web server, introduced in the previous chapter, will be used here (starting in Chapter 5 you will use another open source web server, the Lighttpd).
Running Your First PHP Examples from the Web Server
You will now test PHP files evaluated by the PHP engine and dispatched by the Apache web server. The following examples show how variables are combines with strings and the difference between double and single quotes when used with strings. Also, I explain how you can mix JavaScript and PHP in the same command. Understanding those details in the source code is essential for understanding the web-based projects included in the rest of the book.
Working with Variables and Strings
First you’ll see how PHP strings and variables can be combined. Create a new file with a .php file extension in your document root directory.
$ cd /var/www/html
$ sudo gedit test.php
Enter the following source code that does not include any strings and save the test.php file:
<!DOCTYPE html>
<html>
<head>
<title>
Testing PHP
</title>
<style>
p {
font-size:24px;
color:blue;
</style>
</head>
<body>
<?php
// working with variables
$var1 = 5;
$var2 = 8;
$var3 = $var1 + $var2;
echo $var3;
?>
</body>
</html>
Test the PHP file by entering its URL in the address bar of your browser. If you test from the web server, use the following:
localhost/test.php
If you also test from the web server or from another computer of your LAN, you can use the following:
192.168.1.100/test.php
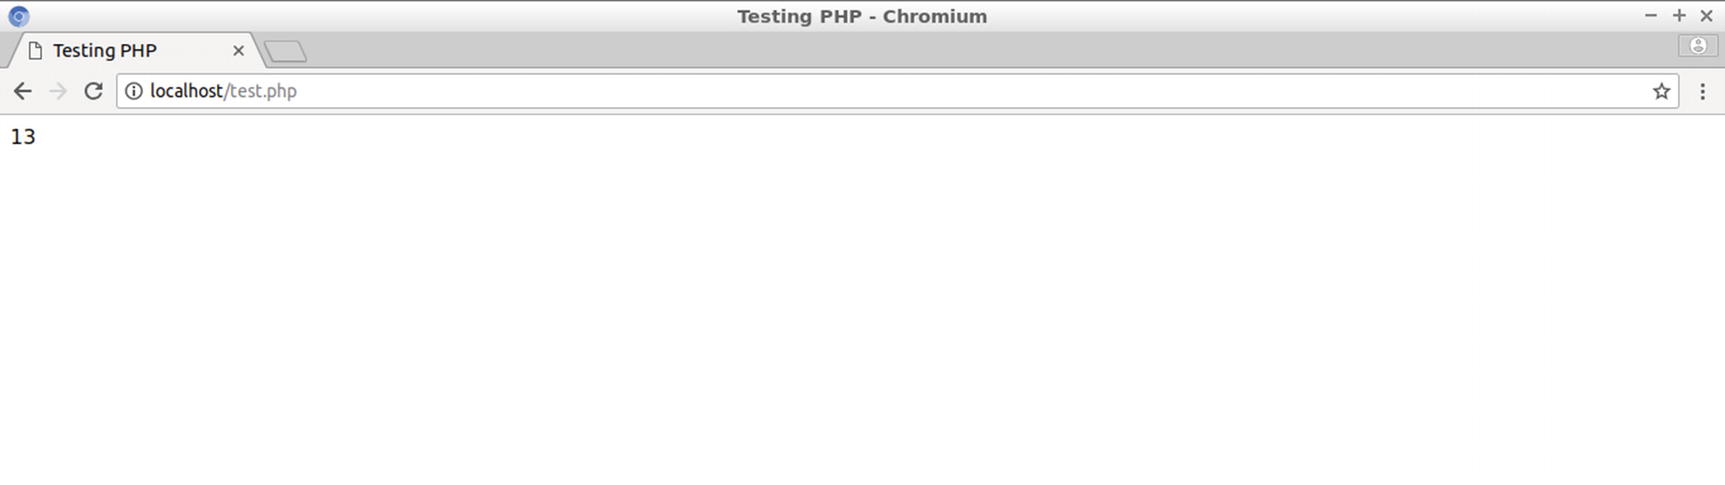
Here, 192.168.1.100 is the private IP address of the computer that hosts the web server. Figure 2-4 shows the web page downloaded to the browser.
Figure 2-4
The evaluated test.php web page
The PHP program uses three variables: $var1 and $var2 that are initialized to specific values, and $var3, whose value is calculated by the addition of the values of the previous two variables. The echo PHP command is used to output the $var3 variable’s value to the web page displayed in your browser. Also, a double forward slash (//) is used to mark a line as a comment. To include multiple continuous lines in a comment, use the slash and star notation, that is, /* for starting and */ for ending.
Notice that a variable name in PHP starts with the dollar sign ($). Prepending a variable with the dollar sign may look like overhead, but it is handy when you include the variable in a string. To display this feature, replace the previous PHP code in test.php with the following:
<?php
// working with variables
$var1 = 5;
$var2 = 8;
$var3 = $var1 + $var2;
echo "The sum of $var1 and $var2 is $var3";
?>
Strings in PHP can be included between double (") or single (') quotes. When a variable is inserted in a string with double quote delimiters, it is evaluated to its actual value. The web page in this example displays the following:
The sum of 5 and 8 is 13
This is not the case, however, when single quotes are used as string delimiters. Replace the previous PHP code in test.php with the following:
<?php
// working with variables
$var1 = 5;
$var2 = 8;
$var3 = $var1 + $var2;
echo 'The sum of $var1 and $var2 is $var3';
?>
The web page displays the following:
The sum of $var1 and $var2 is $var3
You can also use the concatenation operator (.) to concatenate strings and variables. Change the previous PHP code in test.php to the following:
<?php
// working with variables
$var1 = 5;
$var2 = 8;
$var3 = $var1 + $var2;
echo "The sum of " . $var1 . " and ". $var2 . " is " . $var3;
?>
The web page test.php evaluates now to the following:
The sum of 5 and 8 is 13
You can instead use single quotes to have the same effect.
<?php
// working with variables
$var1 = 5;
$var2 = 8;
$var3 = $var1 + $var2;
echo 'The sum of ' . $var1 . ' and ' . $var2 . ' is ' . $var3;
?>
Escaping Double or Single Quotes in PHP
To include double quotes in a string printed in the echo command without getting them mixed up with the message’s double quotes used as delimiters, you can prepend them with the backslash () character. This is referred as escaping the double quotes. Another method is to include the message with the double quote characters in single quote delimiters. For instance, the following PHP file source code allows the double quote to be included in the echo messages:
<?php
echo "This message includes a double quote(")<br>";
echo 'This message also includes a double quote(")<br>';
?>
Similarly, you can include single quotes in a string by escaping them with the backslash character in a single-quoted string or use double quotes as string delimiters. The following PHP example displays this technique:
<?php
echo 'This message includes a single quote(')<br>';
echo "This message also includes a single quote(')";
?>
Mixing JavaScript and PHP
While JavaScript is used for the client-side programming language and PHP is used for the server-side language, there are cases where HTML and JavaScript have to be mixed with PHP. This section outlines the general rules for mixing JavaScript, PHP, and HTML tags.
To start with, a PHP file may include HTML tags such as a common HTML file, for instance:
<!DOCTYPE html>
<html>
<head>
<style>
p{
font-size:24px;
}
</style>
</head>
<body>
<?php
echo "<p>Hello World!</p>";
?>
</body>
</html>
You can instead use a PHP file with HTML-free content like the following:
<?php
echo "Hello World!";
?>
A PHP file may also include JavaScript source code, as in the following example:
<script>
document.write("Hello ");
</script>
<?php
echo "World!";
?>
In the previous PHP file, the two source code blocks are not mixed, and both functions individually print their own part on the web page, with JavaScript running when the browser loads the page and PHP running before the web page is submitted to the user’s browser. Next you will see some cases where the PHP and JavaScript source code are mixed. As a general rule, HTML tags, like <script>, <style>, etc., may be included in a PHP file, however, not inside a PHP source code block, defined between the <php and ?> delimiters. Otherwise, the PHP code won’t run, and the evaluated web page will display an error message (HTTP error 500). The following example will run because the start and end script tags are outside the PHP block and the JavaScript commands are printed in their place with a PHP echo command:
<script>
<?php
echo '
alert("Hello World!");
';
?>
</script>
Also, the following source code snippet will run because all script tags are included in the echo PHP message, and therefore the whole script is printed to the web page when the PHP source code evaluates:
<?php
echo '
<script>
alert("Hello World!");
</script>
';
?>
In the next example, the source code will not run because the script’s start and end tags are included inside the PHP block, however, without being included in the echo command:
<?php
<script>
echo '
alert("Hello World!");
';
</script>
?>
In this book, you will see a lot of cases where you have to use PHP and JavaScript in the same command. For instance, sometimes a PHP variable needs to appear to the user in a pop-up window instead of being typed into the browser’s window with the echo command. With PHP belonging to the server side, you don’t give control to the user’s browser to create a pop-up window. You instead include JavaScript in the PHP evaluated page. The following PHP file contains PHP code in two blocks. In the first block, for simplicity, the variable $name is hardwired to a specific value, and in the second block, a PHP block is combined with JavaScript code as part of the alert() text so that the PHP variable $name appears in a pop-up window message:
<?php
$name = "Madison";
?>
<script>
alert("Hello <?php echo $name; ?> ");
</script>
Consider also the example where the pop-up window appears only if the value of $name is 'Jennifer'. In this case, the whole script needs to be conditionally included in the PHP source code, but it may never run.
<?php
$name = 'Susan';
if ($name === Susan) {
echo '
<script>
alert("Hello ' . $name . ' ");
</script>
';
} else {
echo 'Hello';
}
?>
In the previous example, for simplicity, the $name variable was hardwired to the source code instead of allowing for multiple values, e.g., values derived from an HTML form. Like with the script tag, PHP code can be mixed with other HTML tags.
Here’s an example of source code that won’t run:
<?php
<b>
echo "Hello World!";
</b>
?>
On the other hand, the following example runs as expected:
<b>
<?php
echo "Hello World!";
?>
</b>
Or you can also use the following:
<?php
echo "<b>Hello World!</b>";
?>
In the examples used in this section, the PHP program initialized the PHP variables to their values. Next you will use HTML forms that the site visitor uses to submit user-specific data to the web server and then set the PHP variables according to the user preferences.
Setting the PHP Variables with the GET Method
The most common way to allow the user to send data to the web server is to use an HTML form that implements the GET or POST method and also refers to the URL of the PHP program that receives and processes the user data from the action attribute of the form element. In the following example, you will create a web page that includes an HTML form with the method attribute set to GET. First create the HTML file get.html that includes a form to enable the user to insert numbers in two fields and also to select an arithmetic operator with a drop-down list. When the submit button is clicked, the user data is transmitted to the get.php program, which is located, as the relative URL of the action attribute indicates, on the web server that dispatched the current web page and in the same directory as the current web page.
Use the following commands to switch to the server’s document root and create the file get.html:
$ cd /var/www/html
$ sudo gedit get.html
Insert the following HTML source code:
<!DOCTYPE html>
<html>
<head>
<style>
input, select{
font-size:24px;
}
</style>
</head>
<body>
<form method="get" action="get.php">
<input type="number" name="n1">
<select name="operator">
<option value="add">+</option>
<option value="subtract">-</option>
<option value="multiply">*</option>
<option value="divide">/</option>
</select>
<input type="number" name="n2">
<input type="submit" value="Calculate">
</form>
</body>
</html>
Create the get.php file in the same directory.
$ sudo gedit get.php
Insert the following HTML source code that embeds the PHP source code:
<!DOCTYPE html>
<html>
<head>
<style>
p{
font-size:24px;
}
</style>
</head>
<body>
<p>
<?php
$num1 = $_GET["n1"];
$num2 = $_GET["n2"];
$operator = $_GET["operator"];
switch($operator) {
case "add":
echo $num1 + $num2;
break;
case "subtract":
echo $num1 - $num2;
break;
case "multiply":
echo $num1 * $num2;
break;
case "divide":
echo $num1 / $num2;
break;
}
?>
</p>
</body>
</html>
With the GET form method array $_GET, a global PHP variable is passed by the PHP engine to get.php, the PHP action program. The $_GET array elements consist of the data sent by the form. By using the name of the form’s element with $_GET as the index to submit a value, the specific value is returned. For instance, with the following command, the PHP variable $num1 gets the value submitted by the form’s field named n1:
$num1 = $_GET["n1"];
Similarly, the value entered by the user in the second field of the type number is assigned to the PHP variable $num2.
$num2 = $_GET["n2"];
The drop-down list of the form submits also a value that corresponds to one of the following arithmetic operators: addition (+), subtraction (-), multiplication (*), division (/). The user choice for the operator is then accessed with the PHP $operator variable as follows:
$operator = $_GET["operator"];
Next, $operator enters a PHP switch command that according to the $operator value performs the corresponding arithmetic operation between $num1 and $num2.
To test the client-server interaction of this example, use another computer in your LAN and enter the following in the browser’s address bar:
192.168.1.100/get.html
192.168.1.100 is in this example the private IP address of the computer that hosts your web server. Alternatively, you can test the example from the same computer where your web server resides by entering the following:
127.0.0.1/get.html
Fill in the fields of the form with numeric values and select an arithmetic operator. Figure 2-5 displays the web page get.html with the values 200 and 100 entered in the number fields and also the multiplication sign selected from the drop-down list. Click the Calculate button to submit the form data to get.php.
Figure 2-5
The web page get.html with the form fields completed
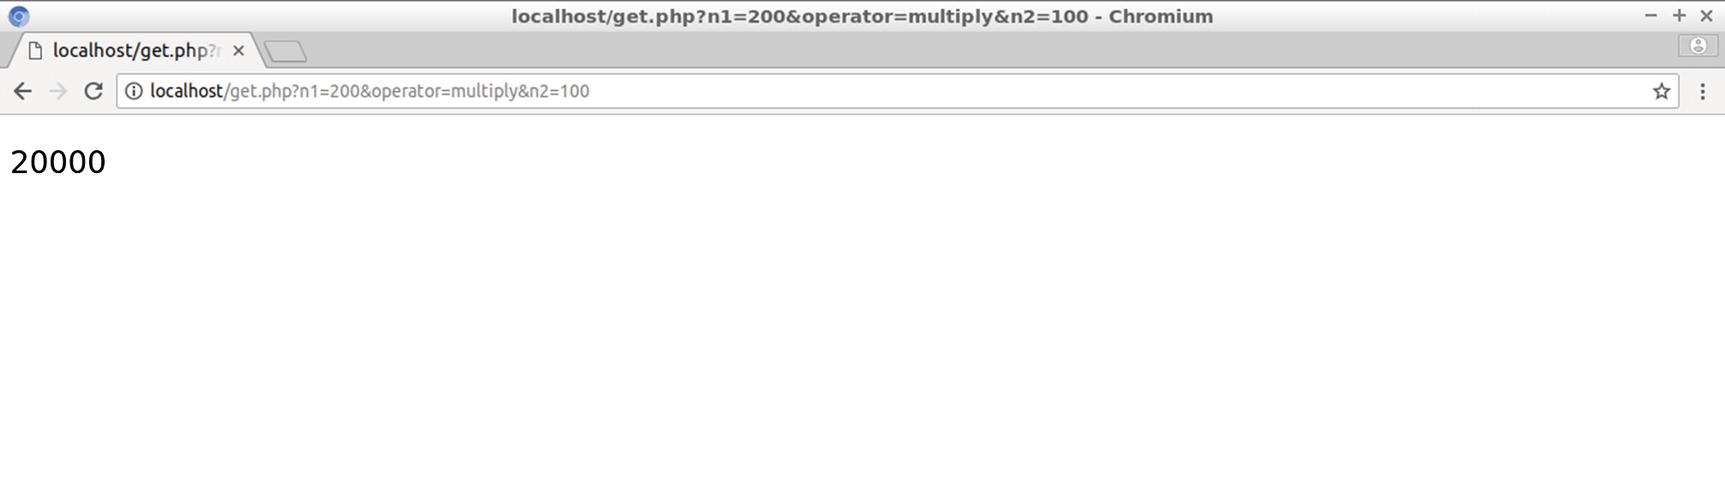
Figure 2-6 displays the web page resulting from the evaluation of get.php, the action program in the web server, that received the data from the get.html form. The PHP code multiplies the two numeric variables $num1 and $num2, and the result is printed with the echo command to the output returned by the web server to the client browser.
Figure 2-6
The evaluated get.php web page as it appears in the user browser
The data submitted by the user is appended as the query string in the URL. The query string, for this example, is as follows:
n1=200&operator=multiply&n2=100
This includes the name-value pairs of all form fields submitted to the server and comprises the info received by the PHP program, which is used to fill the $_GET array and provide the PHP program with the user-defined variables.
Setting the PHP Variables with the POST Method
Let’s now try the POST method of the form element, which is another option for submitting data to the web server. Create the file post.html as follows:
$ cd /var/www/html
$ sudo gedit post.html
Enter the following HTML source code, which differs from the get.html code only by the values of the form attributes method and action:
<!DOCTYPE html>
<html>
<head>
<style>
input, select{
font-size:24px;
}
</style>
</head>
<body>
<form method="post" action="post.php">
<input type="number" name="n1">
<select name="operator">
<option value="add">+</option>
<option value="subtract">-</option>
<option value="multiply">*</option>
<option value="divide">/</option>
</select>
<input type="number" name="n2">
<input type="submit" value="Calculate">
</form>
</body>
</html>
The method used is therefore POST, and the PHP file post.php is used to handle the user request. Create the file post.php also at the document root as follows:
$ cd /var/www/html
$ sudo gedit post.php
Enter the following source code and save the file:
<!DOCTYPE html>
<html>
<head>
<style>
p{
font-size:24px;
}
</style>
</head>
<body>
<p>
<?php
$num1 = $_POST["n1"];
$num2 = $_POST["n2"];
$operator = $_POST["operator"];
switch($operator) {
case "add":
echo $num1 + $num2;
break;
case "subtract":
echo $num1 - $num2;
break;
case "multiply":
echo $num1 * $num2;
break;
case "divide":
echo $num1 / $num2;
break;
}
?>
</p>
</body>
</html>
To test the client-server interaction of this example, use another computer in your LAN and in the browser’s address bar enter the following:
192.168.1.100/post.html
Here, 192.168.1.100 is the private IP address of the computer that hosts your web server. Alternatively, you can test the example from the same computer where your web server resides by entering the following:
127.0.0.1/post.html
Provide a numeric value for each of the two fields and choose also an arithmetic operator from the drop-down list. In Figure 2-7, the two form fields of the web page post.html are completed with the numeric values 3000 and 5, respectively, and the division operator is selected from the drop-down list.
Figure 2-7
The web page post.html with the form completed
Click the Calculate button. The form values are submitted to post.php. On the web server, the PHP engine is invoked, and the form values are retrieved from the global PHP variable $_POST, which is an array similar to $_GET with the values submitted from the form elements. The PHP source code performs the division between 3000 and 5. The result is output with the echo command to the web page, as displayed in Figure 2-8, and is sent back from the web server to the user.
Figure 2-8
The evaluated post.php web page as it appears in the user’s browser
Notice that in the address bar of your browser the URL remains the same. With the POST method, the data is not included in the URL of the HTTP request line, as with the method GET, but is rather appended to the body of the HTTP request sent to the web server. In the following section, another form is used to submit data to a PHP program on the server, and this process is compared with the JavaScript code that performs the corresponding calculation locally.
Running Client-Side vs. Server-Side Programs
You will next compare how server-side programs and client-side programs act, using JavaScript and PHP source code embedded in the same web page. Both languages are used to perform the same operation, specifically an arithmetic addition. JavaScript runs on the client side in the client’s browser and displays the web page. PHP runs on the server side since the addition is performed on the web server that provides the specific web page.
A simple pattern for defining the programming process is to input the data to the source code and output the results. With JavaScript, the web server submits the source code via the network, and then the input/output data is used locally on the client’s system. With PHP, the contrary applies: the client submits the data to the server, which makes the calculation remotely to the client, and the output is sent back to the client, as shown in Figure 2-9.
Figure 2-9
Defining the programming process
The JavaScript/PHP Addition Web Page
In this section, you’ll create two calculators, which for simplicity here only do addition, in the same web page, program.html. The first is a client-side calculator that runs JavaScript, and the second is a server-side calculator that runs PHP. At the Linux terminal, create program.html in the document root of the web server with the following terminal commands:
$ cd /var/www/html
$ sudo gedit program.html
In the gedit window, enter the following HTML page that embeds the PHP and JavaScript source code and save the file:
<!DOCTYPE html>
<html>
<head>
<title>Client side and Server side programs</title>
<style>
input{
font-size:24px;
text-align:right;
background-color:lime;
}
input[type="submit"] {
background-color:yellow;
color:lime;
}
button{
font-size:24px;
color:lime;
background-color:yellow;
}
span{
font-size:24px;
color:lime;
}
</style>
</head>
<body>
<div>
<span>Add using JavaScript: </span>
<input type="text" id = "t1" size=5>
<span>+</span>
<input type="text" id = "t2" size=5>
<button onclick="f1()">=</button>
<input type = "text" id = "t3" size=5>
</div>
<div>
<br>
<span>Add using PHP: </span>
var x = Number(document.getElementById("t1").value);
if (isNaN(x)) {
alert("Please enter a number");
return false;
}
var y = Number(document.getElementById("t2").value);
if (isNaN(y)) {
alert("Please enter a number");
return false;
}
var z = x + y;
document.getElementById("t3").value = z;
}
</script>
</body>
</html>
The HTML file is used to perform addition in two ways: by using JavaScript and by using PHP. For JavaScript, the fields t1 and t2 are used to fill the operands and t3 is used to output the sum. When the button with the equal sign is clicked, the calculation is performed. This button is assigned function f1() for handling the onclick event. The JavaScript section implements function f1(). This routine sets the JavaScript variable x to the current value of the element t1 (the first textbox) and sets the JavaScript variable y to the current value of the element t2 (the second textbox). The JavaScript function Number() is then used to convert the textbox value to a numeric value. Without using Number(), the value 5 would represent the character 5, and the addition 5+5 would result in 55. Because with JavaScript the calculation is performed locally in the browser, no data is transferred to and from the web server, and therefore when using JavaScript, the URL never changes.
The second way to do the addition is to use PHP. With PHP the values of textboxes t4 and t5 are transferred to the web server via a form submission when the submit button is clicked. The submit button looks like the equal button from the JavaScript technique, but it functions by sending the data to the web server contrary to the JavaScript button that invokes a function to make the calculation locally. The program that receives the data on the web server is determined by the value of the action attribute of the form. This is set to addition.php, which is a PHP file that should be found in the document root of the web server, as indicated by the relative URL that includes only the file name.
Create this program with the following command:
$ sudo gedit addition.php
In the gedit window, enter the following source code and click the Save button:
<!DOCTYPE html>
<html>
<head>
<style>
body{
background-color:lime;
font-size:24px;
}
</style>
</head>
<body>
<?php
$x = $_GET["t4"];
$y = $_GET["t5"];
$z = $x + $y;
echo $z;
?>
</body>
</html>
The PHP file addition.php includes a PHP block where the value sent by textbox t4 is retrieved from the $_GET[] global PHP array, and it is assigned then to the PHP variable $x. Similarly, the value sent by textbox t5 is stored in the PHP variable $y. Next, $x and $y are added together, and the result is assigned to the variable $z. The value of $z is printed with the echo command to the web page sent back to the browser.
To try the calculators, enter the following URL in your browser’s address bar:
localhost/program.html
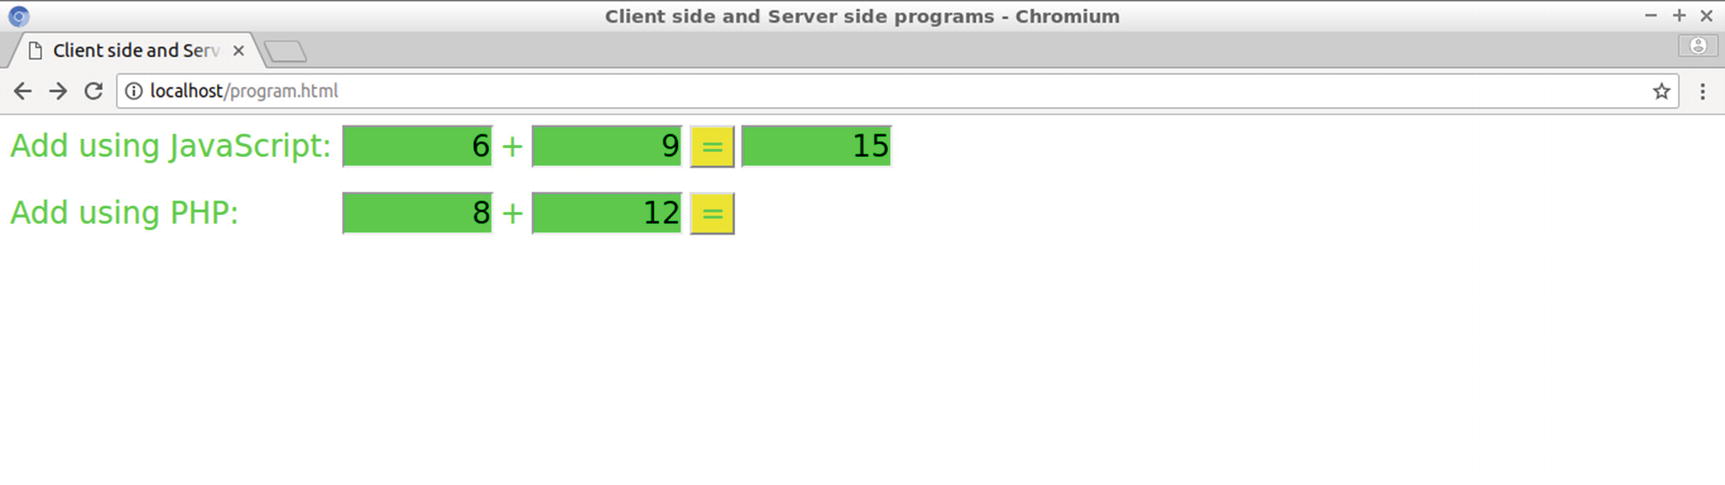
On the web page you can test the JavaScript code first. In the example in Figure 2-10, the result of adding 6 and 9 appears when the first equal sign button is clicked.
Figure 2-10
Performing the addition locally with the JavaScript calculator
Test the PHP addition next. Enter two numbers in the PHP fields. In the example in Figure 2-9, the numbers 8 and 12 were entered. Click the button with the equal sign, which is an HTML form submit button. The evaluated source code of the action file, addition.php, appears, as shown in Figure 2-11.
Figure 2-11
The result of the PHP addition as returned from the web server
In the case of JavaScript, the source code is executed locally on the same computer, and the web page remains the same. For the PHP code, the code is executed in the web server, and the reply is submitted to the client with a new page. In the previous example, it may look like an unfair comparison because PHP provides the result in a web page that is not consistent with the initial one. With the next versions of the files program.html and addition.php, this can be fixed.
The Second Version of the JavaScript/PHP Addition Web Page
Create a file called program2.html with gedit or any other text editor. Enter the following source code in program2.html:
<!DOCTYPE html>
<html>
<head>
<title>Client side and Server side programs</title>
<span>Add using PHP: </span>
<input type="text" name="t4" size=5>
<span>+</span>
<input type="text" name="t5" size=5>
<input type="submit" value="=">
<input type="text" name="t6" size=5>
</form>
</span>
</div>
<script>
function f1() {
var x = Number(document.getElementById("t1").value);
if (isNaN(x)) {
alert("Please enter a number");
return false;
}
var y = Number(document.getElementById("t2").value);
if (isNaN(y)) {
alert("Please enter a number");
return false;
}
var z = x + y;
document.getElementById("t3").value = z;
}
</script>
</body>
</html>
The HTML file program2.html differs from program.html because of the value of the action attribute of the form element. Instead of addition.php, the program addition2.php is used. But there is another difference as well: the first three textboxes, t1, t2, and t3, used for the JavaScript section now use a name attribute, which will be used to transfer their values to the web server when the submit button is clicked. Those values will not be used for any calculation by the PHP web server program, addition2.php, but the values will be submitted to the addition2.php source code to be returned as values in the corresponding textboxes in the evaluated page. Thus, a continuity will be retained with the state of the original page, program2.html.
Create a file named addition2.html in the document root of your server with the following commands:
$ cd /var/www/html
$ sudo gedit addition2.php
Enter the following code and save the file:
<!DOCTYPE html>
<html>
<head>
<title>Client side and Server side programs</title>
<input type = "text" id="t3" name = "t3" size=5 value = "<?php echo $t3 ?>" >
</div>
<br>
<div>
<span>Add using PHP: </span>
<input type = "text" name = "t4" size=5 value = "<?php echo $t4 ?>" >
<span>+</span>
<input type = "text" name = "t5" size=5 value = "<?php echo $t5 ?>" >
<input type="submit" value="=">
<input type = "text" name = "t6" size=5 value = "<?php echo $t6 ?>" >
</div>
</form>
<script>
function function1() {
var x = Number(document.getElementById("t1").value);
if (isNaN(x)) {
alert("Please enter a number");
return false;
}
var y = Number(document.getElementById("t2").value);
if (isNaN(y)) {
alert("Please enter a number");
return false;
}
var z = x + y;
document.getElementById("t3").value = z;
}
</script>
</body>
</html>
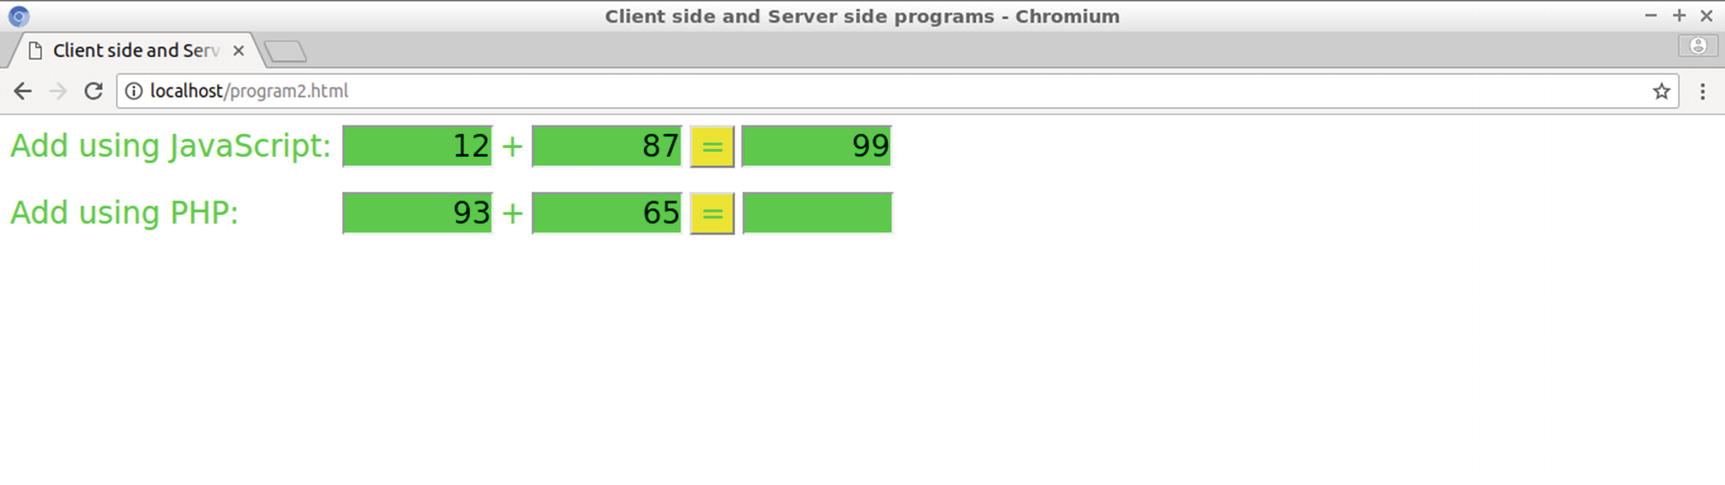
In this new version of the PHP file, the result of the PHP addition appears as the value of a new textbox, named t6, visually simulating the JavaScript calculator. You can test both calculators in this new version. As displayed in Figure 2-12, the fields of the JavaScript calculator reflect the addition previously issued, and in the PHP calculator the operand fields are set for the addition.
Figure 2-12
The web page program2.html before submitting the form
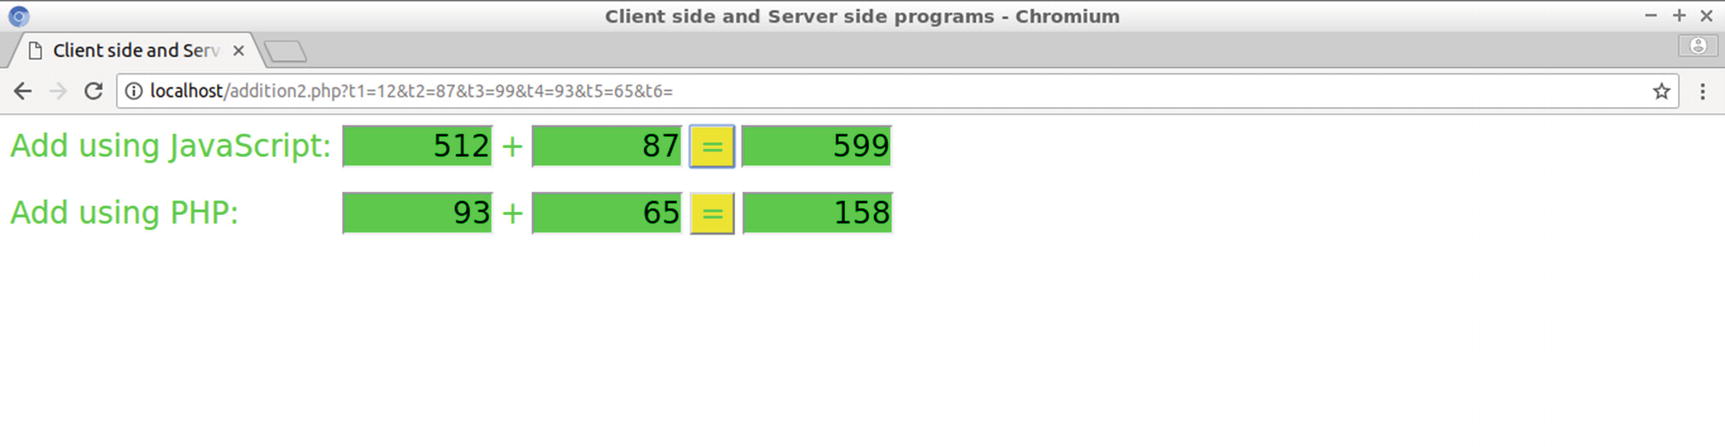
After clicking the submit button, the result appears in the evaluated addition2.php web page. As displayed in Figure 2-13, addition2.php has the same look and feel as the previous web page, program2.html. Moreover, all textbox values from both JavaScript and PHP sections are retained.
Figure 2-13
The evaluated web page addition2.php when the form is submitted
This is achieved with the following PHP block:
<?php
if (isset($_GET["t1"])){
$t1 = $_GET["t1"];
}
if (isset($_GET["t2"])){
$t2 = $_GET["t2"];
}
if (isset($_GET["t3"])){
$t3 = $_GET["t3"];
}
if (isset($_GET["t4"])){
$t4 = $_GET["t4"];
}
if (isset($_GET["t5"])){
$t5 = $_GET["t5"];
}
if (isset($t4) && isset($t5)){
$t6 = $t4 + $t5;
}
?>
In the previous PHP block, the values of the JavaScript textboxes, t1, t2, and t3, are submitted along with two of the values of the PHP section, t4 and t5. The value for the result of the PHP section, appearing in t6, is calculated next from the values of t4 and t5. Function isset() is used to check whether a variable is set.
To return the values of t1 up to t6 in the corresponding textboxes, an echo command is included for each text input element in a separate PHP block. For instance, for t1, its last value, maintained in the PHP code in variable $t1, is printed in the first textbox with the following PHP block contained in the input element:
<input type = "text" id="t1" name = "t1" size=5 value = "<?php echo $t1 ?>" >
The previous input tag processed by the PHP engine, for instance when t1 currently has the value 12, is as follows:
<input type = "text" id="t1" name = "t1" size=5 value = "12" >
This value, carried to the server side and returned to the client side, is maintained to retain the state of the two calculators.
To enable the evaluated page to use the JavaScript calculator, the script of program2.html is also included in addition2.php.
<script>
function function1() {
var x = Number(document.getElementById("t1").value);
if (isNaN(x)) {
alert("Please enter a number");
return false;
}
var y = Number(document.getElementById("t2").value);
if (isNaN(y)) {
alert("Please enter a number");
return false;
}
var z = x + y;
document.getElementById("t3").value = z;
}
</script>
Figure 2-14 shows the results. You can access the JavaScript fields in addition2.php to make further local additions.
Figure 2-14
The new version addition2.php enables both remote PHP additions and local JavaScript additions
Next you’ll create the final version of this site.
The Third Version of the JavaScript/PHP Addition Web Page
Since addition2.php evaluates to the program2.php web page that submits the data, program2.php can be completely omitted from the site. Therefore, the only PHP file required, addition.php, can replace program2.php as the home directory of the site. The following URL will be used:
localhost/addition2.php
In the following section, you will create a site that validates promotional codes dispatched from an HTML form and uses PHP to validate the data submitted by this form.
Form Validation with PHP
So far you have used HTML and JavaScript to validate a web page. Another option you have is to use PHP. With PHP you validate the web page remotely. To test this scheme, create a new PHP site that simulates a scenario where promotional codes are redeemed so that the user can win free products. At the Linux terminal, create the validate.php file in the document root of the web server.
$ cd /var/www/html
$ sudo gedit validate.php
Enter the following source code and save the file:
<html>
<head>
<title>PHP Form Validation</title>
<style>
h1{
color:orange;
}
.error{
color:red;
font-size:20px;
}
label{
color:blue;
font-size:24px;
}
input{
color:blue;
font-size:24px;
background-color:orange;
}
</style>
</head>
<body>
<?php
$errormsg1="";
$errormsg2="";
$errormsg3="";
$valid1=false;
$valid2=false;
$valid3=false;
if (isset($_POST['submit']))
{
$name=$_POST["name"];
$email=$_POST["email"];
$code=$_POST["code"];
if(empty($name) || is_numeric($name))
{
$errormsg1.='<p class="error">* Please enter a valid name.</p>';
$valid1=false;
}
else
{
if(is_string($name))
$valid1=true;
else
{
$errormsg1.='<p class="error">* Please use valid characters.</p>';
$valid1=false;
}
}
if(empty($email) || is_numeric($email))
{
$errormsg2.='<p class="error"> * Please enter your e-mail.</p>';
$valid2=false;
}
else
{
if(is_string($email))
$valid2=true;
else
{
$errormsg2.='<p class="error">* Please use valid characters.</p>';
$valid2=false;
}
}
if(empty($code))
{
$errormsg3.='<p class="error">* Please enter your code number.</p>';
$valid3=false;
}
else
{
$len=strlen($code);
if($len==10)
$valid3=true;
else
{
$errormsg3.='<p class="error">* Code should be in alphabetic letters and numerical digits format with 10 characters in it.</p>';
As displayed in Figure 2-15, validate.php creates a web page that includes a form with three fields and a submit button, with the caption Go.
Figure 2-15
The web page created by validate.php
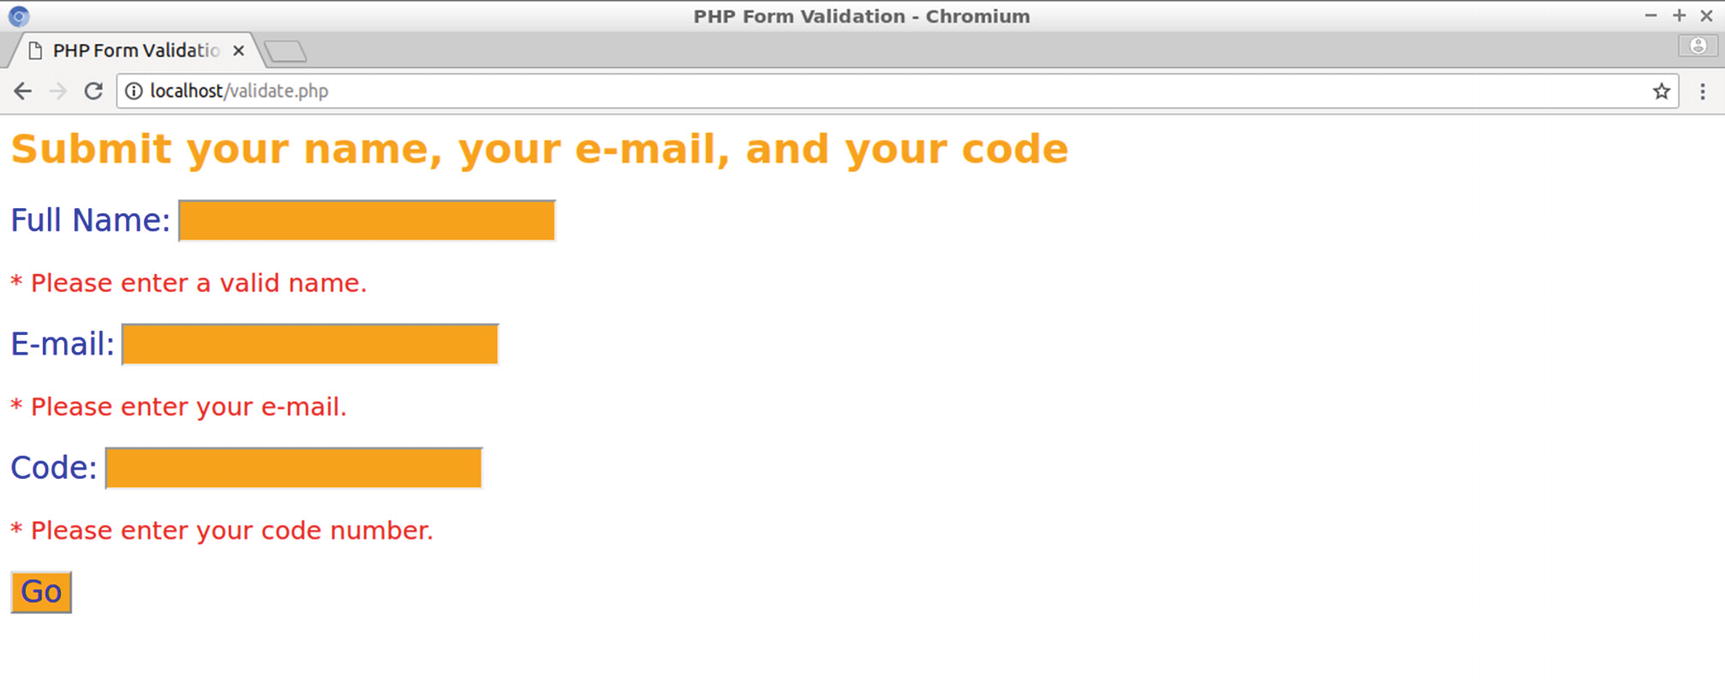
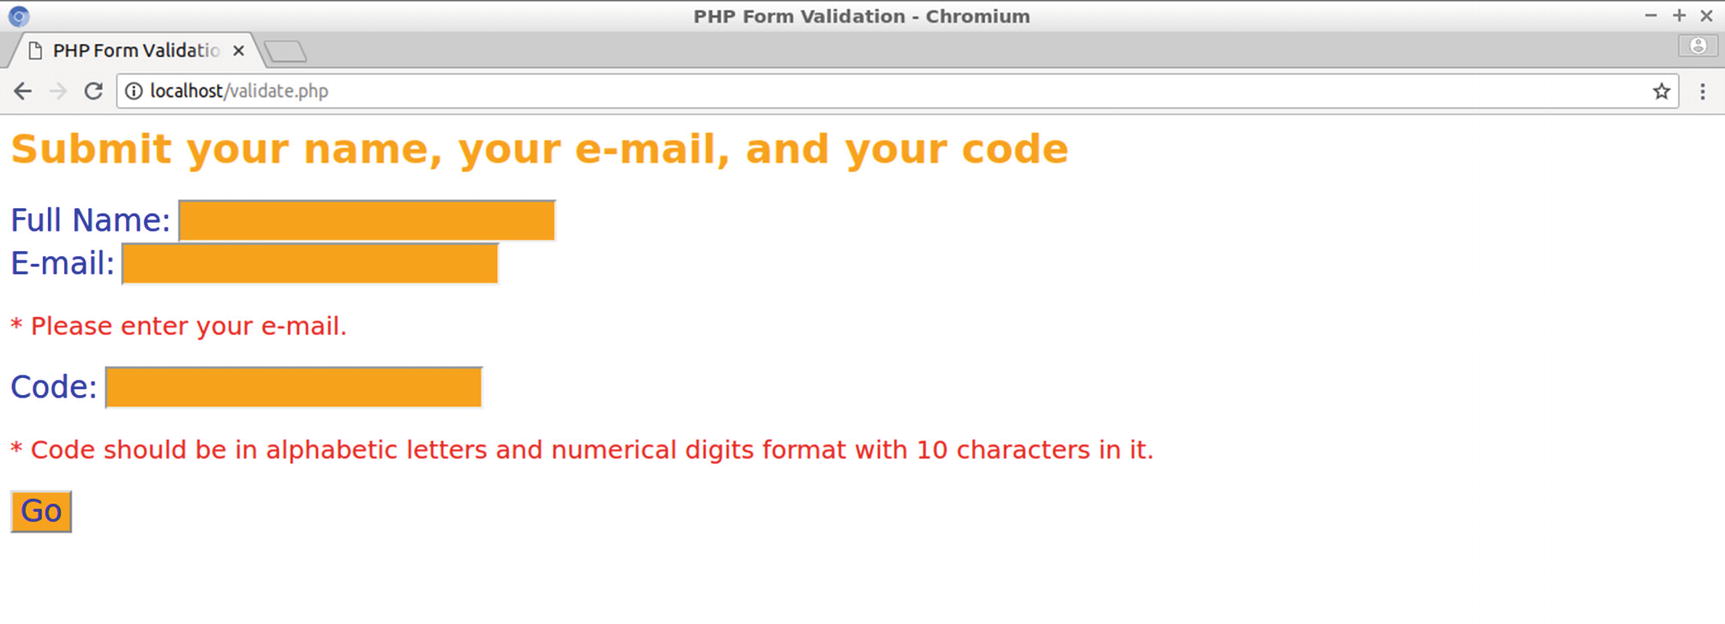
For this form, all fields are required to be filled in, and the code must be an alphanumeric string of 10 characters. Figure 2-16 displays the error messages generated by the PHP code when the user clicks the Go button without completing all the fields.
Figure 2-16
The error messages displayed in the web page when fields are incomplete
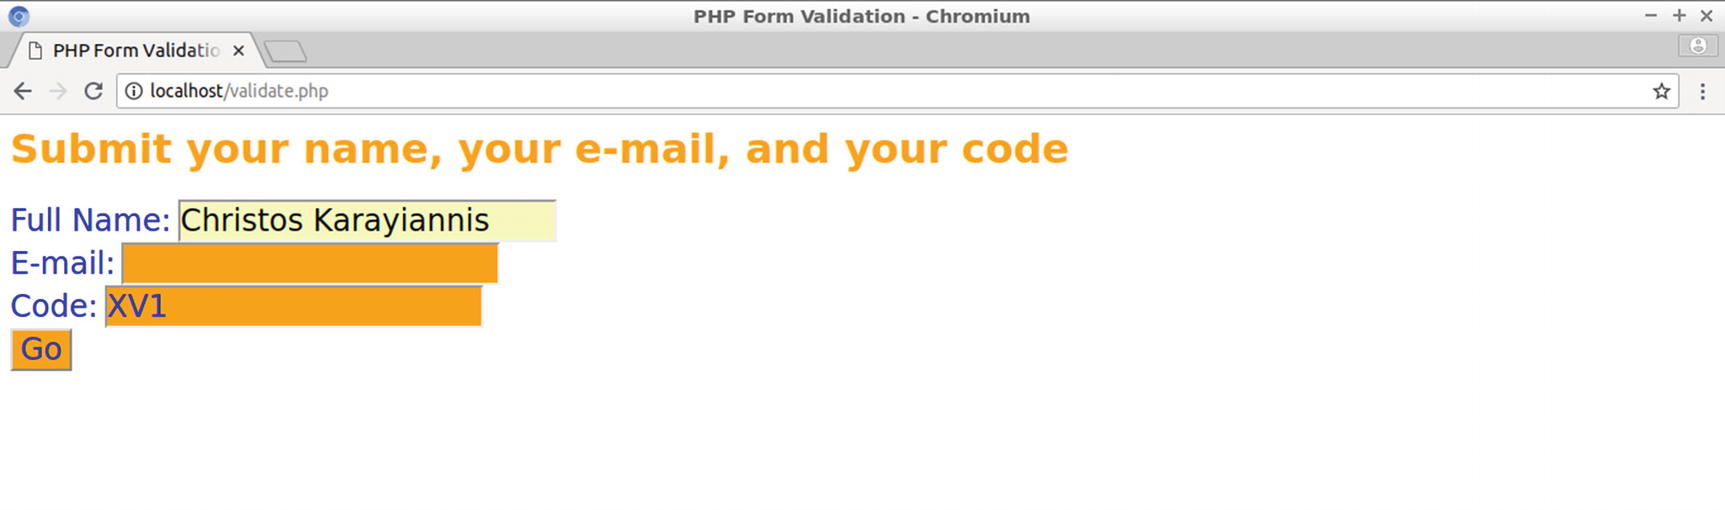
Test the form by completing just two of the fields, e.g., Full Name and Code, with the latter including only three characters. Figure 2-17 displays an example. Click the Go button.
Figure 2-17
Testing the form with only two fields completed
The PHP source code validates the form according to the rule set and displays two warnings, one for the empty field and one for the length of the string entered in the Code textbox. Figure 2-18 displays the warnings.
Figure 2-18
The warnings displayed for the entries of Figure 2-16
In the following section, I’ll discuss the PHP source code for the form validation.
The validate.php Source Code Commentary
The Go button of the form, which is of type submit, relays the data to the PHP file indicated by the value of the form’s action attribute. This is set to $_SERVER["PHP_SELF"], which is another variable of the global PHP $_SERVER[] array. This value is filled by the PHP engine on the fly relative to the document root path of the current file, for this example /validate.php. Notice that the action attribute of the form is set as follows:
The value of the action is enclosed in the PHP tags so that the value of
htmlspecialchars($_SERVER["PHP_SELF"])
is actually printed as the action’s value. Function htmlspecialchars() is used to sanitize the file’s pathname so that symbols like the double quote (") is converted to ", which is the equivalent HTML entity. The purpose of this is to avoid a possible $_SERVER["PHP_SELF"] exploit, which is a cross-site scripting (XSS) exploit, where a hacker injects JavaScript code into web pages viewed by other users.
At the beginning of the PHP source code, three fields are evaluated. For instance, consider the following validation code for the value of the first field sent as $_POST["name"]:
if (isset($_POST['submit']))
{
$name=$_POST["name"];
$email=$_POST["email"];
$code=$_POST["code"];
if(empty($name) || is_numeric($name))
{
$errormsg1.='<p class="error">* Please enter a valid name.</p>';
$valid1=false;
}
else
{
if(is_string($name))
$valid1=true;
else
{
$errormsg1.='<p class="error">* Please use valid characters.</p>';
$valid1=false;
}
}
With function isset(), it is ensured that the evaluation takes place only when the submit button is clicked and the submit method is POST. Otherwise, the fields would get evaluated even before the user had the chance to fill them.
if (isset($_POST['submit']))
The variables $valid1, $valid2, and $valid3 are used as flags to signal a valid (true) or an invalid (false) value for the first, second, and third fields, respectively. Also, the variables $errormsg1, $errormsg2, and $errormsg3 are used to specify the appropriate error message for the first, second, and third fields, respectively. For instance, with the following commands, errormsg3 appears when the value of the code does not have a length of ten characters:
if($len==10)
$valid3=true;
else
{
$errormsg3.='<p class="error">* Code should be in alphabetic letters and numerical digits format with 10 characters in it.</p>';
The concatenating assignment operator (.=) is a PHP string operator that appends the argument on the right side to the argument on the left side.
The form submits to the same PHP file, where it is included, while the user does not provide the expected values, thus allowing for validating the form. When all three fields are filled with valid values, the following if condition holds true and the header() function runs:
The header() function, which sends raw HTTP headers, is used here with the Location HTTP header. This function redirects the browser to the URL indicated by the Location value. In this example, the value includes the attached query string with the variable-value pairs required to be forwarded to the destination file, process.php. Thus, the function header() provides the escape mechanism to validate.php to break out of the loop of continuously submitting data to itself.
Create the file process.php in the document root with the following commands:
$ cd /var/www/html
$ sudo gedit process.php
Enter the following source code and save the file:
<html>
<head>
<title>Code evaluation</title>
<style>
p{
color:green;
font-size:32px;
}
</style>
</head>
<body>
<p>
<?php
$var=$_GET['code'];
$var2=$_GET['name'];
$var3=$_GET['email'];
if(isset($var) && $var == 'SX1DF908RW')
{
echo nl2br("$var2 congratulations you have entered the lucky code: $var
You have won one T-shirt. We will contact you soon.");
// Save the user's e-mail for contacting him/her
$filename = "code.txt";
$handle = fopen($filename, "w") or die(" Unable to open file!");
if ($handle)
{
fwrite($handle, $var2);
fwrite($handle, PHP_EOL);
fwrite($handle, $var3);
fwrite($handle, PHP_EOL);
fclose($handle);
}
}
else
{
echo "You didn't win, please try another time!";
}
?>
</p>
</body>
</html>
The three variable values submitted (code, name, and email) from header() in file validate.php are now retrieved as var, var2, and var3, respectively. The following if condition looks for the lucky code:
if(isset($var) && $var == 'SX1DF908RW')
If the condition is true, the following message is returned to the browser:
echo nl2br("$var2 congratulations you have entered the lucky code: $var
You have won one T-shirt. We will contact you soon.");
The function nl2br() is used to translate escape characters to their meaning; for instance, is treated now as a newline.
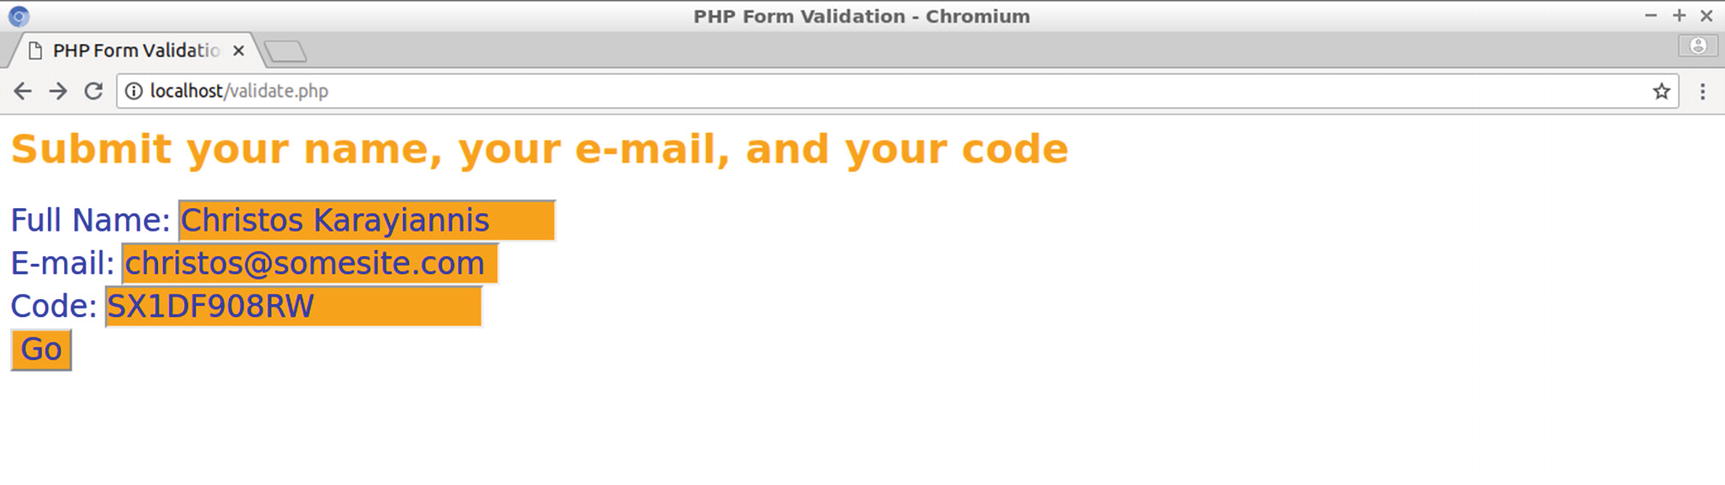
Test the validate.php form by providing the correct code, SX1DF908RW, as shown in Figure 2-19.
Figure 2-19
The validate.php form filled with the correct code
Click the Go button. The form is submitted, and the browser redirects to process.php, which displays the message shown in Figure 2-20 to the client browser.
Figure 2-20
The message displayed from process.php for the correct code
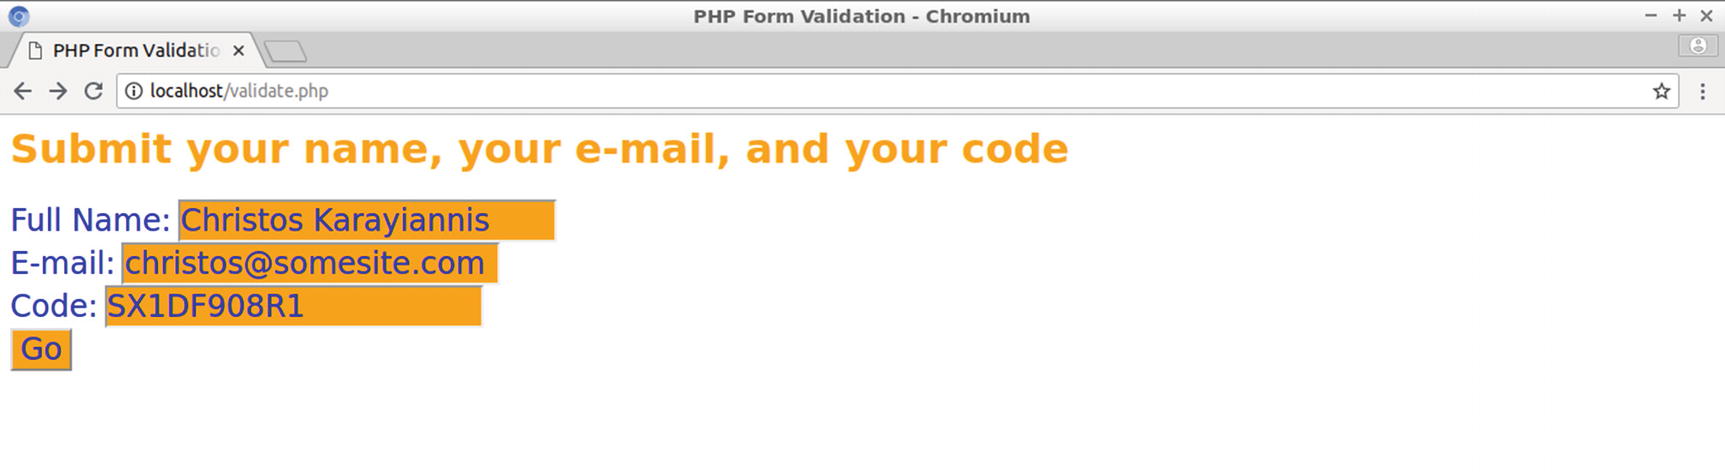
Try validating validate.php with a wrong code, as displayed in Figure 2-21.
Figure 2-21
Testing validate.php with a wrong code
Click the Go button to redirect to process.php. The message displayed to the client’s browser is shown in Figure 2-22.
Figure 2-22
The reply viewed in the user’s browser for a wrong code
Let’s not forget the promise to get back to the user. To save the visitor’s details, the PHP source code is used to provide the interface between the web server and the local filesystem. A new file called code.txt is required to store the winner’s personal details: the full name and the e-mail. With the following PHP code file, code.txt is used to store this information. The file handle $handle is created with fopen(), which in this example is used for writing (w mode) to the file, with the name indicated in the value of $filename. The function fwrite() is used twice to fill the winner’s name and e-mail and also the PHP_EOL value between. This inserts a line break.
// Save the user's e-mail for contacting him/her
$filename = "code.txt";
$handle = fopen($filename, "w") or die(" Unable to open file!");
if ($handle)
{
fwrite($handle, $var2);
fwrite($handle, PHP_EOL);
fwrite($handle, $var3);
fwrite($handle, PHP_EOL);
fclose($handle);
}
To enable the web server (and the PHP engine) to access file code.txt, create it first with the touch command and then change its ownership to belong to the user www-data, a member of the group www-data, which is the user assumed by the web server. At the command line, enter the following:
Figure 2-23 displays the content of code.txt, including the personal details for the user who provided the correct code.
Figure 2-23
The personal details of the winner stored in file code.txt
The user’s personal details are thus saved for contacting the user to claim their prize.
Summary
In this chapter, you saw some examples of the Apache web server utilizing the PHP engine to create programs that run on the server side, and you implemented similar-functioning programs with JavaScript that run on the client side. You also created a site where the form data was validated with PHP, and also PHP code was used to redirect to another web page and to interface the web server with the filesystem. In the following chapter, you will continue to use PHP in combination with the GeoIP geolocation module that you set up for Apache so that information about a visitor’s location can be retrieved and used from the PHP source code on the site’s web pages. But first you will set up your router to officially assign the Apache host as the web server of your LAN and thus enable your site to be accessible from the whole Internet.