© Christos Karayiannis 2019
Christos KarayiannisWeb-Based Projects that Rock the Classhttps://doi.org/10.1007/978-1-4842-4463-0_6

6. The MySQL Database Server

Christos Karayiannis1 
(1)
Karditsa, Thessaloniki, Greece
 

With PHP you can enable the web server to interface with any other program. One of the most commonly used applications for interfacing with a web server is a database server. With a database connection to the web server, your site can search the data of the database system and thus offer dynamic content. There is a large list of database systems to choose from. In this chapter, you will download and start using one of the most common ones, MySQL, which is a relational database that utilizes the Structured Query Language (SQL). SQL is the most widespread set of instructions used to set up and query a database system.

In this chapter, you will use some basic SQL commands to create and manage a MySQL database and to create a shell script to automatically feed a MySQL database with data collected from a web site, a process that is often called web scraping .

Installing and Testing MySQL

Use the following command at the Linux terminal to download the MySQL database system:
$ sudo apt-get install mysql-server mysql-client
The mysql-server package will install the MySQL database server, which you can interact with from the terminal by using the mysql command from the mysql-client package . During the installation process, the dialog shown in Figure 6-1 appears, and you are prompted to enter a password for the MySQL administrator user, named root. In the examples used in this book, no password was provided for accessing the MySQL server, and the password value in the source code examples is an empty string. Likewise, you can leave the password field blank and just press the Enter key.
../images/468152_1_En_6_Chapter/468152_1_En_6_Fig1_HTML.jpg
Figure 6-1

The first dialog of the MySQL installation process prompts you for a password

A second window appears for the password confirmation. If you did not enter a password previously, leave the field in this window empty and press Enter again.

The installation process continues, with information displayed in the terminal until completion.

To find out the status of the MySQL server, use the following command:
$ service mysql status
Some sample output of this command indicating that MySQL is up and running is shown here:
   Loaded: loaded (/lib/systemd/system/mysql.service; enabled; vendor preset: enabled)
   Active: active (running) since Sun 2018-08-19 13:23:05 EEST; 3min 3s ago
  Process: 662 ExecStartPost=/usr/share/mysql/mysql-systemd-start post (code=exited, status=0/SUCCESS)
  Process: 608 ExecStartPre=/usr/share/mysql/mysql-systemd-start pre (code=exited, status=0/SUCCESS)
 Main PID: 661 (mysqld)
    Tasks: 28 (limit: 4915)
   CGroup: /system.slice/mysql.service
           └─661 /usr/sbin/mysqld
Aug 19 13:22:50 pc systemd[1]: Starting MySQL Community Server...
Aug 19 13:23:05 pc systemd[1]: Started MySQL Community Server.

Press Q (quit) on the keyboard to exit the command and release the terminal.

Like with Apache and Lighttpd, to stop the MySQL server and then start it again, use the following commands at the terminal:
$ sudo service mysql stop
$ sudo service mysql start
To connect to the MySQL server, you can use the mysql client program. At the Linux terminal, enter the following command:
$ mysql –u root
A welcome message along with some basic information is output to the terminal. Also, the MySQL prompt appears instead of the shell’s prompt, indicating that you are connected to the MySQL server, ready to send SQL commands.
Welcome to the MySQL monitor.  Commands end with ; or g.
Your MySQL connection id is 36
Server version: 5.7.22-0ubuntu0.17.10.1 (Ubuntu)
Copyright (c) 2000, 2018, Oracle and/or its affiliates. All rights reserved.
Oracle is a registered trademark of Oracle Corporation and/or its
affiliates. Other names may be trademarks of their respective owners.
Type 'help;' or 'h' for help. Type 'c' to clear the current input statement.
mysql>
This message notes that you can use the command help or its corresponding shortcut (h) to list all the available commands. Run help as a first command.
mysql> help
The output of help displays the commands that mysql interprets, shown here:
List of all MySQL commands:
Note that all text commands must be first on line and end with ';'
?         (?) Synonym for `help'.
clear     (c) Clear the current input statement.
connect   ( ) Reconnect to the server. Optional arguments are db and host.
delimiter (d) Set statement delimiter.
edit      (e) Edit command with $EDITOR.
ego       (G) Send command to mysql server, display result vertically.
exit      (q) Exit mysql. Same as quit.
go        (g) Send command to mysql server.
help      (h) Display this help.
nopager   ( ) Disable pager, print to stdout.
notee     ( ) Don't write into outfile.
pager     (P) Set PAGER [to_pager]. Print the query results via PAGER.
print     (p) Print current command.
prompt    (R) Change your mysql prompt.
quit      (q) Quit mysql.
rehash    (#) Rebuild completion hash.
source    (.) Execute an SQL script file. Takes a file name as an argument.
status    (s) Get status information from the server.
system    (!) Execute a system shell command.
tee       (T) Set outfile [to_outfile]. Append everything into given outfile.
use       (u) Use another database. Takes database name as argument.
charset   (C) Switch to another charset. Might be needed for processing binlog with multi-byte charsets.
warnings  (W) Show warnings after every statement.
nowarning (w) Don't show warnings after every statement.
resetconnection(x) Clean session context.
For server side help, type 'help contents'
Test, for instance, the system command, which executes shell commands, with the terminal command clear.
mysql> system clear

The terminal clears with the mysql prompt ready to accept the next command.

To end the MySQL session and return to the Linux terminal, type the exit command.
mysql> exit

With these commands, you can start and exit the MySQL client and also view and run the set of the available commands that mysql interprets. Next, you will learn about the SQL statements that mysql issues to the MySQL server to create and manage a database.

Creating Your First MySQL Database

Start the mysql client to connect to the server so you can create and use your first database. In this section, you will design the tables included in this database, you will define the relationships between the tables, and then you will use the tables to enter your data. You will then be able to issue database queries on the table data and generate results.

First connect to the MySQL server by using mysql at the Linux terminal.
$ mysql –u root
Welcome to the MySQL monitor.  Commands end with ; or g.
Your MySQL connection id is 3
Server version: 5.7.22-0ubuntu0.17.10.1 (Ubuntu)
Copyright (c) 2000, 2018, Oracle and/or its affiliates. All rights reserved.
Oracle is a registered trademark of Oracle Corporation and/or its affiliates. Other names may be trademarks of their respective owners.
Type 'help;' or 'h' for help. Type 'c' to clear the current input statement.
mysql>
To create a new database named library, enter the following create database SQL statement and press Enter:
mysql> create database library;
MySQL server responds with the following message:
Query OK, 1 row affected (0.00 sec)

Hint!

Each MySQL command requires a semicolon (;) to indicate the ending. Some SQL databases require the commands to be inserted in uppercase characters (e.g., CREATE DATABASE library;). The MySQL syntax used here does not require uppercase.

To view all the databases included so far, use the show databases statement .
mysql> show databases;
The command’s output indicates that your new database is added in the default set of the five databases. The MySQL server already includes the following:
+--------------------+
| Database           |
+--------------------+
| information_schema |
| apress             |
| library            |
| mysql              |
| performance_schema |
| sys                |
+--------------------+
6 rows in set (0.00 sec)
You can delete the new database at any time, regardless of whether it is empty or filled with data, using the drop database statement.
 mysql> drop database library;

If you test drop at this time, make sure to repeat the previous create command to re-create the database.

Creating and Deleting Tables of Your Database

To start working with the new database, you have to define that the commands that will follow will refer to that specific database. The use SQL statement indicates the database that will be used for the commands that follow, up to the point where another use is typed.
mysql> use library;
You’ll now create your first table for the database. For each table that will be included in the database, the column (field) names and the types of data inserted to the columns must be defined at creation time. For instance, for the first table of library, called author, the author’s name and the author’s country will be defined as the table’s columns. To create table author, enter the following at the mysql prompt:
mysql> CREATE TABLE author (name VARCHAR(30), country CHAR(2));
The MySQL server responds with an OK message.
Query OK, 0 rows affected (0.43 sec)

The first column, called name, is of type VARCHAR, which means it’s a string of characters with a variable length. You allocate the maximum number of characters for the value in parentheses. In this example, the author’s name can be up to 30 characters. The second column is of type CHAR, also a string of characters but with a fixed length. The length in this example is specified in the parentheses as 2, which means the author’s country will always be inserted as two characters. This is sufficient because the country column value will be provided as the ISO 3166-1 alpha two-character code, e.g., uk.

To print an overview of the table’s structure, enter the following:
mysql> describe author;
MySQL responds with a description of the table’s columns, shown here:
+---------+-------------+------+-----+---------+-------+
| Field   | Type        | Null | Key | Default | Extra |
+---------+-------------+------+-----+---------+-------+
| name    | varchar(30) | YES  |     | NULL    |       |
| country | char(2)     | YES  |     | NULL    |       |
+---------+-------------+------+-----+---------+-------+
2 rows in set (0.01 sec)

Because it’s a relational database, MySQL allows you to connect two or more tables by relating their entries. This allows you to store data in multiple tables, instead of just a big one. This approach makes data more manageable and less error prone.

The queries you’ll execute next will combine columns from both tables. In this example, details of the books written by the authors in the author’s table will make up a second table called book. To connect the two tables and allow their data to be combined, a common column must be used from both tables. This column is defined as the primary key for the first table and the foreign key for the second. A primary key (and therefore a foreign key) must have a unique value in each table’s record so that it discriminates this record from the others.

So far, no primary key was used for the author table. To correct this, you have two options: delete this table and re-create it or alter the existing table’s structure. You can delete a table regardless of whether the table is empty or filled with data. Since you are in an early stages of the database’s design, I’ll display the table deletion here and leave the table modification for later. To delete table author, use the drop table statement as follows:
mysql> drop table author;
The MySQL server responds with an OK message.
Query OK, 0 rows affected (0.22 sec)
Re-create the table authors, this time including author_id, which is the column that will be the primary key of the table. The primary key constraint is the one that assigns author_id as the primary key. The auto_increment keyword defines that for each record (row) inserted in the table, the author_id value will receive automatically the next available integer, starting from 1. The data type of author_id is set to int (integer). At the mysql prompt, enter the following:
mysql> create table author (author_id int auto_increment, primary key(author_id), name varchar(30), country char(2));
The MySQL server responds with an OK message.
Query OK, 0 rows affected (0.44 sec)
Use the describe SQL statement again to view the new table’s structure.
mysql> describe author;
The MySQL server responds by displaying the following table, which describes the structure of author:
+-----------+-------------+------+-----+---------+----------------+
| Field     | Type        | Null | Key | Default | Extra          |
+-----------+-------------+------+-----+---------+----------------+
| author_id | int(11)     | NO   | PRI | NULL    | auto_increment |
| name      | varchar(30) | YES  |     | NULL    |                |
| country   | char(2)     | YES  |     | NULL    |                |
+-----------+-------------+------+-----+---------+----------------+
3 rows in set (0.00 sec)

Notice that the author_id field is identified by the PRI value in the Key column as the primary key. In addition, as indicated by the NO value in the Null column field, author_id should not be empty for any record. Also, the auto_increment keyword for the primary key is shown in the Extra column.

Next, create book, the second table that will be used for the library database. Column book_id will be the primary key for the book table; column title will hold the book title, which will be up to 255 characters; column language will be the language the book is written to; and column author_id will be the foreign key from the author table, defining a connection among the two tables. The not null constraint is also set so that all author_id values are required to be filled. At the mysql prompt, enter the following create table command :
mysql> create table book (book_id char(13), primary key(book_id), title varchar(255), language varchar(20), author_id int not null, foreign key(author_id) references author(author_id));
The MySQL server responds with an OK message.
Query OK, 0 rows affected (0.57 sec)
Use the describe SQL statement for the second table to view its structure.
mysql> describe book;
The MySQL server responds with the following output:
+-----------+--------------+------+-----+---------+-------+
| Field     | Type         | Null | Key | Default | Extra |
+-----------+--------------+------+-----+---------+-------+
| book_id   | char(13)     | NO   | PRI | NULL    |       |
| title     | varchar(255) | YES  |     | NULL    |       |
| language  | varchar(20)  | YES  |     | NULL    |       |
| author_id | int(11)      | NO   | MUL | NULL    |       |
+-----------+--------------+------+-----+---------+-------+
4 rows in set (0.01 sec)

This time, two columns have a NO value in the Null column: book_id, which is the primary key, and author_id, the foreign key, which was explicitly set to not null. The MUL (multiple) key indicates that multiple rows may have the same value as the author_id column.

Inserting, Displaying, and Deleting Records

You can use the insert into SQL statement to enter a number of records in the author table. You don’t have to specify the author_id value since it is automatically entered because of the auto_increment attribute. The following three commands are used, with their output shown here:
mysql>  insert into author (name, country) values(' Tolkien, John Ronald Reuel', 'UK');
Query OK, 1 row affected (0.07 sec)
mysql>  insert into author (name, country) values('Steinbeck, John Ernst Jr.', 'US');
Query OK, 1 row affected (0.07 sec)
mysql>  insert into author (name, country) values('Eco, Umberto', 'IT');
Query OK, 1 row affected (0.08 sec)
To view the records inserted into table author so far, use the select SQL statement, which is one of the most important statements used for SQL queries. In its simplest form, without any clause, select takes as argument the asterisk (*) wildcard, which corresponds to all columns, with no other condition. The following command therefore displays all elements of table author:
mysql> select * from author;
The command’s output is as follows:
+-----------+----------------------------+---------+
| author_id | name                       | country |
+-----------+----------------------------+---------+
|         1 | Tolkien, John Ronald Reuel | UK      |
|         2 | Steinbeck, John Ernst Jr.  | US      |
|         3 | Eco, Umberto               | IT      |
+-----------+----------------------------+---------+
3 rows in set (0.01 sec)
Enter the last record another time.
mysql>  insert into author (name, country) values('Eco, Umberto', 'IT');
Use the SQL select statement to view the table records again.
mysql> select * from author;
The duplicated entry for the name is displayed next. In this case, this is an unwanted result, which can be corrected in the next section.
+-----------+----------------------------+---------+
| author_id | name                       | country |
+-----------+----------------------------+---------+
|         1 | Tolkien, John Ronald Reuel | UK      |
|         2 | Steinbeck, John Ernst Jr.  | US      |
|         3 | Eco, Umberto               | IT      |
|         4 | Eco, Umberto               | IT      |
+-----------+----------------------------+---------+
4 rows in set (0.00 sec)
Use the delete SQL statement to remove the fourth entry of the author table. In the following command, the fourth record is indicated with the where clause, which specifies the records to be deleted by setting the condition: author_id (the primary key) equal to 4.
mysql> delete from author where author_id=4;
The MySQL server responds with an OK message.
Query OK, 1 row affected (0.18 sec)
Display the remaining author records using the SQL select statement .
mysql> select * from author;
The command’s output is as follows:
+-----------+----------------------------+---------+
| author_id | name                       | country |
+-----------+----------------------------+---------+
|         1 | Tolkien, John Ronald Reuel | UK      |
|         2 | Steinbeck, John Ernst Jr.  | US      |
|         3 | Eco, Umberto               | IT      |
+-----------+----------------------------+---------+
3 rows in set (0.01 sec)

Altering the Table’s Structure

Even when a table is filled with data, it is not too late to modify the table’s characteristics. In this section, you will make three alterations in a table’s structure. The first one solves the problem of the duplicated entry shown in the previous section. The second modification will be to the data type, and the third will be to add a column.

First, by using the alter table statement with the add clause, you’ll turn the column name into a unique key. This is a third kind of key category, with the others being the primary and foreign keys.
mysql>  alter table author add unique(name);
The MySQL server responds with an OK message.
Query OK, 0 rows affected (0.47 sec)
Records: 0  Duplicates: 0  Warnings: 0
To view the new table’s structure and display the UNI (unique) key, use the describe SQL statement.
mysql> describe author;
+-----------+-------------+------+-----+---------+----------------+
| Field     | Type        | Null | Key | Default | Extra          |
+-----------+-------------+------+-----+---------+----------------+
| author_id | int(11)     | NO   | PRI | NULL    | auto_increment |
| name      | varchar(30) | YES  | UNI | NULL    |                |
| country   | char(2)     | YES  |     | NULL    |                |
+-----------+-------------+------+-----+---------+----------------+
3 rows in set (0.00 sec)
To test the unique key, use the insert SQL statement with a value for the column name already entered.
mysql>  insert into author(name, country) values('Eco, Umberto', 'IT');
The duplicated record is not allowed in the table, and the web server responds with an error message.
ERROR 1062 (23000): Duplicate entry 'Eco, Umberto' for key 'name'
As the second example of the alter table statement, you will change the data type of a column. For the author table, try first to enter a record with a name value larger than 30 characters.
mysql>  insert into author (name, country) values('Solzhenitsyn, Aleksandr Isayevich', 'RU');
The MySQL server responds with an error message.
ERROR 1406 (22001): Data too long for column 'name' at row 1
Use the alter table SQL statement to modify the data type of the name column.
mysql> alter table author modify name varchar(255);
The MySQL server responds with an OK message.
Query OK, 0 rows affected (0.56 sec)
Records: 0  Duplicates: 0  Warnings: 0
Try to enter the previous entry again with the long name.
mysql>  insert into author (name, country) values(Solzhenitsyn, Aleksandr Isayevich', 'RU');
This time MySQL responds with an OK message.
Query OK, 1 row affected (0.07 sec)
With the select statement , you can view the previous entry of the author table.
mysql> select * from author;
MySQL displays the result.
+-----------+-----------------------------------+---------+
| author_id | name                              | country |
+-----------+-----------------------------------+---------+
|         1 | Tolkien, John Ronald Reuel        | UK      |
|         2 | Steinbeck, John Ernst Jr.         | US      |
|         3 | Eco, Umberto                      | IT      |
|         6 | Solzhenitsyn, Aleksandr Isayevich | RU      |
+-----------+-----------------------------------+---------+
4 rows in set (0.00 sec)
Use the describe SQL statement to view the new data type, reflected in the table’s structure.
mysql> describe author;
The command’s output displays a data type of varchar(255) instead of varchar(30).
+-----------+--------------+------+-----+---------+----------------+
| Field     | Type         | Null | Key | Default | Extra          |
+-----------+--------------+------+-----+---------+----------------+
| author_id | int(11)      | NO   | PRI | NULL    | auto_increment |
| name      | varchar(255) | YES  | UNI | NULL    |                |
| country   | char(2)      | YES  |     | NULL    |                |
+-----------+--------------+------+-----+---------+----------------+
3 rows in set (0.01 sec)
For the third modification, you will add a new column to the book table, for instance pub_date, corresponding to the publication date of each book. Like most modern programming environments, MySQL supports a large set of data types. Common values such as date, time, or year are expected to have their own type. This is the case with the year type that will be used next. At the mysql prompt, enter the following:
mysql> alter table book add pub_date year;
MySQL responds with an OK message.
Query OK, 0 rows affected (1.16 sec)
Records: 0  Duplicates: 0  Warnings: 0
To view the new book structure, use the describe statement .
mysql> describe book;
The MySQL server responds by displaying the new structure of the book table.
+-----------+--------------+------+-----+---------+-------+
| Field     | Type         | Null | Key | Default | Extra |
+-----------+--------------+------+-----+---------+-------+
| book_id   | char(13)     | NO   | PRI | NULL    |       |
| title     | varchar(255) | YES  |     | NULL    |       |
| language  | varchar(20)  | YES  |     | NULL    |       |
| author_id | int(11)      | NO   | MUL | NULL    |       |
| pub_date  | year(4)      | YES  |     | NULL    |       |
+-----------+--------------+------+-----+---------+-------+
5 rows in set (0.00 sec)

Testing the Table Connection

By using a foreign key, the two database tables are connected with a parent-child relationship. In this example, the parent table is author, which provides its primary key as a foreign key to the book table. You can’t delete the author table if you have not already deleted the book table. Also, you can’t insert a book entry with a foreign key value that does not exist.

In the following command, the nonexistent value 8 of the foreign key is used:
mysql> insert into book (book_id, title, language, author_id, pub_date) values('9780743273565','The Great Gatsby', 'English',8,2004);
The MySQL server responds with an error message.
ERROR 1452 (23000): Cannot add or update a child row: a foreign key constraint fails (`library`.`book`, CONSTRAINT `book_ibfk_1` FOREIGN KEY (`author_id`) REFERENCES `author` (`author_id`))
Enter some records in the table book to be used in the query examples. For instance, run the following insert commands (the output of each command is also included):
mysql> insert into book (book_id, title, language, author_id, pub_date) values('9780140177374','The Pearl','English',2,2000);
Query OK, 1 row affected (0.06 sec)
mysql> insert into book (book_id, title, language, author_id, pub_date) values('9782806272836','De ratones y hombres','Spanish',2,2016);
Query OK, 1 row affected (0.07 sec)
mysql> insert into book (book_id, title, language, author_id, pub_date) values('9780547928227','The Hobbit','English',1,2012);
Query OK, 1 row affected (0.06 sec)
mysql> insert into book (book_id, title, language, author_id, pub_date) values('9780547928197','The Return of the King','English',1,2012);
Query OK, 1 row affected (0.07 sec)
mysql> insert into book (book_id, title, language, author_id, pub_date) values('9780143105459','The Acts of King Arthur and His Noble Knights','English',2,2008);
Query OK, 1 row affected (0.06 sec)

In the previous commands, since book_id is the primary key for book, the book_id values must be unique. For the values of the book_id column, the ISBN-13 of each book was chosen because it’s unique to each book.

To view the book records, do a basic query by selecting all (*) records.
mysql> select * from book;
MySQL outputs the following result:
+---------------+-----------------------+----------+-----------+----------+
| book_id       | title                 | language | author_id | pub_date |
+---------------+-----------------------+----------+-----------+----------+
| 9780140177374 | The Pearl             | English  |         2 |     2000 |
| 9780143105459 | The Acts of King                   Arthur and His Noble                   Knights               | English  |         2 |     2008 |
| 9780547928197 | The Return of the King | English  |         1 |     2012 |
| 9780547928227 | The Hobbit            | English  |         1 |     2012 |
| 9782806272836 | De ratones y hombres  | Spanish  |         2 |     2016 |
+---------------+-----------------------+----------+-----------+----------+
5 rows in set (0.00 sec)

The two tables, connected now with a parent-child relationship and filled with records, are used in the following section for extracting information from the database. In other words, you’ll next query the database.

Performing SQL Queries with the MySQL Server

You have used the select statement so far in its simplest form and with the asterisk wildcard. select can be combined with functions such as avg (average), count, max, min, round, etc. The where clause is used to filter records by providing a condition that must be met. For instance, to count the number of book records with the language set to English, use the following:
mysql> select count(book_id) from book where language="English";
The result is four books.
+----------------+
| count(book_id) |
+----------------+
|              4 |
+----------------+
1 row in set (0.00 sec)
You’ll now use the select statement to execute a query that selects columns from both tables. To specify a column, the table’s name must be prepended to the column's name, separated by a period. For instance, using this notation, book.author_id discriminates from author.author_id. The outcome of this combination is determined by the join clause. In the next example, the inner join clause is used, which selects for the output only records that have matching values in both tables.
mysql> select book.title, author.name, book.pub_date from author inner join book on book.author_id=author.author_id where book.language='English';

The inner join includes records of the two tables that have the same value in their author_id columns. The columns for the records included are the title (from book), the name (from author), and the publication date (from author) where the language column in the book table is English.

MySQL displays the following output:
+---------------------------------+----------------------------+----------+
| title                           | name                       | pub_date |
+---------------------------------+----------------------------+----------+
| The Pearl                       | Steinbeck, John Ernst Jr.  |     2000 |
| The Acts of King Arthur and   His Noble Knights               | Steinbeck, John Ernst Jr.  |     2008 |
| The Return of the King          | Tolkien, John Ronald Reuel |     2012 |
| The Hobbit                      | Tolkien, John Ronald Reuel |     2012 |
+---------------------------------+----------------------------+----------+
4 rows in set (0.00 sec)
The following variation of the previous command sorts the records according to the pub_date column in descending order:
mysql> select book.title, author.name, book.pub_date from author inner join book on book.author_id=author.author_id where book.language='English' order by book.pub_date desc;
+---------------------------------+----------------------------+----------+
| title                           | name                       | pub_date |
+---------------------------------+----------------------------+----------+
| The Return of the King          | Tolkien, John Ronald Reuel |     2012 |
| The Hobbit                      | Tolkien, John Ronald Reuel |     2012 |
| The Acts of King Arthur and   His Noble Knights               | Steinbeck, John Ernst Jr.  |     2008 |
| The Pearl                       | Steinbeck, John Ernst Jr.  |     2000 |
+---------------------------------+----------------------------+----------+
4 rows in set (0.00 sec)
The following query includes a count function and an inner join clause. The group by clause groups the results by the column author.​name.
mysql> select count(book.title), author.name from author inner join book on book.author_id=author.author_id group by author.name;
As the output indicates, for the first author, three books are included in the database and for the second two books are included.
+-------------------+----------------------------+
| count(book.title) | name                       |
+-------------------+----------------------------+
|                 3 | Steinbeck, John Ernst Jr.  |
|                 2 | Tolkien, John Ronald Reuel |
+-------------------+----------------------------+
2 rows in set (0.00 sec)
In the following command, two columns participate in the group by clause .
mysql> select count(book.title), author.name, pub_date from author inner join book on book.author_id=author.author_id group by author.name, pub_date;
The query’s result is as follows:
+-------------------+----------------------------+----------+
| count(book.title) | name                       | pub_date |
+-------------------+----------------------------+----------+
|                 1 | Steinbeck, John Ernst Jr.  |     2000 |
|                 1 | Steinbeck, John Ernst Jr.  |     2008 |
|                 1 | Steinbeck, John Ernst Jr.  |     2016 |
|                 2 | Tolkien, John Ronald Reuel |     2012 |
+-------------------+----------------------------+----------+
4 rows in set (0.00 sec)

In the previous table, the output is grouped from right to left, first by publication date (two records have the value 2012) and then by author’s name.

Modifying Records with the update Command

Use the following update and set statements to change an author’s name:
mysql> update author set name='Tolkien, J.R.R.' where name='Tolkien, John Ronald Reuel';
To view the changes, display the author table’s contents.
mysql> select * from author;
The MySQL server displays the following result:
+-----------+-----------------------------------+---------+
| author_id | name                              | country |
+-----------+-----------------------------------+---------+
|         1 | Tolkien, J.R.R.                   | UK      |
|         2 | Steinbeck, John Ernst Jr.         | US      |
|         3 | Eco, Umberto                      | IT      |
|         6 | Solzhenitsyn, Aleksandr Isayevich | RU      |
+-----------+-----------------------------------+---------+
4 rows in set (0.01 sec)

Using the SQL like Operator

A useful operator, used with the where clause, is like . You can use it to query a database when the user wants to specify a keyword but recalls only part of it. With like, you can query for a pattern that is included in the value of a column. For instance, to look for the title, author, and publication date (year) of a book that includes the word king in its title, you can use the like clause as shown here:
mysql> select book.title, author.name, book.pub_date from author inner join book on book.author_id=author.author_id where book.title like '%king%';
The command’s output is as follows:
+----------------------------------+---------------------------+----------+
| title                            | name                      | pub_date |
+----------------------------------+---------------------------+----------+
| The Acts of King Arthur and   His Noble Knights                | Steinbeck, John Ernst Jr. |     2008 |
| The Return of the King           | Tolkien, J.R.R.           |     2012 |
+----------------------------------+---------------------------+----------+
2 rows in set (0.00 sec)
Two wildcard characters are used with like.
  • The percentage (%) wildcard matches any string of zero or more characters.

  • The underscore (_) wildcard matches a single character.

You’ll next use the previous command in another way. This time the title must end with the word king.
mysql> select book.title, author.name, book.pub_date from author inner join book on book.author_id=author.author_id where book.title like '%king';
The command’s output is as follows:
+------------------------+-----------------+----------+
| title                  | name            | pub_date |
+------------------------+-----------------+----------+
| The Return of the King | Tolkien, J.R.R. |     2012 |
+------------------------+-----------------+----------+
1 row in set (0.00 sec)
You can try to delete the two tables used so far. Try first to delete the parent table author.
mysql> drop table author;
MySQL displays the following error message:
ERROR 1217 (23000): Cannot delete or update a parent row: a foreign key constraint fails
The constraint, which exists because of the parent-child relationship, does not allow the parent table to be deleted without previously deleting the child table. So, use the drop table statement to delete the child table, book.
mysql> drop table book;
The MySQL server responds with the following output:
Query OK, 0 rows affected (0.23 sec)
Now you can delete author.
mysql> drop table author;
The table is deleted this time with no complaints:
Query OK, 0 rows affected (0.17 sec)

Web Scraping with MySQL and the Linux Shell

In the previous examples, you manually inserted records into your database. Filling your database one record at a time is certainly tedious. For more realistic examples, you can use automated methods to transfer your data to one or more tables.

In this section, you will implement what is commonly called web scraping . This is the detection and collection of data from various web pages and inserting it into a file (e.g., a spreadsheet) or more appropriately into a database. The Bash shell scripting language and MySQL will be used for this project. Writing a Linux shell script that applies only to a certain web site may seem like overkill; however, this may help you process thousands of data records in some cases.

The URLs Describing the Resources

To start with web scraping, you have to identify the format in which the data is encoded for a specific portal. To search for data in specific web pages, you first have to describe their URLs in a systematic way. Consider, for instance, amazon.​com. By visiting any product page, you can find that what uniquely identifies a product for Amazon is the Amazon Standard Identification Number (ASIN) code. This is a 10-charcter alphanumeric unique identifier.

The ASIN is included in the URL of the specific product. For example, here is one of the products returned from searching using the keyword hi-fi:
https://www.amazon.com/Sharp-XLHF102B-HI-Component-MicroSystem/dp/B00XWIVTXY/ref=sr_1_2?s=amazon-devices&ie=UTF8&qid=1535449079&sr=8-2&keywords=hi-fi
Figure 6-2 displays the web page with the previous URL.
../images/468152_1_En_6_Chapter/468152_1_En_6_Fig2_HTML.jpg
Figure 6-2

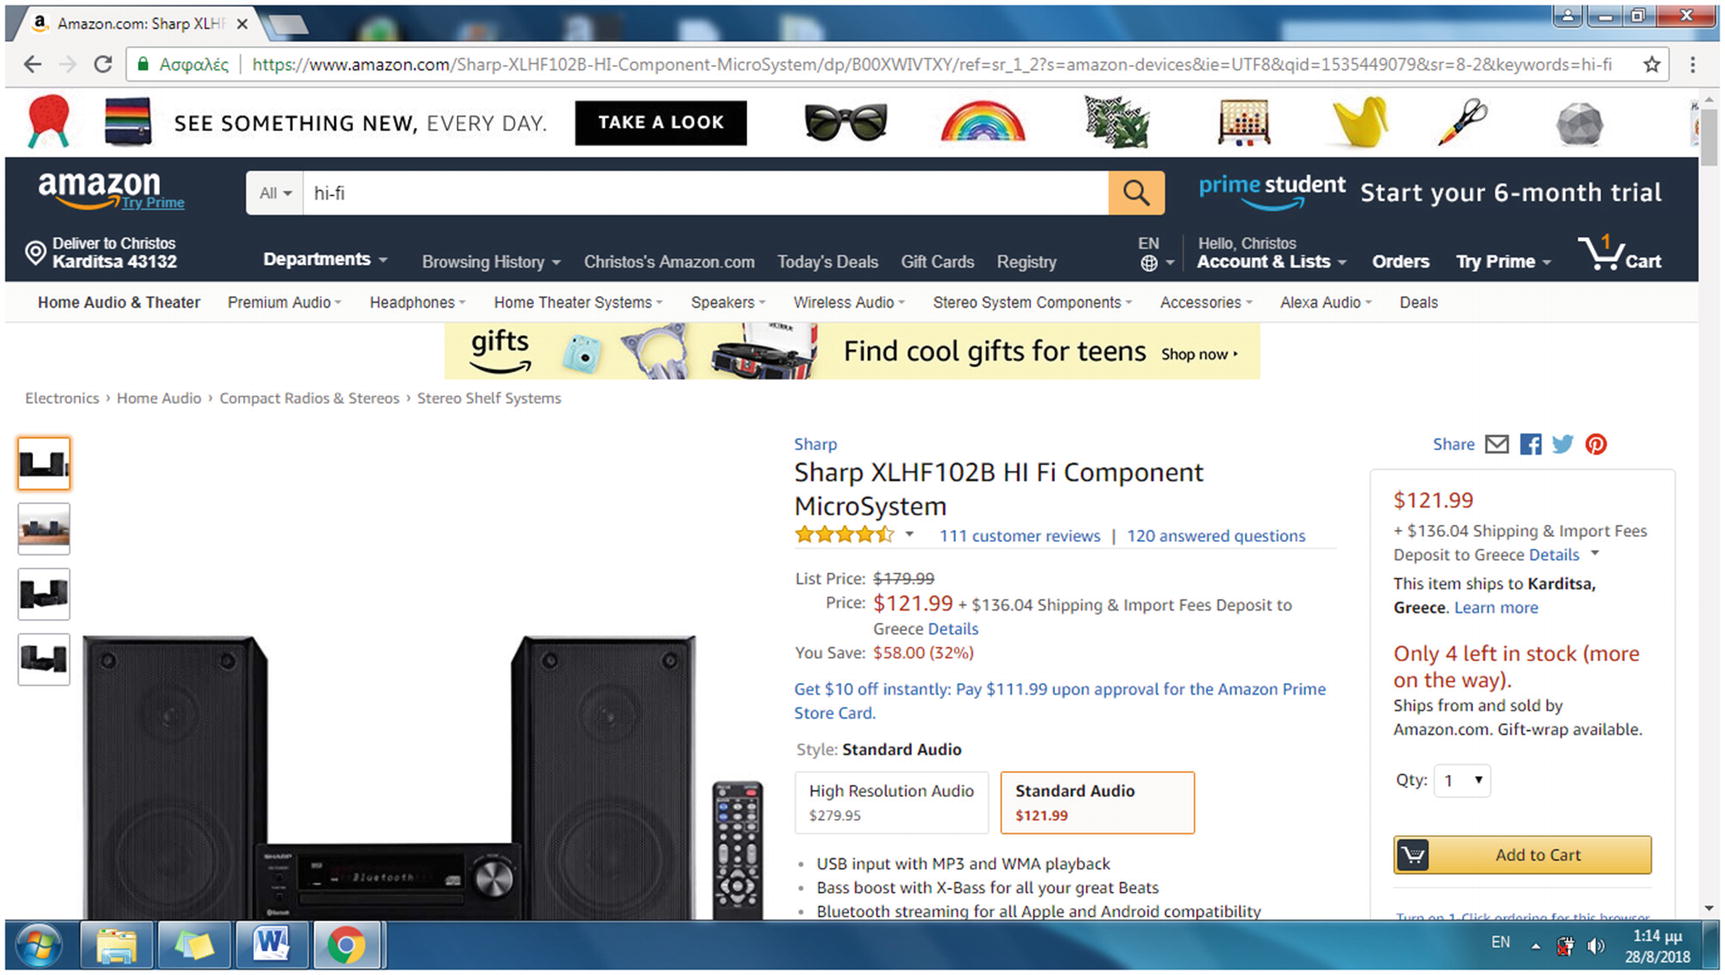
The ASIN is included in the product’s URL

Usually an identifier like the ASIN in this example specifies the product’s web page with a more straightforward URL. Try, for instance, the following:
https://www.amazon.com/dp/B00XWIVTXY/
The same web page is rendered with the simplified format, as shown in Figure 6-3.
../images/468152_1_En_6_Chapter/468152_1_En_6_Fig3_HTML.jpg
Figure 6-3

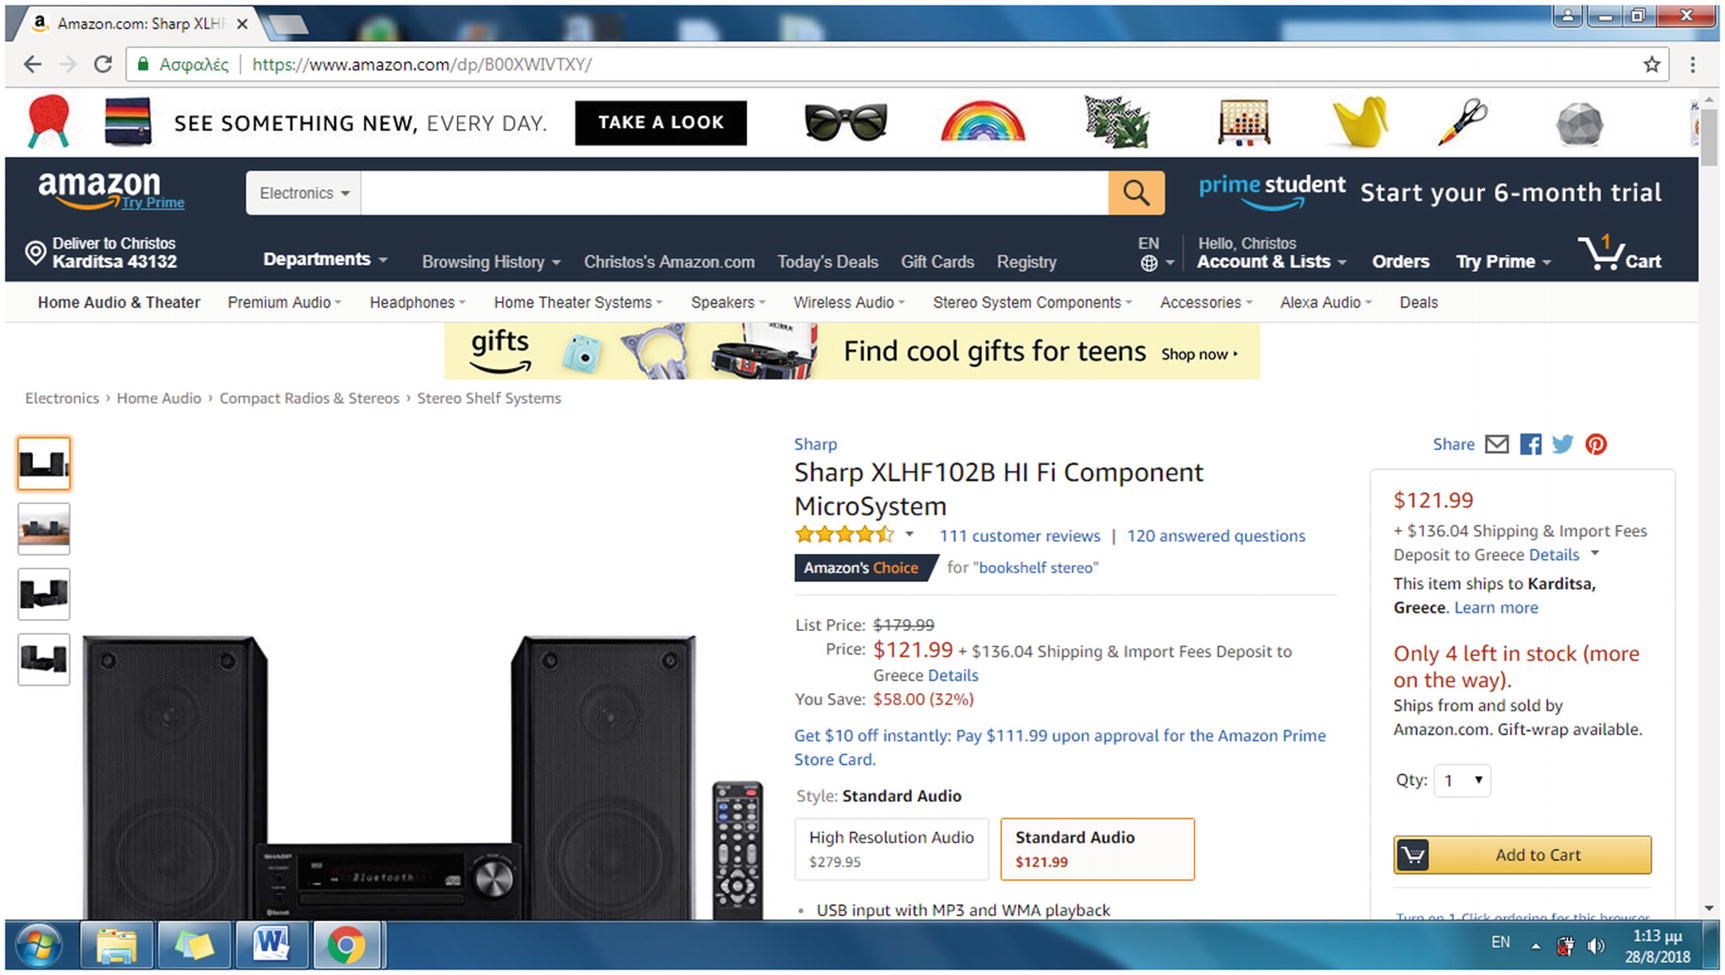
The ASIN included in the simplified URL format of a product

A unique identifier is used in most commercial sites. For web sites that deal with books, there is no need to use any other product identifier because each book is already identified in a unique way with its ISBN. ISBN stands for International Standard Book Number and currently is used in two formats.
  • A 13-digit ISBN, used for books released after the January 1, 2007

  • A 10-digit ISBN, used for books released before January 1, 2007

Apress.​com identifies its products with the 13-digit ISBN identifier. Visit the Apress home page at apress.​com, displayed in Figure 6-4, and then click any link advertising an Apress book.
../images/468152_1_En_6_Chapter/468152_1_En_6_Fig4_HTML.jpg
Figure 6-4

The Apress home page

As viewed in Figure 6-5, the URL in the address bar for the specific example is as follows:
https://www.apress.com/gp/book/9781484227183?wt_mc=Internal.Banner.3.EPR868.APR_DotD_Teaser#otherversion=9781484227190
../images/468152_1_En_6_Chapter/468152_1_En_6_Fig5_HTML.jpg
Figure 6-5

A product page on the Apress site identifies a book with the ISBN in the URL

Notice also that (similarly to the previous Amazon.​com example) the URL can be simplified. For instance, the following URL leads to the same web page:
https://www.apress.com/gp/book/9781484227183

The next step is to locate and extract the data format used in the HTML source code of each product web page. For e-commerce sites, the data format is stored in a consistent way by implementing a data layer. The structure that defines the data layer for this example, the appDataLayer struct, is discussed in the following section.

Designing the Web Scraping Project

The following is the plan for creating the scrapping project: The web scraping shell script receives as an argument the URL of an Apress web page, which includes books of a certain category. It downloads this web page and then searches in the HTML source code of this web page for URLs of web pages that represent certain books. For each URL, the Bash shell script will perform an HTTPS connection to download the corresponding web page. The shell script will examine the web page’s data layer, found behind the scenes, in the HTML source code for values of specific book attributes such as for the title, ISBN, and price. These values will be stored in a MySQL database table that will be created for gathering the data acquired with the previous web scraping technique.

Visit first the Apress home page and hover your mouse over the Categories menu at the top of the web page. As shown in Figure 6-6, a number of menu choices appear, with each one corresponding to a specific book category.
../images/468152_1_En_6_Chapter/468152_1_En_6_Fig6_HTML.jpg
Figure 6-6

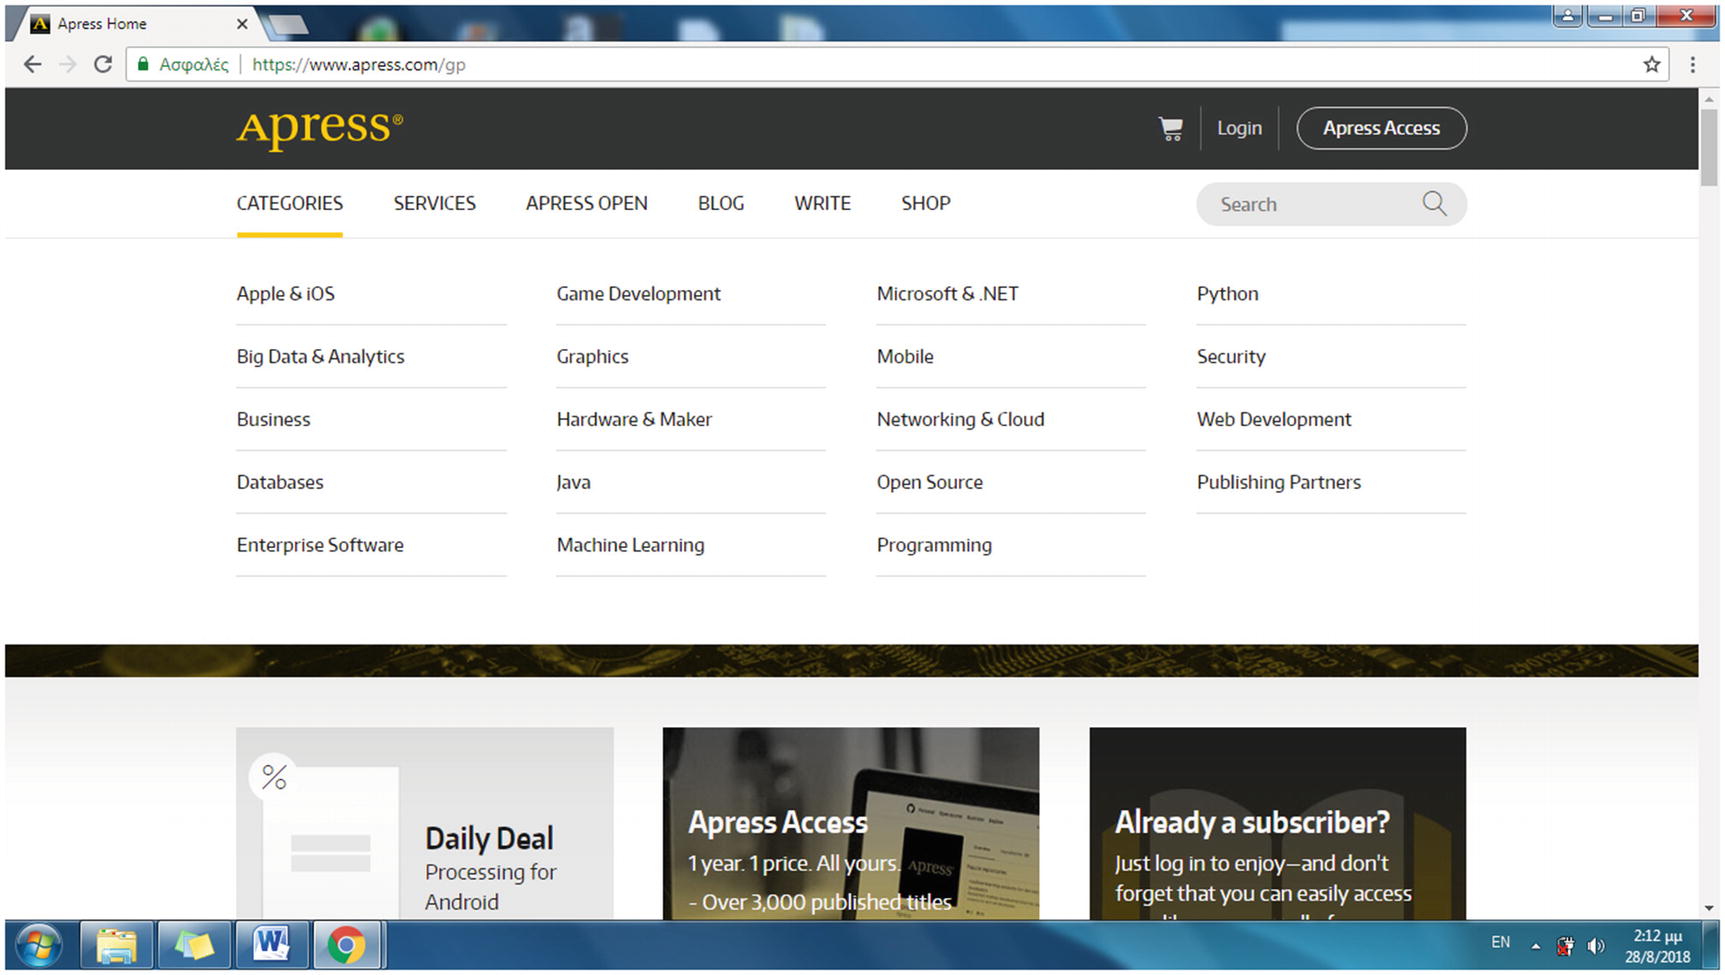
The Categories menu on the Apress home page

For this project, you can run the script for some (or even one) of these categories and collect the attributes of the books appearing in each category. Let’s visit one of those categories, for instance, Web Development. By clicking this category’s link, the web page displayed in Figure 6-7 appears.
../images/468152_1_En_6_Chapter/468152_1_En_6_Fig7_HTML.jpg
Figure 6-7

The books included in the Web Development category of Apress

On this web page, a number of images representing the books appear. Those images are links to web pages that provide descriptions to the corresponding books.

Hint!

Each option in the Categories menu leads to a web page that includes only a portion of the category’s books. It is, however, sufficient for examining the web scraping method here. To view all the books in each category, follow the “Browse all titles” link in each category.

Notice the URL of the category in the address bar.
https://www.apress.com/gp/web-development
Similarly, the URL is formed for any other category by concatenating two parts.
https://www.apress.com/gp/

It uses the category name, in lowercase, with the space between the words substituted by a hyphen (-).

For instance, for the Open Source category, the URL is as follows:
https://www.apress.com/gp/open-source
This consistency can be used to further automate the process and use the script to search multiple categories; however, to simplify the shell script for this example, one category will be used to feed the script each time it runs. The following command will be used at the Linux terminal for the web scraping process:
$ ./shell.sh https://www.apress.com/gp/web-development apress book pPriceGross fn isbn
The following are the parts that make up the command:
  • shell.sh is the name of the shell script that performs the web scraping.

  • https://www.apress.com/gp/web-development is the URL of the category web page, used to provide the URLs of the books included in the category web page, which finally will be downloaded and searched for the pPriceGross, fn, and isbn values of each book.

  • apress is the database name that will be used to store the information.

  • book is the apress database’s table that includes the pPriceGross, fn, and isbn fields.

  • pPriceGross, fn, and isbn are three fields found in the data layer of each page that provide values for the price, the name, and the ISBN, respectively. The number of fields this script supports is variable, which means that the same script can also run for two or five fields without changing any part of the source code.

The web page of the URL provided to the shell script command is the category page that includes a number of URLs leading to product web pages, each one dedicated to a single book. The product URLs have to be retrieved by the script and to be visited to extract the values of the pPriceGross, fn, and isbn fields of the data layer struct.

On the category page, all product pages are included between the start and ending <h3> tags. For instance, a product page link is as follows:
#<h3><a href="/gp/book/9781484233986" onmousedown="wt.sendinfo({linkId: 'recommendation', customClickParameter : { 2 : 'shoppage.recommendedproducts - 1'}});" data-baynote-pid="978-1-4842-3398-6">CSS Framework Alternatives</a></h3>
By including product links in the heading tags of a specific size, size 3 in this case, the designer of the site separated them from other links that appear in the page. For each product, the shell script extracts the ISBN, found after the /gp/book/ directory in the URL, and then uses this ISBN to form the product’s simplified URL. As you recall from the previous section, this has the following form:
https://www.apress.com/gp/book/{ISBN}
Here’s an example:
https://www.apress.com/gp/book/9781484233986
Collecting the URLs of the products included in the category page is the first part of the script’s functionality. The second part is visiting all those URLs and extracting from the HTML source code of the web pages the information about the specified fields (pPriceGross, fn, and isbn in this example). To locate where those fields are stored in each product page, visit a book’s URL from https://www.apress.com/gp/web-development . For instance, visit https://www.apress.com/gp/book/9781484233986 , which is shown in Figure 6-8.
../images/468152_1_En_6_Chapter/468152_1_En_6_Fig8_HTML.jpg
Figure 6-8

Visiting an Apress book web page to view the HTML source code and locate the fields required for the shell script

Right-click the web page and choose View Page Source from the pop-up menu. As shown in Figure 6-9, the web page’s source code appears on a new tab in your browser.
../images/468152_1_En_6_Chapter/468152_1_En_6_Fig9_HTML.jpg
Figure 6-9

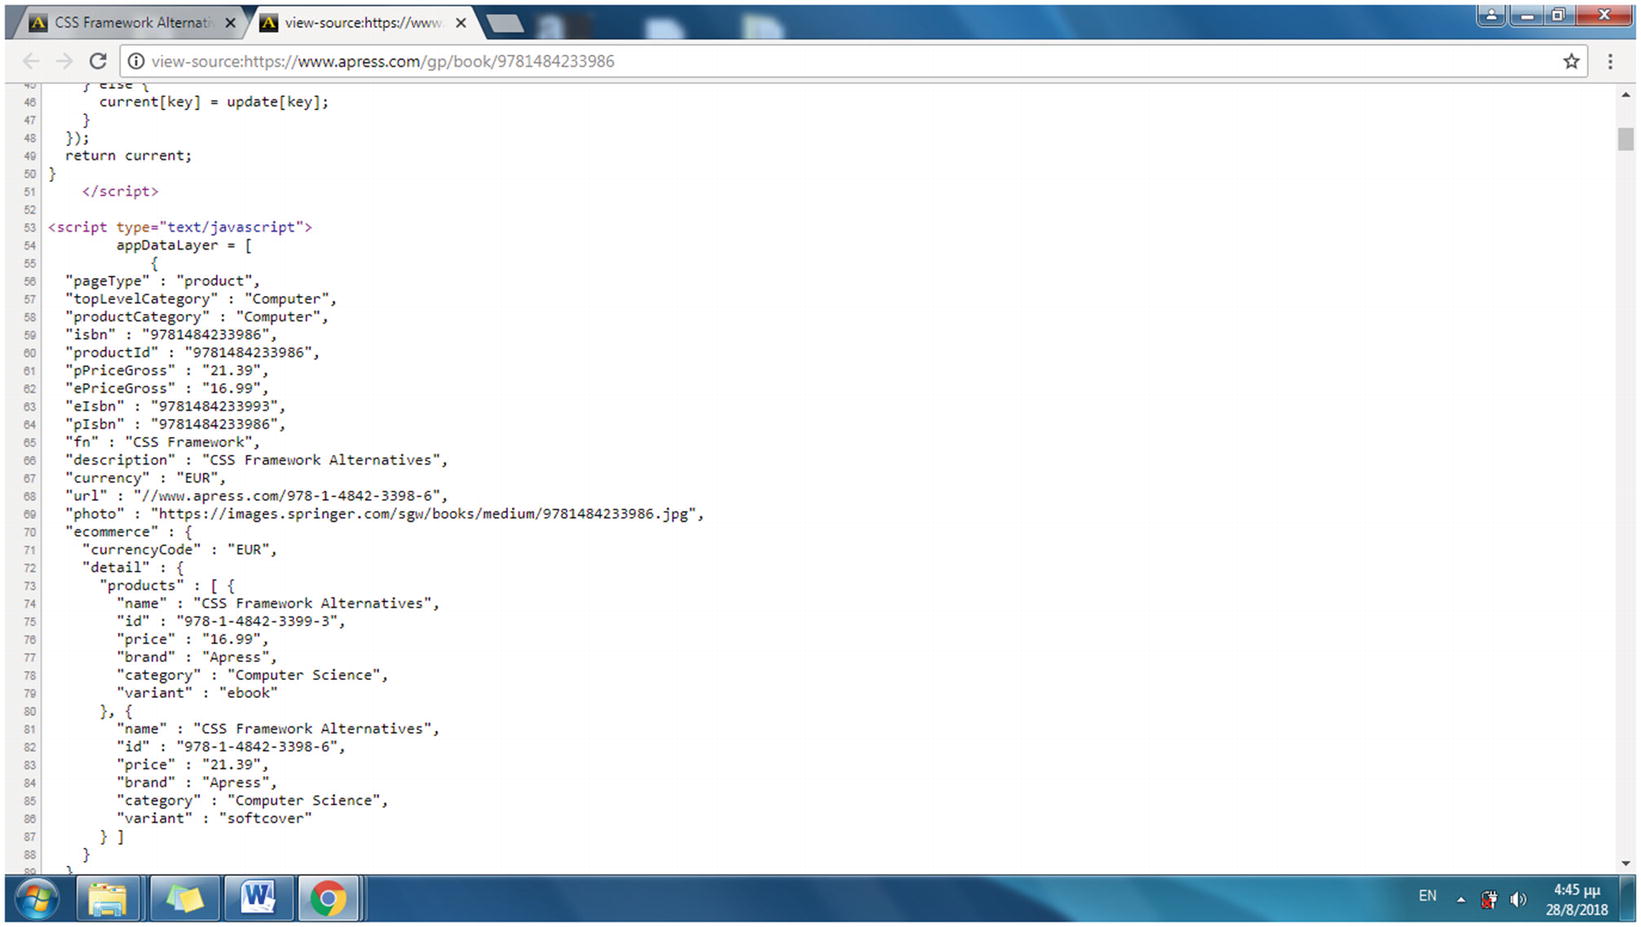
The HTML source code of an Apress web page for a specific book

In the first lines of the source code, you can detect the appDataLayer struct . It looks like the following:
<script type="text/javascript">
        appDataLayer = [
            {
  "pageType" : "product",
  "topLevelCategory" : "Computer",
  "productCategory" : "Computer",
  "isbn" : "9781484233986",
  "productId" : "9781484233986",
  "pPriceGross" : "21.39",
  "ePriceGross" : "16.99",
  "eIsbn" : "9781484233993",
  "pIsbn" : "9781484233986",
  "fn" : "CSS Framework",
  "description" : "CSS Framework Alternatives",
  "currency" : "EUR",
  "url" : "//www.apress.com/978-1-4842-3398-6",
  "photo" : "https://images.springer.com/sgw/books/medium/9781484233986.jpg",
  "ecommerce" : {
    "currencyCode" : "EUR",
    "detail" : {
      "products" : [ {
        "name" : "CSS Framework Alternatives",
        "id" : "978-1-4842-3399-3",
        "price" : "16.99",
        "brand" : "Apress",
        "category" : "Computer Science",
        "variant" : "ebook"
      }, {
        "name" : "CSS Framework Alternatives",
        "id" : "978-1-4842-3398-6",
        "price" : "21.39",
        "brand" : "Apress",
        "category" : "Computer Science",
        "variant" : "softcover"
      } ]
    }
  },
  "content" : {
    "authorization" : {
      "status" : false
    }
  }
}
        ];

The data layer is a collection of information required to pass data to other systems or software. The data layer is included in the source code of the web page, and more specifically to the JavaScript source code, usually as an object or a variable and therefore is hidden from the user. The format of the data layer can be considered as variable-value pairs (for instance, variable description and value CSS Framework Alternatives).

This data layer struct, found in each product page, is the resource for the information that the web scraping script will gather. In the current example, the values of the three fields retrieved (pPriceGross, fn, and isbn) will be stored in a database table, which is created in the following section.

Creating the MySQL Database Used for the Web Scraping Project

To connect to the MySQL server with mysql, assuming that no MySQL password was set, use the following at the Linux terminal:
$ mysql –u root
The mysql> prompt appears to receive MySQL commands. To create a new database called apress, use the following command:
mysql> create database apress;
Select the specific database to apply the commands that will follow by entering the following:
mysql> use apress;
With the following command, you create a table called book, which has three fields.
  • isbn, which is of type CHAR with a length of 13 characters

  • fn, which is of type VARCHAR with a length up to 40 characters

  • pPriceGross, of type DECIMAL, with four digits and two decimal places

mysql> create table book (isbn CHAR(13), fn VARCHAR(40), pPriceGross DECIMAL(4,2));
You can view the table created previously by displaying all the database tables with the show tables statement .
mysql> show tables;
The command’s output is as follows:
+------------------+
| Tables_in_apress |
+------------------+
| book             |
+------------------+
1 row in set (0.01 sec)
To view details about the table’s format, use the following command:
mysql> describe book;
The command’s output is as follows:
+-------------+--------------+------+-----+---------+-------+
| Field       | Type         | Null | Key | Default | Extra |
+-------------+--------------+------+-----+---------+-------+
| isbn        | char(13)     | YES  |     | NULL    |       |
| fn          | varchar(40)  | YES  |     | NULL    |       |
| pPriceGross | decimal(4,2) | YES  |     | NULL    |       |
+-------------+--------------+------+-----+---------+-------+
3 rows in set (0.00 sec)

In the following section, you will create a Bash shell script that runs the web scraping project to download the web content, search for the specified fields, and fill the database.

Implementing the Web Scraping Project

shell.sh is the shell script, implemented with the Bash scripting language, that will be used for the web scraping project. It is roughly separated into two parts. The first finds all hyperlinks included between the <h3> and </h3> tags and extracts the ISBN, e.g., 9781484233986 in this example:
<h3><a href="/gp/book/9781484233986" onmousedown="wt.sendinfo({linkId: 'recommendation', customClickParameter : { 2 : 'shoppage.recommendedproducts - 1'}});" data-baynote-pid="978-1-4842-3398-6">CSS Framework Alternatives</a></h3>
The ISBNs from all links are stored in the file file.txt . Then, in the second part of the shell code, the ISBNs are used to form the simplified product URLs like the following:
https://www.apress.com/gp/book/9781484233986

All URLs are then visited, and the appDataLayer array in each web page is used to provide the values for the isbn, fn, and pPriceGross fields. Finally, the fields are stored in a database table.

To create the file shell.sh in your home directory, enter the following in the Linux terminal:
$ cd ~
$ gedit shell.sh
Insert the following lines in shell.sh :
#!/bin/bash
# USAGE:
# ./shell.sh https://www.apress.com/gp/web-development apress book pPriceGross fn isbn
# 1st PART
# store arguments in a special array
args=("$@");
# get number of elements
ELEMENTS=$#;
# connect to the URL indicated by the 2nd argument, argument $1 (the first, $0, is the script name)
# fill file.txt with ISBNs of the books
wget -q -O - $1 |
grep '<h3><a href="/gp/book/'  |
sed 's:.*<a href="/gp/book/::'  |
awk -F'"' '{print $1}' > file.txt;
# 2nd PART
# get all book urls of a web page
for line in `cat file.txt`;
do
echo -e " --------------------------- ";
a="https://www.apress.com/gp/book/";
b=$a$line;
echo $b;
# for the number of fields to be retrieved
for ((i=3;i<$ELEMENTS;i++)); do
output=$(
wget -q -O - $b |
grep -m 1 ${args[${i}]} |
awk -F ":" '{print $2}' |
sed 's/,//g' |
sed 's/"//g');
args2[${i}]=$output;
done
mysql=${args[3]};
for ((i=3+1;i<$ELEMENTS;i++)); do
sql=${args[${i}]};
mysql="$mysql, $sql";
done
echo $mysql;
mysql2="'${args2[3]}'";
mysql2="$(echo $mysql2 | sed 's/ //')";
for ((i=3+1;i<$ELEMENTS;i++)); do
sql2=${args2[${i}]};
sql2="$(echo $sql2 | sed 's/ //')";
mysql2="$mysql2, '$sql2'";
done
echo -e "$mysql2 ";
sqlstring="INSERT INTO $3 ($mysql) VALUES($mysql2);";
mysql --user="root" --database="$2" -e "$sqlstring";
echo $sqlstring;
done
echo -e " --------------------------- ";
rm -f file.txt;
To provide execute (x) file permission to yourself as the owner user (u) of the shell script so that you can execute it like any other program at the terminal, use the chmod (change mode) command. If your shell file is located in your home directory, enter the following at the Linux terminal:
$ sudo chmod u+x ~/shell.sh
The shell.sh script makes use of two classic but still powerful Unix tools used for text manipulation: awk and sed. It utilizes also the commands grep and cat and the wget program. A short intro to those commands follows:
  • awk takes its name from the initials of its developers Aho, Weinberger, and Kernighan. It is a utility language used for data extraction from text. awk is often combined with sed, and the most common usage is to extract a column from text.

  • sed stands for Stream Editor and is capable of receiving text and performing operations such as appending, inserting, deleting, or substituting text. The latter is one of the most commonly used operations of sed and is the one applied in the current example.

  • grep is a command-line utility for searching text for lines that match a regular expression (or just a piece of text). Its name comes from the text editor command g/re/p that means to globally (g) search a regular expression (re) and print (p).

  • cat is used to read content of files or concatenate (hence the command’s name) files.

  • wget (web get) is used to fetch content of the web servers it connects to from the command line.

The Script’s First Part

The first line of shell.sh sets Bash as the scripting language that will be used in this shell program:
#!/bin/bash
The next lines starting with a hash (#) are just comments. The comment illustrates by example the syntax of the shell.sh command.
# USAGE:
# ./shell.sh https://www.apress.com/gp/web-development apress book pPriceGross fn isbn
Notice that the command in the previous comment is executed from the same directory where the shell script is located (./). When executing a Linux program, a relative or absolute directory path must be prepended, as shown here:
/home/christos/shell.sh https://www.apress.com/gp/web-development apress book pPriceGross fn isbn

In the next section, you will enable shell.sh to run from any directory at the terminal with only its name provided.

The script starts with the following lines:
# 1st PART
# store arguments in a special array
args=("$@");
# get number of elements
ELEMENTS=$#;
In Bash, variable $0 indicates the script’s name, $1 is the first argument of the command, $2 is the second, and so on. The special variable $@ indicates all arguments passed to the script. The arguments are stored in the args array with the following instruction:
args=("$@");
The ELEMENTS variable is assigned the number of arguments, indicated by the special variable $#:
ELEMENTS=$#;

This also could be indicated as ELEMENTS=${#args[@]}.

The next part of the code uses the Unix pipe (|) symbol to apply the Unix piping technique to a number of commands. By piping the output of the command, the left side of the symbol becomes input to the command on the right side. The backslash () is also used to indicate that the command is continued to the next line.
wget -q -O - $1 |
grep '<h3><a href="/gp/book/'  |
sed 's:.*<a href="/gp/book/::'  |
awk -F'"' '{print $1}' > file.txt;

In the first command, wget runs in quiet (flag -q) mode, outputs the content retrieved to stdout (flag -O), and connects to the URL indicated with the first argument ($1) of the shell program (the URL of the category web page).

The source code of the web page downloaded with wget is passed therefore to the grep command to extract the line including the string <h3><a href="/gp/book/, the fixed part of the hyperlink inserted in the <h3> header, which is the format of the links for products included in this web page.

The previous line is passed next as input to sed. The default symbol used as a delimiter in the sed command is the forward slash (/), but since this character is included in the string, any other symbol can be used instead, for instance a colon (:). The sed substitution (s) command has, with the colon delimiter, the following syntax:
sed 's:text_to_be_substituted:text_that_replaces_the_original:'
In this example, this applies as follows:
sed 's:.*<a href="/gp/book/::'  |
In the output provided by grep , the text <a href="/gp/book/ with zero or more characters to the left (.*) is therefore substituted with empty text. Therefore, this text is deleted. Consider, for instance, the following line with the three dots indicating extra text to the left:
. . .<h3><a href="/gp/book/9781484233986" onmousedown="wt.sendinfo({linkId: 'recommendation', customClickParameter : { 2 : 'shoppage.recommendedproducts - 1'}});" data-baynote-pid="978-1-4842-3398-6">CSS Framework Alternatives</a></h3>
When the previous sed command is fed this line, it outputs the following:
9781484233986" onmousedown="wt.sendinfo({linkId: 'recommendation', customClickParameter : { 2 : 'shoppage.recommendedproducts - 1'}});" data-baynote-pid="978-1-4842-3398-6">CSS Framework Alternatives</a></h3>
This output is then passed as input to awk , which with the –F option defines the double quotes (") that follow -F as the column separator. It then prints the first column, and the output is redirected with the greater-than symbol (>) from standard output to the file file.txt. The first column separated from the second with double quotes is the ISBN.
9781484233986

Therefore, when the script runs, file.txt includes a number of ISBNs, with each one placed on its own line.

The Script’s Second Part

The second part of the script reads each line of file.txt using a for loop and assigns it during each iteration to the variable line. The variable line holds therefore an ISBN identifier.
# 2nd PART
# get all book urls of a web page
for line in `cat file.txt`;
do

In the for loop, each ISBN value is concatenated to the fixed string https://www.apress.com/gp/book/ to form the simplified URL of the products pages. Here’s an example:

https://www.apress.com/gp/book/9781484233986

In the following lines of the Bash code, variable a, which holds the fixed part of the URL, is concatenated with the variable line, which holds the specific ISBN to form the value of variable b, which is the product’s URL:
a="https://www.apress.com/gp/book/";
b=$a$line;
echo $b;

Notice that the value of b is output to the terminal with the echo Bash command. The echo commands in the program are used to display the connections performed by the shell script while the script runs.

The code snippet that follows uses a for loop to make one iteration for any field entered as a shell argument:
for ((i=3;i<$ELEMENTS;i++)); do
output=$(
wget -q -O - $b |
grep -m 1 ${args[${i}]} |
awk -F ":" '{print $2}' |
sed 's/,//g' |
sed 's/"//g');
args2[${i}]=$output;
done
Consider, for instance, the case that the shell.sh runs with the following command:
# ./shell.sh https://www.apress.com/gp/web-development apress book pPriceGross fn isbn
In this case, the number of fields to be filled in the database is three (pPriceGross, fn, and isbn), and the loop iterates three times. The loop starts from number 3 because array args[] includes the following elements for the current example:
args[0] : https://www.apress.com/gp/web-development
args[1] : apress
args[2] : book
args[3] : pPriceGross
args[4] : fn
args[5] : isbn
For each field (arguments 3 to 5), a wget connection is created to the product’s URL, and the source code of the web page fetched is searched with grep for the specific field (e.g., pPriceGross). The lines returned by grep are passed next to awk, which uses a colon (:) as the delimiter symbol to print the second column. Recall that the fields are found in the appDataLayer[] array of each page, which has the following format:
<script type="text/javascript">
        appDataLayer = [
            {
  "pageType" : "product",
  "topLevelCategory" : "Computer",
  "productCategory" : "Computer",
  "isbn" : "9781484233986",
  "productId" : "9781484233986",
  "pPriceGross" : "21.39",
  "ePriceGross" : "16.99",
  "eIsbn" : "9781484233993",
  "pIsbn" : "9781484233986",
  "fn" : "CSS Framework",
  . . .
The second column therefore consists of the values of the fields, with the field names consisting of the first column and with the two columns separated by colons. The values are included in double quotes and are suffixed with commas. For instance, when grep searches for the field fn, the second column of the line returned is as follows:
"CSS Framework",
The following two sed commands strip off the double quotes and the commas:
sed 's/,//g' |
sed 's/"//g');
The output is assigned to variable output. In this example, this is as follows:
CSS Framework
The value of output fills the corresponding element of a new array called args2[].
args2[${i}]=$output;

Therefore, if args[4] currently has the value fn, args2[4] has the value of the field fn, in this example CSS Framework.

For each line of file.txt, the args2[3], args2[4], and args2[5] elements are filled.

The following code snippet concatenates the args[] elements with the field names args[3], args[4], and args[5] using commas:
mysql=${args[3]};
for ((i=3+1;i<$ELEMENTS;i++)); do
sql=${args[${i}]};
mysql="$mysql, $sql";
done

shell.sh was used here with three fields, but it works equally for any number of fields. For example, if four fields were used, the previous code snippet would concatenate the elements args[3], args[4], args[5], and args[6] (the new field) using commas.

The code runs recursively and assigns the first field name to variable mysql, finds the next and concatenates the two fields with commas as mysql again, and repeats until all fields are included.

For the current example, the elements are pPriceGross, fn, and isbn. The variable mysql after the concatenation has the following value:
pPriceGross, fn, isbn
This string will be used to form the sqlstring, the 'INSERT INTO' SQL command, that will be used on the MySQL server to insert the data into the database’s book table. An example of sqlstring is as follows:
INSERT INTO book (pPriceGross, fn, isbn) VALUES('35.3', 'Mastering Zoho Creator', '9781484229064');
To form the values part of the fields for the sqlstring , the values of the fields, previously placed in args2[3], args2[4], and args2[5] elements, must be enclosed in single quotes and be separated by commas. Here’s an example:
'35.3', 'Mastering Zoho Creator', '9781484229064'
The following code snippet does this:
mysql2="'${args2[3]}'";
mysql2="$(echo $mysql2 | sed 's/ //')";
for ((i=3+1;i<$ELEMENTS;i++)); do
sql2=${args2[${i}]};
sql2="$(echo $sql2 | sed 's/ //')";
mysql2="$mysql2, '$sql2'";
done

In the previous source code, mysql2 forms the string of all field values separated by commas with a recursive process. The reason the spaces need to be removed from the mysql2 and sql2 variables is that Bash currently prepends a space character to elements, which are read using a for loop from an array.

With the following code line, the MySQL query string, held in variable sqlstring , is finally formed:
sqlstring="INSERT INTO $3 ($mysql) VALUES($mysql2);";
For instance, the sqlstring may hold this value:
INSERT INTO book (pPriceGross, fn, isbn) VALUES('35.3', 'Mastering Zoho Creator', '9781484229064');

For this example, statement INSERT INTO inserts a record into the book table by entering value 35.3 in the pPriceGross field, value Mastering Zoho Creator in the fn field, and value 9781484229064 in the isbn field.

To issue the previous command, a connection is created with the mysql server. The value root is provided to the argument --user, and the value apress (the value of variable $2) is provided as the --database argument. The execution command (-e) is the value of the sqlstring.
mysql --user="root" --database="$2" -e "$sqlstring";

The previous command runs a number of times equal to the number of books included in the web page source of the URL provided as the first argument of the shell ($1).

The text file used in this shell program is deleted at the end of the script.
rm -f file.txt;

Testing the Web Scraping Shell Program

After creating the shell.sh script and the book table in the apress database, you can use your web scraping shell script to complete the table. At the Linux terminal, change the working directory to the one that includes the shell script, in this example the home directory, and enter the shell.sh command with the required arguments.
$ cd ~
$ ./shell.sh https://www.apress.com/gp/web-development apress book pPriceGross fn isbn

Hint!

To run the shell script from any working directory, copy the shell.sh file to /usr/local/bin.

$ sudo cp ~/shell.sh /usr/local/sbin

Execute it then from any working directory as follows:

$ sudo shell.sh https://www.apress.com/gp/web-development apress book pPriceGross fn isbn

In shell.sh, all programs run in silent mode; therefore, the only messages printed to the output are the echo command messages printed at the terminal. The message displayed in each iteration has the following format:
---------------------------
https://www.apress.com/gp/book/9781484237144
pPriceGross, fn, isbn
'35.3', 'RESTAPI Development with Node.js', '9781484237144'
INSERT INTO book (pPriceGross, fn, isbn) VALUES('35.3', 'RESTAPI Development with Node.js', '9781484237144');
---------------------------
When the shell.sh script ends, open the apress database and print the book table contents. Use Ctrl+Alt+T to open a second terminal window. At the command line, enter the following:
$ mysql –u root

The MySQL server connects, and the mysql> prompt appears.
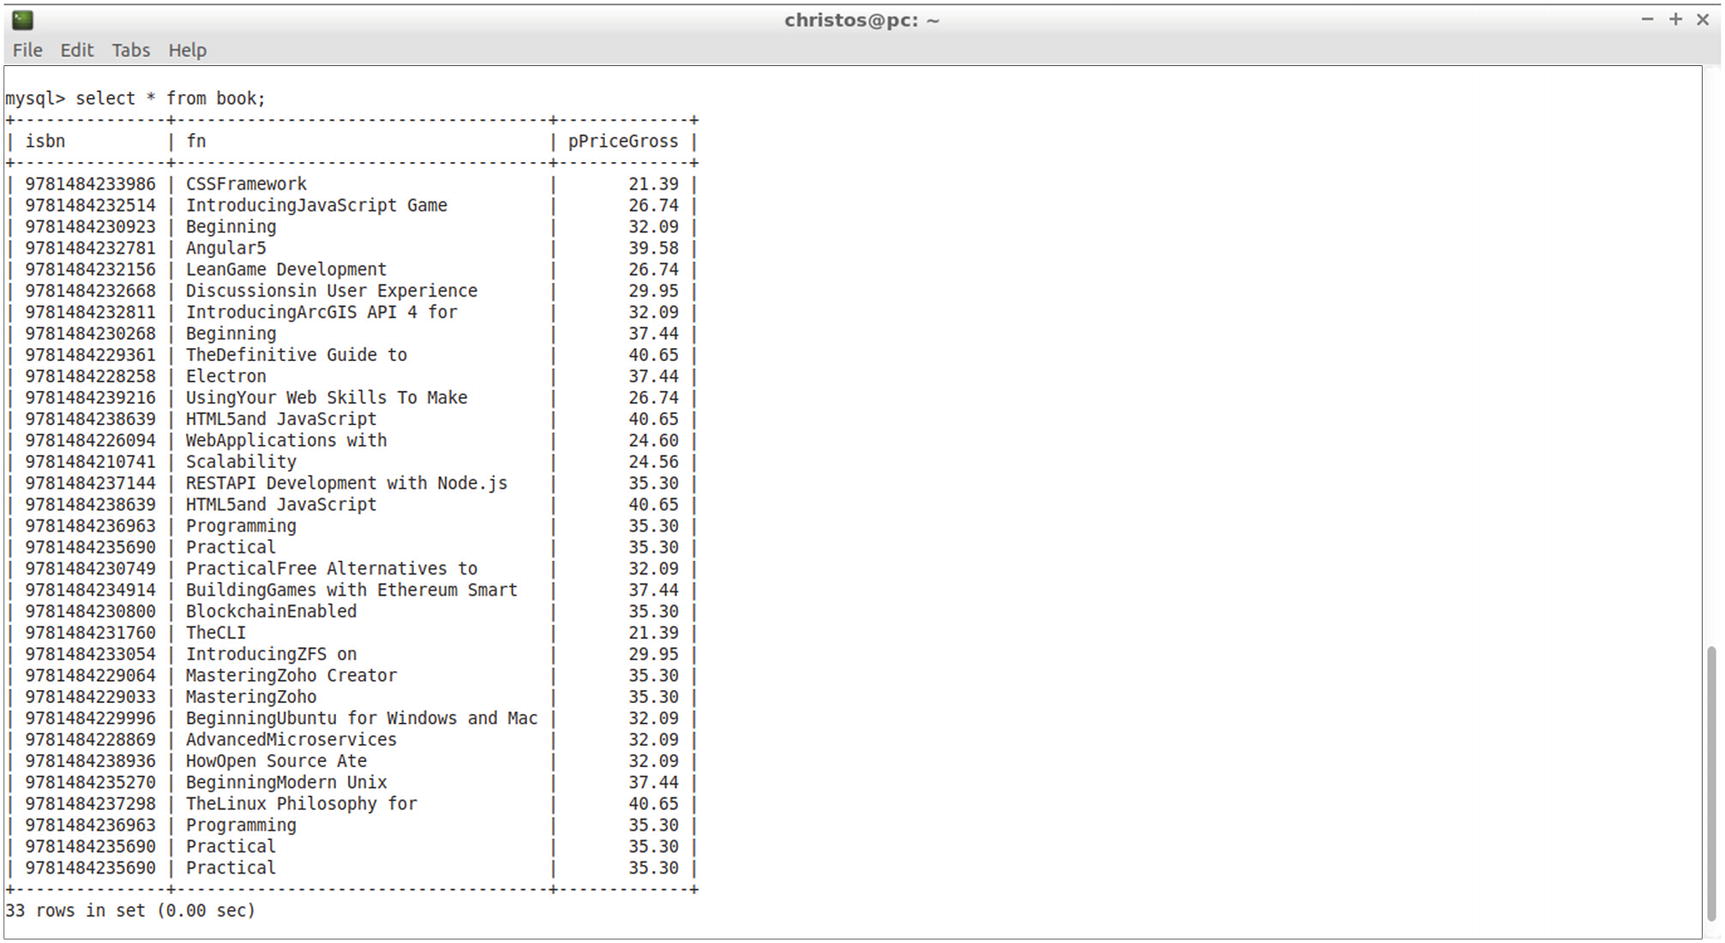
Enter the following commands to select the apress database and also view all the records of the table book.
mysql>use apress;
mysql>select * from book;
The following is the output of the select command:
+---------------+----------------------------------+-------------+
| isbn          | fn                               | pPriceGross |
+---------------+----------------------------------+-------------+
| 9781484233986 | CSSFramework                     |       21.39 |
| 9781484232514 | IntroducingJavaScript Game       |       26.74 |
| 9781484230923 | Beginning                        |       32.09 |
| 9781484232781 | Angular5                         |       39.58 |
| 9781484232156 | LeanGame Development             |       26.74 |
| 9781484232668 | Discussionsin User Experience    |       29.95 |
| 9781484232811 | IntroducingArcGIS API 4 for      |       32.09 |
| 9781484230268 | Beginning                        |       37.44 |
| 9781484229361 | TheDefinitive Guide to           |       40.65 |
| 9781484228258 | Electron                         |       37.44 |
| 9781484239216 | UsingYour Web Skills To Make     |       26.74 |
| 9781484238639 | HTML5and JavaScript              |       40.65 |
| 9781484226094 | WebApplications with             |       24.60 |
| 9781484210741 | Scalability                      |       24.56 |
| 9781484237144 | RESTAPI Development with Node.js |       35.30 |
| 9781484238639 | HTML5and JavaScript              |       40.65 |
| 9781484236963 | Programming                      |       35.30 |
+---------------+----------------------------------+-------------+
17 rows in set (0.00 sec)
Run the script a second time, using another URL from the ones included in the Categories link of the www.apress.com home page. For instance, use the following:
$ ./shell.sh https://www.apress.com/gp/open-source apress book pPriceGross fn isbn
At the second terminal, enter again the last used command.
mysql>select * from book;
As indicated by the following output, more records are added to the database table (see Figure 6-10):
+---------------+-------------------------------------+-------------+
| isbn          | fn                                  | pPriceGross |
+---------------+-------------------------------------+-------------+
| 9781484233986 | CSSFramework                        |       21.39 |
| 9781484232514 | IntroducingJavaScript Game          |       26.74 |
| 9781484230923 | Beginning                           |       32.09 |
| 9781484232781 | Angular5                            |       39.58 |
| 9781484232156 | LeanGame Development                |       26.74 |
| 9781484232668 | Discussionsin User Experience       |       29.95 |
| 9781484232811 | IntroducingArcGIS API 4 for         |       32.09 |
| 9781484230268 | Beginning                           |       37.44 |
| 9781484229361 | TheDefinitive Guide to              |       40.65 |
| 9781484228258 | Electron                            |       37.44 |
| 9781484239216 | UsingYour Web Skills To Make        |       26.74 |
| 9781484238639 | HTML5and JavaScript                 |       40.65 |
| 9781484226094 | WebApplications with                |       24.60 |
| 9781484210741 | Scalability                         |       24.56 |
| 9781484237144 | RESTAPI Development with Node.js    |       35.30 |
| 9781484238639 | HTML5and JavaScript                 |       40.65 |
| 9781484236963 | Programming                         |       35.30 |
| 9781484235690 | Practical                           |       35.30 |
| 9781484230749 | PracticalFree Alternatives to       |       32.09 |
| 9781484234914 | BuildingGames with Ethereum Smart   |       37.44 |
| 9781484230800 | BlockchainEnabled                   |       35.30 |
| 9781484231760 | TheCLI                              |       21.39 |
| 9781484233054 | IntroducingZFS on                   |       29.95 |
| 9781484229064 | MasteringZoho Creator               |       35.30 |
| 9781484229033 | MasteringZoho                       |       35.30 |
| 9781484229996 | BeginningUbuntu for Windows and Mac |       32.09 |
| 9781484228869 | AdvancedMicroservices               |       32.09 |
| 9781484238936 | HowOpen Source Ate                  |       32.09 |
| 9781484235270 | BeginningModern Unix                |       37.44 |
| 9781484237298 | TheLinux Philosophy for             |       40.65 |
| 9781484236963 | Programming                         |       35.30 |
| 9781484235690 | Practical                           |       35.30 |
| 9781484235690 | Practical                           |       35.30 |
+---------------+-------------------------------------+-------------+
33 rows in set (0.01 sec)
../images/468152_1_En_6_Chapter/468152_1_En_6_Fig10_HTML.jpg
Figure 6-10

The output

You can add even more records by using the rest of the Categories menu links.

Summary

In this chapter, you used the MySQL server to create, manage, and query databases using SQL commands. You inserted records into the database tables manually and also used the web scraping technique to fill the database automatically by collecting data provided by a site.

In the following chapter, you will run PHP programs that connect to the MySQL server, enabling the web server to provide a search capability and therefore offer dynamic web content to its sites.

..................Content has been hidden....................

You can't read the all page of ebook, please click here login for view all page.
Reset
3.135.207.129