Most people are familiar with using a web browser. Even when they use a new browser for the first time, they are capable of visiting a web page and navigating to other sites immediately. This is because browsers usually encompass all the same handy functionalities. For example, all browsers include an address bar at the top of the window, a history option, a favorites folder, and some navigation buttons.
Web servers, on the other hand, rarely look similar to each other. However, servers do share some common ground. In this book, you’ll be using two different web servers, and you’ll learn about the common features of both as well as the differences. In this chapter, you’ll use the Apache web server, and in Chapter 5 you’ll use another popular web server, Lighttpd.
Getting Started with Apache
The Apache web server is one of the most popular web servers today. This is because of how easy the administrative features are to use and because of its flexibility based on its modular design. Apache got its name in 1995 when the Apache Project started. The Apache Project was a collaboration of many programmers, and hence the source code required many patches (software fixes). Through software modules, Apache offers additional functionality that administrators can install. Because of these added components, Apache isn’t by default a huge, monolithic piece of software.
Apache was one of the first servers to support virtual hosts (vhosts). This notion—also referred as virtual servers on other web servers like Cherokee—denotes the capability of a single web server to run multiple sites simultaneously that are differentiated either by the IP address, by the port number, or by the domain name used in the client request.
Installing and Testing Apache
The Apache program is currently known as apache2, and you can download and install it from the Linux terminal using the following command:
$ sudo apt-get install apache2
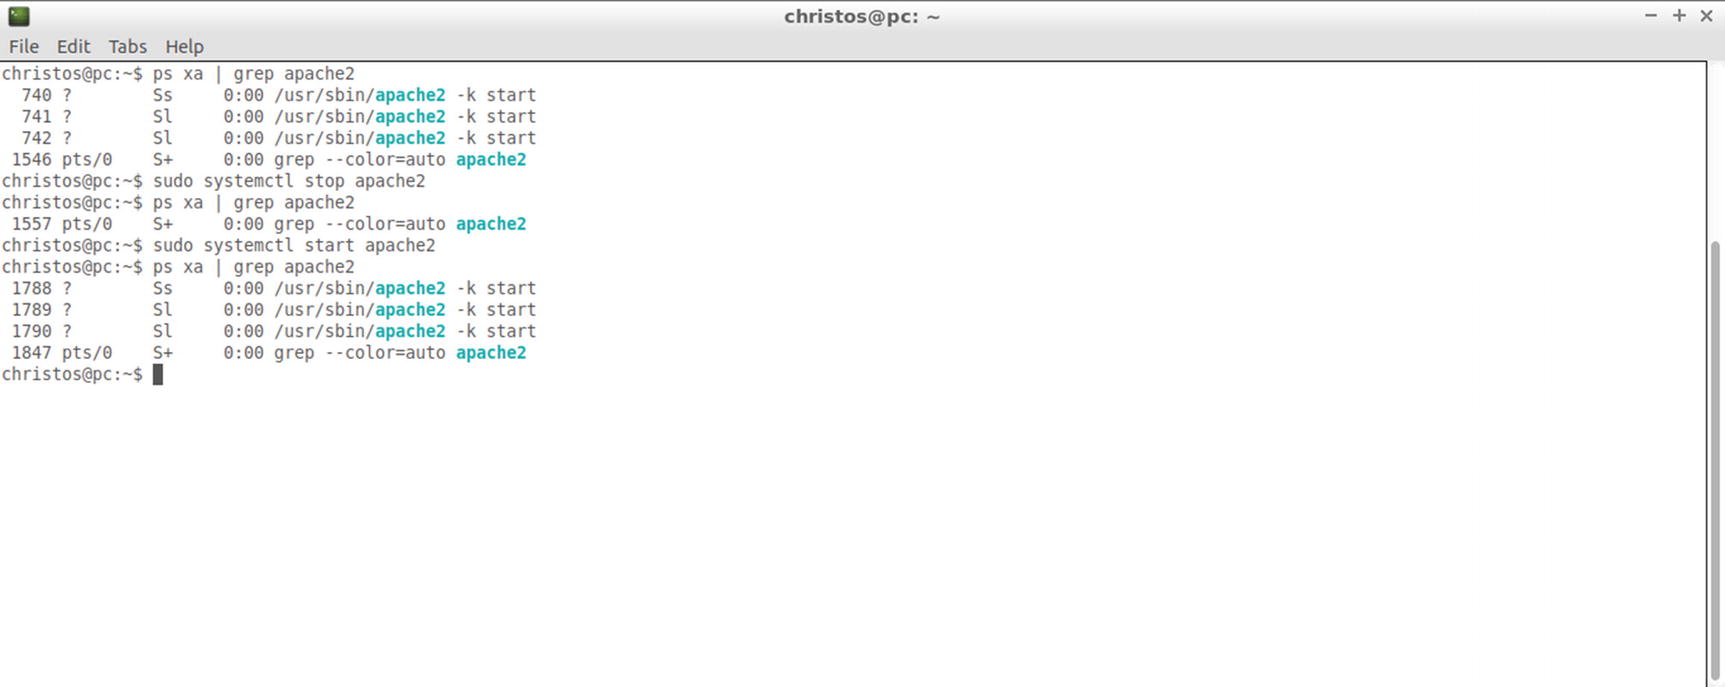
The apache2 process starts running. Use the ps (process status) command from the Linux terminal to view the apache2 processes.
$ ps xa | grep apache2
More than one apache2 process is created instantly to be ready to serve further client requests. Figure 1-1 displays the process IDs (PIDs) for the Apache processes returned at this time by the command ps.
Figure 1-1
The command ps output lists the apache2 PIDs
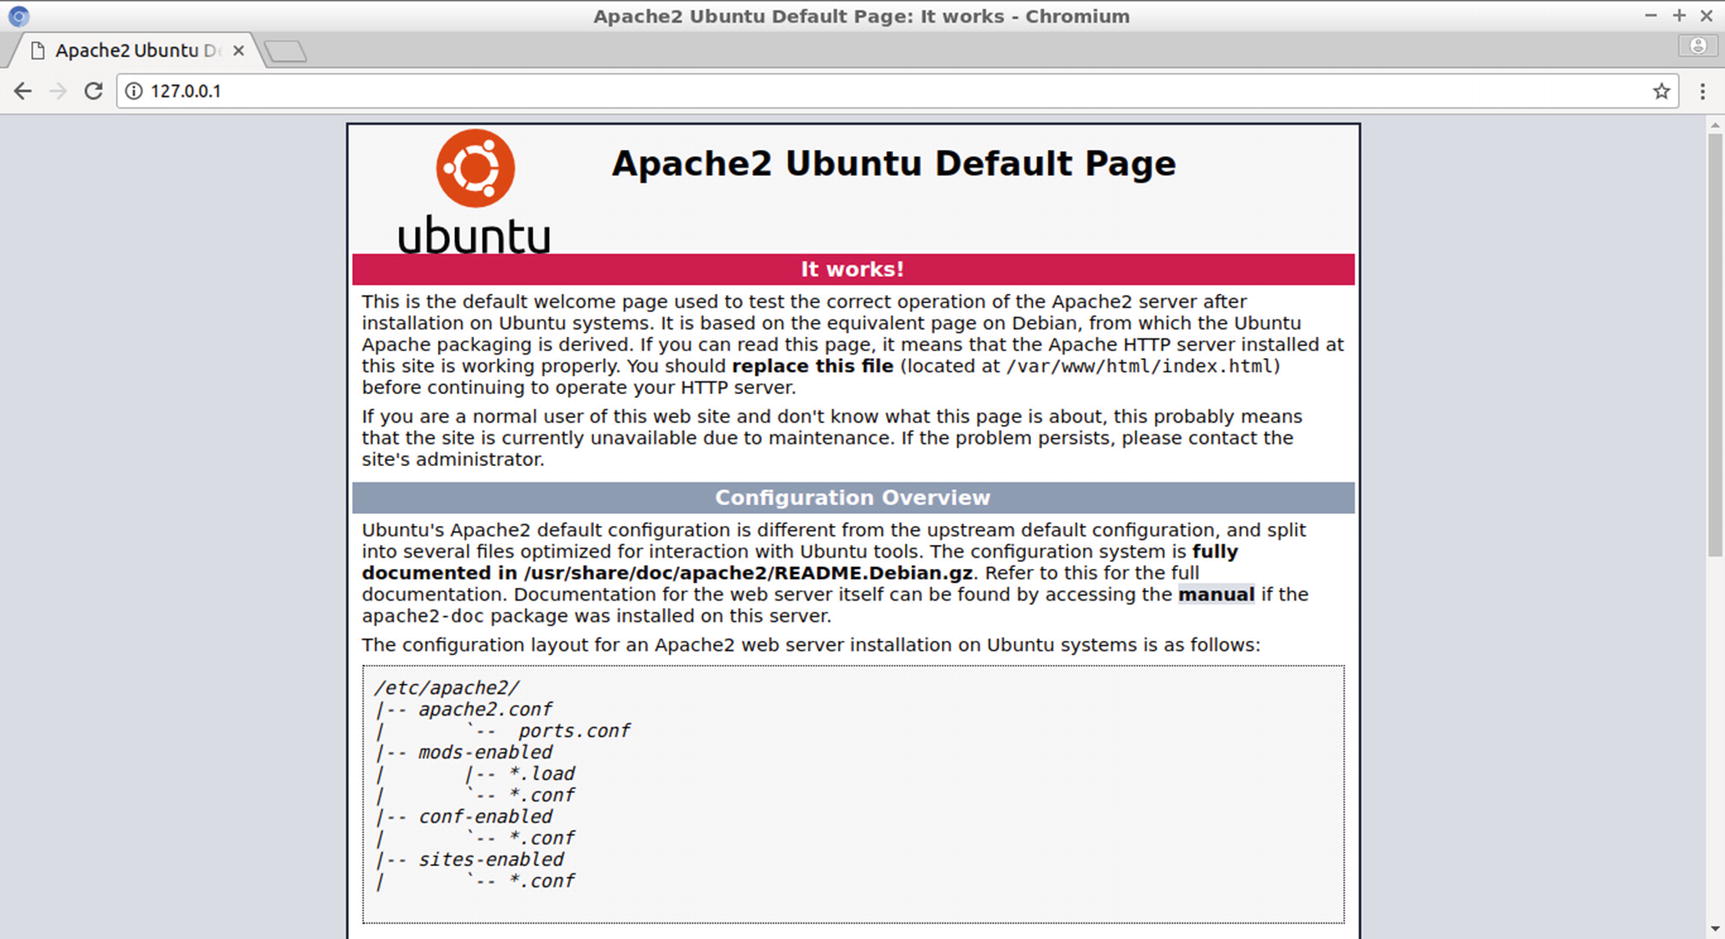
The web server is up and running and ready to dispatch the first page. In the address bar of your browser, enter the loopback IP address, which is the IP address your PC owns even if no network card is installed, or its corresponding host name. Here are some examples:
127.0.0.1
http://127.0.0.1
localhost
Apache responds by providing the directory index since no actual web page was specified in the URL.
Hint!
A default page set for a specific directory is called the directory index for this directory. Also, the directory index for the document root (i.e., the base directory for a website) is the directory index of the site.
The directory index contents include a short introduction to the Apache configuration options. Figure 1-2 displays the Apache default page for Ubuntu.
Figure 1-2
The Apache directory index for Ubuntu
As the first section’s title states, “It works!” The bad news is that so far it works only for users who use their own PC and are interested in just the Apache configuration. There is good news, though. Following the steps in the book, you can customize your web server with your preferences, and you can make your site available to the whole Internet.
Adding New Directories and Web Pages
By reading the web page’s content, you can find out the document root and the file name of the directory index. The following text:
"You should replace this file (located at /var/www/html/index.html)"
indicates that this path is the document root:
/var/www/html/
and indicates that this file is the directory index:
index.html
From the Linux terminal, change the current working directory to /var/www/html, as shown here:
$ cd /var/www/html
Create a copy of index.html to use your own directory index.
$ sudo cp index.html index_OLD.html
Use a Linux text editor such as gedit to edit the original index.html, as shown here:
$ sudo gedit index.html
In the gedit window, enter your own HTML source code, for instance:
<!DOCTYPE html>
<html>
<head>
<title>Testing Apache</title>
</head>
<style>
p {
font-size:24px;
text-align:center;
color:blue;
}
body{
background-color:yellow;
}
</style>
</head>
<body>
<p>Hello World!</p>
</body>
</html>
Click the Save button in the gedit window. Next enter the loopback IP address in the browser’s address bar. As displayed in Figure 1-3, the Apache server displays your own web page.
Figure 1-3
A customized directory index printing “Hello World!”
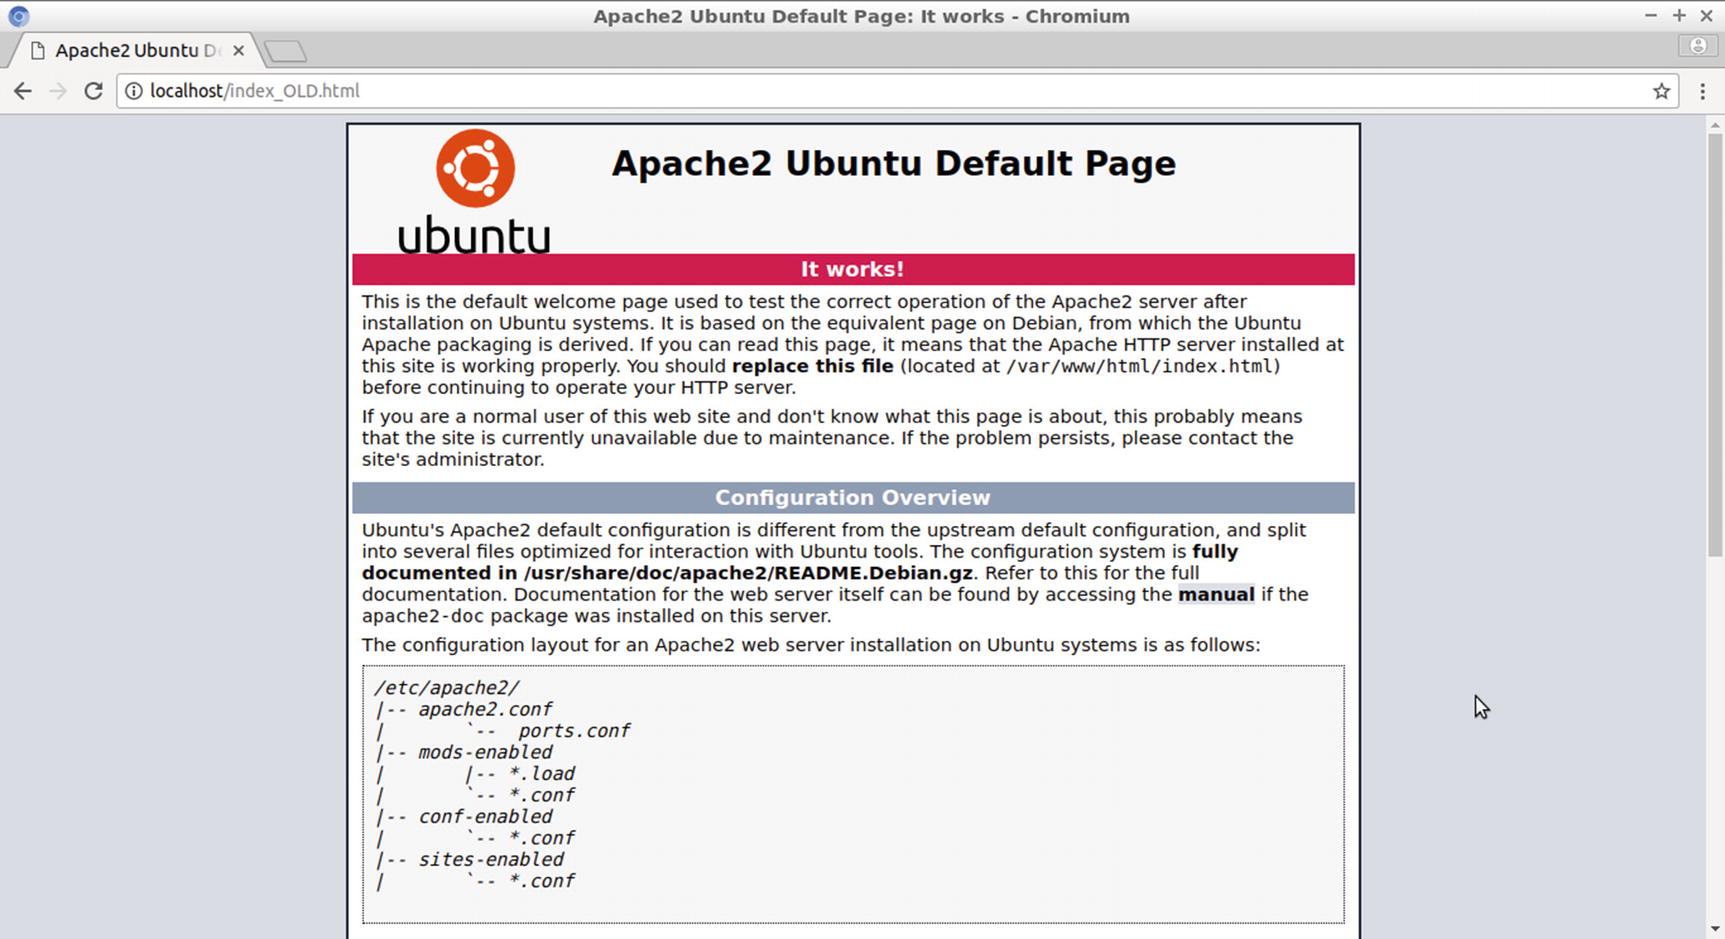
To request another web page, for instance index_OLD.html, you can provide the URL for the web page file by including the web page path starting from the document root. For instance, enter one of the following in the address bar of your browser:
127.0.0.1/index_OLD.html
localhost/index_OLD.html
Because index_OLD.html is in the document root, the path includes only the file name of the web page. By using this URL, the default web page of Apache for Ubuntu is displayed again, as shown in Figure 1-4.
Figure 1-4
Downloading a specific web page by including its path in the URL
Start including subdirectories in the document root to better organize your web site. At the Linux terminal, change the working directory to the document root.
$ cd /var/www/html/
Create a new test directory. In the new directory, create test.html, another HTML file.
$ sudo mkdir test
$ sudo gedit test/test.html
In the gedit window, enter some HTML source code for test.html and click the Save button. Then enter the file name path of the web page, excluding the document root, in the address bar of your browser. The file name path for test.html is as follows:
/var/www/html/test/test.html
You can omit the document root part since on the web server any file reference starts from the document root; therefore, the URL of test.html is as follows:
localhost/test/test.html
or 127.0.0.1/test/test.html
The web page is loaded in your browser, as displayed in Figure 1-5.
Figure 1-5
Testing a web page located in the document root subdirectory
Testing Your Web Site from Another Computer of Your LAN
As another test, you can see whether Apache connects to other computers on the same local area network (LAN) as your PC. A connection between two workstations on the same LAN happens via the Internet layer of the TCP/IP protocol between their private IP addresses. The private IP addresses are valid only internally to the LAN. This is in contrast to public IP addresses that are globally accessible to the whole Internet. Put simply, all workstations in a LAN possess private IP addresses and are represented to the Internet with the public IP address of the LAN router (which also includes a private IP address for internal communication with the LAN workstations).
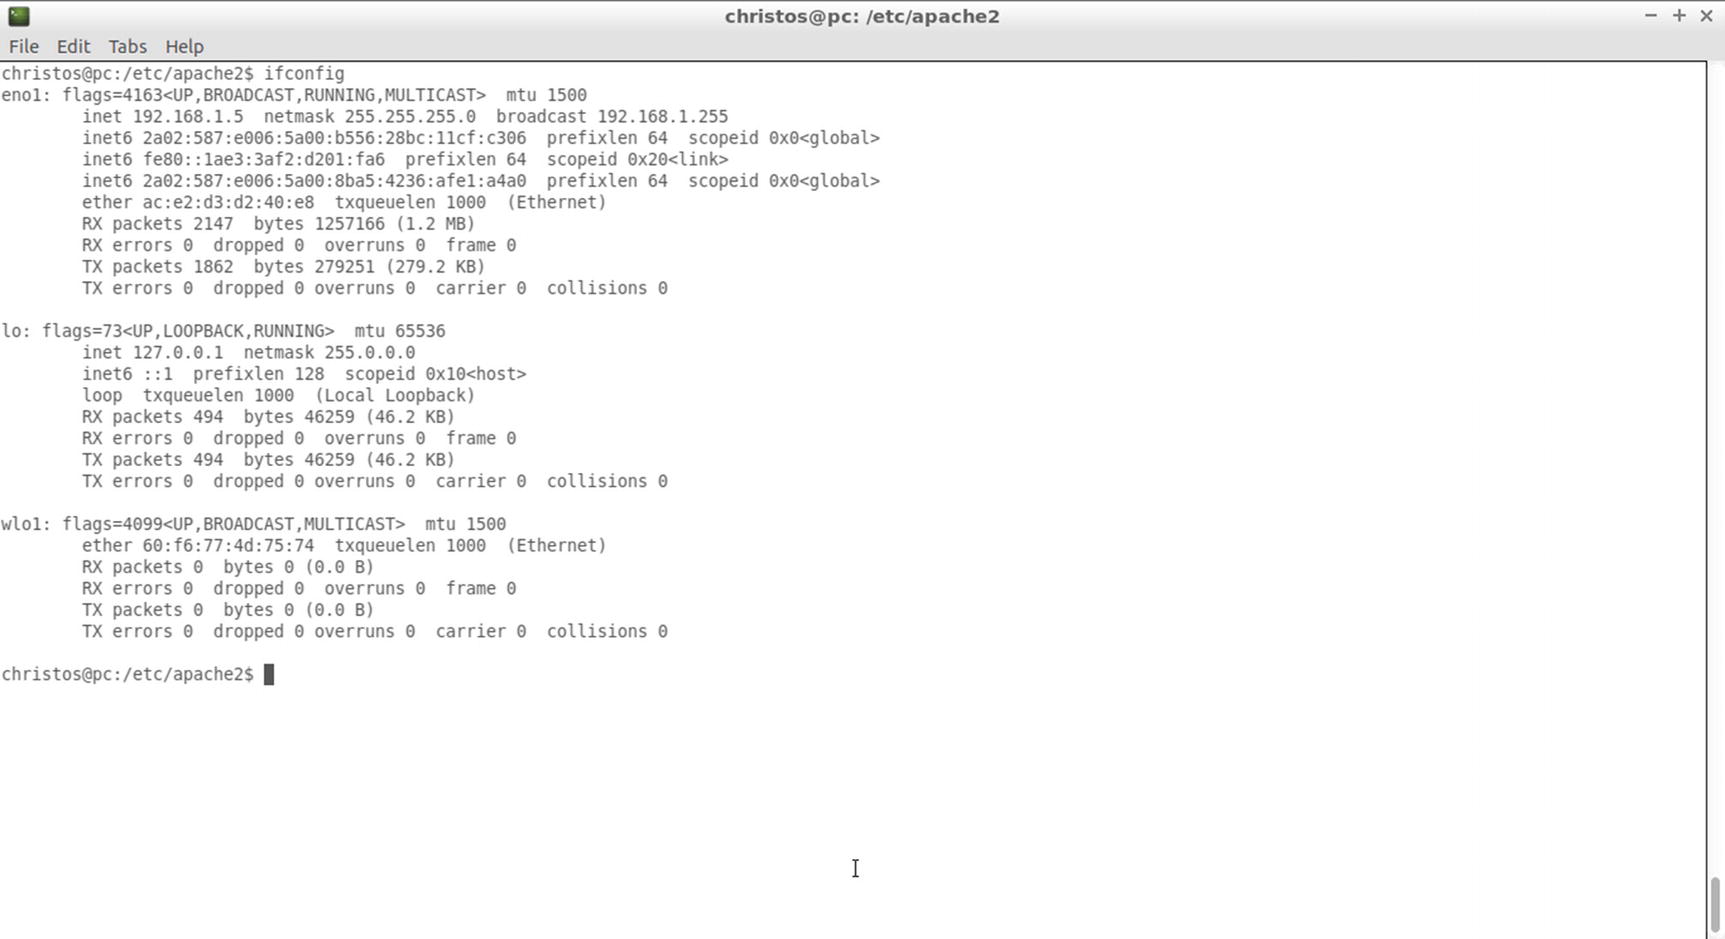
At the Linux terminal, use the ifconfig command to find out the private IP address of your computer.
$ ifconfig
You can also use the hostname command.
$ hostname -I
The private IP address of my computer used at the given time was 192.168.1.5, as shown in Figure 1-6.
Figure 1-6
ifconfig returning the private IP address
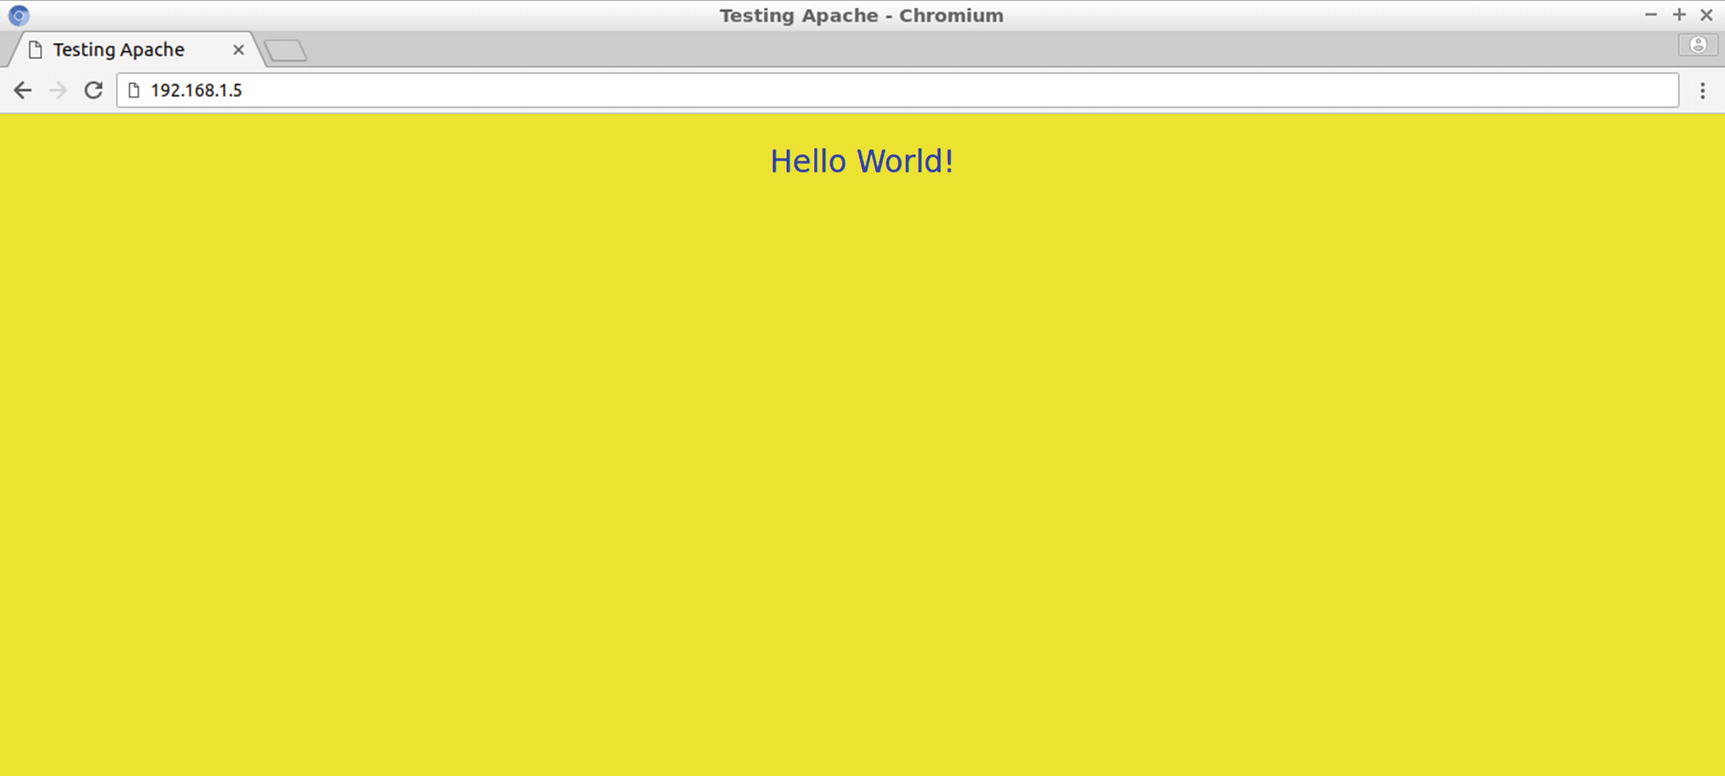
Use the private IP address returned by ifconfig in the address bar of the local browser. The web page loads just like previously (with the loopback address), as shown in Figure 1-7.
Figure 1-7
Testing the web server using a private IP address
Next try the same IP address from another computer of your LAN. Figure 1-8 displays the browser used on a Windows 7 system in the same LAN.
Figure 1-8
Testing the web server from another PC of your LAN
Providing a Static Private IP Address to the Web Server
The next step for the web server configuration is to set up a static private IP address. This is a private IP address that remains the same each time the computer that hosts your web server restarts. This step is optional to test your server from your LAN, but it is essential for making the server available to the whole Internet. To provide a static private IP address, the network connection of the computer that hosts the web server has to properly configured.
The most straightforward configuration for a workstation in a LAN is to obtain its IP address with the Dynamic Host Configuration Protocol (DHCP). When a PC is configured with the DHCP option, on startup it is assigned by the router with an IP address, a network mask, the IP address of the default gateway (the router itself), and the DNS server used for performing the translations between domain names and IP addresses. The drawback with DHCP is that your PC gets the next available IP address from an IP address pool, which may be a different address from the one obtained the previous time (a dynamic address).
Your other option is to use a static private IP address. Each time you start your PC, its IP address remains the same. A static IP address is mandatory for a server required to be available for connections across the Internet. To implement a static IP address, you have to configure manually the information previously retrieved by DHCP. Run first the route command from your terminal to find the default gateway (the router) in your LAN, as shown in Figure 1-9.
$ route –n
Figure 1-9
The route command returns the default gateway IP address
The IP address for the gateway (the router) is therefore 192.168.1.1.
Run ifconfig again to gather information about the current IP address and the mask.
As you saw in Figure 1-6 earlier in the chapter, the IP address for the web server is currently 192.168.1.5 with a netmask of 255.255.255.0. The nonzero part of the netmask describes the part of the IP address that corresponds to the network, while the zero describes the part that corresponds to the computer in that network. By logical ANDing the IP address and its netmask, you get the network address.
The LAN in this example therefore has the IP address 192.168.1.0. This leaves the last byte to represent the computer in the network. This is therefore the byte that you will change to choose the static IP address for the web server. You can select any unused value from 1 to 254. For instance, for the value 100, you get the IP address 192.168.1.100.
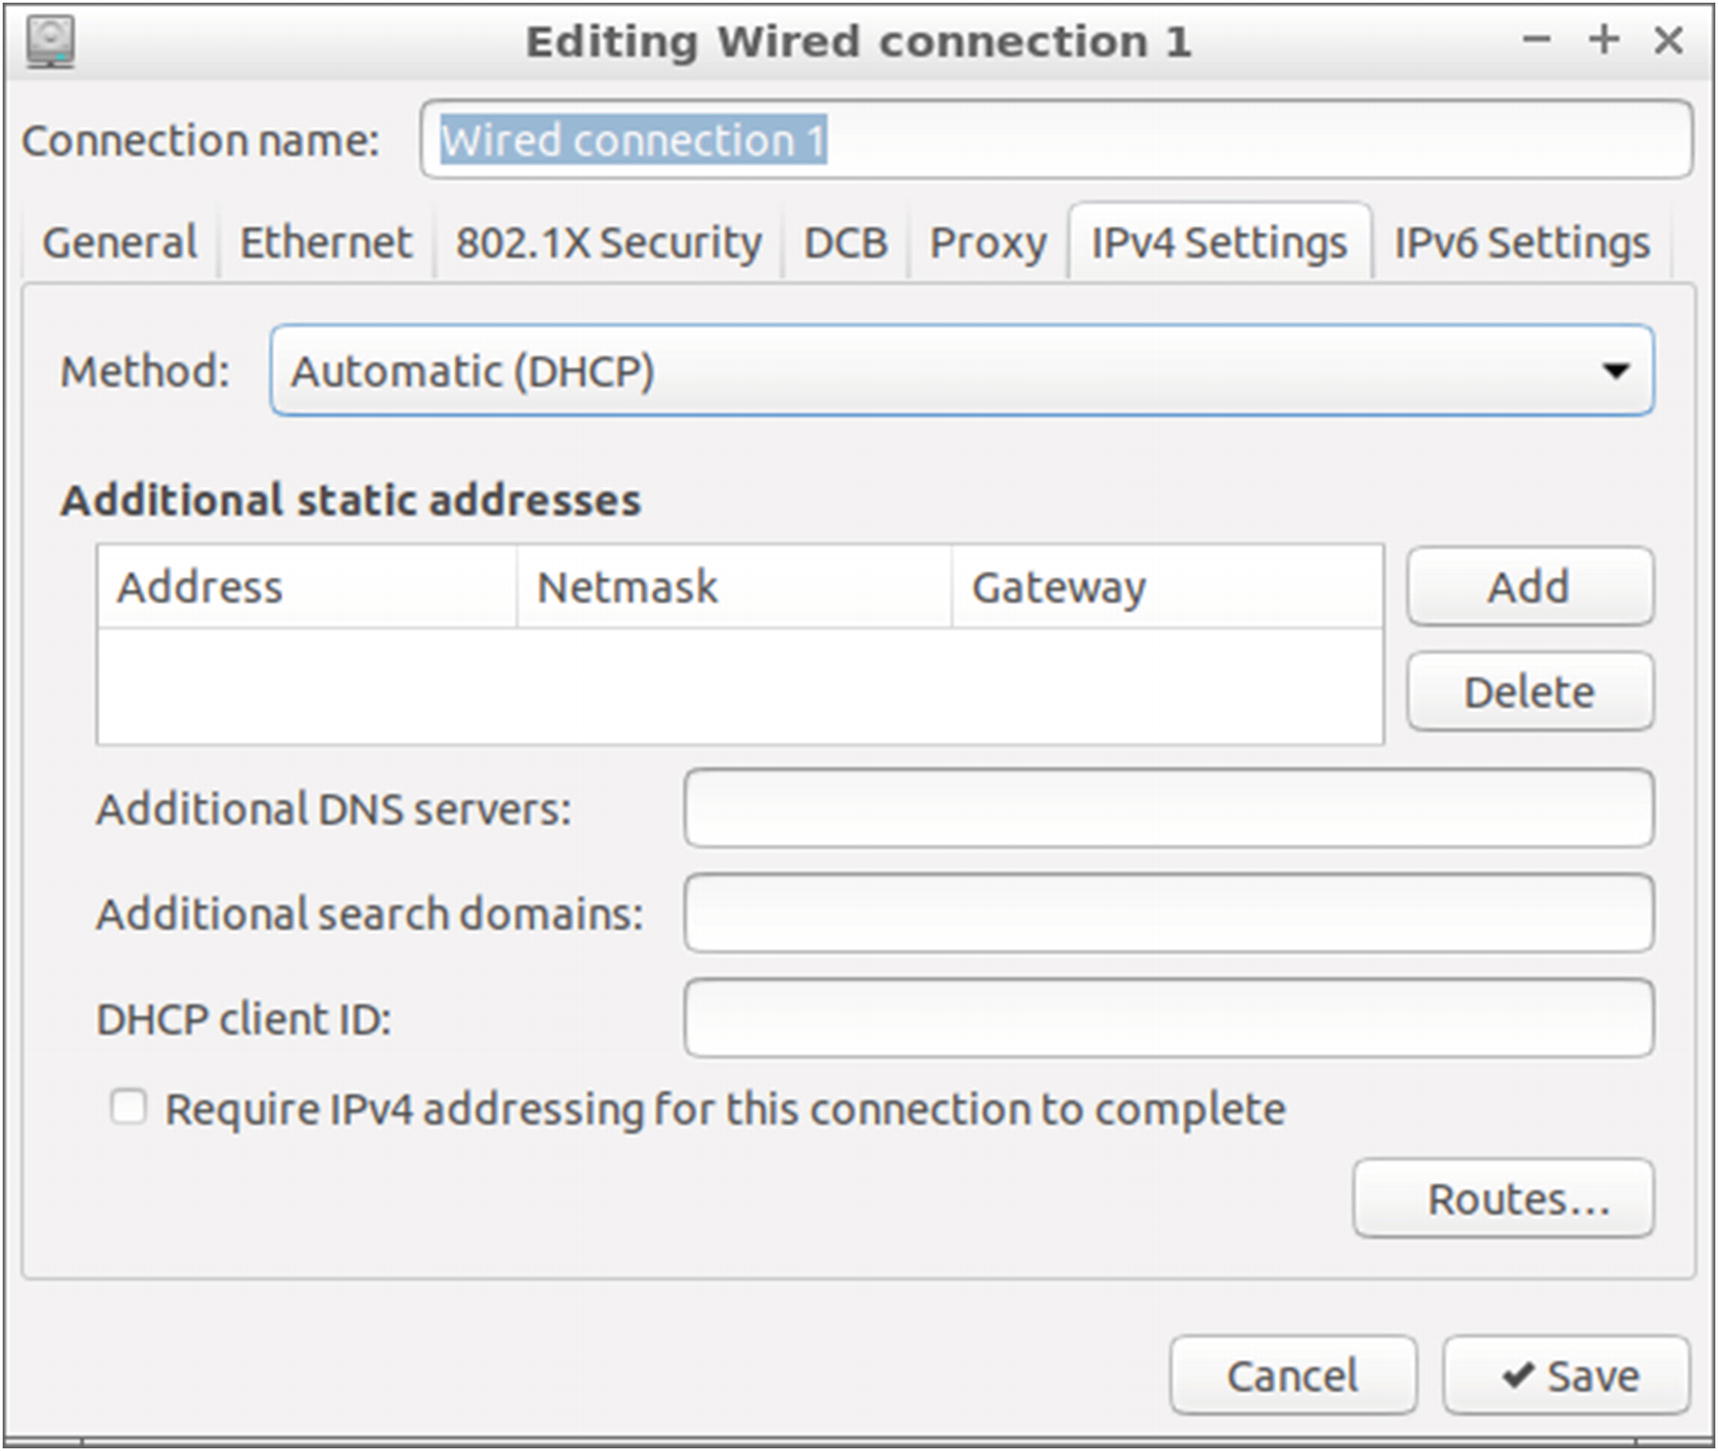
With the information collected, click the Wired Network icon on your desktop and then click Next. Alternatively, select System Settings ➤ Network ➤ Wired or Settings ➤ Preferences ➤ Network Connections depending on your Ubuntu version. In the Network Connections window that appears, as shown in Figure 1-10, double-click “Wired connection 1” (or the option with a similar name in the Ethernet list).
Figure 1-10
The Network Connections window
The “Editing Wired connection 1” window that appears next provides the IPv4 Settings and IPv6 Settings tabs for configuring IPv4 and IPv6 addresses, respectively (Figure 1-11).
Figure 1-11
The “Editing Wired connection 1” window
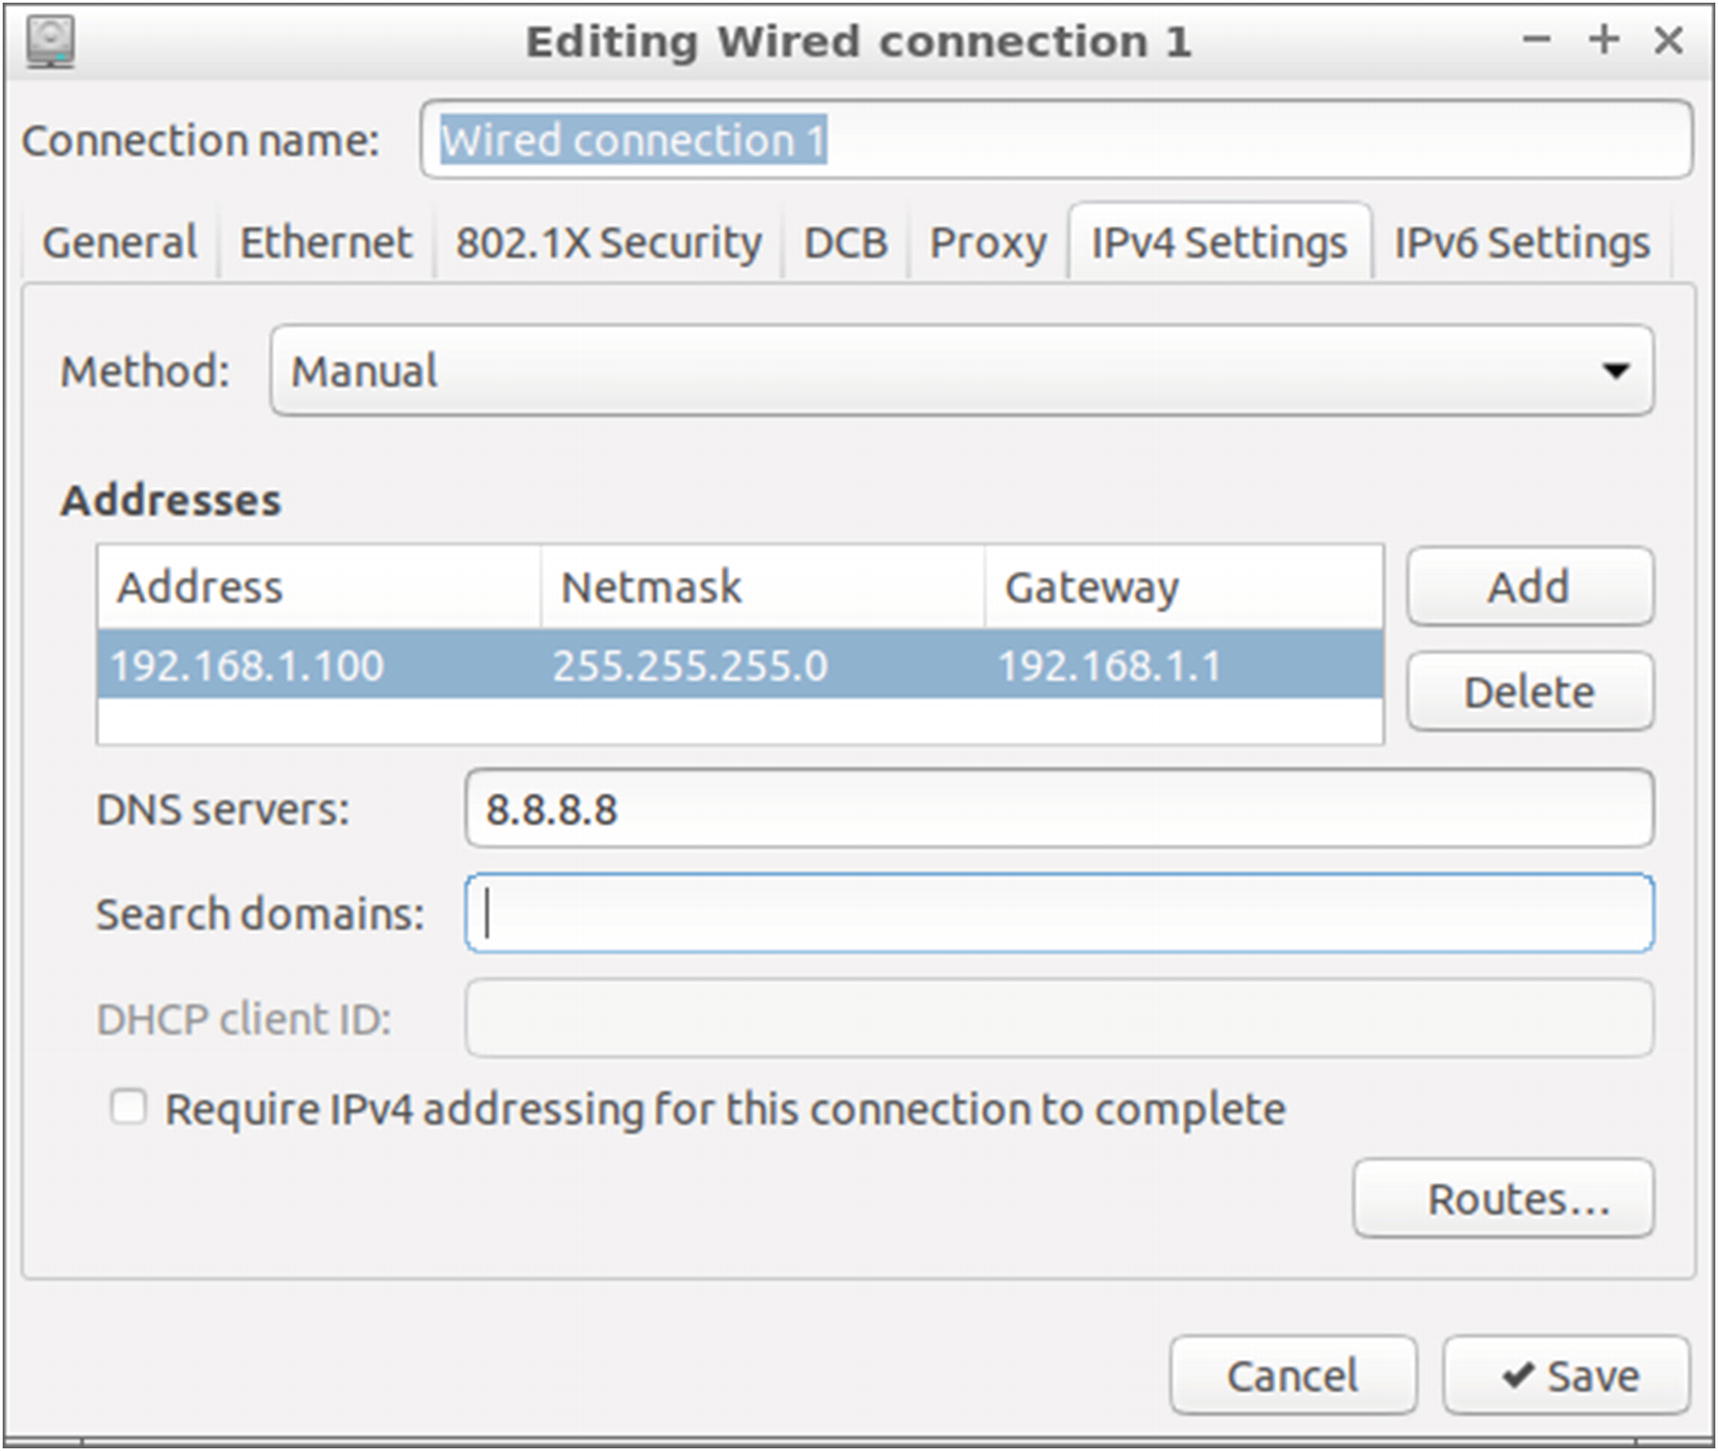
On the IPv4 Settings tab, the method currently selected is Automatic (DHCP). Deselect this option and select instead Manual from the Method list (Figure 1-12).
Figure 1-12
Applying the Manual method for configuring the IPv4 settings
Click the Add button to complete the required fields for manually setting the connection parameters. Under Address, enter your preferred IP address. For the given LAN with the IP address 192.168.1.0, you could enter, for instance, 192.168.1.100 as the new static IP address for the web server. Enter also the value for the netmask, 255.255.255.0, for the Netmask option, and enter the IP address of the router, 192.168.1.1 in this example, for the Gateway option. You need also to provide the IP address (or addresses) for a DNS server in the “DNS servers” field. If you enter more than one IP address, separate them using commas. For the DNS server, you can use the IP address of the DNS server suggested by your Internet service provider (ISP) or use the IP address of a freely available DNS server like Google’s 8.8.8.8.
Click the Save button to confirm the new settings. To activate the new IP address, click the Network Manager icon and select Disconnect; then click again and select “Wired connection 1” or enter the following at the Linux terminal:
$ sudo service network-manager restart
You can try now the static IP address of your web server by entering it in the address bar of a browser and running it from another PC in your LAN, as indicated in Figure 1-13.
Figure 1-13
Testing the web server by using its static IP address
In the following section, you can configure your Linux firewall to block connections for all port numbers except the ones set by you.
Using the Linux Firewall
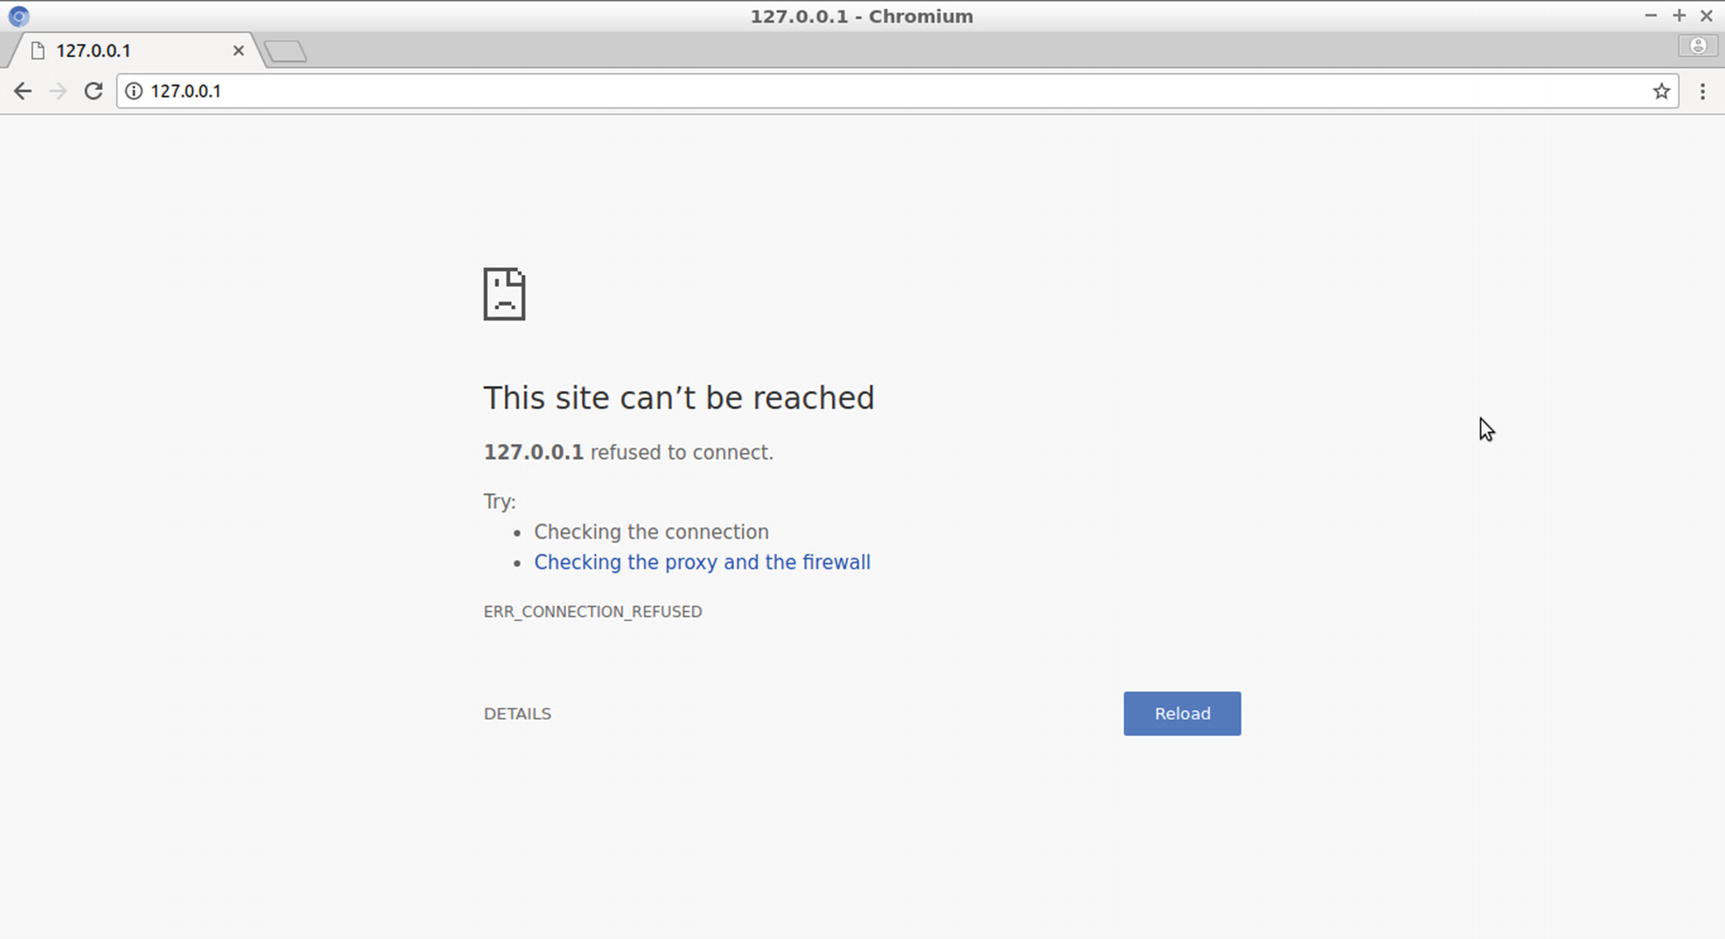
You should be able to view your web page on another PC in your LAN without a problem. However, if a firewall is enabled in your system, you will get the error message “This site can’t be reached” or a similar one in your browser. (A firewall is an application that checks the connections to your system and permits or bans them according to the rules that you set.)
In the system I used in the previous section, the pre-installed Ubuntu Linux firewall (ufw) was disabled by default. To disable it, you can use this command:
$ sudo ufw disable
Now try to connect and see if you get the error message. You can then restore it using the following command:
$ sudo ufw enable
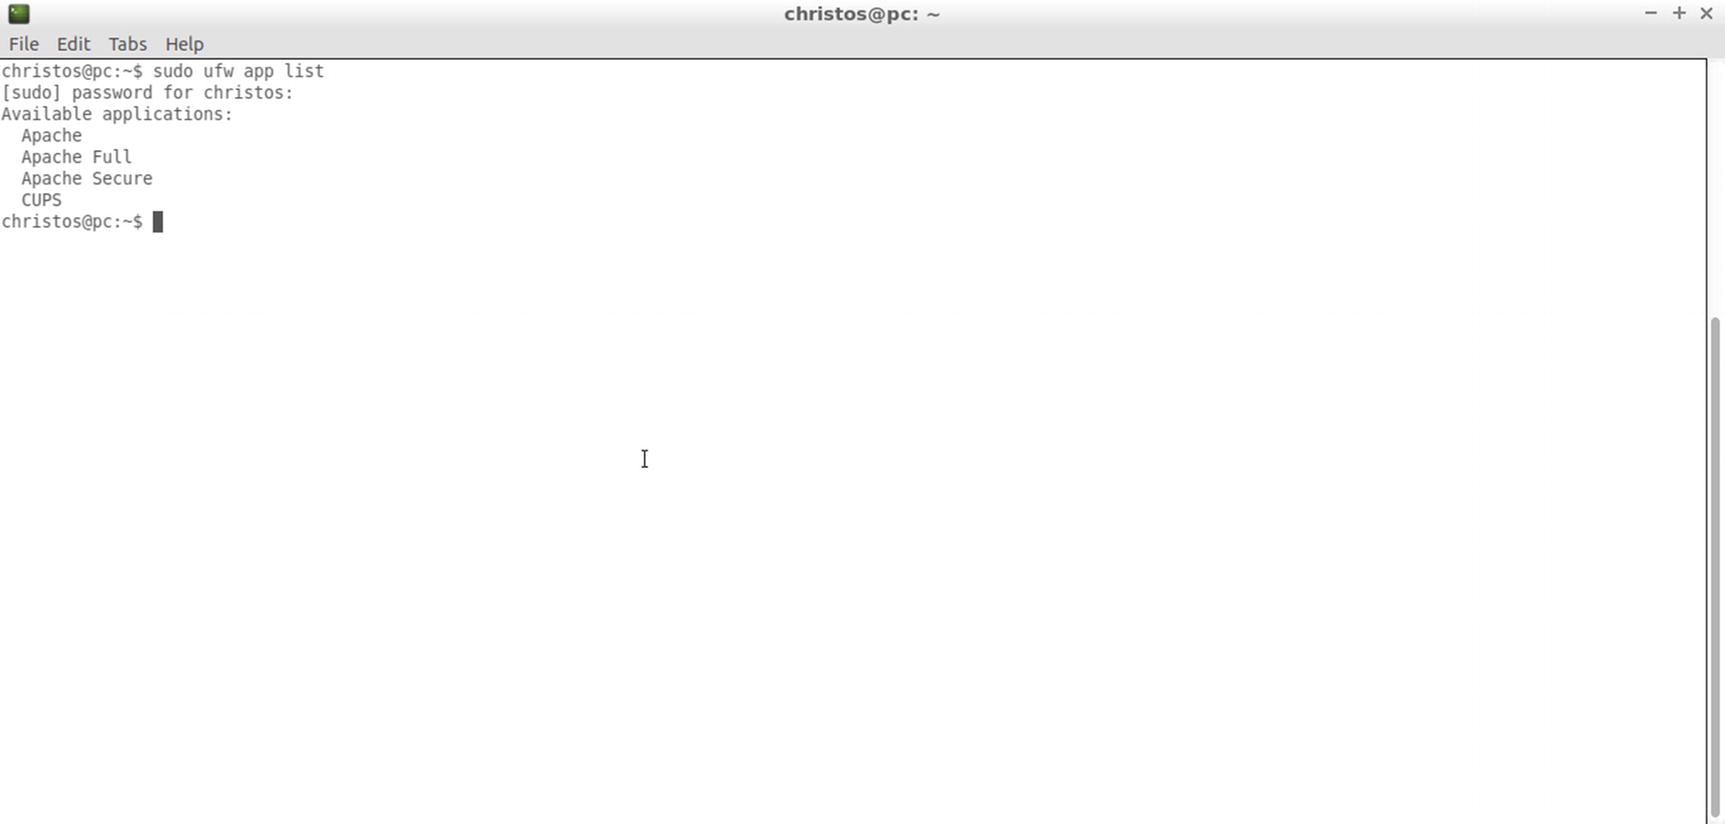
To allow the Apache server to receive connections while a firewall is on, you can specify the appropriate rules. Apache, trying to make your work easy, has already set the basic rules for you when it was installed on your system. At the command line, enter the following:
$ sudo ufw app list
The command’s output includes the ufw profiles for Apache shown in Figure 1-14.
Figure 1-14
Listing the ufw profiles
Profile Apache is for the default HTTP port 80.
Profile Apache Full is for both ports80 and 443.
Profile Apache Secure is for the default HTTPS port 443.
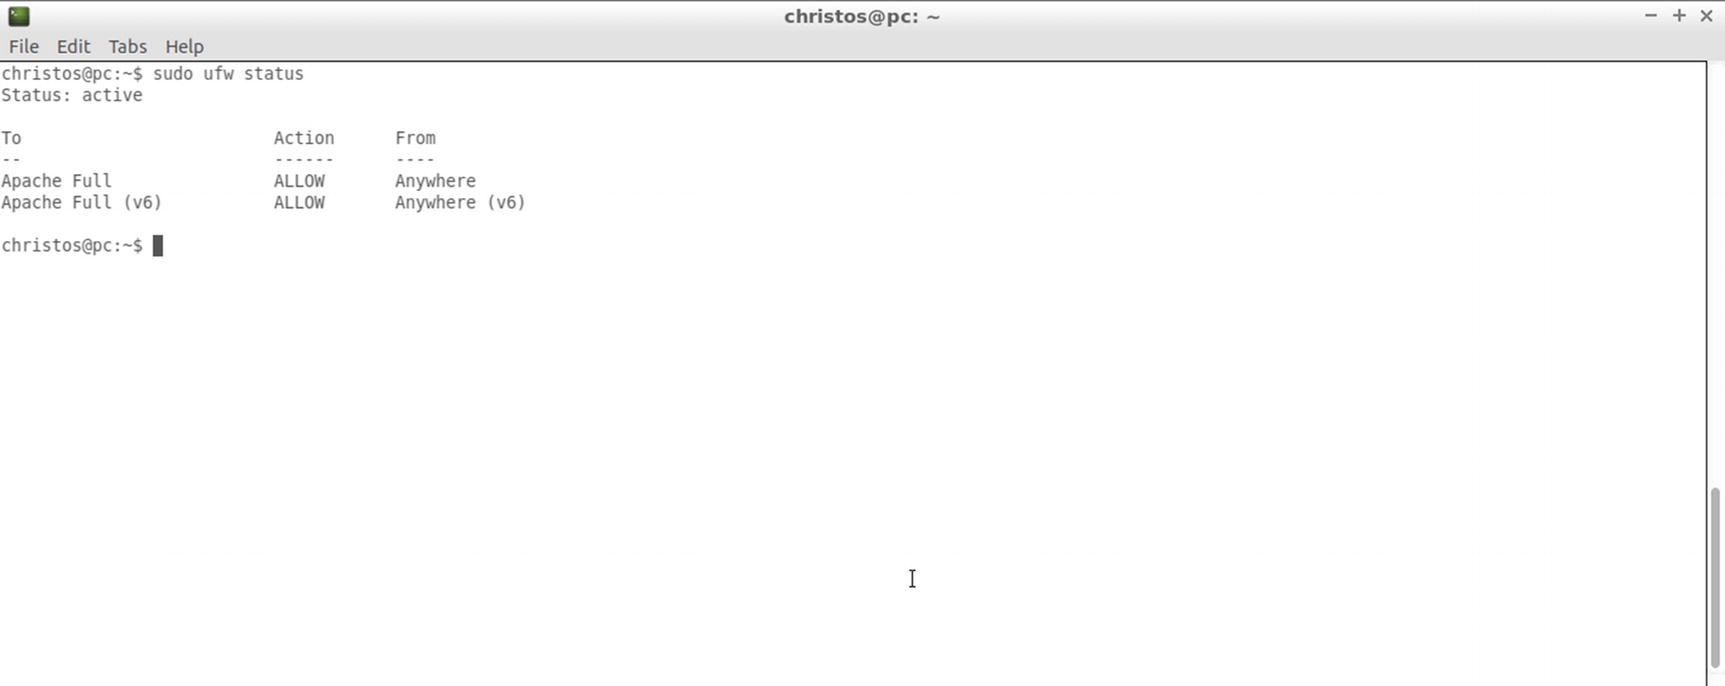
To allow incoming traffic for the Apache Full profile, enter the following at the Linux terminal:
Displaying the status of the ufw firewall with the Apache Full profile set
An even better way to verify this is to connect to the Apache web server from another PC in your LAN. The web page should load as usual.
Managing the Apache Process
To apply new configuration rules while Apache runs and also to start and stop the Apache process (required, for instance, when you want to try other web servers), you need to run a few commands from the Linux terminal.
To stop your web server, enter the following at the command line:
$ sudo systemctl stop apache2
Or use:
$ sudo service apache2 stop
To start the Apache web server when it is already stopped, enter the following:
$sudo systemctl start apache2
Or use:
$ sudo service apache2 start
Do the following experiment to implement the previous commands. First run the following to view the apache2 processes:
$ ps xa | grep apache2
Then use the systemctl stop command and run the ps command again. You’ll find that the apache2 processes have been “killed.” You can also try a request from your browser. You’ll find that the message “The site can’t be reached” appears, as viewed in Figure 1-16.
Figure 1-16
Trying to download a web page with the Apache server stopped
Use the systemctl start command to restore the Apache server.
Displaying the Apache PIDs when the server runs and the absence of Apache PIDs when the server stops
To stop and then start the Apache server again, enter the following:
$ sudo systemctl restart apache2
To reload Apache (that is, to retain the process running and just update the configuration), enter the following:
$ sudo systemctl reload apache2
or you can enter the following:
$ sudo service apache2 force-reload
which is equal to the the following:
$ sudo service apache2 reload
The Apache server starts by default when the system boots. To disable that configuration, enter the following:
$ sudo systemctl disable apache2
To make Apache start on system boot, enter the following:
$ sudo systemctl enable apache2
Working with Virtual Hosts
Virtual hosts (vhosts) or virtual servers enable a web server to host multiple sites simultaneously. Vhosts fall into one of the following categories:
IP-based virtual hosts, where each vhost is dedicated to a site that makes use of a specific IP address from the web server IP addresses
Port-based virtual hosts, where each vhost listens on a different port number for each site it hosts
Name-based virtual hosts, where each vhost is dedicated to a site with a specific domain name
An Apache configuration can mix all these categories and also include a default host.
The initial Apache configuration file is called 000-default.conf and is found in the /etc/apache2/sites-available directory. Apache requires a new configuration file to have a .conf file extension. At the Linux terminal, change the working directory to sites-available, which is the Apache directory that contains the configuration files.
$ cd /etc/apache2/sites-available
Open the default configuration file 000-default.conf with the command cat, as shown here:
$ cat 000-default.conf
The file opens in a new window. The file contents are as follows:
<VirtualHost *:80>
# The ServerName directive sets the request scheme, hostname and port that
# the server uses to identify itself. This is used when creating
# redirection URLs. In the context of virtual hosts, the ServerName
# specifies what hostname must appear in the request's Host: header to match this virtual host. For the default virtual host (this file) this value is not decisive as it is used as a last resort host regardless.
# However, you must set it for any further virtual host explicitly.
#ServerName www.example.com
ServerAdmin webmaster@localhost
DocumentRoot /var/www/html
# Available loglevels: trace8, ..., trace1, debug, info, notice, warn,
# error, crit, alert, emerg.
# It is also possible to configure the loglevel for particular
# modules, e.g.
#LogLevel info ssl:warn
ErrorLog ${APACHE_LOG_DIR}/error.log
CustomLog ${APACHE_LOG_DIR}/access.log combined
# For most configuration files from conf-available/, which are
# enabled or disabled at a global level, it is possible to
# include a line for only one particular virtual host. For example the
# following line enables the CGI configuration for this host only
# after it has been globally disabled with "a2disconf".
#Include conf-available/serve-cgi-bin.conf
</VirtualHost>
# vim: syntax=apache ts=4 sw=4 sts=4 sr noet
Each Apache configuration file includes three kinds of entries.
Directives that define the behavior of the web server
Containers, such as VirtualHost, that define blocks of directives for a vhost
Comments, starting with a hash (#), that provide some aid in the usage of the directives
Container <VirtualHost *:80> pairs with </VirtualHost> just like an HTML start and end tag. The VirtualHost pair encloses all directives for the specific vhost and also defines the IP address and port number to which the given vhost should respond. In this configuration file, the asterisk (*) corresponds to any IP address, and 80 corresponds to port 80, which is the default port for the HTTP protocol. You already tested this configuration in the previous sections when one of the following IP addresses was used in the address bar of your browser to download the directory index:
127.0.0.1
192.168.1.100
Both addresses succeeded because the configuration accepted any valid IP address for this server. In the following section, you will create two different vhosts, each one serving a different IP address.
Using IP-Based Virtual Hosts
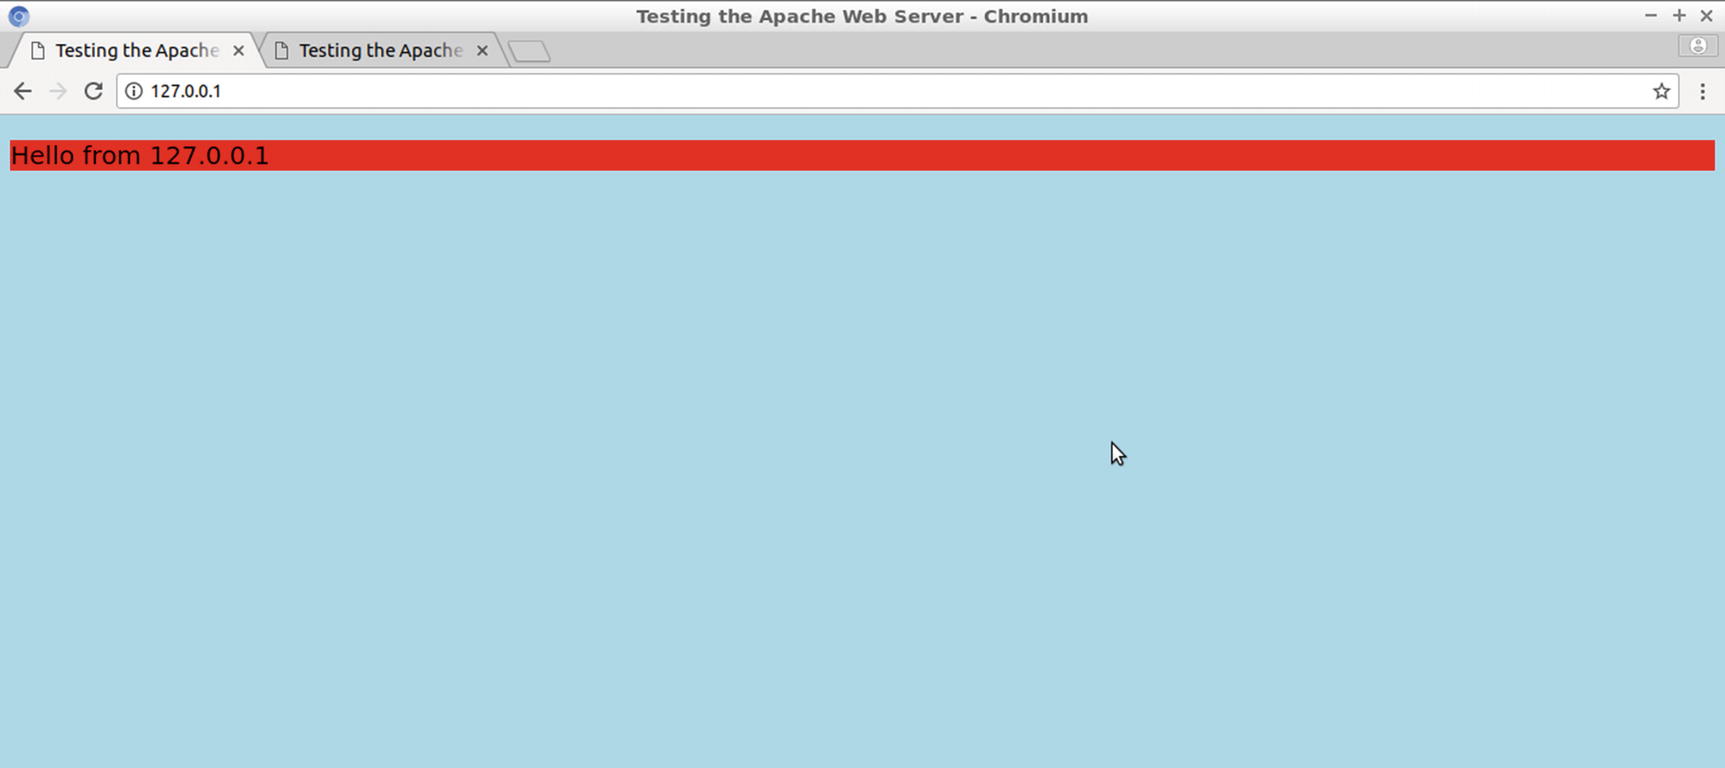
In this section, you’ll create a new configuration file with gedit to implement two IP-based vhosts using the directives contained between the start/end VirtualHost containers. One vhost will be responsible for the loopback IP address, 127.0.0.1, and the other will be responsible for the private IP address of the web server, 192.168.1.100, both listening on port 80. The pair of IP address and port number for each vhost is indicated in the VirtualHost container. For instance, <VirtualHost 127.0.0.1:80> indicates the loopback IP address 127.0.0.1, and 80 is the default port number for the HTTP protocol. You can provide a different directory index to each vhost, such as index1.html for the first and index2.html for the second, using the DirectoryIndex directive. You can leave the other directives with their default values from the 000-default.conf file.
At the Linux terminal, change the working directory to sites-available and use gedit to create the file example1.conf.
$ cd /etc/apache2/sites-available
$ sudo gedit example1.conf
Enter the following configuration rules and save the file:
# 1st vhost
<VirtualHost 127.0.0.1:80>
ServerAdmin webmaster@localhost
DocumentRoot /var/www/html
DirectoryIndex index1.html
ErrorLog ${APACHE_LOG_DIR}/error.log
CustomLog ${APACHE_LOG_DIR}/access.log combined
</VirtualHost>
# 2nd vhost
<VirtualHost 192.168.1.100:80>
ServerAdmin webmaster@localhost
DocumentRoot /var/www/html
DirectoryIndex index2.html
ErrorLog ${APACHE_LOG_DIR}/error.log
CustomLog ${APACHE_LOG_DIR}/access.log combined
</VirtualHost>
Next you need to enable the new configuration using the a2ensite (apache2 enable site) command. At the Linux terminal, enter the following:
$ sudo a2ensite example1.conf
Or simply enter this:
$ sudo a2ensite example1
To enable the new Apache configuration, you need also to reload the web server.
$ sudo service apache2 force-reload
Create two web pages in the document root directory that will serve as the directory indexes for the two vhosts.
$ cd /var/www/html
$ sudo gedit index1.html
Enter the following HTML source code:
<!DOCTYPE html>
<html>
<head>
<title>Testing the Apache Web Server</title>
<style>
body {
background-color:lightblue;
}
p {
background-color:red;
font-size:20px;
}
</style>
</head>
<body>
<p>Hello from 127.0.0.1</p>
</body>
</html>
In /var/www/html, create a web page called index2.html to be used as the directory index for the second vhost. Use the following HTML source code:
<!DOCTYPE html>
<html>
<head>
<title>Testing the Apache Web Server</title>
<style>
body {
background-color:red;
}
p {
background-color:lightblue;
font-size:20px;
}
</style>
</head>
<body>
<p>Hello from 192.168.1.100</p>
</body>
</html>
Open two tabs in your browser. On the first, enter the following address in the address bar:
127.0.0.1
On the second tab, enter the following address in the address bar:
192.168.1.100
With the current configuration, Apache displays different content for each request. The first request, with the IP address 127.0.0.1, resolves to index1.html (Figure 1-18).
Figure 1-18
Testing the first IP-based vhost
The second request with IP address 192.168.1.100 resolves to index2.html (Figure 1-19).
Figure 1-19
Testing the second IP-based vhost
Next you’ll look at a similar example, this time using port-based virtual hosts.
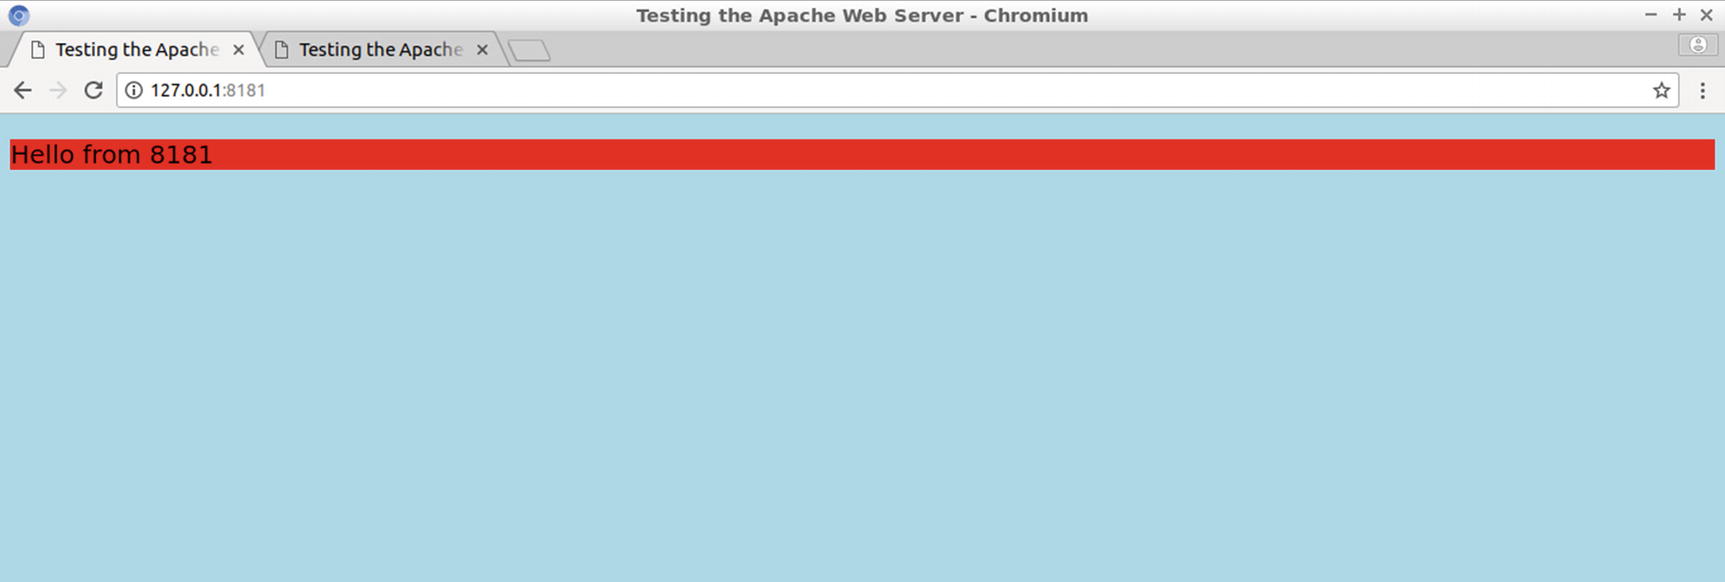
Using Port-Based Virtual Hosts
The configuration used next will create two virtual hosts that listen on different ports, for instance port 8080 and port 8181. When anything other than the default port number for the HTTP protocol, port 80, is used, the port is required to be appended to the URL with a colon (:). Here’s an instance:
192.168.1.100:8080
Using a different port than the default one makes the URL a bit more complicated, but that is not really a problem when you implement a DDNS service (see Chapter 4) that hides this complexity from the user.
In the sites-available directory, create a new configuration file.
$ cd /etc/apache2/sites-available
$ sudo gedit example2.conf
In the file example2.conf, enter the following directives to direct the server to include port numbers 8080 and 8181 in the list of the listening ports:
Listen 8080
Listen 8181
To create a vhost that listens on port 8080 on any IP address of the server, you can use the asterisk notation in the VirtualHost container as <VirtualHost *:8080>. Similarly, for the vhost that listens on port 8181, also on any IP address of the server, use the <VirtualHost *:8181> container. The complete listing of example2.conf is as follows:
Listen 8080
Listen 8181
# 1st vhost
<VirtualHost *:8080>
ServerAdmin webmaster@localhost
DocumentRoot /var/www/html
DirectoryIndex index3.html
ErrorLog ${APACHE_LOG_DIR}/error.log
CustomLog ${APACHE_LOG_DIR}/access.log combined
</VirtualHost>
# 2nd vhost
<VirtualHost *:8181>
ServerAdmin webmaster@localhost
DocumentRoot /var/www/html
DirectoryIndex index4.html
ErrorLog ${APACHE_LOG_DIR}/error.log
CustomLog ${APACHE_LOG_DIR}/access.log combined
</VirtualHost>
Save the new configuration file and enable it using the a2ensite command. Type the following:
$ sudo a2ensite example2.conf
or simply type the following:
$ sudo a2ensite example2
To enable the new Apache configuration, you also need to reload the web server.
$ sudo service apache2 force-reload
Sometimes the same configuration rules apply to different sites, causing unpredictable results. If you have to work on sites with conflicting rules, then you have to disable one of the sites. To disable, for instance, example1, use the a2dissite (apache2 disable site) command, as shown here:
$ sudo a2dissite example1
To have two new port numbers that the server will listen to, you need to set up ufw to permit connections for those port numbers. At the Linux command line, type the following:
$ sudo ufw allow 8080
$ sudo ufw allow 8181
Create at the document root the two directory indexes, index3.html and index4.html, and refer to them in the example2.conf file. These indexes are for the vhosts that listen on port 8080 and on port 8181, respectively.
$ cd /var/www/html
$ sudo gedit index3.html
In the gedit window that appears, enter the following HTML source code:
<!DOCTYPE html>
<html>
<head>
<title>Testing the Apache Web Server</title>
<style>
body {
background-color:red;
}
p {
background-color:lightblue;
font-size:20px;
}
</style>
</head>
<body>
<p>Hello from 8080</p>
</body>
</html>
Next, in the document root directory, add the following HTML source code to index4.html:
<!DOCTYPE html>
<html>
<head>
<title>Testing the Apache Web Server</title>
<style>
body {
background-color:lightblue;
}
p {
background-color:red;
font-size:20px;
}
</style>
</head>
<body>
<p>Hello from 8181</p>
</body>
</html>
To test the new vhosts, open two tabs in your browser. On the first tab, enter the following in the address bar:
127.0.0.1:8080
or enter the following:
192.168.1.100:8080
The directory index index3.html is displayed (Figure 1-20).
Figure 1-20
Testing the first port-based vhost
On the second tab, enter one of the following in the address bar:
127.0.0.1:8181
192.168.1.100:8181
The directory index index4.html is displayed (Figure 1-21).
Figure 1-21
Testing the second port-based vhost
In the following section, you will create another pair of vhosts that serve requests for specific domain names in the Host field of the client's HTTP request.
Using Name-Based Virtual Hosts
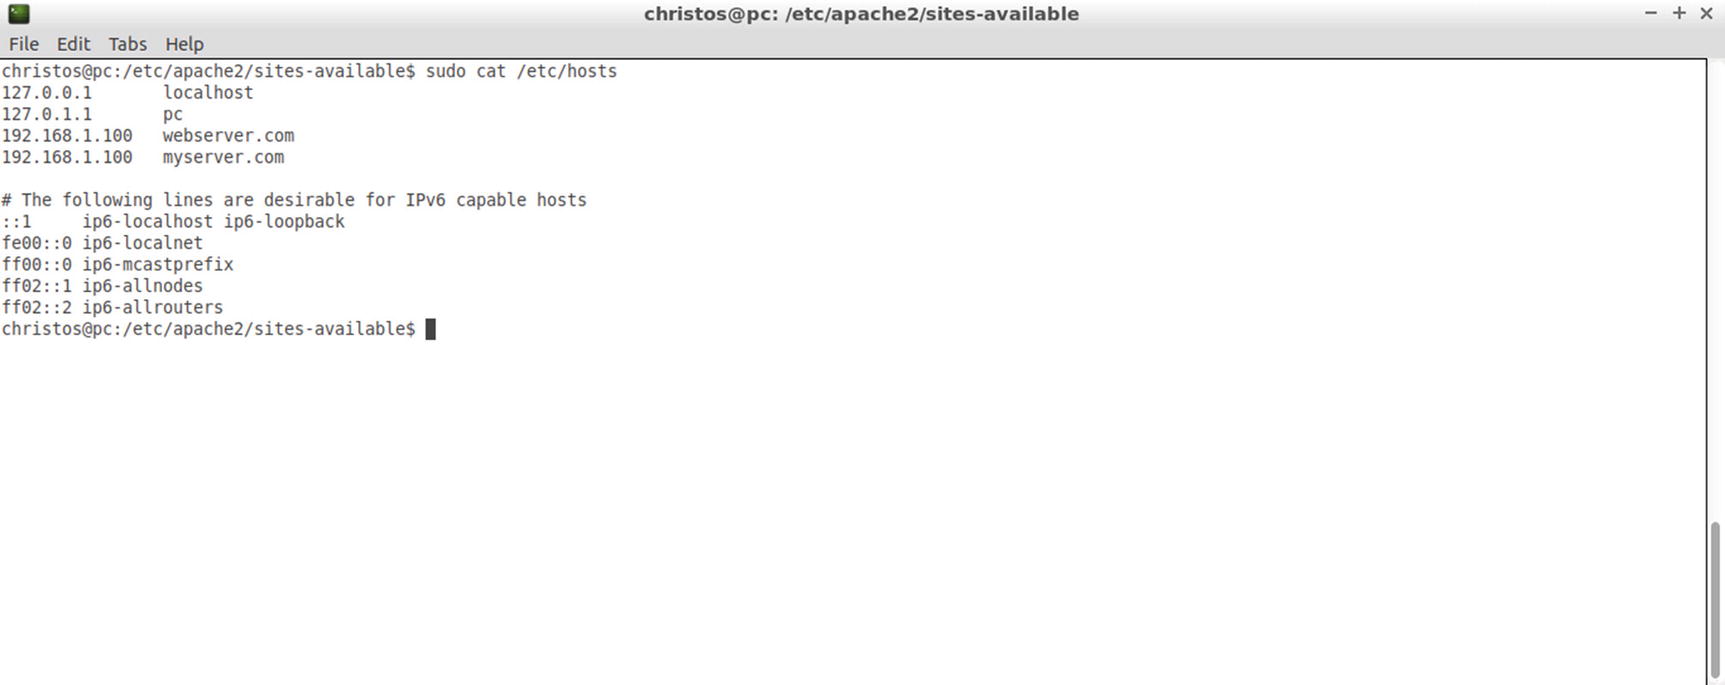
The third approach for running multiple sites is to use name-based vhosts, where each vhost responds to the client’s request if the client provides a host HTTP header value that matches its ServerName directive. You will not use the Domain Name System for your web server until Chapter 4, so for now you can only try the name-based virtual hosts locally, from the same computer as the server. To provide names to your computer, edit the /etc/hosts file as indicated in Figure 1-22. Use the following command at the terminal:
$ sudo gedit /etc/hosts
Figure 1-22
Adding two more host names to /etc/hosts
As you can see, you have already used one entry from this file, localhost, which corresponds to IP address 127.0.0.1. Enter two more entries in /etc/hosts, both resolving to the web server’s static private IP address.
192.168.1.100 webserver.com
192.168.1.100 myserver.com
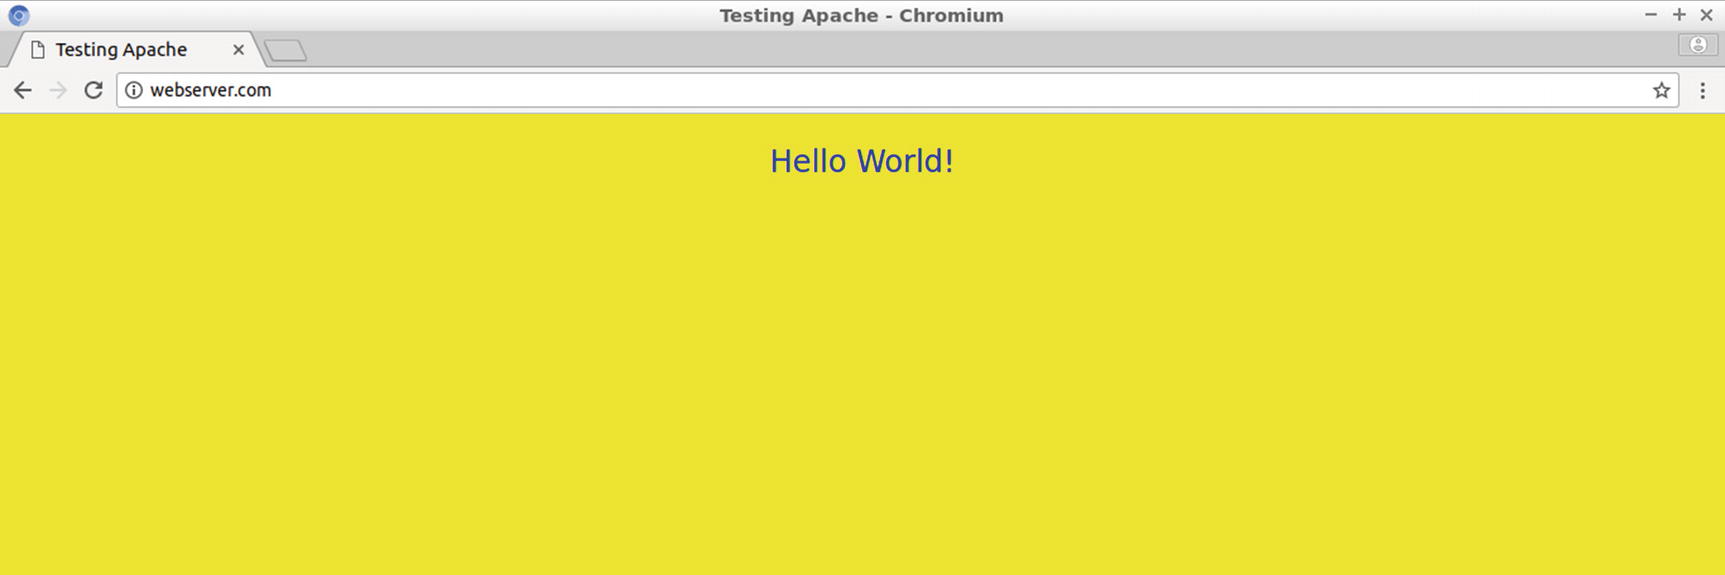
Save the /etc/hosts file and try one of those names, for instance webserver.com, in your browser’s address bar. The domain name resolves to the IP address 192.168.1.100, and with sites of the example1 configuration disabled, the vhost that dispatches this request is the default one, 000-default.conf. The web page downloaded is therefore the one indicated in Figure 1-23.
Figure 1-23
With no name-based vhost configured so far, the default vhost serves the webserver.com request
Create two name-based vhosts, each one responsible for one of the previous names. Use gedit to create the configuration file of the two vhosts.
$ sudo gedit example3.conf
In example3.conf, enter the following directives:
<VirtualHost *:80>
ServerName webserver.com
DocumentRoot "/var/www/html/test1"
</VirtualHost>
<VirtualHost *:80>
ServerName myserver.com
DocumentRoot "/var/www/html/test2"
</VirtualHost>
The first vhost listens to the default HTTP port, which is port 80. It is triggered when it receives an HTTP request with the value of the Host header set to webserver.com. The second vhost also listens to port 80. It waits for HTTP requests with the value of the Host header set to myserver.com.
The two sites use two different document roots, /var/www/html/test1 and /var/www/html/test2, and since no directory indexes are defined with the DirectoryIndex directive, the default one for Apache, index.html, will be used. Create next a file named index.html in each directory root. At the Linux terminal, enter the following:
$ cd /var/www/html/test1
$ sudo gedit index.html
In the gedit window, insert the following HTML code and save the file:
<!DOCTYPE html>
<html>
<head>
<title>Testing the Apache Web Server</title>
<style>
body {
background-color:red;
}
p {
background-color:lightblue;
font-size:20px;
}
</style>
</head>
<body>
<p>Hello from webserver.com</p>
</body>
</html>
Create a file called index.html in the second document root. At the Linux terminal, enter the following:
$ cd /var/www/html/test2
$ sudo gedit index.html
In the gedit window, enter the following source code and save the file:
<!DOCTYPE html>
<html>
<head>
<title>Testing the Apache Web Server</title>
<style>
body {
background-color:lightblue;
}
p {
background-color:red;
font-size:20px;
}
</style>
</head>
<body>
<p>Hello from myserver.com</p>
</body>
</html>
Enable the new configuration using the following:
$ sudo a2ensite example3
You also have to reload the web server to enable the new sites.
$ sudo service apache2 force-reload
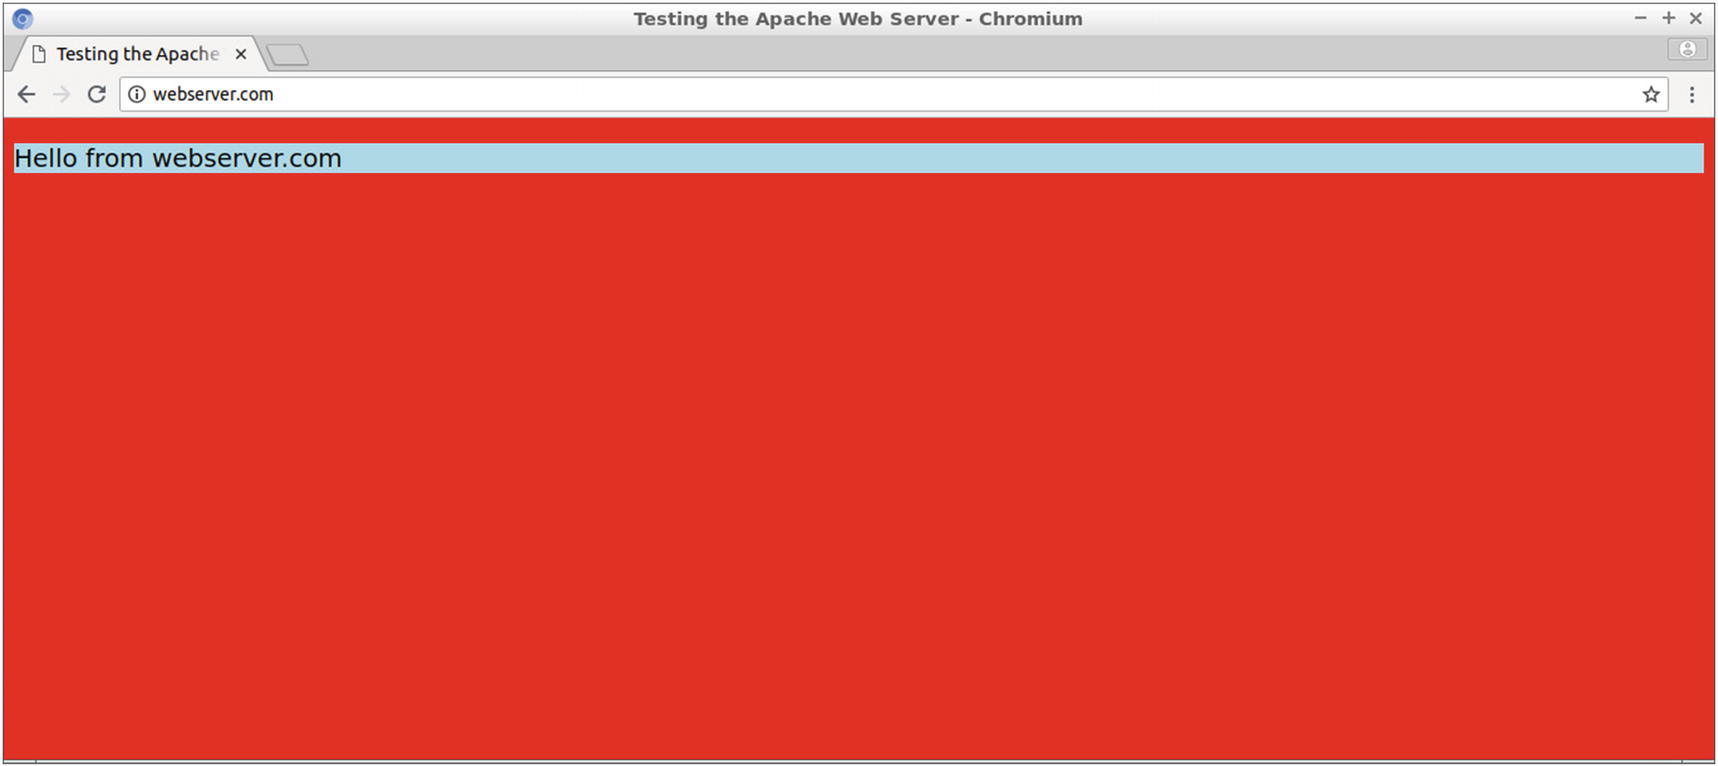
In a browser on the computer that hosts the web server, open two tabs. In the first tab, enter the following in the address bar:
webserver.com
The web page index.html, located in /var/www/html/test1, is displayed in the browser’s window, as displayed in Figure 1-24.
Figure 1-24
Testing the first name-based vhost
Use the following URL on the second tab:
myserver.com
The web page index.html, located in document root /var/www/html/test1, is displayed in the browser’s window, as viewed in Figure 1-25.
Figure 1-25
Testing the second name-based vhost
In Chapter 9 you’ll test the ServerName directive with a globally valid domain name like httpsserver.eu and see how to obtain and apply such a domain name.
Inspecting the Overall Virtual Host Configuration
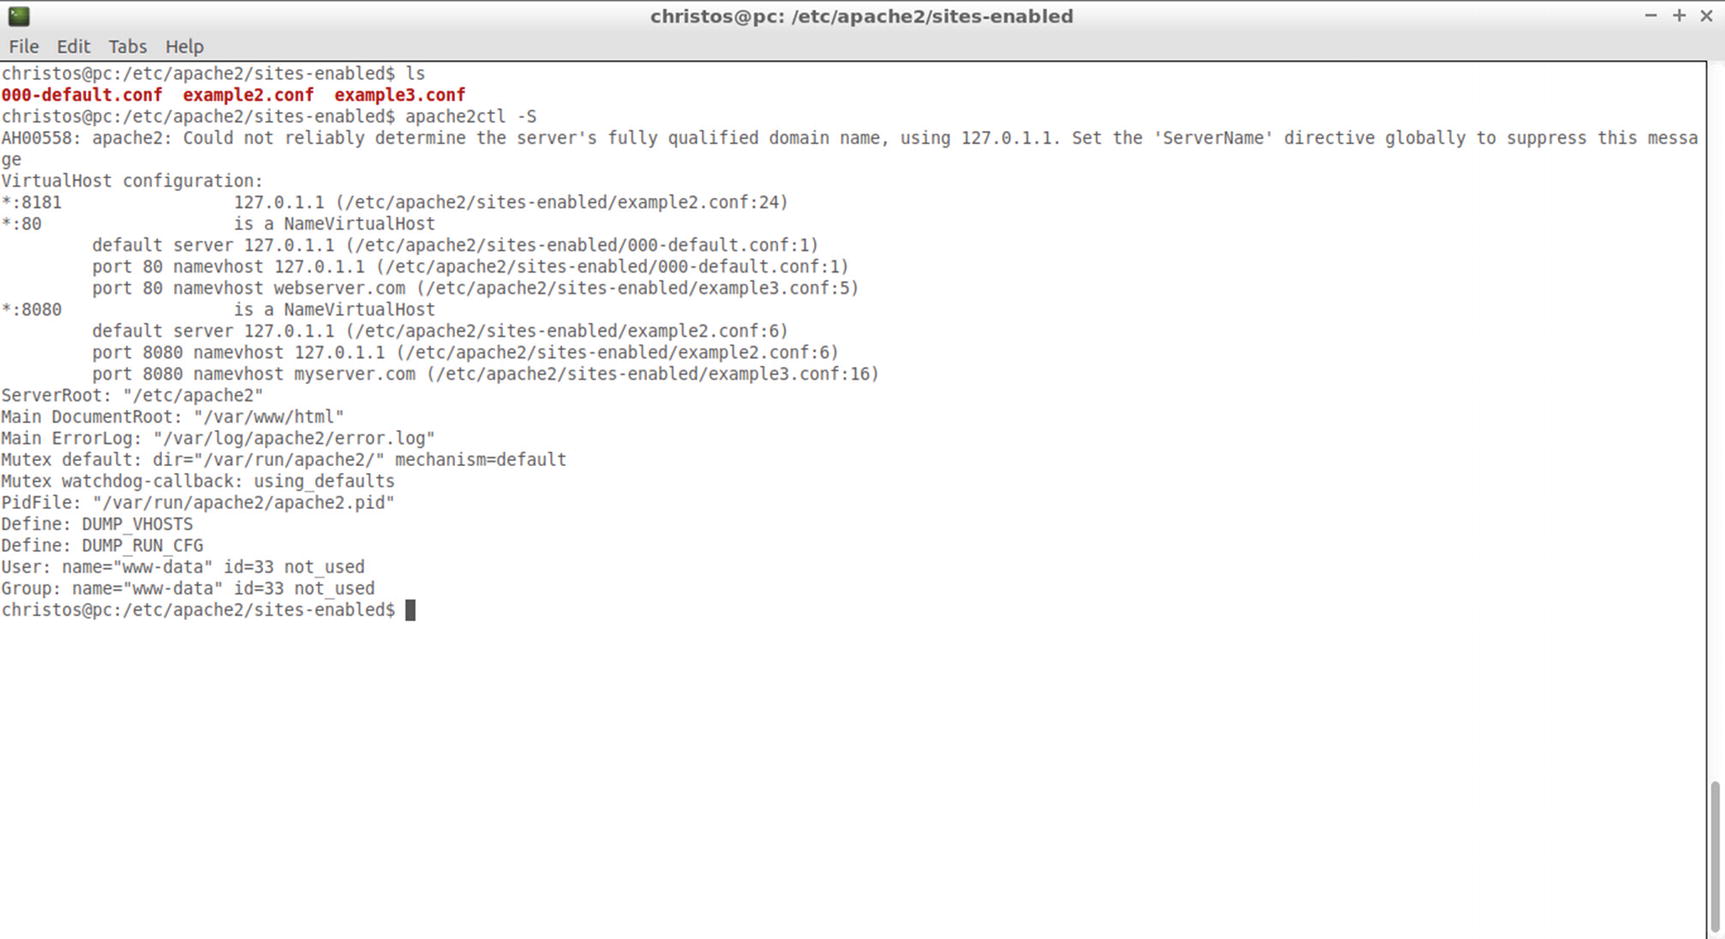
Each configuration enabled with the a2ensite command adds a symbolic link of itself to the directory /etc/apache2/sites-enabled. Use the following:
$ ls /etc/apache2/sites-enabled
As displayed in Figure 1-26, the ls command lists three configuration files: 000-default.conf, example2.conf, and example3.conf. The configuration example1.conf is not included in this directory because it was disabled with the a2dissite command. Use the following to view the details of the overall configuration:
$ sudo apachectl -S
Figure 1-26
Listing the enabled sites and details of the Apache configuration
Figure 1-26 displays also the output of the apachectl -S command, which provides an overview of the vhost configuration.
Reading Apache Log Files
To get an idea of the number of visitors and see some of the connection details, such as the client IP address and the time, you can read the log files of Apache. For the vhosts examples of this chapter, the directives related to log files are used in the configuration files as follows:
ErrorLog ${APACHE_LOG_DIR}/error.log
CustomLog ${APACHE_LOG_DIR}/access.log combined
To locate APACHE_LOG_DIR, use the following at the Linux terminal:
$ grep APACHE_LOG_DIR /etc/apache2/envvars
The Linux terminal responds with the following output:
export APACHE_LOG_DIR=/var/log/apache2$SUFFIX
With an empty value assigned for the variable $SUFFIX in the file envvars, the Apache log directory resolves to /var/log/apache2.
Change the working directory to /var/log/apache2, where the file access.log is used to list the visitor details and the file error.log is used to report any errors.
$ cd /var/log/apache2
Move to another computer of your LAN and make an HTTP request to the Apache server. For instance, at the browser’s address bar, type the following:
192.168.1.100
Read the access.log file using more, less, tail, or a similar command:
$ tail –n 1 access.log
The previous Linux shell command prints one line from the end, which corresponds to the last record of the access log. You can also use the –f argument to continuously print the last visitor’s details of the access log:
$ tail –fn 1 access.log
The details about the new connection are displayed next, including the IP address of the computer used by the client, the date and time the request was issued, the URL used, the operating system, and the browser:
In this chapter, you set up and ran Apache, the first of two web servers used in this book. You created a number of virtual hosts (vhosts), each one corresponding to a different site. Two test sites were then run to display how Apache can discriminate between multiple sites belonging to each of the three main vhost categories: IP-based vhost, port-based vhost, and name-based vhost.
In the next chapter, you’ll set up the PHP engine, namely, the interpreter that cooperates with Apache to create web pages with PHP source code that executes on the web server before the web page is dispatched to the client. With PHP, you enable sites to dispatch different content according to the client request and also to interface with other programs to work with the server, thus providing dynamic content to the visitors of the site.