Sending files across networks and over the Internet or via email has become second nature to most of us. As long as the files that you have obtained conform to some of the widely recognized standards currently in use (of which you will learn more later), you should have little difficulty loading them into Power Query.
As the first part of your journey through the data mashup process, this chapter will show you how to find and load data from a variety of file-based sources. These kinds of data are typically those that you can either locate on a shared network drive, download from the Internet, receive as an email attachment, or copy to your computer’s local drive. The files that are used in the examples in this chapter are available on the Apress website. If you have followed the download instructions in Appendix A, then these files will be in the C:DataMashupWithExcelSamples folder.
File Sources
CSV files
Text files
XML files
Excel files
Access databases
File Sources
File Source | Comments |
|---|---|
Excel | Allows you to read Microsoft Excel files (versions 97 to 2019) and load worksheets, named ranges, and tables |
CSV | Lets you load text files that conform to the CSV (comma-separated values) format |
XML | Allows you to load data from XML files |
Text | Lets you load text files using a variety of column separators |
Folder | Lets you load the information about all the files in a folder |
SharePoint folder | Allows you to list the files in a SharePoint folder |
Access database | Lets you connect to a Microsoft Access file on your network and load queries and tables |
JSON | Helps you to load data from JSON files |
More advanced techniques (such as importing the contents of entire folders of text or Excel files or importing complex XML files and JSON files) are described in Chapter 10. I prefer to handle these separately as they require more advanced knowledge of data transformation techniques—and you need to learn these first.
I realize that Power Query considers MS Access to be a database and not a “file” data type. While I completely agree with this classification, I prefer nonetheless to treat Access as if it were a file-based data source, given that all the data resides in a single file that can be copied and emailed, and not in a database on a distant server. For this reason, we will look at MS Access in this chapter, and not the next one that deals with corporate data sources.
Loading Data from Files
It is time to start looking at the heavy-lifting aspect of Power Query and how you can use it to load data from a variety of different sources. I will begin on the bunny slopes (or “nursery” slopes as we say in the UK) with a simple example of loading data from a text file. Then, given the plethora of available data sources, and to give the process a clearer structure, we will load data from several of the ubiquitous file-based data sources that are found in most workplaces. These data sources are the basis of the data that you will learn to tweak and “mash up” in Chapters 6 through 12.
CSV Files
The scenario is as follows: you have been given a CSV file containing some useful information that you need to load into Excel for further analysis. You now want to use Power Query to look at the data and consider what (if anything) needs to be done to make it usable. On this occasion you have decided to load the data into Power Query first—and load the data into Excel once you have made any necessary modifications to the source data structure.
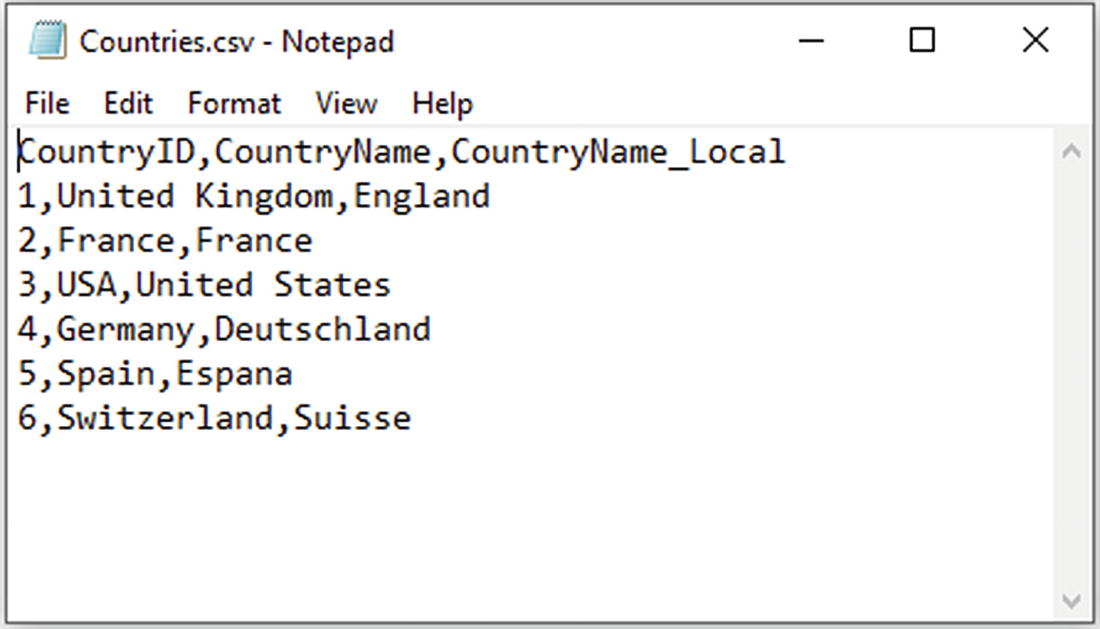
The contents of the Countries.csv file
- 1.
In Excel click Data.
- 2.
Click the Get Data button.
- 3.
Click From Text/CSV. The Import Data dialog will appear.
- 4.
Navigate to the folder containing the file that you want to load and select it (C:DataMashupWithExcelSamplesCountries.csv, in this example).
- 5.
Click Import. A dialog will display the initial contents of the file, as shown in Figure 2-2.
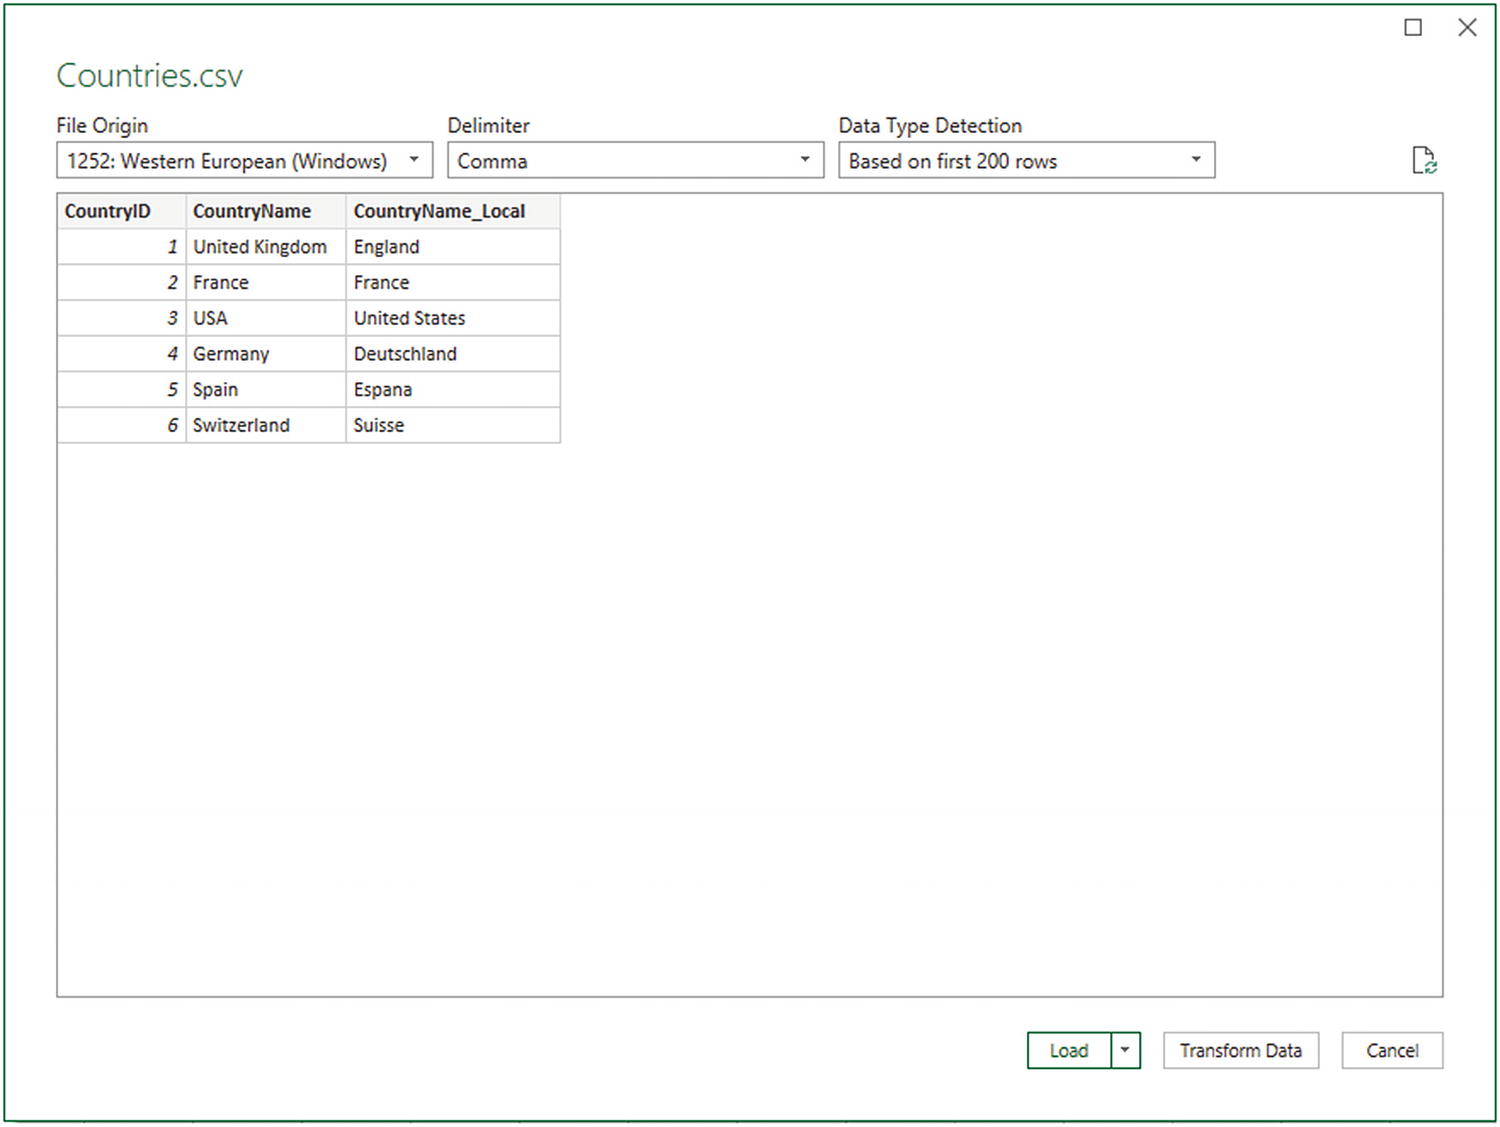
The Power Query file dialog
- 6.
Click the Transform Data button. The Power Query window appears; it contains a sample of the contents of the CSV file—or possibly the entire file if it is not too large. You can see this in Figure 2-3.
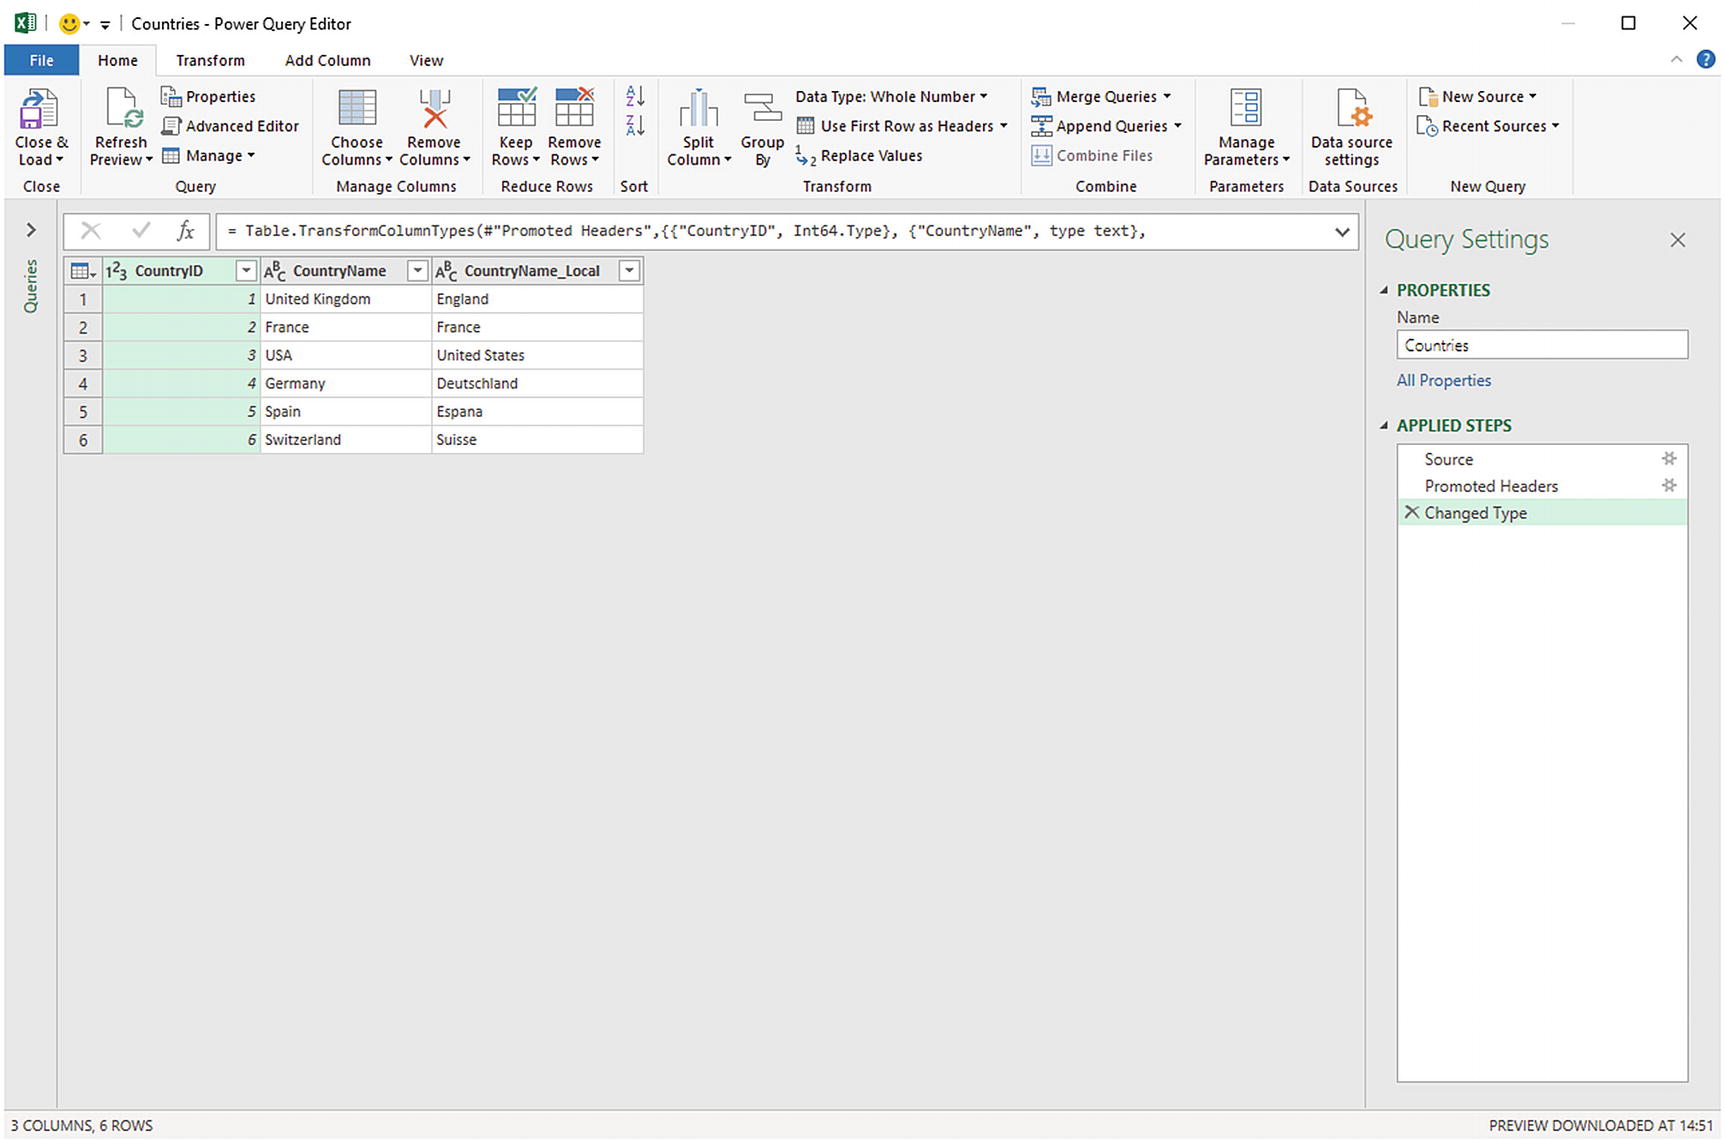
The Power Query window with the contents of a CSV file loaded
- 7.
Click the Close & Load button in the Power Query window (you can see this at the top left of Figure 2-3). The Power Query Editor will close and return to Excel. The source data will be loaded into a new worksheet.
In step 7, make sure that you click the top part of the Close & Load button. Otherwise, you will see a popup menu appear containing a couple of options. If you do see the popup menu, just click Close & Load.
And that, for the moment, is that. You have loaded the data from the source file into Excel in a matter of a few clicks, and it is ready for further analysis. In later chapters, you will learn how to shape this data. For the moment, however, let’s continue looking at some other file-based data sources.
If after step 7 the data does not appear in a new worksheet, then carry out the process again, only this time click the popup menu on the Close & Load button and select Load To—and in the dialog (that you saw in Figure 1-16), select the New worksheet radio button.
What Is a CSV File?
Normally have a .csv extension (it uses this by default to apply the right kind of processing). It can, of course, accept any extension that you specify.
Use a comma to separate the elements in a row. This, too, is a default that can be overridden by selecting a delimiter from those in the dialog shown in Figure 2-2.
End with a line feed, carriage return, or line feed/carriage return.
Can, optionally, contain double quotes to encapsulate fields. These will be stripped out as part of the data load process. If there are double quotes, they do not have to appear for every field nor even for every record in a field that can have occasionally inconsistent double quotes.
Can contain “irregular” records, that is, rows that do not have every element found in a standard record. However, the first row (whether or not it contains titles) must cover every element found in all the remaining records in the list. Put simply, any other record can be shorter than the first one but cannot be longer.
Do not contain anything other than the data itself. If the file contains header rows or footer rows that are not part of the data, then Power Query cannot load the dataset without further work. There are workarounds to this all-too-frequent problem; one is given in Chapter 8.
Text Files
A text file can have something other than a comma to separate the elements in a list. You can specify the delimiter when defining the load step.
A text file should normally have the extension .txt (though this, too, can be overridden).
A text file must be perfectly formed; that is, every record (row) must have the same number of elements as every other record.
A text file, too, must not contain anything other than the dataset if you want a flawless data load the first time.
If a text file encounters difficulties, it should import the data as a single column that you can then try and split up into multiple columns, as described in Chapter 8.
- 1.
Open a new, blank Excel file.
- 2.
In the Data ribbon, click From Text/CSV. The Import dialog will be displayed.
- 3.
Navigate to the folder containing the file and select the file (C:DataMashupWithExcelSamplesCountryList.txt, in this example).
- 4.
Click Import. A dialog will display the initial contents of the file (this dialog is essentially identical to the one that you saw for CSV files in Figure 2-2.). You can, of course, double-click the file name rather than click Open.
- 5.
Click the Cancel button (because after a quick look at the contents of the file, you have decided that you do not really need it).
Where Power Query is really clever is that it can make a very educated guess as to how the text file is structured; that is, it can nearly always guess the field separator (the character that isolates each element in a list from the other elements). And so not only will it break the list into columns, but it will also avoid importing the column separator. If it does not guess correctly, then don’t despair. You will learn how to correct this in Chapter 8.
Looking at the contents of a file and then deciding not to use it is part and parcel of the data discovery process that you will find yourself using when you work with Power Query. The point of this exercise is to show you how easy it is to glance inside potential data sources and then decide whether to import them into the data model or not. Moreover, it can be easier to see the first few rows of large text or CSV files directly in the Load dialog of Power Query than it is to open the whole file in a text editor.
At the risk of stating the obvious, you can press Enter to accept a default choice in a dialog and press Esc to cancel out of the dialog.
Text and CSV Options
File Origin
Delimiter
Data Type Detection
File Origin
This option defines the character encoding in which the file is stored. Different character sets can handle different ranges of characters, such as accents and other diacritics. Normally this information is correctly interpreted by Power Query, and you should only need to select a different character set (file origin) on very rare occasions.
Delimiter
Colon
Comma
Equals sign
Semicolon
Space
Tab character
You can also decide to enter a custom delimiter such as the pipe (|) character or even specify that every field has a fixed width. Choosing either of these options will display another entry field where you can type in the required delimiter.
Data Type Detection
Read the first 200 rows
Read the entire file
No data type detection
Be warned that reading a large file in its entirety can take quite a while. However, without accurate data type detection, you risk seeing badly formed columns in the output data.
Fixed-Width Text Files
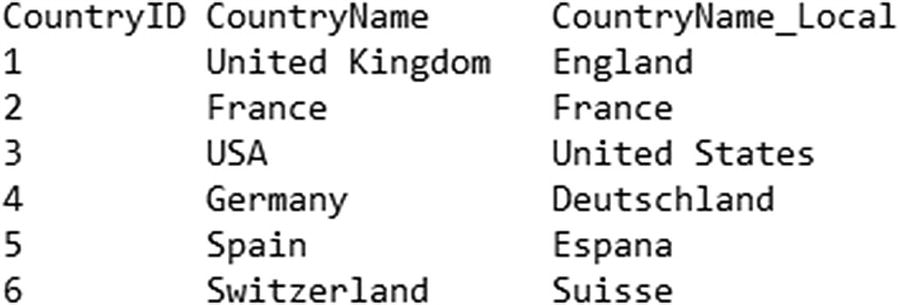
Fixed-width text source data
- 1.
In the Data menu, click Get Data ➤ From File ➤ From Text/CSV. You will see something like Figure 2-5.
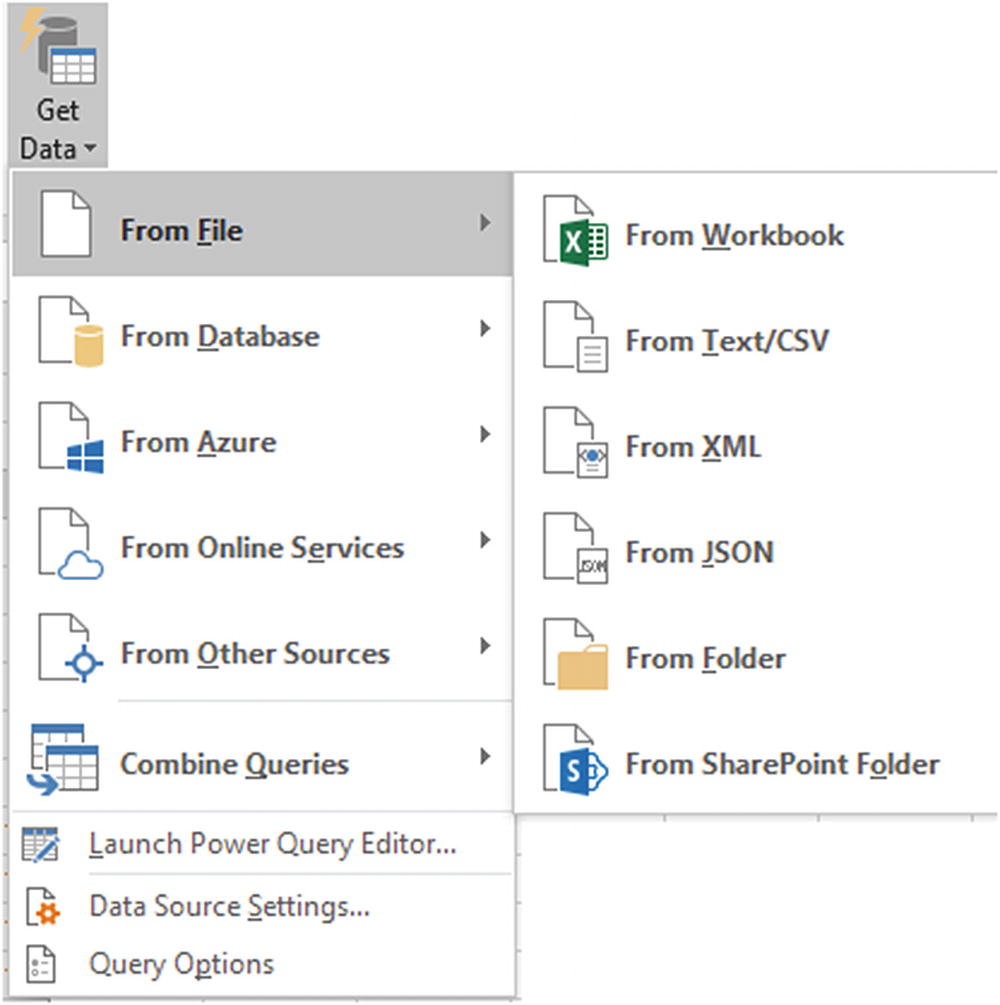
The file data connectors in Power Query
- 2.
Select the file Countries.prn from the folder C:DataMashupWithExcelSamples.
- 3.
Click Open. The dialog displayed in Figure 2-6 will appear.
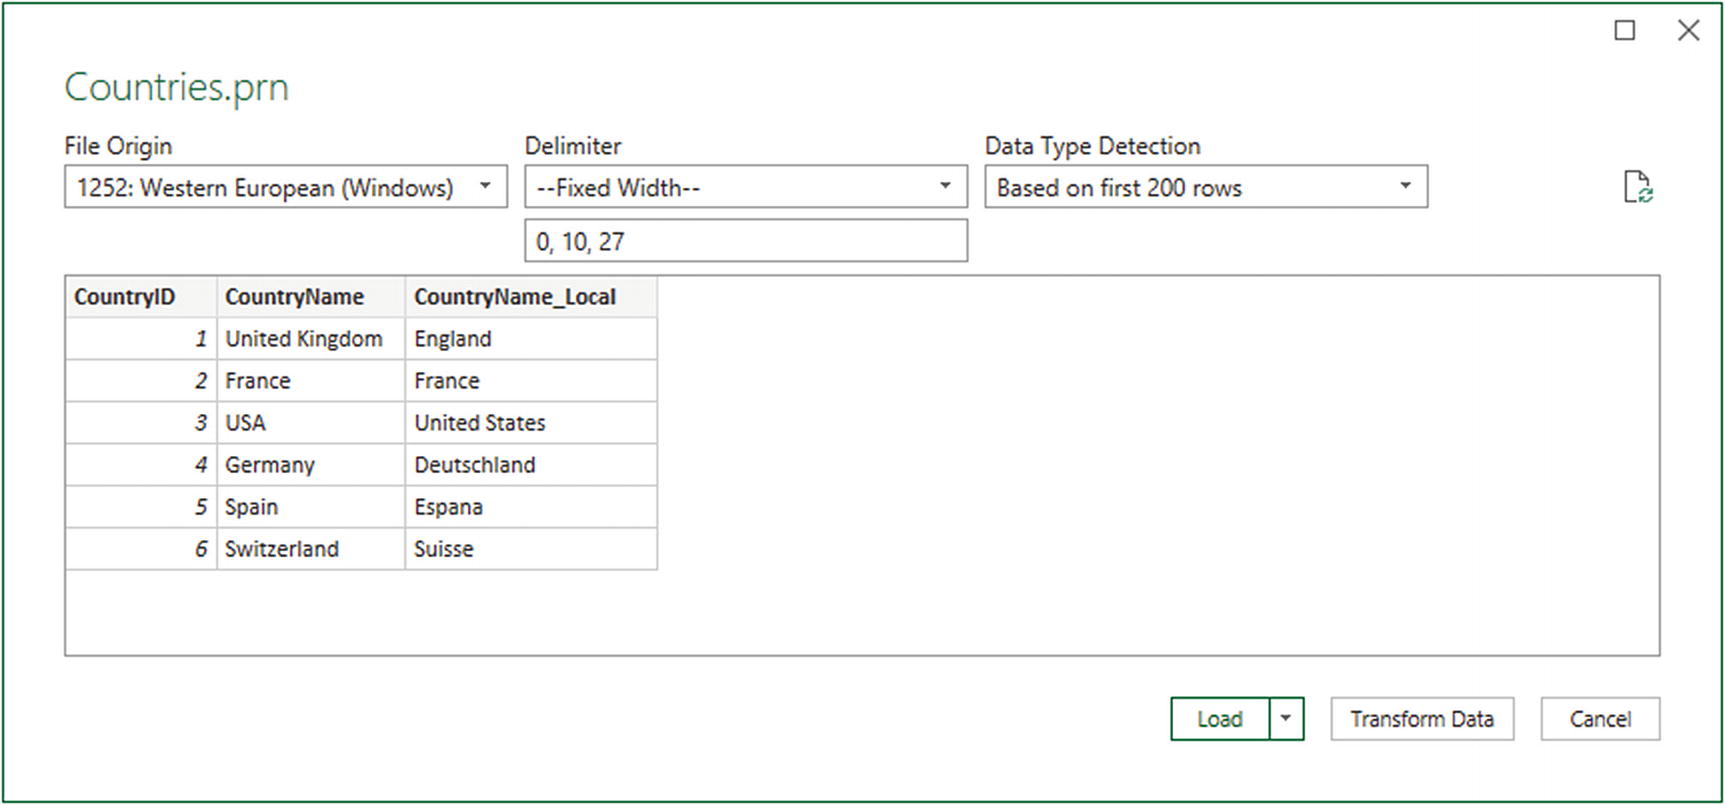
The fixed-width text file import dialog
- 4.
Click Load. The source data will be loaded into a new worksheet.
You can see from Figure 2-6 that Power Query gives you a certain amount of information about fixed-width files. Specifically it calculates the length of each column and provides the required column lengths under the delimiter popup. You can alter this, but hopefully you will never need to.
As was the case with text and CSV files, you can force Power Query to sample the entire source file if you consider this necessary by selecting Based on entire dataset from the Data Type Detection popup menu.
Simple XML Files
- 1.
In the Data ribbon, click the Get Data button, and then click From File and From XML. The Import Data dialog will appear.
- 2.
Navigate to the folder containing the file and select the file (C:DataMashupWithExcelSamplesColoursTable.xml, in this example).
- 3.
Click Import. The Navigator dialog will open.
- 4.
Click the Colours dataset in the left-hand pane of the Navigator dialog. The contents of this part of the XML file will be displayed on the right of the Navigator dialog, as shown in Figure 2-7.
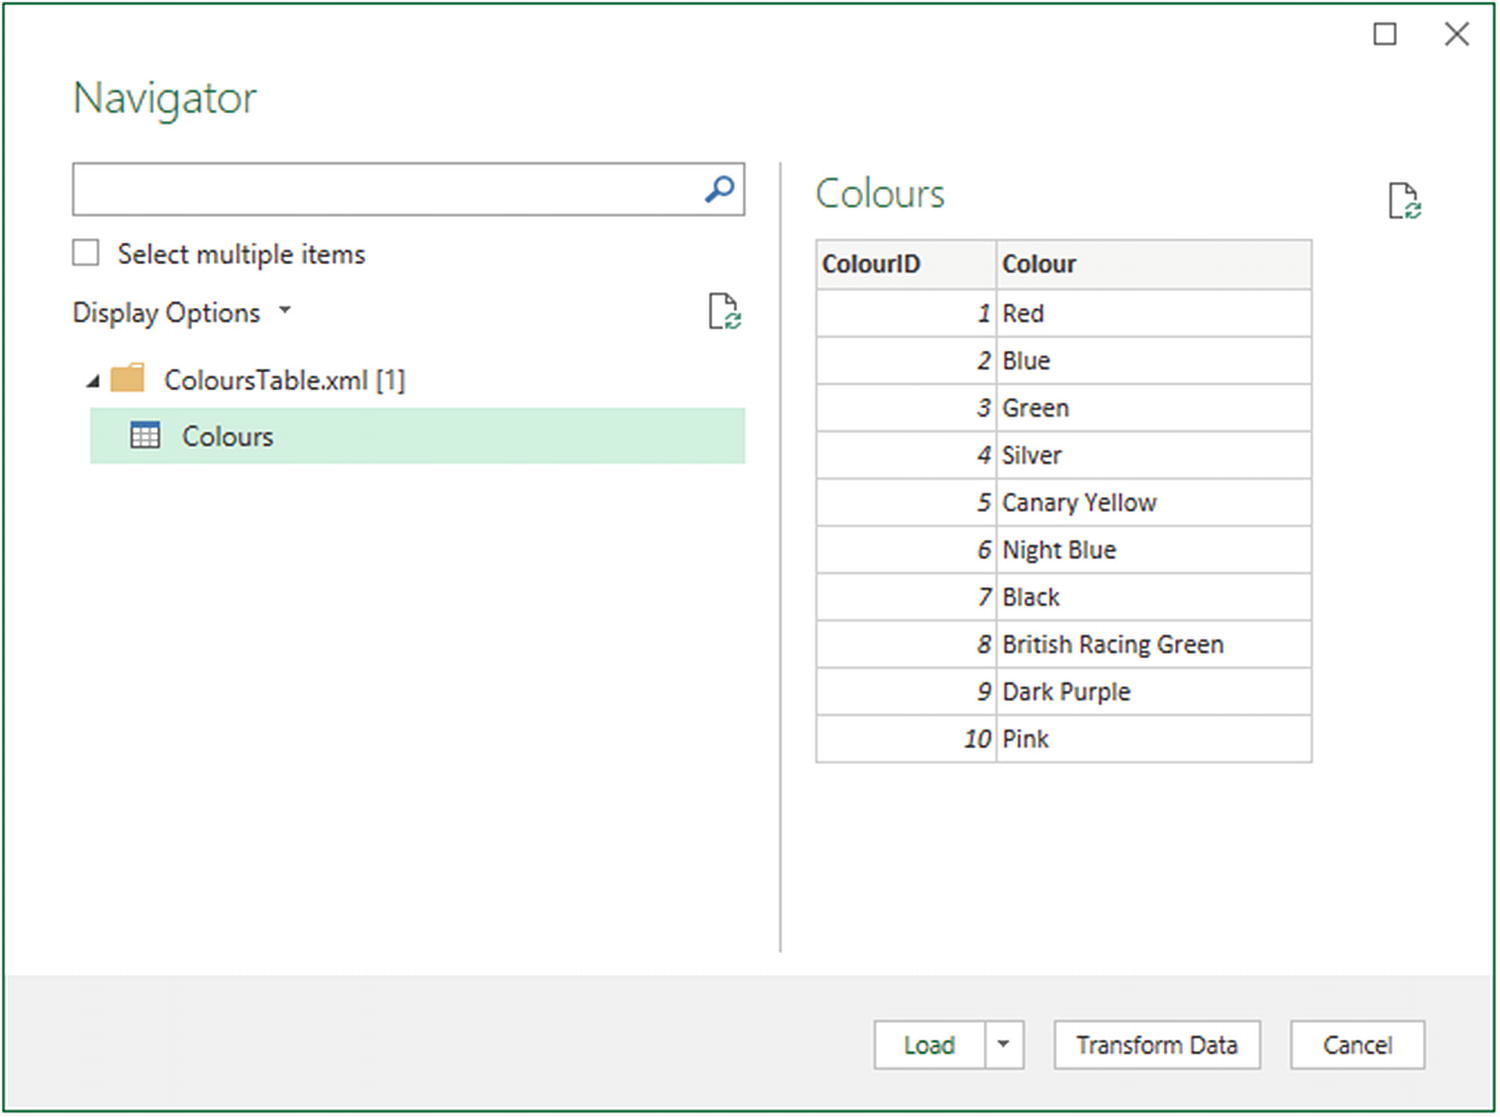
The Navigator dialog before loading an XML file
- 5.
Click the Transform Data button. The Power Query Data window will display the contents of the XML file.
- 6.
Click the Close & Load button in the Power Query Data window. The list of colors will be loaded into a new worksheet.
The actual internal format of an XML file can get extremely complex. Sometimes an XML file will contain only one dataset; sometimes it will contain many separate datasets. On other occasions, it will contain one dataset whose records contain nested levels of data that you need to handle by expanding a hierarchy of elements. You will see how the Navigator dialog handles nested hierarchies of XML data in Chapter 10—once you have learned some of the required data transformation techniques.
Certain types of data source allow you to load multiple sets of data simultaneously. XML files (unlike CSV and text files) can contain multiple independent datasets. You can load several datasets simultaneously in the Navigator window if you first select the Select multiple items check box and then select the check box to the left of each dataset that you want to load from the XML file.
Excel Files
- 1.
In the Excel Data ribbon, click Get Data ➤ From File ➤ From Workbook. The Import Data dialog will appear.
- 2.
Navigate to the directory containing the file that you want to look at (C:DataMashupWithExcelSamples, in this example).
- 3.
Select the source file (InvoicesAndInvoiceLines.xlsx, in this example) and click Import. The Navigator dialog will appear, showing the worksheets, tables, and ranges in the workbook file.
- 4.
Click one of the datasets listed on the left of the Navigator dialog. The top few rows of the selected spreadsheet will appear on the right of the dialog to show you what the data in the chosen dataset looks like.
- 5.
Ensure the Select multiple items check box is selected.
- 6.
Click the check boxes to the left of the Invoices and InvoiceLines datasets on the left. The Navigator dialog will look like the one shown in Figure 2-8.
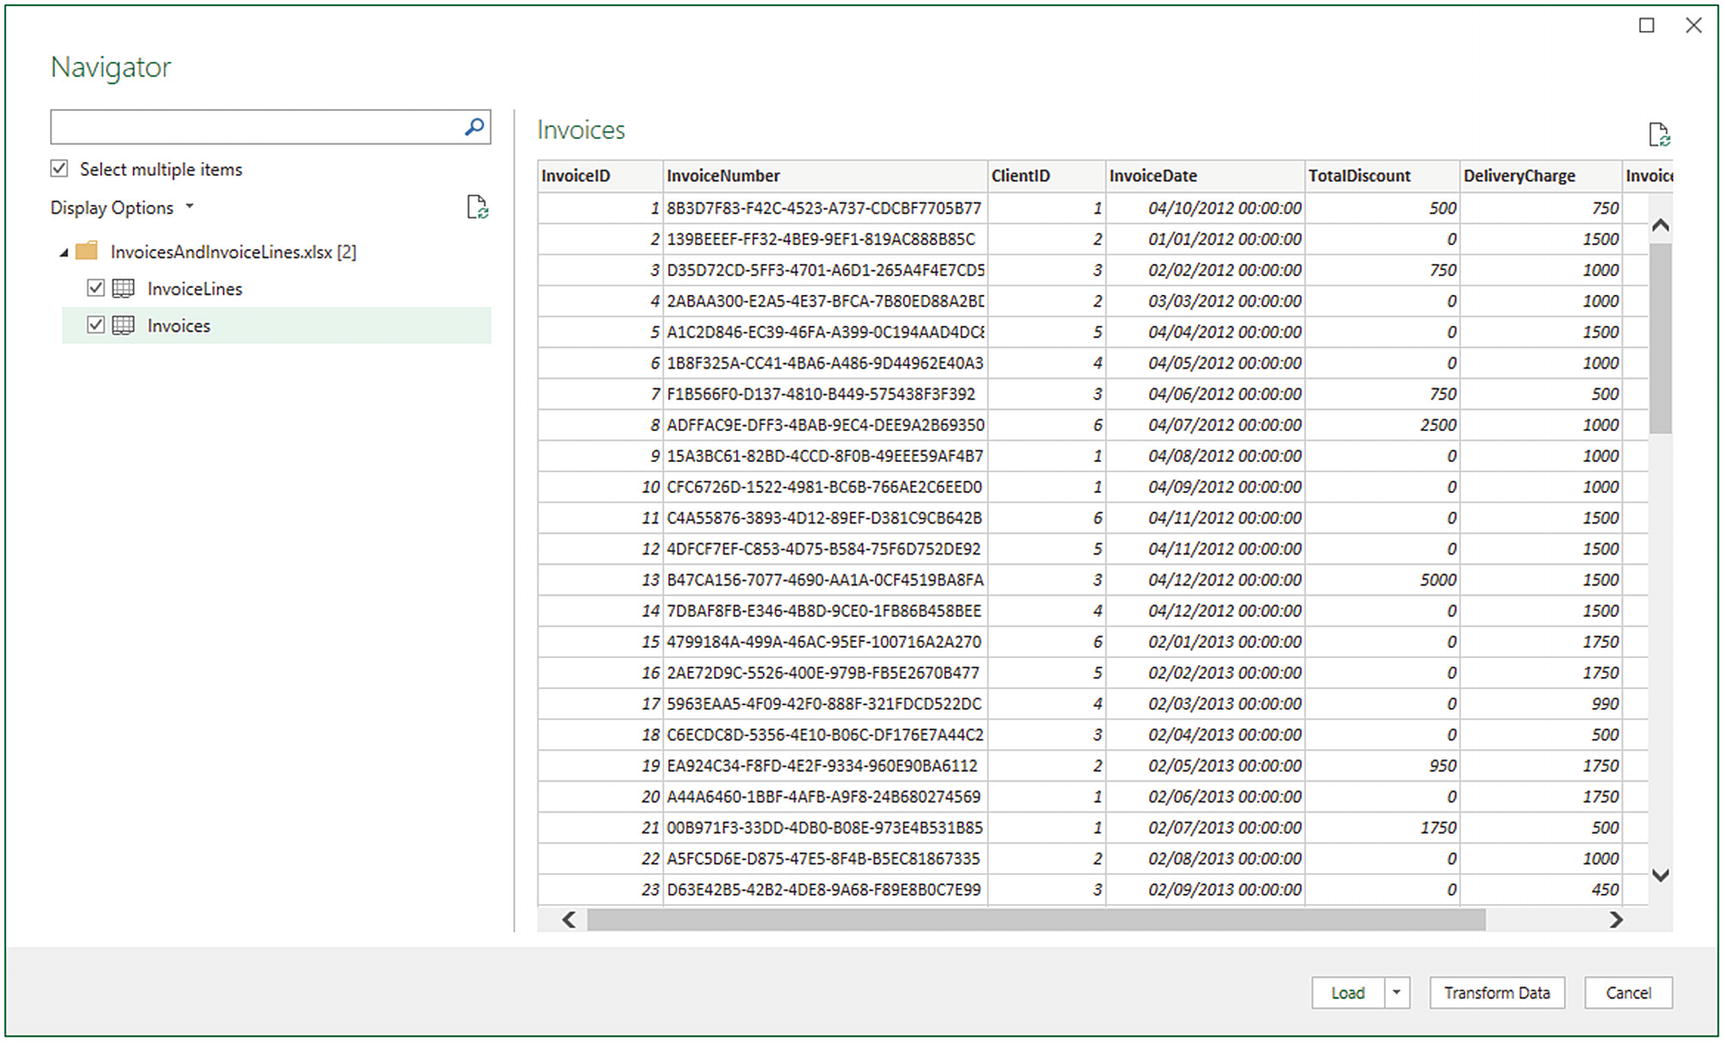
The Navigator dialog before loading data from an Excel workbook
- 7.
Click the popup arrow at the right of the Load button.
- 8.
Select Load To. The Processing Queries dialog will appear, briefly. You can see this in Figure 2-9.
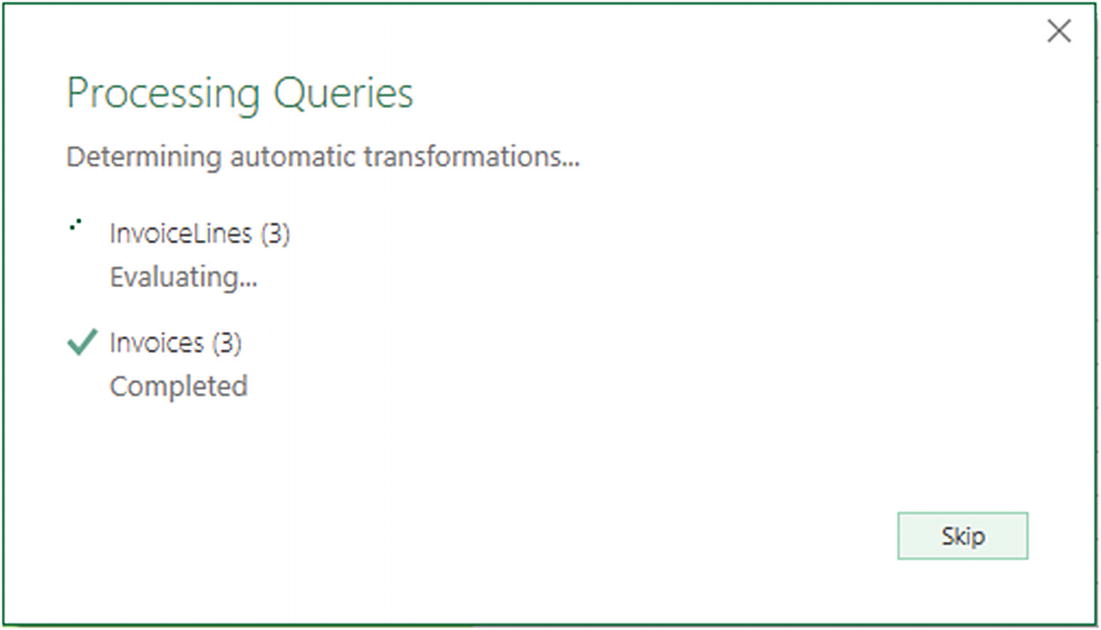
The Processing Queries dialog
- 9.
This Import Data dialog will now appear. Ensure that Add this data to the Data Model is unchecked and leave the Table and New worksheet radio buttons selected. You can see how this looks in Figure 2-10.
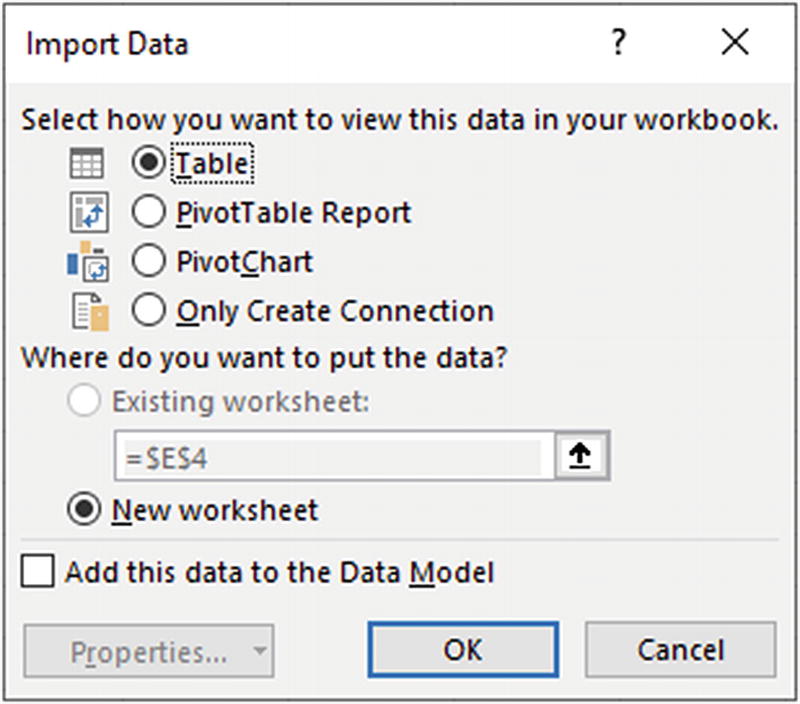
The Import Data dialog
- 10.
Click OK. The selected source datasets will be loaded into separate Excel worksheets.
Certain types of data source allow you to load multiple sets of data simultaneously. XML files (unlike CSV and text files) can contain multiple independent datasets. You can load several datasets simultaneously by selecting the check box to the left of each dataset that you want to load from the XML file.
As you can see from this simple example, having Power Query read Excel data is really not difficult. You could have edited this data in Power Query Editor before loading it, but as the data seemed clean and ready to use, I preferred to load it straight into Excel (or rather the Excel/Power Pivot data model). As well, you saw that Power Query can load multiple datasets at the same time from a single data source. However, you might still be wondering about a couple of things that you saw during this process, so here are some anticipatory comments:
Worksheets (Invoices and InvoiceLines like in Figure 2-8)
Named ranges
Named tables
Each of these elements is represented by a different icon in the Navigator dialog. Sometimes these can, in effect, be duplicate references to the same data, so you should really use the most precise data source that you can. For instance, I advise using a named table or a range name rather than a worksheet source, as the latter could easily end up containing “noise” data (i.e., data from outside the rows and columns that interest you), which would make the load process more complex than it really needs to be—or even cause it to fail. Indeed, unless a worksheet is prepared and structured in a simple tabular format, ready for loading into Power Query, you could end up with superfluous data in your data model.
However, the really cool thing is that you can load as many worksheets, tables, or ranges as you want at the same time from a single Excel workbook. You do not need to load each source dataset individually.
Power Query will list and use data connections to external data sources (such as SQL Server, Oracle, or SQL Server Analysis Services) in a source Excel workbook if the data connection is active and has returned data to the workbook. Once a link to Power Query has been established, you can delete the data table itself in the source Excel workbook—and still load the data over the data connection in the source workbook into Power Query.
Power Query will not take into account any data filters on an Excel data table, but will load all the data that is in the source table. Consequently, you will have to reapply any filters (of which you’ll learn more in Chapter 6) in Power Query if you want to subset the source data.
- 1.
Multiple worksheets, tables, or named ranges can all be imported from the same workbook (i.e., Excel file) in a single load operation. However, you need to define a separate load operation for each individual Excel file.
- 2.
It is also possible to load multiple identically structured Excel files simultaneously using Power Query. This is explained in Chapter 10.
Why Use Power Query to Connect to Excel
At this juncture, you might be wondering why you could possibly want to use Power Query to load data from Excel when you can copy and paste from other Excel worksheets or simply link cells across workbooks.
- 1.
The data cleansing and modification options that are available in Power Query are considerably easier than comparable operations in Excel.
- 2.
Filtering source data (and only loading a subset of the data) is unbelievably easy in Power Query.
- 3.
Power Query adapts to fewer—or more—records in the source data automatically.
- 4.
Refreshing the source data is a simple on-click operation.
- 5.
Any changes to the source data can be made available only when you want the data refreshed.
From Table/Range
- 1.
Open the Excel file Chapter02Sample1.xlsx. This is in the folder C:DataMashupWithExcelSamples.
- 2.
Select a cell inside the table that you want to be the source of the data for modification in Power Query. In this example, you need to make sure that you are in the SourceData tab.
- 3.
In the Excel Data ribbon, click From Table/Range. The Power Query Editor will open.
- 4.
Click inside the Query Settings pane on the query name and enter a new name for this data source.
- 5.
Carry out any modifications that you require to the data in the Power Query Editor (you will learn these techniques in Chapters 6 through 12).
- 6.
Click Close & Load. The transformed data will be loaded into a new worksheet—with a new name.
If you did not click inside an existing table before clicking the From Table/Range button, you will receive a prompt asking you to select the source data.
Microsoft Access Databases
- 1.
In the Data ribbon, click Get Data ➤ From Database ➤ From Microsoft Access Database.
- 2.
Navigate to the MS Access database containing the data that you want to load (C:DataMashupWithExcelSamplesClientsDatabase.accdb, in this example).
- 3.
Select the Access file and click Import. The Navigator dialog appears; it lists all the tables and queries in the Access database.
- 4.
Select the ClientList dataset. This displays the contents of the table, as you can see in Figure 2-11.
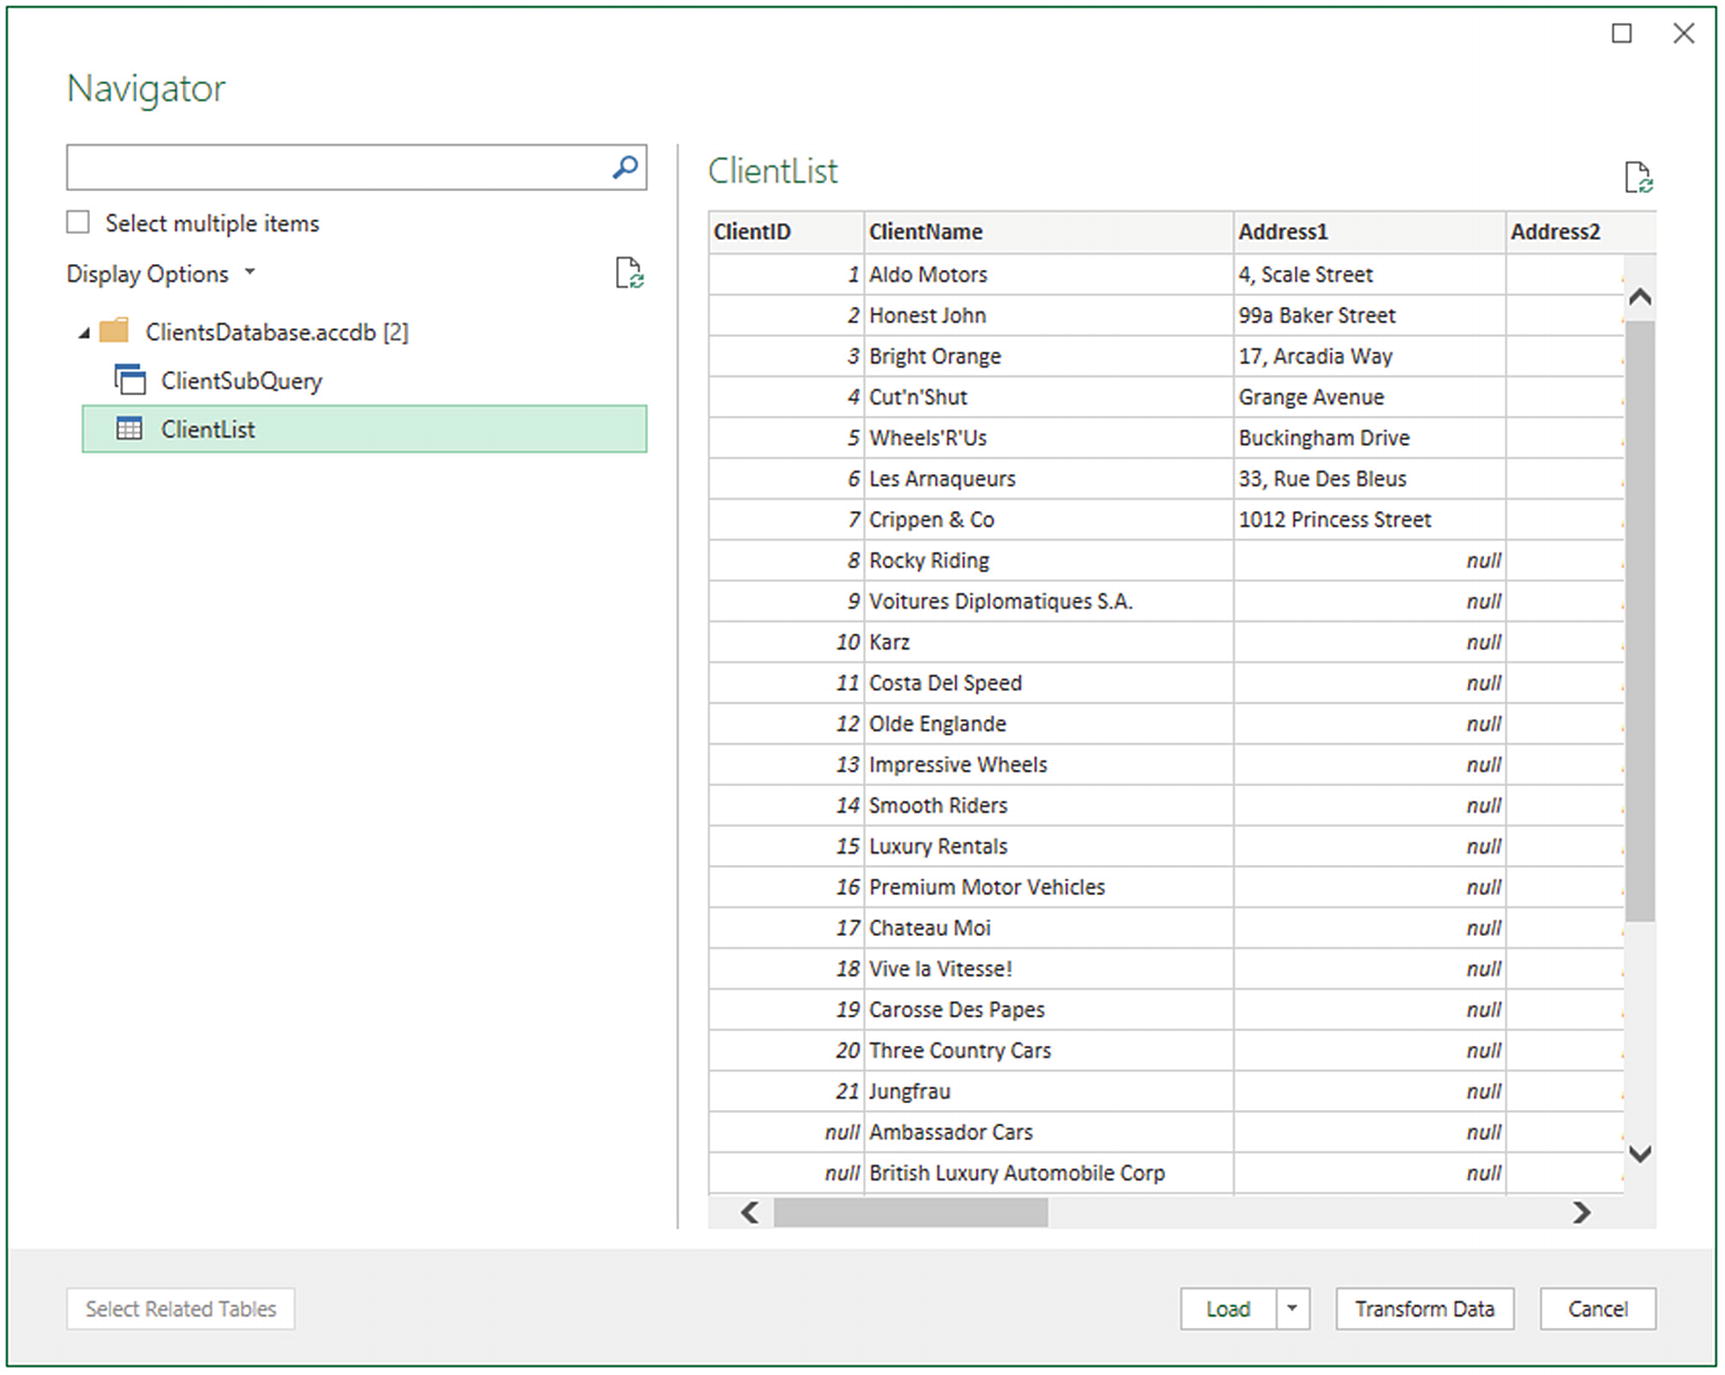
The Navigator dialog before loading data from an Access database
- 5.
Click Load. The source data from Access is loaded into a new worksheet.
If you wish to import several Access tables or queries simultaneously, then simply ensure that the Select multiple items check box is selected. This will enable you to select multiple source data tables or views from the Access database.
A table icon for Access data tables
An icon representing two small windows for Access queries
This can help you to understand the type of data that you are looking at inside the Access database.
Power Query cannot see linked tables in Access, only imported tables or tables that are actually in the Access database. It can, however, read queries overlaid upon native, linked, or imported data.
JSON Files
JSON files are, like XML, a file format that allows users (and computers) to send complex data structures between systems. Generally, JSON files require a little tweaking for them to be loaded in a state that is usable by Power Query. So we will be looking at how to load and prepare JSON files in Chapter 9, once you have assimilated the necessary data transformation techniques in Chapters 6 through 8.
Conclusion
In this chapter, you have seen how this powerful addition to Excel, Power Query, can help you find and load data from a variety of file-based data sources. These sources can be Access, Excel, CSV, XML, or text/CSV files.
You have seen that Power Query will let you see a sample of the contents of the data sources that it can read without needing any other application. This makes it a superb tool for peeking into data sources and deciding if a file actually contains the data that you need. Indeed, Power Query’s Navigator can help you filter multiple datasets in Excel or XML files or Access databases, preview each dataset, and only select the ones that you want to load. Of course, it can also load dozens of datasets at once if they all are stored in the same source.
This chapter is not a complete overview of how to load file-based sources. So if you need to load complex XML files or JSON files or need to understand how to load the contents of entire folders—or all the worksheets in an Excel file, for instance—then you can skip straight to Chapter 9 to learn these techniques.
However, file-based data sources are only a small part of the picture. Power Query can also load data from a wide range of relational databases and data warehouses. We will take a look at some of these in the next chapter.