
12
Temperature and Humidity Data Logger
In this project, you’re going to build a data logger that automatically stores data on temperature and humidity. You’ll learn how to read and log data from your environment, which is useful in numerous applications.

PARTS REQUIRED
Raspberry Pi
Breadboard
DHT22 temperature and humidity sensor (DHT11 and AM2302 also work)
4.7 kΩ resistor
Jumper wires
SOFTWARE REQUIRED
Adafruit_Python_DHT library
You’ll use the DHT22 temperature and humidity sensor to collect data, which will then be saved in a .txt file that you can then use to build charts, graphs, and other visualizations. This project gives you the basics of data collection, which is useful in many different applications that use sensors—for example, monitoring soil dampness, taking the temperature of water in a fish tank, or even registering the exact time unexpected movement was detected around your house. You can apply the concepts from this project to any sensor.
INTRODUCING THE DHT22 SENSOR
The DHT22 (shown in Figure 12-1) is a digital temperature and humidity sensor with a built-in chip that converts analog to digital signals, so there’s no need to use an analog-to-digital converter. This makes wiring really simple.
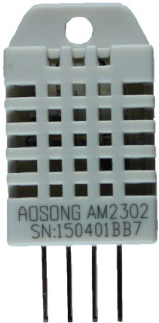
FIGURE 12-1: DHT22 temperature and humidity sensor
WIRING THE CIRCUIT
This is a simple circuit that just has the DHT22 sensor wired to your Pi via a resistor. Follow these instructions, using the circuit diagram in Figure 12-2 as a reference.
Connect GND and 3.3 V on the Pi to the breadboard’s blue and red power rails, respectively.
Connect the DHT22 sensor according to the following table, with pins starting at 1 from left to right when the sensor is facing you. Make sure to wire the resistor between pin 2 of the sensor and the breadboard’s red power rail.
DHT22 |
RASPBERRY PI |
1 |
3.3 V |
2 |
GPIO 4; also connect to 3.3 V through a 4.7 kΩ resistor |
3 |
Don’t connect |
4 |
GND |

FIGURE 12-2: Wiring the DHT22 sensor to the Pi
WRITING THE SCRIPT
You’ll use the Adafruit_Python_DHT library, which allows you to easily control the DHT22 sensor and read the data.
Installing the DHT22 Library
This library can also be used with similar sensors, like DHT11 and AM2302 (the wired version of the DHT22 from Adafruit), if you’re using those instead.
Open the terminal and enter the following:
pi@raspberrypi:~ $ sudo apt update
pi@raspberrypi:~ $ sudo apt install build-essential python-dev
From the terminal, navigate to the desktop, make a folder called Libraries if you haven’t already, and move into the newly created folder as follows:
pi@raspberrypi:~ $ cd ~/Desktop
pi@raspberrypi:~/Desktop $ mkdir Libraries
pi@raspberrypi:~/Desktop $ cd Libraries
pi@raspberrypi:~/Desktop/Libraries $
Clone the library by entering the following command:
pi@raspberrypi:~/Desktop/Libraries $ git clone https://github.com/
adafruit/Adafruit_Python_DHT.git
Finally, move to the Adafruit_Python_DHT directory and install the library with these commands:
pi@raspberrypi:~/Desktop/Libraries $ cd Adafruit_Python_DHT
pi@raspberrypi:~/Desktop/Libraries/Adafruit_Python_DHT $ sudo python
setup.py install
With the necessary library installed, it’s time to write the script.
Entering the Script
The DHT22 library is not supported by Python 3, so you need to use Python 2.7. Open Python 2.7 (IDLE) and go to File ▸ New File to create a new script. Copy the code from Listing 12-1 to the Python Editor and save the script as temperature_humidity_data_logger.py inside the Sensors folder (remember that you can download all the scripts at https://www.nostarch.com/RaspberryPiProject/):
LISTING 12-1: The temperature and humidity data logger script
#import necessary libraries
➊ import Adafruit_DHT
import time
#comment and uncomment the lines below depending on your sensor
#sensor = Adafruit_DHT.DHT11
➋ sensor = Adafruit_DHT.DHT22
#sensor = Adafruit_DHT.AM2302
#DHT pin connects to GPIO 4
sensor_pin = 4
#create a variable to control the while loop
running = True
#new .txt file created with header
➌ file = open('sensor_readings.txt', 'w')
➍ file.write('time and date, temperature, humidity
')
#loop forever
while running:
try:
#read the humidity and temperature
➎ humidity, temperature = Adafruit_DHT.read_retry(sensor,
sensor_pin)
#uncomment the line below to convert to Fahrenheit
➏ #temperature = temperature * 9/5.0 + 32
#sometimes you won't get a reading and
#the results will be null
#the next statement guarantees that
#it only saves valid readings
➐ if humidity is not None and temperature is not None:
#print temperature and humidity
print('Temperature = ' + str(temperature) +
', Humidity = ' + str(humidity))
#save time, date, temperature and humidity in .txt file
➑ file.write(time.strftime('%H:%M:%S %d/%m/%Y') + ', ' +
str(temperature) + ', ' + str(humidity) + '
')
else:
print('Failed to get reading. Try again!')
#wait 10s between each sensor reading
➒ time.sleep(10)
#if KeyboardInterrupt triggered, stop loop and close .txt file
except KeyboardInterrupt:
print ('Program stopped')
running = False
➓ file.close()
First, you import the Adafruit_DHT library ➊ you just installed, as well as the built-in time library. Then, at ➋, you uncomment the line that corresponds to the sensor you’re using. If you’re using DHT22, you don’t need to change anything.
The line at ➎ reads the temperature and humidity and saves the readings in the temperature and humidity variables, respectively. If you want your temperature readings in Fahrenheit, uncomment the line at ➏ to make the conversion from Celsius.
Sometimes the sensor can’t read the data and sends a null result to the Pi. The if statement at ➐ guarantees that the Pi saves data only if it is not null. You also timestamp each reading using time.strftime("%H:%M:%S %d/%m/%Y")—the argument in the parentheses here indicates the format you want the time and date to appear in: hours, minutes, seconds, day, month, and year, respectively.
This script reads and records the temperature and humidity every 10 seconds, but you can change this at ➒ by changing the delay time. The sensor is capable of taking readings every 2 seconds, but no faster than that.
Creating, Writing, and Closing .txt files
The DHT22 temperature and humidity readings are automatically saved in a .txt file that you create with the open() function ➌ and store in the file variable. This function accepts the name you want to give the file as an argument and, in this case, a 'w' telling Python you want this file to be in write mode, meaning the program can write and make changes to the file. The write mode overwrites existing files with the same name.
NOTE
Every time you run the code, it will overwrite whatever was already in the sensor_readings.txt file. If you don’t want this to happen, change the filename at ➍ to create a new file each time you run the script.
The file.write() function writes to the file and accepts a string as an argument. For example, with file.write('time and date, temperature, humidity ') at ➍, you write “time and date, temperature, humidity” into the file. At ➐, you write the sensor data to the file and at➑ the timestamp. The tells Python to start the next display text on the next line, known as a newline.
Finally, the file.close() function ➓ saves and closes the file.
Running the Script
Press F5 or go to Run ▸ Run Module to run the script. Let the script run for a few hours to gather a decent amount of data, and when you’re happy with the data logging period, stop the script by pressing CTRL-C. You should then have a sensor_readings.txt file that contains all your data in your Sensors folder.
TAKING IT FURTHER
In this project you’ve learned a very useful concept: data logging. Now you can use data logging in other monitoring projects. Here are some ideas:
- Use a PIR motion sensor that makes a timestamp every time it detects movement.
- Build a weather station data logger with the Sense HAT.
- Search for other monitoring sensor applications—for example, soil moisture, rain, and light sensors—to build a greenhouse data logger.