
We have to add the scenes that we're going to use to the build settings before we can test our code works, so click on File | Build Settings, and then click on Add Current. You'll see the scene name appear in the Scenes In Build area, now drag the TitleScreen and the GameScreen scenes into the same window and their names will appear there too. Close the build settings window and click on the play icon in the top-middle of the Unity screen. If all has worked as expected you should be staring back at a plain blue screen. That's actually a good result as it means your SetUp scene is working as expected and has loaded the TitleScreen scene immediately, and the blue screen you see is from the background color of Main Camera in that scene.
Double-click on the TitleScreen scene in the Scenes folder to load that scene. We're going to need some kind of instructions on the TitleScreen scene, let's keep it simple for now. Click on GameObject | Create Other | 3D Text. A new Text Mesh component will appear in the Hierarchy panel with the name New Text and Inspector panel will show Text Mesh. New Text should already be highlighted, so click it once more to rename it and call it Play Instructions, then click on Return. Now drag it in to the Main Camera to make it a child object of the Main Camera. Click on the Main Camera and in the Inspector panel, and you should see Background with a blue hue next to it, click on the blue color and a palette will appear in a new window. Move the blue hue to the black hue, and then close the window.
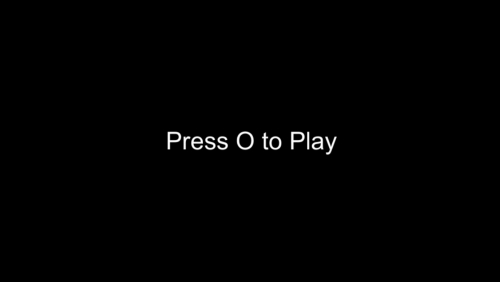
Select the text in the Inspector panel and replace the text that's there, Hello World with the text Press O to Play. Change the anchor from upper-left to middle-center and change the font size to 50. The text has been set and added to the correct GameObject but we need to position it correctly, in the Inspector panel set the position to X: 0, Y: 0, Z: 50, and then click on the play icon to test the scene. You should see something like the following screenshot:
We'll add keyboard support first, and then once we know all our scripts are working, we'll add Ouya controller support.
Right-click on the Scripts folder in your Project panel and navigate to Create | C# Script. Call the new script as ControlsTitleScreen, and then double-click on the script to edit it in MonoDevelop. You'll see that the Start and Update methods have already been created. In the Update method, we're going to check if the Space key has been pressed to start the game. We'll break it down after, but the code we need to add now is as follows:
void Update () {
  if(Input.GetKeyDown(KeyCode.Space)){
    Application.LoadLevel("GameScreen");
  }
}
The preceding code is going to check every frame, if the key with the KeyCode of Space has been pressed that frame. We are just using Space when testing in the editor; we'll be adding Ouya controller support in the next section. You can also use GetKey() to detect the key being held over multiple frames. We used LoadLevel earlier so that we should understand what that does but just to refresh your memory, it will simply destroy everything in the current scene, excluding GameObjects that have DontDestroyOnLoad set, and load the scene specified as a string. The string is the filename of the scene, in this case GameScreen, which we created earlier. Save your script and go back to Unity, we're done for now.
Click on GameObject | Create Empty, and a new GameObject will appear in the Hierarchy panel with the name GameObject. It should already be highlighted, so click on it once more and the name will become editable, call it Controls. Drag the ControlsTitleScreen script from the Project panel to the Controls GameObject.
Click on the play icon to test your scene. It should start off with a black screen with the text Press O to Play on it, and then go to the blue screen when the Space key is pressed.
Assuming that everything now works as it should, let's get the title screen detecting Ouya input and then giving it a run on the Ouya itself to check everything is working as expected. The Ouya code examples are updated frequently, so are often hosted on GitHub for version control and ease of access. The code for accessing input is no different and can be found at https://github.com/rendermat/OuyaInputFramework. As before, if you are familiar with GitHub then you will be better in off cloning the repository, else click on the Download ZIP button located on the right-hand side of the page. For the time being we're only interested in one file from the ZIP, namely OuyaInput.unitypackage.
- Double-click on OuyaInput.unitypackage and it will open in Unity and ask you what you want to import.
- Uncheck Documentation, Prefabs, and Scenes, and then click on Import. If you want to learn more you can import everything and load up the scene named
ControllerSimpleTest. There you can see all input being handled from the Ouya controller. - After the import has finished, you will see a C# script named OuyaInput in the
Pluginsfolder. The code inside this script is defined as a static class, which means we do not have to attach it to a GameObject for it to work. - Double-click on your ControlsTitleScreen script in the Project panel to edit it in MonoDevelop and add the following code just above the
Startmethod:public bool continuousScan = true; public OuyaPlayer player = OuyaPlayer.P01;
The first variable,
continuousScan, is going to be used a little further down, so we'll deal with that when we come to it.The second variable,
player, is being set to an integer value with a predefined name, this is calledenum. This will be passed to theGetButtonDownmethod, so it knows what controller to read the values from. - Add the following lines inside the
Startmethod:OuyaInput.SetContinuousScanning(continuousScan); OuyaInput.UpdateControllers();
Passing
truetoSetContinuousScanningwill allow us to receive button up and down events from the controller.UpdateControllerswill grab the initial state from the controllers. - At the top of the
Updatemethod, add the following code:OuyaInput.UpdateControllers();
- Update the
ifstatement we used to check for the Space key being pressed. Change that line to the following:if (Input.GetKeyDown(KeyCode.Space) || OuyaInput.GetButtonDown(OuyaButton.O, player)){You can see we have added the OR operator,
||, if you read the code now, it should all seem quite clear: if the Space key or the O key is down for player 1, then use the following code.The final script should look like the following code:
using UnityEngine;
using System.Collections;

public class ControlsTitleScreen : MonoBehaviour {

  // Do we want to scan for trigger and d-pad button events?
  publicboolcontinuousScan = true;

  // The player we want to get input for
  publicOuyaPlayer player = OuyaPlayer.P01;

  // Use this for initialization
  void Start () {

    // Set button state scanning to receive input state events for trigger and d-pads
    OuyaInput.SetContinuousScanning(continuousScan);

    // Do a controller update here to get everything started as soon as possible
    OuyaInput.UpdateControllers();
  }

  // Update is called once per frame
  void Update () {

    // Update the controllers here for best results
    OuyaInput.UpdateControllers();

    if (Input.GetKeyDown(KeyCode.Space) || OuyaInput.GetButtonDown(OuyaButton.O, player)){
      Application.LoadLevel("GameScreen");
    }
  }
}
That's it for the Ouya controller support for the TitleScreen at the moment. Make sure your Ouya is turned on and connected to your computer, and click on Build, Run, and Compile Application on the Ouya Panel. Your game should start and present a black screen with Press O to Play on it, press O on your controller and the screen should change from black to blue. Let's stop that screen being so bare.