
The process here is different for Windows 7, Windows 8, and OS X. Let's cover Windows first.
Note
Windows 8 users will need to disable driver signature verification to install the unsigned Android driver. This involves restarting your PC, so do this before you start. See https://devs.ouya.tv/developers/docs/windows8.md for step-by-step instructions.
Before we get up and running, we need to make sure that Ouya will be recognized by Windows so that we will be able to build to it. The first step of this is to add some paths to your PATH environment variable. This will enable us to run the executables in the Android SDK folder from directory via the command line.
- Open My Computer.
- From the left-hand panel, right-click on My Computer and click on Properties.
- From the left-hand panel, click on Advanced system settings.
- Click on the Environment Variables… button.
- If the
PATHvariable already exists in the User variables table select it and click on the Edit… button, else click on the New… button. - If the
PATHvariable already exists then append the following to the Variable value: (your root Android SDK install folder)/sdk/toolsand (your root Android SDK install folder)/sdk/platform-tools. - If the
PATHvariable doesn't exist, typePATHfor the Variable name and (your root Android SDK install folder)/sdk/toolsand (your root Android SDK install folder)/sdk/platform-tools for theVariable value. - Click on the OK button to save your changes.
- Click on the OK button to exit the Environment Variables window.
- Click on the OK button to exit the System Properties window.
Now open the file from the path: (your root Android SDK install folder)/sdk/extras/google/usb_driver/android_winusb.inf in Notepad and paste the code below in both the sections, that is, [Google.NTx86] and [Google.NTamd64]:
;OUYA Console
%SingleAdbInterface% = USB_Install, USBVID_2836&PID_0010
%CompositeAdbInterface% = USB_Install, USBVID_2836&PID_0010&MI_01
Save the changes and close the window. Open the Run window by pressing the Windows key and R or click on Run from the Start menu and type cmd then click on OK.
Type the following in the command prompt window to refresh our data:
adb kill-server
echo 0x2836 >> "%USERPROFILE%.androidadb_usb.ini"
adb start-server
Note
It is important that you now check your adb_usb.ini. You can find it in your c:UsersYOUR_USER_NAME.android folder. Open it in Notepad and ensure that the 0x2836 is at the start of a new line. If the first line started with a # then sometimes it is appended to an existing line rather than starting a new one.
Close the window and plug in Ouya to your computer and it should now be recognized. Perform the following steps to install the driver for it:
- Open the Device Manager by right-clicking on My Computer.
- Click on Properties and then Device Manager.
- In Device Manager, open Portable Devices and you should see OUYA Console.
- Right-click on and select Update Driver Software....
- Click on Browse my computer for driver software.
- Click on Let me pick from a list of device drivers on my computer.
- If you're using Windows 8 then click on All devices and then click on Next. If you're using Windows 7 this step is not necessary.
- Click on Have Disk and browse to
c:adt-bundle-windows-x86-20130729sdkextrasgoogleusb_driver. - Choose ADB Composite Device.
- Accept the unsigned driver.
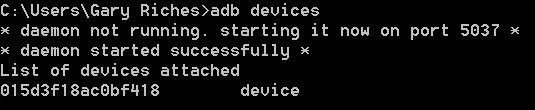
Turn on Ouya and wait for the menu screen to appear on your TV. Make sure no other Android devices are attached to your computer. Now, open the command prompt and type adb devices. If all has gone according to plan, you should see a device listed as the following screenshot:
If not, go back and check again whether you've completed the all the preceding steps. Common fail points are your adb_usb.ini having 0x2836 appended to an existing line rather than being on a new one or the number being typed incorrectly. Also try killing and starting the ADB server again with the adb kill-server and adb start-server commands we used earlier.