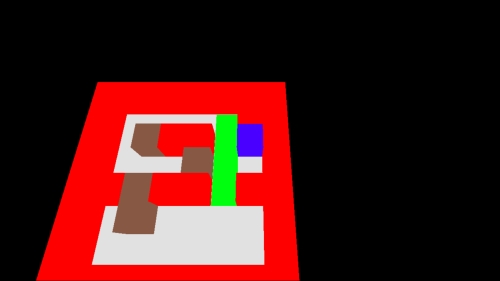
From the previous chapter, you should have a very colorful view when you test the game, but it's somewhat lacking in interactivity. We're going to add movement to our basic character and get the Main Camera game object in Unity following them around the level as they move. We'll also add in the ability for them to push crates around the level. Finally, we'll swap out our existing character for something that is a bit fancier and trigger their built in animations as they move around the level.
The first thing you hopefully noticed when we tested the scene in the previous chapter was that we were just looking in to the distance at nothing. That won't do for a game, traditionally the camera follows the player around the level and responds to their movements. The character in our game at the moment is represented by a blue cube, in our BuildLevel method of our Sokoban script, we assign a name to the player when we instantiate it; to refresh your memory the code in question is as follows:
thePlayer = Instantiate(player,new Vector3 (i,0, j),Quaternion.identity) as Transform;
thePlayer.name = "Player";
Giving the instantiated GameObject a name of Player means we will be able to address the Player game object from other scripts when we need to reference it.
Let's create a new script for making the Main Camera focus on the player and rotate according to the player's orientation. Right-click on the Scripts folder that you created earlier and then click on Create and select C# Script. Once you click on it, a script will appear in the Scripts folder, it should already be selected and asking you to type a name for the script, call it UpdateCameraPosition. Double-click on the script in Unity and it will open
MonoDevelop. The aim of this script will be to:
- Find the player
- Move the Main Camera game object to a fixed distance from them
- Rotate to position the Main Camera game object behind the player
Unity provides a method to find any GameObject, conveniently called Find, although it's a very expensive operation to call. If no game object with that name can be found, null is returned. The preferred usage is to find the game object, using Find, you want at the initial execution of the script and store a reference to the game object as a variable. Also, you should check that the result is not null before you try and use it.
Let's put what we've just learned in to practice and write our Main Camera movement script. As we are going to use Find and store the result for reuse later; we will need to create a variable above the Start method that has been added automatically for you:
Transform target;
We will also add a method call to the Start and ourUpdate method, so add the following line in both methods:
PositionCamera();
So, we've added the calls to the PositionCamera method but we still need to write it. As we have done previously, the code will be written in its entirety; later we can break it down to see what it's doing:
void PositionCamera () {

  // If we don't have it then try to find it
  if (target == null) {
    target = GameObject.Find("Player").transform;
  }

  // Is the target still no? If so, then you've named it
  // incorrectly
  if (target == null) {
    return;
  }

  float angleToReach = Mathf.LerpAngle(transform.eulerAngles.y,target.eulerAngles.y,4 * Time.deltaTime);

  Quaternion currentRotation = Quaternion.Euler(0,angleToReach,0);

  transform.position += target.position + new Vector3(0, 9, 0);
  transform.position -= currentRotation * Vector3.forward * 4;
  transform.LookAt(target.position);
}
As per the Unity documentation, we'll be storing a reference to our GameObject rather than calling GameObject.Find every frame. If our target variable is not set, we call target = GameObject.Find("Player").transform. We only store transform as that's all that's needed to adjust the Main Camera's position.
Next up is angleToReach, to set this variable we use Mathf.LerpAngle which will interpolate the Vector3 rotation type of the camera's rotation to that of the target's rotation over a period of time. The third argument of LerpAngle is the position in Lerp (linear interpolation). While you can set an absolute of 0 or 1, for this argument you get a nicer effect by using Time.deltaTime. This will normally be quite constant, but as the Main Camera's rotation will be changing each frame, this will give you an easing effect as the Main Camera pans around. We want this to happen quite quickly so we are using Time.deltaTime for the position in Lerp, hence we are multiplying it by four.
We use the value in angleToReach as a variable for the currentRotation quaternion and it's going to allow us to work out where the Main Camera game object should be positioned in relation to our target. This is done in a two-step process; first we need to move the Main Camera's position to be over the target and then we need move it along the line of the angleToReach float multiplied by Vector3.forward. This will give you a position around the target that eases in to place, but by multiplying it by four we can exaggerate the effect.
Finally, now that our Main Camera is orbiting our target and easing in to position, we have to make it actually look at the target. This is very simple in Unity, we just have to call transform.LookAt(target.position) and it's as easy as that. This will automatically modify transform.rotation of the Vector3 rotation type to point at the target.position.
Close the script, go back to Unity and press the play icon at the top-middle of the Unity screen. If all has gone according to the plan, you should see the Main Camera game object much closer to the player.

