
We are now going to assemble the hardware for this project. As this is the first project of this book, it will be quite simple. However, there are quite a lot of components, so be sure to follow all the steps.
Here is a schematic to help you out during the process:

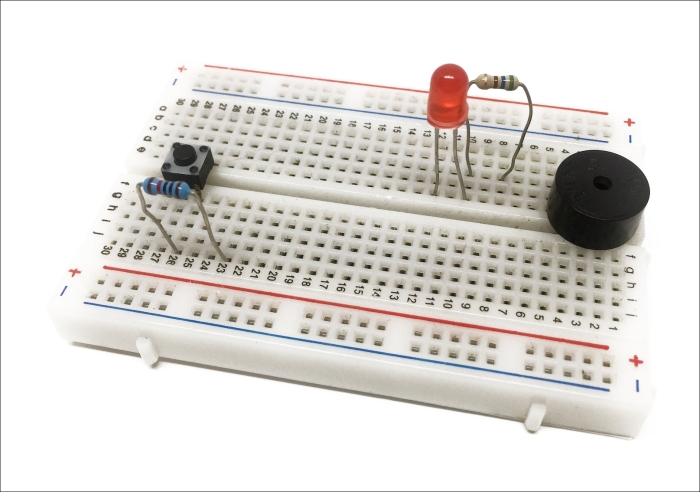
Let's start by putting all the components on the board. Place the buzzer, button, and LED on the board first, according to the schematics. Then, place the 330 Ohm resistor in series with the LED anode (the longest pin) and connect the 1k Ohm resistor to one pin of the push button.
This is how it should look at this stage:
Now we are going to connect each component to the Arduino board.
Let's start with the power supply. Connect the 5V pin of the Arduino board to one red power rail of the breadboard, and the GND pin of the Arduino board to one blue power rail of the breadboard.
Then, we are going to connect the buzzer. Connect one pin of the buzzer to pin number 5 of the Arduino board and the other pin to the blue power rail of the breadboard.
After that, let's connect the LED. Connect the free pin of the resistor to pin number 6 of the Arduino board and the free pin of the LED (the cathode) to the ground via the blue power rail.
Let's also connect the push button to our Arduino board. Refer to the schematic to be sure about the connections since it is a bit more complex. Basically, you need to connect the free pin of the resistor to the ground and connect the pin that is connected to the button to the 5V pin via the red power rail. Finally, connect the other side of the button to pin 12 of the Arduino board.
Finally, let's connect the PIR motion sensor to the Arduino board. Connect the VCC pin of the motion sensor to the red power rail and the GND pin to the blue power rail. Finally, connect the SIG pin (or OUT pin) to Arduino pin number 7.
The following is the final result:
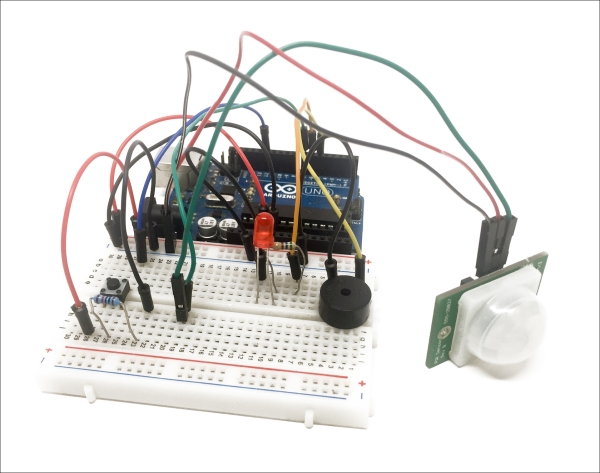
If your project looks similar to this picture, congratulations, you just assembled your first secret agent project! You can now go on to the next section.