
In this section, we are going to put everything together and actually build our spy microphone.
The hardware for the project is nearly ready if you followed the previous section. You just need to plug the SD card into the reader again.
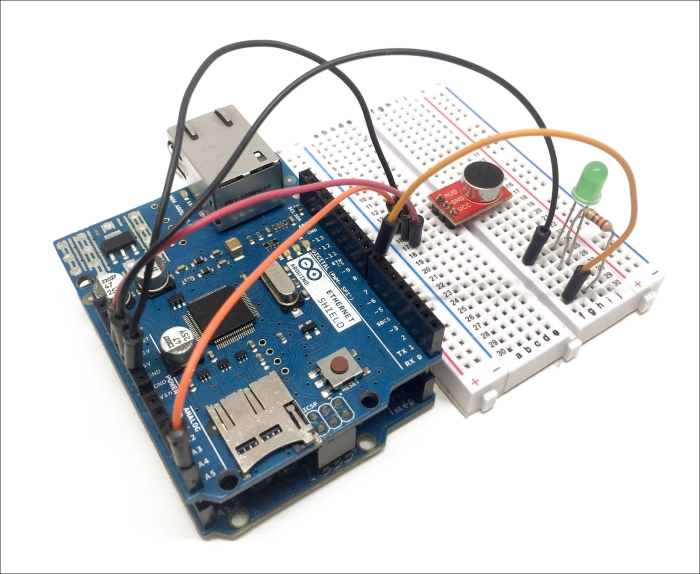
I also added an LED on pin 7, just to know when the recording is on. If you want to do the same, you just need an LED and a 330 Ohm resistor. Of course, remove this LED when you actually want to use it as a spy microphone or your project might get noticed.
The schematic to help you out is as follows:

The following is the image of the completely assembled project:
We are now going to see the details of the code for the project. Basically, we want the device to record audio from the microphone for a given amount of time and then stop the recording.
As the code is long and complex, we are only going to see the most important parts here.
The first step is to include the SdFat library:
#include <SdFat.h>
Then, we will create the instances that are necessary in order to write on the SD card:
SdFat sd;
SdFile rec;
After that, we will define on which pin we want the optional recording LED to be:
const int ledStart = 7;
We will also define a variable for the internal counter of the project:
byte recordingEnded = false;
unsigned int counter;
unsigned int initial_count;
unsigned int maxCount = 10 * 1000; // 10 Seconds
Note that here you will have to modify the maxCount variable according to the time for which you want the device to record. Here, I just used 10 seconds by default as a test.
Then, we will initialize the ADC (Analog-Digital Converter):
Setup_timer2();
Setup_ADC();
After that, we will initialize the SD card and also flash the LED if this is successful:
if (sd.begin(chipSelect, SPI_FULL_SPEED)) {
  for (int dloop = 0; dloop < 4; dloop++) {
    digitalWrite(ledStart,!digitalRead(ledStart));
    delay(100);
  }
}
Then, we will actually start the recording with the following function:
StartRec();
We will also initialize the counter with the following line of code:
initial_count = millis();
Then, in the loop() function of the sketch, we will update the counter, which helps to keep track of the elapsed time:
counter = millis() - initial_count;
Still in the loop() function, we will actually stop the recording if we reach the maximum amount of time that we defined previously:
if (counter > maxCount && !recordingEnded) {
  recordingEnded = true;
  StopRec();
}
Note that the whole code for this section can be found in the GitHub repository of the book at https://github.com/marcoschwartz/arduino-secret-agents.