
It's now time to build the last project of this chapter: a real GPS location tracker. For this project, we'll get the location just as before, using the GPS if available, and the GPRS location otherwise.
However, here we are going to use the GPRS capabilities of the shield to send the latitude and longitude data to dweet.io, which is a service we have used before. Then, we'll plot this data in Google Maps, allowing you to follow your device in real time from anywhere in the world.
As the sketch is very similar to the ones in the previous sections, I'll only detail the most important parts of the sketch here.
You need to define a name for the thing that will contain the GPS location data:
String dweetThing = "mysecretgpstracker";
Then, after getting the current location, we prepare the data to be sent to dweet.io:
uint16_t statuscode;
int16_t length;
char url[80];
String request = "www.dweet.io/dweet/for/" + dweetThing + "?latitude=" + latitude + "&longitude=" + longitude;
request.toCharArray(url, request.length());
After this, we actually send the data to dweet.io:
if (!fona.HTTP_GET_start(url, &statuscode, (uint16_t *)&length)) {
    Serial.println("Failed!");
  }
  while (length > 0) {
    while (fona.available()) {
      char c = fona.read();

      // Serial.write is too slow, we'll write directly to Serial register!
      #if defined(__AVR_ATmega328P__) || defined(__AVR_ATmega168__)
        loop_until_bit_is_set(UCSR0A, UDRE0); /* Wait until data register empty. */
        UDR0 = c;
      #else
        Serial.write(c);
      #endif
      length--;
    }
  }
  fona.HTTP_GET_end();
Now, before testing the project, we are going to prepare our dashboard that will host the Google Maps widget. Just as in the previous chapter, we are going to use freeboard.io for this purpose. If you don't have an account yet, go to http://freeboard.io/.
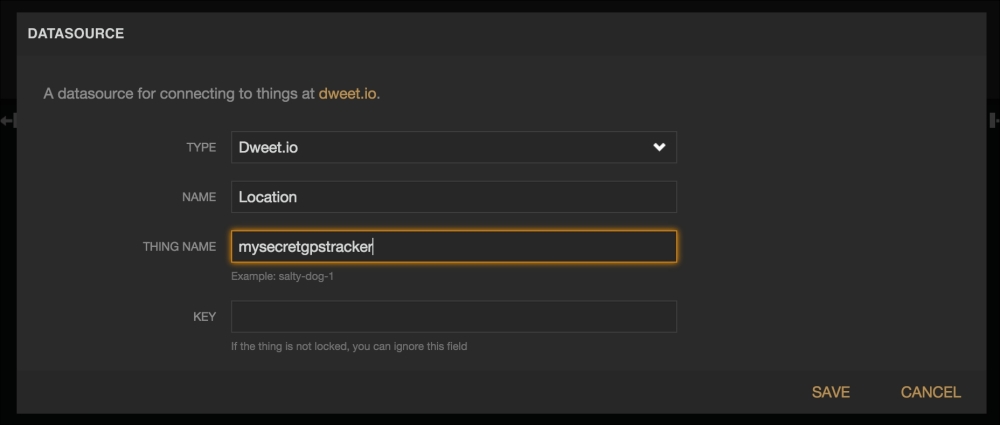
Create a new dashboard, and also a new datasource. Insert the name of your thing inside the THING NAME field:
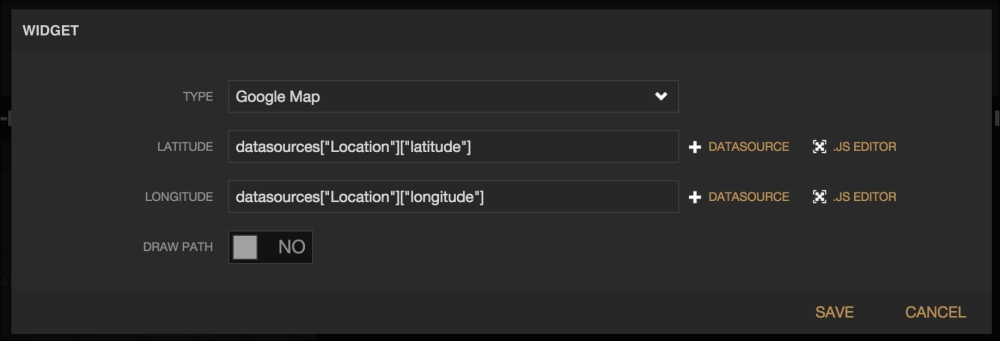
Then, create a new pane with a Google Maps widget. Link this widget to the latitude and longitude of your location datasource:
It's now time to test the project. Make sure you grab all the code, for example from the GitHub repository of the book. Also, don't forget to modify the thing name, as well as your GPRS settings.
Then, upload the sketch to the board and open the Serial monitor. This is what you should see:
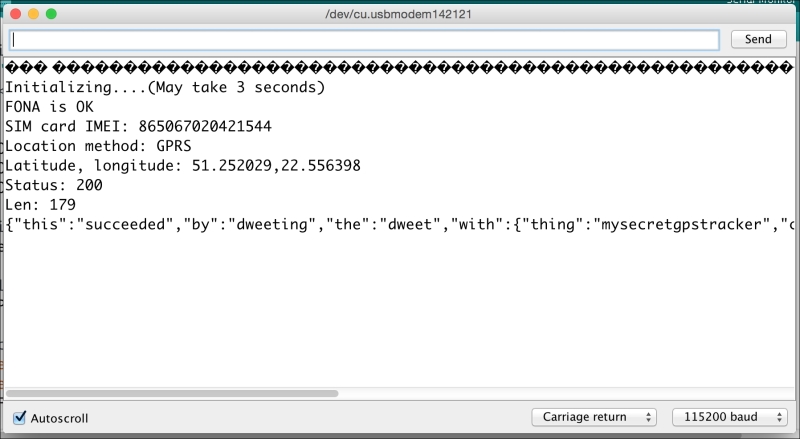
The most important line is the last one, which confirms that data has been sent to dweet.io and has been stored there.
Now, simply go back to the dashboard you just created, and you can now see that the location on the map has been updated:
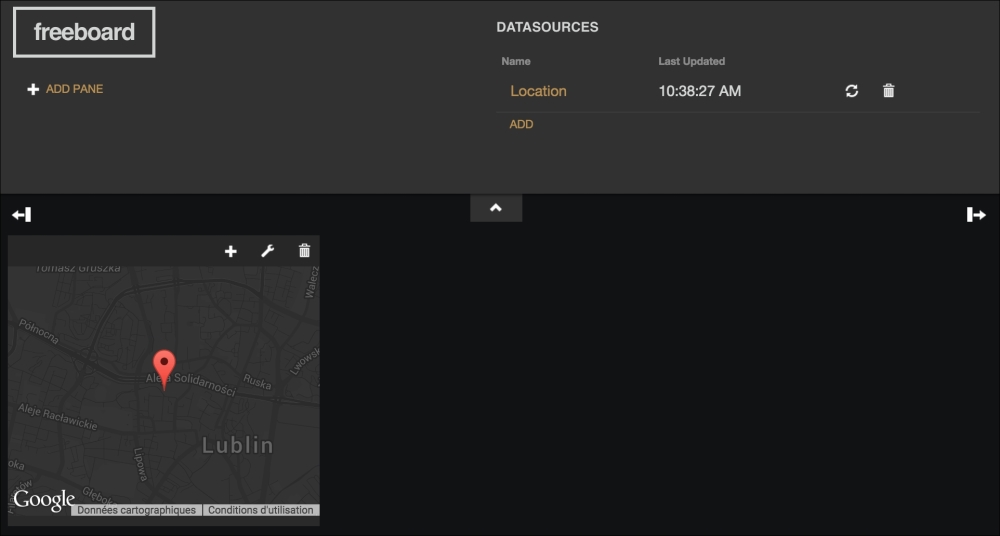
Note that this map is also updated in real time as new measurements arrive from the board. You can also modify the delay between two updates of the position of the tracker by changing the delay() function in the sketch. Congratulations, you just built your own GPS tracking device!