
HTML5 was designed to deliver rich, cross-platform content without the need to use additional plugins. In this chapter, we will learn how different HTML5 features can be used in Dart. We will cover the following topics:
- The notification APIs
- The native drag-and-drop APIs
- The geolocation APIs
- Canvas
Processes that occur in web applications are asynchronous, and as time passes, they generate event messages to alert end users about the start, end, or progress of the process execution. The web notification API allows you to display notifications outside the context of web pages. The user agent determines the optimum presentation of the notification. This aspect depends on the device on which it is running. Usually, it can present notifications in the following areas:
- At a corner of the display
- In an area within the user agent
- On the home screen of a mobile device
The web notification API, available as part of the dart:html package, allows you to send information to a user even if the application is idle. Notifications can be useful in the following use cases:
- To notify users about new incoming messages
- To notify users about special events in game applications
- To notify users about the connection status of an application, the battery status of a device, and so on
When you build web applications, you can use the notification API in the event handlers or polling functions to notify the users. Event handlers are the obvious choice when it comes to responding to various happenings. Event handlers use simple, required conditions that can detect events from the DOM elements and send a notification event to the user. Sometimes, the conditions required can be a lot more complex and event handlers may not be suitable to cover them. In such cases, you can use a polling function (implemented as a combination of event handlers) to periodically check for given conditions to send notifications. Notifications can be of the following two types:
Let's see how we can use the web notification API for our needs. You can find the source code in the notification project. In the following code, we used the standard button event handler to send notifications to the user:
void main() {
  var notifyBtn = querySelector("#notify_btn")
  ..onClick.listen((Event event) {
    sendNotification();
  });
}

void sendNotification() {
  Notification.requestPermission().then((String permission) {
    if (permission == "granted") {
      Notification notification = new Notification('My Notification', body: "Hello World");
    }
  });
}
Before you send any notifications to the user, the website must have permissions. You can let websites send a notification automatically or by means of a permission request first. This is a common requirement when an API tries to interact with something outside a web context, especially to avoid sending useless notifications to the user. To see the notification settings, follow these steps:
- Open the Settings option in Dartium and type
notificationsin the search field, as shown in the following screenshot:
- Open the Content settings pop-up dialog by clicking on the button of the same name, and then scroll down to find the Notification settings:
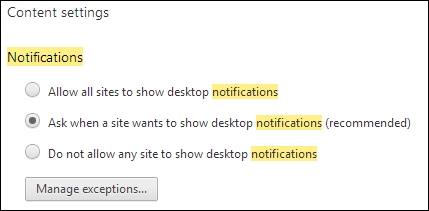
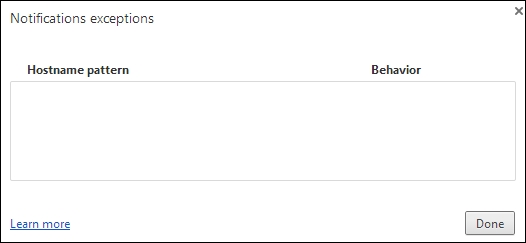
- Choose the recommended option and open the Notifications exceptions dialog by clicking on the Manage exceptions button. For now, it will not contain our website, as shown in the following screenshot:
- Now, run the application and click on the Notify button. As shown in the following screenshot, the
requestPermissionstatic method of the Notification class requests a permission to allow desktop notifications for thelocalhost:
- You can allow or deny notifications for this website. Your choice will complete the future permission requests with the value of the chosen permission. The desktop notifications that are allowed are added to the list of Notifications exceptions. Now, open the Notifications exceptions dialog again to see your website, as shown in the following screenshot:

- The next step is to create a notification. It is enough to specify only the title of the notification to create an original one. The constructor of the
Notificationclass has optional properties that help us create notifications with a body and icon. A notification when instantiated is displayed as soon as possible, as shown in the following screenshot:
A notification triggers the following four events that track the current state of the notification:
Notifications are still open until the user closes them, but you can use the close method of the Notification class to close them via a program, as shown in the following code:
void sendNotification() {
  Notification.requestPermission().then((String permission) {
    if (permission == "granted") {
      Notification notification =
        new Notification('My Notification', body: "Hello World");
      notification.onShow.listen((Event event) {
        new Timer(new Duration(seconds:2), () {
          notification.close();
        });
      });
    }
  });
}Every time you click on the Notify button in your application, the web notification API generates new notifications and puts them on top of the previous one. Similar notifications can be marked with the following tag attribute to prevent crowding a user's desktop with hundreds of analogous notifications:
void sendNotification() {
  Notification.requestPermission().then((String permission) {
    if (permission == "granted") {
      Notification notification =
        new Notification('My Notification', body: "Hello World",
          tag: "myNotification");
      notification.onShow.listen((Event event) {
        new Timer(new Duration(seconds:2), () {
          notification.close();
        });
      });
    }
  });
}
Now when you generate a notification with the same tag, the web notification API removes the previous one and adds the new one instead. Web notification specifications are not stable yet, and they are supported only by the latest version of web browsers such as Chrome, Firefox, Safari, and Opera.