Perform the following steps to configure the NearBus connected device for Xively:
- Log in to your NearBus account.
- Click on the DEVICE LIST menu. The DEVICE LIST page will appear:
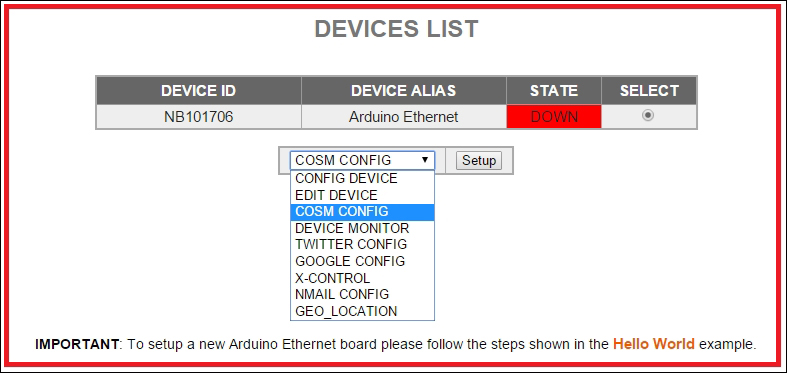
- From the drop-down menu, select COSM CONFIG.
- Click on the Setup button. The COSM CONNECTOR (xively.com) page will appear:
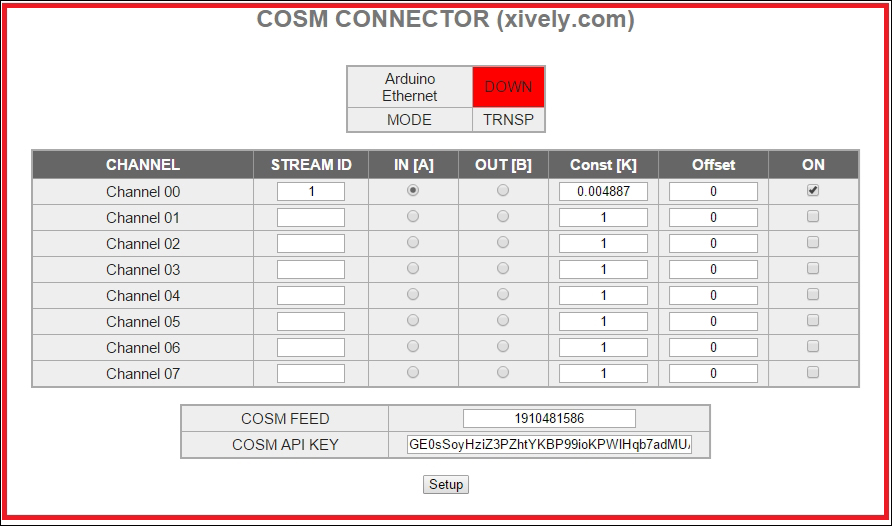
- In this page, you have to enter some configuration settings in order to work your Arduino with NearBus and Xively. Here, we are using the NearBus channel 0 to communicate with our device. So, configure the following entries for the channel 0 entry using the CMOS CONNECTOR (xively.com) page:
- STREAM ID:
1. - IN[A]: Click to enable.
- Const[K]:
0.004887(Arduino analog input can accept values from 0-1023, so we need to map the input voltage (in this case 5v) with it). Divide 5V by 1024, then you will get 0.0048828125. Copy and paste it to the Const[K] textbox. - Offset:
0. - ON: Click on the checkbox to check.
- COSM FEED: Type the Feed ID generated by the Xively.
- COSM API KEY: Type the API Key generated by the Xively.
- STREAM ID:
- Click on the Setup button.
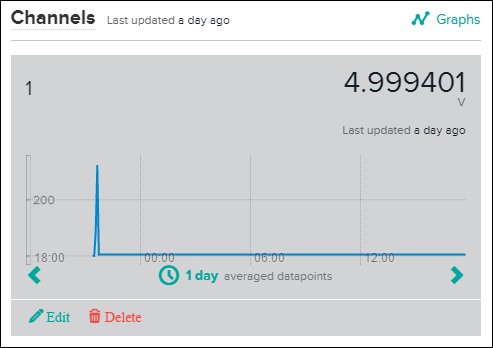
- Now, switch to your Xively web page. On the left-hand side of the page, you can see a graph displaying your solar cell voltage with time. If you can't see the graph, click on the channel ID to expand the graph:
..................Content has been hidden....................
You can't read the all page of ebook, please click here login for view all page.