
Rather than saving the captured image in an SD card, we can automatically upload the image to Flickr. In the next section, we will learn how to do this with Flickr and Temboo cloud service.
Follow these steps to create a Flickr account:
- Open your Internet browser, navigate to https://www.flickr.com/.
- Click on the Sign In link in the top-right corner of the page. If you already have a Yahoo account, you can use the same login credentials to log in to Flickr.
- If you don't have a Yahoo account, click on Sign Up in the top-left corner of the page, or on the Sign up with Yahoo button in the center of the page and follow the instructions to create a new Yahoo account.
- After you have successfully logged in to Flickr, click on the Explore menu in the top, and in the resulting drop-down menu, click on App Garden.
- The App Garden page will appear, as shown in the following screenshot:
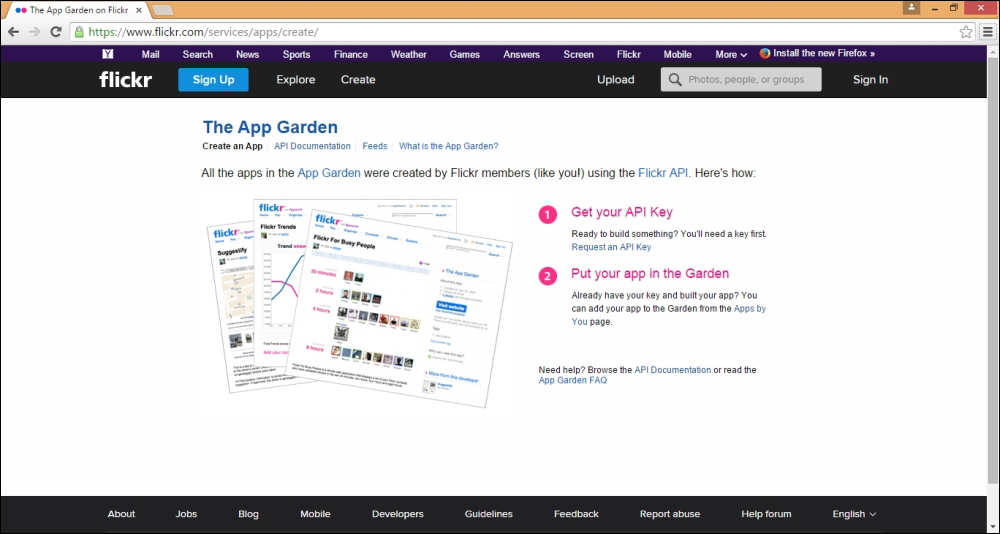
Flickr: The App Garden page
- Click on the Create an App link if it is not selected by default.
- Under Get your API Key, click on Request an API Key, as shown in the following screenshot:
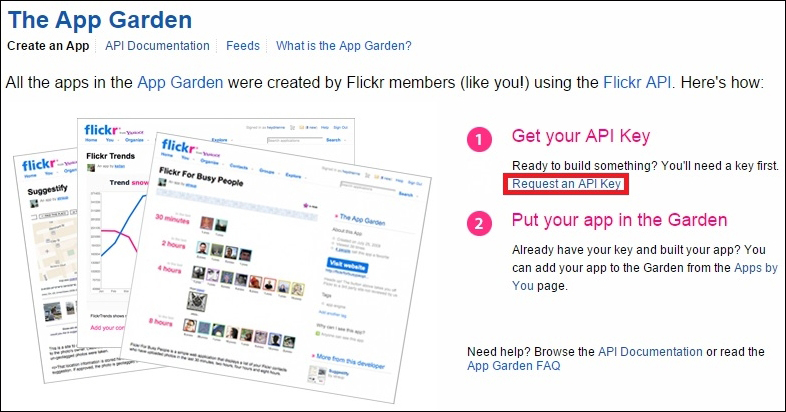
Flickr: The App Garden page
- Click on the APPLY FOR A NON-COMMERCIAL KEY button, as shown here:
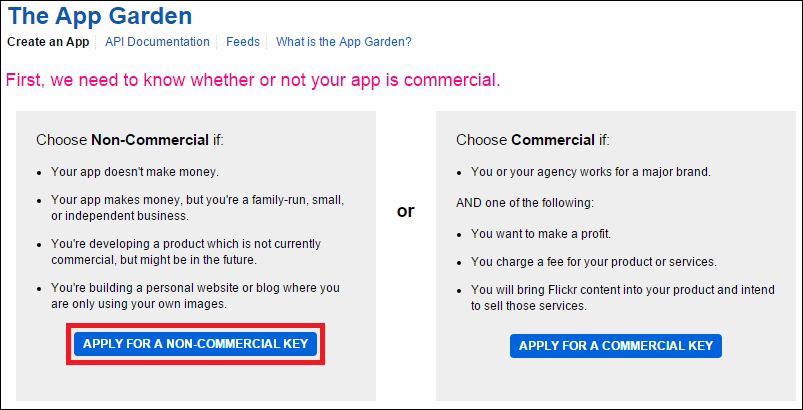
Flickr: The App Garden page
- The Tell us about your app page will appear, as shown in the following screenshot:
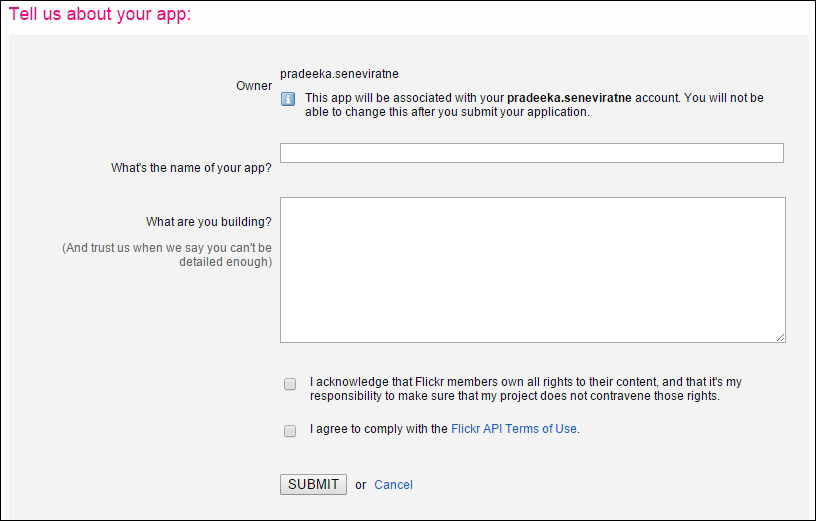
Flickr: The App Garden page
- Fill the following text boxes:
- What's the name of your app?: Give a short name for your app
- What are you building?: Give a brief description about your app and its purpose
- Check the two checkboxes.
- Click on the SUBMIT button.
- The API Key and Secret for your new app will be displayed in the next page, as shown here:
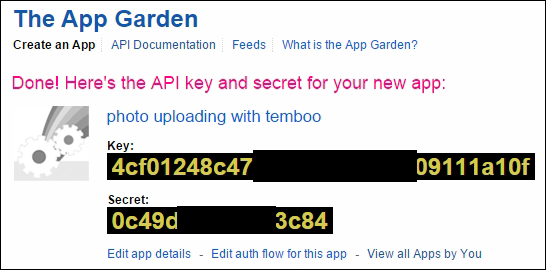
Flickr: The App Garden page
Copy and paste the API Key and Secret into a notepad, if you think it will be easy for your reference later.
That's it for the moment. Later, you have to again visit the Flickr website, so don't sign out from Flickr. To access Flickr services, we have to create a Temboo account and make some configurations.
Temboo provides normalized access to 100+ APIs and databases. It provides code-based, task-specific code components called Choreos that can be used with the Arduino language to simplify the complex tasks such as uploading images to Flickr, sending SMS, sending Twitter tweets, and many more.
Let's look at how to create a new Temboo account, so you can use this account for experimenting with Temboo and Arduino.
- First, navigate to https://temboo.com/ using your Internet browser.
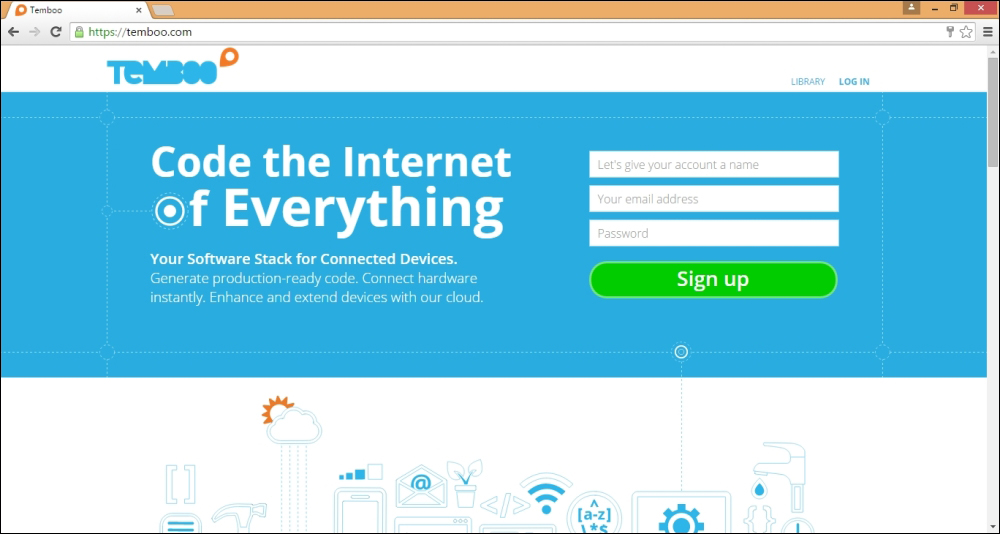
The Temboo home page
- Then, you have to create a new user account in Temboo.
- In the top-right corner of the page, there is a section for Sign up. Enter a name for your account, a valid e-mail address, and a password (which must have eight characters, at least one letter, and one number); agree with Temboo terms and click on the Sign up button. The Welcome page will appear, as shown here:
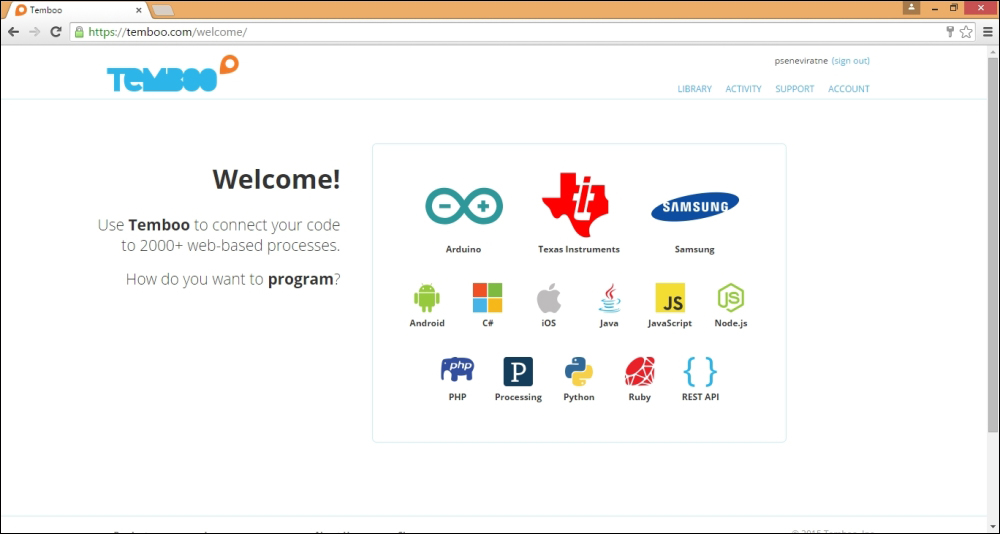
The Temboo Welcome page
Now, we are ready to create our first Choreo. To do this, we need to complete a series of configurations and processing steps with Temboo.
In the top-right of the Temboo web page, click on LIBRARY. The LIBRARY page will appear. Under the CHOREOS pane (listed in the left-hand side of the page) go to Flickr | OAuth by clicking on the down arrow signs, and finally, click on InitializeOAuth.
First, enable IoT Mode, as shown in the following screenshot:
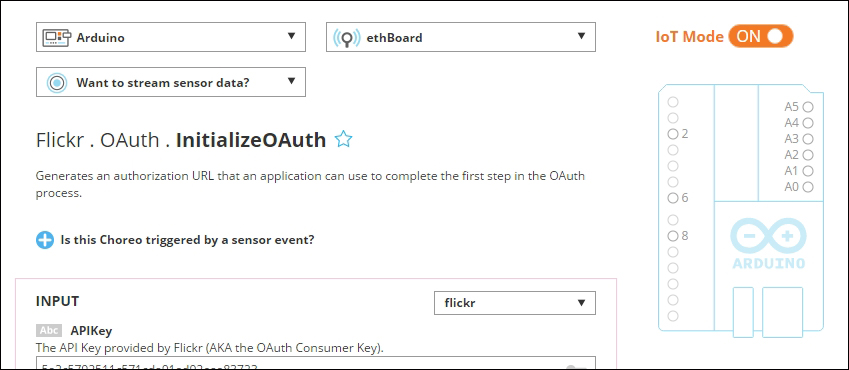
Enabling IoT mode
Then, configure the form as shown in the following steps:
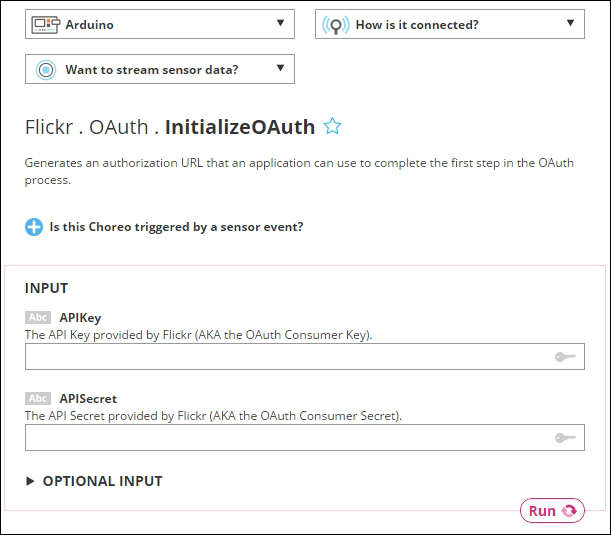
Initialize OAuth for Flicker
- Select Arduino from the left drop-down menu. The default is Arduino Yún.
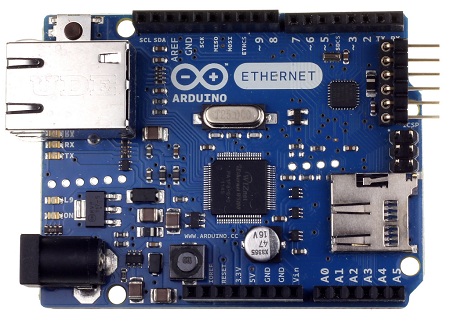
- Select Arduino Ethernet from the How is it connected? drop-down menu. The Tell us about your shield dialog box will appear.
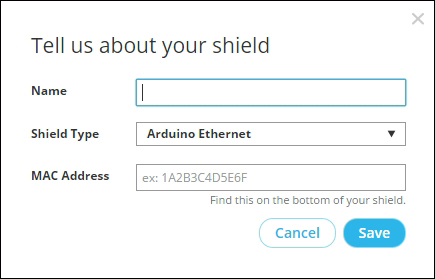
Tell us about your shield dialog box
- Type a name for your shield and type the MAC address of your shield in the MAC Address field without any spaces. Then, click on the Save button.
- Under the INPUT section, enter the following:
- APIKey: Enter the API key provided by Flickr
- APISecret: Enter the API Secret provided by Flickr

- Click on the Run button to process the OAuth initialization. In a few seconds, the process will generate following output:
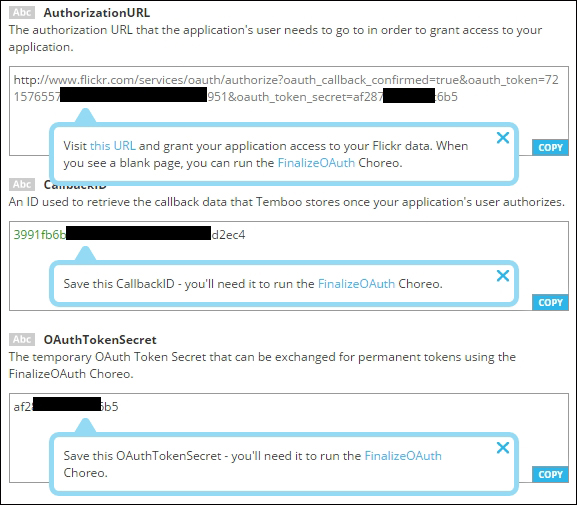
Output after the process of OAuth initialization for Flickr
The following listing of information is extracted from the preceding output. The information will differ according to your setup.
- Authorization URL:
http://www.flickr.com/services/oauth/authorize?oauth_callback_confirmed=true&oauth_token=7215xxxxxxxxxxxxxxxxxxxxx951&oauth_token_secret=af287xxxxxxxc6b5 - CallbackID:
3991fb6b-xxxxxxxxxxxxxxx-b83e453d2ec4 - OAuthTokenSecret:
af287xxxxxxxc6b5
- Authorization URL:
- Open a new browser tab and paste the authorization URL into the address bar and press the Enter key on your key board. A page will appear for authorization confirmation, as shown here:
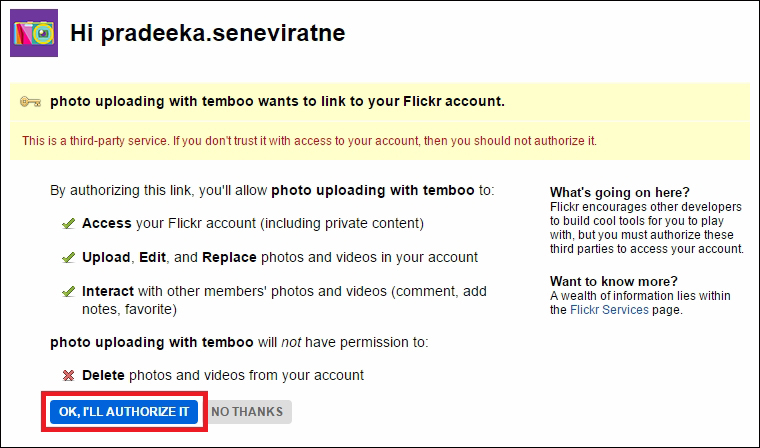
A Flicker user account authorization page
- Click on the OK, I'LL AUTHORIZE IT button. Now, you will be navigated to a blank web page.
Finally, you have successfully authorized your app.
Perform the following steps to finalize OAuth:
- Click on FinalizeOAuth after navigating to Flickr | OAuth. The FinalizeOAuth page will appear, as shown in the following screenshot:
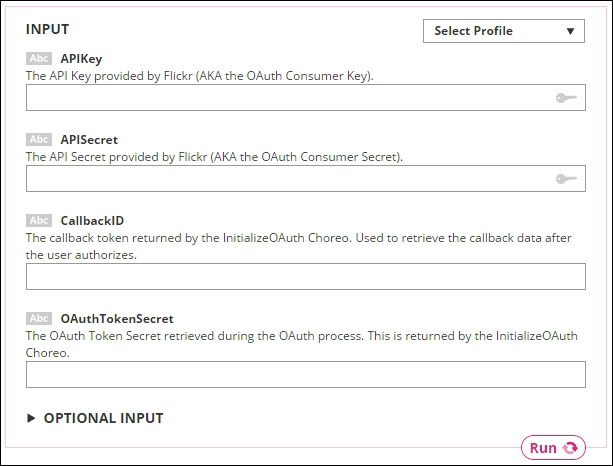
FinalizeOAuth for Flickr
- Fill the following text boxes with the relevant information:
- APIKey: The API Key provided by Flicker for your app
- APISecret: The API secret provided by Flickr for your app
- CallbackID: The callback token returned by the InitializeOAuth process
- OAuthTokenSecret: The OAuth Token Secret retrieved during the OAuth process
- Click on the Run button to process. Now you have finalized the OAuth process for your Flickr app.
In this section, you will learn how to generate the photo upload sketch. To achieve this, you need to perform the following steps:
- Under CHOREOS go to Flickr | Photos and then click on Upload. The following screen will appear:
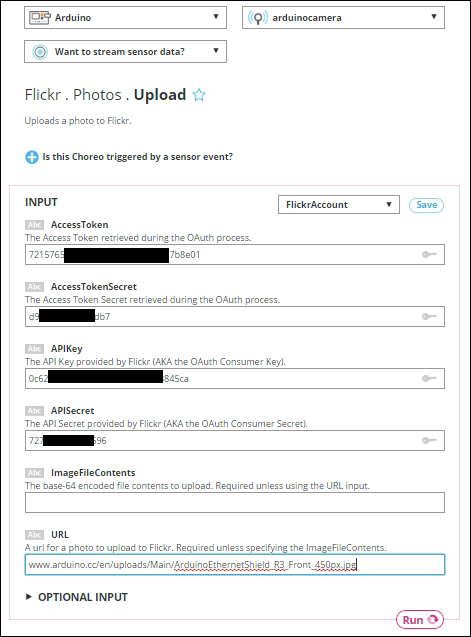
A Flicker photo upload Choreo
- Fill the textboxes with the following information:
- AccessToken: The Access Token retrieved during the OAuth process.
- AccessTokenSecret: The AccessTokenSecret retrieved during the OAuth process.
- APIKey: The API Key provided by Flickr.
- APISecret: The API Secret provided by Flickr.
- ImageFileContents: Keep this field blank.
- URL: Any valid image URL. (for example, use https://www.arduino.cc/en/uploads/Main/ArduinoEthernetFront450px.jpg). Note that this specified image will be uploaded to your Flickr account for testing.
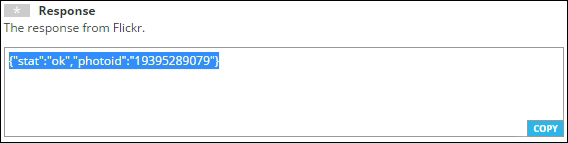
- Click on the Run button to process the image upload to Flickr. If everything is correct, you will get a response, as shown in the following screenshot:
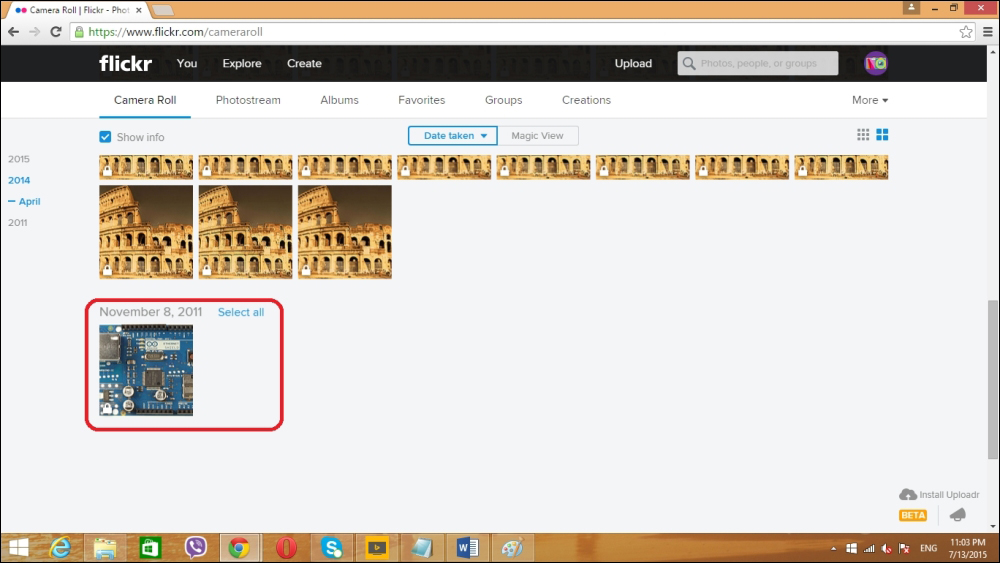
- To verify the uploaded image, sign in to your Flickr account. On the Flickr web page, click go to You | Camera Roll. You can see the uploaded image by the Temboo cloud service, as shown here:
- Continue with step 3, and scroll down the page. You can see two sections, CODE and HEADER FILE:
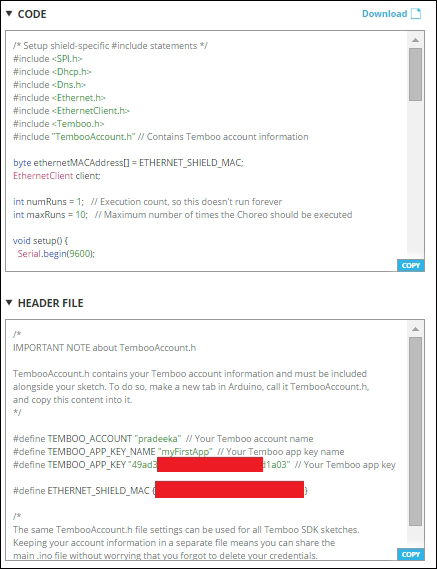
- Now open a new Arduino IDE and copy and paste the generated code inside the CODE box.
- Create a folder and rename it to TembooAccount inside your Arduino installation directory, and then under the Libraries folder. Copy the code inside the HEADER FILE box and paste it to a new Notepad file. Save the file as
TembooAccount.hinside theTembooAccountfolder. - Then, verify the code and upload it into your Arduino board.
- Open the Arduino Serial Monitor. You can see the image upload status and it will upload your same image 10 times on Flickr. Open your Flickr's camera roll and verify the uploaded images.
- The following Arduino sketch will upload an image (https://www.arduino.cc/en/uploads/Main/ArduinoEthernetFront450px.jpg) maximum of 10 times on Flickr. The sample sketch for this named
B04844_04_02.inocan be copied from theChapter 4code folder. Also, modify the API key values according to your Flickr and Temboo accounts.
The Arduino sketch for the B04844_04_02.ino file is:
/* Setup shield-specific #include statements */
#include <SPI.h>
#include <Dhcp.h>
#include <Dns.h>
#include <Ethernet.h>
#include <EthernetClient.h>
#include <Temboo.h>
#include "TembooAccount.h" // Contains Temboo account information

byte ethernetMACAddress[] = ETHERNET_SHIELD_MAC;
EthernetClient client;

int numRuns = 1;  // Execution count, so this doesn't run forever
int maxRuns = 10;  // Maximum number of times the Choreo should be executed

void setup() {
  Serial.begin(9600);

  // For debugging, wait until the serial console is connected
  delay(4000);
  while(!Serial);

  Serial.print("DHCP:");
  if (Ethernet.begin(ethernetMACAddress) == 0) {
    Serial.println("FAIL");
    while(true);
  }
  Serial.println("OK");
  delay(5000);

  Serial.println("Setup complete.
");
}

void loop() {
 if (numRuns <= maxRuns) {
  Serial.println("Running Upload - Run #" + String(numRuns++));

  TembooChoreo UploadChoreo(client);

  // Invoke the Temboo client
  UploadChoreo.begin();

  // Set Temboo account credentials
  UploadChoreo.setAccountName(TEMBOO_ACCOUNT);
  UploadChoreo.setAppKeyName(TEMBOO_APP_KEY_NAME);
  UploadChoreo.setAppKey(TEMBOO_APP_KEY);

  // Set Choreo inputs
  String APIKeyValue = "0c62beaaxxxxxxxxxxxxxxxe3845ca";
  UploadChoreo.addInput("APIKey", APIKeyValue);
  String AccessTokenValue = "7215xxxxxxxxxxxxxxxxxxxxxx7b8e01";
  UploadChoreo.addInput("AccessToken", AccessTokenValue);
  String AccessTokenSecretValue = "d95exxxxxxxfddb7";
  UploadChoreo.addInput("AccessTokenSecret", AccessTokenSecretValue);
  String APISecretValue = "7277dxxxxxxxx7d696";
  UploadChoreo.addInput("APISecret", APISecretValue);
  String URLValue = "https://www.arduino.cc/en/uploads/Main/ArduinoEthernetFront450px.jpg";
  UploadChoreo.addInput("URL", URLValue);

  // Identify the Choreo to run
  UploadChoreo.setChoreo("/Library/Flickr/Photos/Upload");

  // Run the Choreo; when results are available, print them to serial
  UploadChoreo.run();

  while(UploadChoreo.available()) {
   char c = UploadChoreo.read();
   Serial.print(c);
  }
  UploadChoreo.close();
  }

  Serial.println("
Waiting...
");
  delay(30000); // wait 30 seconds between Upload calls
}In the previous step, we successfully uploaded an image, which is in a remote server, on Flickr. Now, we are going to upload an image on Flickr, which is captured by the camera.
To do this, first we need to convert the image binary data stream to the base 64 stream.
Download the base64.h library from https://github.com/adamvr/arduino-base64 and extract it inside to the Libraries folder.
Copy and paste the B04844_04_03.ino code from the sketches folder of this chapter and upload it on your Arduino board.
For every 30 seconds, your camera will capture an image and upload on Flickr.
Adafruit TTL serial camera has built-in motion detection capability. Using the VC0706 library, we can capture and upload the detected image to the Flickr. Here, we have used more similar code implementation as explained in the previous section of Motion Detection.
- Open a new Arduino IDE and copy and paste the code
B04844_04_04.inofrom theChapter 4code folder. Verify and upload the code on your Arduino board. - To test the motion, move an object in front of the camera. Wait nearly 30 seconds.
- To verify the captured image, sign in to your Flickr account, and then, on the Flickr web page, go to You | Camera Roll. You can see the newly uploaded image by the Temboo cloud service.
Let's look at some important points in motion detection that are related to the Arduino sketch.
To enable the motion detection functionality on the VC0706 Camera module, you can use the following code line and set the parameter to true. The default is false. Note that the cam is the object of the VC0706 class.
cam.setMotionDetect(true);
The motion is detected by the following function and it will return true when the motion is detected by the camera module.
cam.motionDetected();