
So far, we have achieved externalizing configuration parameters as well as load balancing across many service instances.
Ribbon-based load balancing is sufficient for most of the microservices requirements. However, this approach falls short in a couple of scenarios:
- If there is a large number of microservices, and if we want to optimize infrastructure utilization, we will have to dynamically change the number of service instances and the associated servers. It is not easy to predict and preconfigure the server URLs in a configuration file.
- When targeting cloud deployments for highly scalable microservices, static registration and discovery is not a good solution considering the elastic nature of the cloud environment.
- In the cloud deployment scenarios, IP addresses are not predictable, and will be difficult to statically configure in a file. We will have to update the configuration file every time there is a change in address.
The Ribbon approach partially addresses this issue. With Ribbon, we can dynamically change the service instances, but whenever we add new service instances or shut down instances, we will have to manually update the Config server. Though the configuration changes will be automatically propagated to all required instances, the manual configuration changes will not work with large scale deployments. When managing large deployments, automation, wherever possible, is paramount.
To fix this gap, the microservices should self-manage their life cycle by dynamically registering service availability, and provision automated discovery for consumers.
Dynamic registration is primarily from the service provider's point of view. With dynamic registration, when a new service is started, it automatically enlists its availability in a central service registry. Similarly, when a service goes out of service, it is automatically delisted from the service registry. The registry always keeps up-to-date information of the services available, as well as their metadata.
Dynamic discovery is applicable from the service consumer's point of view. Dynamic discovery is where clients look for the service registry to get the current state of the services topology, and then invoke the services accordingly. In this approach, instead of statically configuring the service URLs, the URLs are picked up from the service registry.
The clients may keep a local cache of the registry data for faster access. Some registry implementations allow clients to keep a watch on the items they are interested in. In this approach, the state changes in the registry server will be propagated to the interested parties to avoid using stale data.
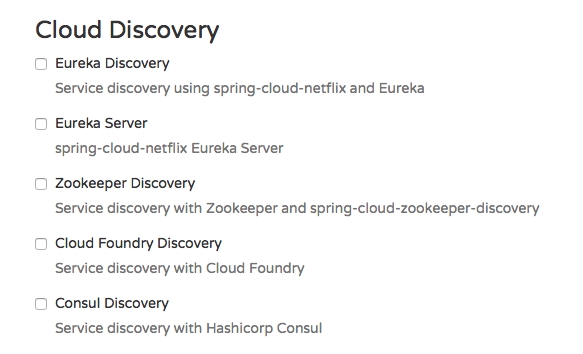
There are a number of options available for dynamic service registration and discovery. Netflix Eureka, ZooKeeper, and Consul are available as part of Spring Cloud, as shown in the http://start.spring.io/ screenshot given next. Etcd is another service registry available outside of Spring Cloud to achieve dynamic service registration and discovery. In this chapter, we will focus on the Eureka implementation:
Spring Cloud Eureka also comes from Netflix OSS. The Spring Cloud project provides a Spring-friendly declarative approach for integrating Eureka with Spring-based applications. Eureka is primarily used for self-registration, dynamic discovery, and load balancing. Eureka uses Ribbon for load balancing internally:
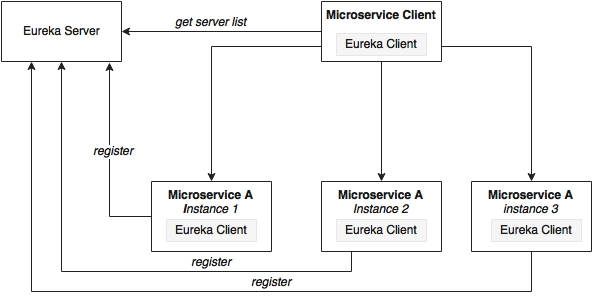
As shown in the preceding diagram, Eureka consists of a server component and a client-side component. The server component is the registry in which all microservices register their availability. The registration typically includes service identity and its URLs. The microservices use the Eureka client for registering their availability. The consuming components will also use the Eureka client for discovering the service instances.
When a microservice is bootstrapped, it reaches out to the Eureka server, and advertises its existence with the binding information. Once registered, the service endpoint sends ping requests to the registry every 30 seconds to renew its lease. If a service endpoint cannot renew its lease in a few attempts, that service endpoint will be taken out of the service registry. The registry information will be replicated to all Eureka clients so that the clients have to go to the remote Eureka server for each and every request. Eureka clients fetch the registry information from the server, and cache it locally. After that, the clients use that information to find other services. This information is updated periodically (every 30 seconds) by getting the delta updates between the last fetch cycle and the current one.
When a client wants to contact a microservice endpoint, the Eureka client provides a list of currently available services based on the requested service ID. The Eureka server is zone aware. Zone information can also be supplied when registering a service. When a client requests for a services instance, the Eureka service tries to find the service running in the same zone. The Ribbon client then load balances across these available service instances supplied by the Eureka client. The communication between the Eureka client and the server is done using REST and JSON.
In this section, we will run through the steps required for setting up the Eureka server.
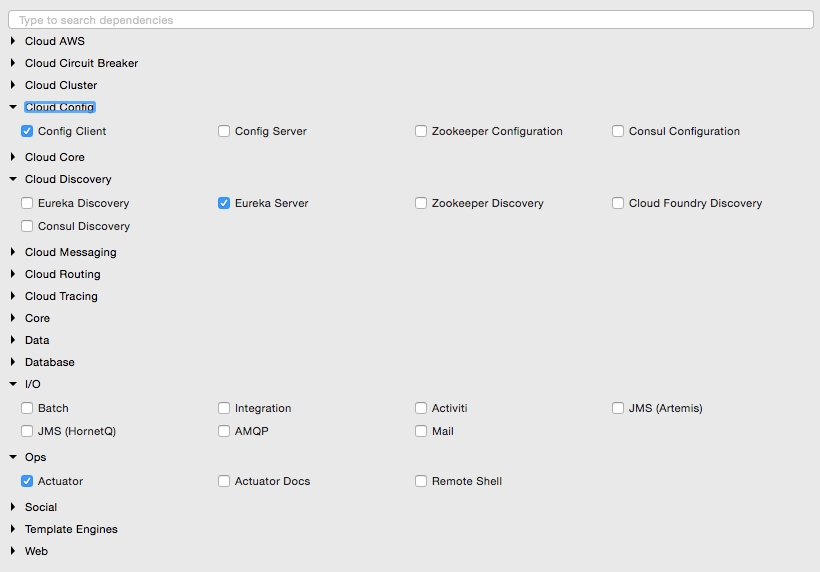
- Start a new Spring Starter project, and select Config Client, Eureka Server, and Actuator:
The project structure of the Eureka server is shown in the following image:
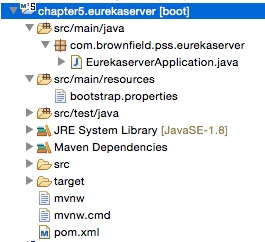
Note that the main application is named
EurekaserverApplication.java. - Rename
application.propertiestobootstrap.propertiessince this is using the Config server. As we did earlier, configure the details of the Config server in thebootsratp.propertiesfile so that it can locate the Config server instance. Thebootstrap.propertiesfile will look as follows:spring.application.name=eureka-server1 server.port:8761 spring.cloud.config.uri=http://localhost:8888
The Eureka server can be set up in a standalone mode or in a clustered mode. We will start with the standalone mode. By default, the Eureka server itself is another Eureka client. This is particularly useful when there are multiple Eureka servers running for high availability. The client component is responsible for synchronizing state from the other Eureka servers. The Eureka client is taken to its peers by configuring the
eureka.client.serviceUrl.defaultZoneproperty.In the standalone mode, we point
eureka.client.serviceUrl.defaultZoneback to the same standalone instance. Later we will see how we can run Eureka servers in a clustered mode. - Create a
eureka-server1.propertiesfile, and update it in the Git repository.eureka-server1is the name of the application given in the application'sbootstrap.propertiesfile in the previous step. As shown in the following code,serviceUrlpoints back to the same server. Once the following properties are added, commit the file to the Git repository:spring.application.name=eureka-server1 eureka.client.serviceUrl.defaultZone:http://localhost:8761/eureka/ eureka.client.registerWithEureka:false eureka.client.fetchRegistry:false
- Change the default
Application.java. In this example, the package is also renamed ascom.brownfield.pss.eurekaserver, and the class name changed toEurekaserverApplication. InEurekaserverApplication, add@EnableEurekaServer:@EnableEurekaServer @SpringBootApplication public class EurekaserverApplication { - We are now ready to start the Eureka server. Ensure that the Config server is also started. Right-click on the application and then choose Run As | Spring Boot App. Once the application is started, open
http://localhost:8761in a browser to see the Eureka console. - In the console, note that there is no instance registered under Instances currently registered with Eureka. Since no services have been started with the Eureka client enabled, the list is empty at this point.
- Making a few changes to our microservice will enable dynamic registration and discovery using the Eureka service. To do this, first we have to add the Eureka dependencies to the
pom.xmlfile. If the services are being built up fresh using the Spring Starter project, then select Config Client, Actuator, Web as well as Eureka discovery client as follows: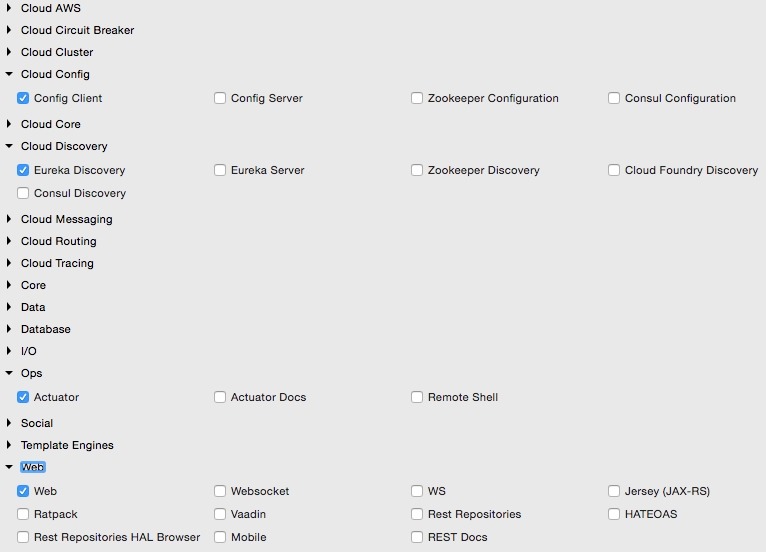
- Since we are modifying our microservices, add the following additional dependency to all microservices in their
pom.xmlfiles:<dependency> <groupId>org.springframework.cloud</groupId> <artifactId>spring-cloud-starter-eureka</artifactId> </dependency>
- The following property has to be added to all microservices in their respective configuration files under
config-repo. This will help the microservices to connect to the Eureka server. Commit to Git once updates are completed:eureka.client.serviceUrl.defaultZone: http://localhost:8761/eureka/
- Add
@EnableDiscoveryClientto all microservices in their respective Spring Boot main classes. This asks Spring Boot to register these services at start up to advertise their availability. - Start all servers except Booking. Since we are using the Ribbon client on the Booking service, the behavior could be different when we add the Eureka client in the class path. We will fix this soon.
- Going to the Eureka URL (
http://localhost:8761), you can see that all three instances are up and running:
Time to fix the issue with Booking. We will remove our earlier Ribbon client, and use Eureka instead. Eureka internally uses Ribbon for load balancing. Hence, the load balancing behavior will not change.
- Remove the following dependency:
<dependency>
  <groupId>org.springframework.cloud</groupId>
  <artifactId>spring-cloud-starter-ribbon</artifactId>
</dependency>
- Also remove the
@RibbonClient(name="fares")annotation from theFareServiceProxyclass. - Update
@FeignClient(name="fares-service")to match the actual Fare microservices' service ID. In this case,fare-serviceis the service ID configured in the Fare microservices'bootstrap.properties. This is the name that the Eureka discovery client sends to the Eureka server. The service ID will be used as a key for the services registered in the Eureka server. - Also remove the list of servers from the
booking-service.propertiesfile. With Eureka, we are going to dynamically discover this list from the Eureka server:fares-proxy.ribbon.listOfServers=localhost:8080, localhost:8081
- Start the Booking service. You will see that
CommandLineRunnersuccessfully created a booking, which involves calling the Fare services using the Eureka discovery mechanism. Go back to the URL to see all the registered services: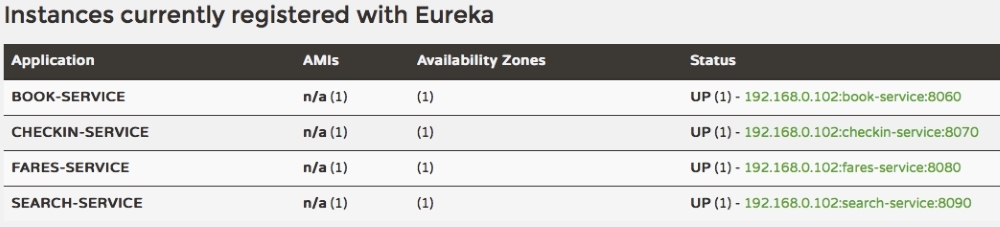
- Change the website project's
bootstrap.propertiesfile to make use of Eureka rather than connecting directly to the service instances. We will not use the Feign client in this case. Instead, for demonstration purposes, we will use the load balancedRestTemplate. Commit these changes to the Git repository:spring.application.name=test-client eureka.client.serviceUrl.defaultZone: http://localhost:8761/eureka/
- Add
@EnableDiscoveryClientto theApplicationclass to make the client Eureka-aware. - Edit both
Application.javaas well asBrownFieldSiteController.java. Add threeRestTemplateinstances. This time, we annotate them with@Loadbalancedto ensure that we use the load balancing features using Eureka and Ribbon.RestTemplatecannot be automatically injected. Hence, we have to provide a configuration entry as follows:@Configuration class AppConfiguration { @LoadBalanced @Bean RestTemplate restTemplate() { return new RestTemplate(); } } @Autowired RestTemplate searchClient; @Autowired RestTemplate bookingClient; @Autowired RestTemplate checkInClient; - We use these
RestTemplateinstances to call the microservices. Replace the hardcoded URLs with service IDs that are registered in the Eureka server. In the following code, we use the service namessearch-service,book-service, andcheckin-serviceinstead of explicit host names and ports:Flight[] flights = searchClient.postForObject("http://search-service/search/get", searchQuery, Flight[].class); long bookingId = bookingClient.postForObject("http://book-service/booking/create", booking, long.class); long checkinId = checkInClient.postForObject("http://checkin-service/checkin/create", checkIn, long.class); - We are now ready to run the client. Run the website project. If everything is fine, the website project's
CommandLineRunnerwill successfully perform search, booking, and check-in. The same can also be tested using the browser by pointing the browser tohttp://localhost:8001.
In the previous example, there was only one Eureka server in standalone mode. This is not good enough for a real production system.
The Eureka client connects to the server, fetches registry information, and stores it locally in a cache. The client always works with this local cache. The Eureka client checks the server periodically for any state changes. In the case of a state change, it downloads the changes from the server, and updates the cache. If the Eureka server is not reachable, then the Eureka clients can still work with the last-known state of the servers based on the data available in the client cache. However, this could lead to stale state issues quickly.
This section will explore the high availability for the Eureka server. The high availability architecture is shown in the following diagram:
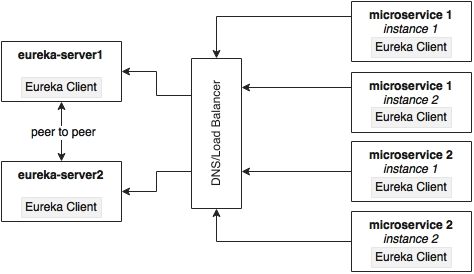
The Eureka server is built with a peer-to-peer data synchronization mechanism. The runtime state information is not stored in a database, but managed using an in-memory cache. The high availability implementation favors availability and partition tolerance in the CAP theorem, leaving out consistency. Since the Eureka server instances are synchronized with each other using an asynchronous mechanism, the states may not always match between server instances. The peer-to-peer synchronization is done by pointing serviceUrls to each other. If there is more than one Eureka server, each one has to be connected to at least one of the peer servers. Since the state is replicated across all peers, Eureka clients can connect to any one of the available Eureka servers.
The best way to achieve high availability for Eureka is to cluster multiple Eureka servers, and run them behind a load balancer or a local DNS. The clients always connect to the server using the DNS/load balancer. At runtime, the load balancer takes care of selecting the appropriate servers. This load balancer address will be provided to the Eureka clients.
This section will showcase how to run two Eureka servers in a cluster for high availability. For this, define two property files: eureka-server1 and eureka-server2. These are peer servers; if one fails, the other one will take over. Each of these servers will also act as a client for the other so that they can sync their states. Two property files are defined in the following snippet. Upload and commit these properties to the Git repository.
The client URLs point to each other, forming a peer network as shown in the following configuration:
eureka-server1.properties
eureka.client.serviceUrl.defaultZone:http://localhost:8762/eureka/
eureka.client.registerWithEureka:false
eureka.client.fetchRegistry:false

eureka-server2.properties
eureka.client.serviceUrl.defaultZone:http://localhost:8761/eureka/
eureka.client.registerWithEureka:false
eureka.client.fetchRegistry:false
Update the bootstrap.properties file of Eureka, and change the application name to eureka. Since we are using two profiles, based on the active profile supplied at startup, the Config server will look for either eureka-server1 or eureka-server2:
spring.application.name=eureka
spring.cloud.config.uri=http://localhost:8888
Start two instances of the Eureka servers, server1 on 8761 and server2 on 8762:
java -jar –Dserver.port=8761 -Dspring.profiles.active=server1 demo-0.0.1-SNAPSHOT.jar
java -jar –Dserver.port=8762 -Dspring.profiles.active=server2 demo-0.0.1-SNAPSHOT.jar
All our services still point to the first server, server1. Open both the browser windows: http://localhost:8761 and http://localhost:8762.
Start all microservices. The one which opened 8761 will immediately reflect the changes, whereas the other one will take 30 seconds for reflecting the states. Since both the servers are in a cluster, the state is synchronized between these two servers. If we keep these servers behind a load balancer/DNS, then the client will always connect to one of the available servers.
After completing this exercise, switch back to the standalone mode for the remaining exercises.